Project managment


The first week in Fab academy revolved around creating a website, which belongs to the student. In this website the student can document the progress of each week of the program.


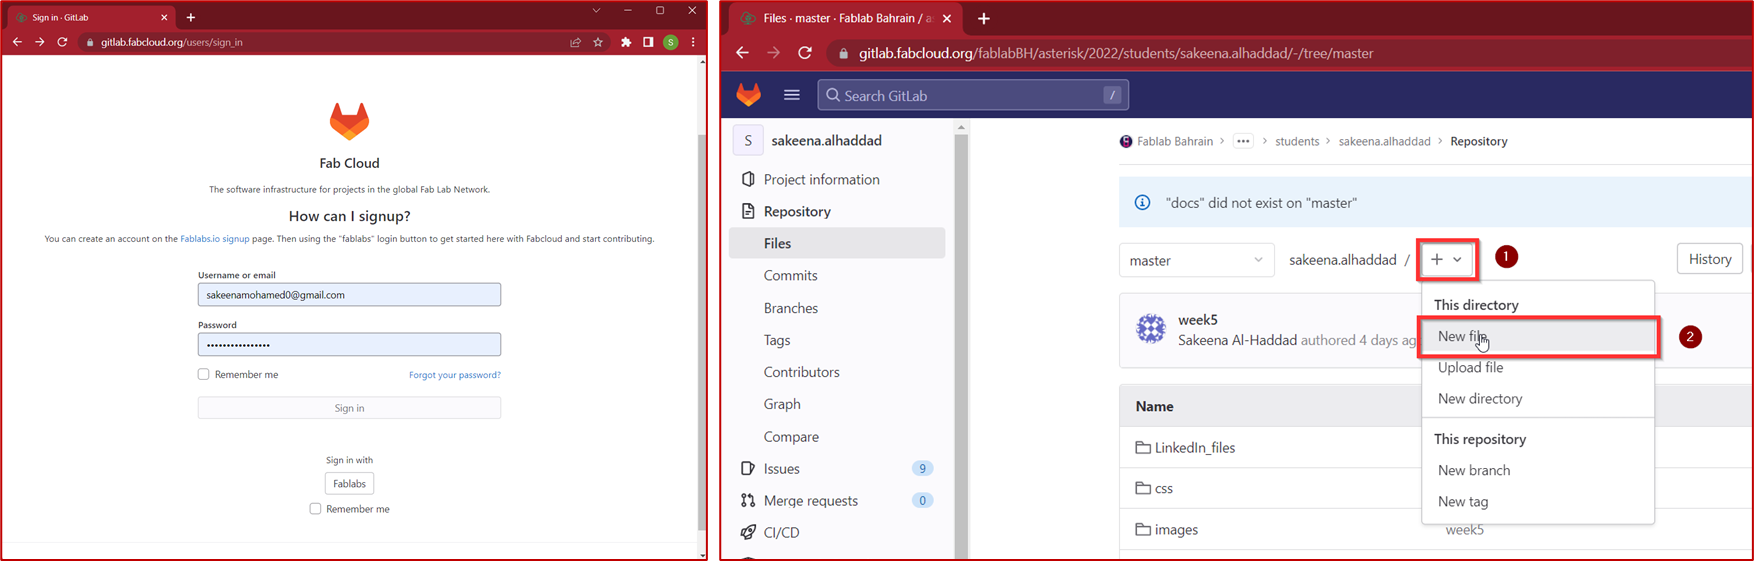
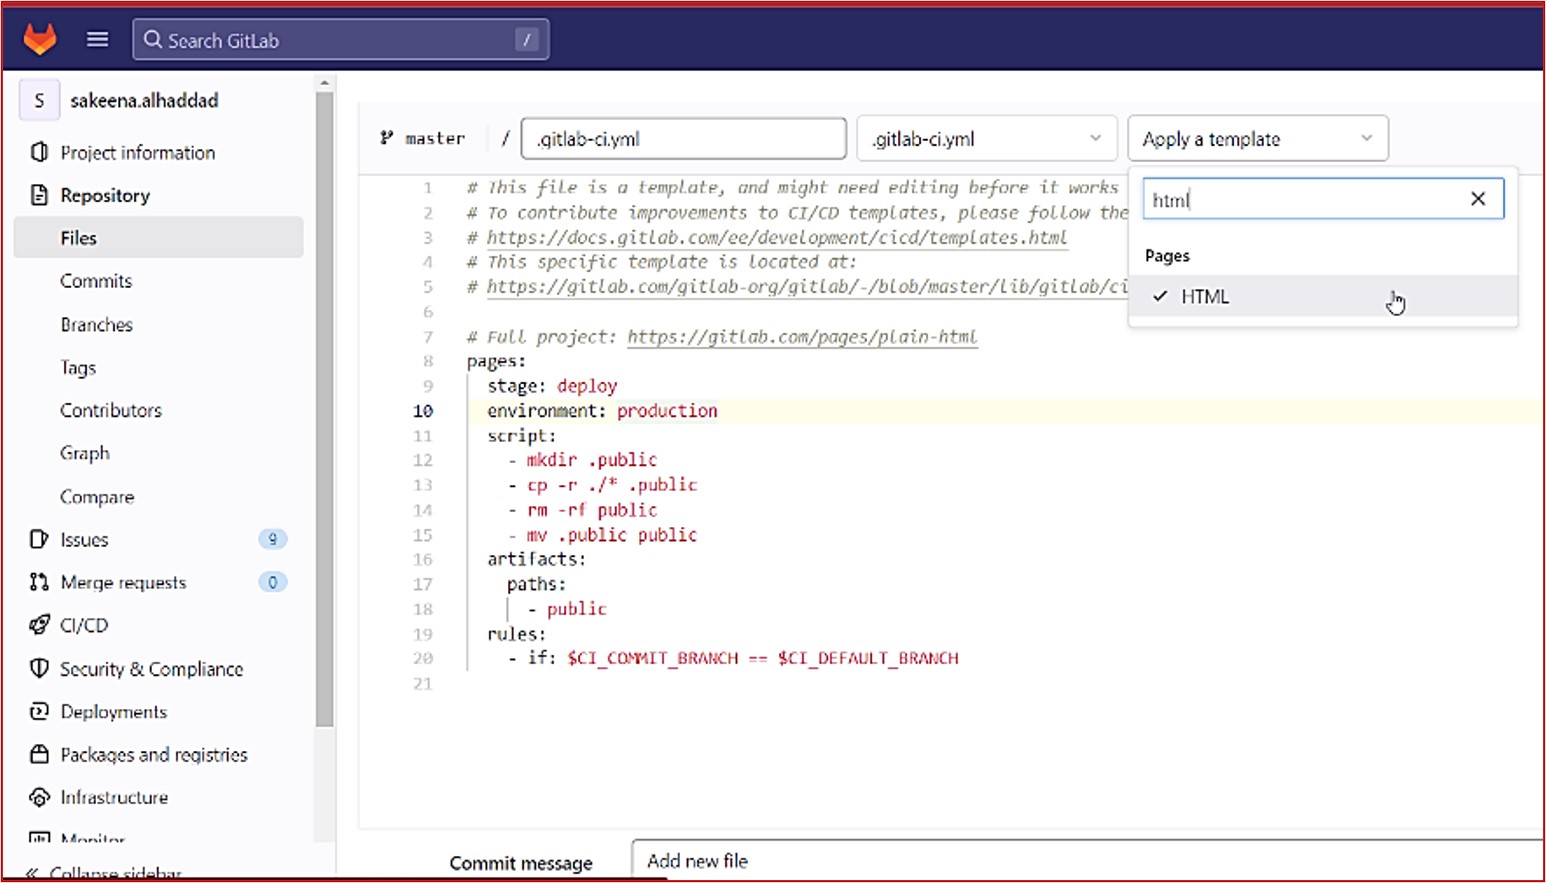
To create your own website, you would need different softwares, some of them can allow you to design and edit your website online for example GITLAB, while some of them allow you to edit locally on your computer (offline) such as ATOM.


Before getting started, we need to understand some of the tools we will be using.


WHAT IS GIT?


Git is the most commonly used version of control system. Git tracks the changes you make to files, so you have a record of what has been done, and you can revert to specific versions should you ever need to.


WHAT IS GITBASH?


Git Bash is an application that provides Git command line experience on the Operating System. Git Bash is a package that installs Bash, some common bash utilities, and Git on a Windows operating system. In Git Bash the user interacts with the repository and git elements through the commands.
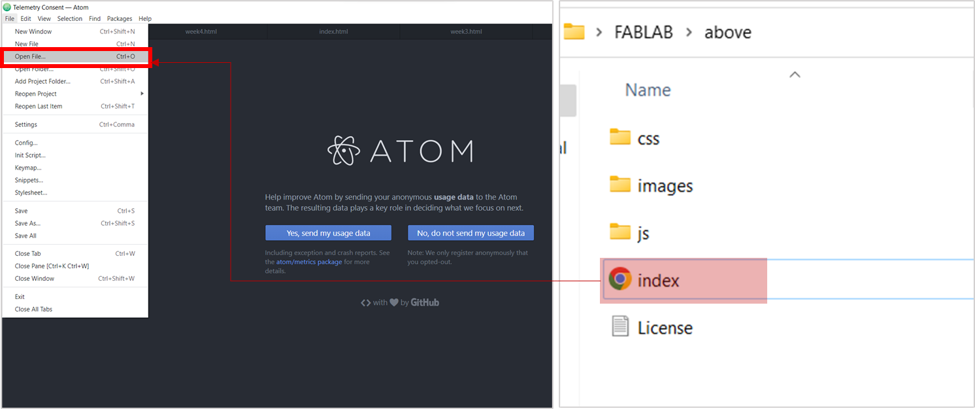
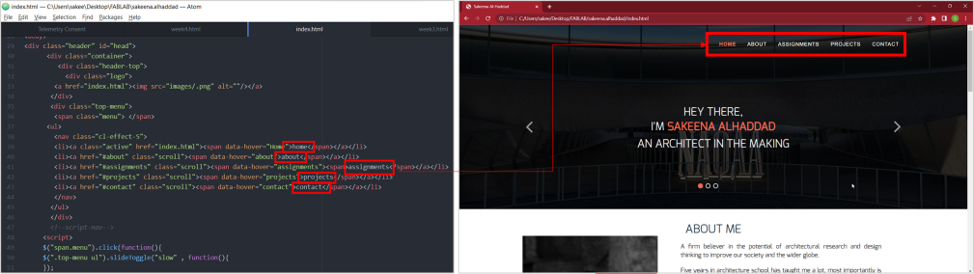


WHAT IS ATOM?


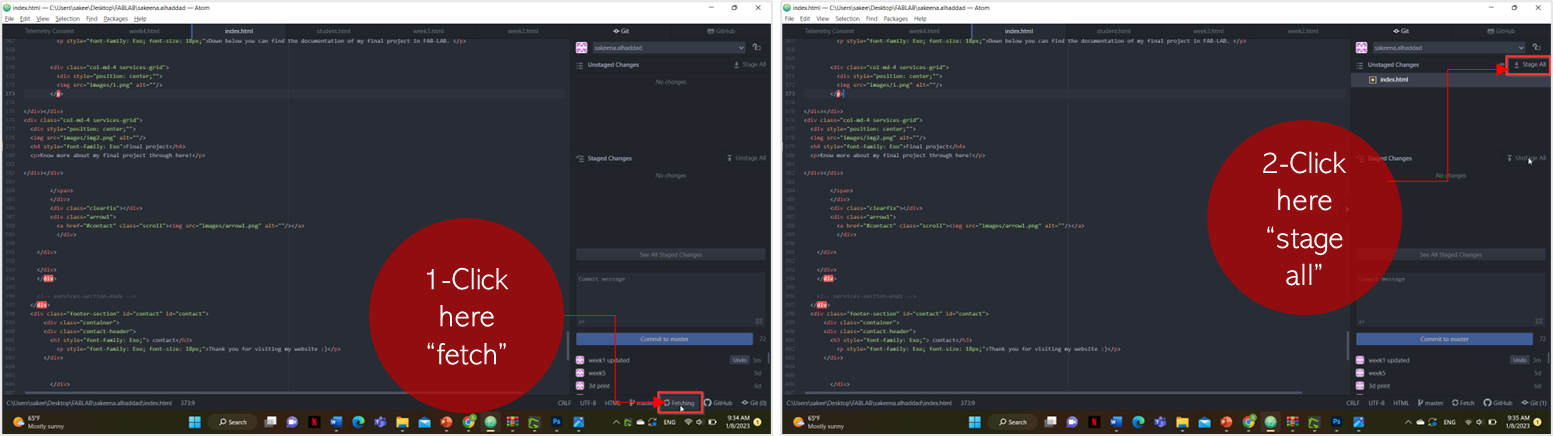
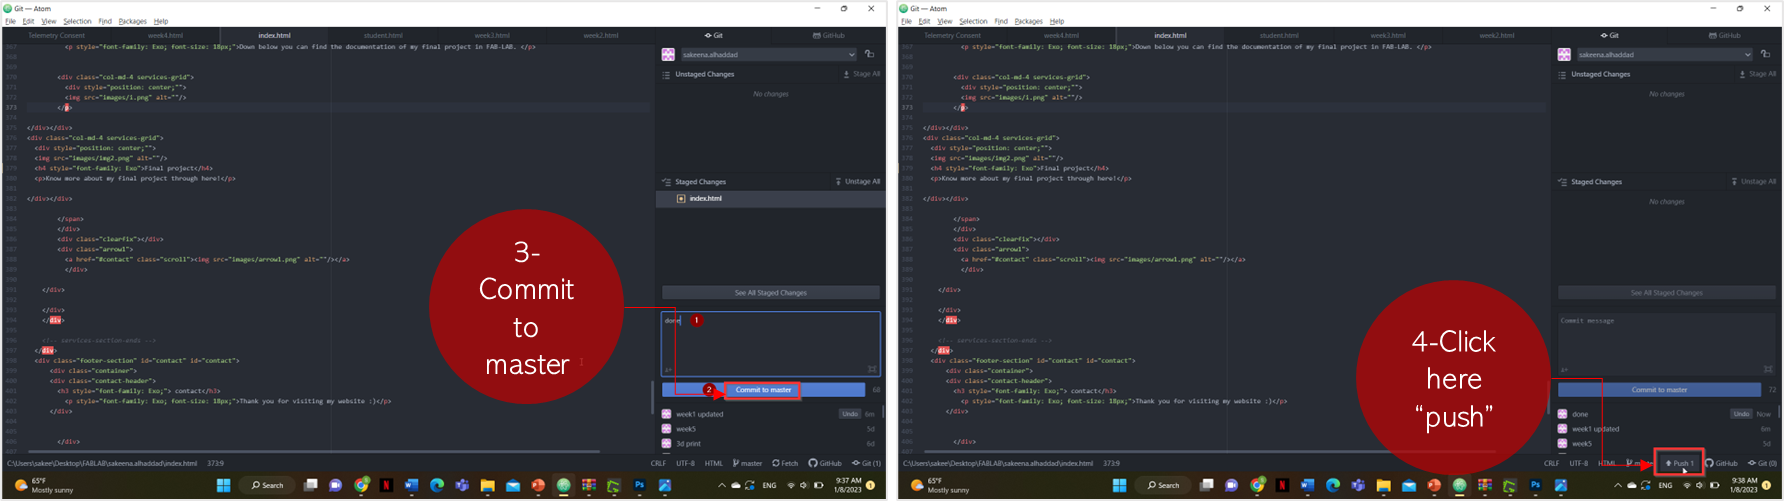
Atom is a desktop application built with HTML. It allows you to make changes in your website locally in your computer before pushing the changes to be on your website.


Mkdocs: is a website generator that helps in documenting projects.

Markdown: is an easy language that helps in converting our texts into html codes.


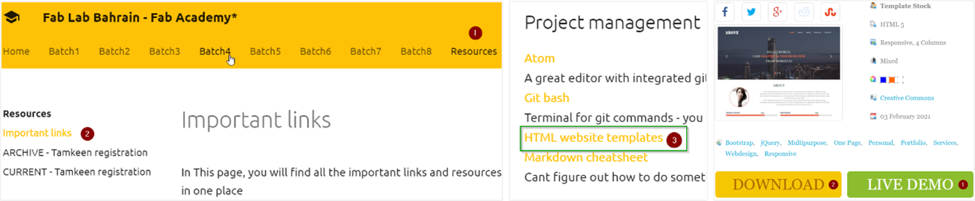
To start with, the team provided a ready template to the students, but I wanted to try something new by using a new template that suited my personality better. scroll down to see how I developed it!


ATOM


1- The first step is to download ATOM, as explained above it is a free software that will allow you to edit your website offline, then push it whenever you are ready. click here to download.


2- Choose a template and to do that you have to log-in Fab-Lab, then click on resources. On the left side, click on important links, then scroll down and click on HTML websites templates.

The link will take you to a website full of templates. choose one then click on live demo to see how it will look like. If you like it, download it.

3- Extracting files, after downloading, move it to the desktop, then create a new folder where you can keep all the website folders in one place. Move the zip file that you downloaded to the new folder you created, then right click and choose 'extract all'. Multipul folders will appear.

4- Opening the file in Atom, inside the new folder you will find a chrome file called 'index', this is your template. To start experimenting and editing the website, go to Atom > Open > choose "index" the chrome file.

5- Start editing, I started by customizing the titles at the top, and I began replacing the text, each text in the grey color represent the text that will appear in the website.

I customized my template to have five sections, the header, the about section which has information about me, the assignments section which has all the documentation of all the assignments we took in Fab-lab, the final project section and lastly the footer which includes the contact information.

6- Push the changes you made, after editing you need to push the changes you made to the online website so it shows for everyone, start by clicking on "FETCH" on the bottom right side as shown below, than click on "stage all" on the top right side.

After that, right a meesage, then click on "Commit to master". A "push" button will appear on the bottom right, click on it to push the changes.

Scroll down to see how to connect the website to GITLAB.

GITLAB

After learning how to edit the website offline, it was time to launch it online through GITLAB.

1- Login GITLAB, the first thing to do is to create an acount in Gitlab by signing up, then go ahead and delete all the existing files. as shown below, click on new files to add the new template.

2- Adding your website, add your file and select "HTML" as shown below.

Congrats! you just added your new website.