EMBEDDED PROGRAMMING


The aim of this week is to learn how to program a microcontroller:


What is a microcontroller? and how does it work?


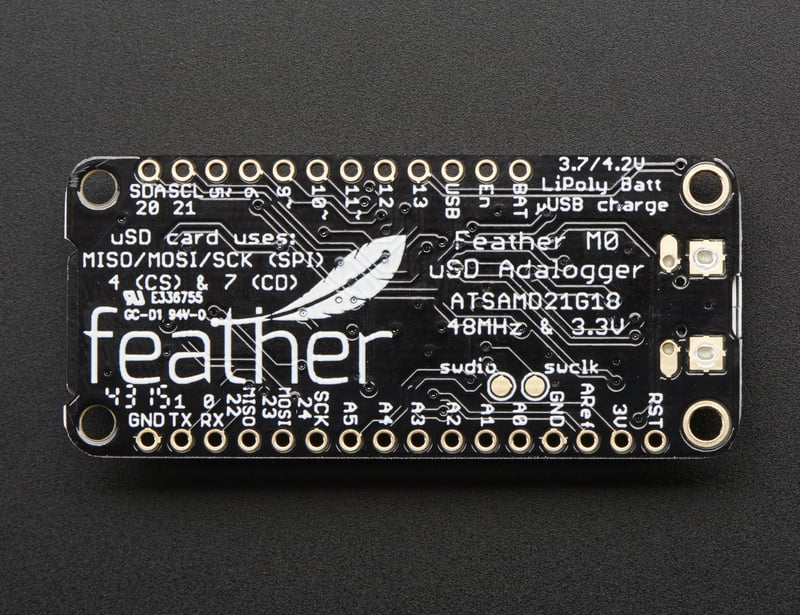
Microcontrollers are embedded inside devices to control the actions and features of a product. Hence, they can also be referred to as embedded controllers. They run one specific program and are dedicated to a single task. .


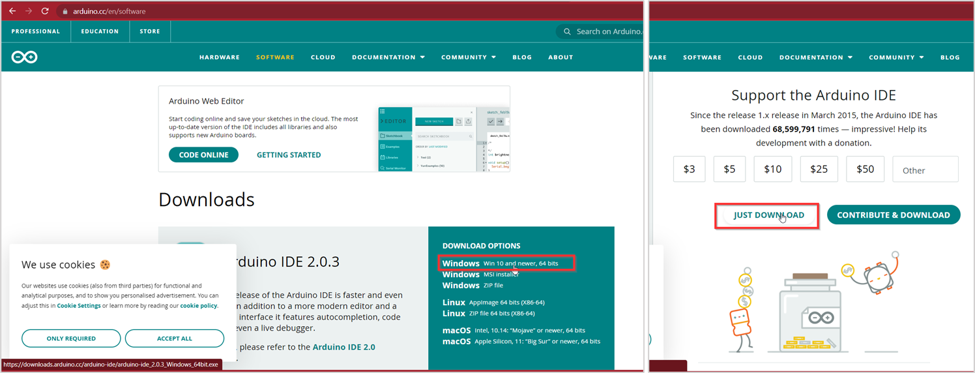
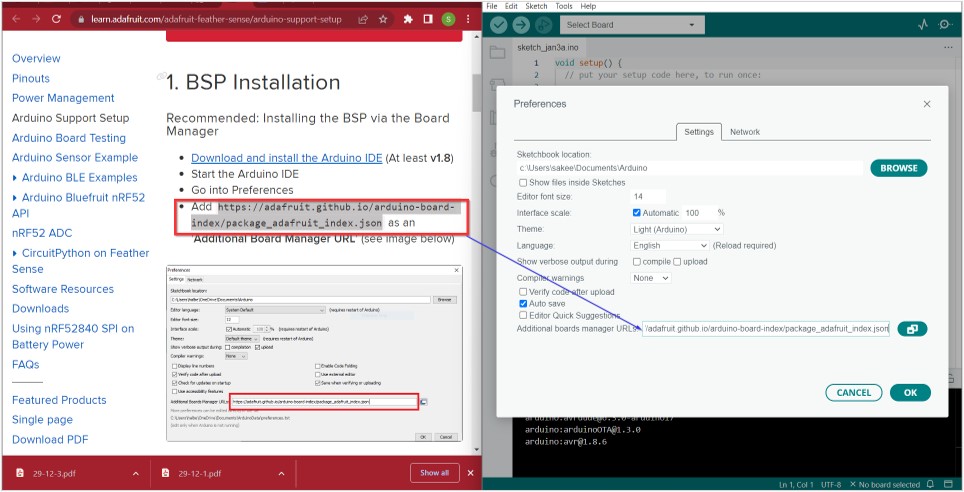
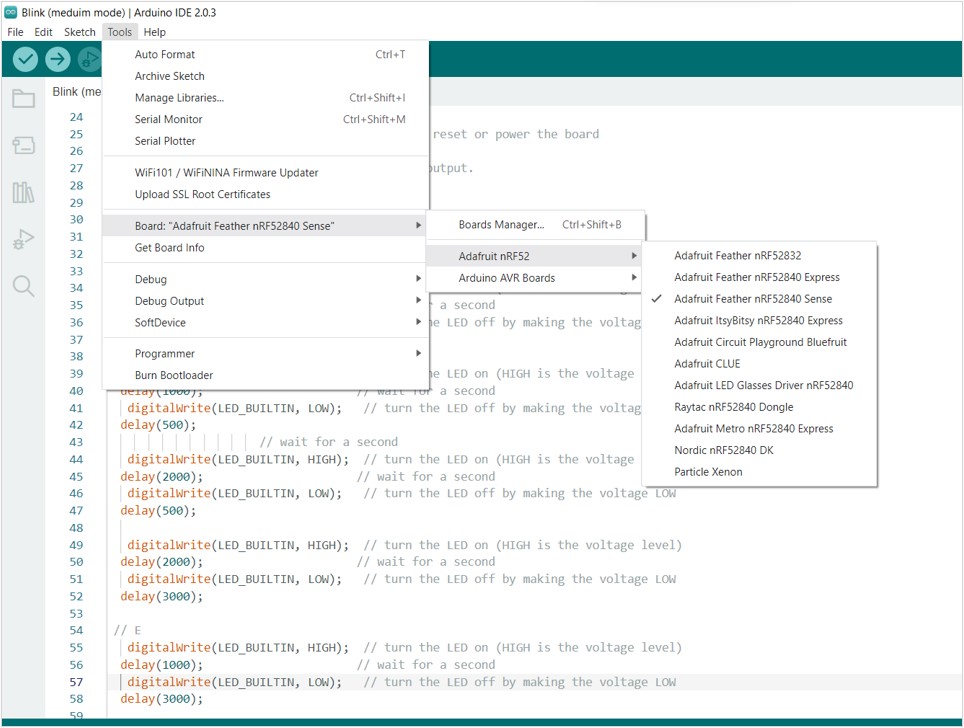
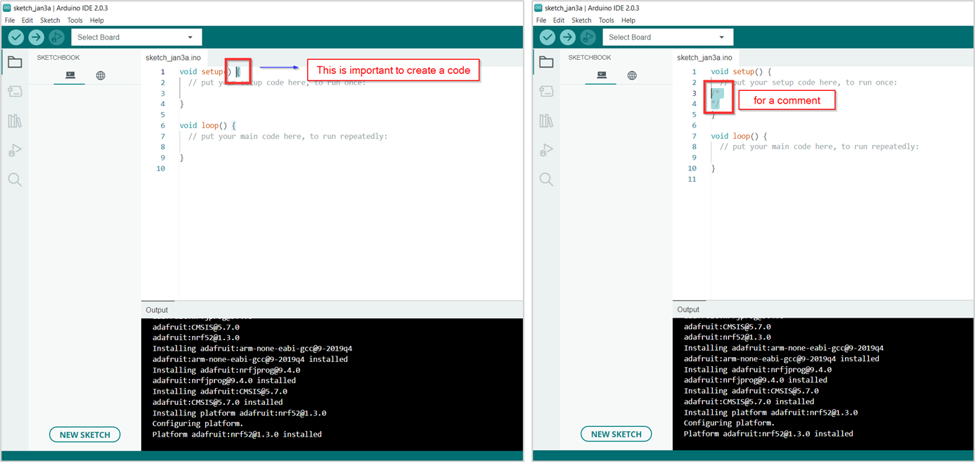
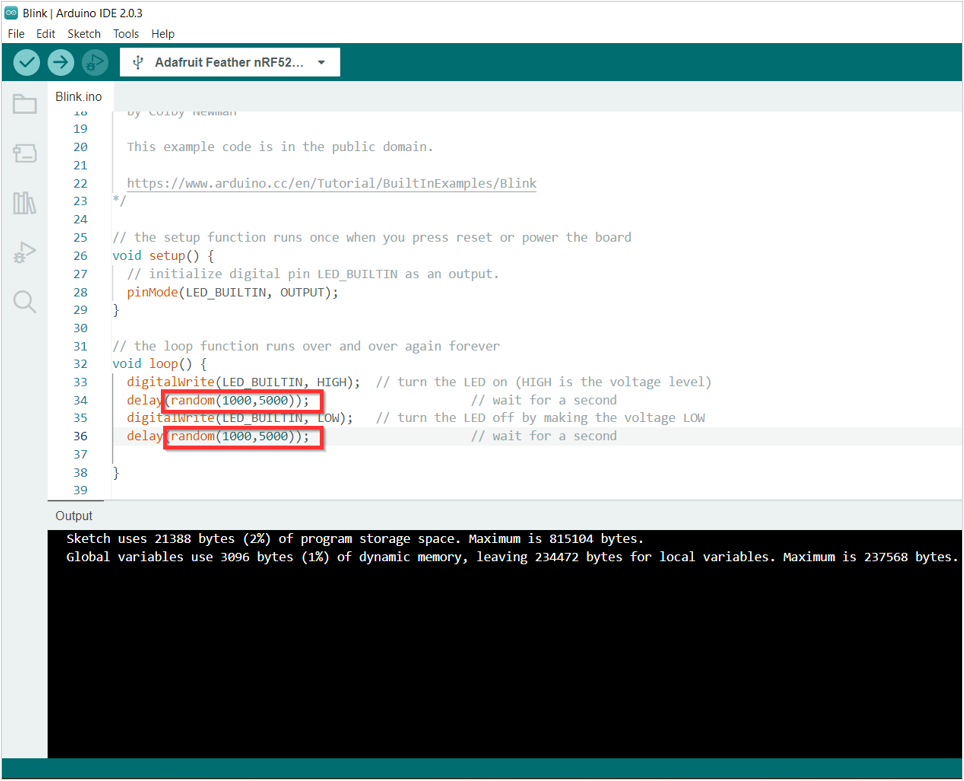
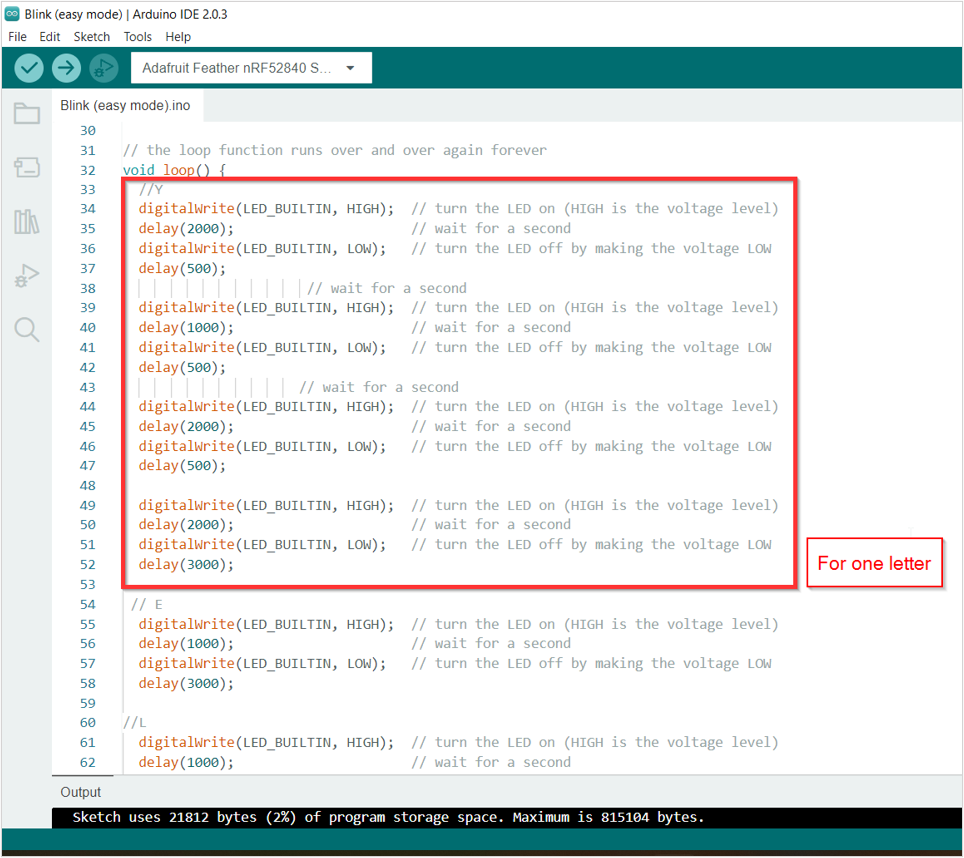
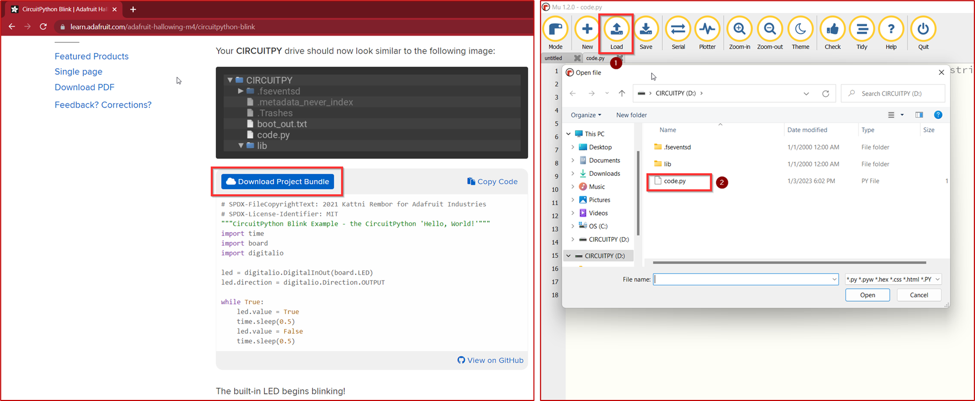
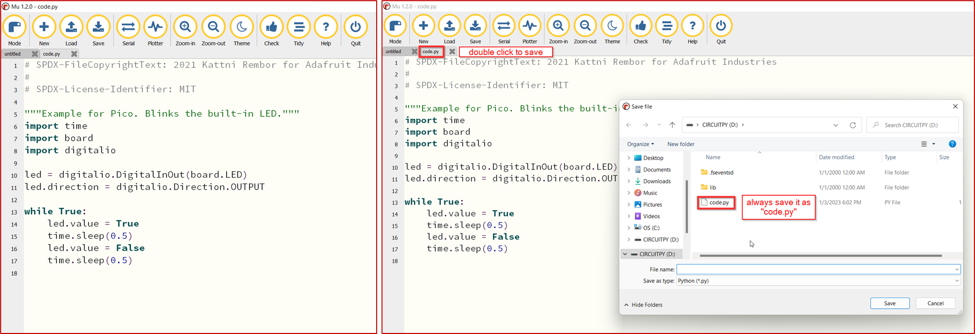
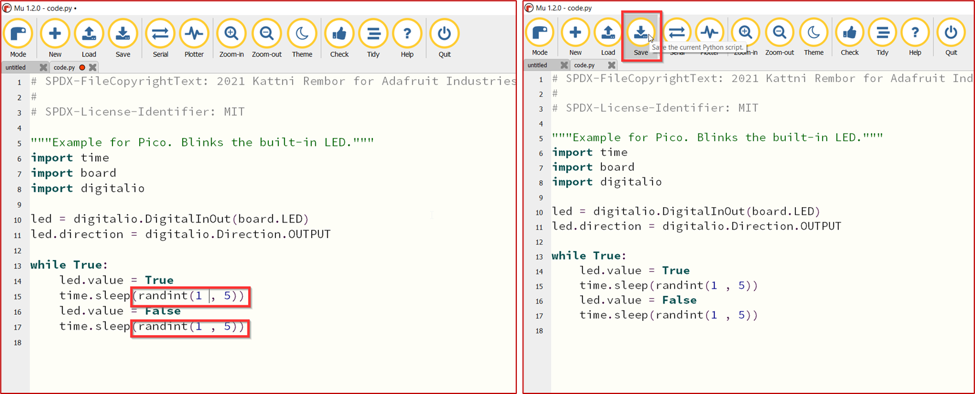
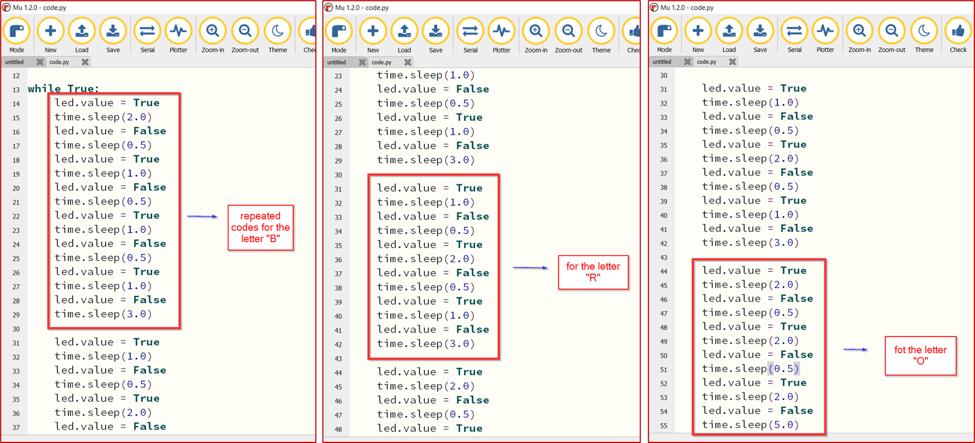
We learned two softwares that allow us to program the microcontroller, the first one is ARDUINO IDE, and the second one is MU EDITOR, scroll down to learn about them.


Group assignment:


In the group assignemnt each group was assigned to search about a microcontroller and compare them all in the end. click here to learn more about each type.

ARDUINO IDE


What is ARDUINO IDE?

The Arduino IDE is an open-source software, which is used to write and upload code to the Arduino boards. The IDE application is suitable for different operating systems such as Windows, Mac OS X, and Linux. It supports the programming languages C and C++. Here, IDE stands for Integrated Development Environment. It contains a text editor for writing code, a message area, a text console, a toolbar with buttons for common functions and a series of menus. It connects to the Arduino hardware to upload programs and communicate with them.

Individual assignment:

I used the feather adafruit microcontroller, here is the datasheet for it. click here. This microcontroller has 28 pins. The pins include; power pins, 6 analog pins (A0 … A5), PWM outputs pin, 12C pins and others, It has two buttons; reset button and user button. To reset the board quickly press twice on the reset button. This microcontroller power could be supplied from USB or from batteries. Connect with a USB cable (just plug into the jack) and the Feather will regulate the 5V USB down to 3.3V. Or connect a 4.2/3.7V Lithium Polymer or Lithium Ion battery to the JST jack. This will let the Feather run on a rechargeable battery. When the USB power is powered, it will automatically switch over to USB for power, as well as start charging the battery (if attached). This happens ‘hot-swap’ style so you can always keep the LiPoly connected as a ‘backup’ power that will only get used when USB power is lost. Here batteries can be connected to the BAT pin. And the usb power supply can be connected to USB pin.

In the individual assignment we were asked to program the microcontroller using Arduino IDE with different challanges.

1- Downloading ARDUINO IDE, The first step is to download ARDUINO IDE by clicking here.


2- Linking the microcontroller with Arduino IDE, through searching in google the name of the microcontroller that you are using, in my case I'm using the adafruit microcontroller.

Next, copy the link as shown below and paste it in Arduino IDE by going to Files > Prefrences, and paste the link as shown down below.

Next, connect the microcontroller to Arduino IDE by goining to Tools > Board > then choose the board's name you are working with.

Next, I wanted to experiment with the software more, here are the first tips you will need: this "(" represents the start of a code, and whatever that is not between "()" those brackets does not count as a code.

3- First challange (easy mode) I started on the first challange which was adjusting the Blink feature into random intervals between 1 to 5 seconds, as shown in the picture down below, I entered the specific code to make it randomly blink.

I got the code from this website.

The video shows the random blink effect.

Title of the document

    // the setup function runs once when you press reset or power the board
void setup() {
  // initialize digital pin LED_BUILTIN as an output.
  pinMode(LED_BUILTIN, OUTPUT);
}

// the loop function runs over and over again forever
void loop() {
  digitalWrite(LED_BUILTIN, HIGH);   // turn the LED on (HIGH is the voltage level)
  delay(random(1000,5000));
  digitalWrite(LED_BUILTIN, LOW);    // turn the LED off by making the voltage LOW
  delay(random(1000,5000));
}


4- Second challange (medium mode) I worked on the second challange which was creating a code with the blink feature to represent a letter, You can see the letter codes down below. The picture here shows an example of one letter of the word I made which was (YELLOW).

Down below are the codes for each letter.


MU EDITOR


Mu is a Python editor for beginning programmers, designed to make the learning experience more pleasant. I personally liked working with it more because I find it easier.

1- Download MU EDITOR.

2- Downloading libraries, The next step is to download the required libraries for the microcontroller you are using.


3- First challange (easy mode) I looked up a code for the blink mode, and I downloaded it in the software.

After uploading the code, save it as "code.py".

I tried experimenting with the code more as shown below.


    import board
import digitalio
import time

led = digitalio.DigitalInOut(board.LED)
led.direction = digitalio.Direction.OUTPUT

while True:
    led.value = True
    time.sleep(randint(1.5))
    led.value = False
    time.sleep(randint(1.5))


4- Second challange (medium mode) I used the same chart and I created the word "BRO" as shown below.