week2
computer Aided
Design

What I did
-
This week
I learned about two 2D softwares
I learned about two 3D softwares
I used the softwares to create 2D and 3D designs.

Computer-Aided Design
Before a thing is ever created, it is possible to digitally develop 2D drawings and 3D models of it using computer-aided design (CAD). I had to practice and create models with 3D and 2D software this week. .
Vector and Raster
A Vector image may be resized. This implies that regardless of how large or small you make the image, the quality will not change. It's because it is mathematical. The example of file types are (dwg,svg,ai,dxf)
Raster images have a set size. Raster quality decreases as it becomes larger and "pixelates." That's because it's basically constructed out of a series of colored squares. The example of file types are (jpg,bmp,tiff,gif,png,heif)
The difference between raster and vector
Rasters cannot be scaled but Vectors can. The two distinct file formats typically have different uses in reality.
When it comes to visual work, raster pictures are more "ordinary" and are typically utilized for photography, print, internet images, digital artwork, etc.
For technical drawings, graphics that must be scaled, very accurate plans, logo design, exporting to machines like CNC, etc., vector images are superior since they are more "specialized."
2D Design Software
The process of choosing the visual components and comprehending the fundamentals of art and design is known as 2D design. A designer creates 2D designs using only the length and width parameters. I worked on my Cuttle and Inkscape skills.
Cuttle
For cutting devices like laser cutters, digital die cutters, and CNC routers, there is a 2D design tool called Cuttle. It blends parametric CAD and programming power with the vector editing features of programs like Illustrator and Inkscape.
MoodBoard

Getting Started!
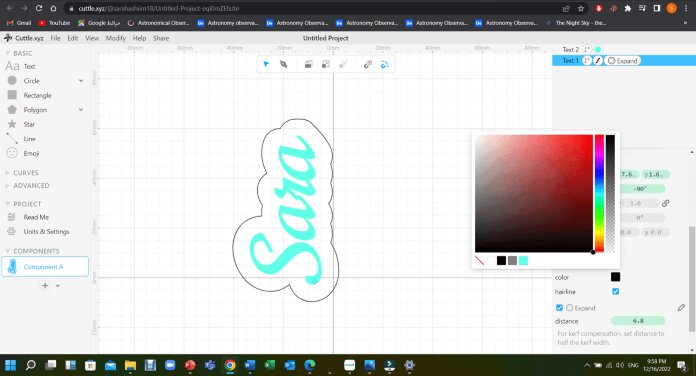
(STEP1) Start by dragging a text from the left side bar. you can change the text from the field on the right. I changed the font, size of the text, and the letter spacing. Set the rotation to -90.
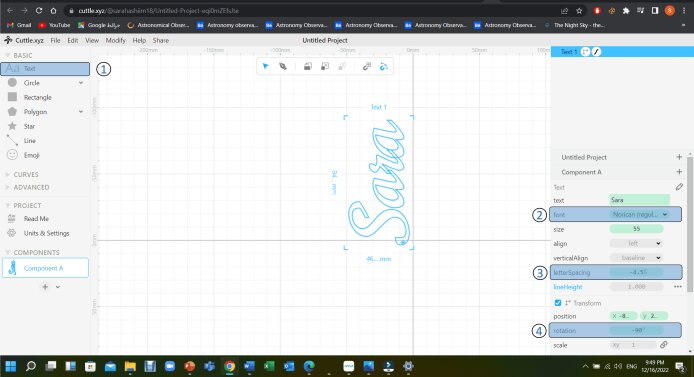
(STEP2) Turn off the Stroke and turn on the Fill option then set a color

(STEP3) for placing an outline around the text (representing the snowflake shape based on the curvature of the letters) Select the text, click edit then duplicate.

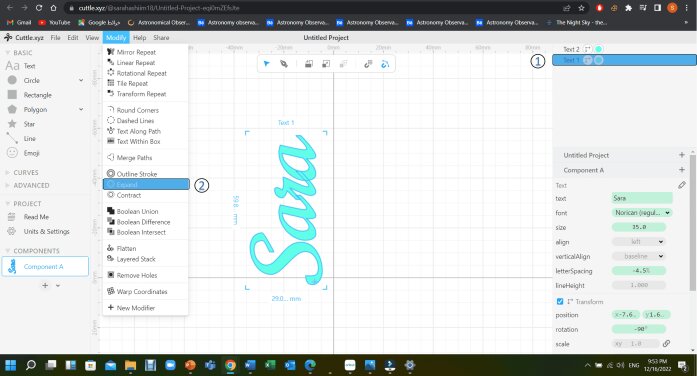
(STEP4) choose text 1 from the right field, then go to modify and choose the Expand option.
(STEP5) From the field on the right choose the distance you want and make the Join option round.
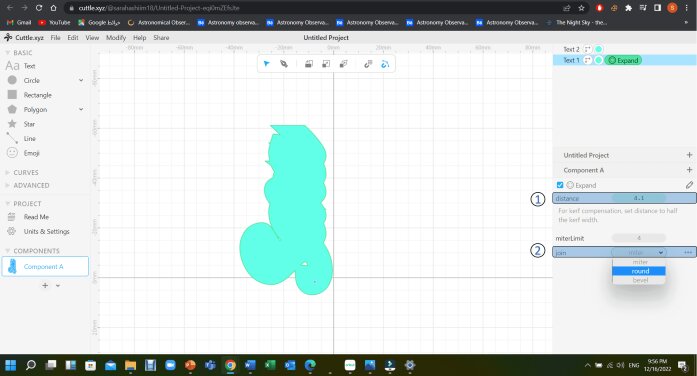
This is how it should look like
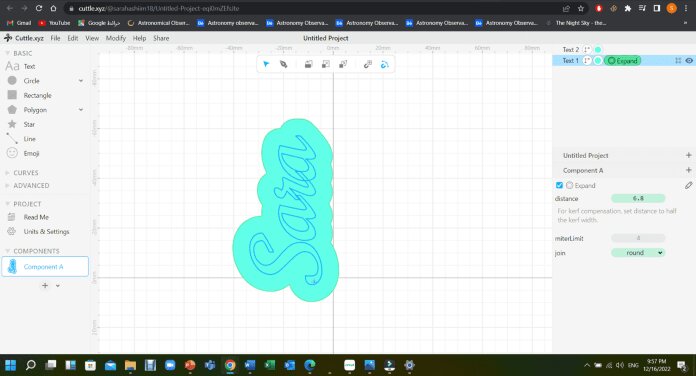
(STEP6) Exit the expand mode by clicking on text and turn off Fill and turn on Stroke. Make it black
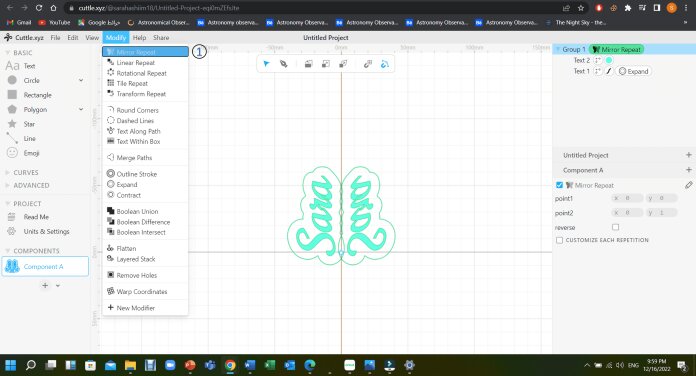
(STEP7) Go to Modify, choose MirrorRepeat, control the point1 y axis to bring the texts closer.
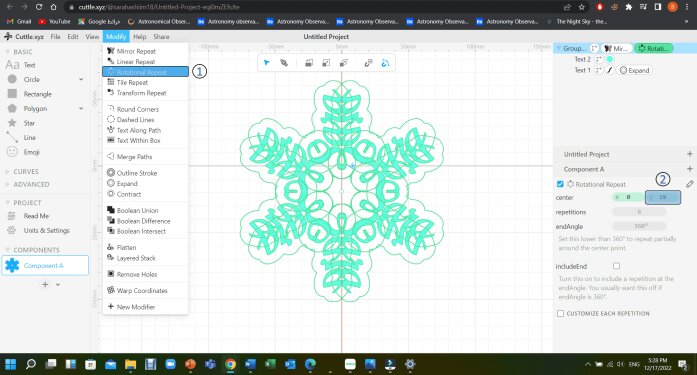
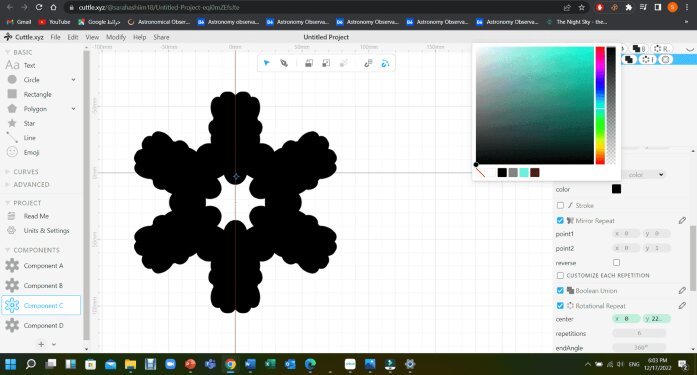
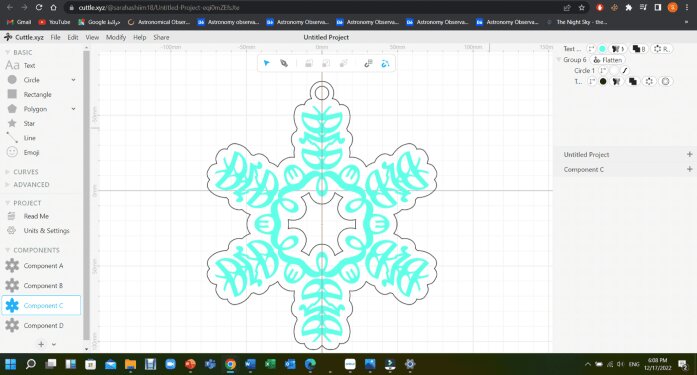
(STEP8) Go to Modify, choose Rotational Repeat and keep the repetitions 6. control the y axis and create the shape you like, I tried to expand the central area to make a flower in the middle which represent the moodboard I made earlier.
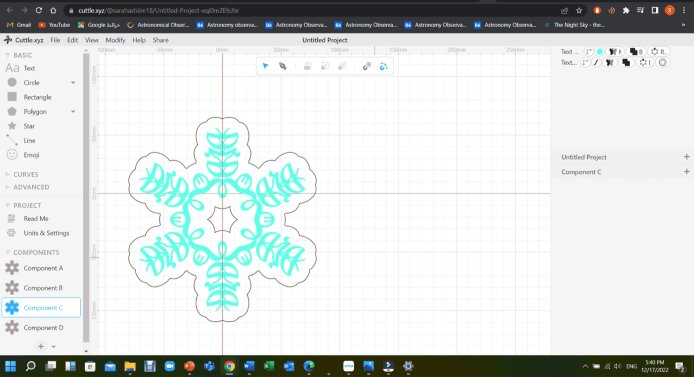
(STEP9) I copied the text into a new component and hide its outline so I can control the Boolean Modifier. I selected the whole text and clicked Boolean.

(STEP10) Unhide the outline.
(STEP11) To add keychain ring hide the engraved text, Fill the outline area with black and uncheck the Stroke option on the right
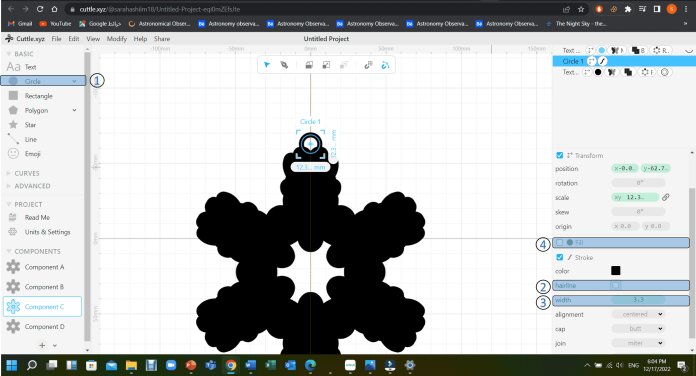
(STEP12) Add a Circle to the top, uncheck the Hairline option on the right and choose the width you want. The last step would be to turn on Fill and choose a white color. Now the black area represent where you want to cut out.
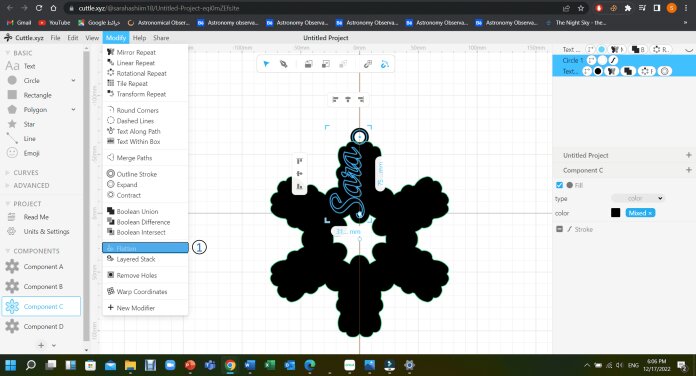
(STEP13) Select both shapes and use Flatten Modifier which will automatically give you the outline of anything that is black and while.
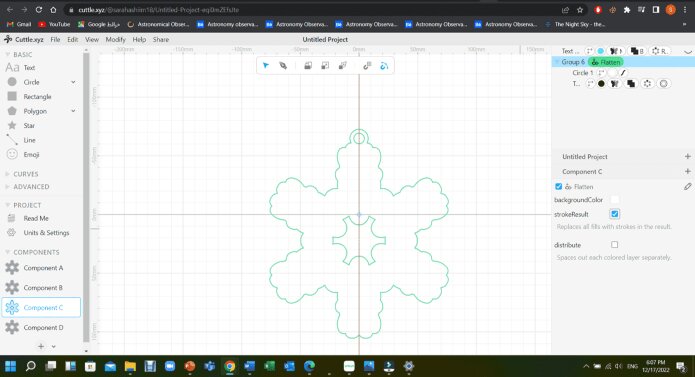
(STEP14) Turn on the Stroke Result parameter to see the outline.
(STEP15) Bring back the text by clicking on the Eye Icon on the top right to make the text visible again.
(STEP16) The last step would be Exporting your file to SVG and it should be ready for laser cutting.

(STEP17) This is the final result.

To download my original file
click here
InKscape
Inkscape is primarily an illustration tool, although it may also be used for a variety of computer graphic applications. Inkscape has a wide range of capabilities that might be unexpected at times. It's used to create diagrams, logos, programmatic marketing materials and online graphics.
Getting Started!
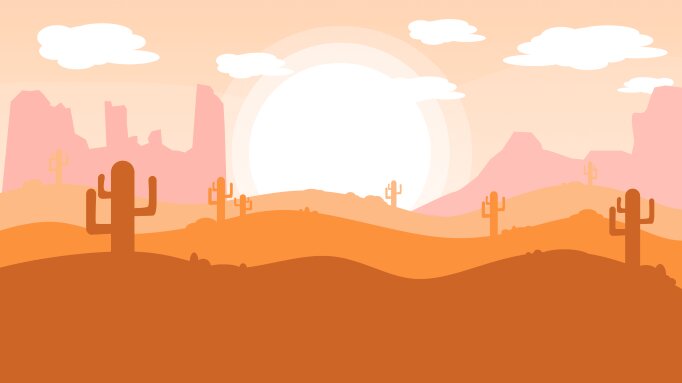
I used inKscape to create Flat Vector Landscape Design, by watching a tutorial on youtube.
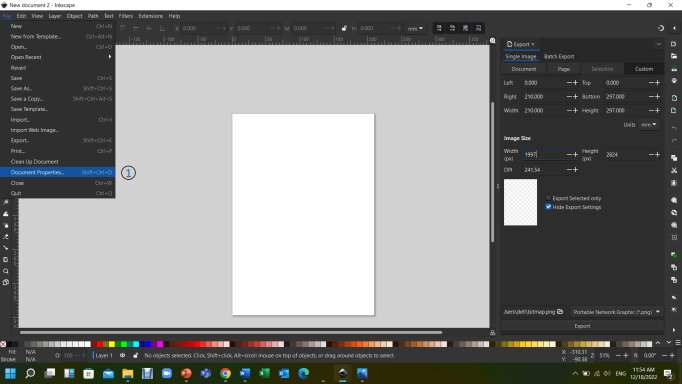
(STEP1) to do so, start by changing the drawing sheet size. Click on file – document properties
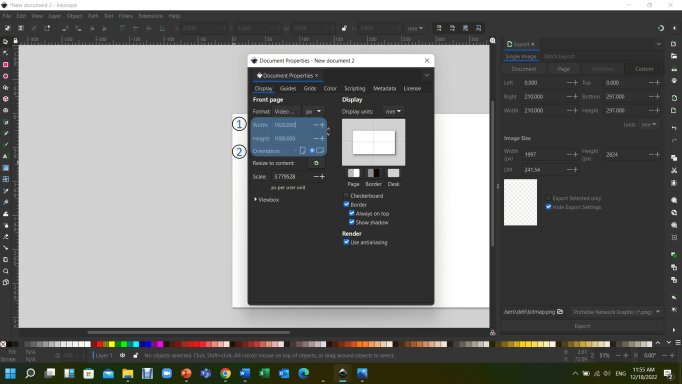
(STEP2) Change the width and height of your page and make it landscape
(STEP3) Grab an image from a file (color template), you can find it online

(STEP4) Place it above the drawing sheet. this is where you will pick your colors.

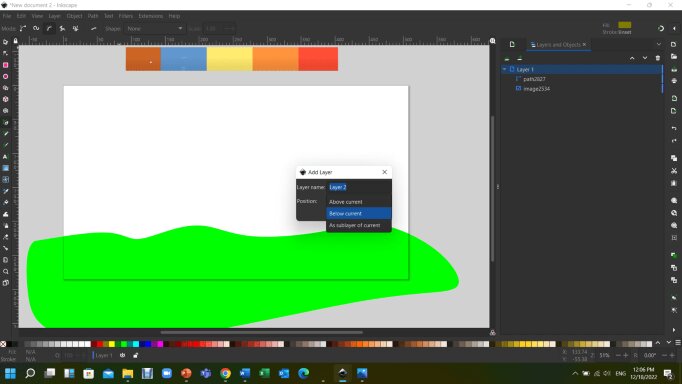
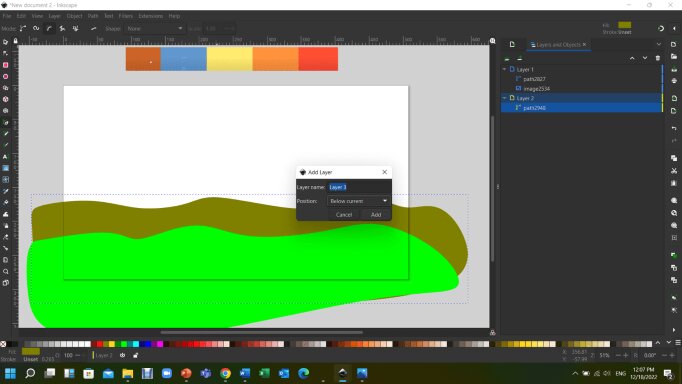
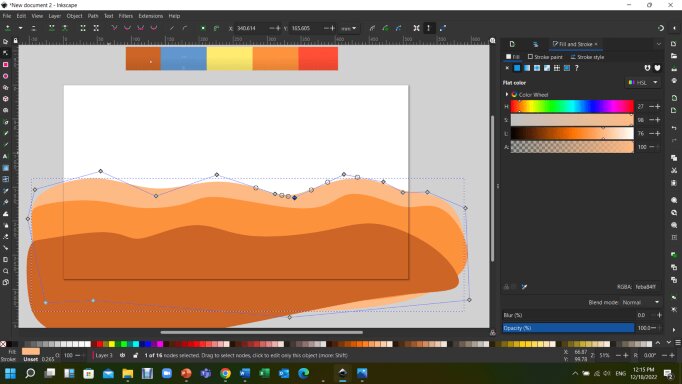
(STEP5) Use the beizer to draw the first layer of the sand. then add a new layer.

(STEP6) Make sure it's below the current layer.
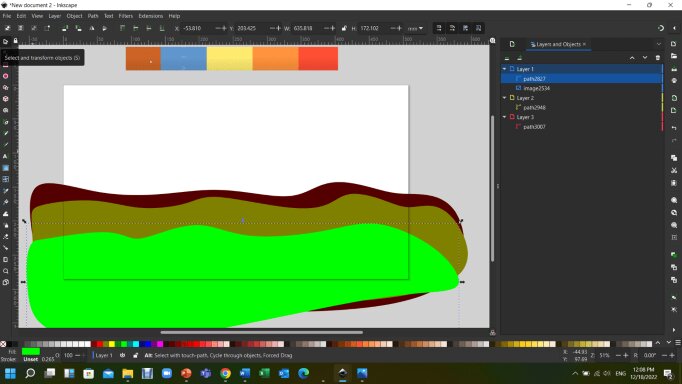
(STEP7) Repeat the steps to make a third layer of sand.
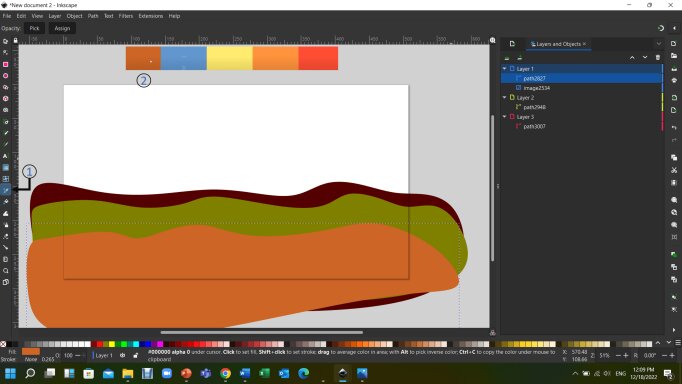
(STEP8) Select the eye dropper tool from the left bar, select the darkest color in the pallatte.
(STEP9) Repeat the step and select the next brighterr color.
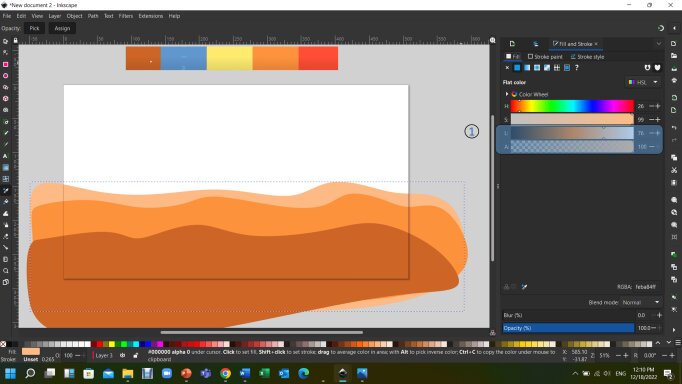
(STEP10) Now to make the last layer of sand brighter, go to object - fill and stroke.

(STEP11) Change the values to make the color brighter.

(STEP12) Select each shape and edit the paths using edit paths by nodes tool.
(STEP13) Select each shape and edit the paths using edit paths by nodes tool.
(STEP14) Add a new layer and then a box covering the whole drawing. reduce the opacity from fill and stroke to make it brighter
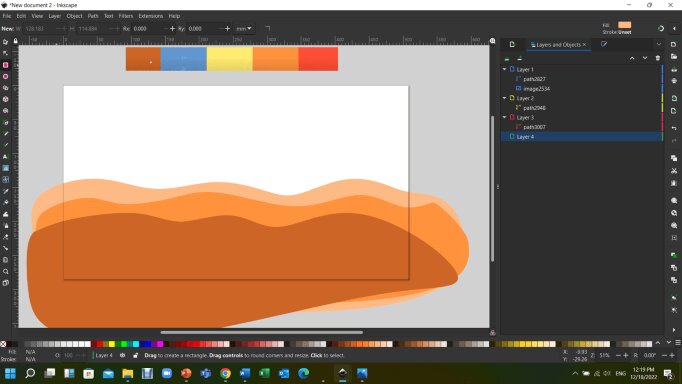
(STEP15) Rename the layers to make it easier to navigate. We have sky, sun, back, middle and front.

(STEP16) Use circle tool to draw a sun while holding ctrl key to make it proportional and make it white. Shift+ctrl+A To open align tool then select center on vertical axis.

(STEP17) Press Ctrl + D to duplicate the sun and resize it to make it a bit larger then choose the option lower the selection one step.
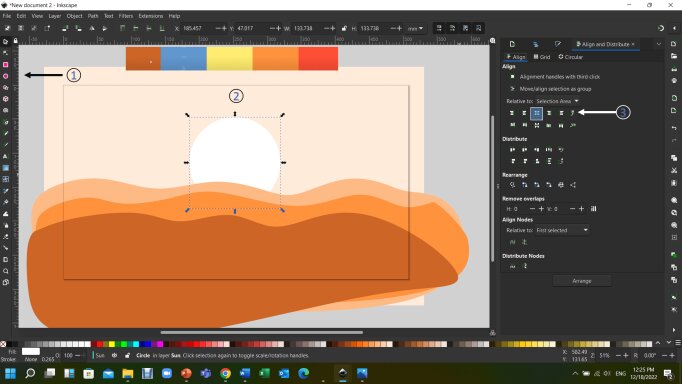
(STEP18) Lower the opacity and repeat the step to make another circle.

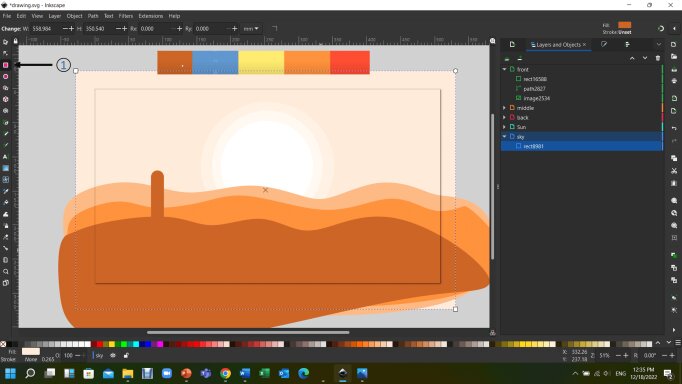
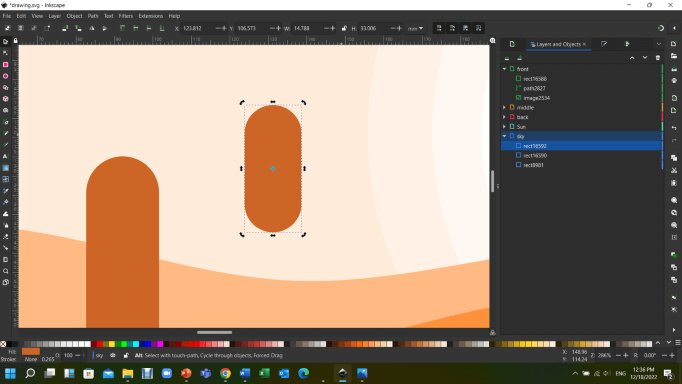
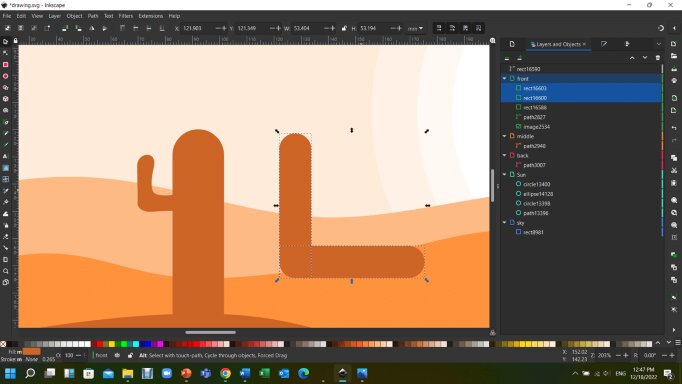
(STEP19) Draw a cactus using the box tool then zoom in to drag the point where it makes the corners smooth.

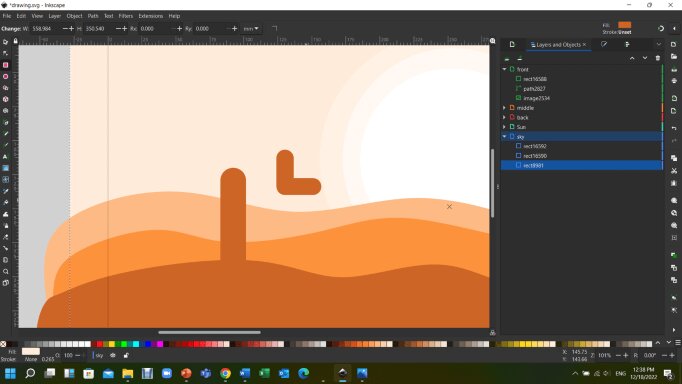
(STEP20) Draw another shape then ctrl + D to duplicate.
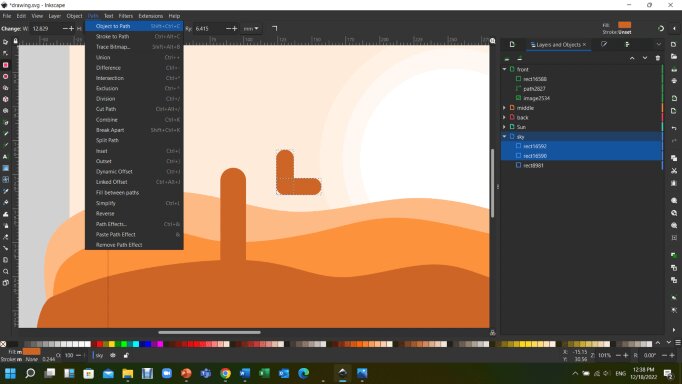
(STEP21) Rotate the shape and bring it to the corner Then select both shapes. click path – object to path.
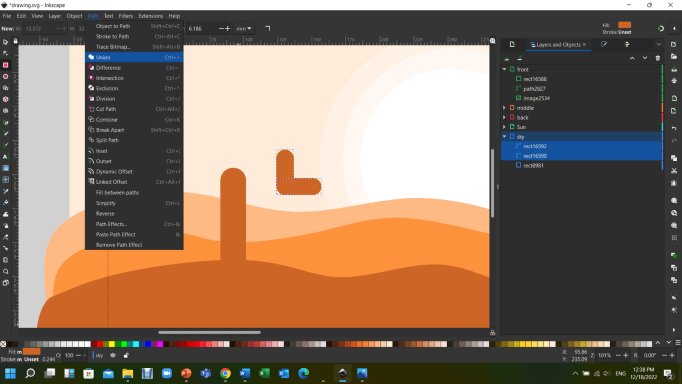
(STEP22) Click on path again and choose union to turn it into one shape.
(STEP23) Move the shape you created by clicking on selection tool and select the shape. resize it using the arrows.
(STEP24) To make it more realistic choose edit paths by nodes then choose a node, click on make selected nodes symmetric and move the nodes until you are satisfied with the shape.
(STEP25) Repeat the steps to make more arms for the cactus, H key to flip the shape.

(STEP26) you need to click edit and group the cactus. Click ctrl+d to copy and move it to distribute the cactus randomly. You want to make sure you head to each layer (Middle, back) and click Ctrl+c to copy then ctrl+x to cut. choose the layer you want and then ctrl+v. by clicking the eyedropper tool on the left, choose the ground color of each layer to match the cactus.

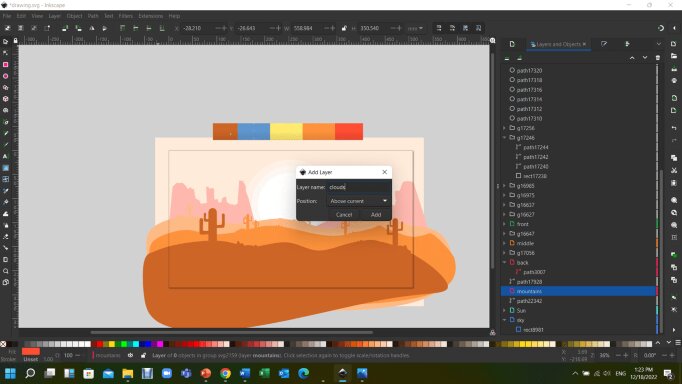
(STEP27) Add a new layer named mountains and place it between the sun and back layer, choose the red color from the palate and draw the mountains randomly using Bezier tool.
(STEP28) Reduce its opacity and draw another set of mountains on the other side.

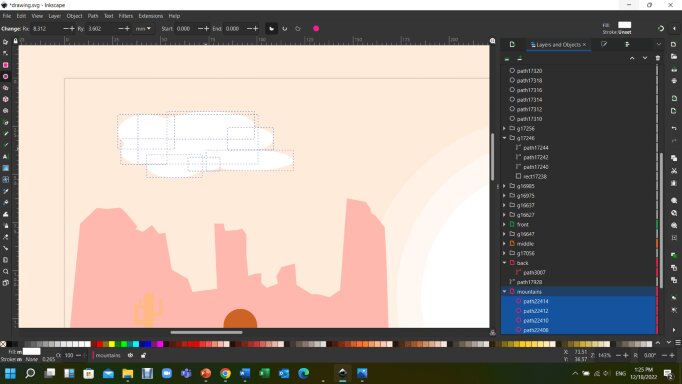
(STEP29) Add a new cloud layer and make it above current.

(STEP30) Draw random circles and click ctrl+A to select the shapes in the layer then join them.

(STEP31) Distribute the clouds randomly on the drawing.
(STEP32) Select the background and click on gradient tool, then change the values the way you find it more convenient.
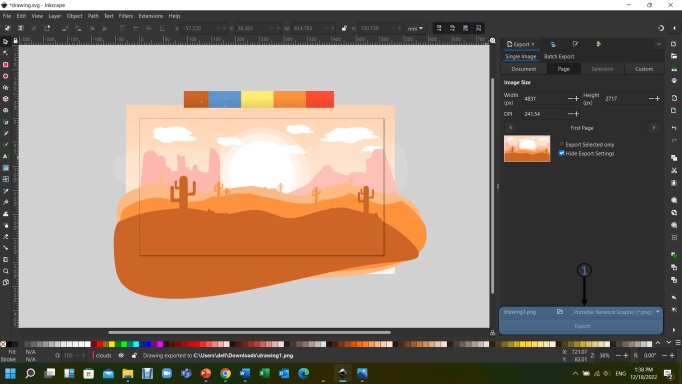
(STEP33) Export the file as png or DXF any other format, for now I exported it as an image because my purpose was to use it as a background.
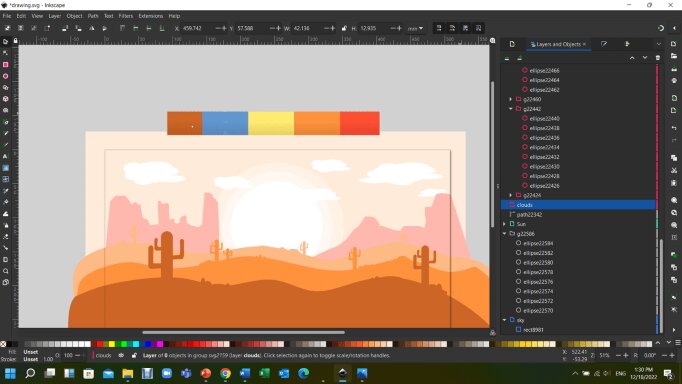
(STEP34) This should be the final result.
3D Design Software
The technique of creating a mathematical representation of a three-dimensional item or shape using software is known as 3D design. The object developed is known as a 3D model, and these 3-dimensional models are utilized in computer-generated (CG) design. 3D design is utilized in many sectors to assist artists in shaping, communicating, documenting, analyzing, and sharing their ideas.
Fusion
Fusion 360 integrates CAD and CAM applications into a single piece of software. It offers all the tools required to move from design through fabrication without leaving the platform. another software: Inkscape Cuttle website.
Parametric Design
It is a CAD technique in which the user sets features and limitations with design goals in mind. When utilizing parametric modeling, every aspect of a model is created to exact proportions.
Getting Started!
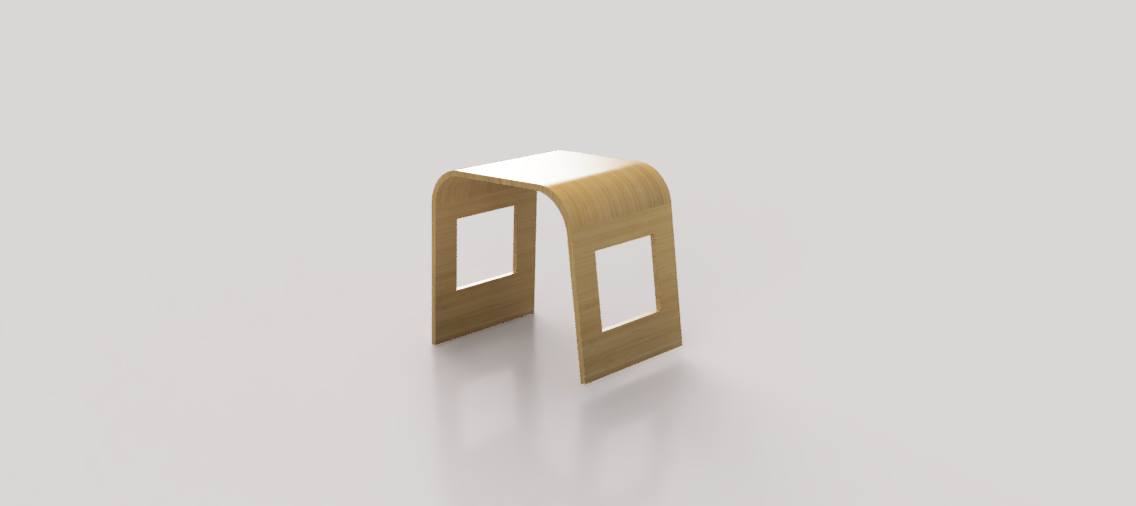
I used Fusion to create Benjamin Chair.
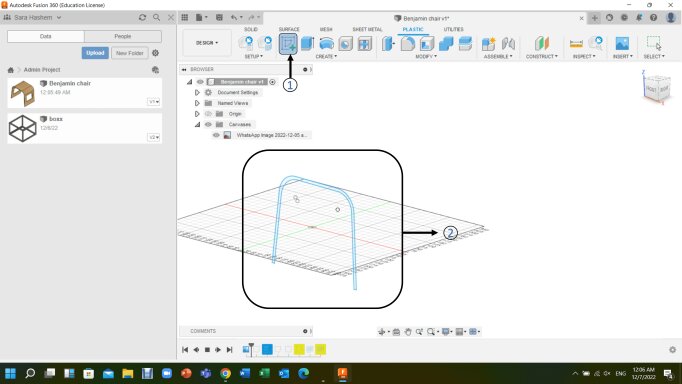
(STEP1) I chose the (z,x) axis to upload a front side image of the chair through insert button on the top right.
(STEP2) I opened a new sketch and drew the outline using line.
(STEP3) I used fillet to make the corners round by selecting two lines intersecting at each corner.

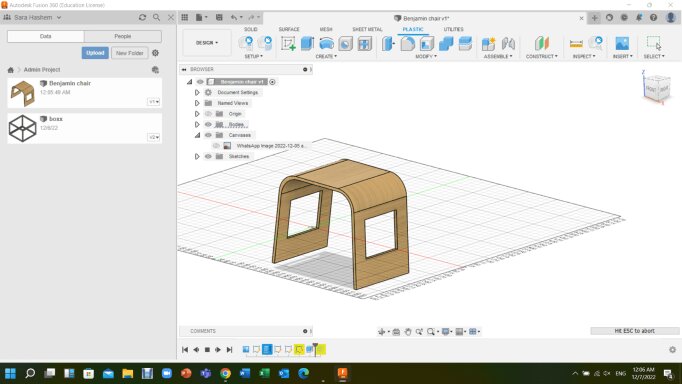
(STEP4) I used Extrude and extruded the shape based on the dimensions I took earlier.

(STEP5) I made a box in the middle of the chair and extruded it to make the openings using (cut).
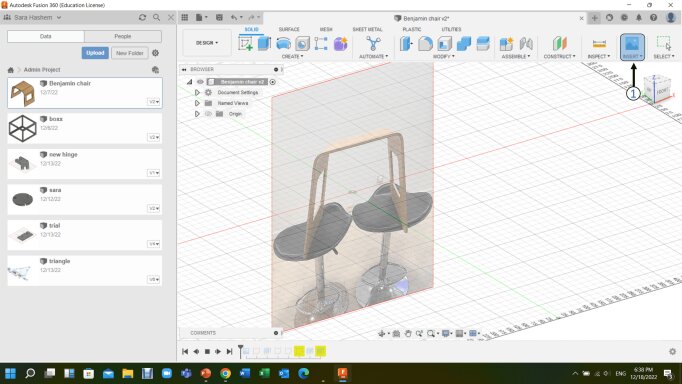
(STEP6) I added a material by heading to modify, physical material, choose the material desired and then dragg it to the object. this is how it turned out after rendering.
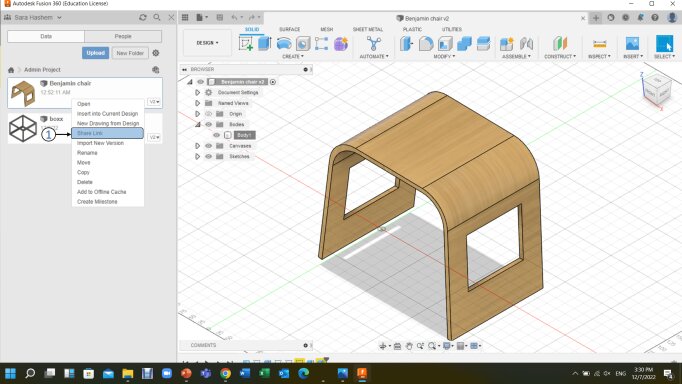
(STEP7) To get the link, i clicked on project itself from the data box on the left side, right click then share link.

(STEP8) I copied the link to paste it in this code.
<div class="fusion"><iframe width="640" height="480" src=" your link" frameborder="0" allow="autoplay; fullscreen; vr" mozallowfullscreen="true" webkitallowfullscreen="true"></iframe>
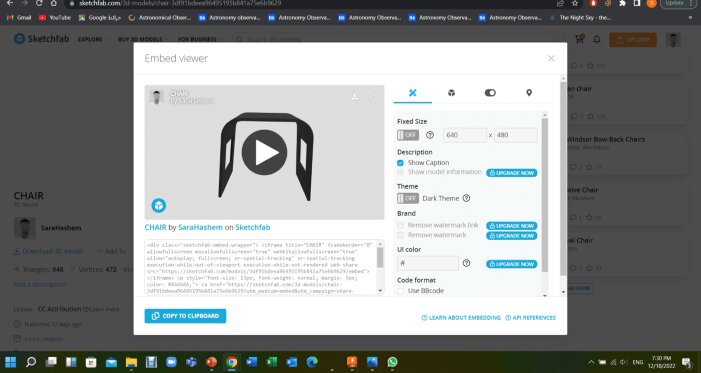
(STEP9) the second way to upload is to upload the model in sketchfab website, choose embeded and copy the link then paste it directly in your html website.
(STEP9) This how it should look like.
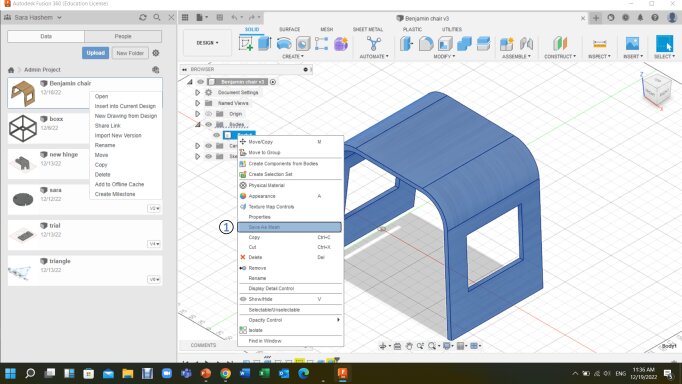
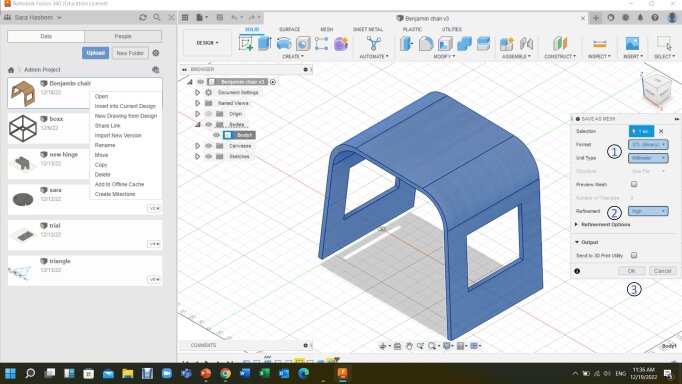
(STEP10) To export 3D model for printing: right click on the body then click save as a mesh (format is STL Binary)
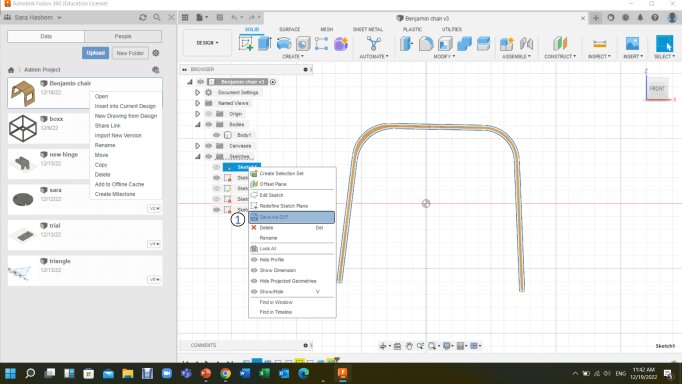
(STEP11) To export as a 2D make a new sketch, select the object and make sure it's the top view, then right click on the sketch, save as DXF
Blender
Blender is a free and open source 3D modeling and animation software. It covers the complete 3D pipeline, including modeling, rigging, animation, simulation, rendering, compositing, and motion tracking, as well as video editing and game design.
Getting Started!
I chose to make an astronaut by watching a tutorial online and these are the steps I went through:
This is the final result

To export the model click file - export - export as stl.

Then you can upload the model in sketchfab, after you upload it choose embeded option and paste the link in your html.
These are some renders I made using a scene I created before by donwloading galaxy background and some ready mades planets from the internet
To download my original file
click here
🔎 Conclusion
Discovering those new softwares helped me understand that each one has advantages and disadvantages. For example, Blender is a fascinating software with impressive outcomes, but it has far too many tools. I preferred Fusion over the other 3D software since it is more straightforward and offers simpler capabilities if you are developing anything basic.
When it comes to 2D softwares, I think Cutter is the fastest and can generate fantastic designs, especially for laser cutting machines, while Inkscape
🔗 Download Files
Snowflake
Desert wallpaper
Benjamin chair Fusion
astronaut blender
04
Contact Me
Mobile Numberr
+973 35011840
Email
sarahashiim18@gmail.com
Social Network