Week 4: Embedded Programming
This week I worked on defining my final project idea and started to getting used to the documentation process.
This Week’s Tasks
Objective
Complete the assignments focusing on embedded programming, which include individual and group tasks:
-
Group Assessment: Identify a Microcontroller and its Parameters
-
Individual Assessment: Download Arduino IDE and Test a Microcontroller
-
Group Assessment: Download Thonny and Test an ESP32 kidsIOT STEM Microcontroller with LED
-
Individual Assignment: Conduct tests of an ESP32 Kids IOT STEM Microcontroller with multiple LEDs
First Group Assessment
Our group assignment involved identifying an unnamed microcontroller and determining its specifications. Through collaborative research and various websites, we successfully identified the microcontroller as an ESP32. We used this information to answer the questions posed in our assignment sheet. You can find our detailed findings and the research conducted by other groups in the downloaded shared document [1].
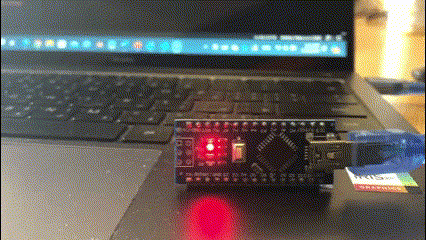
First Individual Assessment
Step-by-Step Process:
-
Download Arduino IDE:
- Visit the Arduino website [2] to download the IDE.
-
Connect the Microcontroller:
-
Connect your microcontroller (e.g., Arduino Nano) to your laptop.

-
Open the Arduino IDE, select the board, and choose the correct port that appears with (USB).

-
-
Enable Compile and Upload:
- Go to ‘Preferences’ and enable ‘Compile and Upload’ to get detailed error messages and understand any issues that arise during programming.


-
Verify and Upload:
-
Verify: This button checks your code for errors without uploading it to the microcontroller. It ensures that your code is correct and ready for uploading.
-
Upload: This button compiles your code and uploads it to the connected microcontroller, making it ready for execution.
-
Both buttons are located in the top left corner of the Arduino IDE, just below the menu bar.

-
-
Load the Blink Example:
-
Navigate to
File > Examples > 01 Basics > Blink.
-
This basic example helps verify that the microcontroller is functioning correctly by blinking an onboard LED.
-
First Experiment
The initial experiment was to modify the timing of the LED blinking:
-
Change the delay for the LED to stay on from 1 second (1000 ms) to 2 seconds (2000 ms), and adjust the delay for the LED to turn off from 1 second (1000 ms) to 0.5 seconds (500 ms).

- Original Code:
void setup() {
  pinMode(LED_BUILTIN, OUTPUT);
}

void loop() {
  digitalWrite(LED_BUILTIN, HIGH);  // turn the LED on (HIGH is the voltage level)
  delay(1000);                      // wait for a second
  digitalWrite(LED_BUILTIN, LOW);   // turn the LED off by making the voltage LOW
  delay(1000);                      // wait for a second
}

- Adjusted Code:
void setup() {
  pinMode(LED_BUILTIN, OUTPUT);
}

void loop() {
  digitalWrite(LED_BUILTIN, HIGH);  // turn the LED on (HIGH is the voltage level)
  delay(5000);                      // wait for a second
  digitalWrite(LED_BUILTIN, LOW);   // turn the LED off by making the voltage LOW
  delay(1000);                      // wait for a second
}
- Original Code:
Video Demonstrations:
-
LED blinking for 0.1 seconds on and 0.1 seconds off.
-
LED blinking for 0.5 seconds on and 0.5 seconds off.
Second Experiment: Programming Challenges
Easy Challenge: Random Blink Delay
-
Programmed the LED to blink with randomized delay periods between 1 and 5 seconds using
random(min, max).
  // the setup function runs once when you press reset or power the board
  void setup() {
    // initialize digital pin LED_BUILTIN as an output.
    pinMode(LED_BUILTIN, OUTPUT);
  }

  // the loop function runs over and over again forever
  void loop() {
    digitalWrite(LED_BUILTIN, HIGH);  // turn the LED on (HIGH is the voltage level)
    delay(random(500, 5000));                      // wait for a second
    digitalWrite(LED_BUILTIN, LOW);   // turn the LED off by making the voltage LOW
    delay(random(500, 5000));                      // wait for a second
  }
Medium Challenge: Morse Code
The task was to code the microcontroller to blink an LED to represent the Morse code message “SAMBOOSA”. Here’s how I approached it and the steps I took:
-
S = · · ·
-
A = · -
-
M = - -
-
B = - · · ·
-
O = - - -
-
O = - - -
-
S = · · ·
-
A = · -

- Code Implementation:
The following Arduino code controls an LED to blink out “SAMBOOSA” in Morse code:
  // the setup function runs once when you press reset or power the board
  void setup() {
    // initialize digital pin LED_BUILTIN as an output.
    pinMode(LED_BUILTIN, OUTPUT);
  }

  // the loop function runs over and over again forever
  void loop() {
    // S letter
      digitalWrite(LED_BUILTIN, HIGH);  // turn the LED on (HIGH is the voltage level)
      delay(1000);                      // wait for a second
      digitalWrite(LED_BUILTIN, LOW);   // turn the LED off by making the voltage LOW
      delay(500);                      // wait for a second

      digitalWrite(LED_BUILTIN, HIGH);  // turn the LED on (HIGH is the voltage level)
      delay(1000);                      // wait for a second
      digitalWrite(LED_BUILTIN, LOW);   // turn the LED off by making the voltage LOW
      delay(500);                      // wait for a second

      digitalWrite(LED_BUILTIN, HIGH);  // turn the LED on (HIGH is the voltage level)
      delay(1000);                      // wait for a second
      digitalWrite(LED_BUILTIN, LOW);   // turn the LED off by making the voltage LOW
      delay(3000);

    // A letter
      digitalWrite(LED_BUILTIN, HIGH);  // turn the LED on (HIGH is the voltage level)
      delay(1000);                      // wait for a second
      digitalWrite(LED_BUILTIN, LOW);   // turn the LED off by making the voltage LOW
      delay(500);                      // wait for a second

      digitalWrite(LED_BUILTIN, HIGH);  // turn the LED on (HIGH is the voltage level)
      delay(2000);                      // wait for a second
      digitalWrite(LED_BUILTIN, LOW);   // turn the LED off by making the voltage LOW
      delay(3000);                      // wait for a second

    // M letter
      digitalWrite(LED_BUILTIN, HIGH);  // turn the LED on (HIGH is the voltage level)
      delay(2000);                      // wait for a second
      digitalWrite(LED_BUILTIN, LOW);   // turn the LED off by making the voltage LOW
      delay(500);                          // wait for a second

      digitalWrite(LED_BUILTIN, HIGH);  // turn the LED on (HIGH is the voltage level)
      delay(2000);                      // wait for a second
      digitalWrite(LED_BUILTIN, LOW);   // turn the LED off by making the voltage LOW
      delay(3000);

    // B letter
      digitalWrite(LED_BUILTIN, HIGH);  // turn the LED on (HIGH is the voltage level)
      delay(2000);                      // wait for a second
      digitalWrite(LED_BUILTIN, LOW);   // turn the LED off by making the voltage LOW
      delay(500);                          // wait for a second

      digitalWrite(LED_BUILTIN, HIGH);  // turn the LED on (HIGH is the voltage level)
      delay(1000);                      // wait for a second
      digitalWrite(LED_BUILTIN, LOW);   // turn the LED off by making the voltage LOW
      delay(500);                          // wait for a second

      digitalWrite(LED_BUILTIN, HIGH);  // turn the LED on (HIGH is the voltage level)
      delay(1000);                      // wait for a second
      digitalWrite(LED_BUILTIN, LOW);   // turn the LED off by making the voltage LOW
      delay(500);                          // wait for a second

      digitalWrite(LED_BUILTIN, HIGH);  // turn the LED on (HIGH is the voltage level)
      delay(1000);                      // wait for a second
      digitalWrite(LED_BUILTIN, LOW);   // turn the LED off by making the voltage LOW
      delay(500);                          // wait for a second

      digitalWrite(LED_BUILTIN, HIGH);  // turn the LED on (HIGH is the voltage level)
      delay(1000);                      // wait for a second
      digitalWrite(LED_BUILTIN, LOW);   // turn the LED off by making the voltage LOW
      delay(3000);                          // wait for a second

    // O letter
      digitalWrite(LED_BUILTIN, HIGH);  // turn the LED on (HIGH is the voltage level)
      delay(2000);                      // wait for a second
      digitalWrite(LED_BUILTIN, LOW);   // turn the LED off by making the voltage LOW
      delay(500);                          // wait for a second

      digitalWrite(LED_BUILTIN, HIGH);  // turn the LED on (HIGH is the voltage level)
      delay(2000);                      // wait for a second
      digitalWrite(LED_BUILTIN, LOW);   // turn the LED off by making the voltage LOW
      delay(500);                          // wait for a second

      digitalWrite(LED_BUILTIN, HIGH);  // turn the LED on (HIGH is the voltage level)
      delay(2000);                      // wait for a second
      digitalWrite(LED_BUILTIN, LOW);   // turn the LED off by making the voltage LOW
      delay(3000);                          // wait for a second

    // S letter
      digitalWrite(LED_BUILTIN, HIGH);  // turn the LED on (HIGH is the voltage level)
      delay(1000);                      // wait for a second
      digitalWrite(LED_BUILTIN, LOW);   // turn the LED off by making the voltage LOW
      delay(500);                      // wait for a second

      digitalWrite(LED_BUILTIN, HIGH);  // turn the LED on (HIGH is the voltage level)
      delay(1000);                      // wait for a second
      digitalWrite(LED_BUILTIN, LOW);   // turn the LED off by making the voltage LOW
      delay(500);                      // wait for a second

      digitalWrite(LED_BUILTIN, HIGH);  // turn the LED on (HIGH is the voltage level)
      delay(1000);                      // wait for a second
      digitalWrite(LED_BUILTIN, LOW);   // turn the LED off by making the voltage LOW
      delay(3000);
    // A letter
      digitalWrite(LED_BUILTIN, HIGH);  // turn the LED on (HIGH is the voltage level)
      delay(1000);                      // wait for a second
      digitalWrite(LED_BUILTIN, LOW);   // turn the LED off by making the voltage LOW
      delay(500);                          // wait for a second

      digitalWrite(LED_BUILTIN, HIGH);  // turn the LED on (HIGH is the voltage level)
      delay(2000);                      // wait for a second
      digitalWrite(LED_BUILTIN, LOW);   // turn the LED off by making the voltage LOW
      delay(5000);                          // wait for a second

  }
Guess the Word Game
As a fun addition, I created an interactive game where you can guess the word “SAMBOOSA” when you are trying to code the MORSE CODE. Since you already know the answer, why not make a friend to check it out 😂. Here’s a simple web-based game for you to try:
Guess the Word Game
Can you guess the word? (Hint: It's a popular Middle Eastern snack)
This game challenges you to guess the word “SAMBOOSA”. After five incorrect attempts, you get a hint. The game provides instant feedback and an option to reset. Enjoy playing and happy guessing!
Hard Challenge: Serial Monitor Control
This task involves programming a microcontroller to control the LED blink duration via the serial monitor.
- The code allows entering the duration for the LED to stay on and off.
-
ifstatement: Blinks once. -
whilestatement: Continuous blinking based on input.
int D; //delay

void setup() {
  pinMode(LED_BUILTIN,OUTPUT);
  pinMode(LED_BUILTIN,OUTPUT);
  Serial.begin(9600);
  D=0;
}

void loop() {
  D = Serial.parseFloat();
  D=D*1000;
  while(Serial.available()){
  digitalWrite(LED_BUILTIN,HIGH);
  delay (D);

  digitalWrite(LED_BUILTIN,LOW);
  delay(2000);
  }
}
Second Group Assessment
Step-by-Step Process:
-
Install Thonny IDE:
- Download and install Thonny IDE from the official Thonny website [3].
-
Configure Thonny for MicroPython:
- Go to
Tools > Options. - In the
Interpretertab, selectMicroPython (ESP32)from the dropdown. - Choose the correct port (e.g.,
USB Serial @ COM13). - Click
Install or Updateto ensure you have the latest firmware.
- Choose the correct port (e.g.,
USB Serial @ COM13). - In the
MicroPython family, select (ESP32) from the dropdown. - In the variant, select (
Espressif • ESP32 / WROOM) from the dropdown. - Click
Install, then clickOkafter installing.
- Go to
-
Connect the Microcontroller:
- Connect your microcontroller (e.g., KidsIOT ESP32) to your laptop.

- Press the reset button on the microcontroller.
- In Thonny, go to
View > Filesto open the file explorer.
- If
boot.pyappears on the left side, the connection is successful. If not, press the reset button again.
- Connect your microcontroller (e.g., KidsIOT ESP32) to your laptop.
- Connect External LED:
- Connect an external LED to a cable, then connect the other side to the microcontroller’s port (e.g., IO26).


- Connect an external LED to a cable, then connect the other side to the microcontroller’s port (e.g., IO26).
- Write and Run Code:
- Create a New Document to type your code.

- Create a New Document to type your code.
Basic LED Control:
from machine import Pin
import time

LED = Pin(26, Pin.OUT)
LED.value(1)
time.sleep(2)
LED.value(0)
- Click the green ‘Run’ icon. The LED will light up for a bit, and then it will shut-down.
Continuous LED Light:
from machine import Pin
import time

LED = Pin(26, Pin.OUT)
LED.value(1)
time.sleep(2)
Blinking LED in a Loop:
from machine import Pin
import time

while True:
    LED = Pin(26, Pin.OUT)
    LED.value(1)
    time.sleep(2)
    LED.value(0)
    time.sleep(2)
Challenges for the Third Assignment
After completing the basic experiments, my group moved on to replicate the Arduino challenges using the ESP32 microcontroller and Thonny IDE. This included three challenges of varying difficulty levels, and an additional challenge to control an RGB LED.
Easy Challenge: Random Blink Delay
Objective:
Program the LED to blink with random delays to make the blinking pattern unpredictable.
Explanation:
This challenge helps understand the use of the random library in MicroPython and how to generate random delay intervals.
Code:
from machine import Pin
import time
import random

while True:
    LED = Pin(26, Pin.OUT)
    LED.value(1)
    time.sleep(random.randrange(1, 5))
    LED.value(0)
    time.sleep(random.randrange(1, 2))
Outcome:
The LED blinks at random intervals, making the pattern dynamic and less predictable.
Medium Challenge: Morse Code
Objective:
Program the LED to blink a Morse code message, in this case, the word “SAMBOOSA”.
Explanation:
This challenge introduces the concept of encoding messages in Morse code and using timed LED blinks to represent the dots and dashes.
Code:
from machine import Pin
import time

while True:
    LED = Pin(26, Pin.OUT)

    # S
    LED.value(1)
    time.sleep(0.1)
    LED.value(0)
    time.sleep(0.1)
    LED.value(1)
    time.sleep(0.1)
    LED.value(0)
    time.sleep(0.1)
    LED.value(1)
    time.sleep(0.1)
    LED.value(0)
    time.sleep(0.1)

    # A
    LED.value(1)
    time.sleep(1)
    LED.value(0)
    time.sleep(0.5)
    LED.value(1)
    time.sleep(1)
    LED.value(0)
    time.sleep(3)

    # M
    LED.value(1)
    time.sleep(1)
    LED.value(0)
    time.sleep(0.5)
    LED.value(1)
    time.sleep(2)
    LED.value(0)
    time.sleep(0.5)

    # B
    LED.value(1)
    time.sleep(1)
    LED.value(0)
    time.sleep(0.5)
    LED.value(1)
    time.sleep(2)
    LED.value(0)
    time.sleep(0.5)
    LED.value(1)
    time.sleep(1)
    LED.value(0)
    time.sleep(3)

    # O
    LED.value(1)
    time.sleep(1)
    LED.value(0)
    time.sleep(0.5)
    LED.value(1)
    time.sleep(2)
    LED.value(0)
    time.sleep(0.5)

    # O
    LED.value(1)
    time.sleep(1)
    LED.value(0)
    time.sleep(0.5)
    LED.value(1)
    time.sleep(2)
    LED.value(0)
    time.sleep(3)

    # S
    LED.value(1)
    time.sleep(0.1)
    LED.value(0)
    time.sleep(0.1)
    LED.value(1)
    time.sleep(0.1)
    LED.value(0)
    time.sleep(0.1)
    LED.value(1)
    time.sleep(0.1)
    LED.value(0)
    time.sleep(3)

    # A
    LED.value(1)
    time.sleep(1)
    LED.value(0)
    time.sleep(0.5)
    LED.value(1)
    time.sleep(1)
    LED.value(0)
    time.sleep(10)
Outcome:
The LED blinks out the Morse code message “SAMBOOSA”, allowing you to decode it if you know Morse code or by just trying using the earlier image of Morse Code letters.
Hard Challenge: Serial Monitor Control
Objective:
Program the microcontroller to accept input from the serial monitor to control the duration of LED on and off periods.
Explanation:
This challenge introduces real-time interaction with the microcontroller, where users can input commands to control the LED blink duration.
Code:
from machine import Pin
import time

LED = Pin(26, Pin.OUT)

def control_led():
    while True:
        # Read the duration for LED to stay on and off
        on_duration = int(input("Enter on duration (ms): "))
        off_duration = int(input("Enter off duration (ms): "))

        # Blink the LED based on the input durations
        LED.value(1)
        time.sleep(on_duration / 1000)
        LED.value(0)
        time.sleep(off_duration / 1000)

control_led()
Outcome:
The LED blinks according to the durations entered via the serial monitor, providing a dynamic way to control the LED behavior.
New Challenge: RGB LED Control
Objective:
Control an RGB LED, turning on the green LED for a set duration.
Explanation:
This challenge extends the basic LED control to an RGB LED, showing how to control multiple LEDs on a single microcontroller.
Code:
from machine import Pin
import time

LEDgreen = Pin(18, Pin.OUT)
LEDred = Pin(17, Pin.OUT)
LEDblue = Pin(19, Pin.OUT)

while True:
    LEDgreen.value(1)
    time.sleep(5)
    LEDgreen.value(0)
Outcome:
The green LED of the RGB LED lights up for 5 seconds, demonstrating how to control individual colors on an RGB LED.
Second Individual Assignment
Test-1: Traffic Lights
We’ll create a simple traffic light system using three LEDs: red, yellow, and green. The ESP32 will control their behavior to mimic a traffic signal.
Procedure
-
Hardware Setup:
- Connect the LEDs as follows:
- Red LED: Connect to GPIO pin 17 (LEDred).
- Yellow LED: Connect to GPIO pin 18 (LEDyellow).
- Green LED: Connect to GPIO pin 19 (LEDgreen).
-
Code Implementation:
- Initialize the GPIO pins for the LEDs.
- In your loop:
- Turn on the red LED for 3 seconds.
- Turn off the red LED.
- Turn on the yellow LED for 3 seconds.
- Turn off the yellow LED.
- Turn on the green LED for 3 seconds.
- Turn off the green LED.
- Repeat this cycle.
-
Code:
  from machine import Pin
  import time

  LEDyellow= Pin(18,Pin.OUT)

  LEDred = Pin(17,Pin.OUT)

  LEDgreen = Pin(19,Pin.OUT)

  while True:
      LEDred.value(1)
      time.sleep(3)
      LEDred.value(0)
      time.sleep(1)

      LEDyellow.value(1)
      time.sleep(3)
      LEDyellow.value(0)
      time.sleep(1)

      LEDgreen.value(1)
      time.sleep(3)
      LEDgreen.value(0)
      time.sleep(1)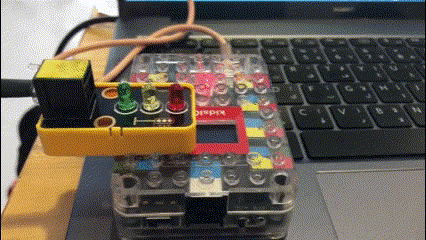
-
Behavior: When you run the code, the LEDs should simulate a traffic light sequence.
Test-2: Button-Controlled Red Light
Overview
We’ll add a button to control the red LED. When the button is pressed, the red light should turn on.
Procedure
- Hardware Setup:
-
Connect a push-button switch to GPIO pin 26 (BUTTON).
-
Code Implementation:
- Modify your existing script:
- Initialize the GPIO pin for the red LED (GPIO pin 17).
- Continuously read the button state (BUTTON.value()).
- If the button is pressed (logic state True), turn on the red LED; otherwise, turn it off.
-
Code:
    from machine import Pin
    import time

    BUTTON= Pin(26,Pin.IN)

    LEDred = Pin(17,Pin.OUT)

    while True:
        LEDred.value(BUTTON.value())
        time.sleep(0.1)
        LEDred.value(BUTTON.value())
        time.sleep(0.1)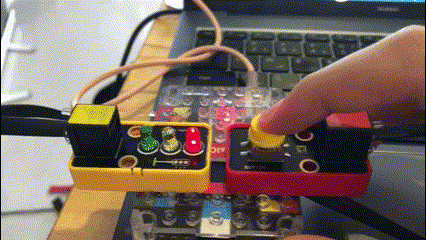
-
Behavior: Pressing the button should illuminate the red LED, and releasing the button should turn it off.
Test-3: Fan, Button, and Lights (RGB LED)
In this scenario, we’ll control a fan and an RGB LED using a button. When the fan is not spinning, the LED will be red. When the button is pressed and held, the LED will turn green, and the fan will start spinning.
Procedure
-
Hardware Setup:
- Connect components as follows:
- Button: GPIO pin 5 (BUTTON).
- Red LED: GPIO pin 12 (LIGHT1).
- Green LED: GPIO pin 13 (LIGHT2).
- Blue LED: GPIO pin 14 (LIGHT3).
- Fan: GPIO pin 23 (FAN).
- Ensure proper wiring and component orientation.
-
Code Implementation:
- Extend your existing script:
- Initialize GPIO pins for the button, LEDs, and fan.
- Read the button state (logic_state).
- If the button is pressed (logic_state == True):
- Turn off the fan (FAN.value(0)).
- Turn on the red LED (LIGHT1.value(1)).
- Turn off the green LED (LIGHT2.value(0)) and blue LED (LIGHT3.value(0)).
- Otherwise (button released):
- Turn on the fan (FAN.value(1)).
- Turn off the red LED (LIGHT1.value(0)).
- Turn on the green LED (LIGHT2.value(1)).
-
Code:
from machine import Pin
from time import sleep

BUTTON= Pin(5 ,Pin.IN)

LIGHT1= Pin(12,Pin.OUT)

LIGHT2= Pin(13,Pin.OUT)

LIGHT3= Pin(14,Pin.OUT)

FAN= Pin(23,Pin.OUT)

while True:
    logic_state = BUTTON.value()
    if logic_state == True:
            FAN.value(0)
            LIGHT1.value(1)
            LIGHT2.value(0)
            LIGHT3.value(0)

    else:
            FAN.value(1)
            LIGHT1.value(0)
            LIGHT2.value(1)
            LIGHT3.value(0)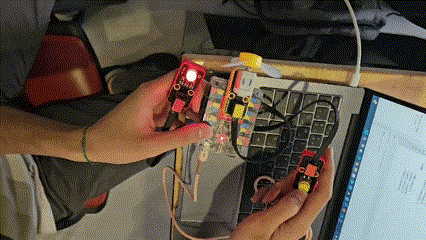
-
Behavior:
- Initially, the red LED should be on (indicating the fan is off).
- When you press and hold the button, the green LED should turn on, and the fan should start spinning.
- Releasing the button should turn off the fan and revert the LEDs to their initial states.