8. Week 8 3D Printing and Scanning
Day 1 - 3D Printing Group Assignment (Thanks to Saeed Makhlooq)
Day 2 - Design
To start 3D printing, first you need to have a design ready. Any 3D CAD software can be used as long as the final file type can be exported as an STL file. I used both SolidWorks and Fusion for the multiple aspects of the design. SolidWorks was used to convert a PNG photo into a sketch. Then, Fusion was used to combine all the different parts together as it requires less processing for imported mesh designs. The design I decided to go for was a sword embedded into a boulder. The sword is a downloaded STL file whereas the rest of the design I made from scratch. Click here for the downloadable sword model.

SolidWorks
As mentioned, SolidWorks in this case was used to convert a PNG image into a 2D sketch that can be manipulated and extruded or cut later on. The first step is to make sure that the image has no background to allow for an easier extraction of the drawing. Once the image is ready, go to SolidWorks and open a new part. Then start a new sketch on the front plane.
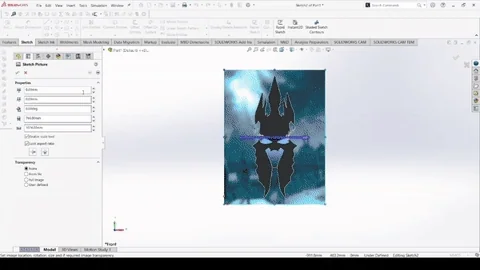
Go to the ribbon and select Tools --> Sketch Tools --> Sketch Picture, and select the image that you would like to import and position it as you like.
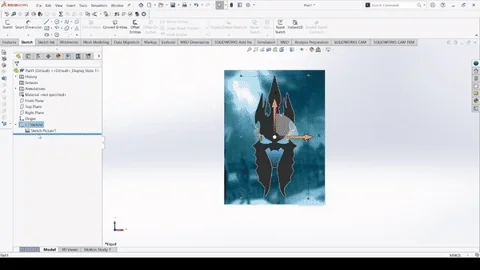
Now you have many features you can edit before editing the picture. Click on the right pointing green arrow on the top right of left plane. If it is not there, you will have to turn on the "Autotrace" feature by going to Tools --> Add-Ins --> Autotrace. Now click on the "Select color" tool, and mark the bodies on the image that should be traced and click on "Begin Trace". You can edit the brightness, contrast, tolerance, and recognition to refine the tracing quality depending on the image. Once you are satisfied, click the green checkmark.
Now the image has been traced and can be manipulated and extruded or even saved as a DXF file to be exported to other softwares or machines. In my case, the image was exported to DXF to be able to use it on Fusion as there is where the whole design is combined.
Fusion
On fusion, first the 3D model of the sword is imported. The orientation of the sword is then adjusted so that it will appear entering the boulder at an angle. The remaining is just a simple design using extrusions and cutting features as previously mentioned in combination with some words. Lastly, the DXF file from SolidWorks is imported and then cut through for extra flair. The process is now complete and the file is sent to the Creality K1 3D Printer through the software.

Click here to download the 3D Model
Day 3 - 3D Printing
The full method of 3D printing method is available in the Group Assignment Page (Thanks to Saeed Makhlooq).
3D Printing
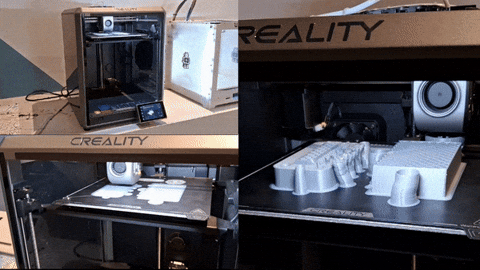

The issue that occurred was that the supports interfered a lot with the sword model. This led to the snapping of the sword while removing the supports. Hence, the sword was then 3D printed separately and I manually digged a whole using multiple swords in the block for the new sword to fit in. The new sword was printed horizontally allowing the supports to not be in awkward positions and making their removal much easier.
Broken 3D Design

Fixed 3D Design


Day 4 - 3D Scanning
3D scanning is the process of which a camera or a scanner can be used to model a real object in the form of a digitalized stored file. This allows for the conversion of real-life equipment, locations, people, and so much more, into ones and zeros that can be stored for either re-modeling, editing, or simply for stored for historical purposes. Scanniverse is the app that was downloaded on the phone to 3D scan objects.
3D Scanning
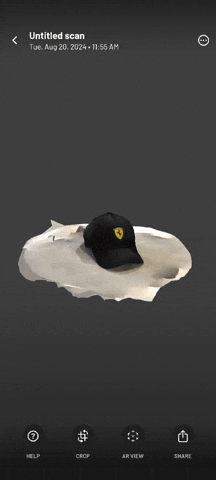
I chose to scan my baseball cap. First the object should be set in a location where you can easily mover around it completely to be able to scan all sides of it in a smooth motion. Then simply open the app and select New Scan --> Mesh then the size of the object that you are scanning (small in my case). Hit the record button once you are ready to scan and make sure you are taking your time and moving slowly all around the object to capture all the details as clearly as possible.
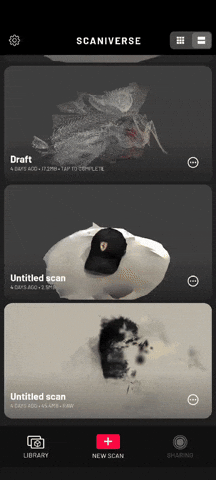
Once you are done with scanning, the file will be processed and saved and can be viewed in your library. It can be noticed that the scanning is not perfect as my hand was not very still while conducting the scan.
The 3D model is now ready to be exported into one of four file types available in the application: FBX, OBJ, GLB, PLY.
The file can then be converted into an STL file using an online converter. I personally used imagetostl.com as you can convert a variety of file types into STL. The model can now be sent to any 3D printing software or even edited in a CAD software.
Click here to download the 3D Model
Personal Notes
- Having a design with a lot of intricate features will be difficult to print small scale since the nozzle, depending on the type of printer, has limited capabilities.
- Make sure the joints are not too thing has removing the supports could result in the cracking of the actual model.
- 3D printing causes many support issues when the model has a lot of verticality. Hence, having a design be more horizontal will make it easier for removal as the supports will be smoother
- The process in general of 3D Printing is very simple relative to other processes as the software ensures that the design parameters are set within the boundaries of the printer.
Last update:
September 15, 2024