7. Week 7: Moulding and casting
Group Assignment
During this week’s group assignment, we were required to review safety sheets of four different moulding and casting material and to create test casts with each of them and compare the end results. During the assignment, I was given the material resin to research about it and use it. I have learned many things including:
1) To create a cast using resin, you must mix the resin and hardener at a ratio of 10:6 respectively.
2) Resin requires 8-12 hours to cure and has a work time of 45 mins at room temperature.
3) To ensure that the resins is fully hardened, it is best to wait for 24 hours.
4) it is best to wear gloves and an apron to ensure your clothes do not get resin on them.
5) if the end product is going to be solid, you must use a flexible mold. on the other hand, if the end product going to be flexible, you must use a solid mold. For example, when creating an object from resin, the mold must be create from silicon.
Moulding and Casting

Molding
Molding or Moldmaking is the act of creating the cavity / form that carries a negative or reverse impression of an original model. Molds can be made of a rigid material, such as plaster or plastic resin or more commonly, a flexible material such as rubber. The material to use should be chosen considering the material of the model, the material to be used to make castings, and whether there are any undercuts.
Casting
Casting is the act of pouring liquid material into the cavity of a mold. After a period of time, this liquid will cure via chemical reaction or cooling. The solidified part is also known as a casting, which is ejected or broken out of the mold to complete the process. Casting materials are usually metals or various cold setting materials that cure after mixing two or more components together; examples are epoxy, concrete, plaster and clay.
3D Design
We were required to design something so that we can create a mold and cast it.
Design Constraints:
1- Depth must not exceed 8 mm
2- Length must not exceed 60 mm
3- Height must not exceed 60 mm
4- The design must not have details smaller than 1.6 mm (diameter of the machine bit)
5- The design must not have undercuts.

Design Steps
1) I decided to design a keychain that is based on a symbol of one of my favorite anime Berserk. First, I sketched the keychain design.

2) Then, I extruded the desing to a width of 8 mm.

3) I added 2 mm fillets to outer edges

4) After that, I added 1.6 mm fillets to the inner edges.

5) Finally, I added a 0.9 mm fillet to the front face.

Final Design

Click here to download my design’s STL file
Creating the Positive Wax Mold
First, the wax was inserted in the milling machine and its surface was smoothed out (this processes is called roughing). This step was done beforehand to save time.

Then, the the design’s STL file was inserted in software called SRP player. This software is used to operate the milling machine. There are 4 steps that you must do to start the cutting process
1-Model Size and Oreientation
We didn’t change anything in this option, since the designs that we inserted are already set to the desired size and orientation.
2- Type of Milling
The steps has 3 settings that you must specify depending on the type of milling required and the design created.


3- Create Tool Path
In this step you must select the workpiece material (in this case its wax) and enter its dimensions.


After select create tool path, a new window will pop up. This window will be used to create a separate tool path for each design. This will be done to reduce the time taken for the moulding process. Instead of cutting all of the blue shaded area, we created separate areas for each design.

A roughing and finishing tool paths will be created for the first design and then, they will be duplicated for the second design.
For the roughing tool path, right click on the roughing, select “partial” and drag the area over the designs to make it over one of them only.


4-Preview Results

In this step, you get a preview of the final product and the time taken for the milling process. In my case it was 2.2 hours.
5-Perform Cutting

Changing the Milling Bit
In this step, the machine will be prepared for the cutting process. After selecting “start cutting”, a window will appear to instruct us to install the roughing bit 3/32 inch into the machine’s spindle.
Note: for the rouging process, the milling bit will be bigger to reduce the cutting time. After the roughing process is over, the bit will be changed to the 1/16 inch bit.


Zeroing the Z-Axis

The x and y axis’ have already been zeroed because the wax have undergone the surfacing processes previously. To zero the z axis, open the VPanel for SRM-20 software, under the set origin point select the X/Y button and under To origin, select the X/Y button to move the spindle to the center of the wax.

Then using the z buttons, move the z axis down until the bit touches the wax. To increase or reduce the amount the z axis moves with each step, change the cursor step value (x100 moves a lot, x1 moves a little).


To be able to see whether the bit touched the wax or not, we switched the spindle on while we were moving the z axis.
Finally, click next to start the cutting process.

End Result

Creating the Negative Silicon Mold
The first step of creating the silicon mold is to place the wax mold on the scale and to pour water in it and measure the mass of the water to approximate the amount of silicon we will need to the mold.


The mass of water combined for my design and Saeed’s are 58.4 g. To account for silicon losses that will occur in the cup, we decided to use 80 grams of silicon. The silicon consists of two materials so, 40 g of each material were poured into two cups.


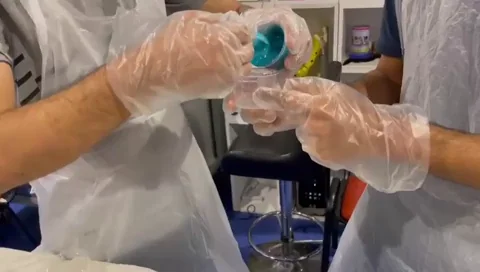
After that, the two parts of the silicon were mixed together for 2 mins.
Then, the mixture was poured in the second cup and mixed again for 2 mins.
Finally, the silicon was poured in the wax mold and left for 24 hours to solidify.

After 24h hours:

Creating the Keychain out of Resin
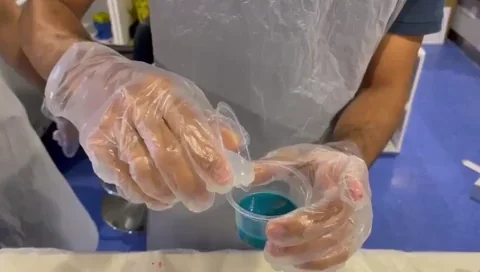
Resin consist of two liquids a hardner and resin. To create the keychain out of resin, I had to use a ratio of 10(resin) : 6 hardener. I measured out 15 grams of resin and 9 grams of hardener.


Then, I mixed them together for 3 minutes.
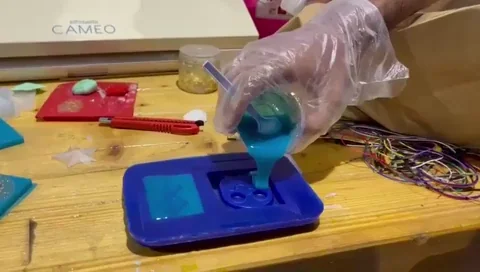
After that, I added a red dye and mixed it until it got fully mixed with the resin.
Then, I poured the resin into the silicon mold and used a heat gun to heat up the resin to remove any bubbles in it.

The resin was left to cure and harden for 24 hours before being removed from the silicon mold.
Hero Shots


