8. Week 8: 3D Scanning and Printing
Group Assignment

3D printing, also known as additive manufacturing, is a process of creating three-dimensional objects by adding material layer by layer based on a digital model. This technology allows for the production of complex shapes and structures that would be difficult or impossible to achieve using traditional manufacturing methods.
In 3D printing, a digital model of the object is created using computer-aided design (CAD) software. This model is then sliced into thin horizontal cross-sections, and the 3D printer builds the object layer by layer, typically using materials such as plastics, metals, ceramics, or composites.
During the group assignment, I learned many things including:
1) There are different types of 3d printers (Fused Deposition Modeling (FDM), Stereolithography (SLA) and Selective Laser Sintering (SLS)). The most common type and the one that we have at FabLab is FDM.
2) While printing, some modules require support in order to ensure they will not fall/break during the printing process. typically, supports must be used when a model overhangs by more than 45 degrees.
3) There are many different types of filaments such as PLA, ABS and TPU. Most filaments available at FabLab are PLA filaments.
4) Infill is the percentage of material that occupies the printed 3D model. The higher the infill percentage, the stronger the model is.
5) How to install and remove filament in both the Creality K1 and the Ultimaker 2+ 3D printers.
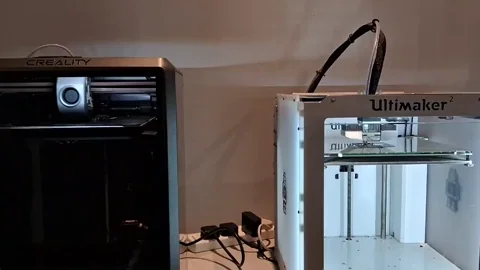
During the group assignment, we were required to test both of the avaialble printers at Fablab which are the Creality K1 and the Ultimaker 2+. We printed an object using both machines to compare the results and found that the K1 was much faster at printing and provided a higher quality product.

3D Modeling (Backpack Hanger)
I started the design process by drawing the side view of my table to visualize where will the hanger be screwed on and I have drawn a mounting bracket of the hanger.

Then, I extruded the bracket to a width of 17 mm.

After that, I sketched the bag hook and extruded it in the middle of the mounting bracket to a width of 60 mm.


I added fillets to the sharp edges to reduce stress concentration areas and make the hook look better.


I created four mounting holes so that I can screw the mounting bracket to the table. I used the hole wizard to create the holes


Finally, I added extra fillets to the hook.


Final Product

Click here to download my design’s STL file
Click here to download my design’s SolidWorks file
3D Printing
To start the 3D printing process using the Creality K1, first download the Creality Print software. When you open the software, a window will appear requiring you to select the printer you will be using.

Then, select import model to import your STL file.


Go to the right hand side and select the filament material that you will be using. In our case it is PLA.

There are many things that you can edit depending on your requirements to change how the design gets 3D printed. In my case, the first thing I edited was the infill. To do that, I went to Processes -> Strength -> Infill and I increased the Sparse infill density to 18%.

Then I went to the support tab and selected enable support, changed the support type to tree auto and changed the threshold angle to 65 as per Haitham’s instructions.

I added a brim to my design by going to the others tab and selecting outer brim only. A brim basically creates an outer layer to ensure that the design will not move while printing.

After that, I selected slice plate to generate the G-code.


Finally, I selected lan printing -> Print Calibration -> send G-code to send my file to the 3D printer. Then I went to the 3D printer, selected my file and pressed started the printing process.
Alternatively, you can select one-click printing to start the print directly from you PC.

Printing Process
Hero Shots


3D Scanning
3D scanning is a process that involves capturing the shape of a physical object and creating a digital representation of it in three dimensions. This is typically done using specialized equipment like 3D scanners, which can use various technologies such as lasers, structured light, or photogrammetry to gather data about the object’s surface. To scan an object using my phone, I downloaded an app called MagisScan.

Scanning Proceedure
After opening the app, I selected 360 scan to scan an object (a model of a car). While scanning, I tried to go turn over the object while facing my camera over it to capture all of its sides.
Exporting the STL Model
After scanning the object, I exported the STL Model. Overall, I was not able to get a good 3D model using the scanning technique which is mainly due to my phone’s camera being bad and my inexperience with this technique.
Scanned Model
Click here to download my scanned model’s STL file