Week 3 - Computer Controlled Cutting
This Week’s Accomplishments:
Group Assignment:
-
Characterized the lasercutter’s focus, power, speed, rate, kerf, joint clearance, and types.
-
Documented the work on the group work page and reflected on what I learned on my individual page.
Individual Assignments:
-
Designed, lasercut, and documented a parametric press-fit construction kit that can be assembled in multiple ways, accounting for the lasercutter kerf.
-
Cut something on the vinylcutter.

1. Introduction
This week I was introduced to computer controlled cutting with its various forms. On the first day, we were taught about vinyl laser cutting and its compartments like how the machine operates and what should we be aware of while designing and cutting.
1.1 Our Group Assignment
For this assignment, we worked as a group. My classmate, Faisal Fathi, handled the documentation. You can view it on his page by clicking on Faisal’s Website Here.
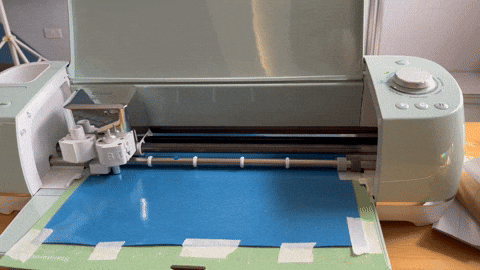
2. Vinyl Cutting (Cricut)
I was introduced to several vinyl cutting machines like Cricut and Cameo Silhouette. I chose the cricut because my instructor Noor told us it can have better options. So I downloaded the software from here which you can also download :)
Lucky me (a noob in designing), the software had material options and free empty templates to choose from, so when I saw the templates I noticed an apron, and I immediately had the perfect idea for it!

I took all the components from cricut’s collection of shapes, there was a nice variety to choose from. I went along with the idea of doing a restaurant logo for jam sandwiches.. yep a place specialized in jam sandwiches! Which I will be giving to my dear friend who does exquisite jam sandwiches.

When I was about to print and cut, the software required me to pay $ 0.99 for the font I used, so sadly I had to change it and look up a curved shape to give my J an elongated look to be suitable for a logo. So I imported a shape and used it.

I grouped and united all the pieces together to be able to print them in a uniform shape then using transfer paper to not lose the alignment.

Then adjusted my material size and type and clicked on “On Mat”.

The first material I chose was not suitable for a heat transfer so sadly I had to remake it.

Here I chose a heat transfer material but forgot to set the cricut settings to a press-on vilyl instead of regular vinyl :(
And finally a correct material with the correct settings! After 4 trials and errors.

Getting lots of help from Haitham! Thanks a lot!! It took so much detailed work and focus to be able to get every bit. I do not recommend it especially with tiny details that require attention.
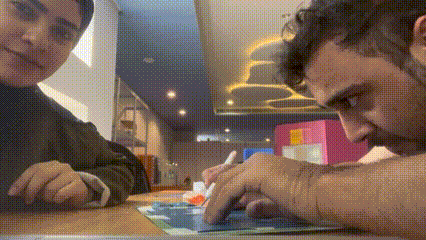
Then I moved on to use the iron along with a special piece of cloth that was suitable for heat. A few tiny details required many passes to stick on and some of them got torn but it came along nicely in the end.

Tadaa! Got a model to present the apron on! Although it took several days and extra hours to get it done, it was super fun to see the final results coming to life and being worn to prepare delicious meals ♡💚.

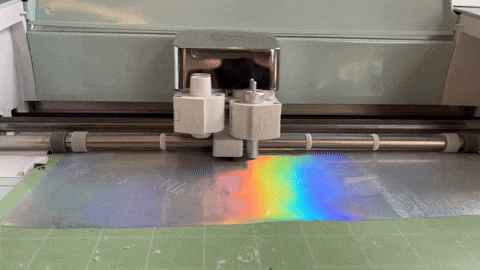
3. Laser Cutting
This is the laser cutting machine in FabLab Academy. The CO2 100 WATTS

I was introduced to the CO2 laser cutting machine, which is a subtraction device that precisely cuts materials. This machine operates on three axes (X, Y, and Z), allowing the laser to move in an X-shaped pattern, often accompanied by a distinct burning smell. It features a water cooling system to prevent overheating and a lens that magnifies the laser beam, enhancing its cutting power. The main controls include power, speed, and frequency settings. Increasing the power and reducing the speed results in deeper cuts and vice versa. Additionally, it’s crucial to ensure the vacuum system is on to absorb any fumes generated during the cutting process.
Now Moving on to Designing A Laser-Cut Product
3.1 What is a parametric design?
A Parametric design refers to an approach where objects or structures are created by defining their characteristics using adjustable parameters. Imagine it as having a set of flexible building blocks – you can change their size, shape, and relationships. These parameters allow the designer to adapt the design easily without starting from scratch. In order to design something to be cut by laser, it has to be made into a parametric design. As well as that, we were asked to do a parametric cross-fit as our individual assignment for the week.
3.2 What is a Parametric Cross-Fit?
Parametric press-fit is an approach in design and modeling where parameters and relationships between different elements drive the design process. Here’s how it works:
-
Parameters: These are design variables that can be changed. For example, you might have parameters for slot width, material thickness, or other dimensions.
-
Constraints: Constraints define rules that govern how parameters relate to each other. You can set constraints manually while sketching or use commands to define them. For instance, coincident constraints ensure that points meet together.
-
Relations: These describe mathematical or logical relationships between parameters. For example, you can use “Equal” constraints to make the radius of arcs the same.
By using parametric modeling tools like Autodesk Fusion or Blender, we can create designs that adapt automatically when we adjust parameters. Press-fit, also known as an interference fit, holds two parts together using friction without additional fasteners. It’s commonly used for components like gears, pulleys, and railroad wheels where the shaft diameter is slightly larger than the bore hole diameter.
3.3 What is Kerf?

Kerf is how much will be burnt and wasted. In order to avoid that, we were instructed to pay attention to our design parameters because we might end up with a design that is smaller than what we expected because of the burnt part of the hot laser beam. In order to avoid that, we were told to do a kerf test which enables us to know beforehand how much of the material used will be burnt off around the edges.
4. Designing My First Laser-Cut Horse
I used the Autocad Fusion 360 software in order to create my parametric cross-fit design because I find it simpler than other softwares I’ve tried so far like Cuttle, also the downside of Cuttle is that it cannot produce parametric designs.
You can download my design by clicking on this link
First Ghafoor helped me set the parameters from start to make it easier.

Chose the z plane and made a centered square.

Made parametric cross-fit joints to be able to connect the shape together.

Extruding

To make it more beautiful Ghafoor advised me to fillet the corners to get them rounded.

Extruding again after adjusting my sizes.

We were instructed to save it in a .DXF format.

Choosing the materials (Cardboard).

Got to know about RD Works which is the laser cutting software for our CO2 machine. Uploaded my design and it was an opportunity to learn about it with my classmates in a group assignment which I linked above.


Here are the final pieces joined together in a little cardboard horse!

Here is the downloadable design in two formats
5. Laser Safety Measures

You can learn much more about laser safety precautions through the documented notes on my group assignment above.
My Week in a Summary
This week, I demonstrated and described the processes involved in parametric 2D modeling, showcasing how to create adaptable and scalable designs. I also identified and explained the steps required to use the laser cutter, ensuring precise and efficient cutting for my projects. Additionally, I developed, evaluated, and constructed a parametric construction kit, which can be assembled in multiple ways. Lastly, I identified and explained the processes involved in using the vinyl cutter. It was a fun experience to learn about new machines while taking safety measures.