Week 4 - Embedded Programming
This Week’s Accomplishments:
Group Assignment:
-
Researched various types of microcontroller boards and compared their features.
-
Investigated different programming languages, compared them, and identified how many can be used to program the same microcontrollers.
Individual Assignment:
-
Read the datasheet for the microcontroller board I am programming.
-
Programmed the board to perform a task using multiple programming languages and environments (Arduino IDE and Thonny).
Introduction
This week I learned about microcontrolling boards and worked into a group to compare between different arduinos given to us. We searched about different types of micro controllers given to us in a group assignment and uploaded all the info on the google docs file given to us here. credits to Faisal Fathi for collecting all the info on his website.
Arduino
Arduino is an open-source electronics platform that combines easy-to-use hardware and software. Arduino boards can read various inputs, such as light from a sensor, a button press, or even a Twitter message. They then translate these inputs into outputs, like activating a motor, turning on an LED, or publishing something online.
This is the Arduino that was given to me to practice on today which is the Arduino Nano 33 IoT. You can learn more about it from their official website here

To work with it, first I downloaded the Arduino IDE softwaare from here
Here is the main page after downloading and running the latest version of Arduino IDE:

Here is a quick guide to the main buttons we were told we’ll be using:

-
Now to start programming, first go to “file”, “preferences”, “show verbose output” during compile and upload in order to know what went wrong in case of errors when programming.

-
Then go to Select Board and choose your type, mine was the Arduino Nano 33 IoT. I clicked on “install” and then waited.
-
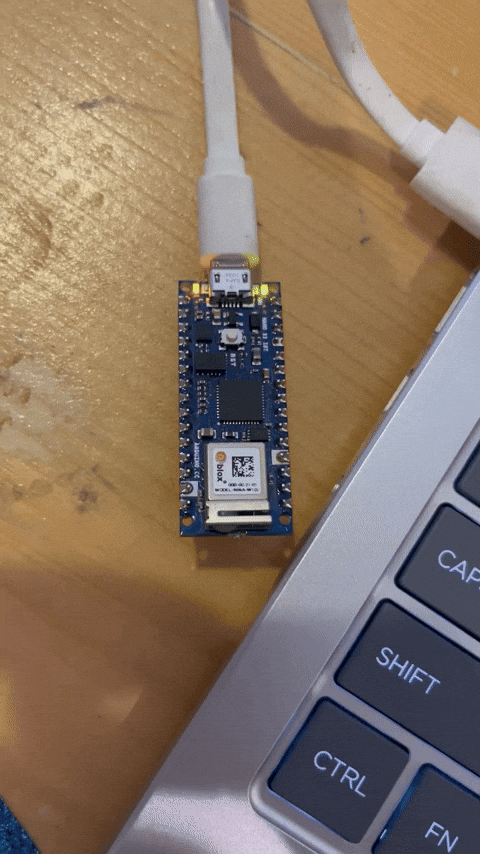
In the mean time I took a micro-sized port and connected the Arduino to my laptop then it showed up on the boards selection menu. After connecting, the message confirmed to me that my Arduino nano 33 IoT was succesfully connected.

-
I then went to “file”, “examples”, “basics”, “blink”

-
Once I had my code and wanted to upload it, I clicked on the yellow arrow button to push the command.

How to Construct a Basic Arduino IDE
So these basic values come out after choosing the “blink” code, and they represent a constant loop in which the LED follows:

// the loop function runs over and over again forever
void loop() {
  digitalWrite(LED_BUILTIN, HIGH);   // turn the LED on (HIGH is the voltage level)
  delay(1000);                       // wait for a second
  digitalWrite(LED_BUILTIN, LOW);    // turn the LED off by making the voltage LOW
  delay(1000);                       // wait for a second
}
Arduino - Task 1
To test out my Arduino, I changed the void loop timing in which the LED blinks through from one second (1000) to two seconds (2000) which is the HIGH that starts on the built-in LED, and made it shut down through the LOW value which was one second (1000) to half a second (500).
Before:


After:

Arduino - Task 2
I was given a task to try out by my instructor Duaa, to blink my led but have the blink delay periods be randomized values between 1 second and 5 seconds, so I googled a randomization code by typing “random function arduino” because I have no prior experience :)
so I found these and copied only the random(10, 20):

and placed my own values inside the brackets:

This is how the blinking turned out:

Moving on to another assignment while raising the difficulty a bit, I’ll be pre coding my microcontroller to send a Morse code of one word message and challenging my colleagues and instructor to figure it out. I’ll be referring to this table below. I’m feeling a bit hungry so I’ll choose the word food lol.

FOOD: (..-./—/—/-..)
Here are the commands I worked for:
-
F: 1 second light on, 0.5 second light off, one second light on, 0.5 second light off, 2 second light on, 0.5 second light on, one second light on.
-
3 second light off. (space between letters)
-
O: 2 second light on, 0.5 second light off, 2 second light on, 0.5 second light off, 2 second light on.
-
3 second light off. (space between letters)
-
O: 2 second light on, 0.5 second light off, 2 second light on,0.5 second light off, 2 second light on.
-
3 second light off. (space between letters)
-
D: 2 second light on, 0.5 second light off, 1 second light on, 0.5 second light off, 1 second light on.
-
10 second light off. (to make it a loop)
And here is the code I used:
// the loop function runs over and over again forever
void loop() {
  digitalWrite(LED_BUILTIN, HIGH);  //
  delay (1000);                      // F1
  digitalWrite(LED_BUILTIN, LOW);   //
  delay(500);                      // F1
  digitalWrite(LED_BUILTIN, HIGH);  //
  delay (1000);                      //F2
  digitalWrite(LED_BUILTIN, LOW);   //
  delay(500);                      // F2
  digitalWrite(LED_BUILTIN, HIGH);  //
  delay (2000);                      // F3
  digitalWrite(LED_BUILTIN, LOW);   //
  delay(500);                      // F3
  digitalWrite(LED_BUILTIN, HIGH);  //
  delay (1000);                      // F4
  digitalWrite(LED_BUILTIN, LOW);   //
  delay(3000);                      //F4
  digitalWrite(LED_BUILTIN, HIGH);  //
  delay (2000);                      // O1
  digitalWrite(LED_BUILTIN, LOW);   //
  delay(500);                      // O1
  digitalWrite(LED_BUILTIN, HIGH);  //
  delay (2000);                      // 02
  digitalWrite(LED_BUILTIN, LOW);   //
  delay(500);                      // 02
  digitalWrite(LED_BUILTIN, HIGH);  //
  delay (2000);                      // O3
  digitalWrite(LED_BUILTIN, LOW);   //
  delay(3000);                      // O3
  digitalWrite(LED_BUILTIN, HIGH);  //
  delay (2000);                      //O1
  digitalWrite(LED_BUILTIN, LOW);   //
  delay(500);                      // O1
  digitalWrite(LED_BUILTIN, HIGH);  //
  delay (2000);                      // O2
  digitalWrite(LED_BUILTIN, LOW);   //
  delay(500);                      // O2
  digitalWrite(LED_BUILTIN, HIGH);  //
  delay (2000);                      // O3
  digitalWrite(LED_BUILTIN, LOW);   //
  delay(3000);                      // 03
  digitalWrite(LED_BUILTIN, HIGH);  //
  delay (2000);                      // D1
  digitalWrite(LED_BUILTIN, LOW);   //
  delay(500);                      // D1
  digitalWrite(LED_BUILTIN, HIGH);  //
  delay (1000);                      // D2
  digitalWrite(LED_BUILTIN, LOW);   //
  delay(500);                      // D2
  digitalWrite(LED_BUILTIN, HIGH);  //
  delay (1000);                      // D3
  digitalWrite(LED_BUILTIN, LOW);   //
  delay(10000);                      // D3
}
Final result of my Morse code:
Morse Code from Sara Hamza on Vimeo.
Thonny
For our second software of the week, we downloaded an app called Thonny. It is a beginner-friendly Python Integrated Development Environment (IDE). You can download it through this link.
This is how the main website looks like

Then we were given another type of microcontroller and we connected it to an external caple:

How to Construct a Basic Python IDE
-
First off go to tools > options > second options window > interpreter > MicroPython (ESP32) > USB Serial @ COM13

-
After choosing INSTALL OR UPDATE > Target port > USB Serial @ COM13 > MicroPython family > ESP32 > variant > Expressif * ESP32 > Install = once installed close micropython ESP 32

-
click ‘reset’ on the microcontroller > [laptop] view > files > something will appear on the left side of the screen (boot.py) = if it did not appear then click ‘reset’ on the microcontroller > connect external LED to a cable and then connect the other side to the microcontroller [port-3 = io26] >

- file > new > and write the following code:
from machine import Pin
import time

LED = Pin(26,Pin.OUT)
LED.value(1)
time.sleep(2)
LED.value(0)
-
After writing the code > Click Run (GREEN ICON) > Light (white) will lighten-up in the LED (for about 1-seconds)

-
The above code will make sthe LED blink only for two seconds and not light up again, to make it into a loop, (always lightening-up and shutting off) add the text while True:

from machine import Pin
import time
while True:
  LED = Pin(26,Pin.OUT)
  LED.value(1)
  time.sleep(2)
  LED.value(0)
  time.sleep(2)
- New code trying to make it always lighten-up (always open, not shutting):
from machine import Pin
import time

LED = Pin(26,Pin.OUT)
LED.value(1)
time.sleep(2)

Thonny - Task 1
I was asked to makr the same challenges made in Arduino IED. so I Googled random function in micropython (BBC) > and clicked within the website (Random Number Generator)
from machine import Pin
import time
import random
while True:
LED = Pin(26,Pin.OUT)
LED.value(1)
time.sleep(random.randrange(1,5))
LED.value(0)
time.sleep(random.randrange(1,2))

Thonny - Task 2
My team and I generated a morse code using Thonny programming. you can download our code by clicking here

Thonny - Task 3
We also generated an LED with different lighting colors that you can access from here
My Week in a Summary
This week, I focused on identifying relevant information in a microcontroller datasheet, which helped me understand the specifications and capabilities of the microcontroller I am working with. I also implemented various programming protocols to ensure effective communication with the microcontroller.
In addition, I documented what I learned from reading the microcontroller datasheet, providing detailed notes and insights. I successfully programmed my board and described the programming processes I used, including the steps and tools involved. I included my source code to showcase the implementation and provided short videos demonstrating my board in action. Finally, I linked my work to the group assignment to ensure all related work is easily accessible for my website readers.