4. Embedded programming
This week I worked on defining my final project idea and started to getting used to the documentation process.
MICROCONTROLLERS
What is it?
A microcontrollers is a compact integrated circuit designed to do a specific operation in an embedded system. A typical microcontrollers includes a processor (CPU), memory (RAM and ROM), and input/output (I/O) peripherals on a single chip.
Features
- Low Power Consumption
- Small Size
- Cost-Effective
- Real-Time Operation
Applications
Microcontrollers are used in a wide variety of applications, including:
Consumer Electronics: Remote controls, microwave ovens, washing machines.
Automotive: Engine control units, airbag systems, and infotainment systems.
Industrial Automation: PLCs (Programmable Logic Controllers), robotics, and process control systems.
Medical Devices: Blood pressure monitors, glucose meters, and portable diagnostic equipment.
Communication Devices: Routers, modems, and wireless transceivers.
Examples
MKR1010 is a microcontrollers board that have wifi and bluetooth capabilities and security features which makes it suitable for a wide range of applications, from home automation to industrial monitoring. With support for battery power and a variety of I/O options, it provides an excellent platform for developing portable and connected devices.
For more info click hereto visit Faisal’s website.
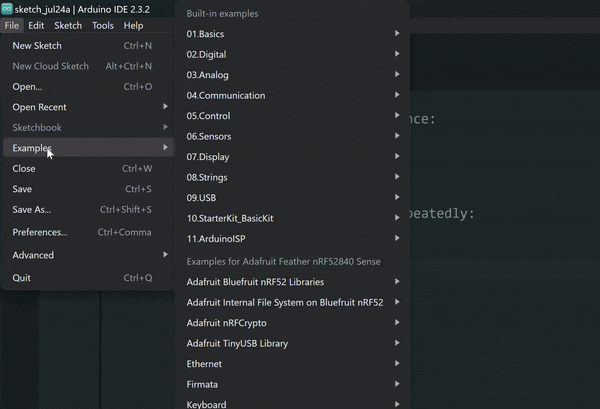
Arduino IDE
The Arduino Integrated Development Environment (IDE) is an open-source software application that provides an easy-to-use platform for writing, compiling, and uploading code to Arduino boards. It is designed to simplify the process of programming microcontrollers, especially for beginners, by providing a straightforward interface and comprehensive libraries.
Getting Started
-
Download and Install Arduino IDE
-
Edit preferences
- Install boards and libraries

-
Connect Your Arduino Board. Ensure that the board is properly powered and recognized by your computer.
-
Select the Board and Port

In the IDE, go to the Tools menu, select the appropriate board (e.g., Arduino Uno, Arduino Nano) under the Board submenu, and choose the correct communication port under the Port submenu.
- Write Your Sketch Here’s a simple example of the built-in Blink sketch
Here’s a complex example been done on Adafruit feather
#include <Adafruit_NeoPixel.h>

// The pin where the onboard LED is connected
#define PIN         8

// Number of LEDs in the strip (there's only one onboard)
#define NUMPIXELS   1

// Define the NeoPixel object
Adafruit_NeoPixel pixels(NUMPIXELS, PIN, NEO_GRB + NEO_KHZ800);

void setup() {
  // Initialize the NeoPixel library.
  pixels.begin();
  pixels.show(); // Initialize all pixels to 'off'
}

void loop() {
  // Set the LED color to red
  pixels.setPixelColor(0, pixels.Color(255, 0, 255)); // pink
  pixels.show();
  delay(1000); // Wait for a second

  // Set the LED color to green
  pixels.setPixelColor(0, pixels.Color(0, 255, 255)); // Green
  pixels.show();
  delay(1000); // Wait for a second

}
- Compile and Upload
Click the Verify button (checkmark icon) to compile your sketch and check for errors. If there are no errors, click the Upload button (right arrow icon) to upload the sketch to your Arduino board.
- Monitor Output
Open the Serial Monitor (Tools > Serial Monitor) if your sketch uses serial communication. This allows you to see data sent from the Arduino board and send data to it.
- Result
Challenges
- Easy mode: Blink your led but have your blink delay periods be randomized values between 1 second and 5 seconds Code
#include <Adafruit_NeoPixel.h>

// The pin where the onboard LED is connected
#define PIN         8

// Number of LEDs in the strip (there's only one onboard)
#define NUMPIXELS   1

// Define the NeoPixel object
Adafruit_NeoPixel pixels(NUMPIXELS, PIN, NEO_GRB + NEO_KHZ800);

void setup() {
  // Initialize the NeoPixel library.
  pixels.begin();
  pixels.show(); // Initialize all pixels to 'off'
}

void loop() {
  // Set the LED color to on
  pixels.setPixelColor(0, pixels.Color(28, 0, 28));
  pixels.show();
  delay(2000); // Wait for a second

  // Set the LED color to off
  pixels.setPixelColor(0, pixels.Color(0, 0, 0));
  pixels.show();
  delay(random(1000,5000));


}
Result
- Medium mode: pre code your microcontroller to send a Morse code 1 word message and challenge a friend, family member, your colleagues or your instructor to figure it out. (Refer to the schedule)
Code
#include <Adafruit_NeoPixel.h>

// The pin where the onboard LED is connected
#define PIN         8

// Number of LEDs in the strip (there's only one onboard)
#define NUMPIXELS   1
#define r 25
#define g 25
#define b 0
// Define the NeoPixel object
Adafruit_NeoPixel pixels(NUMPIXELS, PIN, NEO_GRB + NEO_KHZ800);

void setup() {
  // Initialize the NeoPixel library.
  pixels.begin();
  pixels.show(); // Initialize all pixels to 'off'
}

void loop() {

// Y -.--
  // dash
  pixels.setPixelColor(0, pixels.Color(r, g, b));
  pixels.show();
  delay(2000); // Wait for a second
  // gap
  pixels.setPixelColor(0, pixels.Color(0, 0, 0));
  pixels.show();
  delay(500); // Wait for a second
   // dot
  pixels.setPixelColor(0, pixels.Color(r, g, b));
  pixels.show();
  delay(1000); // Wait for a second
  // gap
  pixels.setPixelColor(0, pixels.Color(0, 0, 0));
  pixels.show();
  delay(500); // Wait for a second
  // dash
  pixels.setPixelColor(0, pixels.Color(r, g, b));
  pixels.show();
  delay(2000); // Wait for a second
  // gap
  pixels.setPixelColor(0, pixels.Color(0, 0, 0));
  pixels.show();
  delay(500); // Wait for a second
  // dash
  pixels.setPixelColor(0, pixels.Color(r, g, b));
  pixels.show();
  delay(2000); // Wait for a second
  // GapL
  pixels.setPixelColor(0, pixels.Color(0, 0, 0));
  pixels.show();
  delay(3000); // Wait for a second


// A .-
  // dot
  pixels.setPixelColor(0, pixels.Color(r, g, b));
  pixels.show();
  delay(1000); // Wait for a second
  // gap
  pixels.setPixelColor(0, pixels.Color(0, 0, 0));
  pixels.show();
  delay(500); // Wait for a second
  // dash
  pixels.setPixelColor(0, pixels.Color(r, g, b));
  pixels.show();
  delay(2000); // Wait for a second
  // GapL
  pixels.setPixelColor(0, pixels.Color(0, 0, 0));
  pixels.show();
  delay(3000); // Wait for a second


// Q --.-
  // dash
  pixels.setPixelColor(0, pixels.Color(r, g, b));
  pixels.show();
  delay(2000); // Wait for a second
  // gap
  pixels.setPixelColor(0, pixels.Color(0, 0, 0));
  pixels.show();
  delay(500); // Wait for a second
  // dash
  pixels.setPixelColor(0, pixels.Color(r, g, b));
  pixels.show();
  delay(2000); // Wait for a second
  // gap
  pixels.setPixelColor(0, pixels.Color(0, 0, 0));
  pixels.show();
  delay(500); // Wait for a second
  // dot
  pixels.setPixelColor(0, pixels.Color(r, g, b));
  pixels.show();
  delay(1000); // Wait for a second
  // gap
  pixels.setPixelColor(0, pixels.Color(0, 0, 0));
  pixels.show();
  delay(500); // Wait for a second
  // dash
  pixels.setPixelColor(0, pixels.Color(r, g, b));
  pixels.show();
  delay(2000); // Wait for a second
  // GapL
  pixels.setPixelColor(0, pixels.Color(0, 0, 0));
  pixels.show();
  delay(3000); // Wait for a second

// O ---
  // dash
  pixels.setPixelColor(0, pixels.Color(r, g, b));
  pixels.show();
  delay(2000); // Wait for a second
  // gap
  pixels.setPixelColor(0, pixels.Color(0, 0, 0));
  pixels.show();
  delay(500); // Wait for a second
  // dash
  pixels.setPixelColor(0, pixels.Color(r, g, b)); // Green
  pixels.show();
  delay(2000); // Wait for a second
  // gap
  pixels.setPixelColor(0, pixels.Color(0, 0, 0));
  pixels.show();
  delay(500); // Wait for a second
  // dash
  pixels.setPixelColor(0, pixels.Color(r, g, b));
  pixels.show();
  delay(2000); // Wait for a second
  // GapL
  pixels.setPixelColor(0, pixels.Color(0, 0, 0));
  pixels.show();
  delay(3000); // Wait for a second

// O ---
  // dash
  pixels.setPixelColor(0, pixels.Color(r, g, b));
  pixels.show();
  delay(2000); // Wait for a second
  // gap
  pixels.setPixelColor(0, pixels.Color(0, 0, 0));
  pixels.show();
  delay(500); // Wait for a second
  // dash
  pixels.setPixelColor(0, pixels.Color(r, g, b));
  delay(2000); // Wait for a second
  // gap
  pixels.setPixelColor(0, pixels.Color(0, 0, 0));
  pixels.show();
  delay(500); // Wait for a second
  // dash
  pixels.setPixelColor(0, pixels.Color(r, g, b));
  pixels.show();
  delay(2000); // Wait for a second
  // GapL
  pixels.setPixelColor(0, pixels.Color(0, 0, 0));
  pixels.show();
  delay(3000); // Wait for a second

// B -...
  // dash
  pixels.setPixelColor(0, pixels.Color(r, g, b));
  pixels.show();
  delay(2000); // Wait for a second
  // gap
  pixels.setPixelColor(0, pixels.Color(0, 0, 0));
  pixels.show();
  delay(500); // Wait for a second
  // dot
  pixels.setPixelColor(0, pixels.Color(r, g, b));
  pixels.show();
  delay(1000); // Wait for a second
  // gap
  pixels.setPixelColor(0, pixels.Color(0, 0, 0));
  pixels.show();
  delay(500); // Wait for a second
  // dot
  pixels.setPixelColor(0, pixels.Color(r, g, b));
  pixels.show();
  delay(1000); // Wait for a second
  // gap
  pixels.setPixelColor(0, pixels.Color(0, 0, 0));
  pixels.show();
  delay(500); // Wait for a second
  // dot
  pixels.setPixelColor(0, pixels.Color(r, g, b));
  pixels.show();
  delay(1000); // Wait for a second
  // GapL
  pixels.setPixelColor(0, pixels.Color(0, 0, 0));
  pixels.show();
  delay(3000); // Wait for a second

// GapEnd
  pixels.setPixelColor(0, pixels.Color(192, 192, 192));
  pixels.show();
  delay(6000); // Wait for a second
}
Result
Thonny
Thonny is an integrated development environment (IDE) specifically designed for programming in Python. It is particularly well-suited for beginners due to its simple and intuitive interface, but it also includes features that make it useful for more advanced users.
Getting Started
-
Download and Install Thonny
-
Install software on esp32
-
Connect Your Esp32 Board. Ensure that the board is properly powered and recognized by your computer.
-
Select the Board and Port

- Write Your Sketch

-
Click the “Run” button to upload and execute the code on your microcontroller. The LED should start blinking.
-
Result
Challenges
- Easy mode: Blink your led but have your blink delay periods be randomized values between 1 second and 5 seconds
- Medium mode: pre code your microcontroller to send a Morse code 1 word message and challenge a friend, family member, your colleagues or your instructor to figure it out. (Refer to the schedule)
- Hard mode: you select the duration of the light being on and off while the program is running by entering it in the serial monitor. Write a code that takes the data from the serial monitor and delays by that amount of time.