Final Project: Pill Pal - Smart Medication Dispenser
![]()
![]()

Aim and Background
The goal is to create a medical medicine dispenser that connects to an alarm bracelet that helps people take their medication on time and improves compliance. By incorporating a positive aspect, this solution aims to enhance patients’ mindsets regarding taking medication regularly. This device is designed for people of all demographics, with a particular focus on elderly individuals and those with terminal illnesses.
Many people either forget to take their medication, are reluctant to do so, or struggle to keep track of their prescriptions. Additionally, the process of managing medication can evoke negative emotions. The dispenser aims to empower patients by helping them manage their medication independently, providing peace of mind through reliable reminders, engaging them with interactive features, and offering positive reinforcement through a rewards system and encouraging messages.
Our Initial Scenario - Method of Operation
Imagine it’s morning, and it’s time for your medication. Your bracelet vibrates to notify you. As you approach the smart medication dispenser, it activates when you come within a specified proximity. The dispenser starts to dispense your medication, and motivational messages from your loved ones play, either before or after you take the medicine. This makes the experience positive, associating it with the voices of those you care about. The device dispenses the medication into a secure chamber with a tiltable surface, ensuring that only you can access it. This tiltable surface requires you to engage with the device, providing proof that the medication has been taken out.
Key Features and Components
The smart medication dispenser will include several key features:
-
Automated Dispensing: Automatically dispenses the correct dosage at scheduled times, with customizable schedules for different medications.
-
Reminders and Alerts: Provides audible and visual alerts using voice messages from loved ones, mobile notifications, and a buzzer bracelet that vibrates on the user’s wrist.
-
User-Friendly Interface: Features easy-to-use buttons for setting up and managing medication schedules, and a speaker module for playing reminders.
-
Safety Features: Includes a child lock to prevent accidental access.
-
Compliance Tracking: Tracks medication usage and generates compliance reports for healthcare providers.
-
Connectivity: Connects to smartphones via WiFi and to the alert bracelet via Bluetooth.
-
Proximity Alerts: Plays encouraging voice messages when the user is near the dispenser.
| Component | Description |
|---|---|
| LCD Screen | Shows medication name, count, reminder, and countdown to the next dose. |
| Vibration Motor | Integrated into the bracelet to notify the patient when it’s time to take their medication. |
| Tilt Sensor/Accelerometer | Ensures the tiltable surface is engaged, providing proof that the medication has been taken out. |
| Speaker | Plays motivational messages from loved ones to encourage the patient. |
| Motor and Actuator | Controls the dispensing mechanism to release the medication into the secure chamber. |
| Connectivity Module (Bluetooth and Wi-Fi) | Syncs the dispenser with the smartphone app for notifications, logging, and proximity connection to the dispenser. Detects when the patient is within a specified range of the dispenser, triggering the device to activate. |
| Battery | Ensures the device operates reliably and can be recharged as needed. |
| Step Motor | Operates the dispensing mechanism. |
Potential Challenges
Click to expand
- **Q1: How will the system work if the patient is not at home or has to travel?** The dispenser is portable, allowing patients to take it with them. However, this may defeat the purpose of scheduled dispensing. - **Q2: How will the device be powered?** It can be battery-powered or connected to the wall using a converter. - **Q3: How will the loved ones’ sounds be activated?** The device activates when the patient is within a specified proximity, notified through the patient’s phone. - **Q4: Is the 3D printing filament food safe?** No. But this is a prototype. For an actual product it will be made using other manufacturing processes that can be suitable for foods.Naming our Dispenser
| English Suggestions | Arabic Suggestions |
|---|---|
| PillPep | رفيق الدواء (Rafiq Al-Dawa) |
| DoseBuddy | صديق الحبة (Sadiq Al-Habba) |
| DoseAlert | مساعد الدواء (Musa’id Al-Dawa) |
| PillCue | دواء الأمل (Dawa’ Al-Amal) |
| DoseReminder | |
| PillBox |
Project Timeline
We have 8 weeks to learn about all the steps we will be using starting from learning to research keywords from scientific papers to designing and managing electronics, coding, and engineering our products. With an additional 2 weeks to focus merely on creating our final product. So a total of 10 weeks of intense work and focus.
1. Prototyping
1.1 First Prototype
- Bill of Materials:
| Qty | Description | Price |
|---|---|---|
| 1 | Arduino UNO R4 (wifi) | 28.50 $ |
| 1 | LCD Screen (I2C) 20x4 | 11.00 $ |
| 1 | Accelerometer | 0.99 $ |
| 1 | Knob (Rotary Angle Sensor) | 2.91 $ |
| 2 | Bread Board | 8.99 $ |
| 1 | Battery or Power Bank | 17.99 $ |
| 1 | F-M wires | 5.90 $ |
| 1 | M-M Wires | 4.70 $ |
| 1 | SD Card Module | 7.50 $ |
| 4 | Buttons | 4.00 $ |
| 1 | Speaker | 10.00 $ |
| 3 | Step Motor | 45.78 $ |
| 1 | Bluetooth | 6.00 $ |
1.1.1 Designing and Printing
For the 3D design, Saeed used TinkerCad to create a prototype featuring an LCD screen and dispensing gear. We then cut a cardboard model, I, Sara, and Saeed worked on drawing and cutting the pieces, and taping the edges for a clean finish.
1.1.2 Coding
During the preparation phase, we combined our knowledge from the embedded programming week to write custom codes for the medication dispenser using Arduino IDE. Hassan coded the LCD screen and rotary encoder, while Ali focused on the stepper motor, eventually merging their efforts into a single code. You can download our code by clicking on the link here.

1.1.3 Electronics
Finally, we gathered all the electronics to integrate them into our 3D design, though we faced challenges with pin availability on our Arduino Uno R3. Here’s the circuit connection for our first prototype:

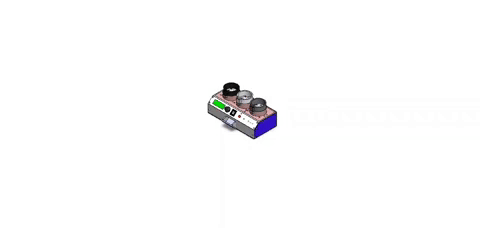
1.1.4 Final result of the first prototype:
1.1.5. Issues with our first prototype
Click Here to Expand on Issues With the First Prototype:
**A. Rotary Encoder** When the rotary encoder is set to medicine 3 and the machine is powered off and on, the screen defaults to displaying medicine. This indicates that the rotary encoder does not retain its value. If the rotary encoder is turned too quickly, it fails to update the medicine value/name on the screen. **B. Lack of Pins** We thought of using two Arduino in order to have enough capacity for our pins. one single arduino uno contains 13 digital pins. while we need about 4 motors (each motor needs 4 digital pins) so a total of 16 pins is required. After a few days of thinking and brainstorming during the weekend, [_Ali_](https://fablabbh.fabcloud.io/asterisk/2024/ali.aljeshi/about/) came up on Sunday with something called shift register. A shift register is an essential component in digital electronics and microcontroller projects. Specifically, the **74HC595 shift register** allows you to expand the number of outputs using only a few pins on your microcontroller. It controls eight different output pins with only three input pins, making it a versatile solution for adding more I/O pins to your project. By daisy-chaining multiple shift registers, we will be able to control even more devices efficiently.1.2 Second Prototype
- New Bill of Materials:
| Qty | Description | Price | Link | Notes |
|---|---|---|---|---|
| 1 | Arduino Mega | 53.00 $ | link | |
| 1 | ISD1820 Sound Voice Recording Playback Module | 3.95 $ | link | |
| 3 | 28BYJ-48 stepper motor with driver | 4.00 $ | link | priced for each |
| 2 | Bread Board | 8.99 $ | link | priced for both |
| 1 | Passive Buzzer | 6.59 $ | link | |
| Many | F-M wires | 5.90 $ | link | pack of 65 |
| Many | M-M Wires | 4.70 $ | link | pack of 65 |
| 1 | LCD Screen I2C 16x2 | 0.99 $ | link | |
| 1 | Tilt Sensor | 0.52 $ | link | pack of 10 |
| 1 | Speaker | 10.00 $ | module not decided yet | |
| 1 | KY-023 Joystick module | 2.00 $ | link | |
| 1 | ESP 01S WIFI module | 4.50 $ | link | |
| 3 | LED Lights | 0.36 $ | link | pack of 10 |
| 1 | Button | 0.99 $ | link | 180 pcs kit box |
| 1 | 10k Ohm Resistor | 5.99 $ | link | pack of 40 |
| 4 | 220 Ohm Resistor | 6.19 $ | link | pack of 10 |
| Total Cost of Electronics | 115.41 $ |
In our new prototype, we replaced some items with others to have better functions with a wider range of features, like replacing the arduino uno R4 with an arduino mega 2560, a KY-023 Joystick module instead of a rotary encoder, a ISD1820 sound voice recording playback module, 28BYJ-48 stepper motors with driver, ESP 01S WIFI module, and a DS3231 RTC Module. So we altered our design to have slots for each component.

Over the 8 weeks of tests and experiments, we concluded that 3D printing was not suitable for creating the housing of our project due to several limitations: the printer’s bed size was restricted to 220mm x 220mm x 250mm, printing took a long time even at maximum speed, and the high demand for the printer among students caused delays. Additionally, printing large parts would monopolize the printer, preventing other groups from using it. Therefore, we opted for the laser cutting machine, which is faster, more reliable, and less busy. We chose acrylic as the material and finalized the design of model 3, creating individual parts and assembling them.
Saeed’s dedication and hard work were instrumental in this prototype process. He tested and experimented with different approaches, ensuring that every detail was perfect. His efforts in designing and refining the housing were crucial to the project’s success. Saeed’s commitment to overcoming the challenges of 3D printing and his innovative use of the laser cutting machine truly showcased his exceptional skills and determination.
Check out Saeed’s awesome housing designs with their concepts here.


2. 3D Designing and Printing
At the start of the project, we created a concept design for the dispenser. This initial model was a visual representation without real dimensions or consideration for mechanism space. However the next design was more advanced, parametric, and considered real dimensions and mechanisms. Inspired by a YouTube video, this design was ultimately too large for our printer and too complex for CNC or laser creation, leading to its discard.
2.1 Housing
The housing is the face of our product, creating the first impression for customers and influencing their decision to purchase. Therefore, great care is taken in the external aesthetics and physical appearance of the device. However, aesthetics alone are not enough; the housing must also securely contain all internal components. So our mechanical engineer Saeed Makhlooq took care of the matter into his own hands. Then Hassan Mandeel carried on and added holes them (a large hole was created to the back piece so that the microcontroller wire and microphone jack can be placed out of the housing).


2.1.1 Designing the Door and Creating the Brackets
Hassan designed the door so that after the pills are dispensed, they land directly inside it. This way, the patient can easily open the door and take the pills. Additionally, we created a mounting area that was initially meant for the accelerometer, but we decided to use it for the tilt sensor instead.
Initially, Hassan created the brackets out of MDF wood using the CNC machine. However, some of the brackets got damaged during the cutting process due to their small size. Also, the material was determined to be too weak. Therefore, we decided to create the brackets from acrylic using the laser cutting machine.

Laser Cutting the Housing Components
You can access in full details the previous housing designs through Saeed’s page here, As well as more detailed parts in a 3D format in Hassan Mandeel’s page here.
2.2 Internal Components
2.2.1 Designing the motor chair, slide, and hangers

The internal components of our smart pill dispenser are designed to be hidden within the housing, each serving a specific purpose. Motor chairs securely hold the motor in place below the roof piece. The slide collects pills dispensed from each container and delivers them to the door. Hangers for the chairs and slide feature slots where the chairs and slide joints fit. Additionally, there are other components that required adjustments or custom designing to ensure optimal functionality.
2.2.2 Designing the roof frame

The roof was very challenging and complicated piece to design since it is the middle part between the dispensing mechanism and the internal parts. So I had to coordinates with my group mate Hassan and his mechanism design and the internal design. All must fit together neatly so the mechanism can run smoothly.
You can access in full details the internal components design through Saeed’s page here
2.2.3 Designing the cylinders, rotating disk,sweeper arm, and motor couplings

After numerous trials and errors, we finally achieved satisfactory components. The cylinder, which houses all the mechanism components including the pills, has a dispensing hole. The cylinder cap protects the pills from debris. The rotating disk moves the pills to the dispensing hole, with each disk having a specific hole for each pill. The sweeper arm ensures only one pill enters the dispensing hole at a time. The motor couplings, both male and female, facilitate the rotation of the disk. Through various design iterations, we refined each component to ensure smooth and efficient operation.

After printing and cutting out everything in the correct measurements, we assembled all the pieces together into one.

3. Coding Electronics

3.1 Real Time Clock Module DS3231
For time tracking, Ali used the DS3231 RTC module, which operates on a 3V coin battery and uses I2C communication to minimize pin usage. Initially, the RTC worked well with an Arduino Uno, but we faced issues with time readings on the Arduino Mega, likely due to I2C transfer rates. We eventually opted for the built-in RTC functionality in Blynk. You can access our codes through Ali’s page
3.2 Wi-Fi Module ESP-01S
To add IoT connectivity to our Arduino Mega, we used the ESP-01S WiFi module. This module, though a standalone microcontroller, was programmed using an Arduino Uno. We configured it with AT commands to connect to our WiFi network, enabling the Arduino Mega to communicate over the internet. While MIT App Inventor and Thingspeak were considered for data interaction and visualization, they were not suitable for our project’s requirements. Please refer to Ali Aljishi’s page for in-depth details here.
3.3 Voice Recording and Playback Module ISD1820

To integrate sound into our smart medication dispenser, Hassan used the ISD1820 module, which allows recording and playback of 10-second voice messages. The module features a microphone for recording and a speaker for playback. To operate, connect 5V and ground to the VCC and GND ports, attach a speaker, and use a phone to record the desired sound while holding the REC button. Playback is controlled via the PLAYE and PLAYL buttons. We encountered issues with low speaker volume and background noise from the microphone, which we resolved by using a better speaker and replacing the onboard microphone with a phone microphone. Additionally, we connected a button to the REC pin and used an LED to indicate recording status, utilizing example code from the Arduino IDE. For detailed info please refer to Hassan Mandeel here.
3.4 I2C Screen
We decided to use I2C instead of a regular LCD AND directly wiring it; because wiring an LCD to a microcontroller requires many pins and wires, increasing the chance of incorrect connections. To address this, we used an I2C board. I2C (Inter-Integrated Circuit) is a two-wire communication protocol that connects low-speed devices like sensors and microcontrollers using a serial data line (SDA) and a serial clock line (SCL). Each device has a unique address, and data is transferred in bytes. I2C is valued for its simplicity and low pin count, making it ideal for embedded systems. By using I2C with the LCD, we reduced the number of pins from 16 to 4, significantly decreasing the number of wires needed. Hassan Mandeel has the programing tutorial on his website.
3.5 Door Opening Trigger - the Accelerometer

To identify when the medicine door opens to play the motivational voice recording, Ali tried using an accelerometer. This device is useful because it can accurately detect its orientation in 3 axes. It also uses I2C communication which can help mitigate the number of pins needed. We used the proprietary wires that came with the device.
For more info on how I was able to program it with zero experience, refer to my page here, and for ALI ALJESHI’s electrical connection to our circuit, check out his website.
3.6 Joystick

We initially chose a rotary encoder to control the LCD but faced issues with manual resetting and slow operation. Therefore, we switched to a joystick, which automatically returns to its zero state and handles fast movements well. The joystick has five pins (Ground, VCC, VRX, VRY, SW) and functions as a coordinate system with a range from 0 to 1023 on each axis. Understanding the map function is essential for utilizing the joystick effectively, as it maps input values to desired output ranges. Please refer to Saeed’s page here for how he programmed the joystick.
3.7 Pill Dispensing Mechanism
To dispense a single pill at a time, we researched various mechanisms and adapted a design from a reference video. The mechanism includes a cylinder that houses all components and pills, with a hole for dispensing, and a cylinder cap that encloses the cylinder to protect the pills from debris. A rotating disk moves the pills to the dispensing hole, with a specific hole for each pill, while a sweeper arm ensures only one pill enters the dispensing hole. Motor couplings (male and female) connect to the motor and rotating disk to transfer rotations. Our design iterations included changes to the cylinder, making it shorter and switching from a threaded to a press-fit cap, and adjustments to the rotating disk, although we faced printing challenges.
For detailed info on the mechanism please refer to HASSAN MANDEEL here.
3.8 Compiling Codes
This is the final circuit schematic. You can also check it out on Cirkit Designer for a zoomable view by Ali below.

We have prepared a code that connects everything specially for the presentation where it dispenses pills in a short span of time for the purpose of presenting to a group of people. You can download the codes compiled by Ali from here or by referring to the rest of the codes through Saeed Makhlooq’s page, as well as for each of our pages through the links I provided under each section.
4. Creating a Phone App - Blynk IoT Platform

Blynk is an IoT platform used to control devices like Arduino, Raspberry Pi, and NodeMCU via the Internet. It supports app creation on web, Android, and iOS. While the free version allows 2 devices and 5 datastreams, our complex project required the maker subscription at $6.99/month (2.63 BHD).
To start, we created a template and device in Blynk, then we copied the essential data (Auth token, etc.) for our code. Used the Blynk library and example codes to set up WiFi connectivity and data interaction. Datastreams act as variables for data exchange between the Arduino and Blynk. The platform offered us dashboards and apps with widgets for data input and output. So we utilized them to our project.
4.1 Sending Data from Arduino to Internet
To send data from Arduino to the web, we used Blynk.virtualWrite with a timer function to manage data transmission intervals. For example, to send pill counts to the web app, out timer function looks like this:
Click to expand
``` cpp void myTimer() { Blynk.virtualWrite(V1, Medicine1_Pills); Blynk.virtualWrite(V2, Medicine2_Pills); Blynk.virtualWrite(V3, Medicine3_Pills); } ```In the setup, define the interval for the timer function:
timer.setInterval(1000L, myTimer); // Updates every second
4.2 Sending Data from Internet to Arduino
To send data using the web app, we used the function BLYNK_WRITE. This function needs to be defined for each datastream. For example, to update the pill count of medicine 1 from a Numeric Input widget:
BLYNK_WRITE(V4) {
  int Add_Med_1 = param.asInt();
  Medicine1_Pills += Add_Med_1;
}
Variables used in BLYNK_WRITE must be defined outside any void function to be accessible.
4.3 Pushing Notifications
To create notifications in Blynk, we sat up a new event from the Events & Notifications tab. Enabled “expose to automation” and selected the recipients for the notifications. More details are found on Ali Aljeshi’s page.
5. Designing the Logo and Slogan

I initially created a logo with a grandpa walking with his grandchild while holding a medication container in his hand, however we felt that it was a bit shady so I designed another one that conveyed more emotions. We chose the slogan “Precision in dosing, love in every reminder” for our Pill Pal dispenser to highlight our dual focus: ensuring accurate medication management and providing emotional support. Our logo, featuring a woman hugging her daughter, symbolizes the deep emotional connection and care that our device aims to foster. This imagery emphasizes the importance of emotional support in medication adherence, making the process feel more personal and compassionate for patients. Our project not only addresses the technical aspect of precise dosing but also the human need for love and reassurance during medication times.
6. Pill Pal Package Zip File
This is our downloadable project link, which includes all the codes and designs we used. Everything is available under a CC license. We believe science should be accessible to everyone, so we’re making our project an open-source library along with Fab Lab Academy. Feel free to explore and learn on our work. So we keep pushing the boundaries of knowledge together.
CLICK HERE FOR FUNCTIONAL CODE
7. Aaaand Let Us Present You The Final Product! :)
First Let’s Look at an Assemply of Pill Pal


This is a demonstration of Pill Pall
My Lovely Team While Presenting Pill Pal


Our Participation at the Arab IoT Competition


Future Considerations
-
Use erasable sticker labels for each medicine name to easily distinguish containers.
-
Add a grid to the speaker to enhance functionality.
-
Utilize a printed circuit board (PCB) to tidy up the setup and save space.
-
Employ cable management solutions, like smaller breadboard wires, to keep things organized.
-
Reduce container diameters to make the design more compact.
-
Replace the joystick with a more professional button for better usability.
-
Incorporate an amplifier and an SD card to allow for multiple personalized messages, adding customization.
Voltage Adjustments
Looking ahead, we plan to address the voltage differences between the Arduino Uno and the ESP-01s. Since the Arduino operates at 5V and the ESP-01s requires 3.3V, it’s crucial to ensure the ESP-01s receives the correct voltage to prevent damage. For long-term stability, we can look into using voltage limiters to ensure the ESP-01s consistently receives 3.3V instead of 5V from the Uno. We could either place a resistor in series or opt for a ready-made voltage limiter. These modifications will improve the device’s reliability and functionality, reducing the need for frequent troubleshooting.
Conclusion
Our intensive 10-week program was a transformative experience, where we, as final-year university students, gained and used our fabrication skills to create a smart pill dispenser. Despite the challenges and the tiring nature of the process, our fights and arguments, the journey was incredibly rewarding and fun. We gained invaluable practical experience that will undoubtedly benefit us in our future careers. The skills and knowledge we acquired have not only prepared us for future projects but have also instilled a sense of excitement and confidence in our abilities. Overall, it was a positive and enjoyable experience that has left us eager to apply what we’ve learned in our professional lives. Thank you FabLab Academy for this wonderful opportunity!
Acknowledgements
We are incredibly grateful for the tremendous support and guidance provided by our instructors Haitham Al Naser, Duaa Al Aali, Faisal Naji, Abdulghafoor Ismail, Dr. Salman, and Noor Alsuwaidan throughout the development of our smart medication dispenser. Their expertise and guidance were invaluable to our success. Additionally, we extend our heartfelt thanks to Tamkeen and Bahrain Science Center for offering us this amazing opportunity to participate in FabLab Academy and make the best use of our last summer vacation as students.
References
- Prototype Videos:
1.How to invent a pill dispenser - Algoryx Momentum
3.Building an Automatic Pill Dispenser - Michael Sangiorgio (Best one)
4.Automated Pill Dispenser using Arduino - Russell Epstein