Computer Controlled cutting
Laser cutting machine specs

Available features and key settings of laser cutter:
Machine name: Thunder Laser Cutter
Machine max power in Watts: 100W
Machine bed size (work area): 600mm X 900mm
Machine type (CO2 or fiber): CO2
Toolpath generation software used: RD Works
Safety Instructions
⚠ Operators should not be absent while the machine is running in case of any fire.
⚠ Check the submerged pump when started each time; do not use it if the pump yields no water.
⚠ Do not use it unless the machine is in grounding connection. The earth wire of the laser power source should be connected not to doors and windows; water pipes and other installations, but to the ground especially the outdoor earth.
⚠ Temperature of the water in the tank should be under 25C. Change the circulating water when the temperature is overhigh. Make sure to change circulating water periodically.
⚠ Non-professionals should not take the liberty to disassemble the components because of the laser and high-pressured part within the machine.
⚠ Make sure the air blower is on when engraving so as not to stain the eyeglass and focus lens. Compustibles and explosives should be kept clear of the apparatus in case of fire.
⚠ Do not use machine during thunderstorms.
⚠ Do not plug/unplug the power line and communication cable when electrified.
⚠ When non-luminance found, collision of coordinate system and other abnormal phenomenon, cut off power and restart after trouble elimination.
⚠ Clear the lead rail periodically
How To Use Software and Machine


Focus
The focus position of the laser cutting machine is the relative position between the focus and the upper surface of the workpiece, based on the machined material surface.

Perform one of those 2 Focus tests, take pictures and log the results test1 test2

[describe the test]
As per the test performed, we found the optimal distance between the lens and material to get the best focus is ![distance]mm
Power and speed
Power Test
A design was created for laser cutting to test the power at different ranges. We created a simple design that was supposed to be a phone stand:

We imported a picture found in pinterest to our preferred 2D software, AutoCAD and scaled it to the approximate right size.

Then traced on top of the picture as a guide.

After doing the first sketch, we just mirrored it to get the second piece. And here is where we made the mistake of not thinking about how the pieces will fit together. The joints weren’t in the right place.

Then we exported the design to dxf ready to be sent to the machine and put the settings according to our test:

The design was later multiplied six times and given different colors to allow for changing the settings for each object. The same speed was applied to all which was set to 85, but the power differed.

- The first design got a power of 85

- The second design got a power of 80

- The third design got a power of 70

- The fourth design got a power of 65

- The fifth design got a power of 60

- The sixth design got a power of 30

Findings:
The less power used, the less the laser cuts deep. The last design with the power of 30 did not get cut deep, and the piece was not able to be removed.

Speed Test
To test the cutting speed and how it affects our selected material (cardboard), we created two simple puzzle designs.
The first design was a rectangle, with a 3-point arc placed in the middle and connected by a line to create two separate puzzle pieces. To decorate the sides of the puzzle, we just added more 3-point arcs. Trim was used to remove the extra lines.


The second design used a reference image placed on a canvas, and was created with the spline tool by hand.


When loading up the settings on the Laser Cutting machine, the speed was set from a range of 35 to 140.


We then started the process by clicking on “Download” and adjusting the origin point

Here is comparison of the speeds


Our observation was that cutting speed using these settings on cardboard material has little to no impact on the final result. However, this might not be the case for other thicknesses and materials.
Speed Test
The material being tested is cardboard which is 3mm thick. Multiple different speeds and powers were tested and the best values were found to be a power of [power] and a speed of [speed].
Rate
The rate at which the laser pulses or fires. For this material we used a rate of [rate]
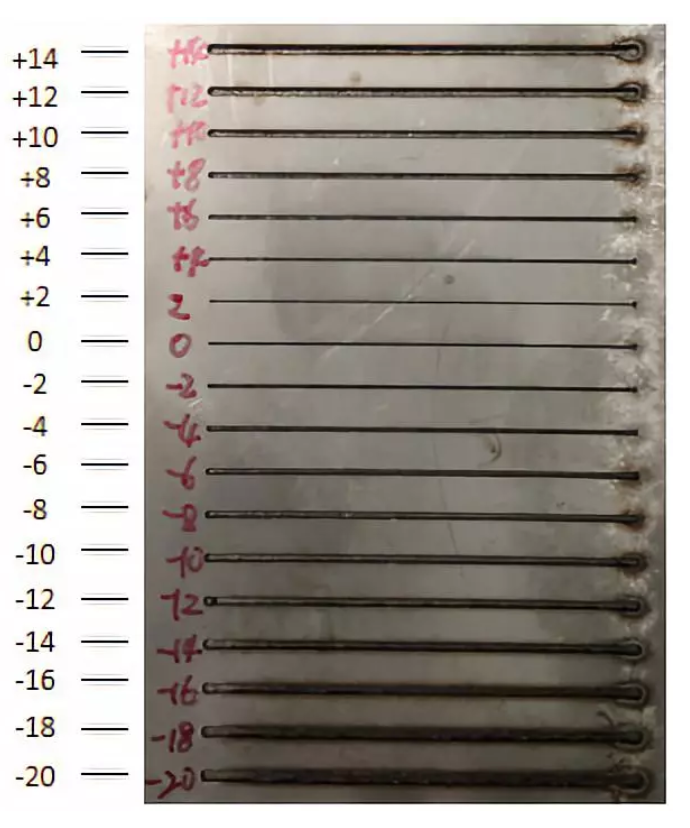
kerf & joint clearance
Cutting kerf is the amount of material that is removed by the cutting process. This information is crucial when designing joints since the design used must account for the cutting kerf to be able to fit properly. the kerf test generator
The test performed is the comb test/kerf test. The material used has a thickness of [thickness]. The slot that worked best with the chosen speed and power settings had a thickness of [thickness] in the design.
[2] - [1.6] = [0.4]
Kerf = [0.4] / 2 = [0.2]
Sources
The information referenced in this page was found in the following sources:
Source 1
Source 2
Source 3
Source 4
Press Fit
The purpose of doing Press Fit testing is to find the right settings where to components will fit together with enough friction to hold well.
If the fit is too tight, then depending on the material, the parts might not connect or break. If the fit is too loose, then the parts won’t connect together.
To start with our Press Fit testing, we need to first measure our material thickness with a caliper.

Next, we can use this tool to enter the thickness of the material, the step increments, and the number of steps.
Kerf Check Tool

The result is what we call a “Comb”

We can cut two of these combs to test the Press Fit.

In our example, the first two increments were too tight, however the third and fourth were better, and the ideal setting would be something in between. We can further test by narrowing down the range of measurements and the steps in between, to get that perfect fit.

