To practice 3D Scanning, I downloaded a powerful application on my iphone called Qlone.
Here is a short tutorial showing how to use the application.
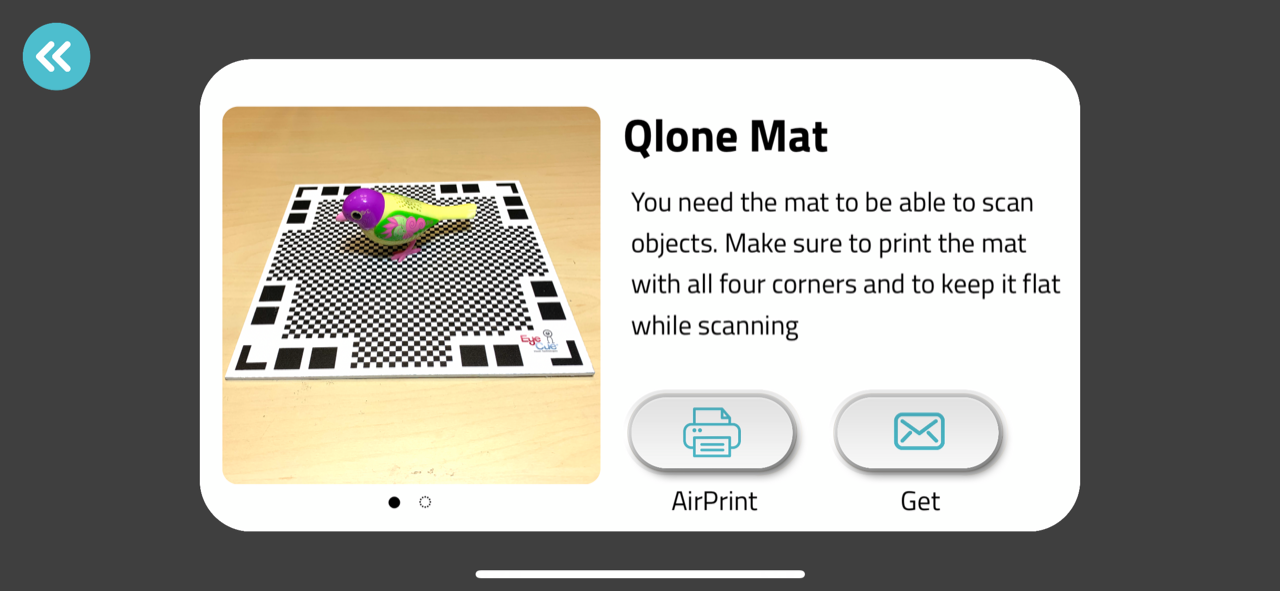
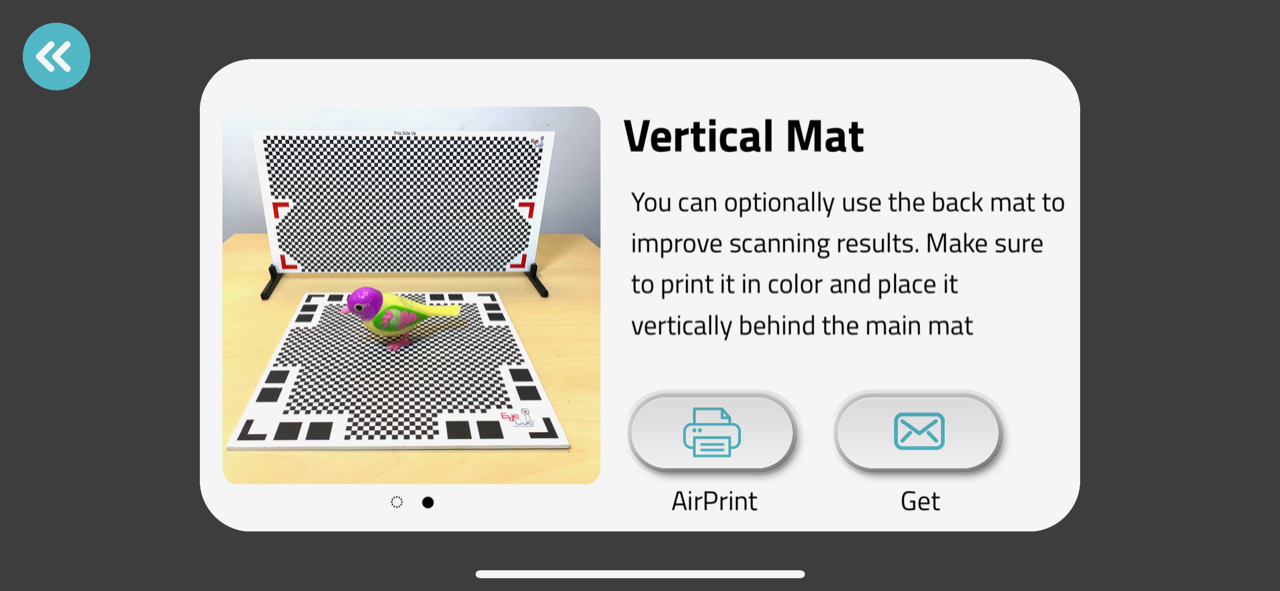
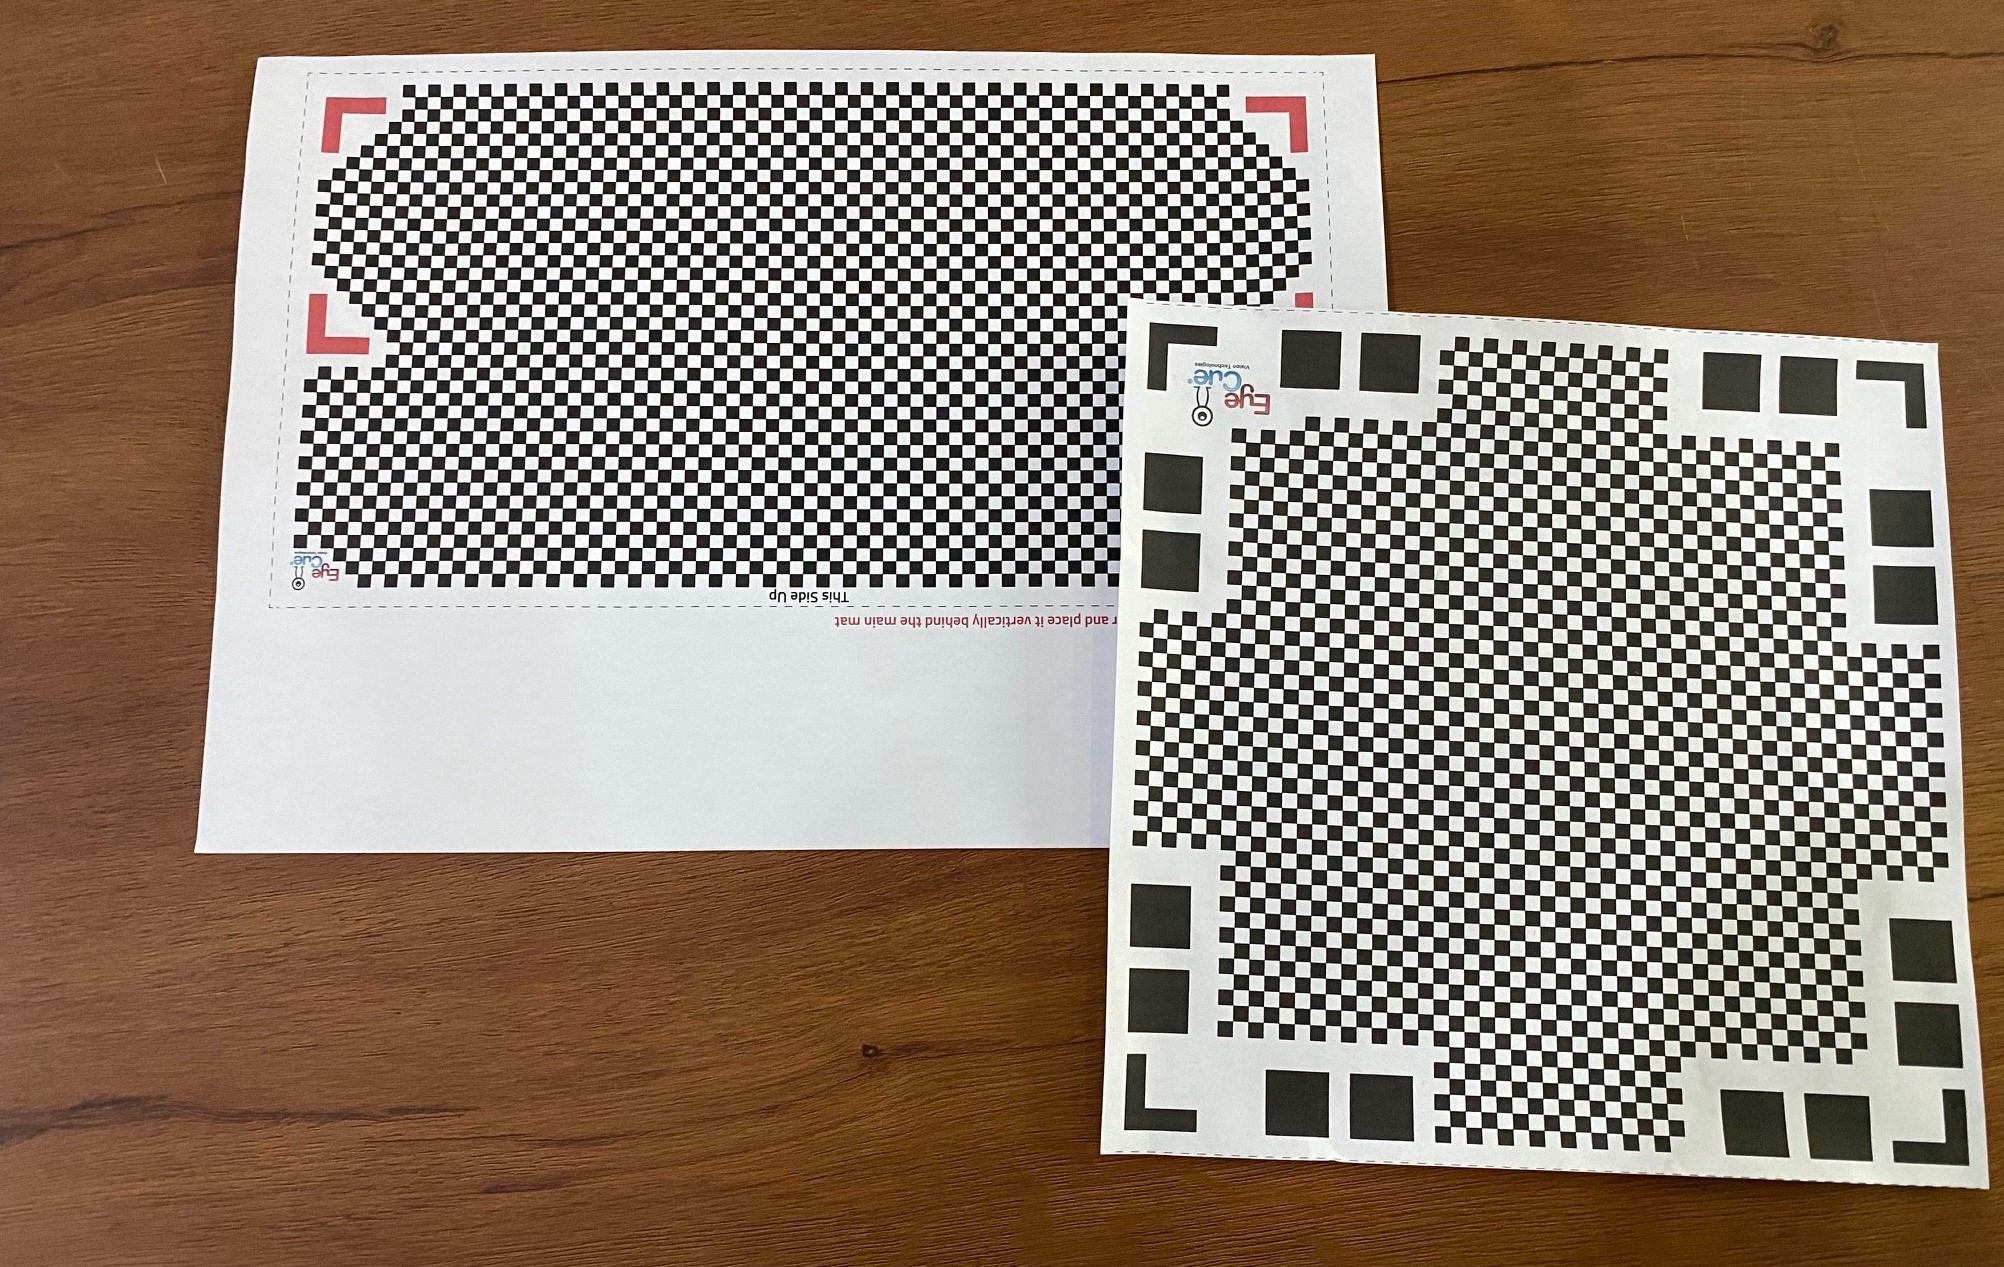
To use this application you must have the sacanning mat, it can be downloaded directly from the application, open menu > get mat. Where you can download two mats, which are:.
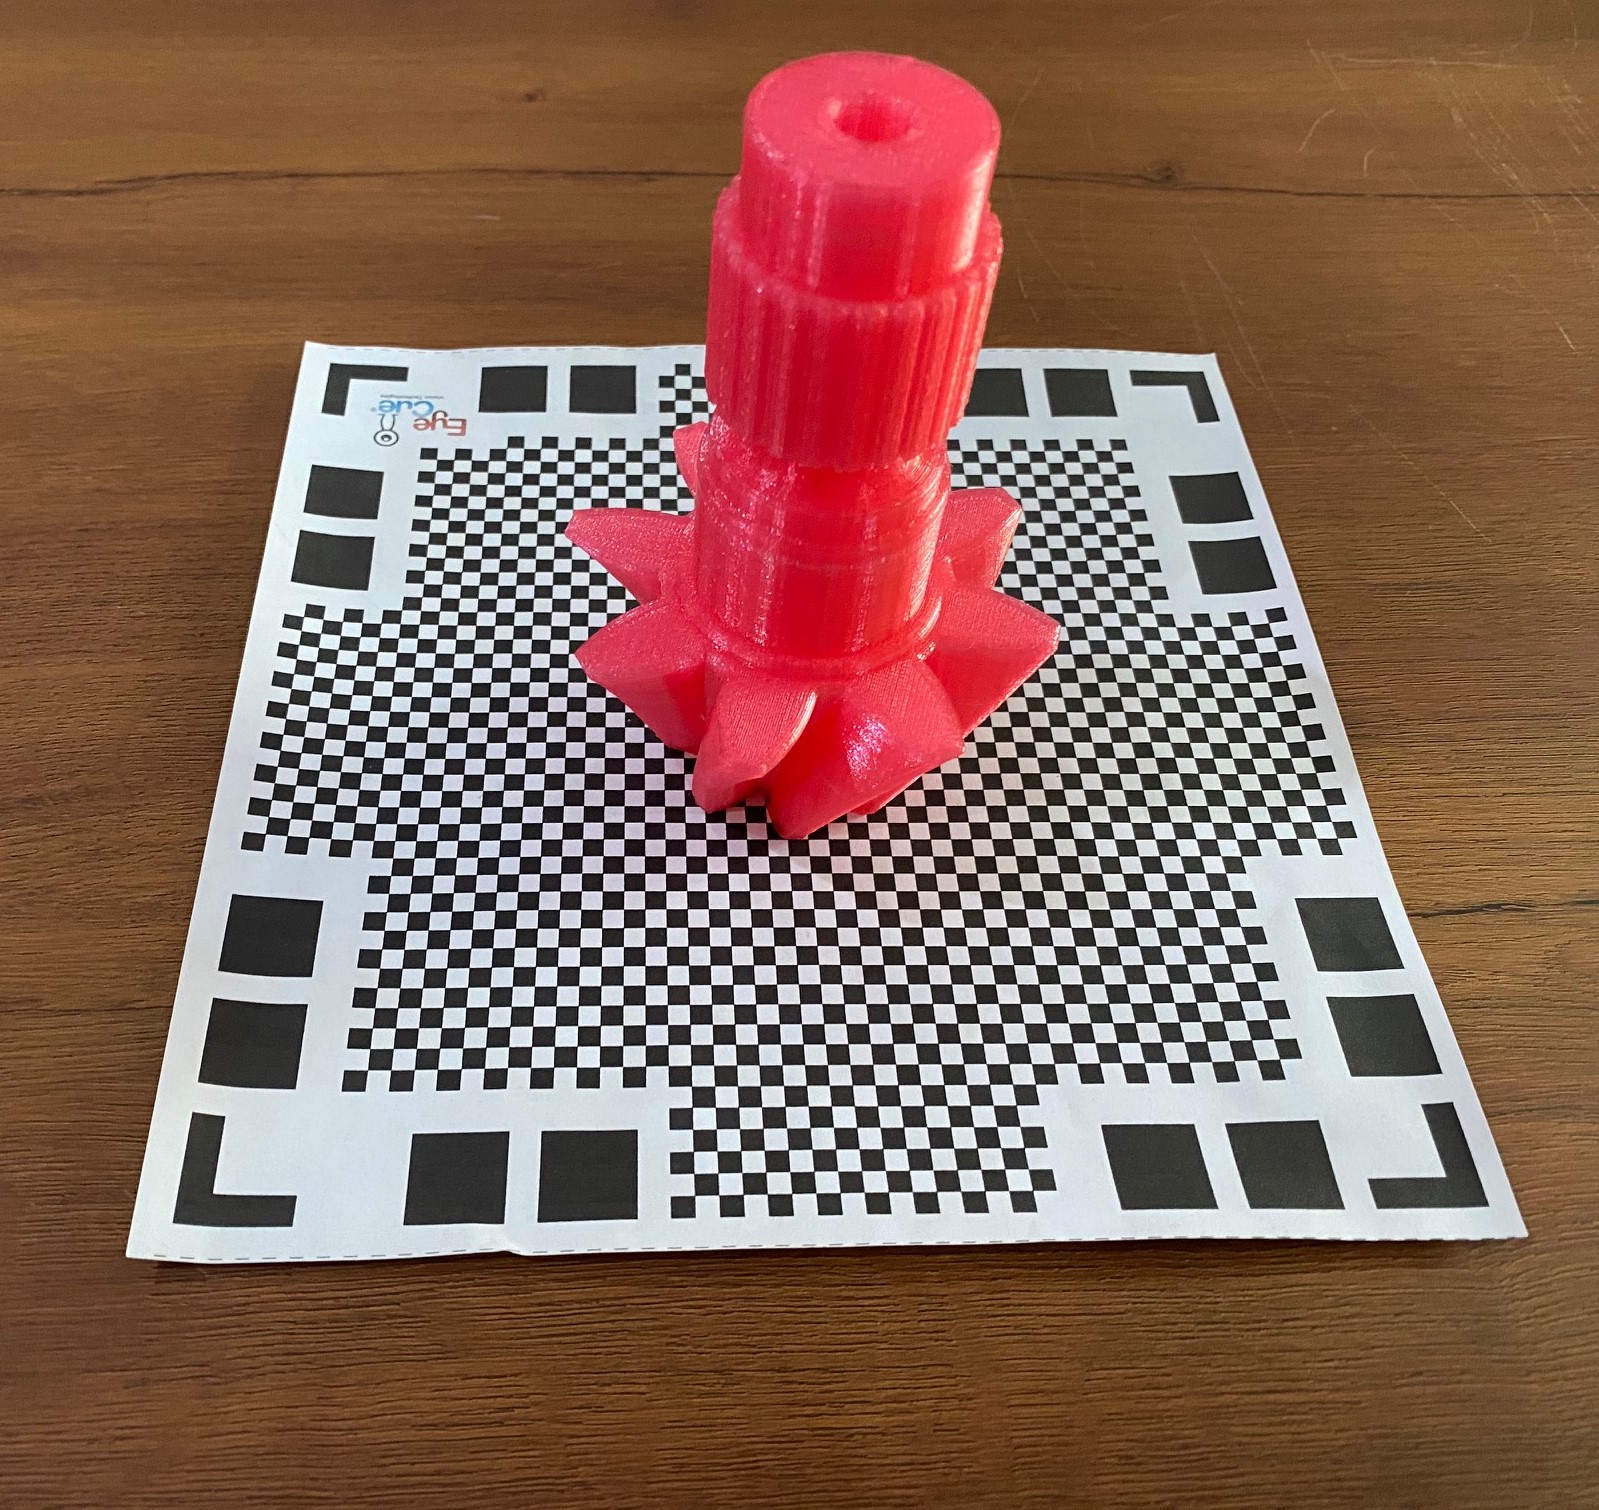
I prepared the object to be scanned an place it on the scanning mat.
To experiment the affect of the vertical mat on the scanning effeciency, I did two scanning tests. One with using the scanning mat only, and I had the result as the following:
As you can see the result is poor, so I placed the vertical mat and got a better result.
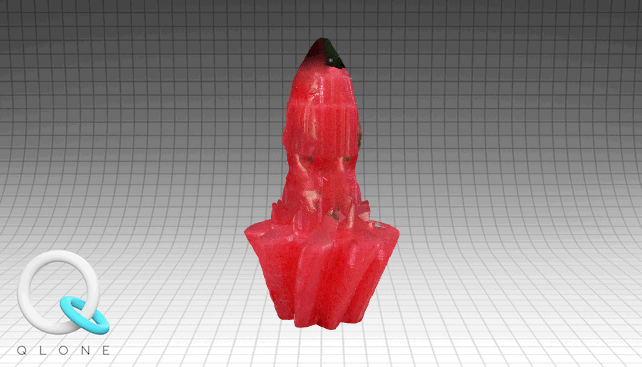
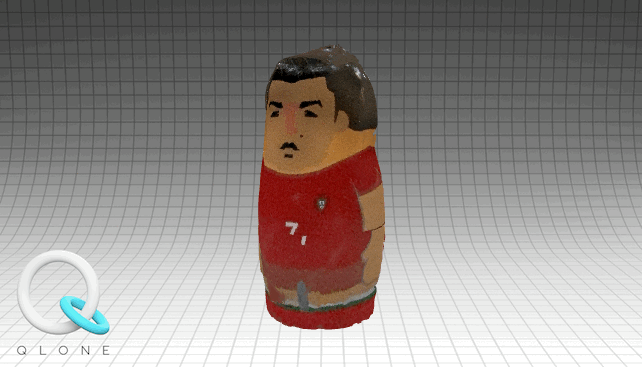
I also tried to scan this object.
And this was the result after scanning.
Introduction to 3D Printing
For this topic, I should go through two steps which are:
Create and design a model.
Use the 3D Printing machine to print the model.
Before using the machine there are some parameters that we should know to ensure having a perfect output, which are:
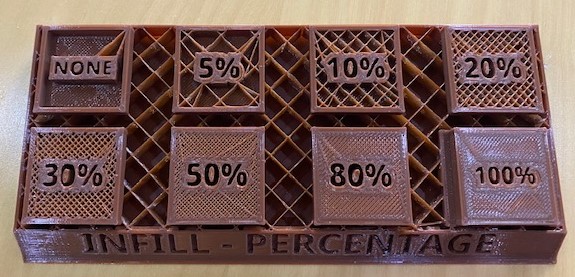
1. Infill
This test is done in the lab to show how the infill percentage will affect the output.
As you can see 100% will produce a really tough output, this maybe required for heavy applications.
While 5% infill will produce a weak output that is almost shallow.
For my design I used a 20% infill, becuase I don't need my prototype to be really strong as it will be used for decoration.
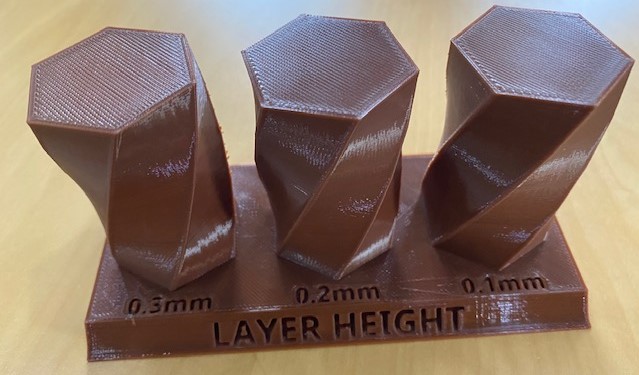
2. Layer Height
This parameter is to identify the distance between the layers, where it is set to 0.2 mm in my design.
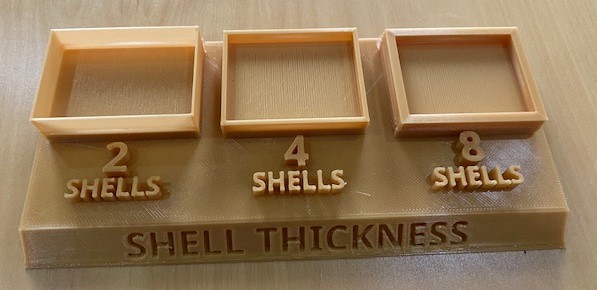
3. Shell Thickness
This test is showing how changing the thickness of the shell will affect the output.
4. Support
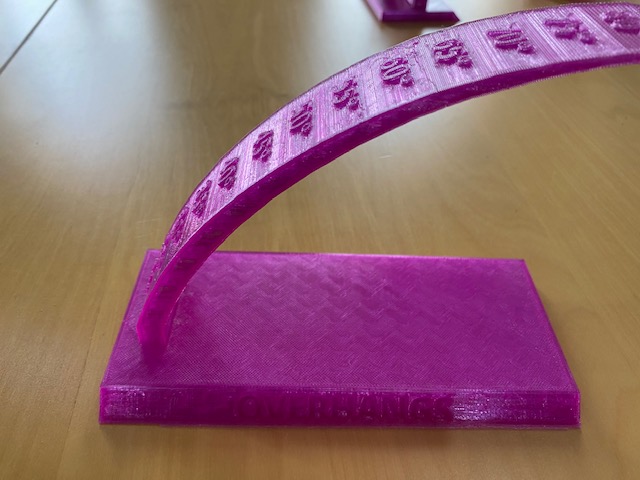
This test shows how the supportive material is added to support the design, and avoid the material from falling due to gravity.
This test is showing why the support is important in case of haveing curves, as you can see the material is strong until angle 50, but
then the design is getting weak and easy to break.
I used these test to refer to during setting my design parameters to have a good result.
Create and Design a Model
Using Fusion360 Software
I wanted to do a helical gear to be printed, so I searched for tutorials that explains how to do helical gear using
Fusion360.
I followed this tutorial step by step to have the same result, but in I made my model parametric to have more flexible design.
This is the Fusion360 editable file to see the 3D model.
The stl file for this model can be downloaded here.
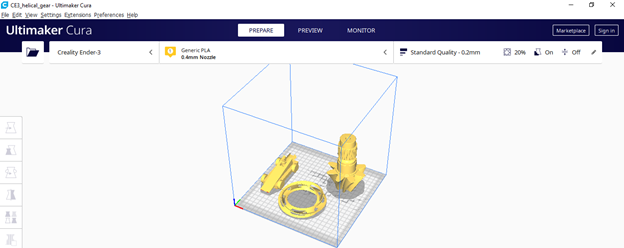
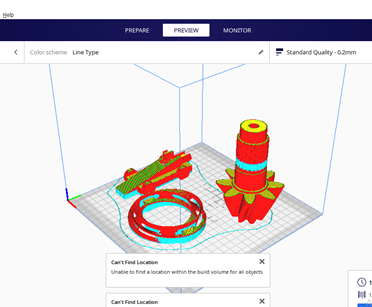
To Print my desing, I first import it to a software called Ultimaker Cura.
The square here shows the limitation of the machine, you can see the helical gear it fitted with two other designs for my colleagues.
At the right hand side od the screen, there are some options that you can change depend on your design application.
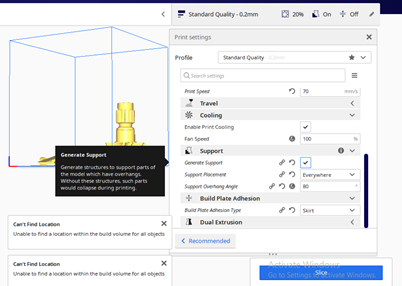
The infill density here is set to be 20% with a zigzag pattern.
The support option is important to avoid the material from falling due to gravity. Having a support will make the design stronger, and added supportive
material can be removed easily. This option will add support automatically by the software in all the spots that needs support.
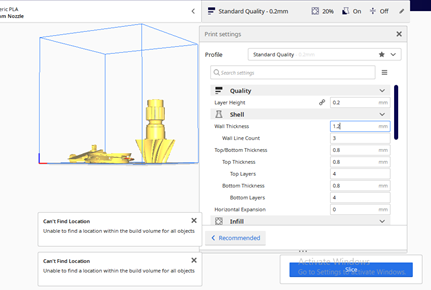
The shell thickness can also be changed depending on the design application. It is set here to be 1.2 mm in thickness.
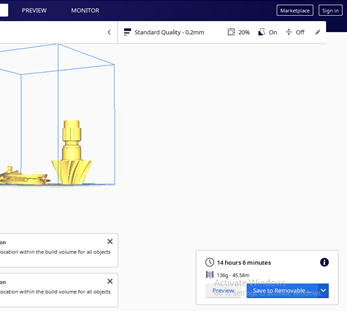
After setting all of the parameters, press on slice to continue.
It is showing that the whole printing process will take 14 hrs and 6 mins. The material needed to print these 3 objects is 136 grams.
Press on preview to see how your design will look, the blue spots here are where the support will be added.
Afterthat press on Save to Removables to save this design to the memory and transfer it to the machine.
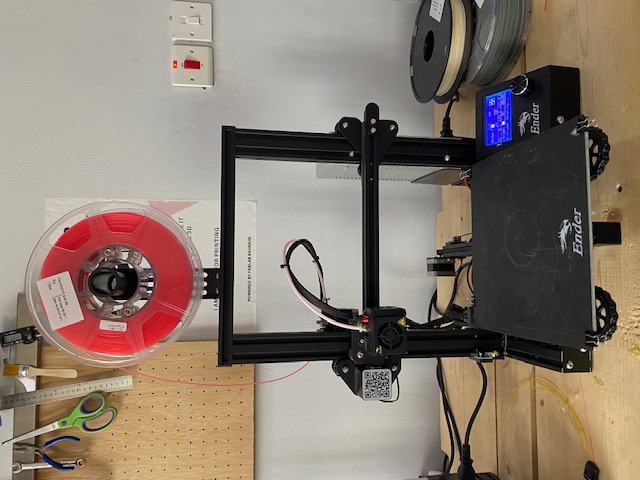
This is the 3D printing machine that will be used to print my design, the pully contains the material that will be heated and added layer by layer
to create the full object.
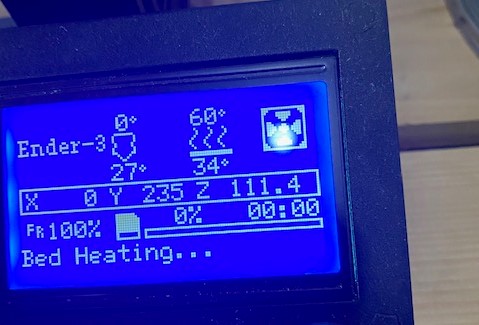
When we start operating the machine, the small screen was displaying this.
The bed is heating up, so that the material added will melt and stick on the bed.
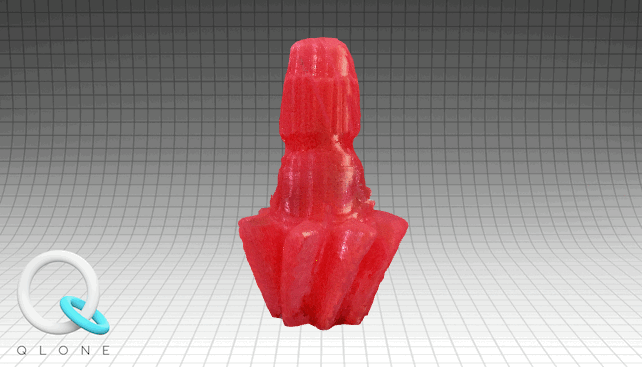
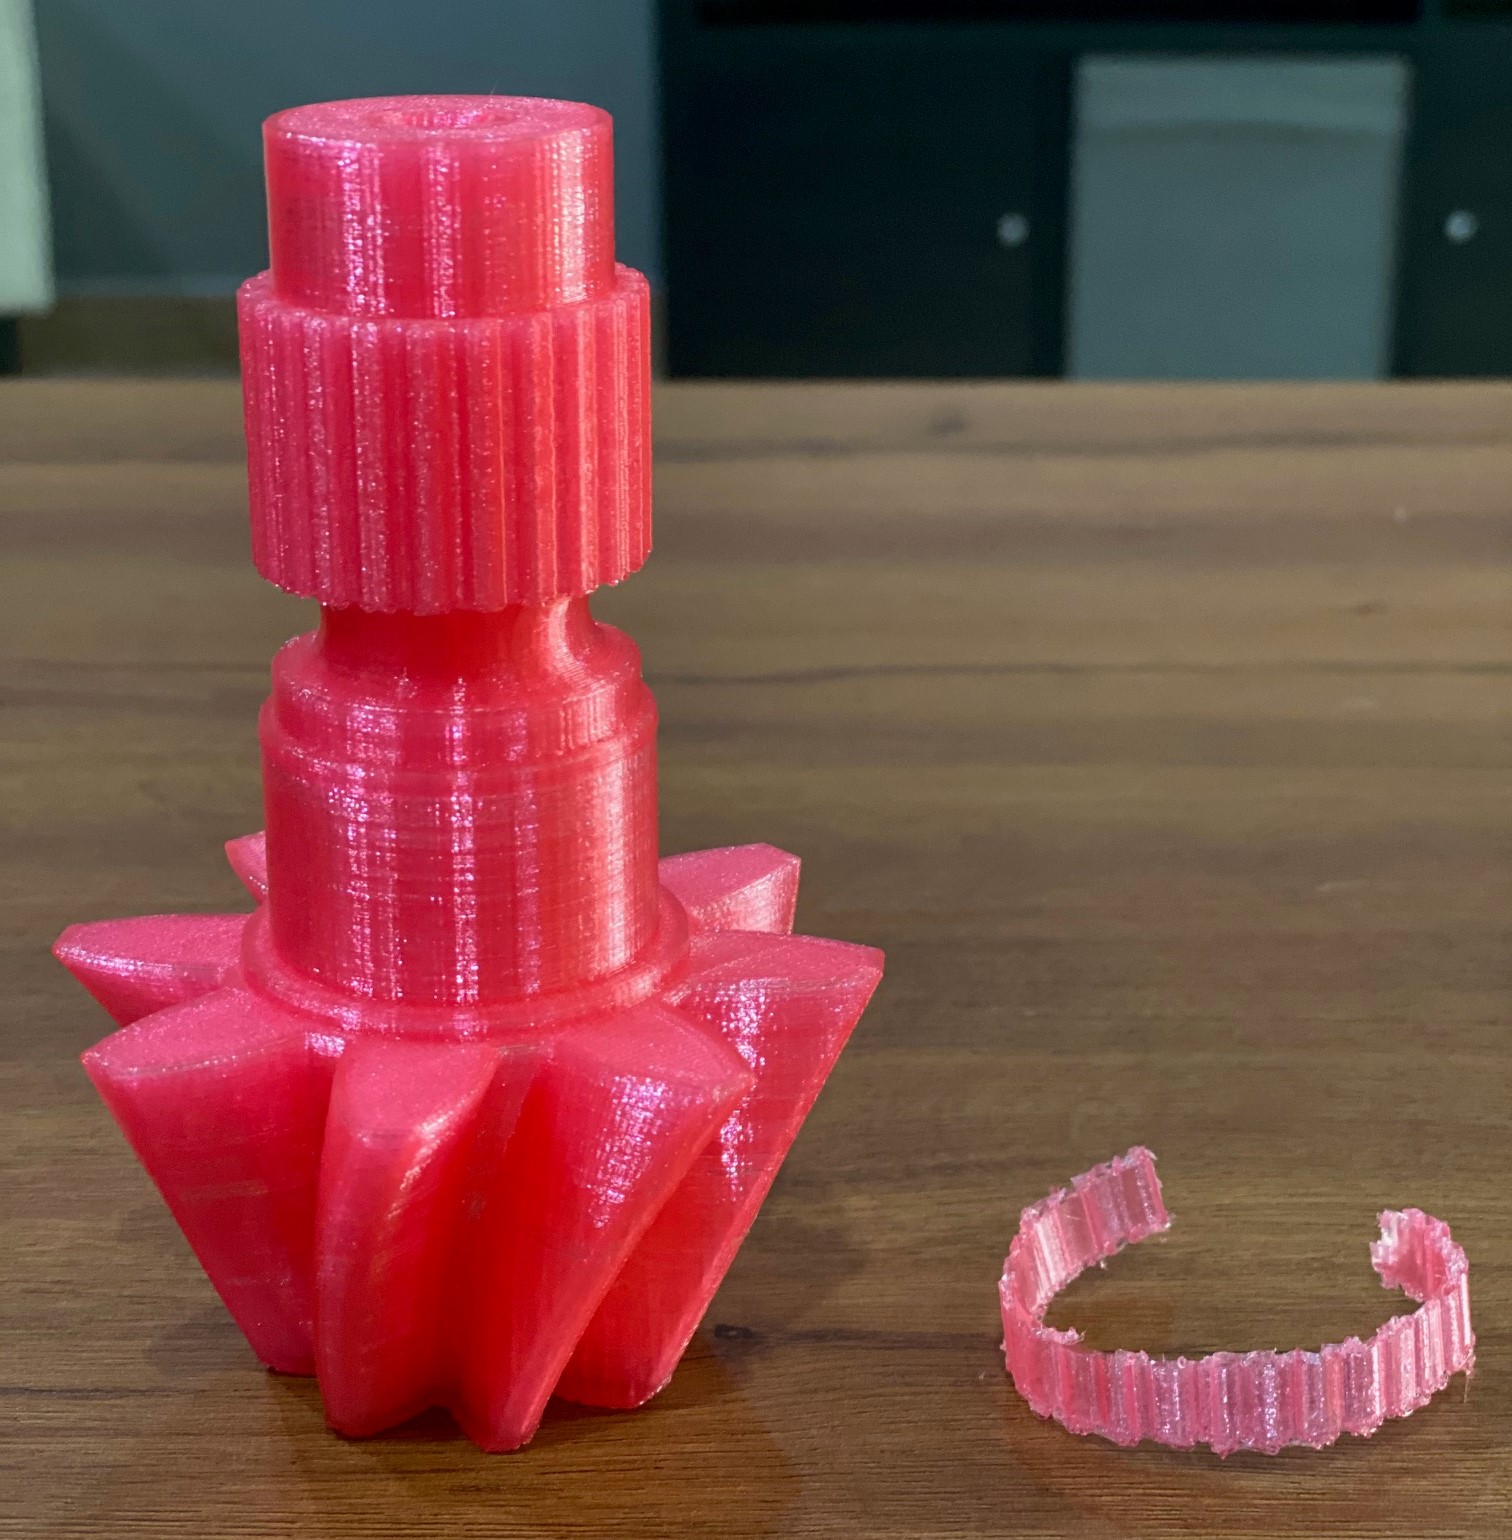
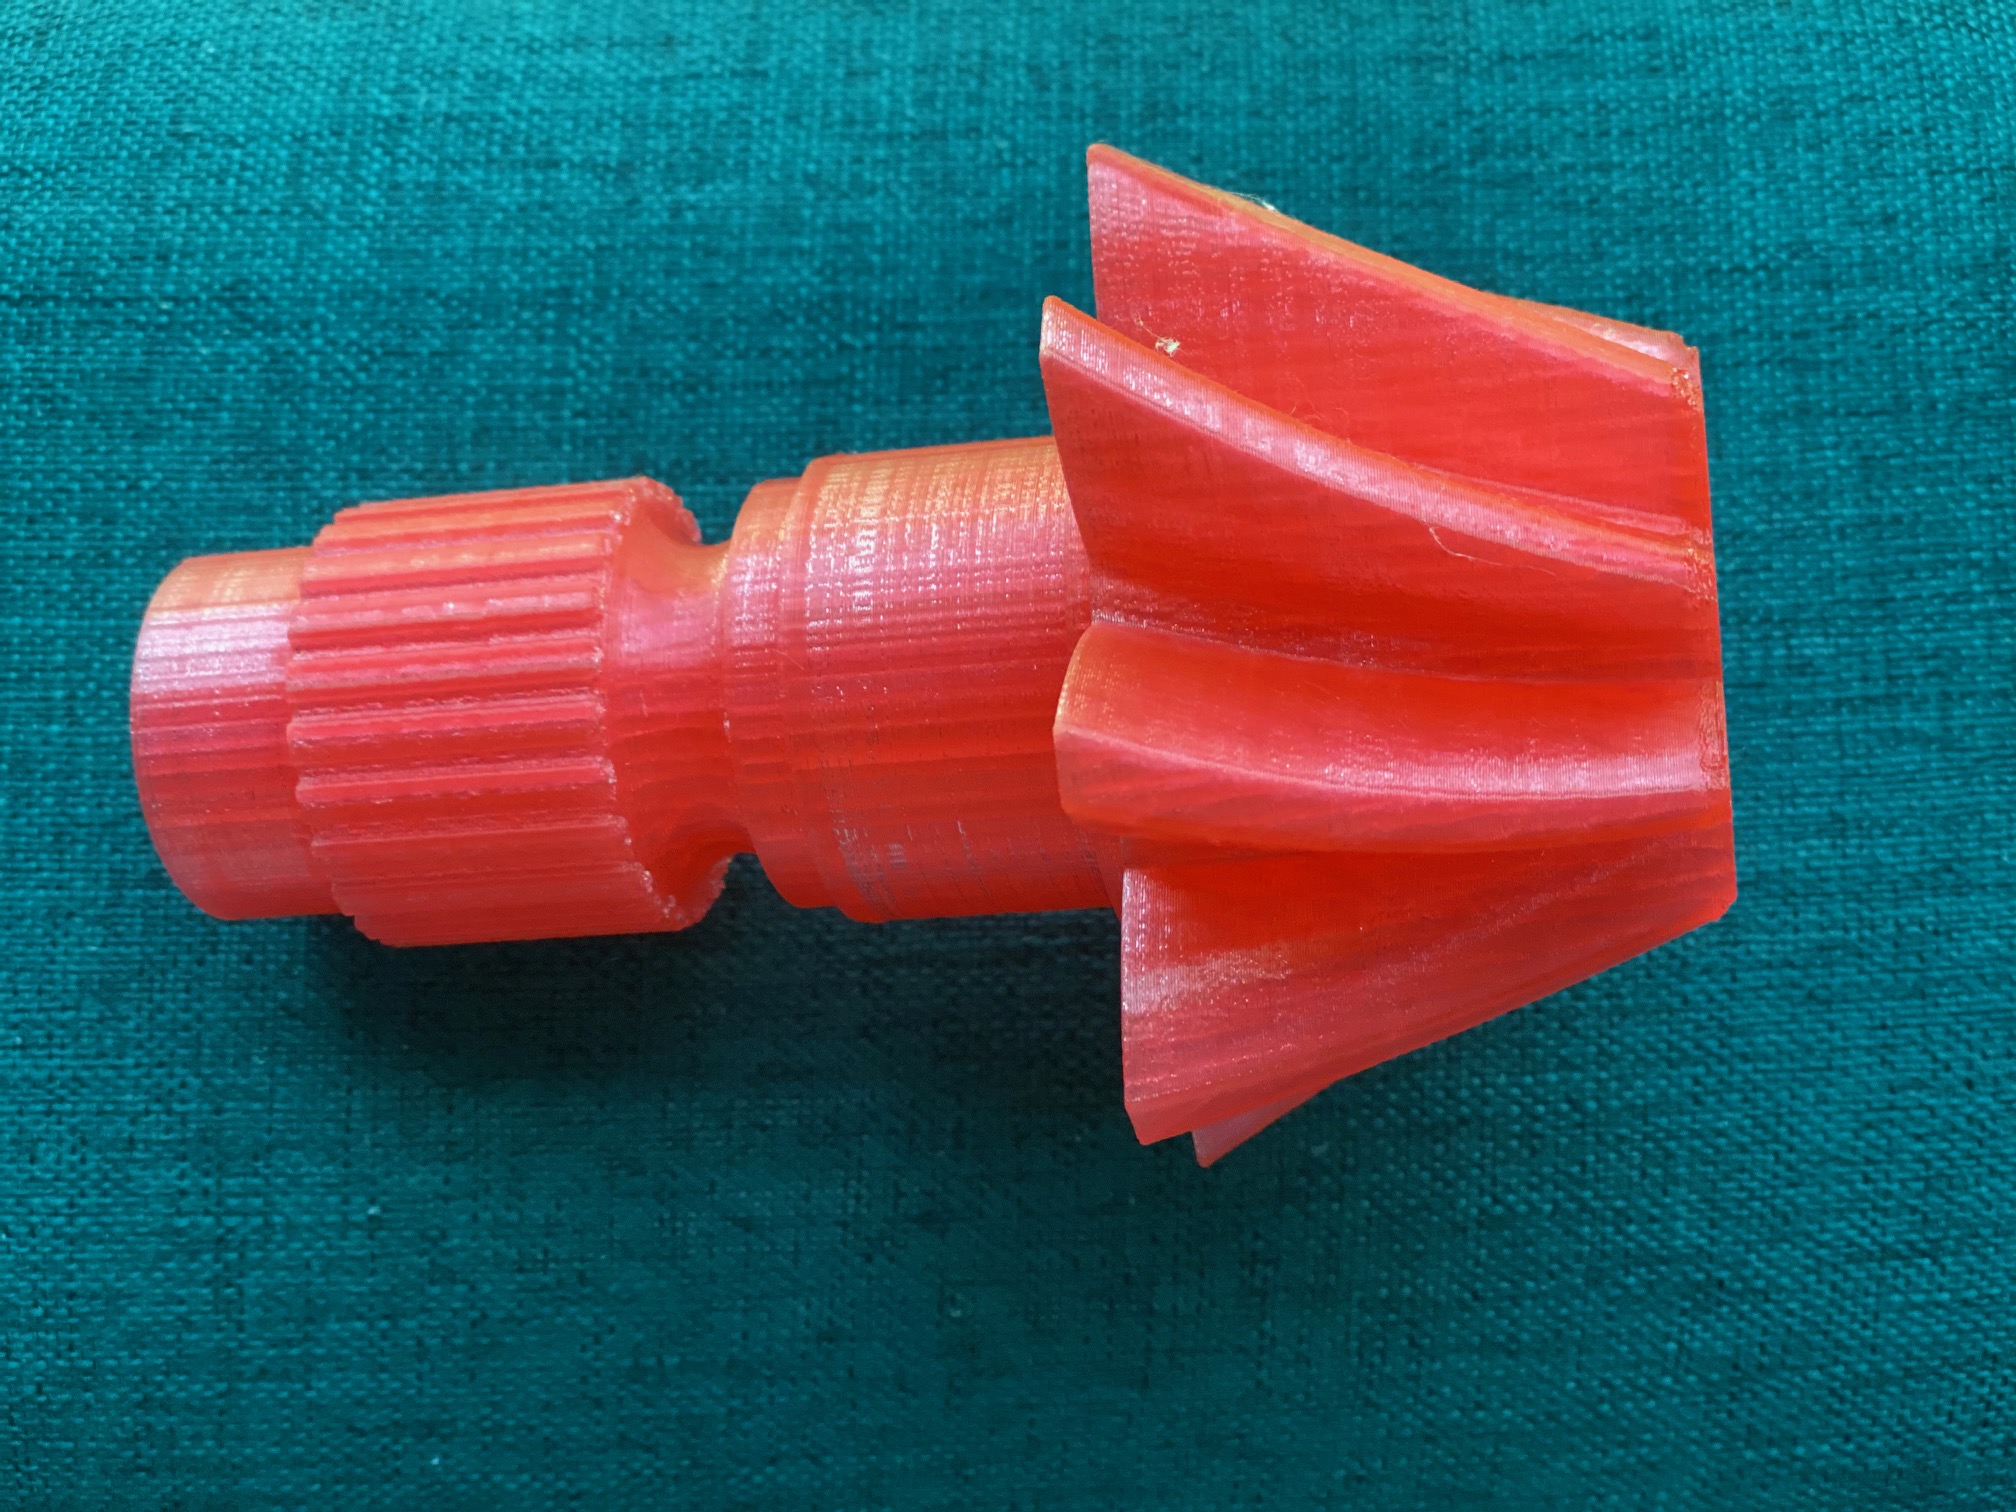
The 3D Printed Helical Gear
This is the resulted 3D printed helical gear.
As you can see here, the supportive material is not removed. I used a sharp tool to remove all of the support material as the following.
This is how the Helical Gear looked after removing that extra material.