Embedded Programming
Embedded programming is the programming of a microprocessor or microcontroller
to perform a dedicated function.

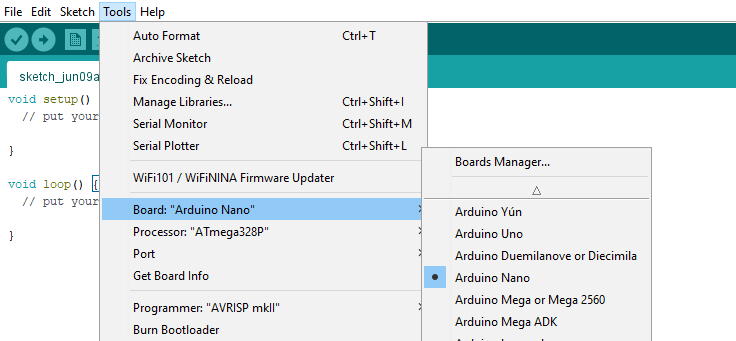
For this topic we are using Arduino Nano. A small and Compelete board
based on ATmega328. It has the same functionality of Arduino UNO but with
a smaller size.
So, in this week the important things to learn are:
- Introduction to Arduino Nano and its components.
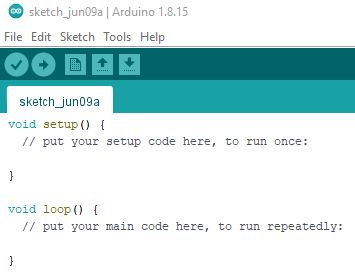
- Download Arduino IDE to start programming.
Introduction to Arduino Nano
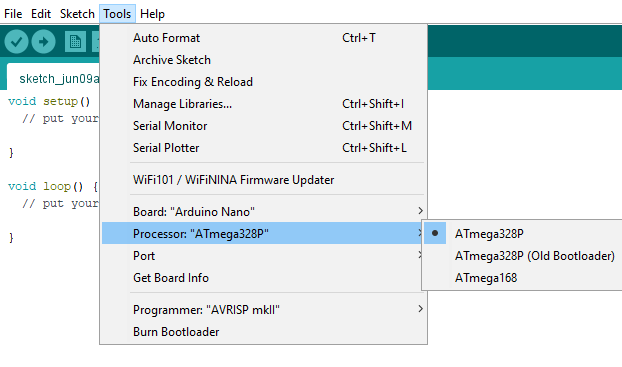
As I mentioned before, Arduino Nano is based on
ATmega328P Microcontroller.
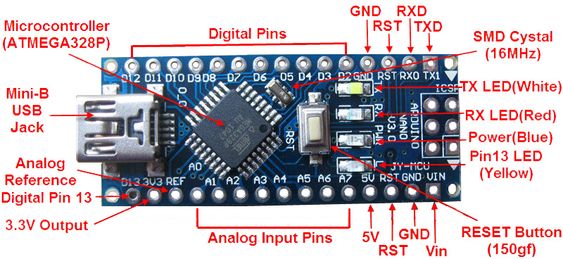
The figure illustrated below explains the important components of the Arduino Nano Board.
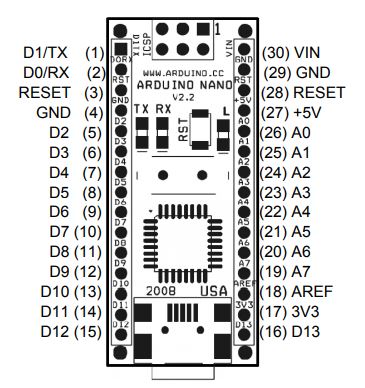
The figure and table below are explaining Arduino Nano Pinouts, name, type and description.
This YouTube video is important to understant the basics of Arduino.
The figure illustrated below explains the important components of the Arduino Nano Board.
The figure and table below are explaining Arduino Nano Pinouts, name, type and description.
| Pin No. | Name | Type | Description |
|---|---|---|---|
| 1-2, 5-16 | D0-D13 | Input/Output | Digital Input/Output Pins |
| 3, 28 | RESET | Input | Reset (Active low) |
| 4, 29 | GND | PWR | Supply Ground |
| 17 | 3V3 | Output | +3.3V Output |
| 18 | AREF | Input | ADC Reference |
| 19-26 | A7-A0 | Input | Analop Input Pins |
| 27 | +5V | Output or Input | +5V Output (from on-board regulator) +5V Input (from external power supply) |
| 30 | VIN | PWR | Supply Voltage |
This YouTube video is important to understant the basics of Arduino.
Connecting Aruino Nano
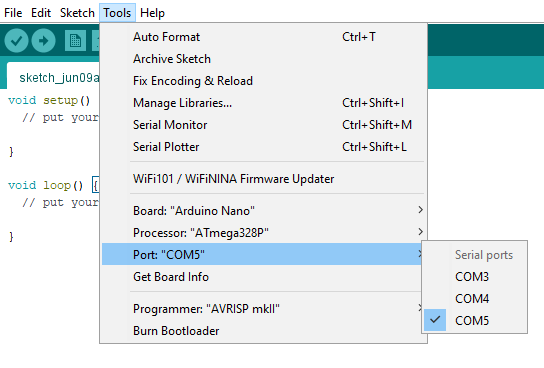
*An easy solution to this, open Device Manager on your device, expand Ports(COM & LPT) to figure out which one is Arduino Nano.
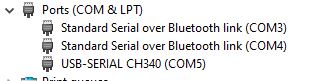
*As shown in this figure CH340 which is COM5 is Arduino Nano.
Getting Started
Blink LED Light
This is the Default code to do a simple Blink. *I did some changes in the code to make it blink faster, this is done easly by changing the delay time to 100 milli-seconds. I also changed LED_BIULTIN to 13, and this is because the Built in Led on the board is connected to D13.
* After uploading the code to my Arduino Board the LED Light was blinking faster.
Morse Code Challenge
Our instructor shared a challenge to practice programming the Arduino Nano using the Built-In LED light:
Challenge: Pre code your microcontroller to send a Morse code 1 word message and challenge a friend, family member, your colleagues or your instructor to figure it out.Where:
This figure is showing English letters presented by Morse Code, where I will be presenting them by blinking LED light according to the table above.

To do this I used TinkerCad, a programming language that uses blocks, where I found it easier to use it for Morse Code.
*Press on Start simulation to see how the code works.
*Press on Code to see the blocks used, note that these blocks can be downloaded and automatically written as Arduino IDE Code.
*Download Code/Open in Arduino IDE/Connect Arduino Board/Upload the code to the Arduino
Challenge: Pre code your microcontroller to send a Morse code 1 word message and challenge a friend, family member, your colleagues or your instructor to figure it out.Where:
| time (sec) | LED Mode | |
|---|---|---|
| dot | 0.5 s | LED ON |
| dash | 1 s | LED ON |
| gap between dots and dashes | 0.5 s | LED OFF |
| gap between letters | 2 s | LED OFF |
This figure is showing English letters presented by Morse Code, where I will be presenting them by blinking LED light according to the table above.
To do this I used TinkerCad, a programming language that uses blocks, where I found it easier to use it for Morse Code.
*Press on Start simulation to see how the code works.
*Press on Code to see the blocks used, note that these blocks can be downloaded and automatically written as Arduino IDE Code.
*Download Code/Open in Arduino IDE/Connect Arduino Board/Upload the code to the Arduino
How I Used TinkerCad
- After creating an account, select the Circuits option from the menu on the left, and then start building your circuit.
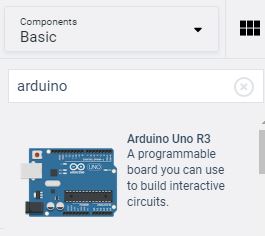
- First search for the components you want, for example Arduino, Piezo Buzzer, Motor, etc. *you are also able to see the discription of each component as the following.
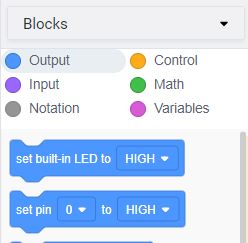
- Now, open the Code window and choose either blocks or text. Different operations can be done using TinkerCad, Output, Loop, statements, etc.
*For example, the block appearing in the figure, set pin 0 to HIGH, can be used to blink the Built-In LED. But firt the code should be changed to set pin 13 to High. High can also be changed to LOW to close the LED as the following.

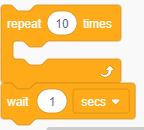
*Repeat function can be used in the Control section and it is useful to be used as a for loop.
*Change the repeat time from to 10 to any other number depending on the required output.
*Wait Function act as delay in Arduino IDE, but in TinkerCad you can set the time changing to either seconds or millisecond.
*Change the repeat time from to 10 to any other number depending on the required output.
*Wait Function act as delay in Arduino IDE, but in TinkerCad you can set the time changing to either seconds or millisecond.