COMPUTER CONTROLLED CUTTING


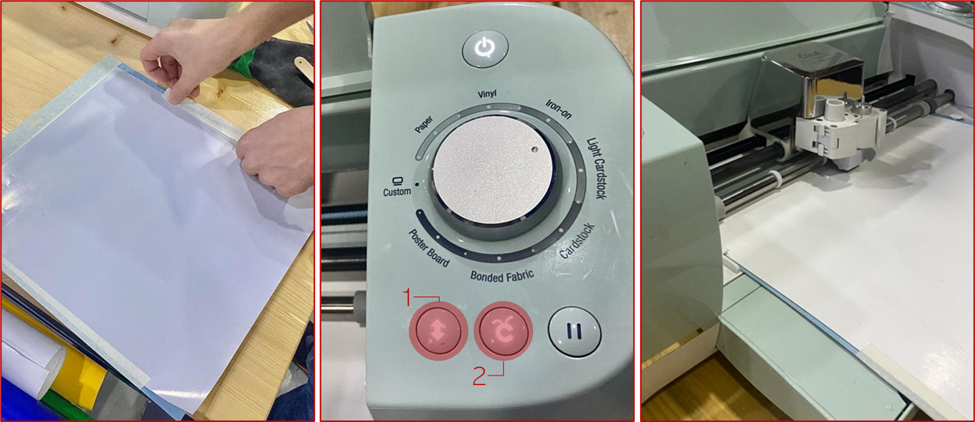
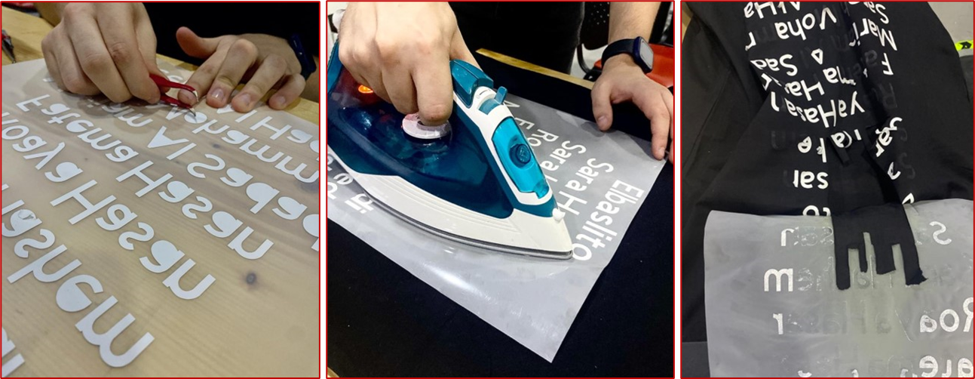
We started the practical work on the third week of the program. The team intoduced two machines to us, the first one was the lasercutting machine and the second one was the vynil machine, and we experminted with each machine, individually and in groups.


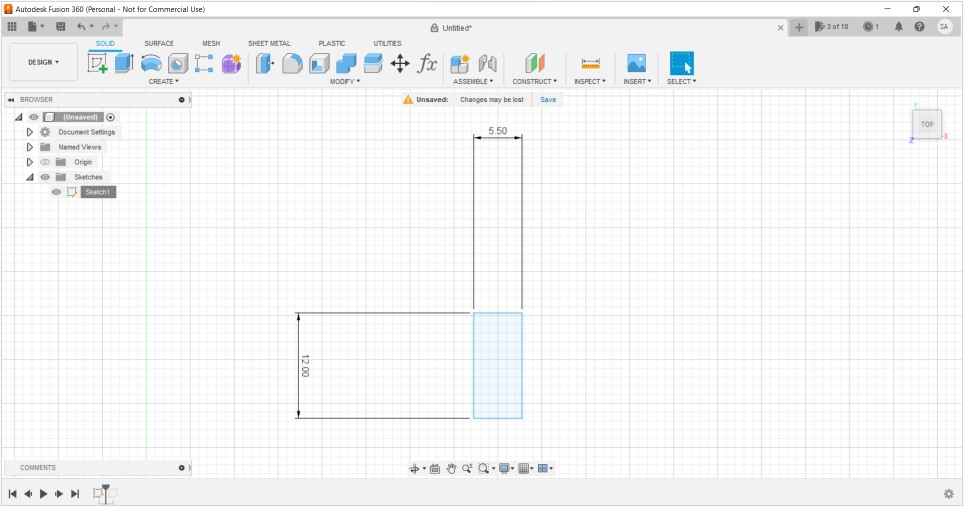
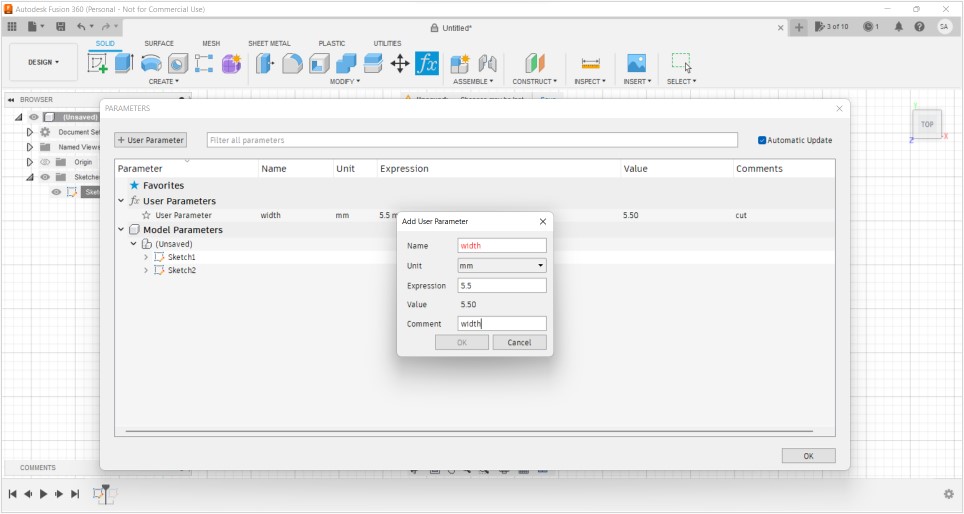
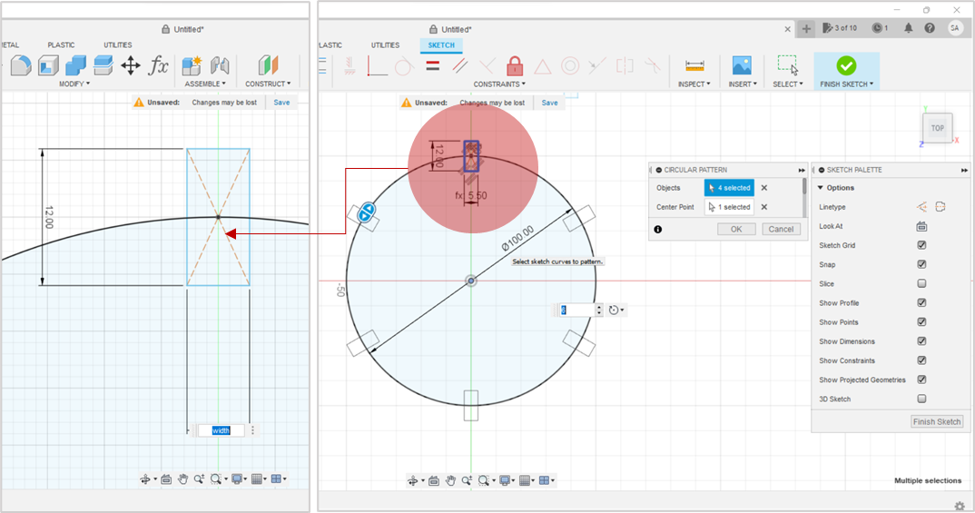
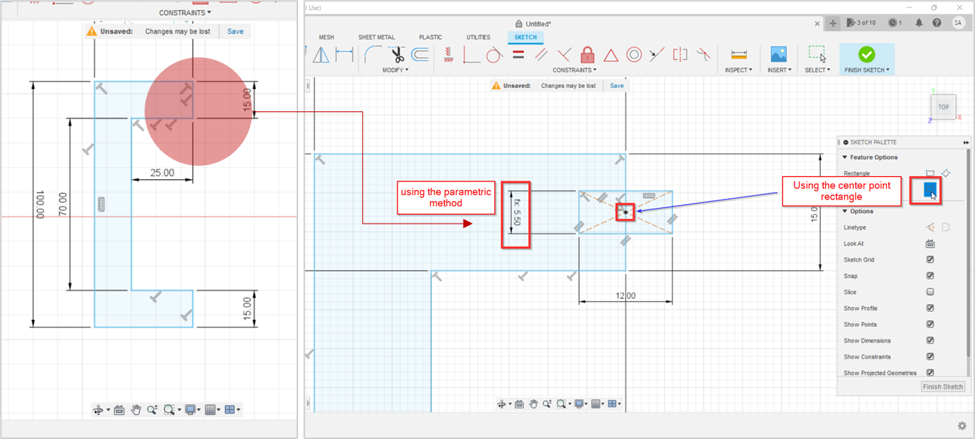
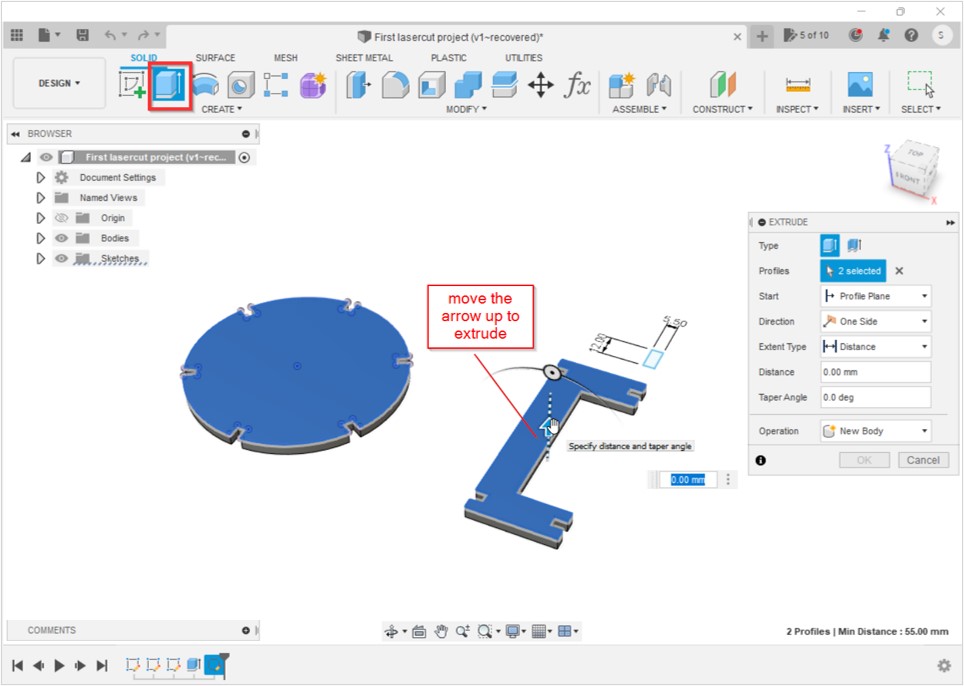
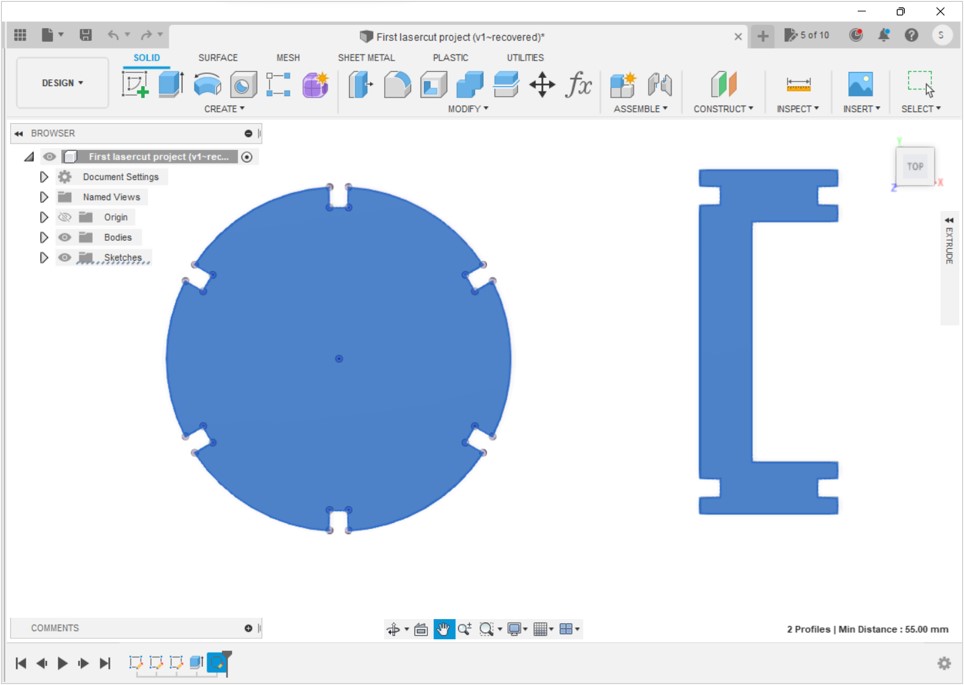
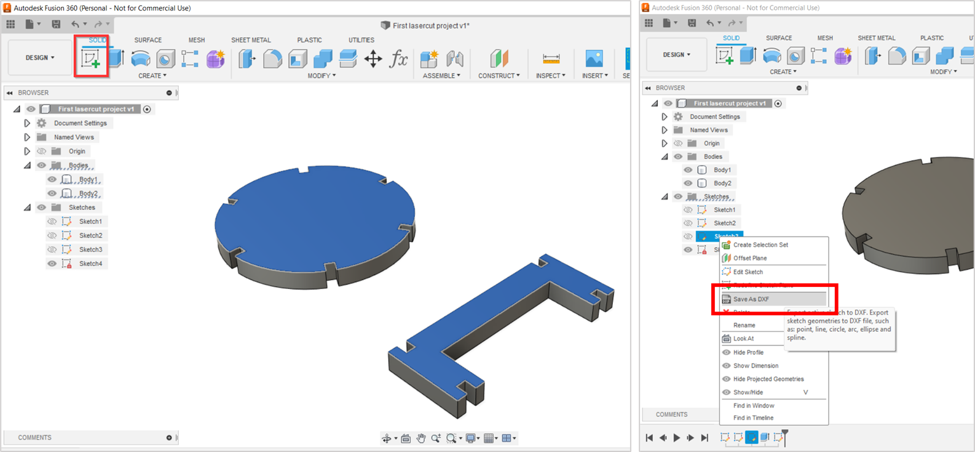
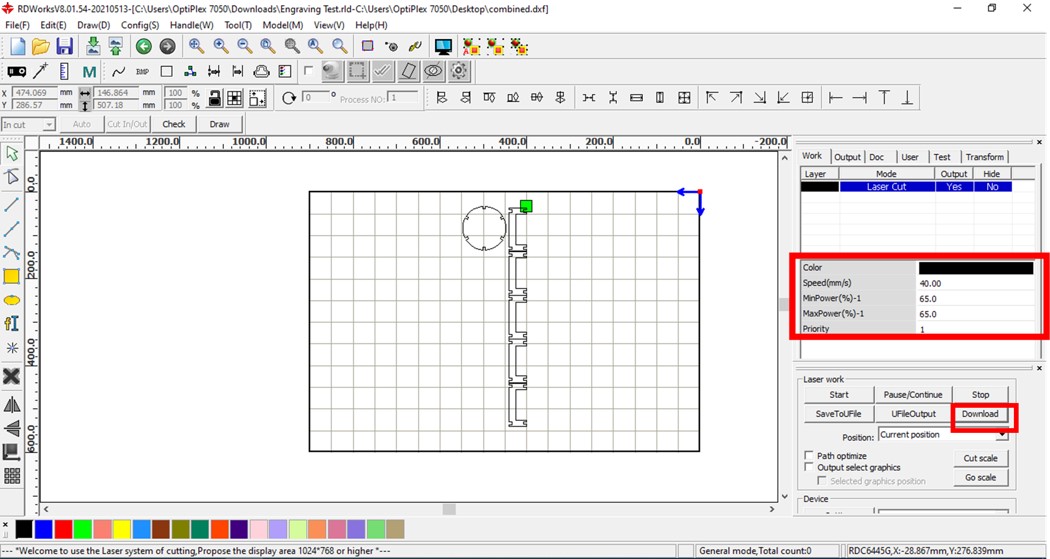
The assignments included learning how to make a parametric design in FUSION 360, which you will find the steps for it down below in the "LAZER CUTTING" section.
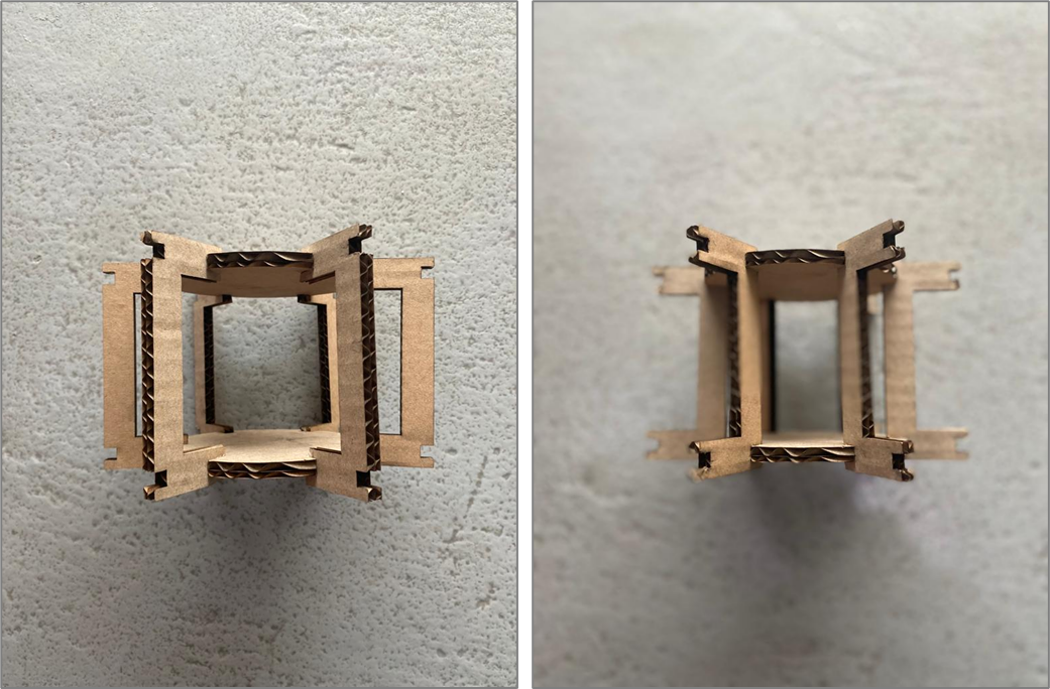


WHAT IS PRESSFIT?


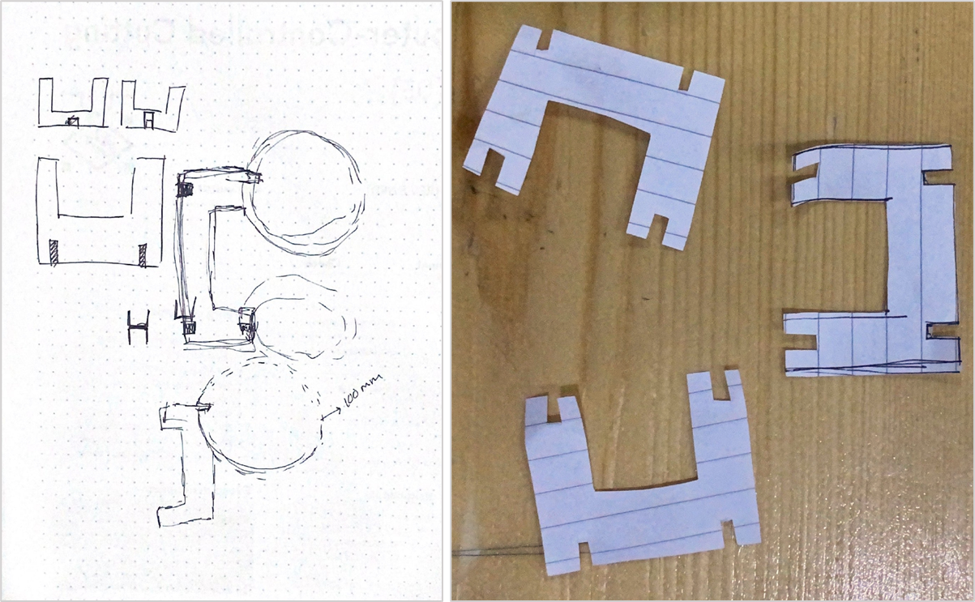
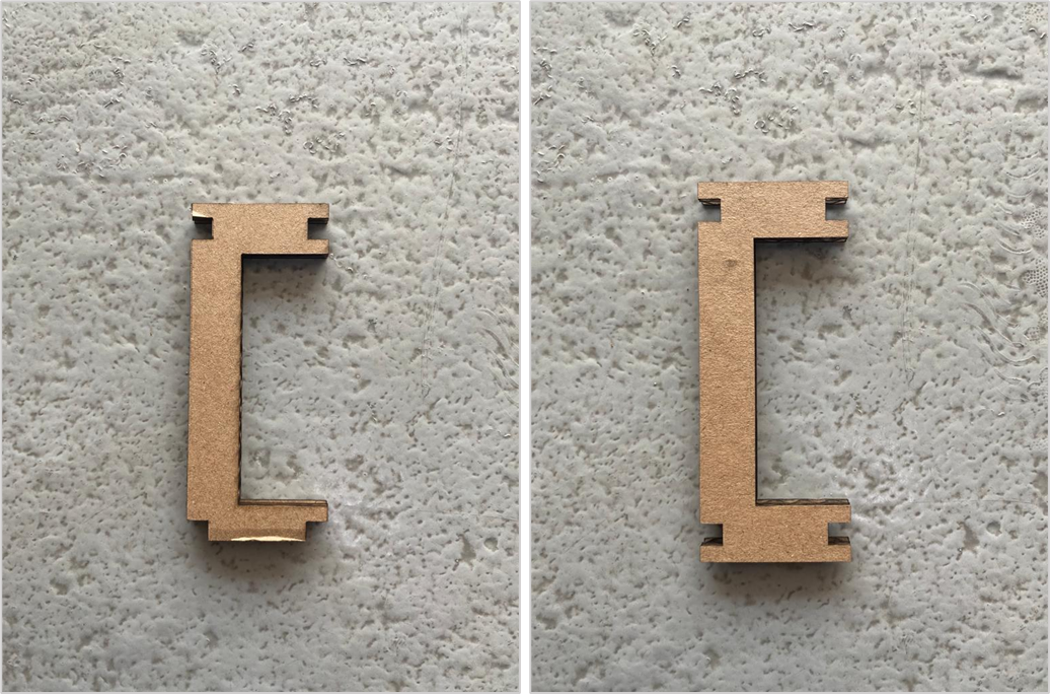
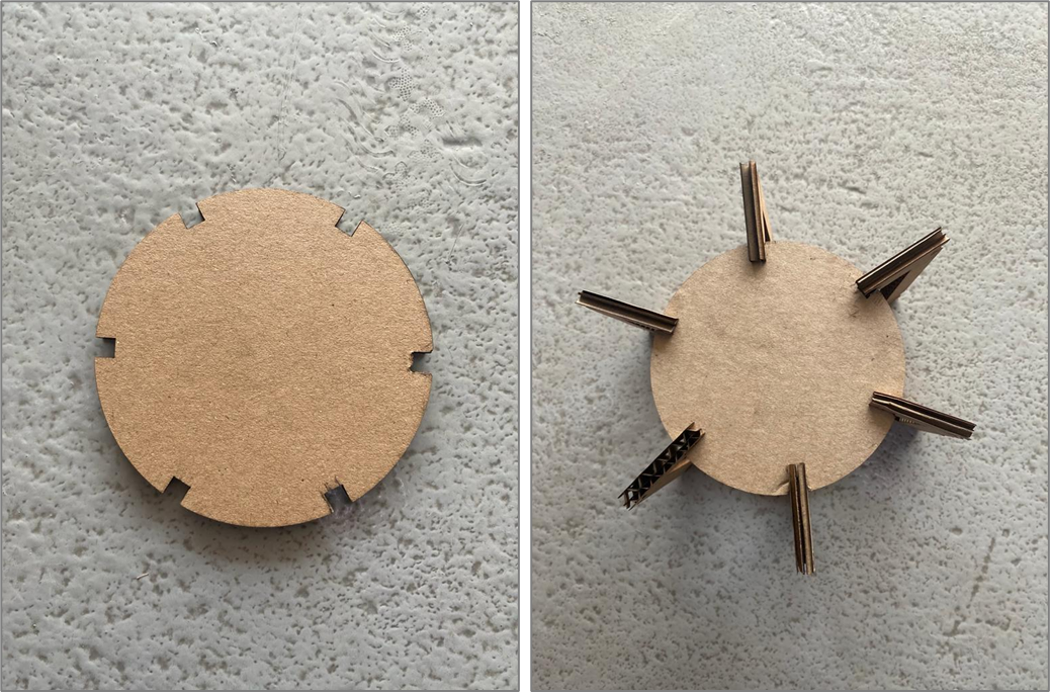
The second thing we learned is PRESSFIT design, and it is the fastening of two parts or objects together through joints, without using other materials, the two parts both have a joining element that can fit through the other object.


Scroll down to learn about the two machines.

LAZER CUTTING


Group assignment:

In the group assinment, we were assigned to figure out the width of the joints according to the material used in the PRESS-FIT project. We learned the steps on how to use the lasercutting machine. You can find the steps in Sarah Al Balooshi's page by clicking here .

Individual assignment:

We were asked to design a pressfit-kit that consists of two shapes. Press-fit construction kit consists of multiple objects, they could be the same shape or different, the important part is how these objects can produce a shape through joining them together, that is why the joints size matters. In the group asignment we discovered the best fit which determined the size of the joints for us, in our case it was 5.5 mm, we used this value in designing of our shapes .

1- Sketching the design on paper, Before getting started, I sketched my design on paper to see how the joints will connect the two shapes.

2- Sketching the design in FUSION 360, First step is to draw the joint with the value that fits (5.5).

Then set the value to be a code for example (width) using the parameter tool.

After this step you can continue sketching your design, add the joints but set the width value as (width) to link it back to the rectangle we made in the beginning. to create multilpe joints, you can use the array tool for faster results.

Repeat the process in the other shapes.

Lastly, extrude both faces and create a new sketch to create the joints.

These are the final shapes.

3- Export as DXF, Next is to export the shapes as a DXF file, so we can send it to the machine. To do that, first we need to create a sketch over the shapes and close it so they can be a 2d sketch, then right click on the the sketch itself>save as mesh>export it as DXF.

4- Download your design in the machine, send the DXF file to fablab gmail, and open it in the computer that is connected to the machine. Pick a color for your shapes and assign the power and speed to that color as shown below, I used cardboard therefore the speed is 40 and the power is 65 according to the group assignment. Click on donwload to send it to the machine.

Before you start cutting, make sure to choose the origin and to make sure of the callibration before you start, you can find the steps to that in the group assignment page linked above. First I tried cutting two pieces only to see if they would fit, and they did, so I went ahead and cut the rest.


Problems encountered:

One of the pieces was not cut fully due to it being on the very edge of the material, so try to leave space around the edges. The picture on the right shows how it was supposed to look like.

This is the final result, the joints fit perfectly!

This is how it looks like from the side, if you are wondering, it is a plant devider that can help devide the stems in a perfect round shape! you can also flip the sides to make it wider as shown in the picture below.

This concludes my first lazercutting journey!


VYNIL


What is a vynil cutter and what is it used for?

A vinyl cutter is a machine for making signs, to sum it up. Computer designed vector files with patterns and letters are directly cut on the roll of vinyl which is mounted and fed into the vinyl cutter through USB or serial cable to produce shaped stickers and window graphics.

Group assignment:

1- Download CRICUT and start your design, first we downloaded CRICUT software that connects to the machine. Then we started by writing our names in the CRICUT software as shown below.

2- Prepare for printing, we wanted the names to be printed on a t-shirt, the first step is to flip the names and choose the size of the mat we will be using.

-

3- Insert the mat, Cut the material you want and stick it on the mat and insert it in the machine. To insert the mat first press on the first button as shown below, then on the second one to start cutting.

4- Remove all the extra pieces and start ironing, After it was done cutting, it was time to remove the unwanted pieces using the tools as shown below. Then we pressed the names on the t-shirt with an iron to stick them. But Unfortunately, the material was hard to work with and the iron was too hot for the t-shirt to handle so it got burned.

We tried again with a lighter material and it worked!


Individual assignment:

1- Importing pictures, I chose two pictures from the internet that were black and white and imported them in CRICUT.


2- Choosing the mat, I chose the mat size and adjusted the picture to be in the frame.


3- The results!

My first Vynil Experiment is done!