3D PRINTING AND SCANNING


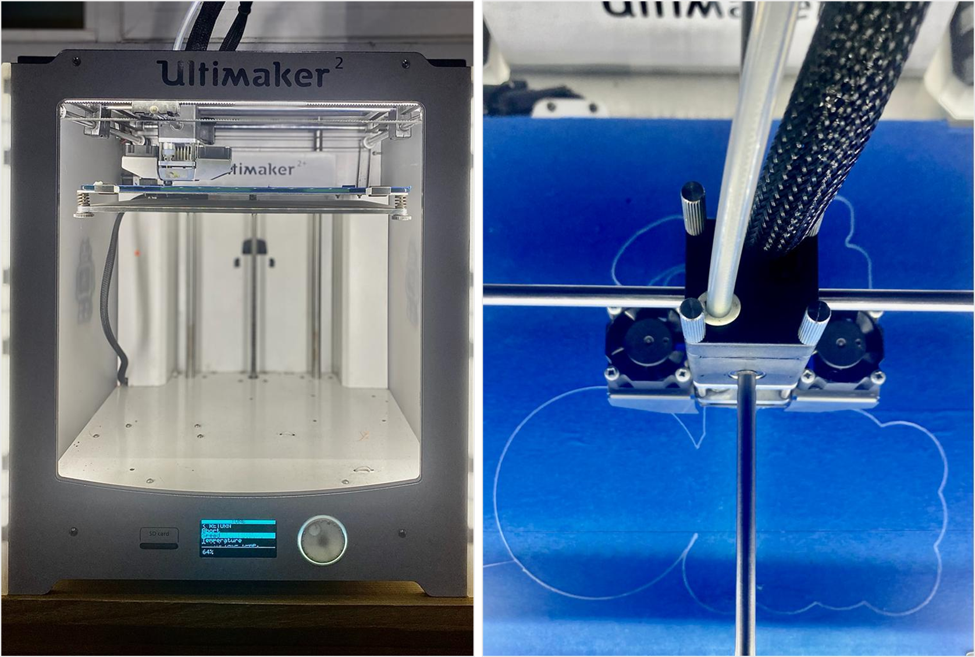
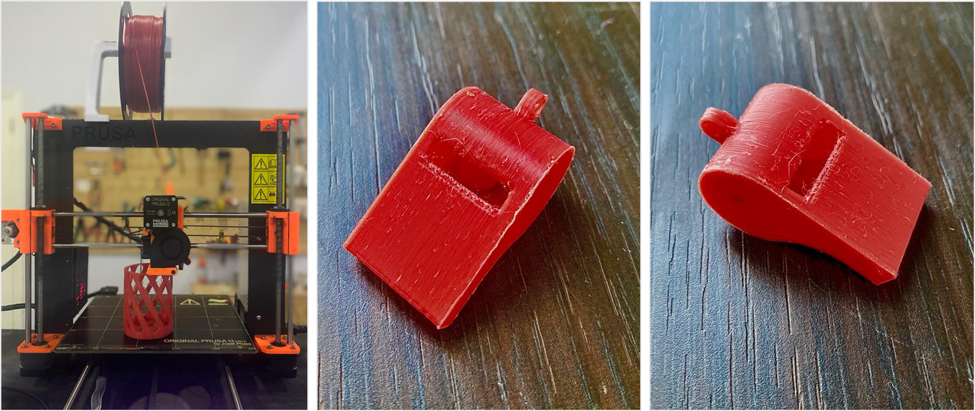
This week we were introduced to different 3D machines, where we experimented with them in groups and individually. First of all, we learned all about the machines before using them:


What is 3D Printing?


3D printing uses computer-aided design to create three-dimensional objects through a layering method. Sometimes referred to as additive manufacturing, 3D printing involves layering materials, like plastics, composites or bio-materials to create objects that range in shape, size, rigidity and color.


Types of 3D Printers:


The three most established types of 3D printers for plastics parts are stereolithography (SLA), selective laser sintering (SLS), and fused deposition modeling (FDM). The table down below illustrates the differences between these printers, in terms of filaments (materials) they can take, the accuracy, etc.

  School timetable


Types How it works Materials Strenghts Common applications DIM-accuracy
 Fused Deposition Modeling (FDM) It works by pushing a plastic filament through a heated nozzle. The molten plastic is then placed down layer by layer until the part is complete. ABS, PLA, ETG, Etc. Cheap, Easy to operate Prototyping, Hobbyist parts, Manufacturing Jigs 0.5 mm
 Stereolithography (SLA) It works by curing a liquid photopolymer into the final part by tracing a high-powered laser in the shape of the part cross-section onto the build plate. This process continues while each subsequent layer is polymerized onto the previous one. Polycarbonate-Like, ABS-Like, Polypropylene like High detail Casting patterns, Prototypes 0.1 mm
Selective Laser Sintering (SLS) It works by placing down a layer of powdered plastic and tracing out the cross-section of the part with a laser. This laser melts the powder and fuses it. Another layer of plastic powder is laid over the previous one and the laser melts the cross-section shape while also fusing it into the previous layer. Polyamide 12, Glass Filled Nylon Isotropic materials, No support structures needed Flame retardant components, Medical devises 0.3 mm


Types of 3D printer filaments:


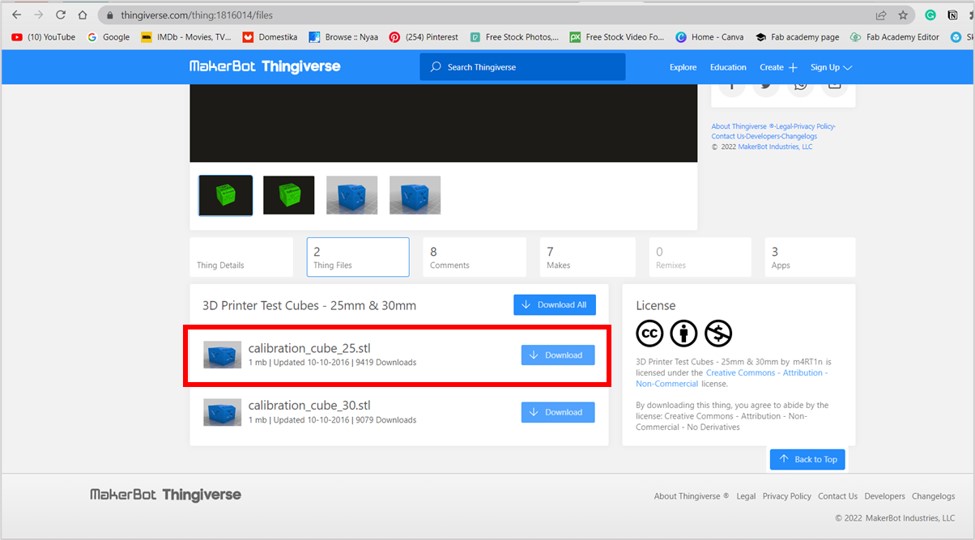
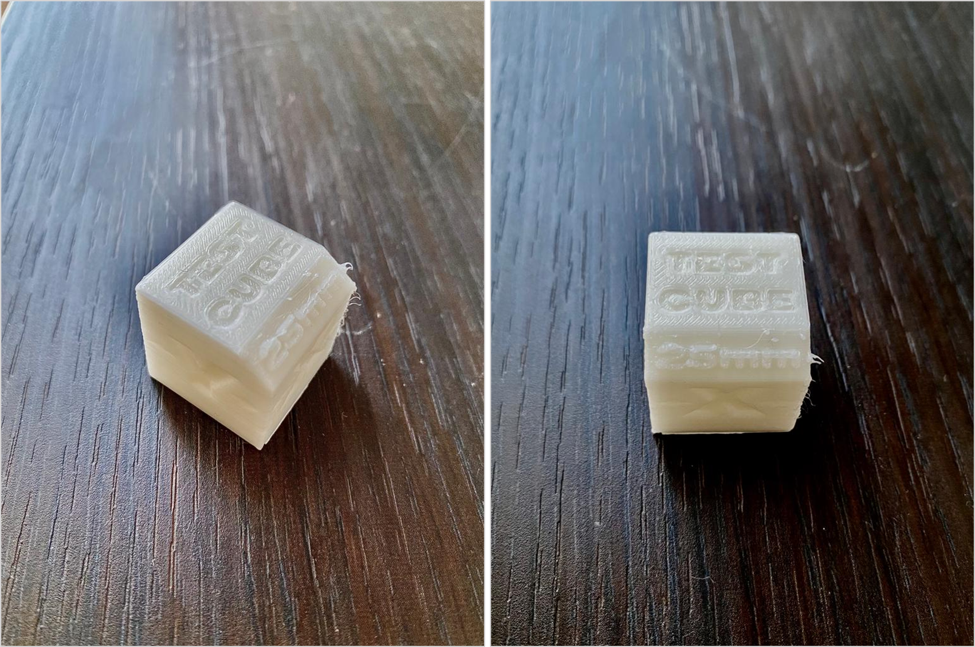
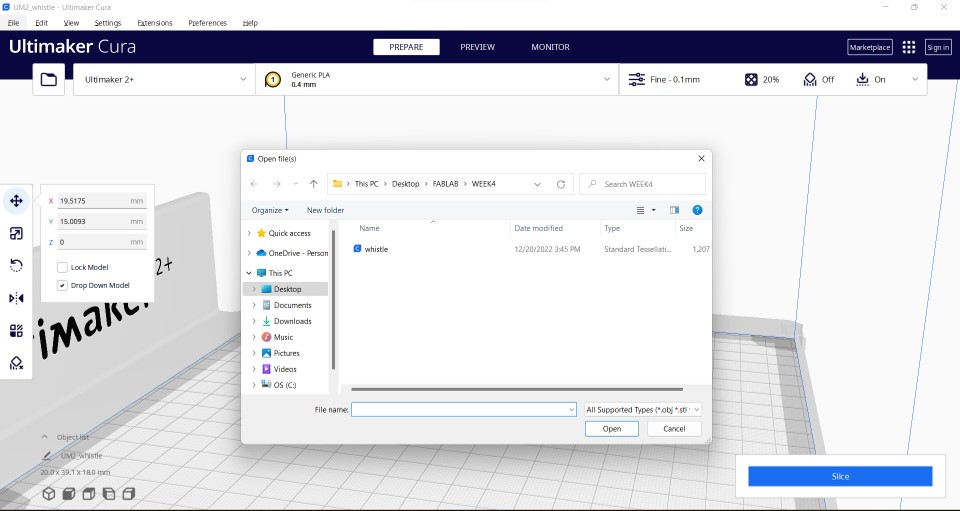
The most common filament types are acrylonitrile butadiene styrene (ABS) and polylactic acid (PLA). Most basic 3D printers are designed to exclusively use these filaments. In this assignment we used PLA. Down below is a table of PLA filament properties.

  School timetable


Property Value
Heat Deflection Temperature (HDT) 126 °F (52 °C)
Density 1.24 g/cm³
Tensile Strength 50 MPa
Flexural Strength 80 MPa
Impact Strength (Un­notched) IZOD (J/m) 96.1
Shrink Rate 0.37-0.41% (0.0037-0.0041 in/in)


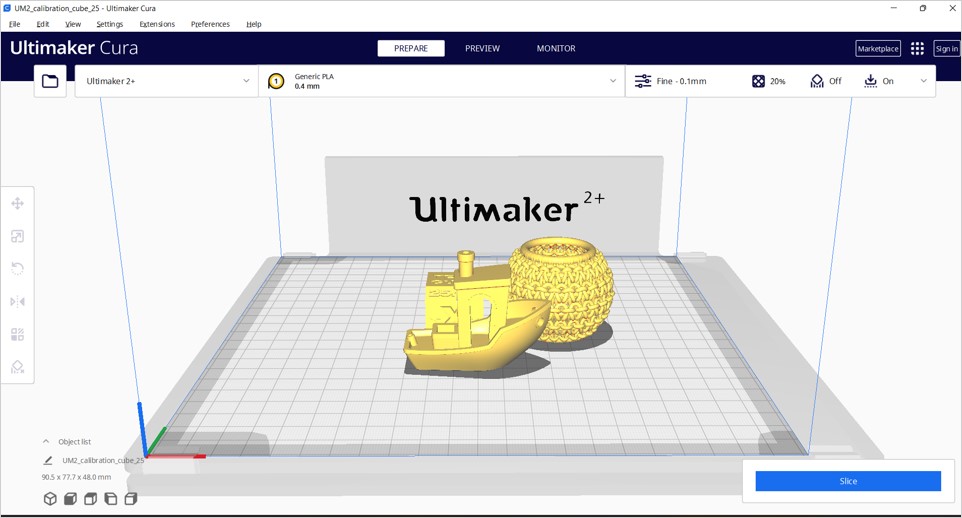
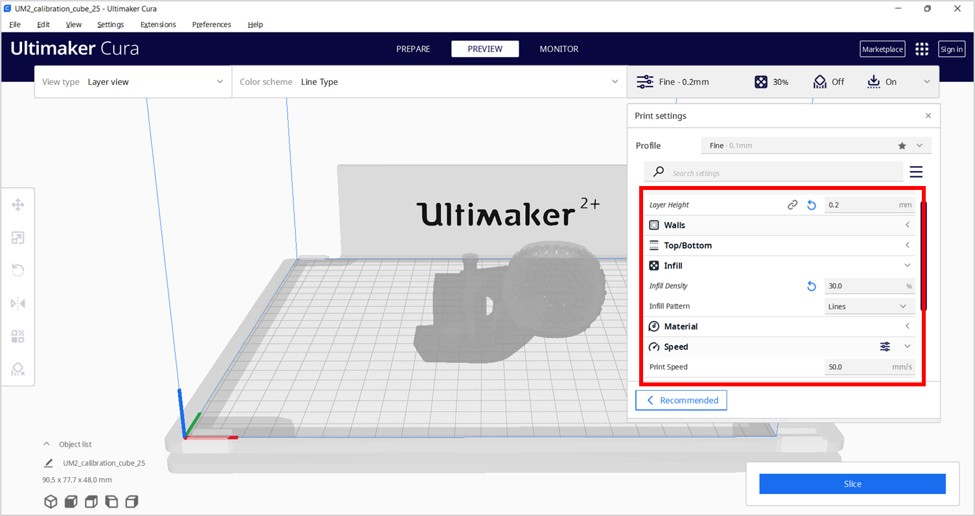
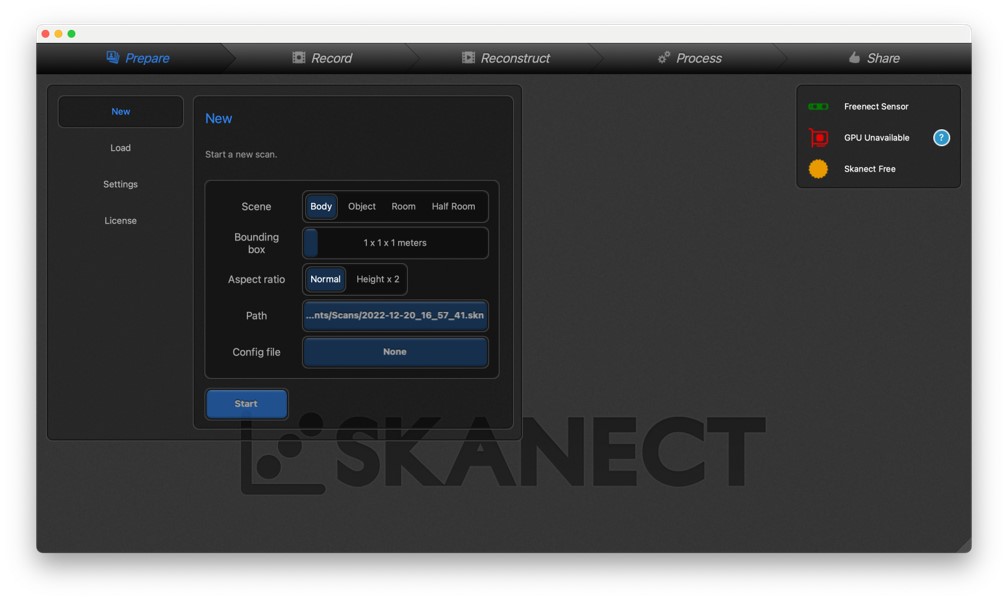
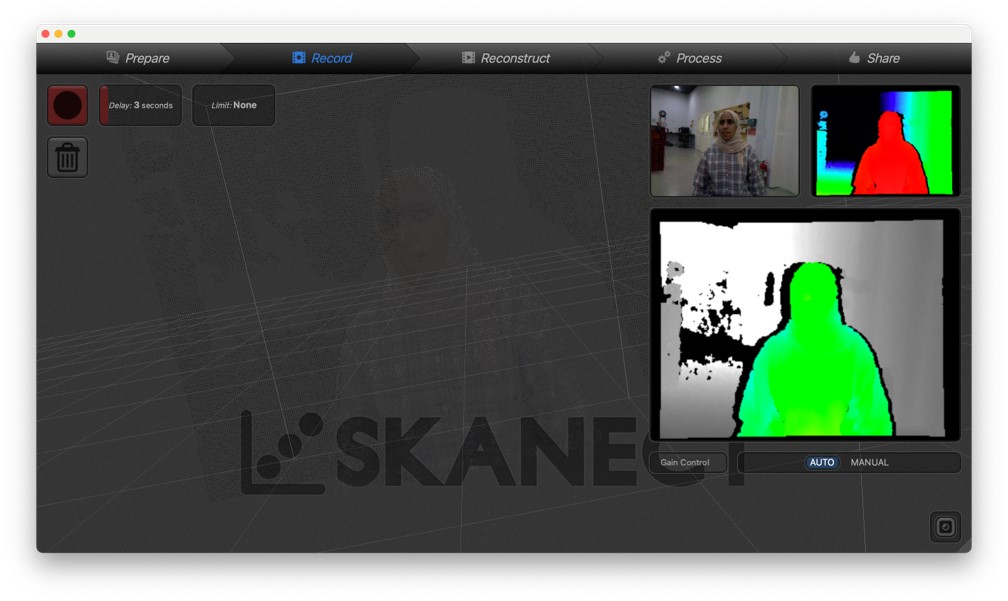
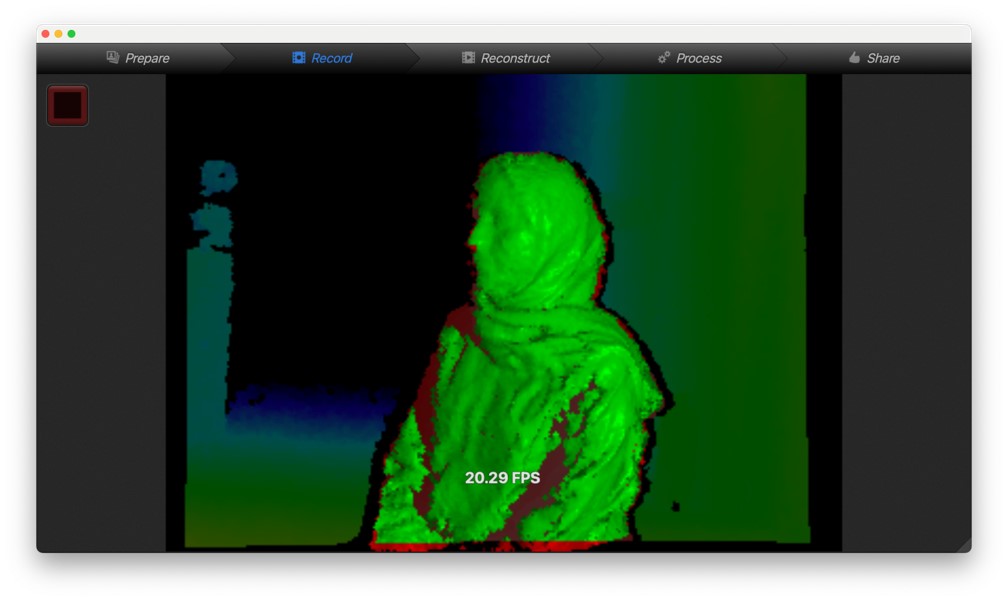
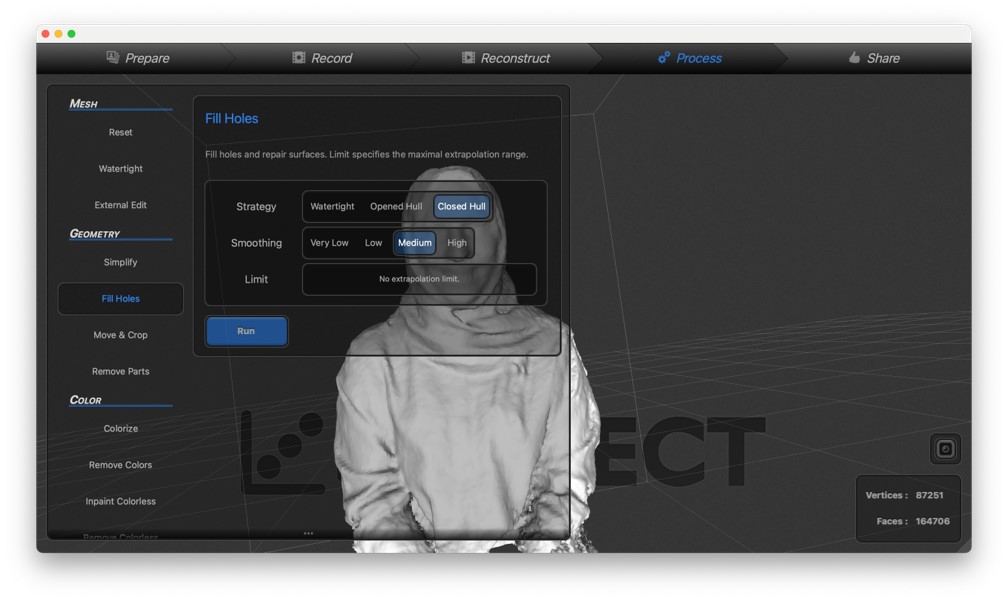
Scroll down to learn about how we used the printers.

3D PRINTING


Group assignment:

There are three 3D printers in Fab-Lab,(Prusa i3 Mk2, Maker Bot Replicator Z18, Ultimaker 2) each group was assigned to a printer to test it together, and compare them all at the end. Our group worked on Ultimaker 2.


1- Downloading 3d objects, The first step is to download the 3D designs we will be test-printing, we downloaded a boat which you can find here along with a cube, click here .

2- Downloading CURA and uploading the 3d's, After downloading the files, you will need to download the Cura software that allows us to connect the 3d objects to the printer, Ultimaker Cura

Upload the stl files in Cura, placing them close to eachother to reduce the printing time.


3- Adjusting the settings,The next step is to change the settings, as shown in the picture below, (Qaulity=0.2, Infill=30, Material= 215x60, Speed=50, Build plate= brim). Next, click slice.

The software will estimate the printing time for the object.

These are the objects after they were printed.

The results were very good, the details show but not very precise compared to the PRUSA 3d printer, for example the writing as you can see on the cube it shows but at the same time it isn't as sharp as the PRUSA printer. Removing the brim was fairly easy as you just need to rip them from the objects.

In the videos down below you can see how the printer generates the plates or what we call the "brim" to create a plate for the objects before printing them.


Individual assignment:

I designed my object in FUSION 360, and I followed a tutorial to learn how to make a whistle, the tutorial was really helpfull, you can click here to see it.

The first step was to create the secion of the whistle as a 2d sketch, I used the circle and the line tools, and to connect them we used the tanget tool as shown below.

Next, I extruded the section by choosing the symmetrical extrusion to ensure that the sketch will remain in the middle.

To make it hollow inside, we used the shell tool, with the value 1 mm.

Another tool that helped me alot is the section analysis. It allows you to section the object on any plane and see the inside, which makes it easier to design.

The next step is to ensure that all tools are used correctly, go to prefrences and then choose design on the left side and follow the picture down below.

Using the analysis section, I created the whole on the top on the whistle. I started by sketching two lines, one with 45 degree angle and the second one with 135 degree as it was on the other side.

To specify the hole's size, I used the dimension tool (press d on the keyboard) to enter the required length between the two lines. I used the same tool to position the hole from the left as shown.

The next step is too extrude the surface between the two angled lines to cut the object.

To create the little hanging piece on the end of the whistle, I sketched a rectangle and used the coincident constrain to align it with the back side of the whistle.

-

After that, I finished the sketch and extruded on both sides using the symmetric option.

The last step was to create the ball inside the whistle, I started by sketching a circle and used the revolve tool to turn it into a sphere.

Lastly, I save my file as STL and uploaded in cura to prepare it for the 3d printing as explained above in the group assignment.

Problems encountered:

Due to dust entering the pipe where the filaments are melted to print the 3d objects, the printer was interrupted and did not print accordingly, so we printed the whistle in a different machine called Pursa as shown below.

To know more about Prusa 3d printer, you can visit Fatima's website where she documented her experience with the printer by clicking here.

This is the final product after printing, we used a metal tool (screwdriver) to seperate the ball from the whistle.

-

To upload the model on the website from sketchfab, the first step is to upload your model in sketchfab. Then click on "see my model as" shown below.

Next, click on "embed" under the video as shown below.

Copy the link and paste it in your website, either through Gitlab or Atom

-

Next is uploading the STL file, first you open your project then right click on it as shown below. Copy the link and paste it in the code below.

This is the code, copy it then change the link.

     <div class="fusion"><iframe width="640" height="480" src=" https://a360.co/3ZleWLZ " frameborder="0" allow="autoplay; fullscreen; vr" mozallowfullscreen="true" webkitallowfullscreen="true"></iframe>

-

Why was the design couldn't be easily made subtractively?

Additive manufacturing processes build objects by adding material layer by layer, while subtractive manufacturing removes material to create parts. Additive technologies are also typically better suited for small parts and highly complex designs, while subtractive processes are idealy for Larger, less complex objects. My design is very small in size so it was ideal to use the additive method.


click here to downland the stl file.


click here to downland the fusion file.

3D SCANNING


3D scanning is a process of analyzing an object from the real world, to collect all the data in order to recreate its shape and appearance, digitally. The object then can become a 3D model, which could help you as a base for the 3D project you are about to develop, but it can also be useful to reconstruct, analyze, or simulate ideas.

1- Downloading SKANECT, In the lab, we tried 3d scanning eachother to see how well we can scan an object and to see what level of details we can get. we started by downloading the software Skanect, which is a 3D scanning program that allows you to use a sensor to scan objects, rooms, or even people and recreate them as computer-based 3D models. click here to download it.

2- Start scanning the object, open a new file in Skanect, as shown below.

Position the camera to face the body, until all of it is highlighted green, then start recording by pressing the space button on the keyboard.

Once it begins recording, rotate the object 360 degrees in slowmotion to allow the camera to get all the details. When you're done, press the space button to stop recording.

3- Fixing the scanned object, first step is to fill the holes which you will find under "process", press run as shown below.

Next, to see the object with colors, press colorize on the left window, then press "run".

This is the final result, it is better than expected as you can see the details on roaya's face especially her teeth!. The colors were a bit dull than normal but were still correct. To share the file, you can export it as STL file.