week7
Moulding
and Casting
What I did
-
This week
we were introduced to the milling machine.
I did a group assignment searching for a specific type of material.
I worked on my indivisual assignment to create a necklace.

Moulding
Casting
is the act of pouring liquid material into the cavity of a mold. After a period of time, this liquid will cure via chemical reaction or cooling. The solidified part is also known as a casting, which is ejected or broken out of the mold to complete the process. Casting materials are usually metals or various cold setting materials that cure after mixing two or more components together; examples are epoxy, concrete, plaster and clay.
Group Assignment
For the group assignment which you can find by clicking here. we compared between the different materials and we documented the process and the result.
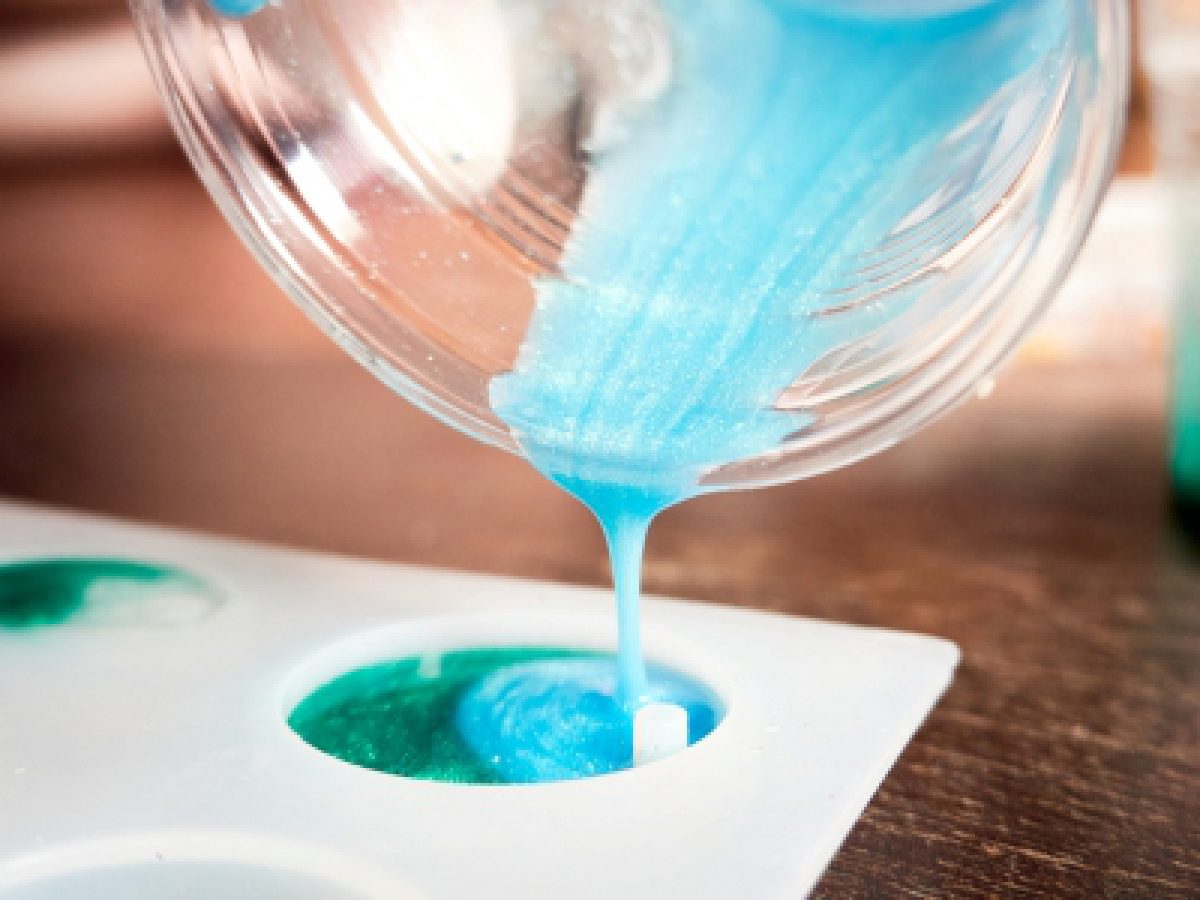
The material we used is called Resin, we searched for the steps and ratios to make and test a small piece of Resin
Process of making the resin
we used GraffittiResin which comes in 2 bottles, one is the hardner and the second one is the Resin

STEP1:We started by Mixing exact ratio of 10 grams of resin to 6 grams of hardener. (make sure you use different spoon for each).


STEP2:We poured the hardener into the resin and started mixing with a wooden stick.
STEP3:After mixing well, we added paint and some glitter.(note: don’t add to much paint if you want it to be transparent).
STEP4:This is how it looked.

STEP5:We added some stars at the bottom before pouring the liquid.

STEP6:We poured the liquid but the 1st trial it overflowed so we made another one.
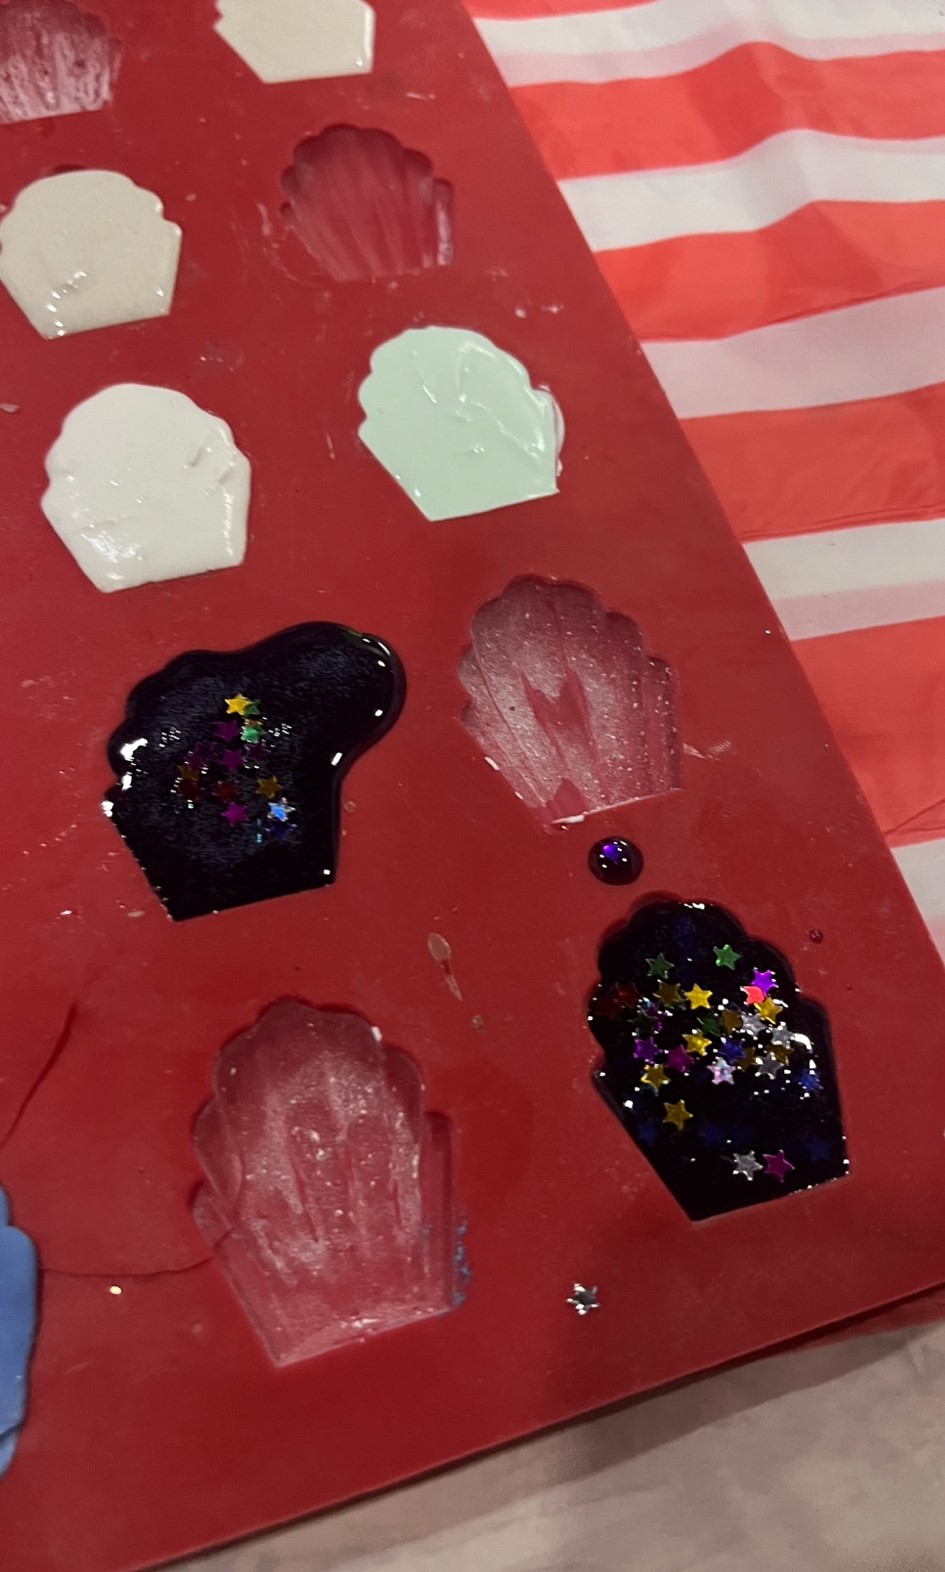
These were the final results

Individual Assignment
For the individual assignment I was asked to make a 2.5D design with the following reqirements:
Smallest gap: 1.6mm (That's the smallest milling bit)
Design height max: 8mm
Design width and length max: 60mm
Info! The term 2.5 dimensional model (2.5D model) is used for models that include calculation beyond a mere 2D model, but do not treat the third dimension in like manner. The term is commonly used for such fluid dynamics models. 2.5D models represent a means of offering better simulation than a 2D model and less computation than a 3D model
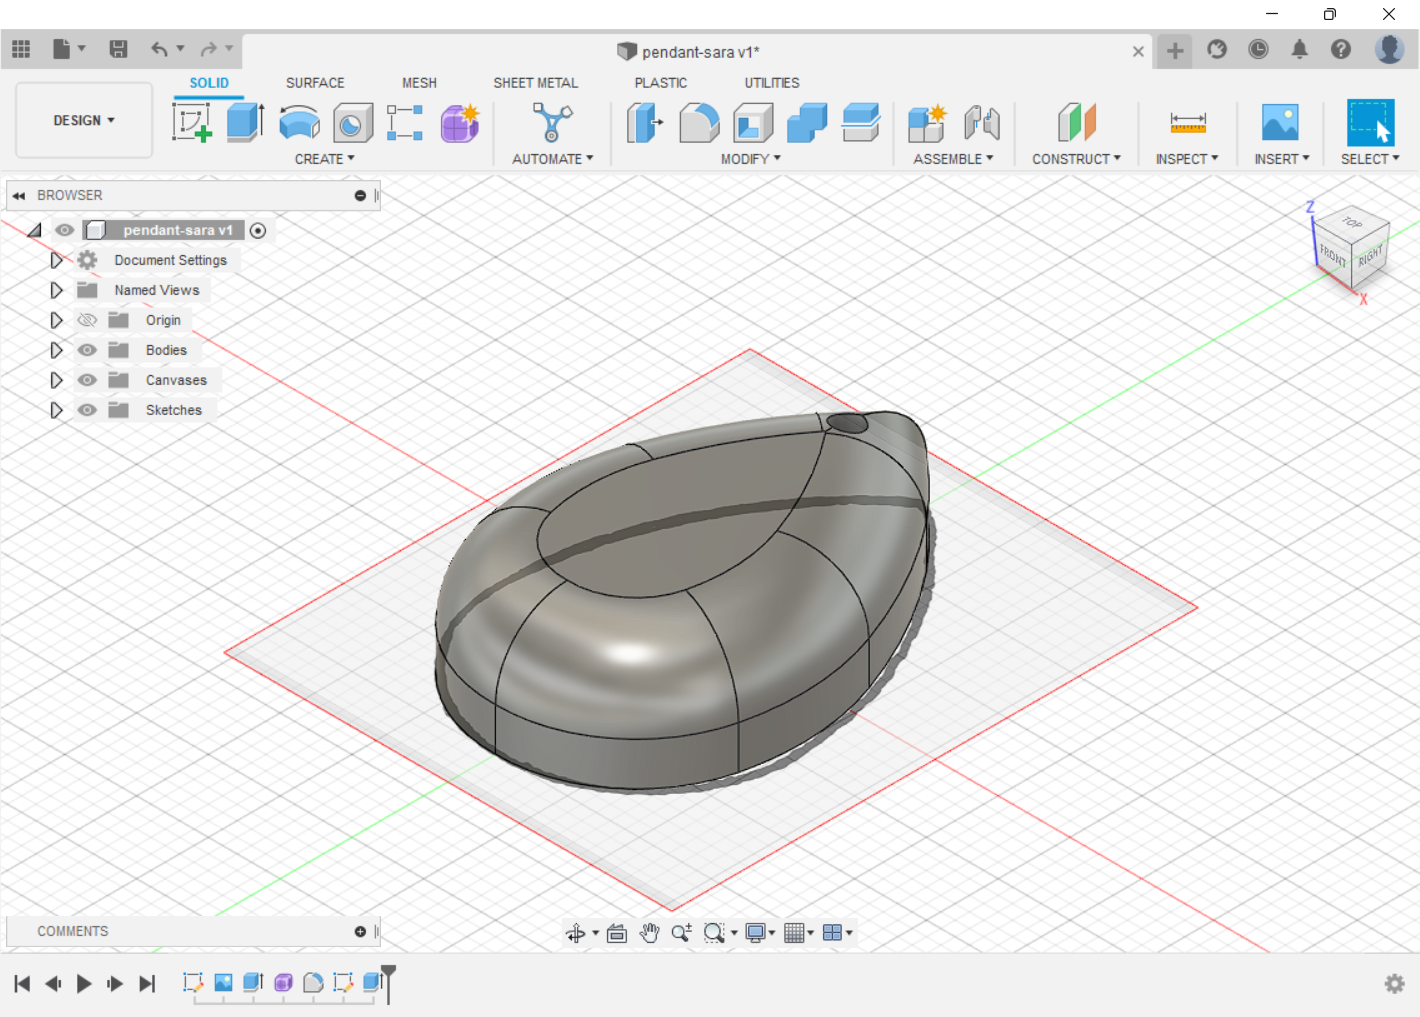
Design Stage
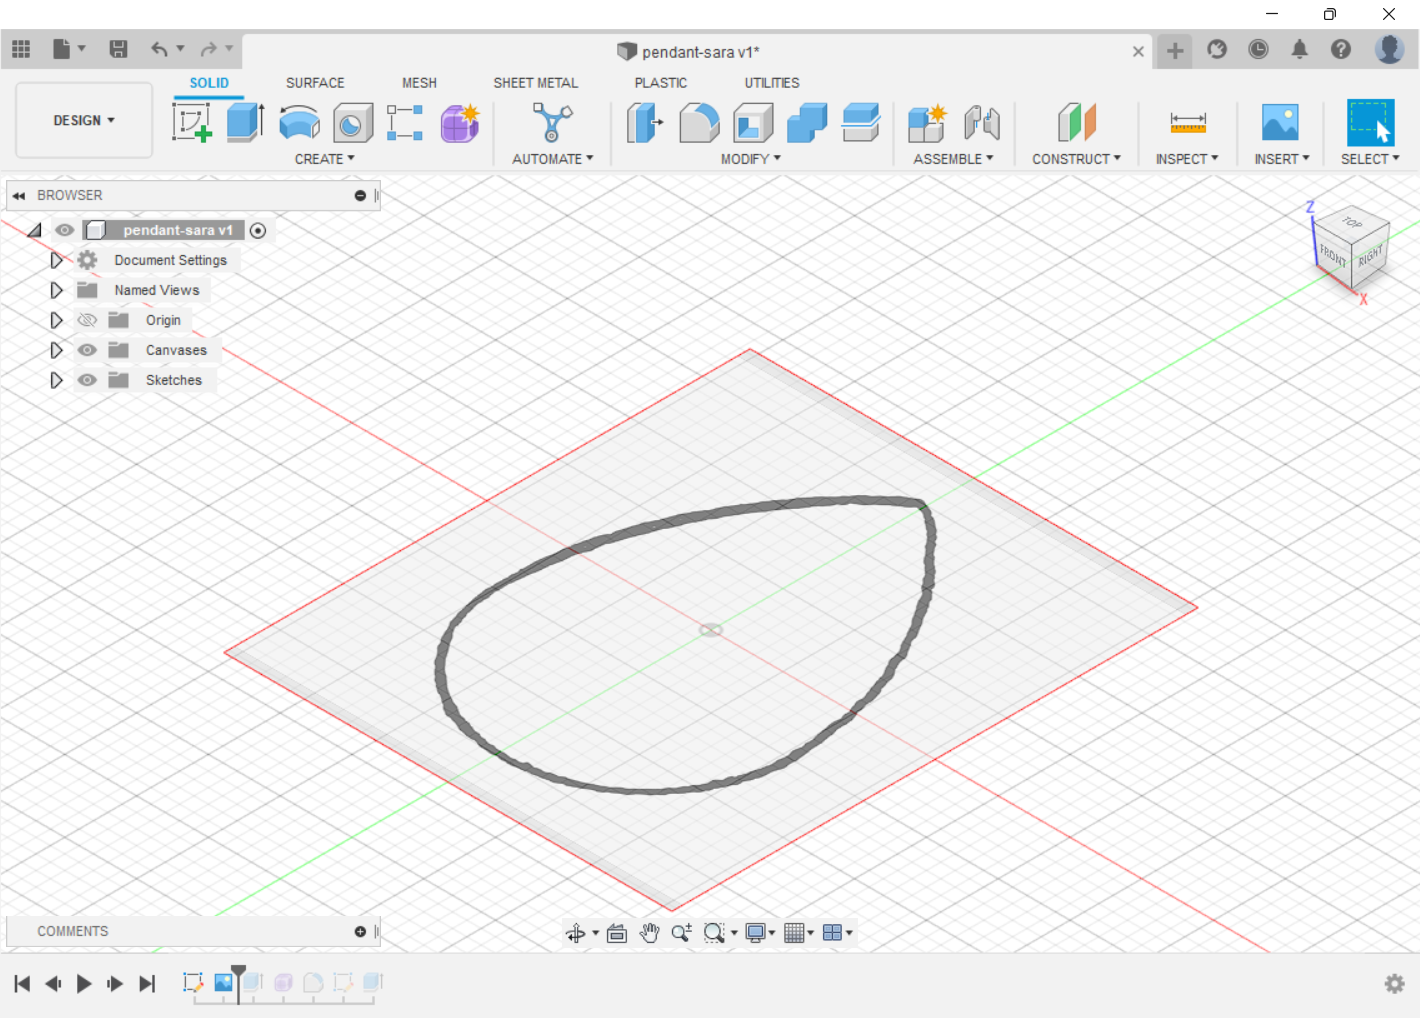
I started making my shape in Fusion 360 by adding an image of almond shape and i drew it using Lines. The final idea was to make a necklace.
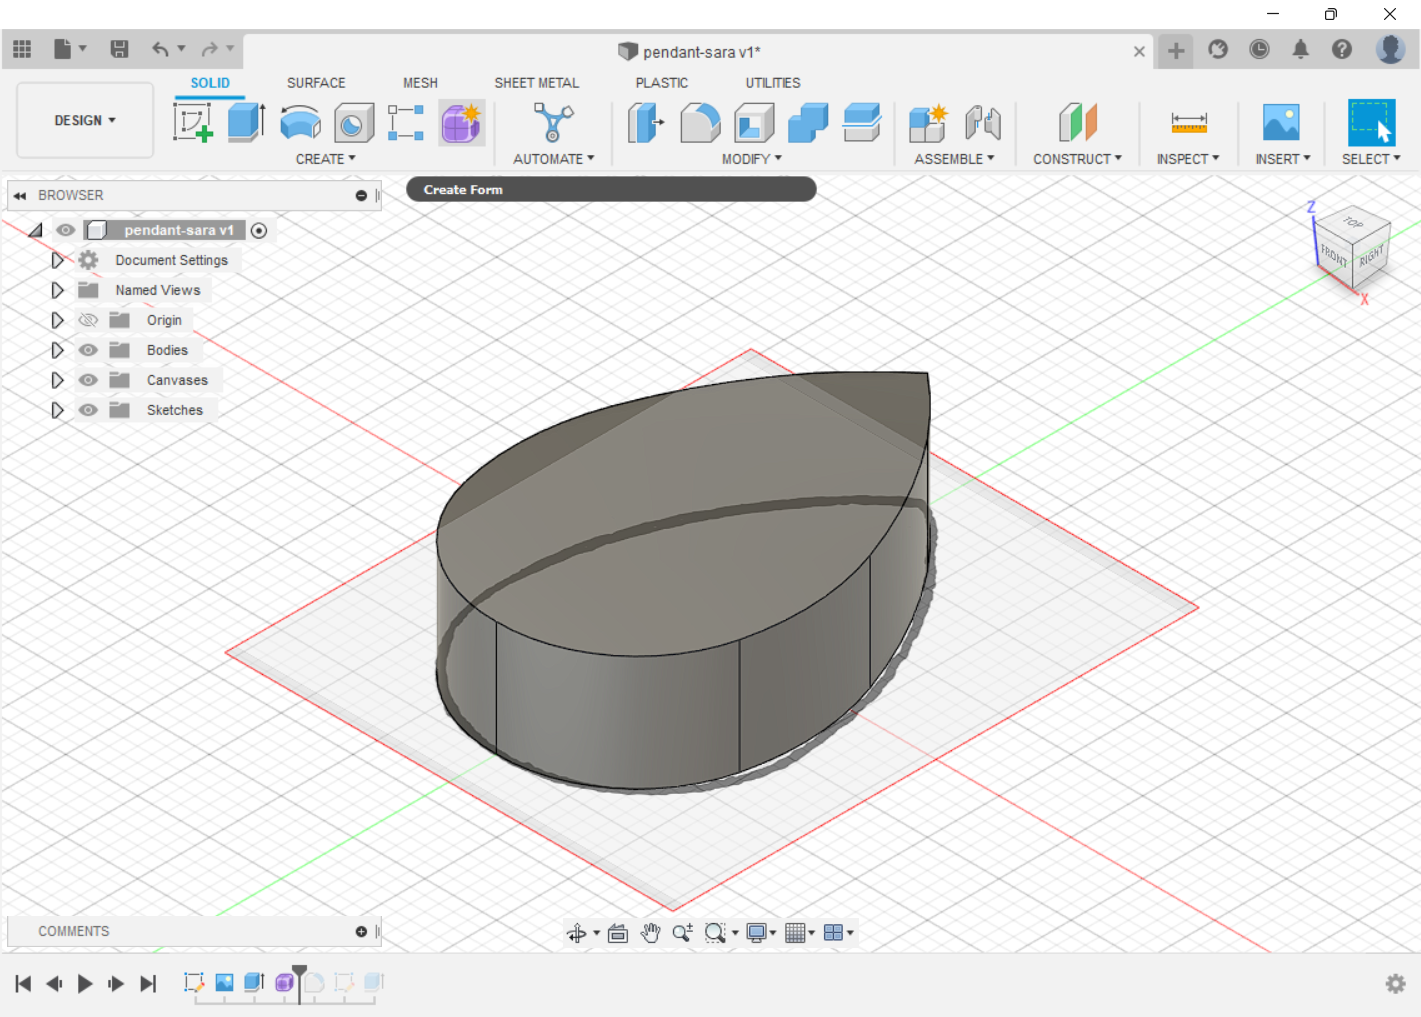
I extruded the shape using Extrude

To make the surface rounded and smooth I used create form

The final step was to draw a hole and then Extrude it to make a vertical cut through the entire shape.
Making a mould
To make a mould I used monoFab SRM-20 Desktop Milling Machine
The SRM-20 has a fully-enclosed cabinet that reduces dust and noise and features a side-window for easy progress viewing. It also features an intelligent safety interlock to that automatically pauses the machine when the cover is opened, permitting milling to resume upon closing the cover and selecting “continue”.
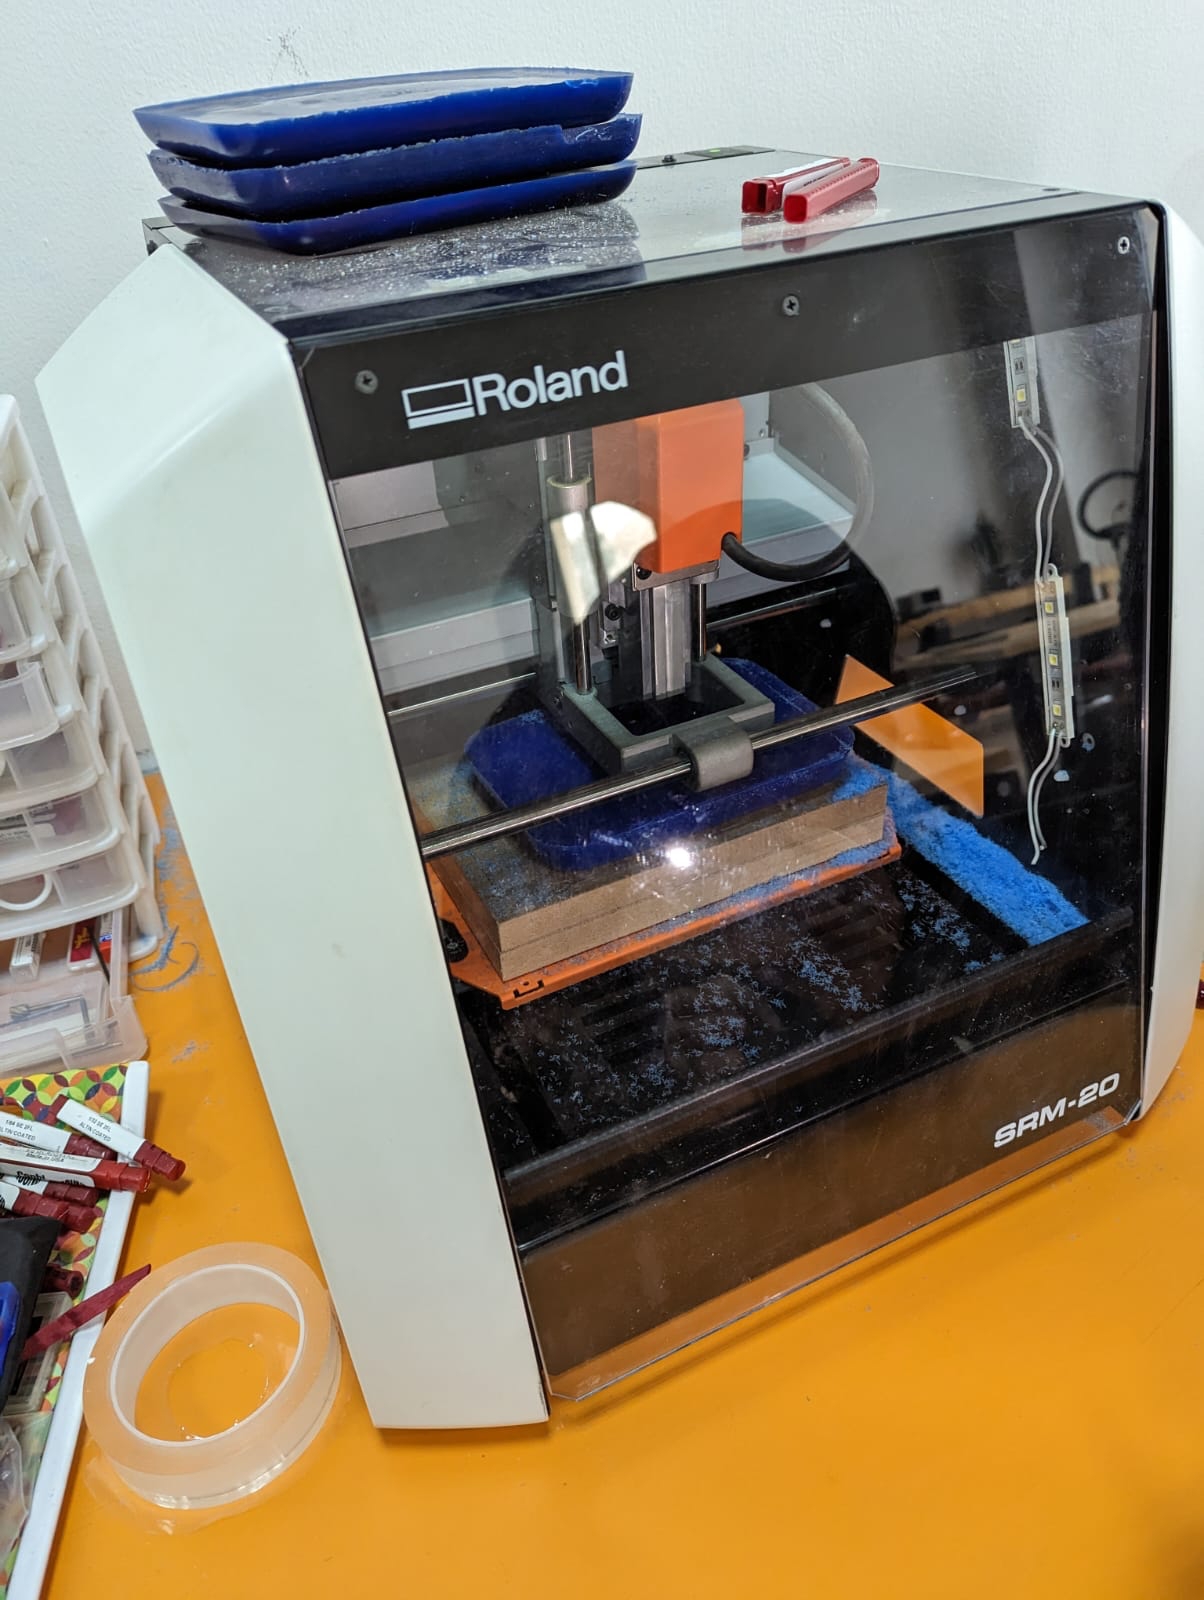
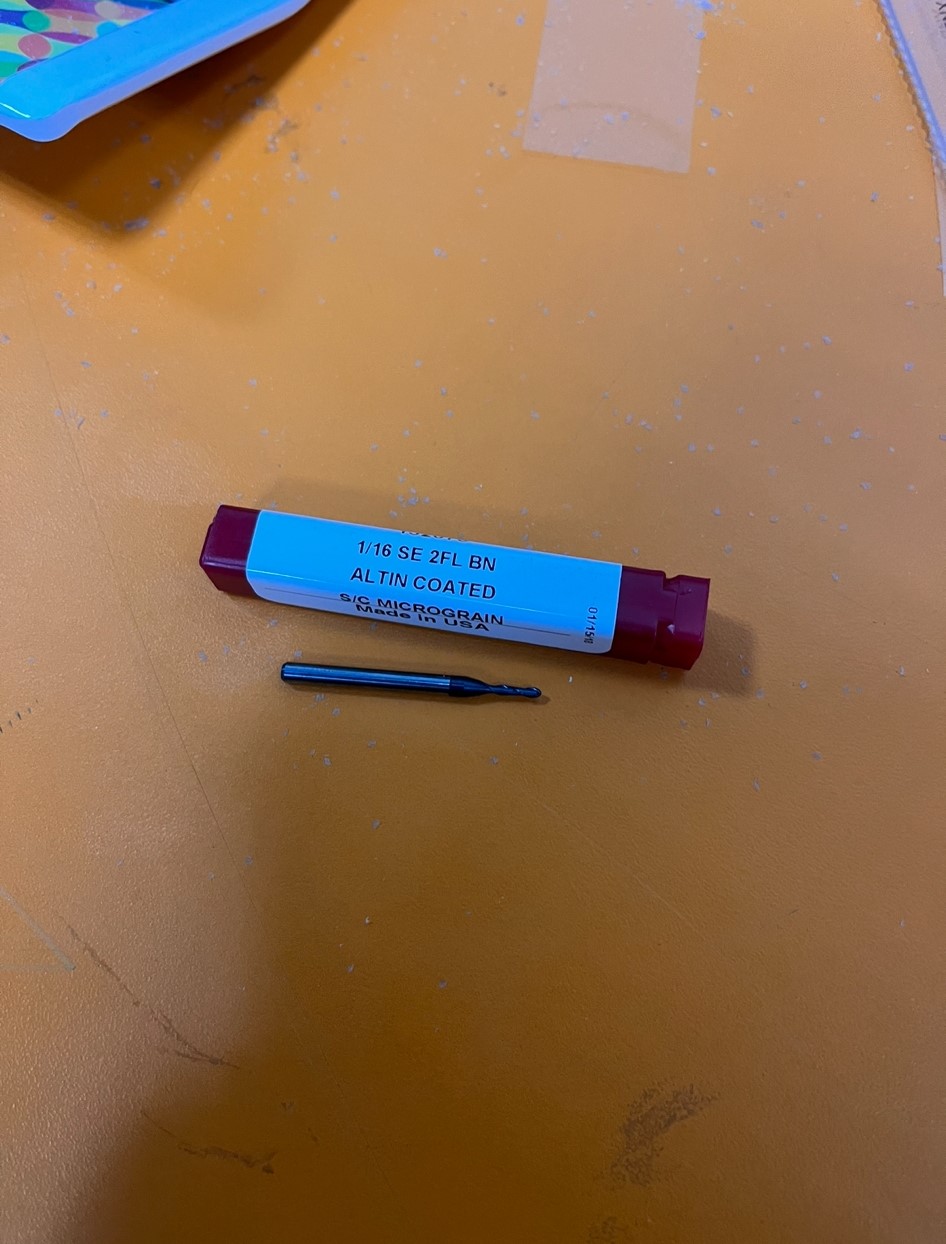
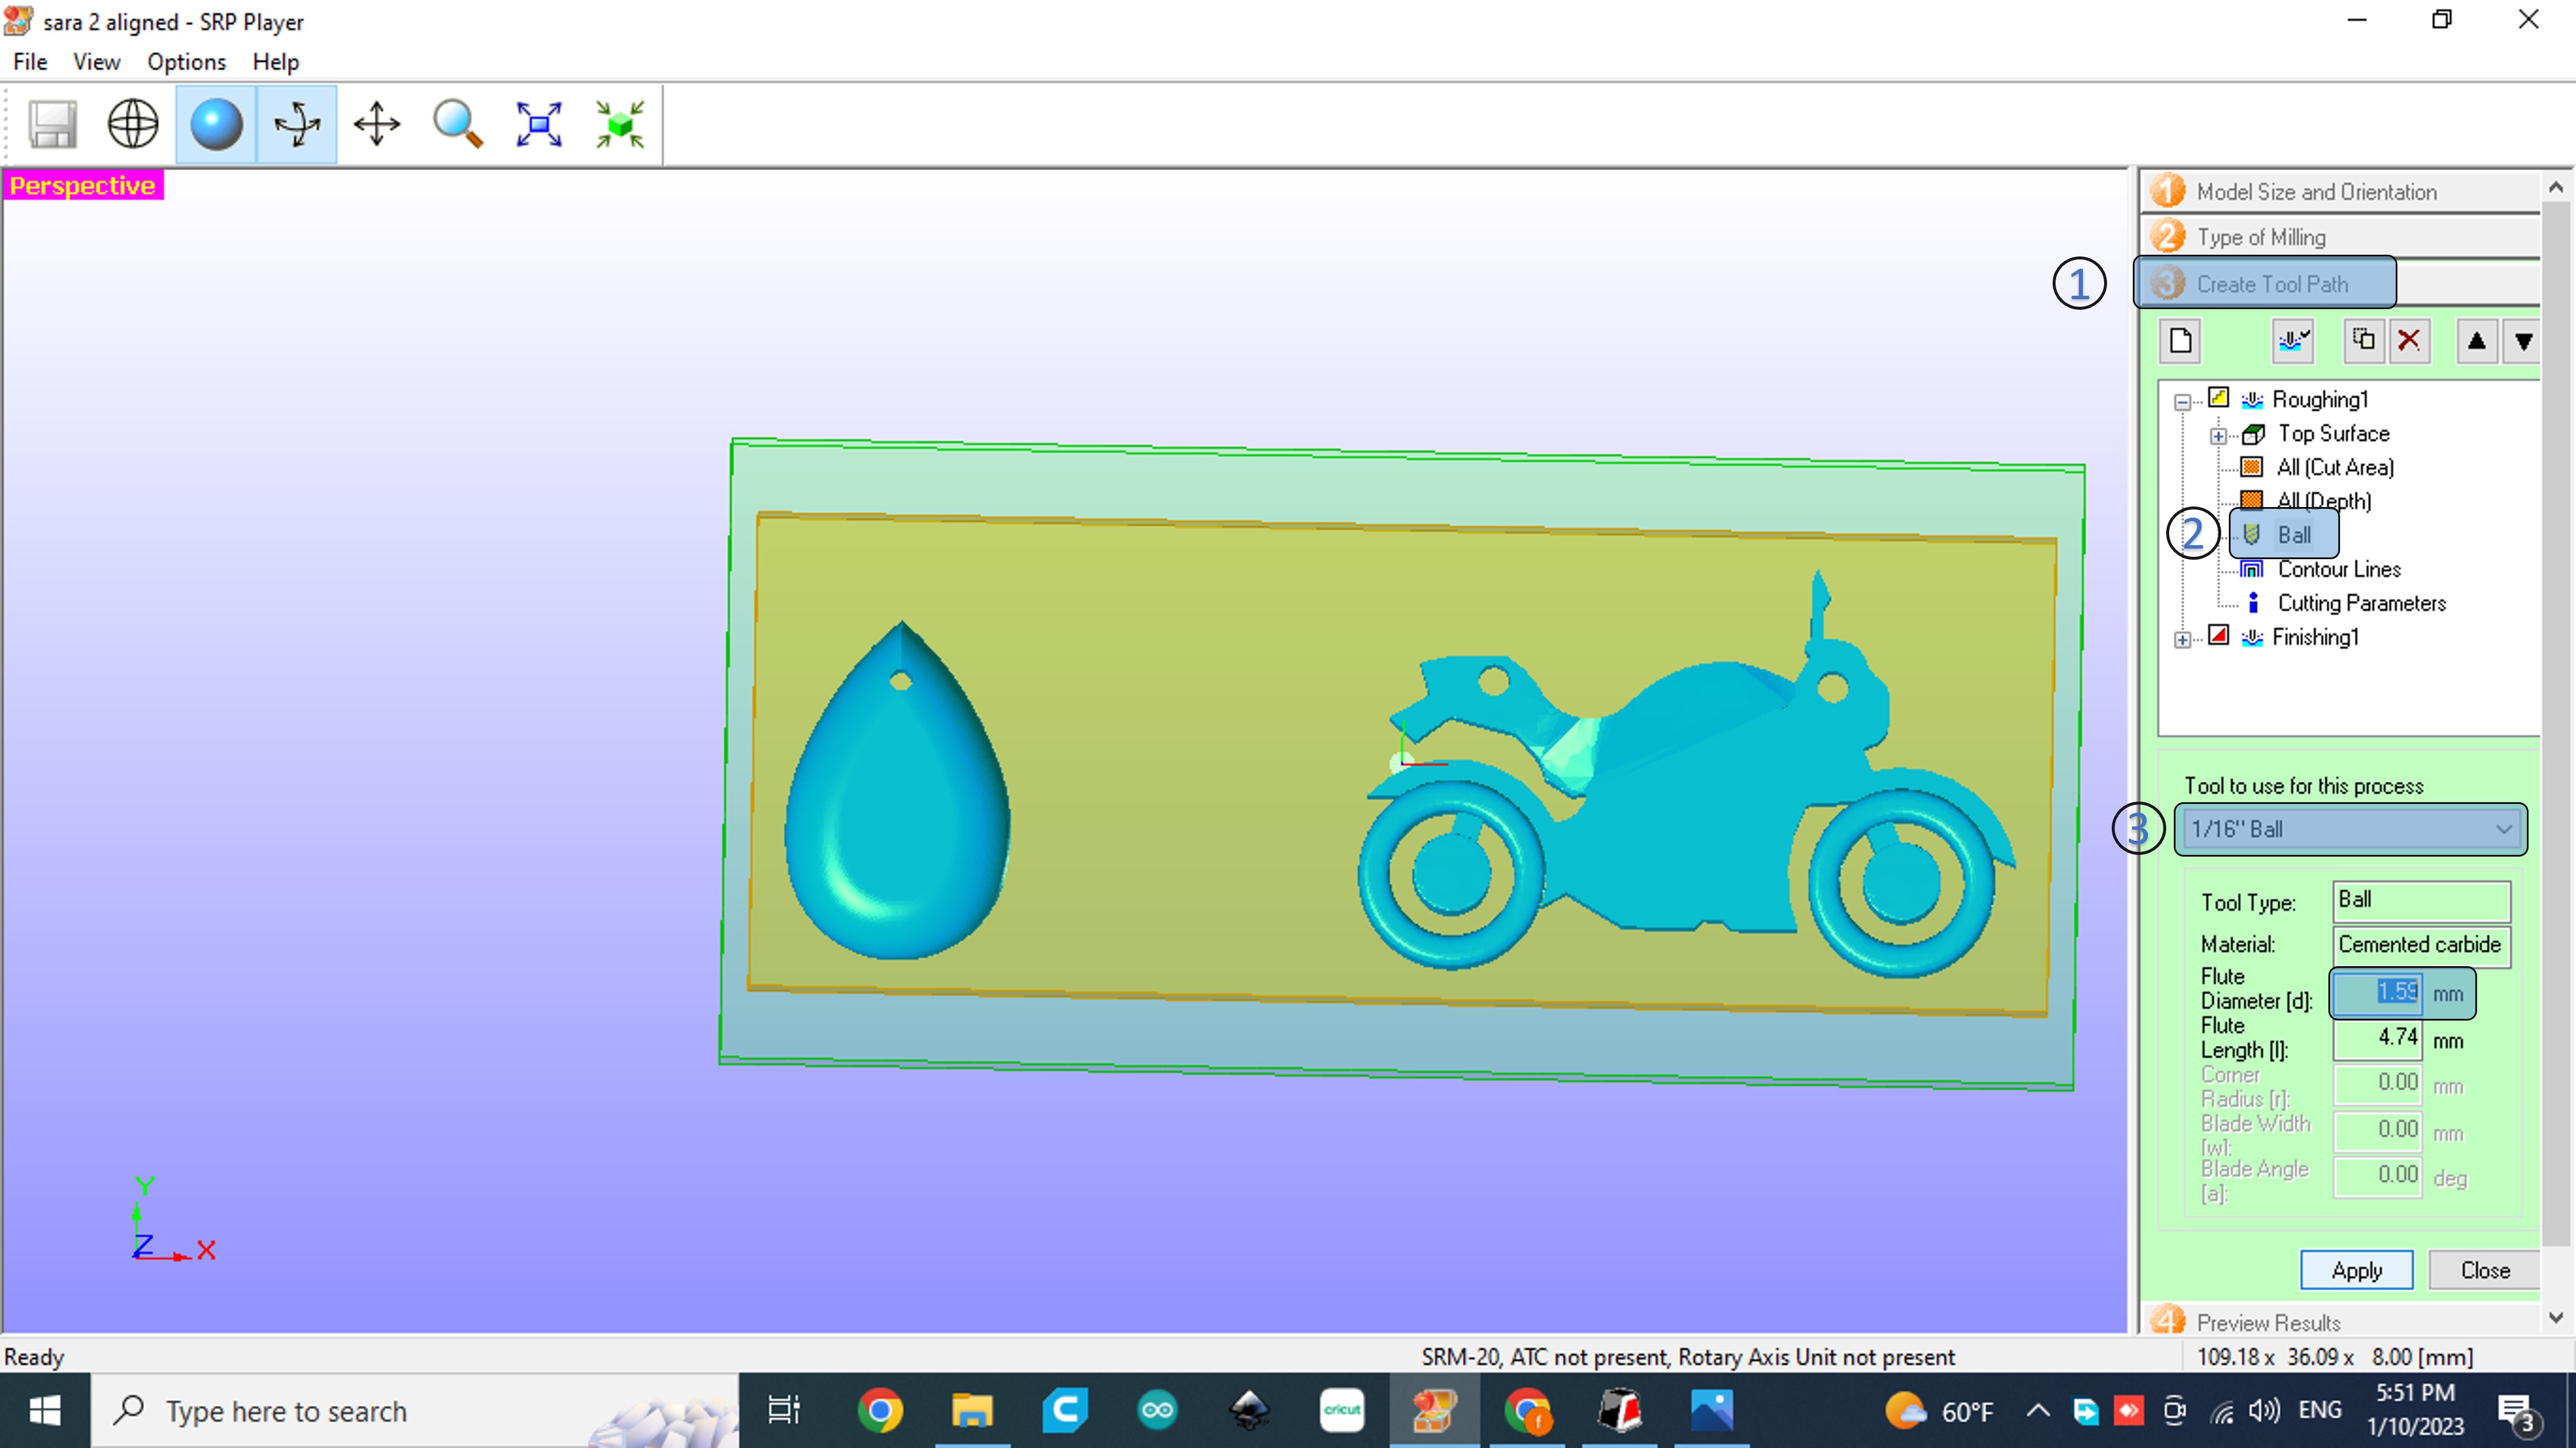
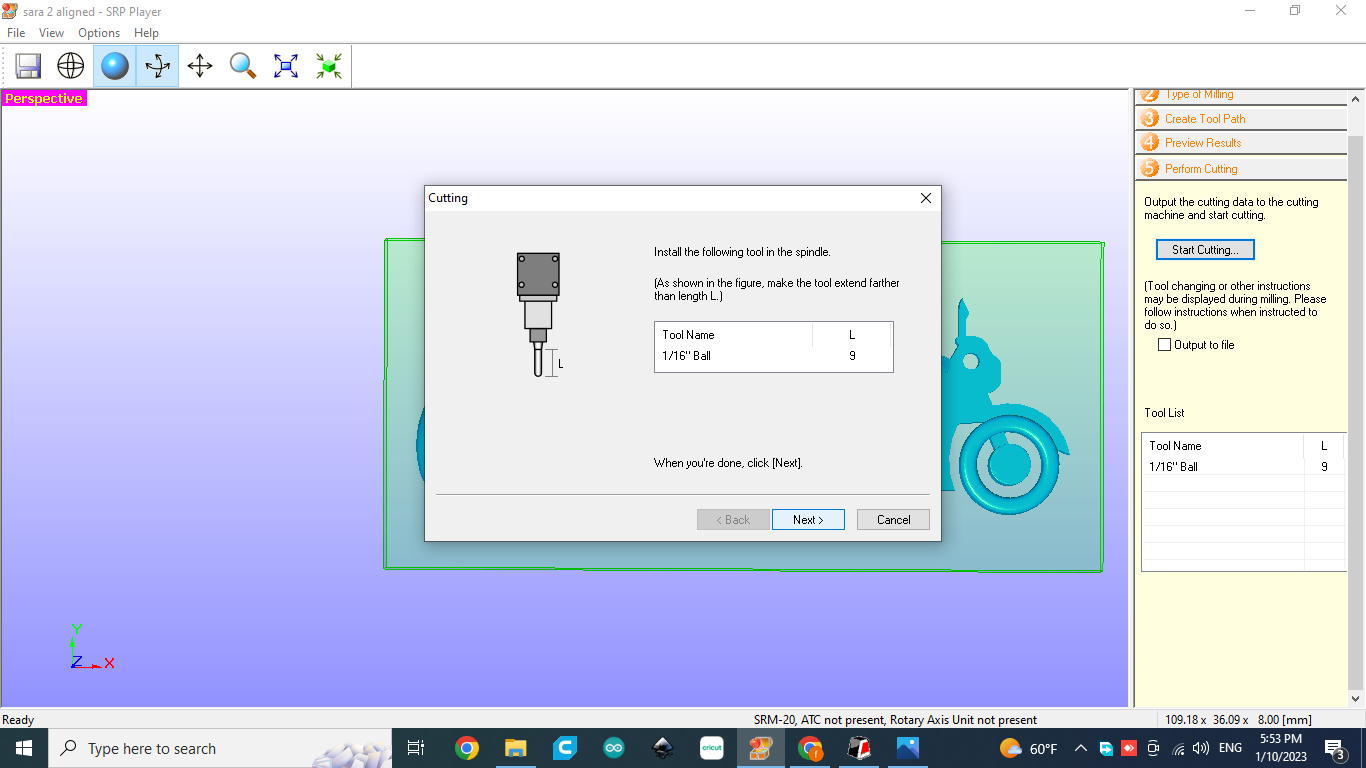
The first step was to put the milling bit. for this process I used 1\16
The next step was to mark a centeral point in the material we are using. I used a cutter and ruler to make an x that guides me to a central point. this method is important to move the milling bit to its start location.
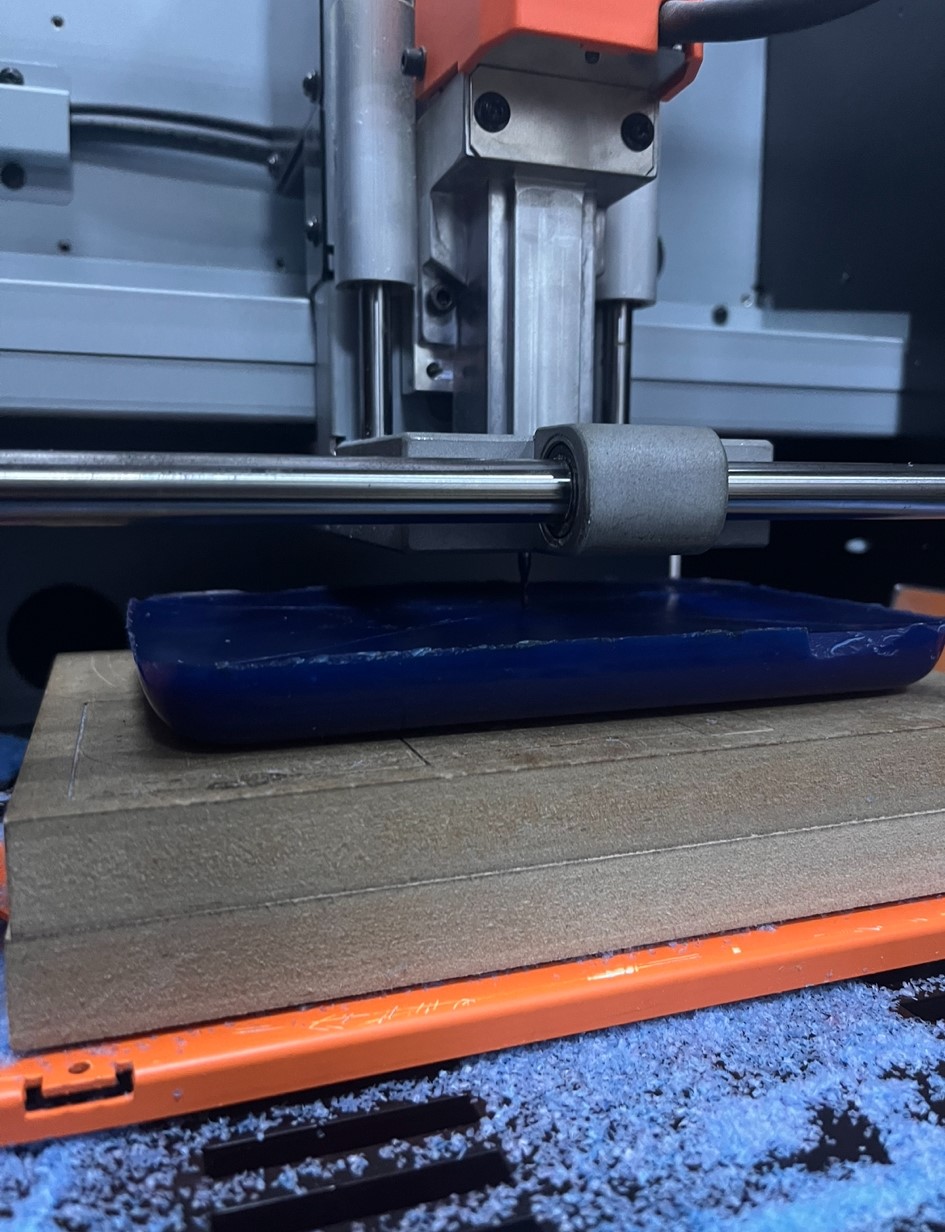
DoubleSided Tape to stick the material in its place

After closing the door of the machine we head back to the computer to upload our files
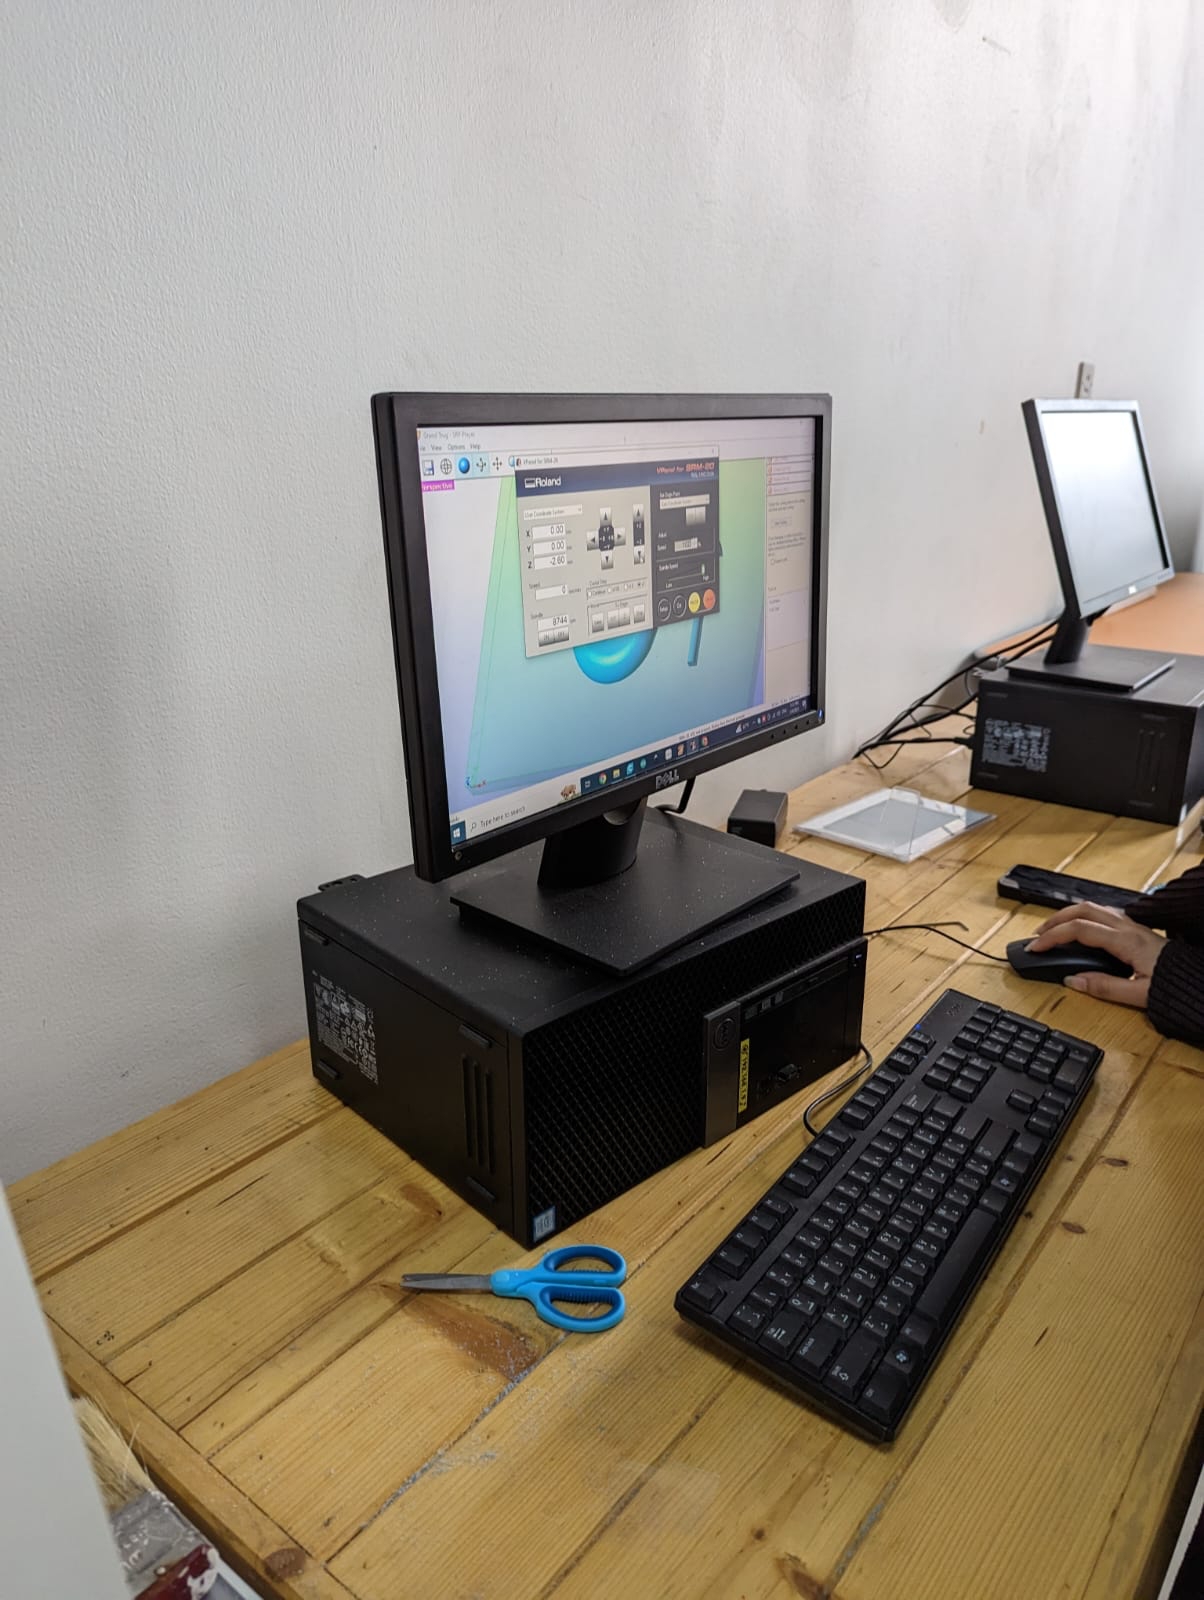
VPanel controller to regulate feed rate, spindle speed and milling on a complete X, Y, Z axes
Make sure the milling bit is almost contacting the material but is not completely touching it.
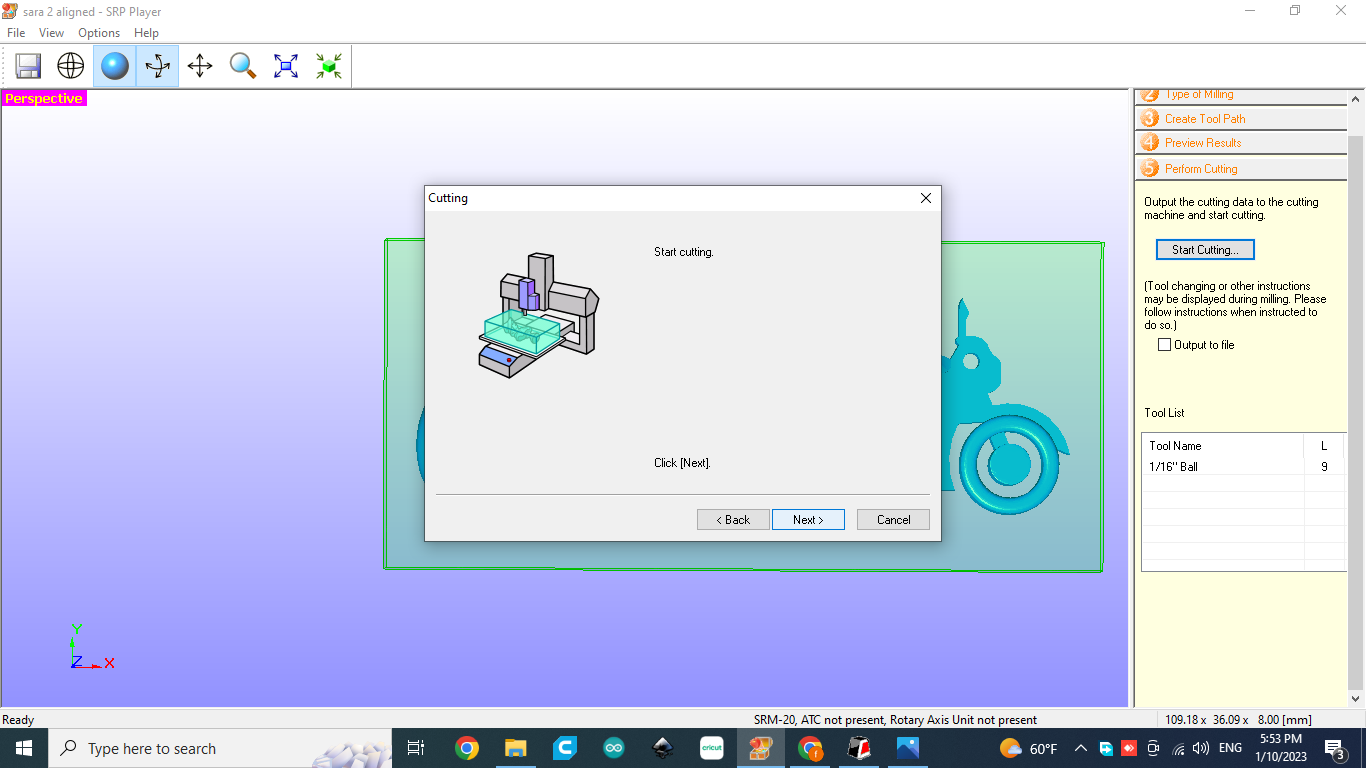
On the programm existing on the computer in the Lab, I followed those steps before hitting start:
STEP 1: Open the stl file and check the sizes to make sure it fits in the wax block you are using.
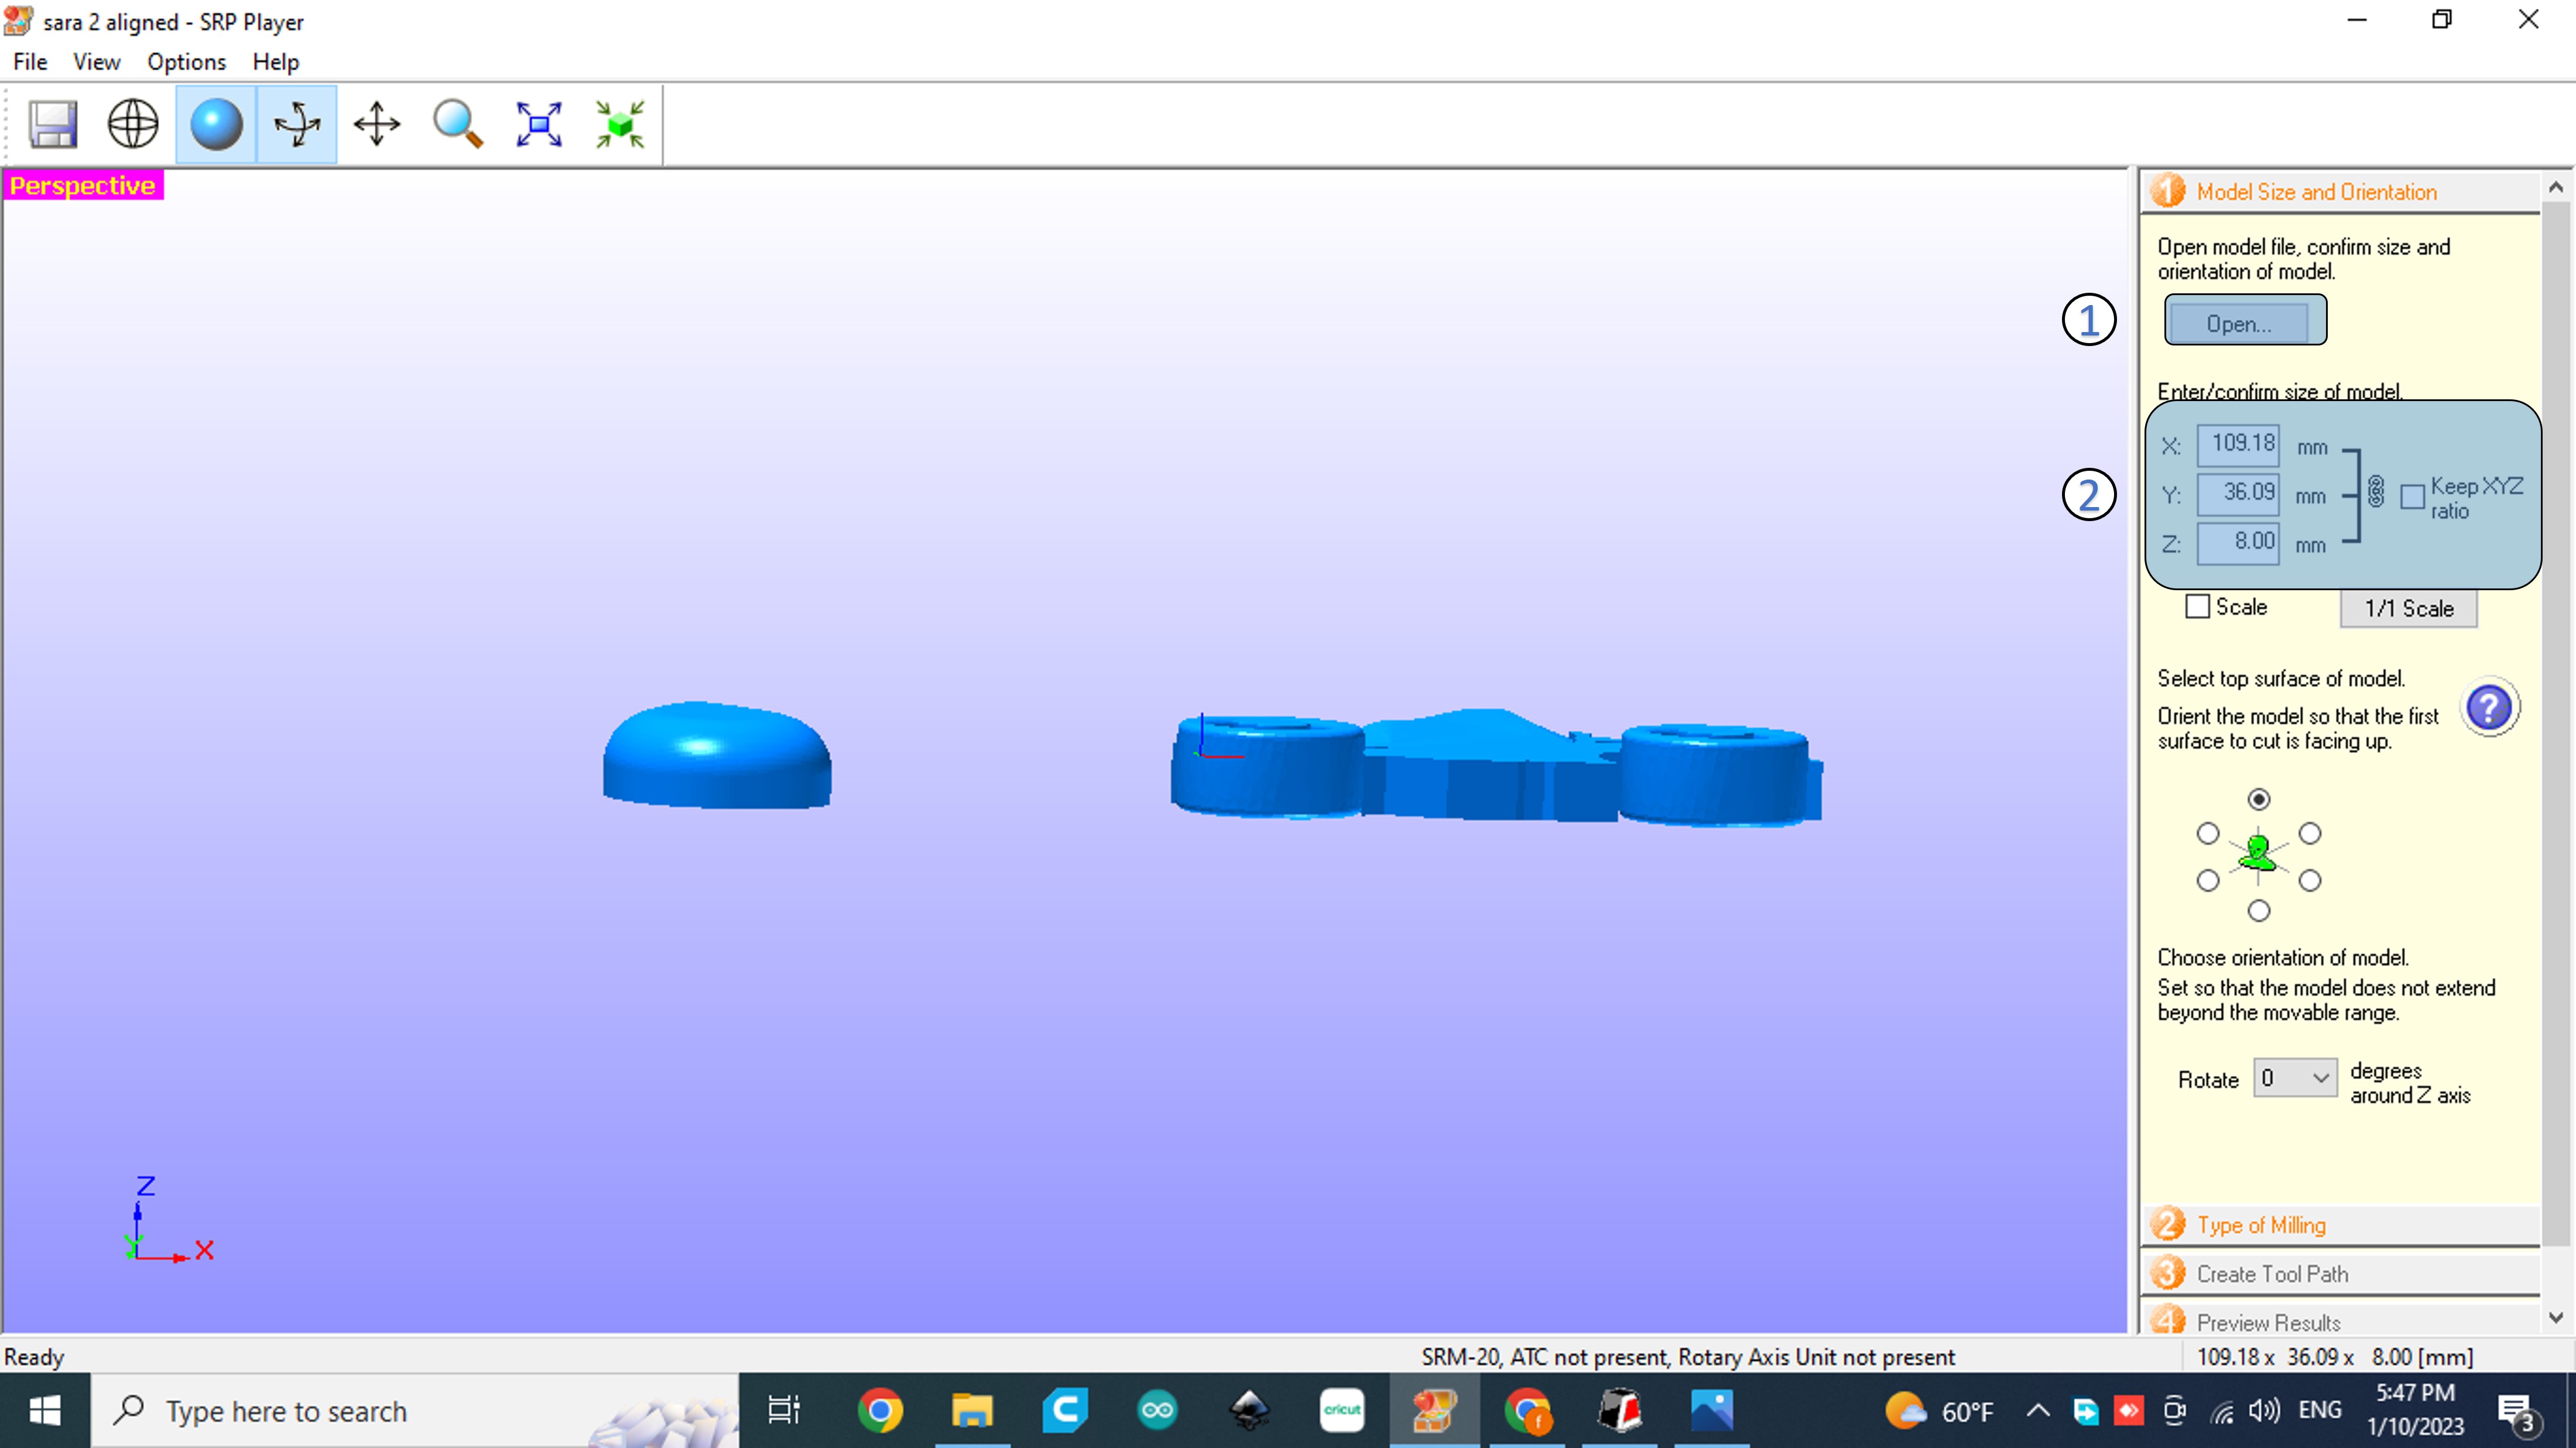
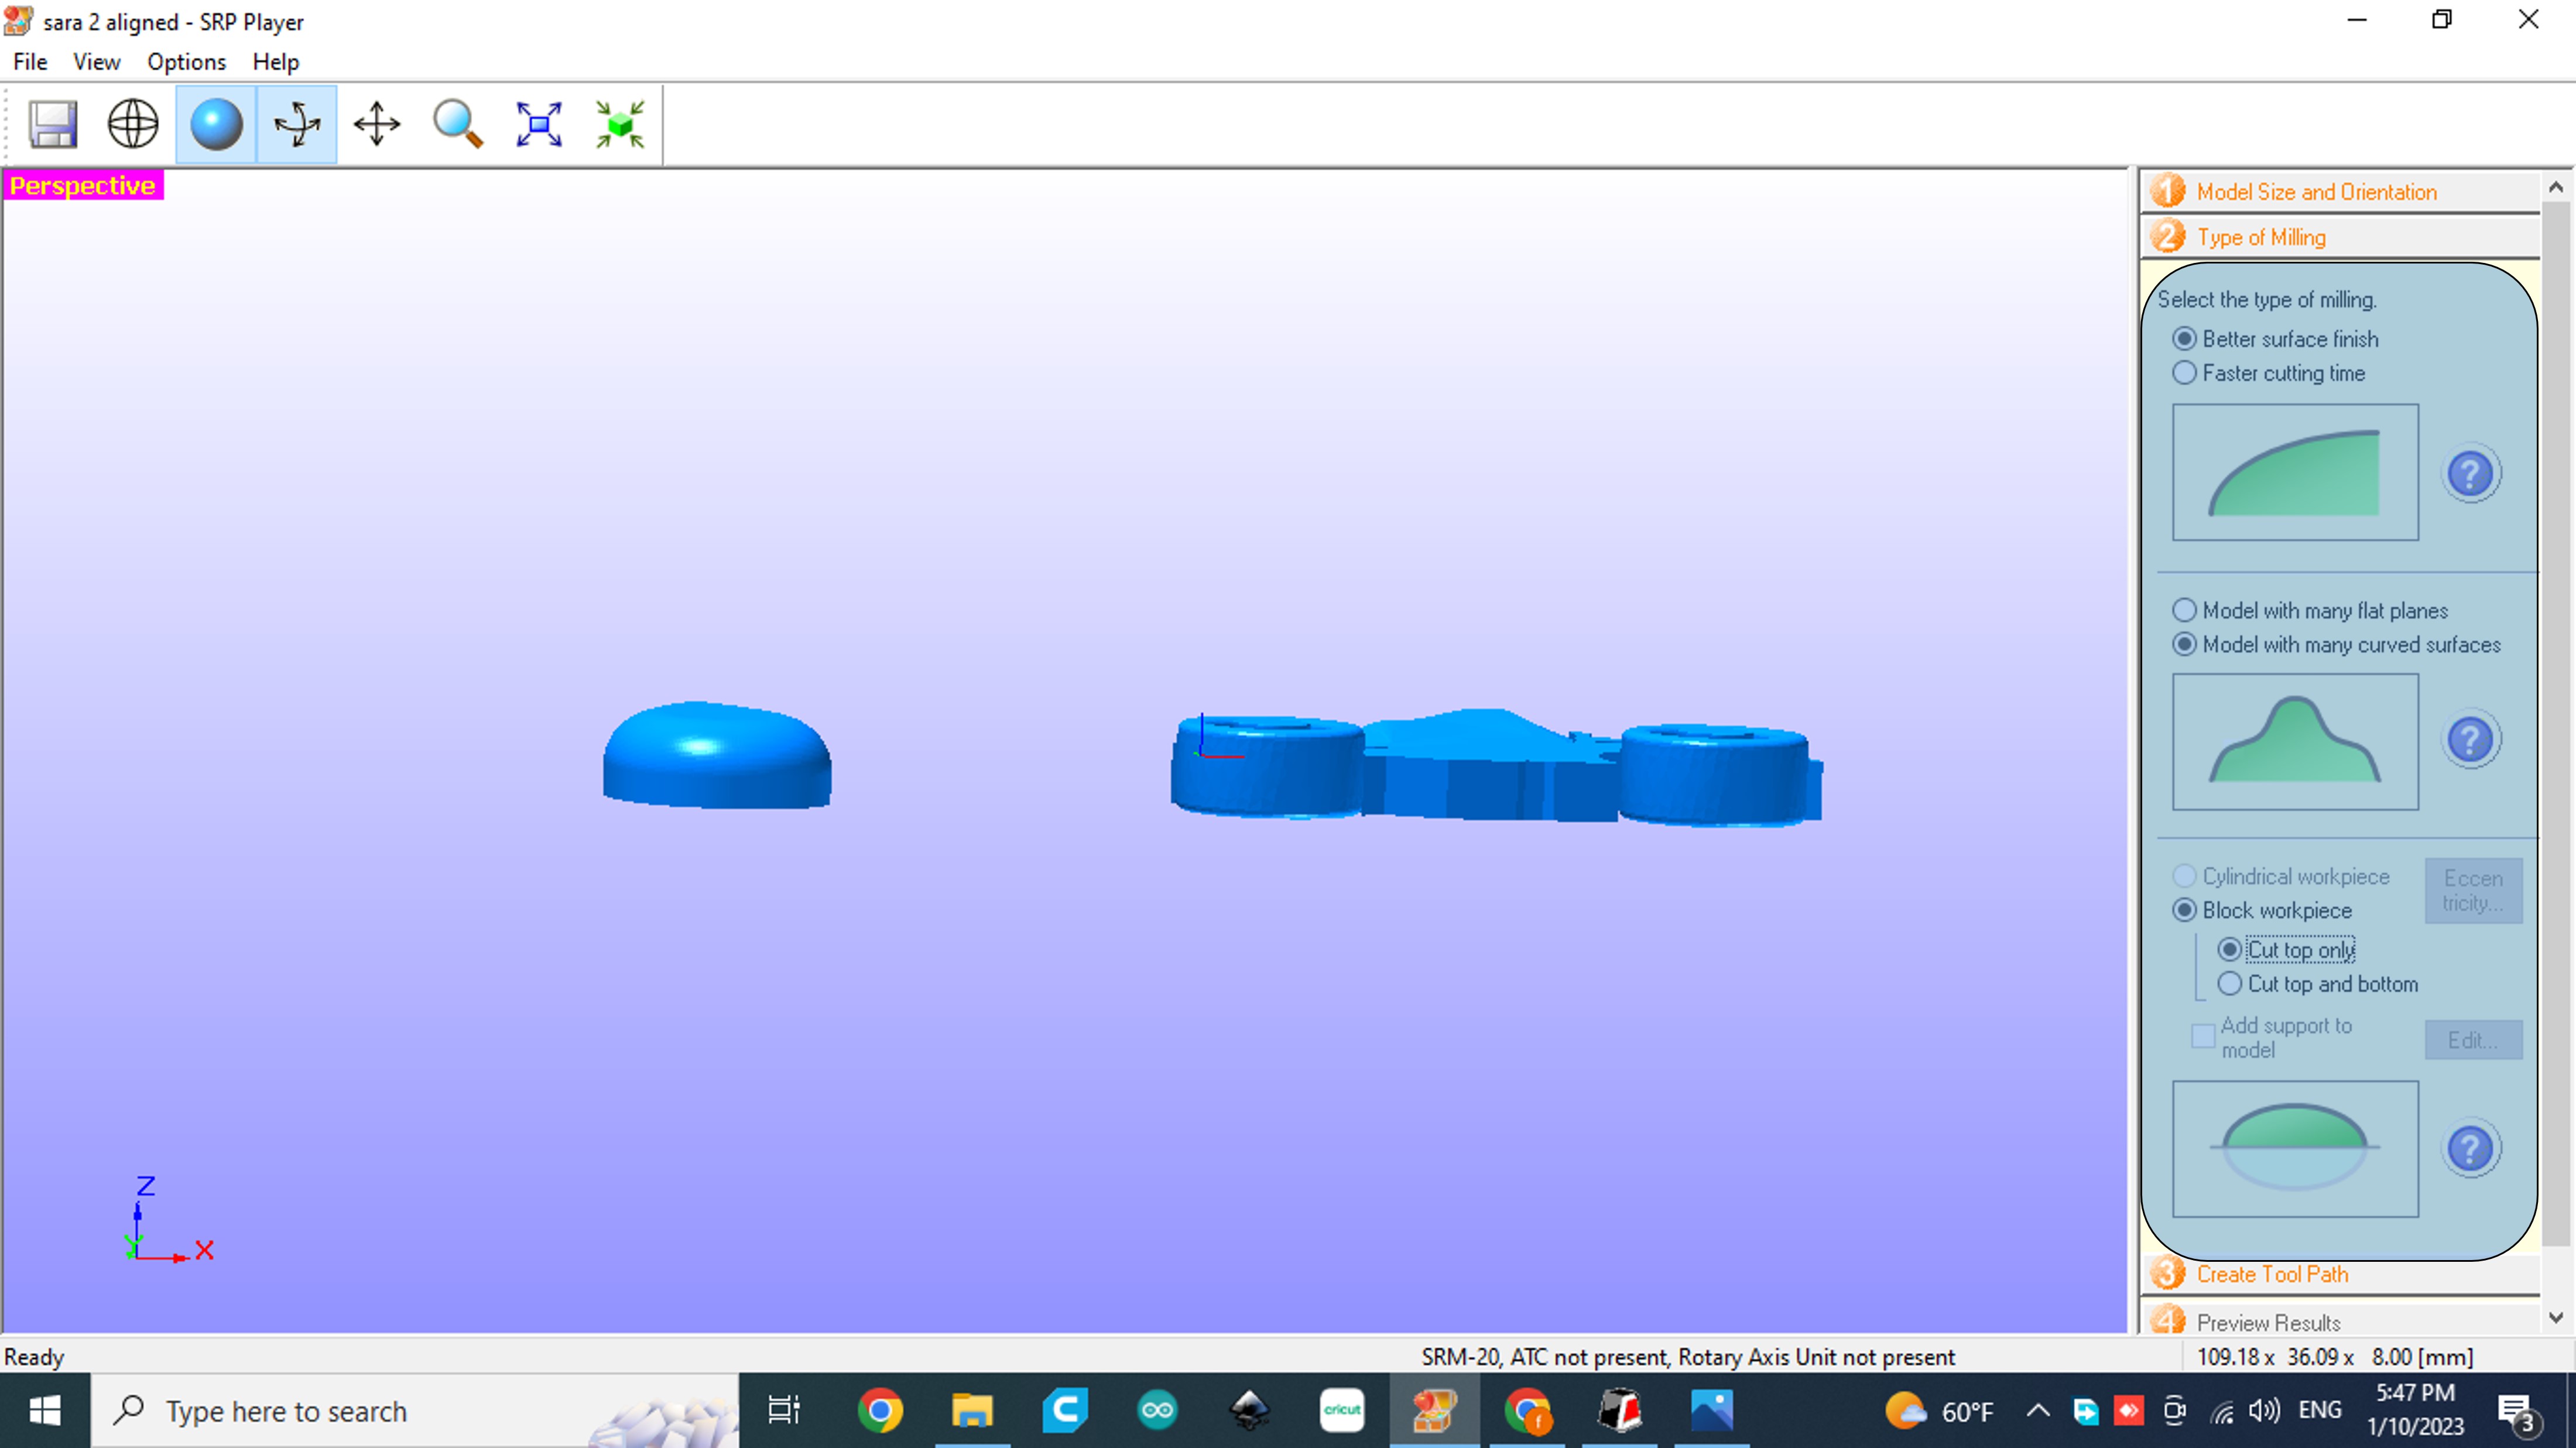
STEP 2: Choose the milling type
STEP 3: Create the toolpath
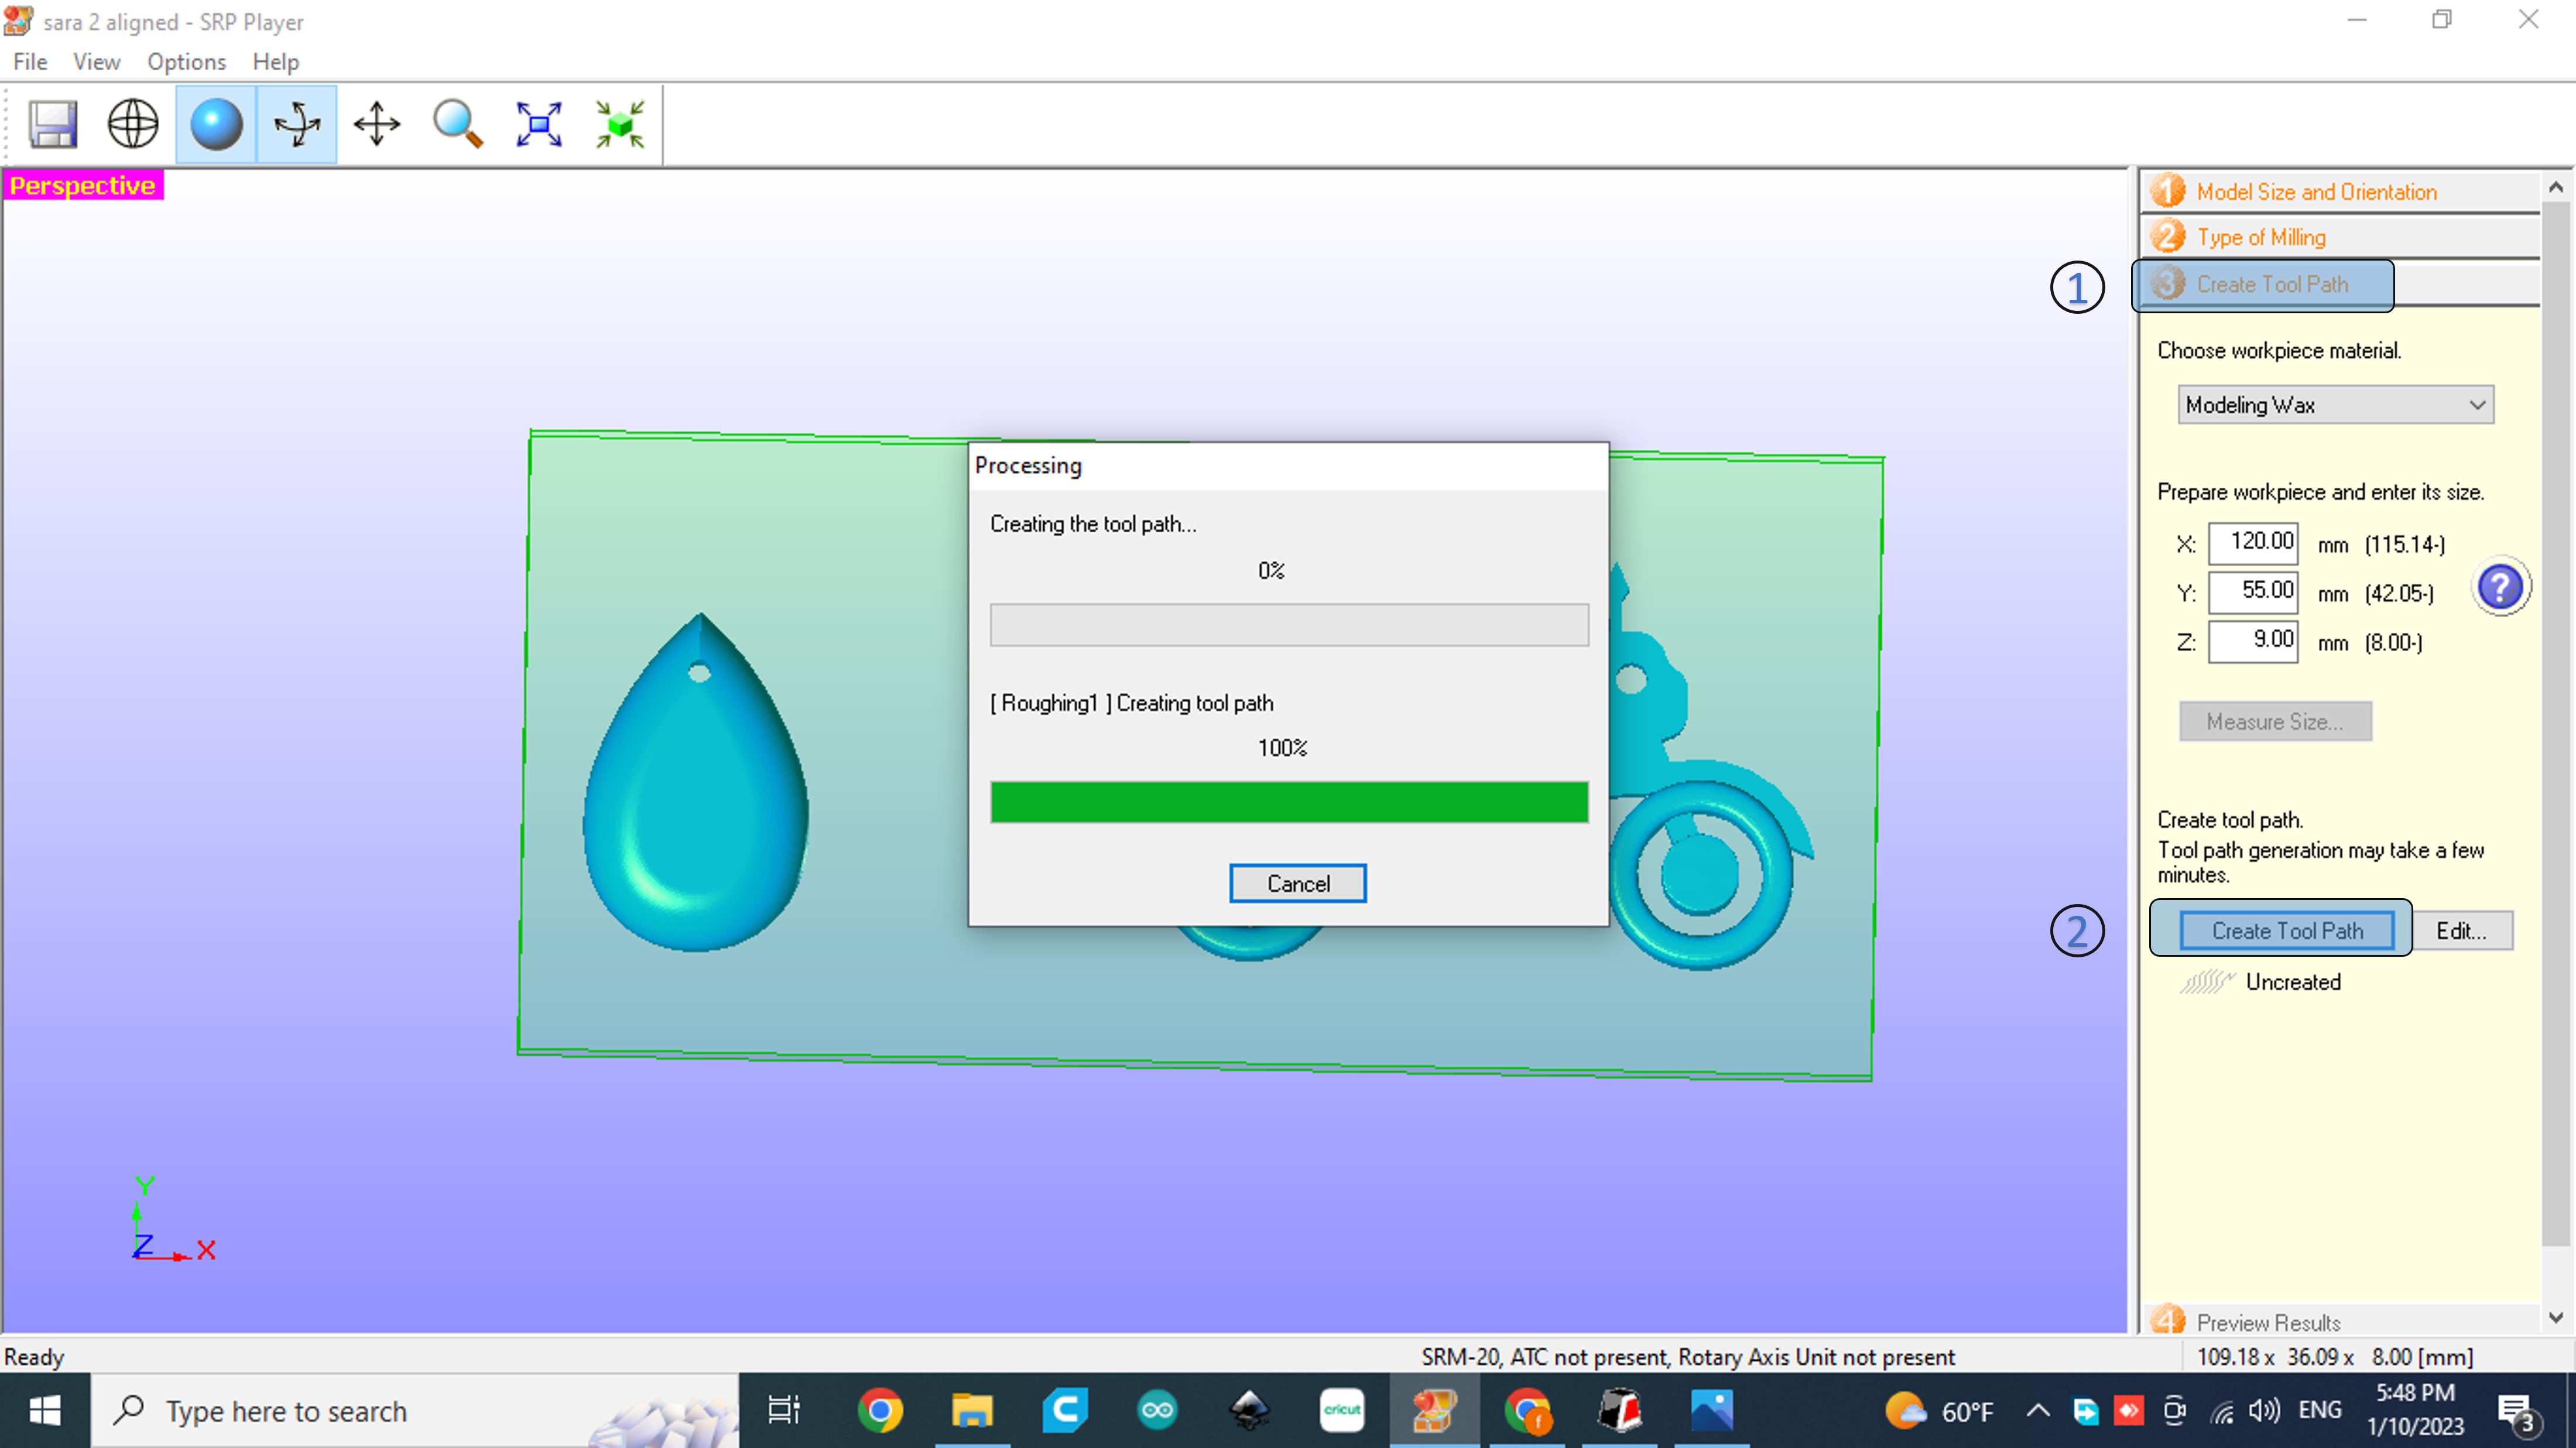
STEP 4:Based on the outcome, the milling time was approximately 2.3 hours.
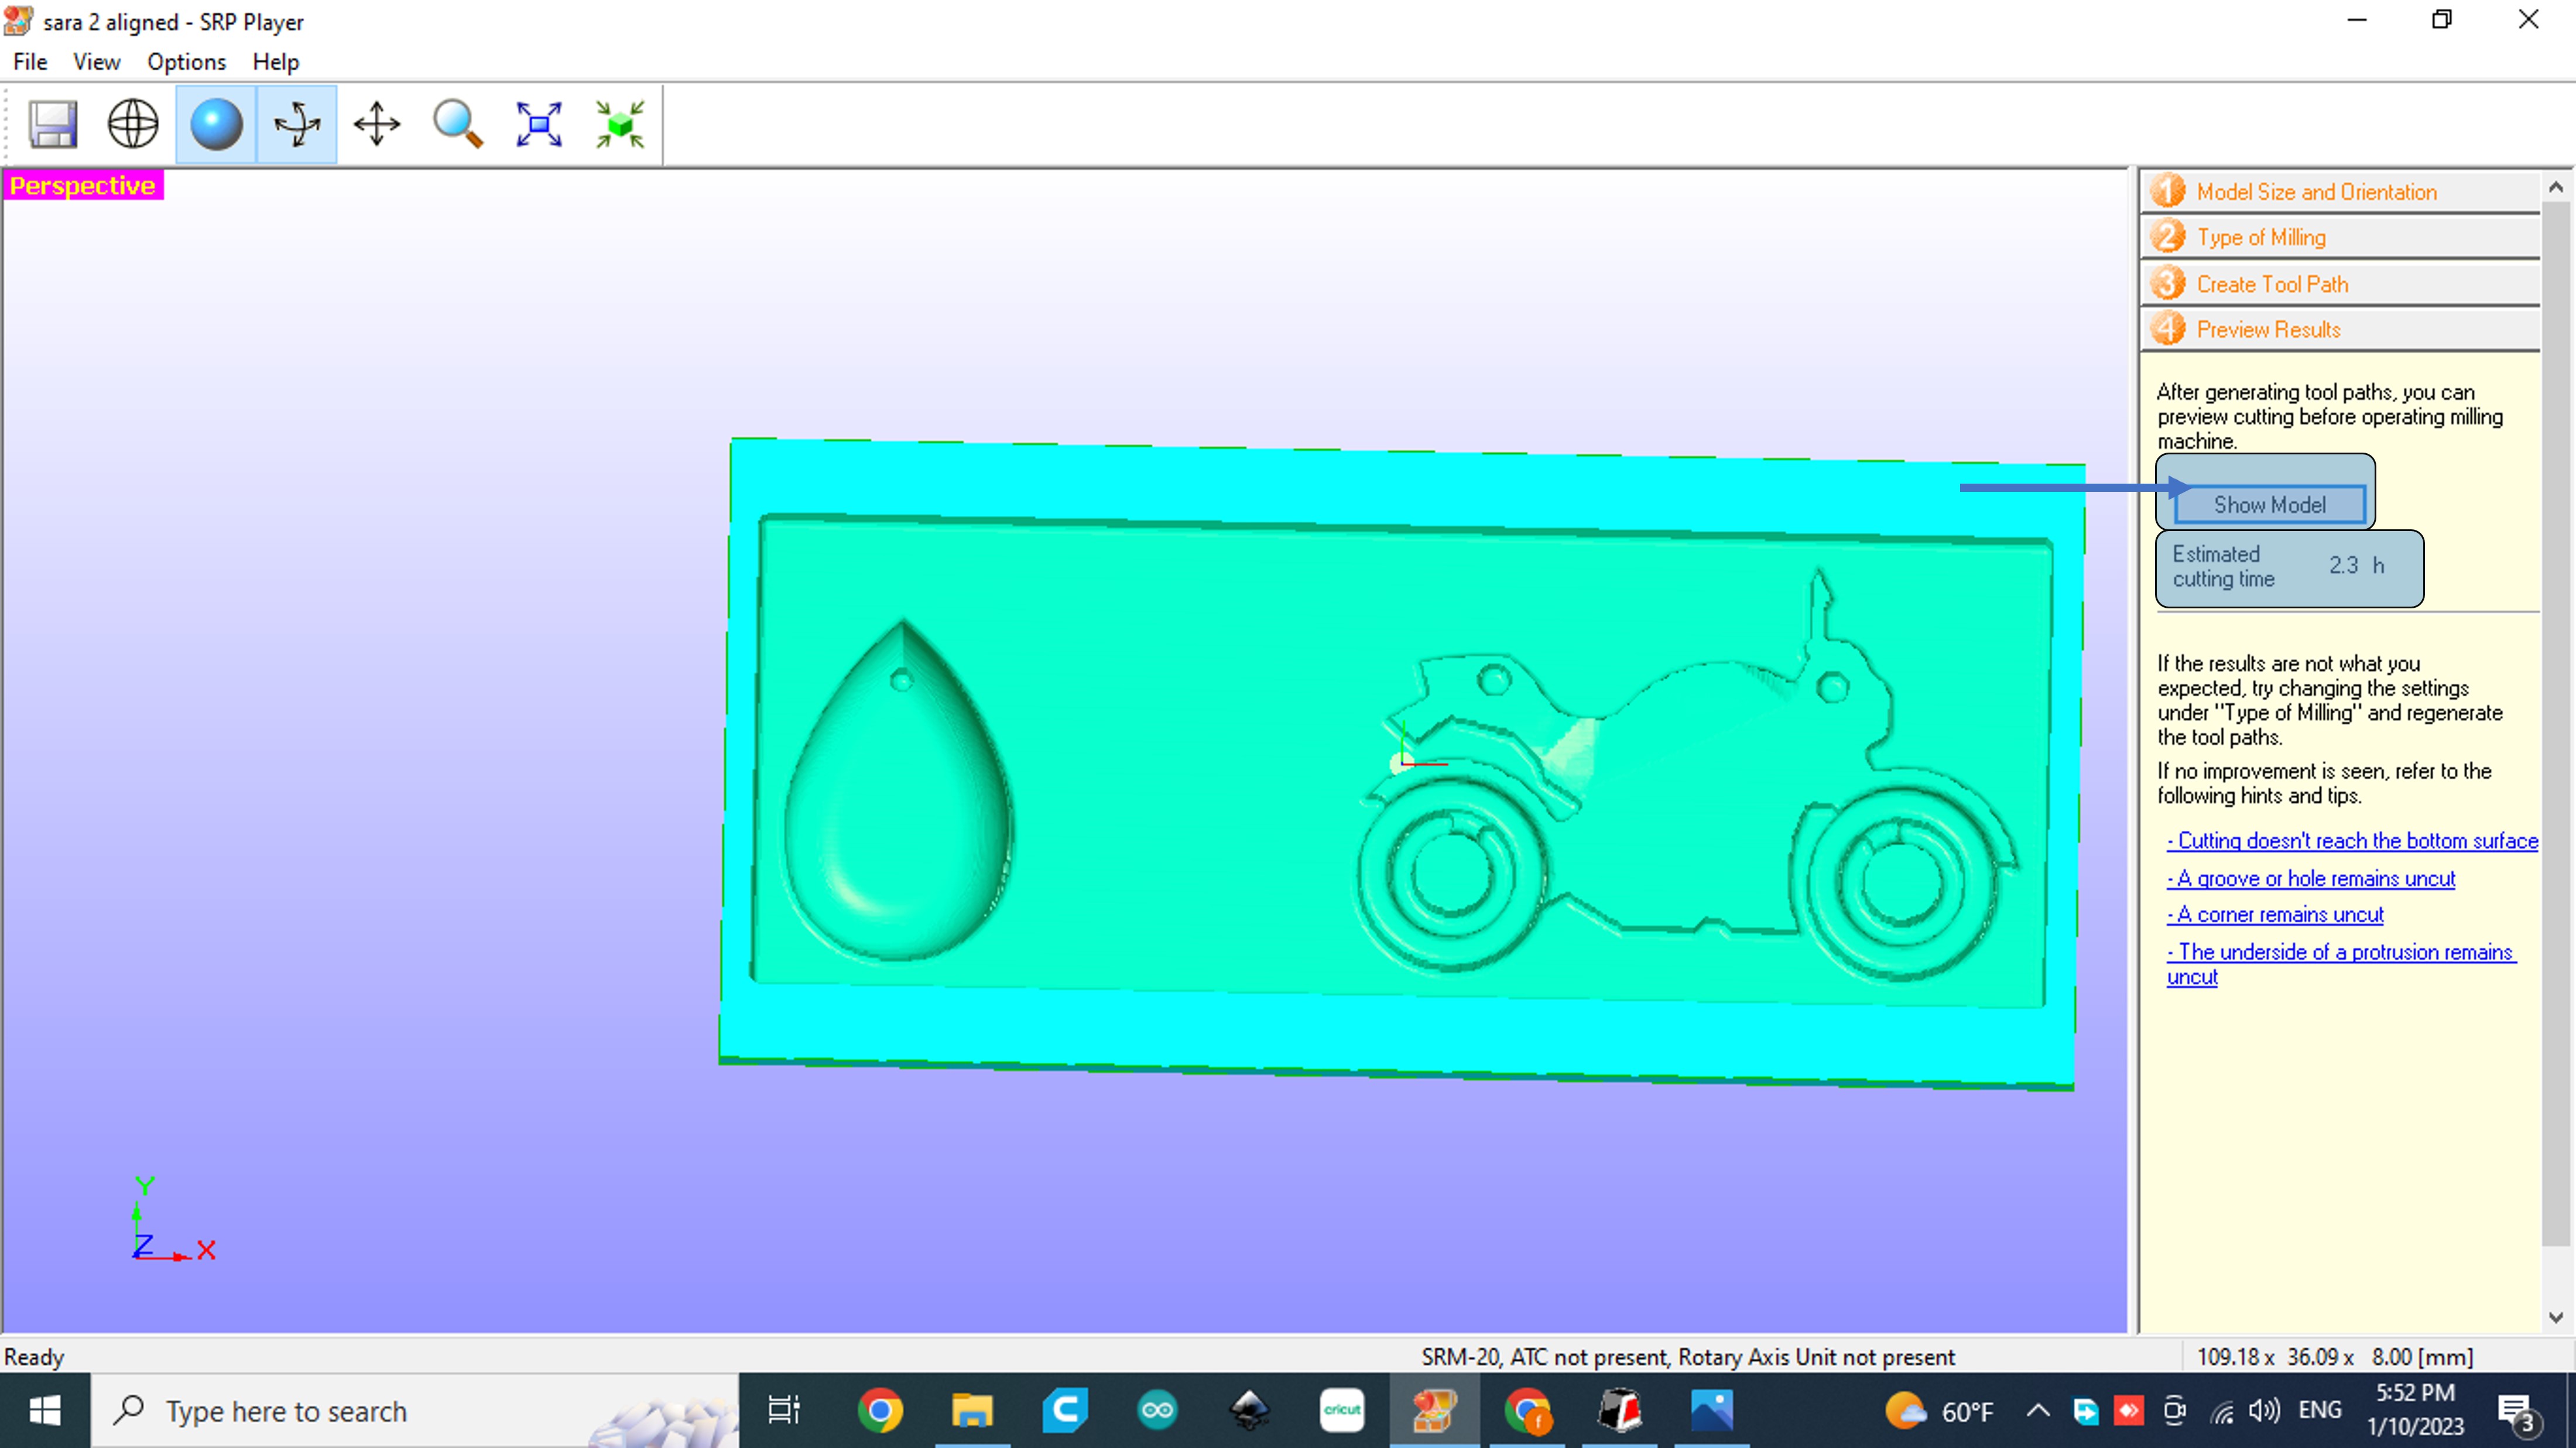
Note:You can decrease the milling time by seperating the two designs into two indivisual rectangles
STEP 4: Going back to step 3 to make sure we chose the right ball size
STEP 5: on the VPanel (Operation Panel), Sst the machine's zero origin point, its beginning point, and the drill pit as near as possible to the wax block without touching it.
Info! you can slide a piece of thin paper to make sure there is a noticable gap "which you can't tell by only observing".
STEP 6: in te same section of step 5 you hit start cutting, a message will apear where you can re-make sure of the size of the drill pit.

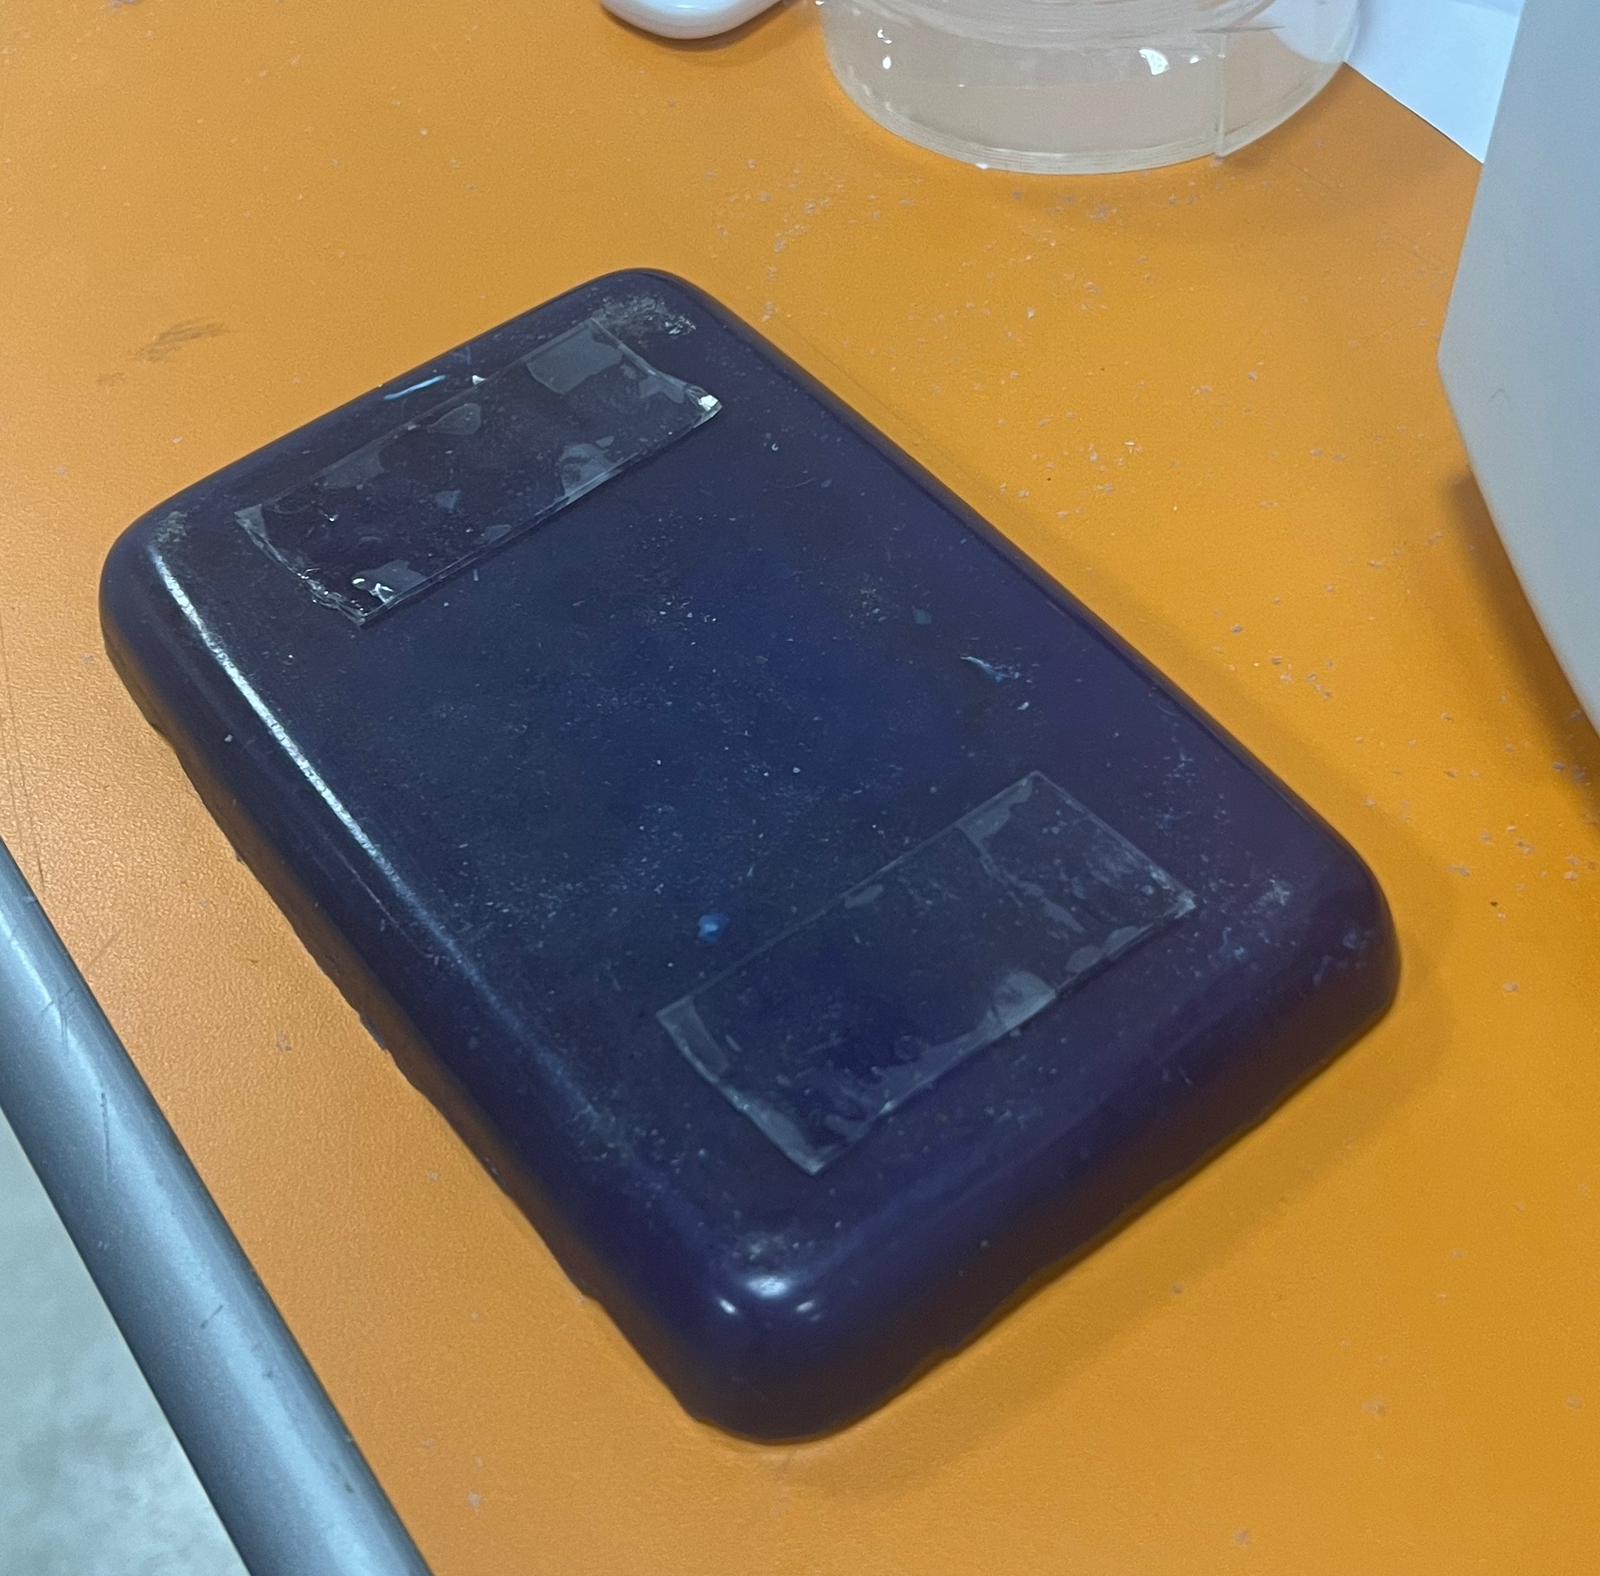
This was the result

Using the mould
STEP 1: Make sure all dust is removed from your mold.
STEP 2: Set the scale to zero and put your mould.
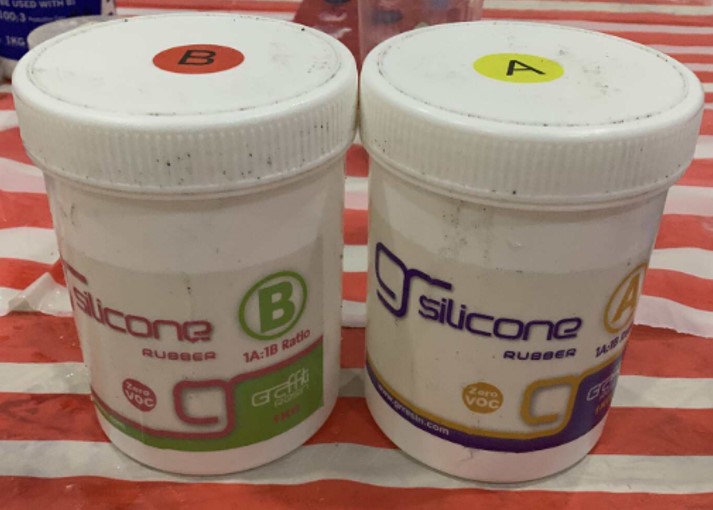
STEP 3: Pour some water and check its weight to know how much silicon you need.
STEP 4: A and B must be used in equal amounts. mix them and pour the mixture into the mould.
Warning! Make sure you stick some tape surrounding your mould to make sure it is thick enough.
This is how it should look like, leave it to Cure, in my case I left it for almost 2 days but usually it takes 24h.
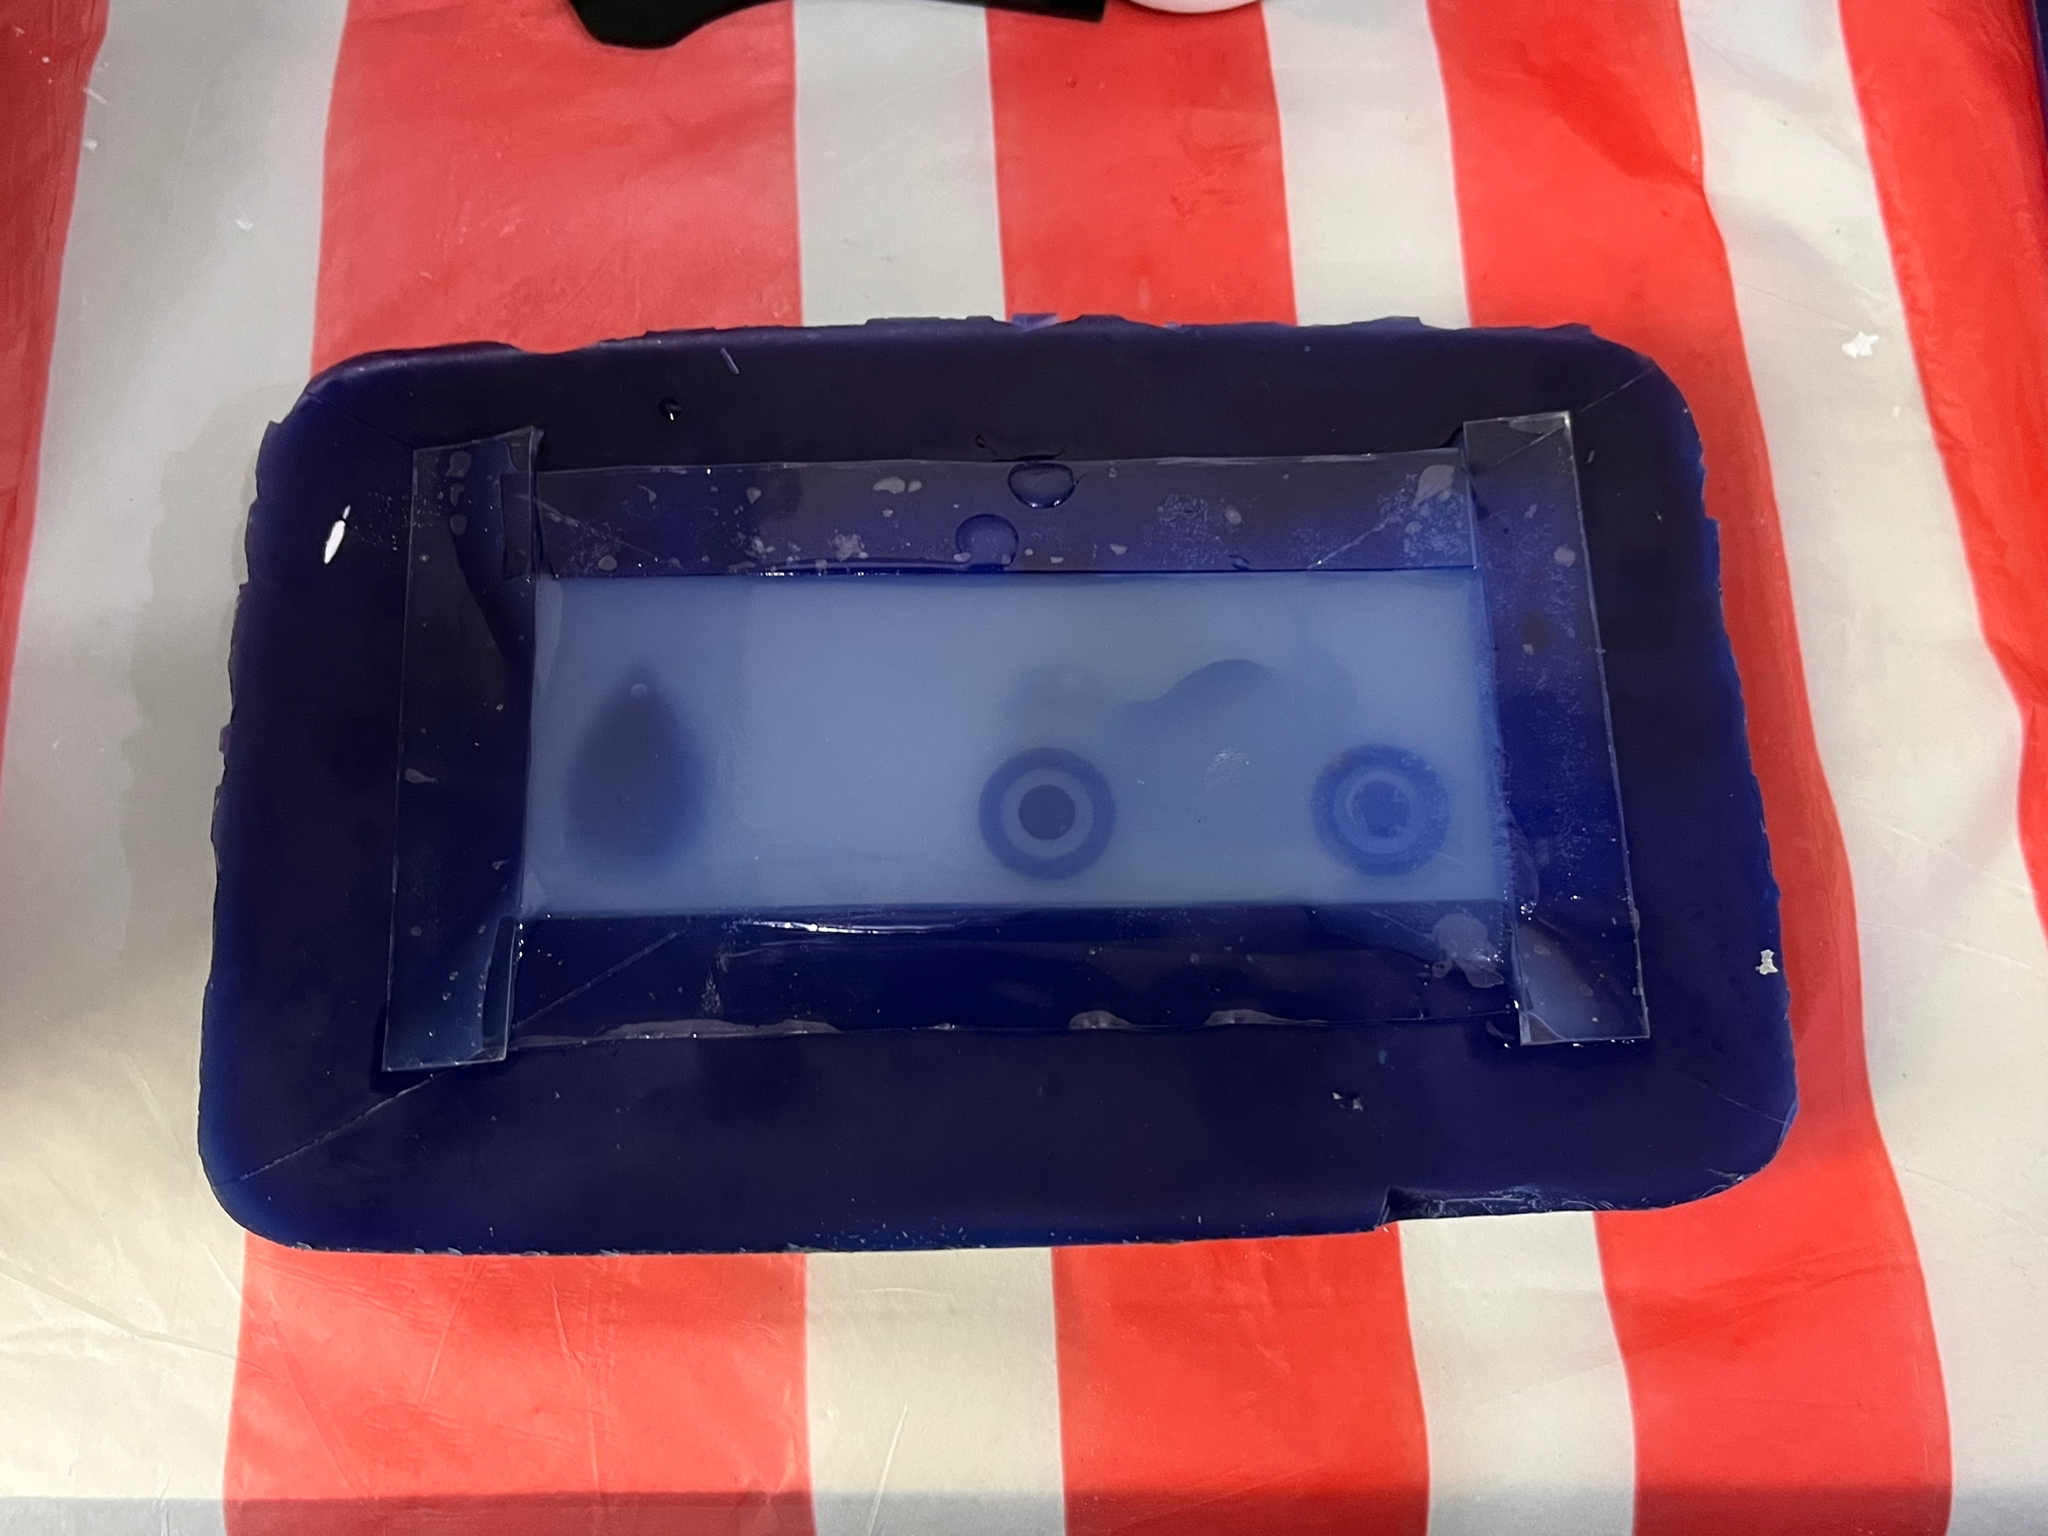
This is the Result, if you look closely you'll find that it is missing the hole, this is because the bubbles prevented the material from going in, and this is the problem I faced in this assignment

As an elternative solution I decided to put a wooden stick just to mark the hole and then drill it to make a gap
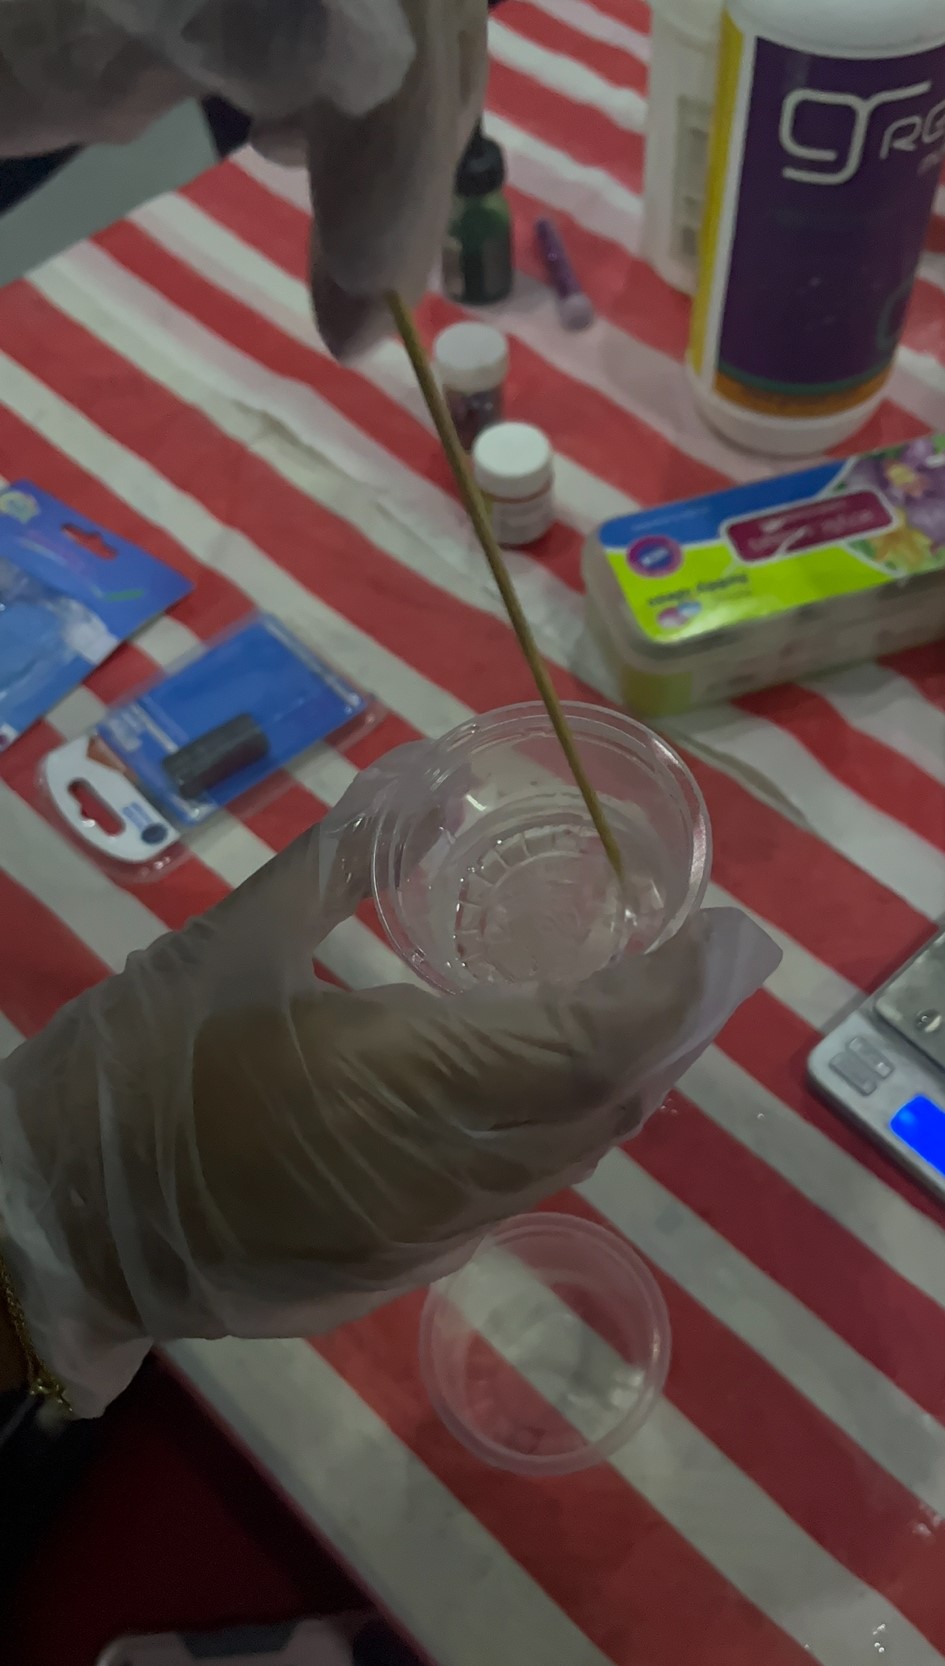
Process of making Resin
First of all! Safety
Safety: Although liquid 3D printing resins are toxic, potentially irritating skin and giving off harmful fumes, they are safe to use if the appropriate safety precautions are taken. Such precautions include the use of personal protective equipment like safety glasses and nitrile gloves, as well as proper disposal containers.
Work time: 15 minutes
STEP 1: I started by Mixing exact ratio of 10 grams of resin to 6 grams of hardener. (make sure you use different spoon for each)
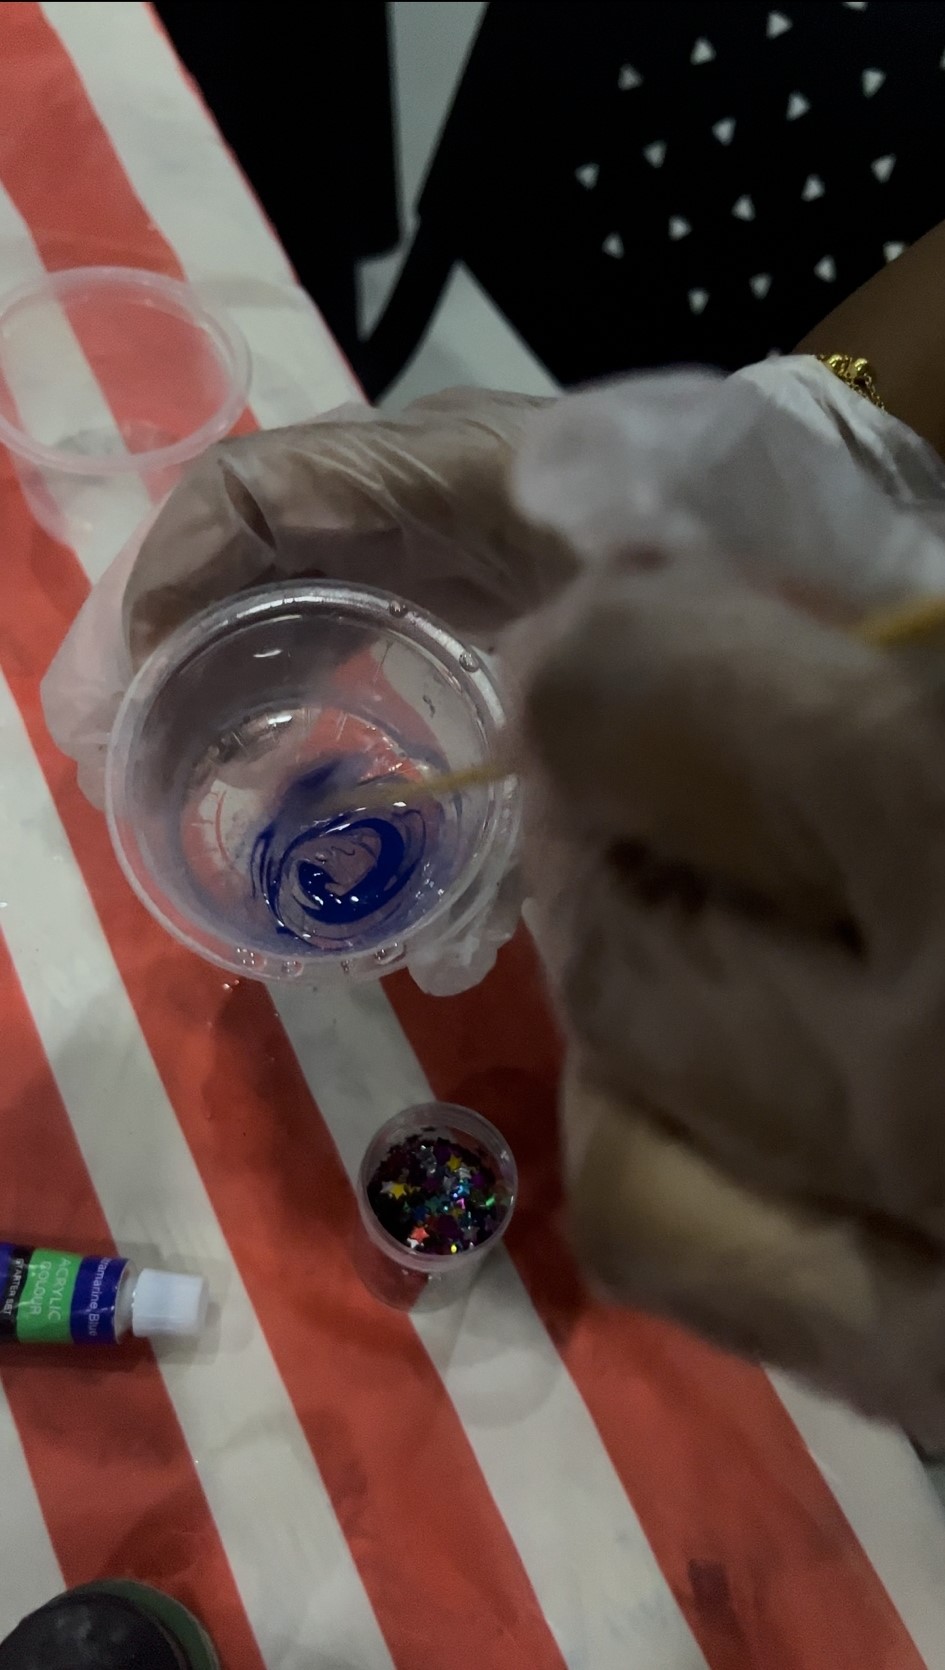
STEP 2: I poured the hardener into the resin and started mixing with a wooden stick.
STEP 3: I poured the hardener into the resin and started mixing with a wooden stick.
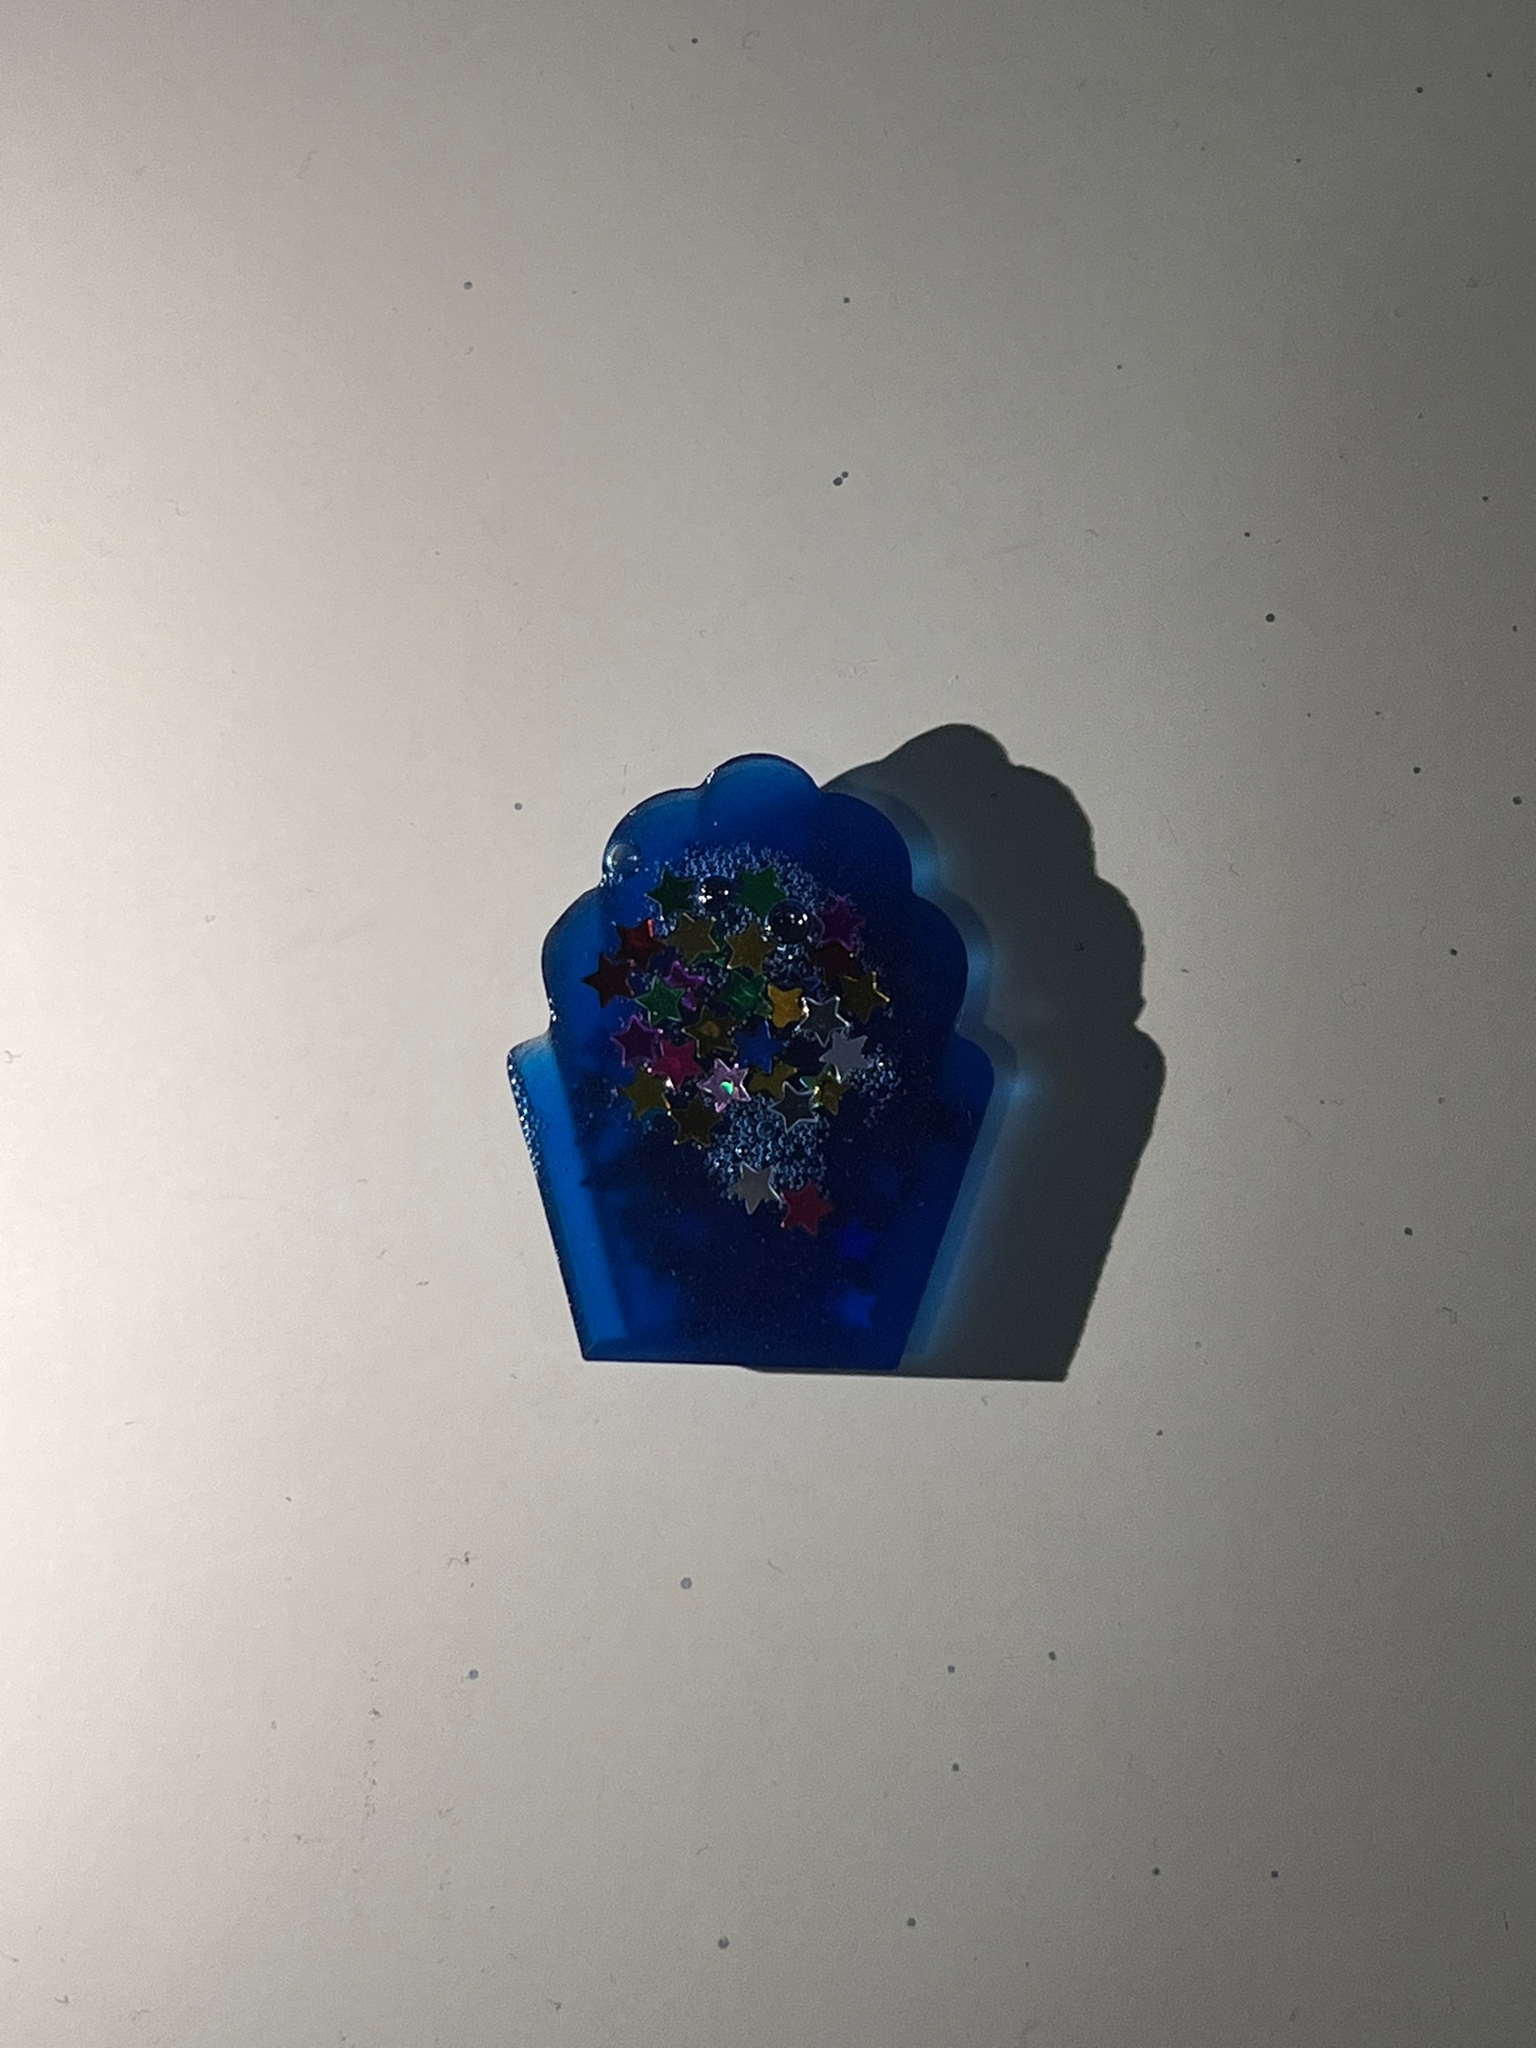
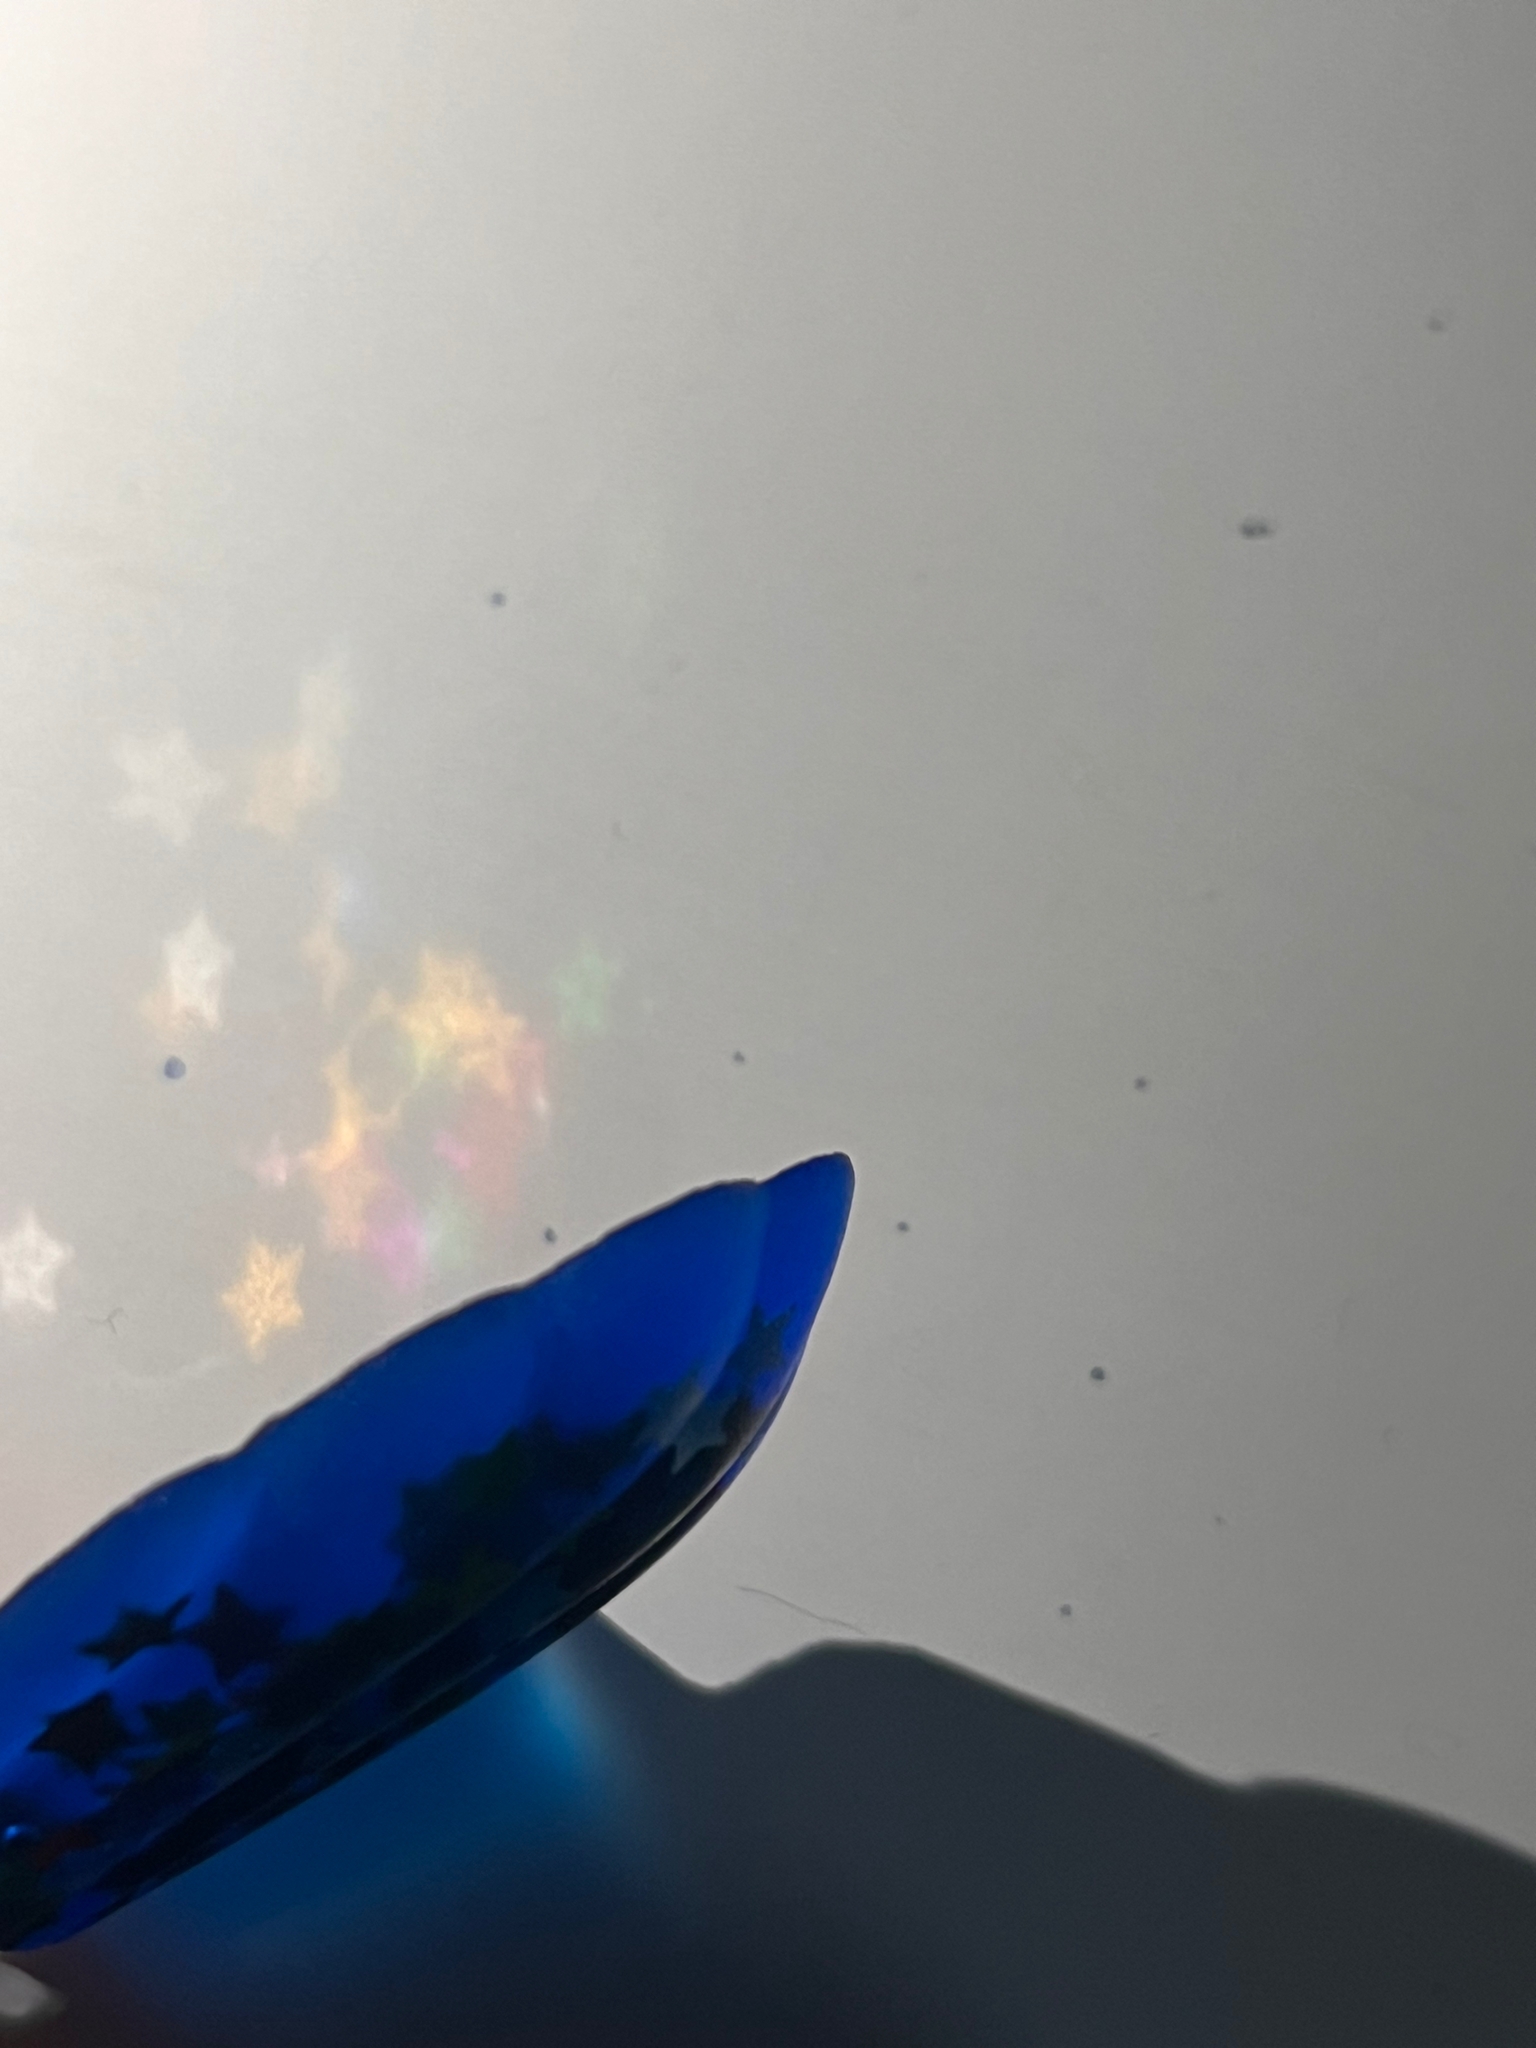
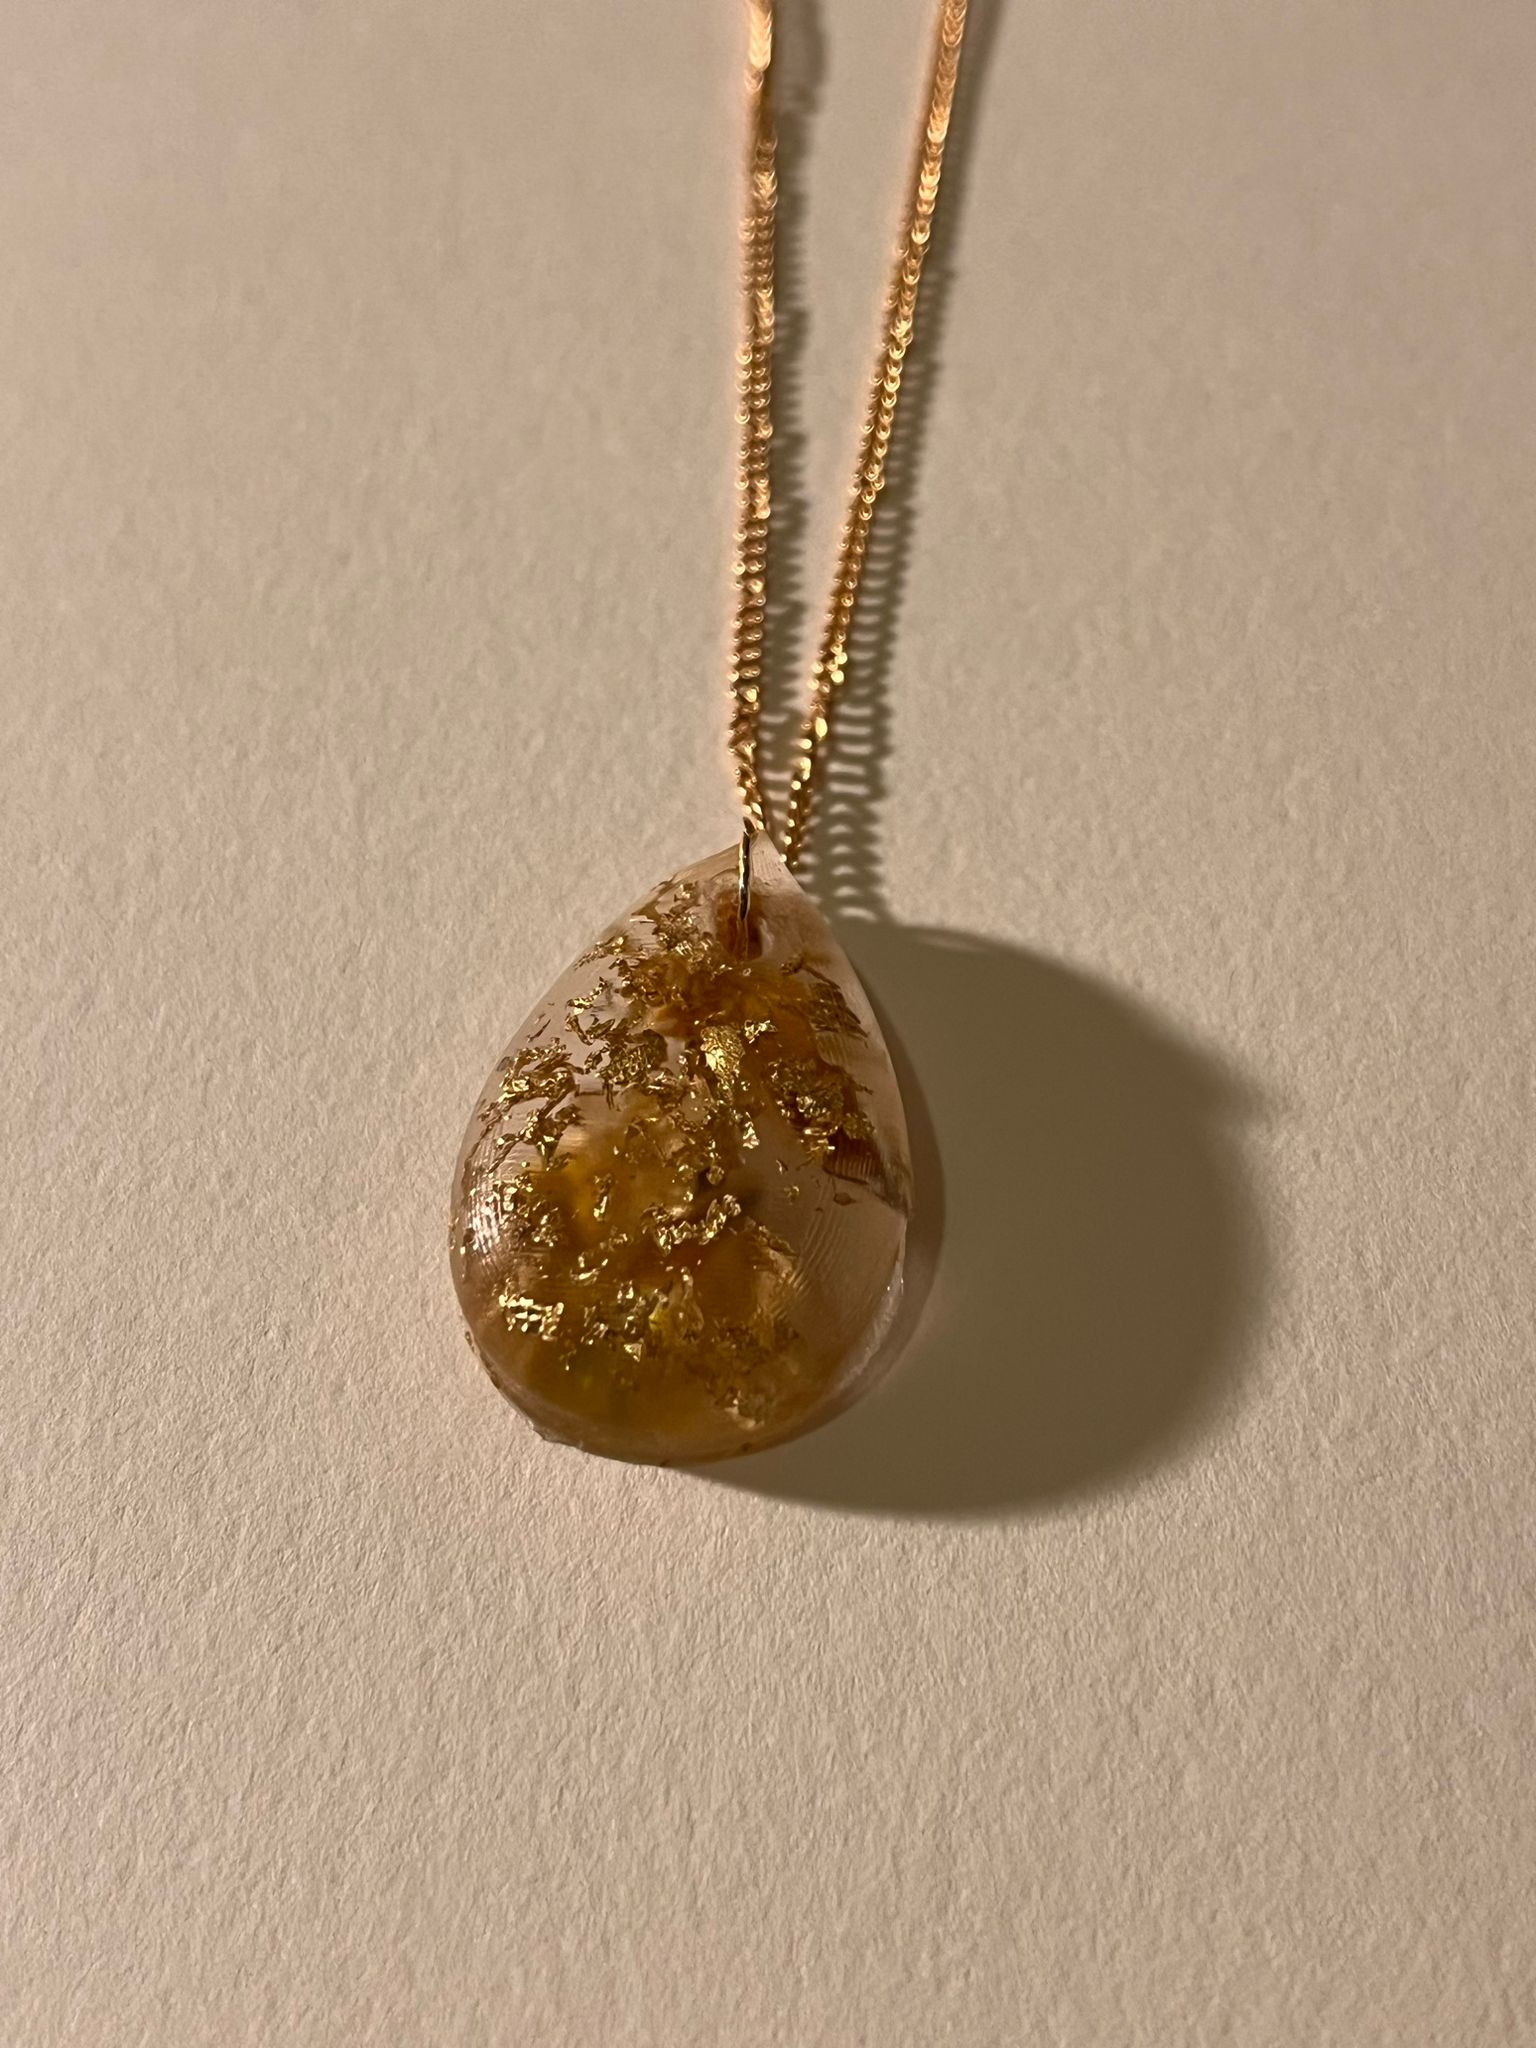
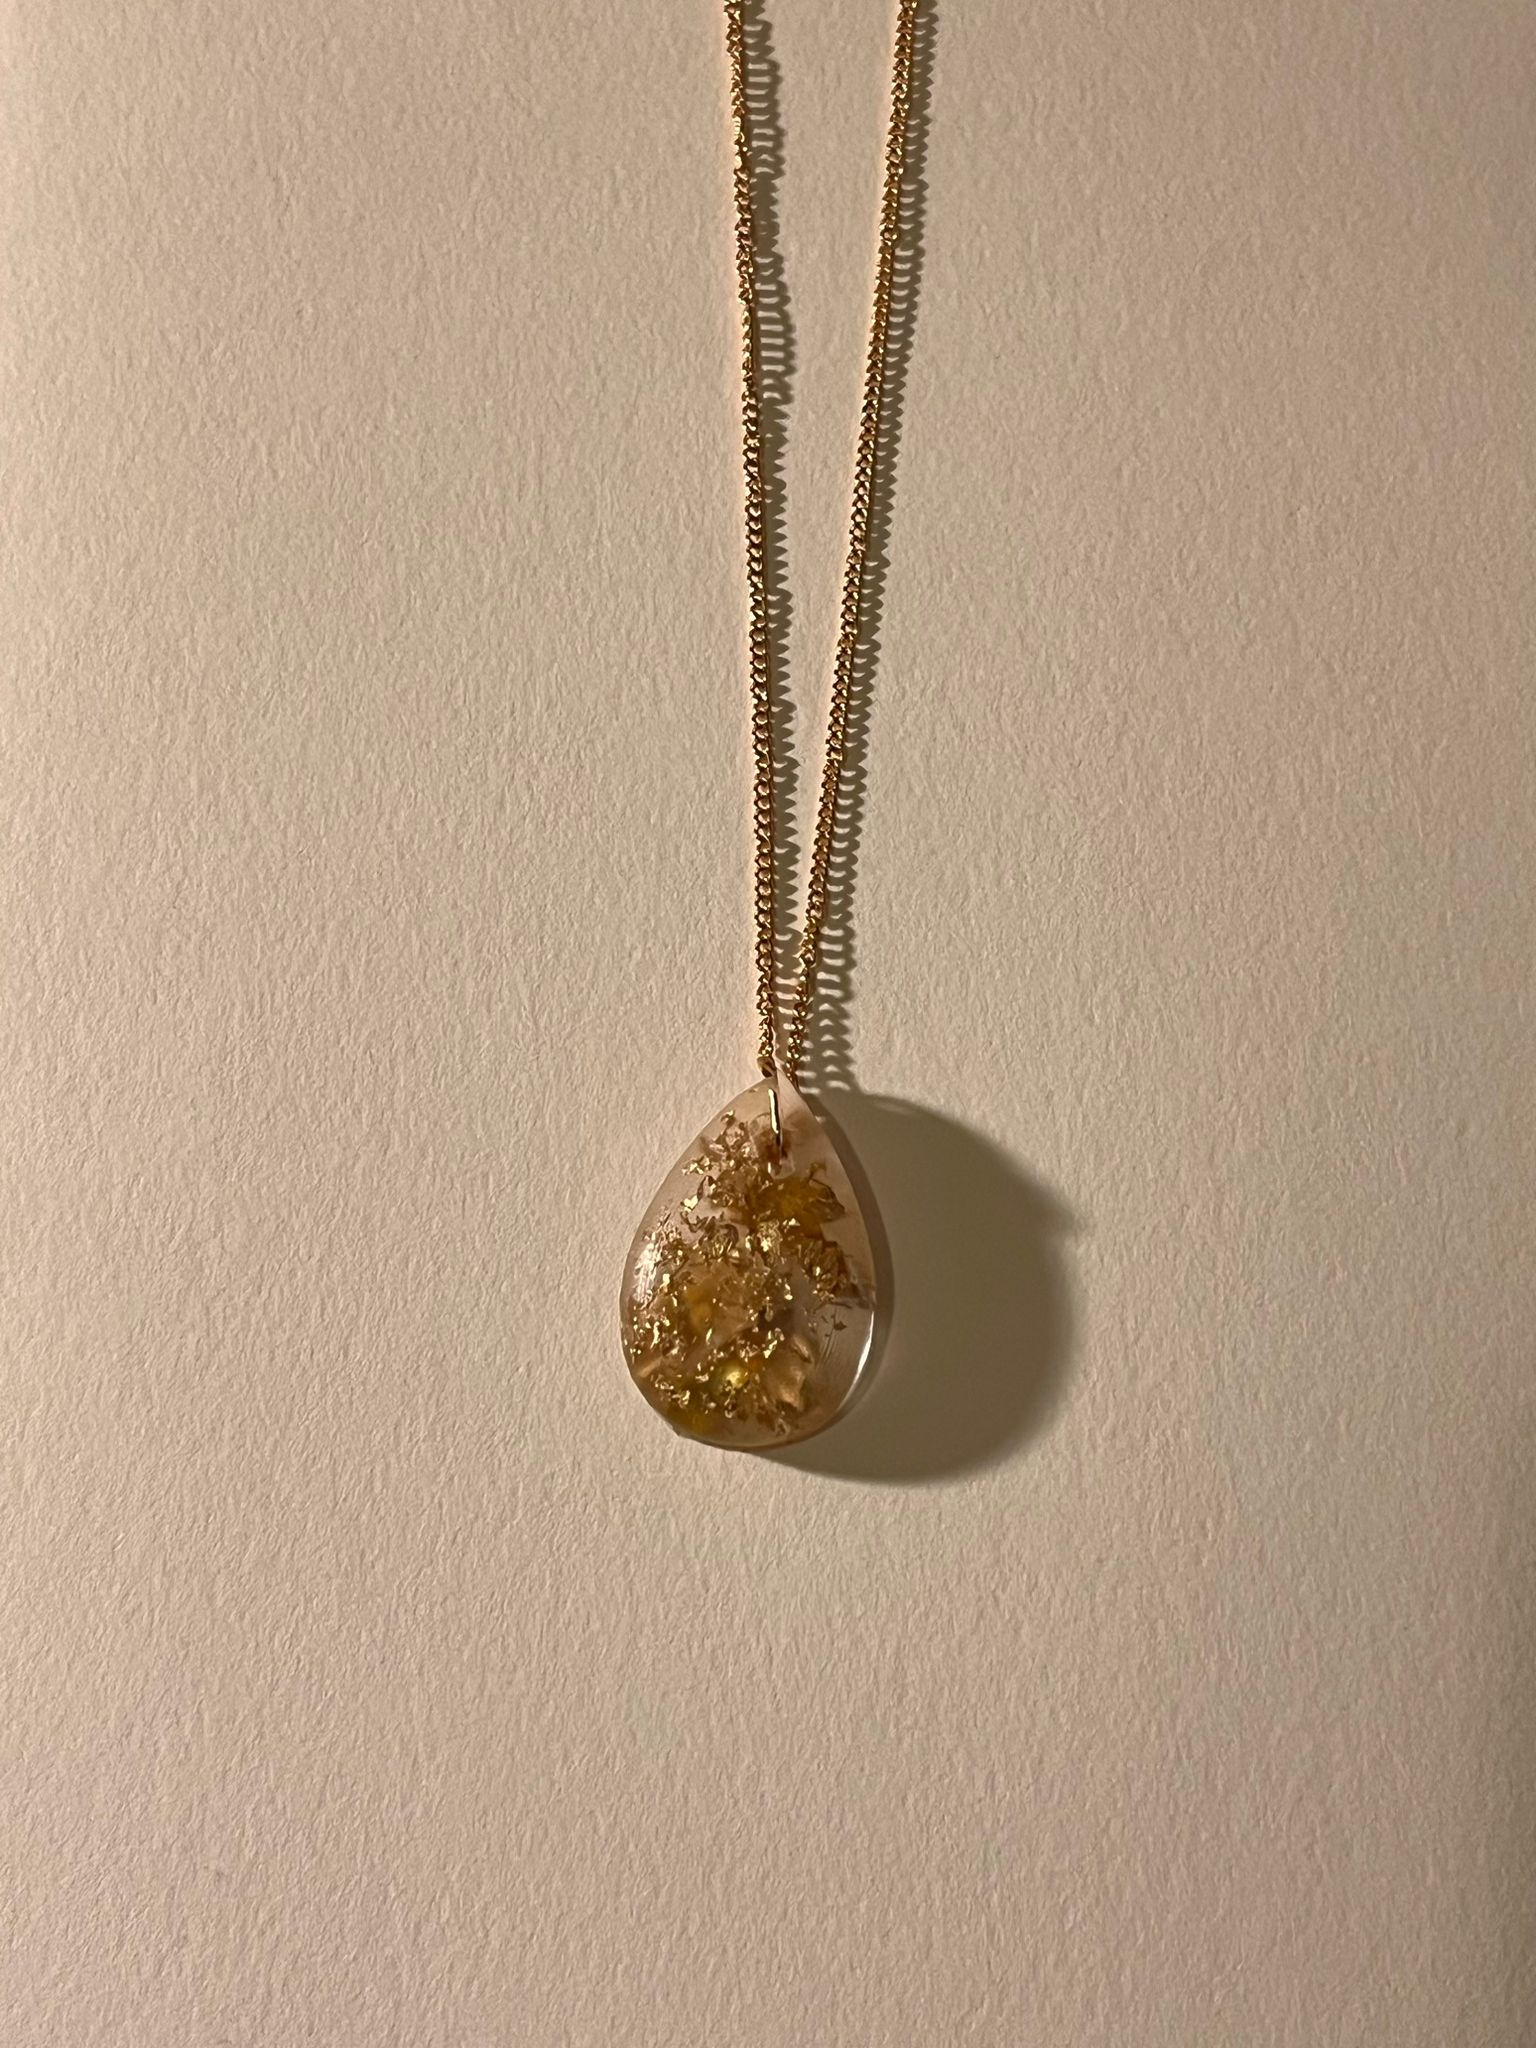
I poured the Resin material in and added some gold flakes and dried flowers, the idea of this mould is that I can make special gifts for friends and family depending on what type of flowers they like.
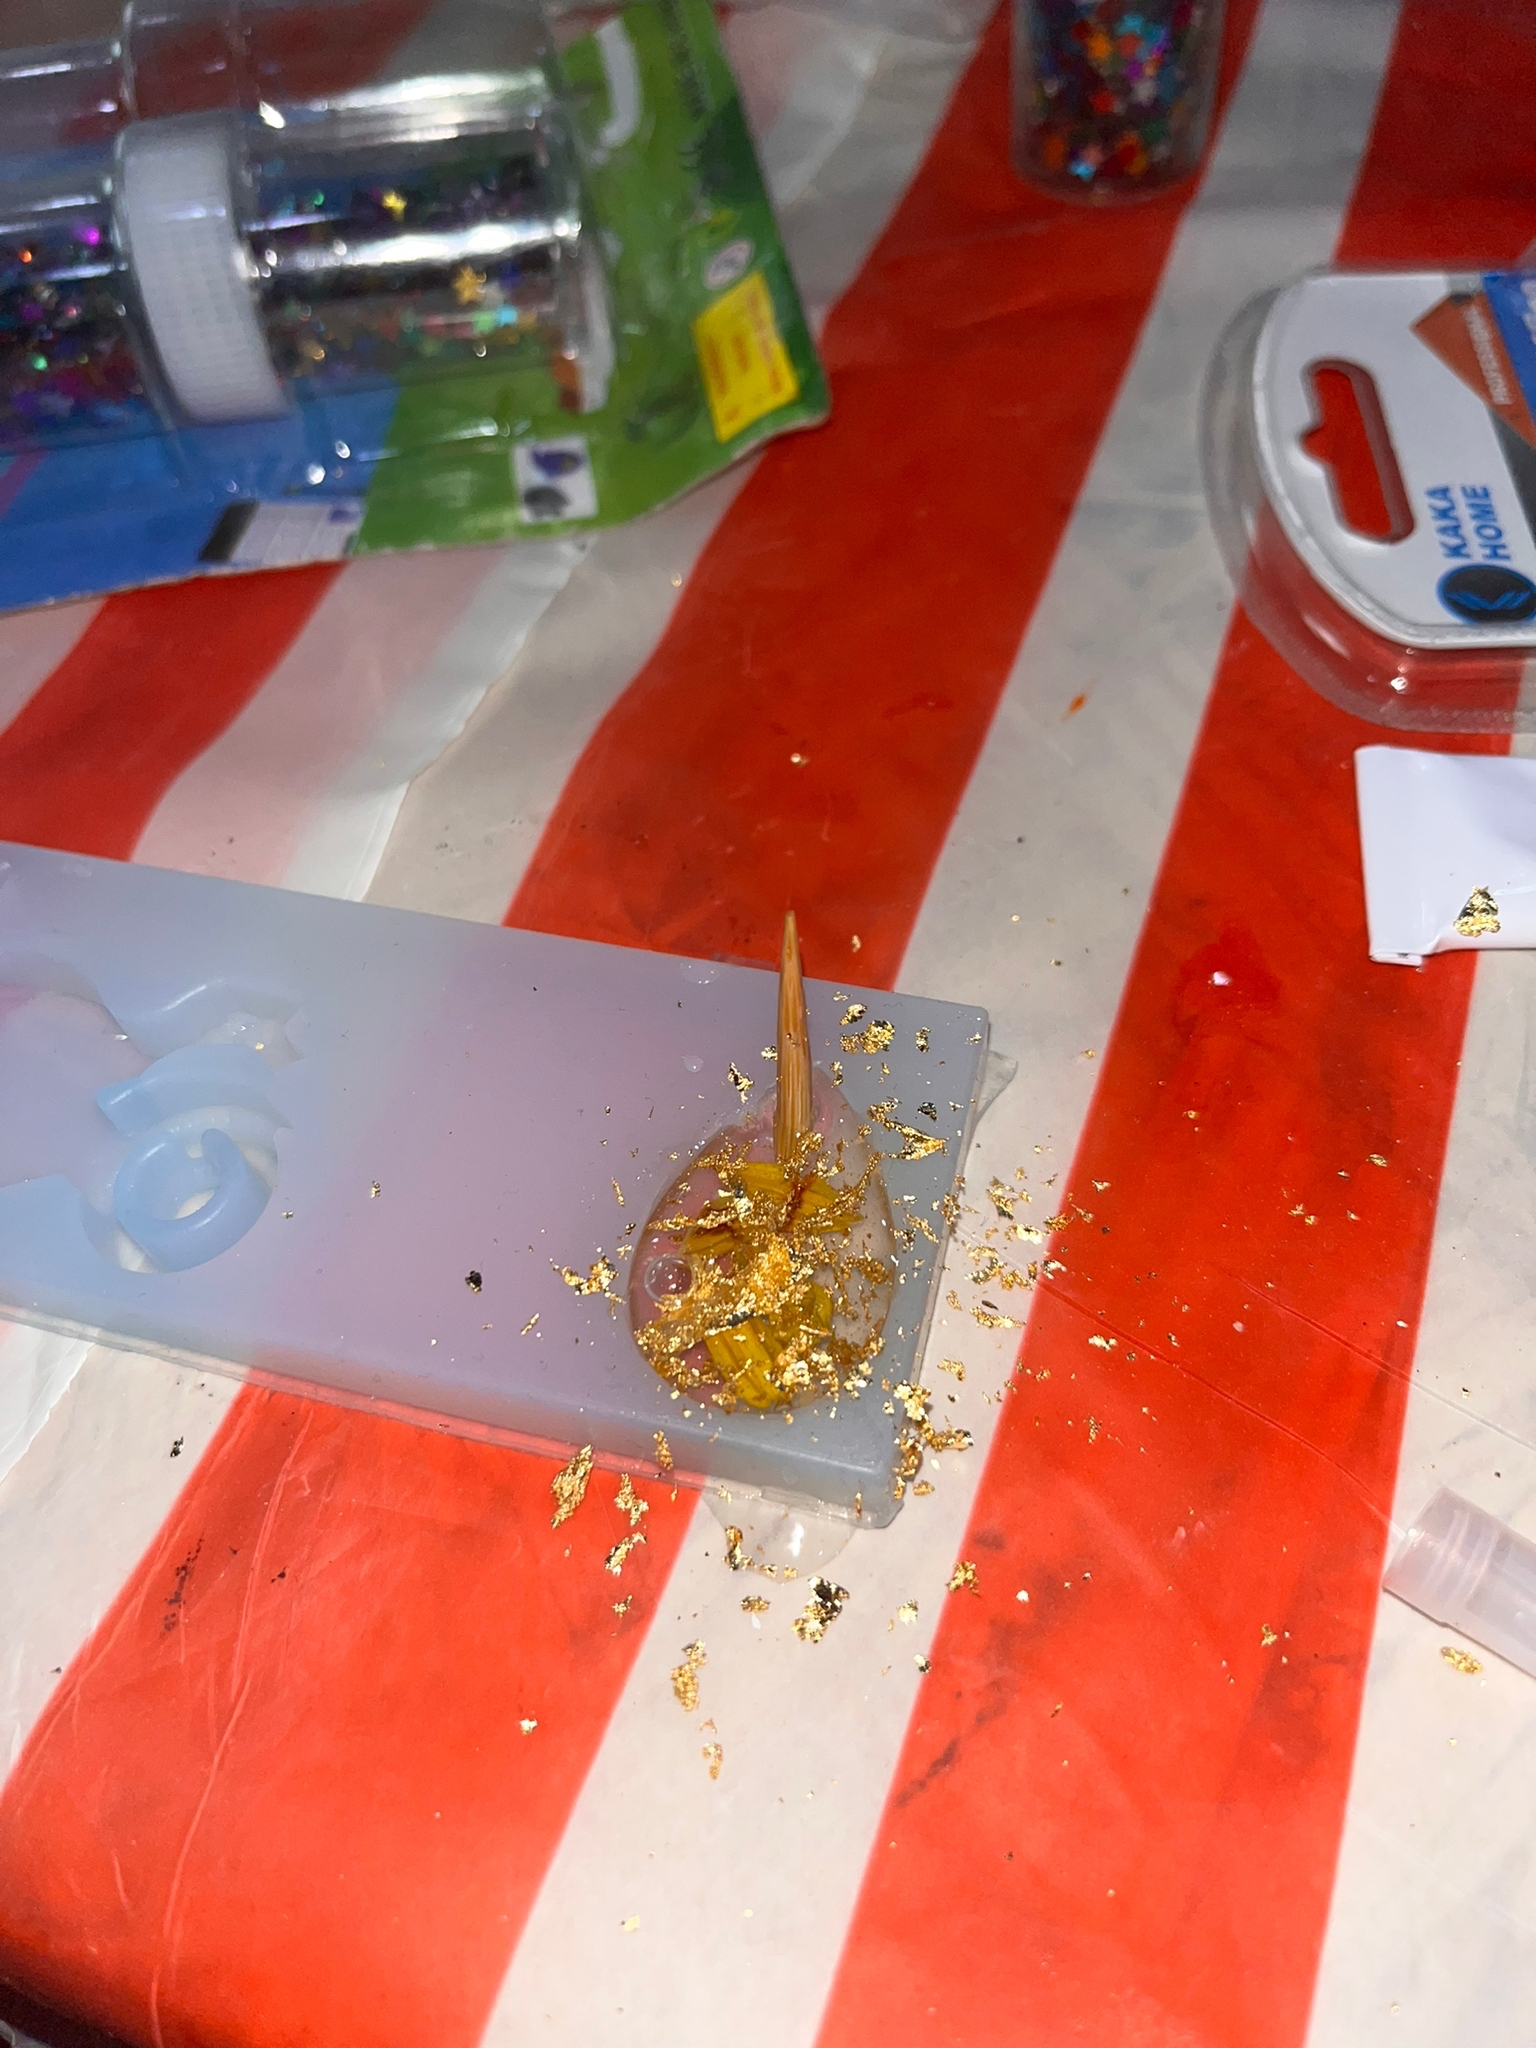
Last step: Let it cure for 2-24h depending on the size.
Hero Shots
After drilling the gap, I used 10mm jump ring and a gold stainless steel chain necklace, and this is how it looked like
🔗 Download Files
3D pendant fusion file
3D pendant stl file
🔗 Resources
SRM-20 Milling Machine Info
Molding Vs Casting
🔗 Useful links
How to put notes in HTML
04
Contact Me
Mobile Numberr
+973 35011840
sarahashiim18@gmail.com