FINAL PROJECT
POSTER
PRESENTATION VIDEO
PROJECT DESCRIPTION
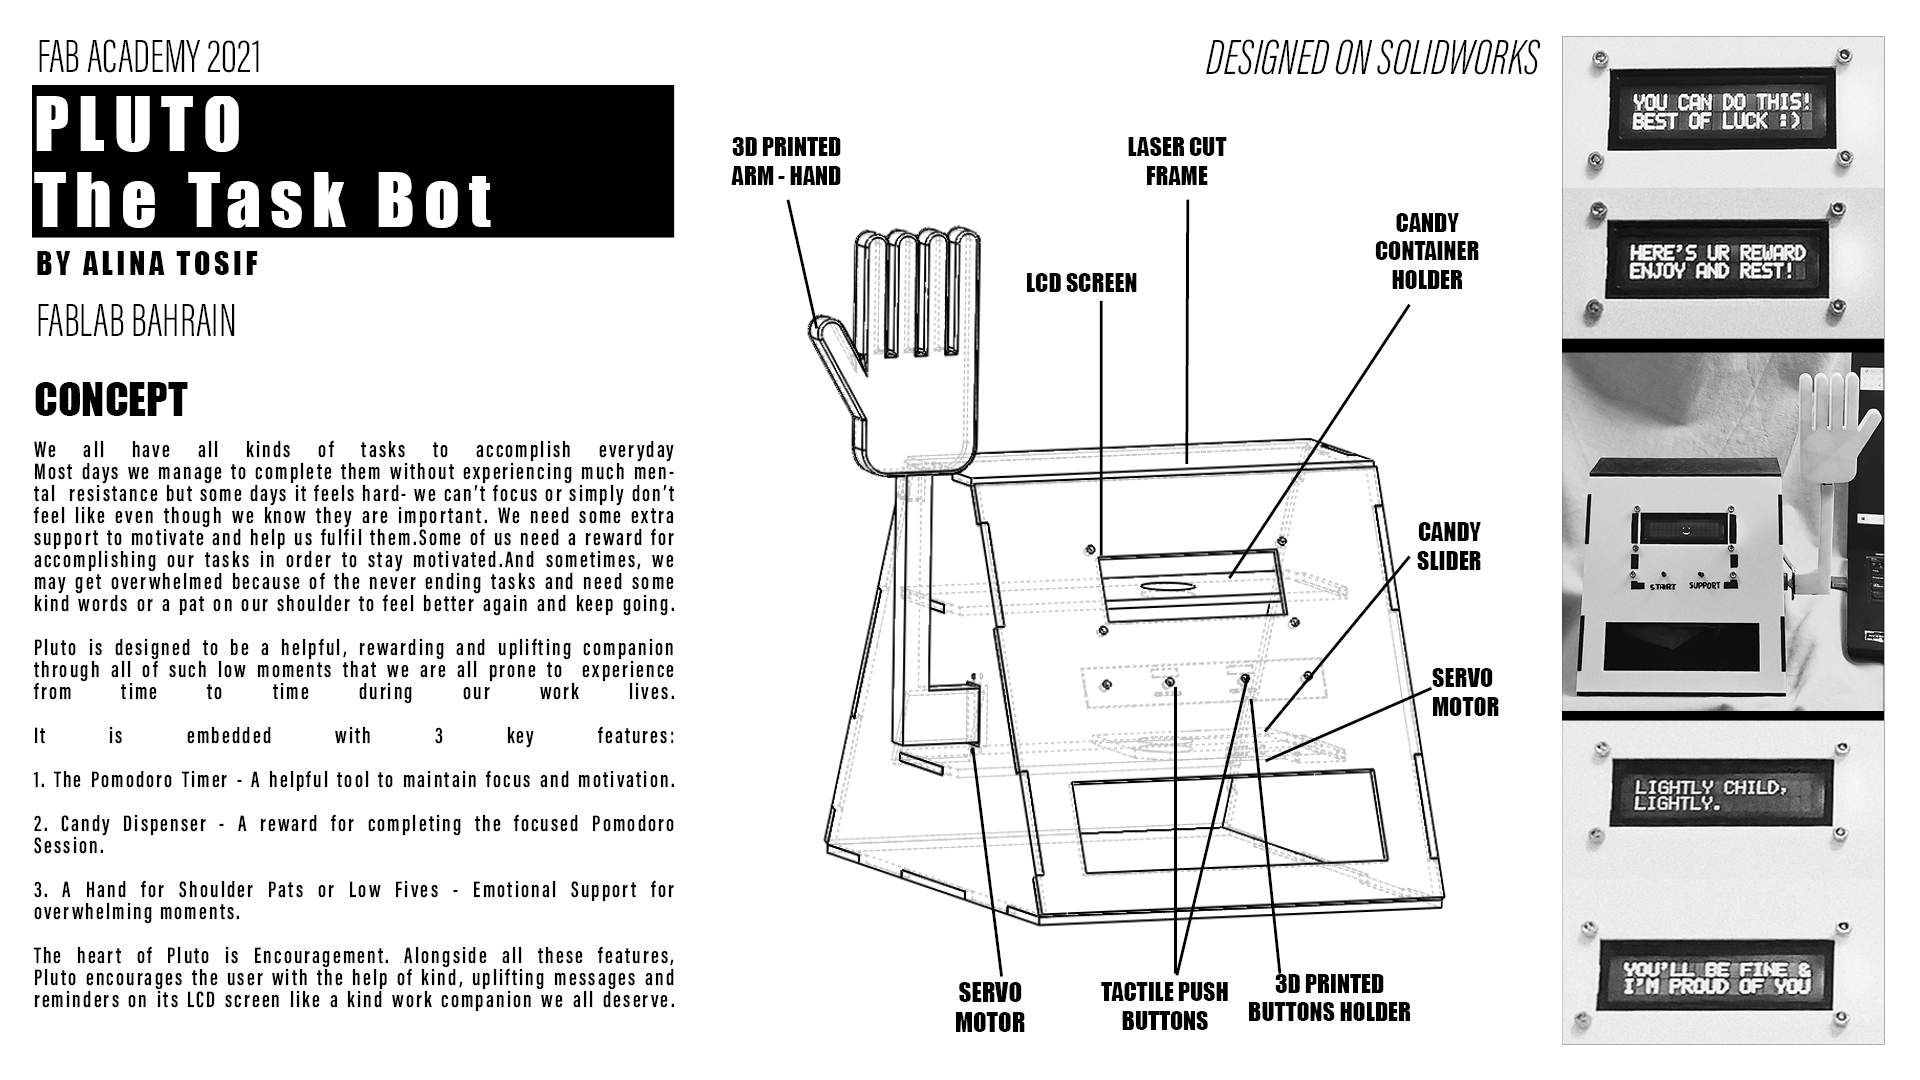
Pluto is a small encouraging bot built to be a work companion in the overwhelmingly fast paced world of today where there is no end to work and responsibilities. A part of it is based on a time-management method called Pomodoro, Pluto is designed to encourage you through your 25-minute-Pomodoro sessions by displaying uplifting messages and then reward you with a candy after your Pomodoro Session. If you find yourself feeling overwhelmed and stressed out, it is just a button click away to give you a pat on your shoulder and offer you kind words.
CONCEPT AND RESEARCH
I decided to
make a task completion oriented project paired with an encouraging element in week 7 and
documented it on my week 0 - final project planning page but its week 10 now and that idea has been
through alot of changes since then so I am going to discuss in detail, the key elements of final concept, personal inspirations
and some research that aided the concept development in this section.
The initial idea was was inspired by this Proud Parent Machine
by Simone Giertz but I did not want to just stop there so I researched
and brainstormed more and came across
this beautifully written article
article on Emotional Tech that helped me ask the right
questions while finalizing my project immensely. With my very limited
electronics skills and time capacity I have tried to address the following quotes
from that article that inspired me the most:
"... Using tech to improve our feeling of having a place in the world is a challenge pitched against
Sartre’s echoing war cry to the mind: “everything has been figured out, except how to live.” Are we ready to
build new tools to help us along our existence journeys, as organizations and as individuals?"
"We need tech that guides and directs the uncertain lives of the billions of new adults and children yet
to parachute into our buildings, bus stops, boutique lifestyle contracts, and banking systems."
"The tech that, like your favorite novelist,
finds its own way to put a hand on your shoulder when you’re lonely."
Now, let me explain the key features of my bot in detail!
Pomodoro Timer
Since I was making something around tasks completion, I wanted to also provide
a tool for helping in fulfilling them and Pomodoro technique is something that is
proven to be helpful for alot of people, including me. There are many online pomodoro timers
and apps but I think they tend to be distractive since they are on phones and internet.
Having a physical timer is less distractive.
"This popular time-management method can help you power through distractions, hyper-focus
and get things done in short bursts, while taking frequent breaks to come up for air and relax."
The Pomodoro technique has the following key steps:
1. Choose a task to be accomplished
2. Set the Pomodoro to 25 minutes (the Pomodoro is the timer)
3. Work on the task until the Pomodoro rings,
then put a check on your sheet of paper (your to-do list)
4. Take a short break
5. Every 4 Pomodoros take a longer break
I personally use this method during my semester when I find myself struggling
with focus and motivation.
It helps in breaking down the lengthy assignments and exam material into small 25 minute chunks
which I find easy to manage.
Therefore, looking at the the technique's simplicity
and benefits I decided to embed it into my bot.
Candy Dispenser
This feature is added for motivating and rewarding.
It gives the user something to
look forward to during the pomodoro session which adds a fun touch to work and motivates the
user to work and recieve their reward.
Hand Mechanism
This feature is purely for comforting and fun purposes. It is programmed to give a shoulder pat
to comfort the user and and let them know that pluto is proud of them.
It can also give low-fives to keep you company during your low moments =p
Why Is Encouragment The Main Focus?
I consider the encouraging messages displayed on LCD screen the heart of Pluto. Encouraging words are the kindest, healthiest way to motivate someone.
They can give someone the energy to endure and the spirit to fulfil their tasks.
Moreover, I feel that 'most' adults- parents and educators especially, lack the language of encouragement.
They are mostly seen using the language of fear and punishment in order to motivate the children and students
which is extremely unhealthy and can have terrible effects on their mental health and personal development.
Last year, when I watched this documentary called "Homework" by Abbas Kiarostami, it validated all
my opinions and feelings on this subject.
I cannot change adults or school systems but I have made Pluto, which can be a small source of encouragement, help in managing the pressure of never ending deadlines and make working/studying fun! =)
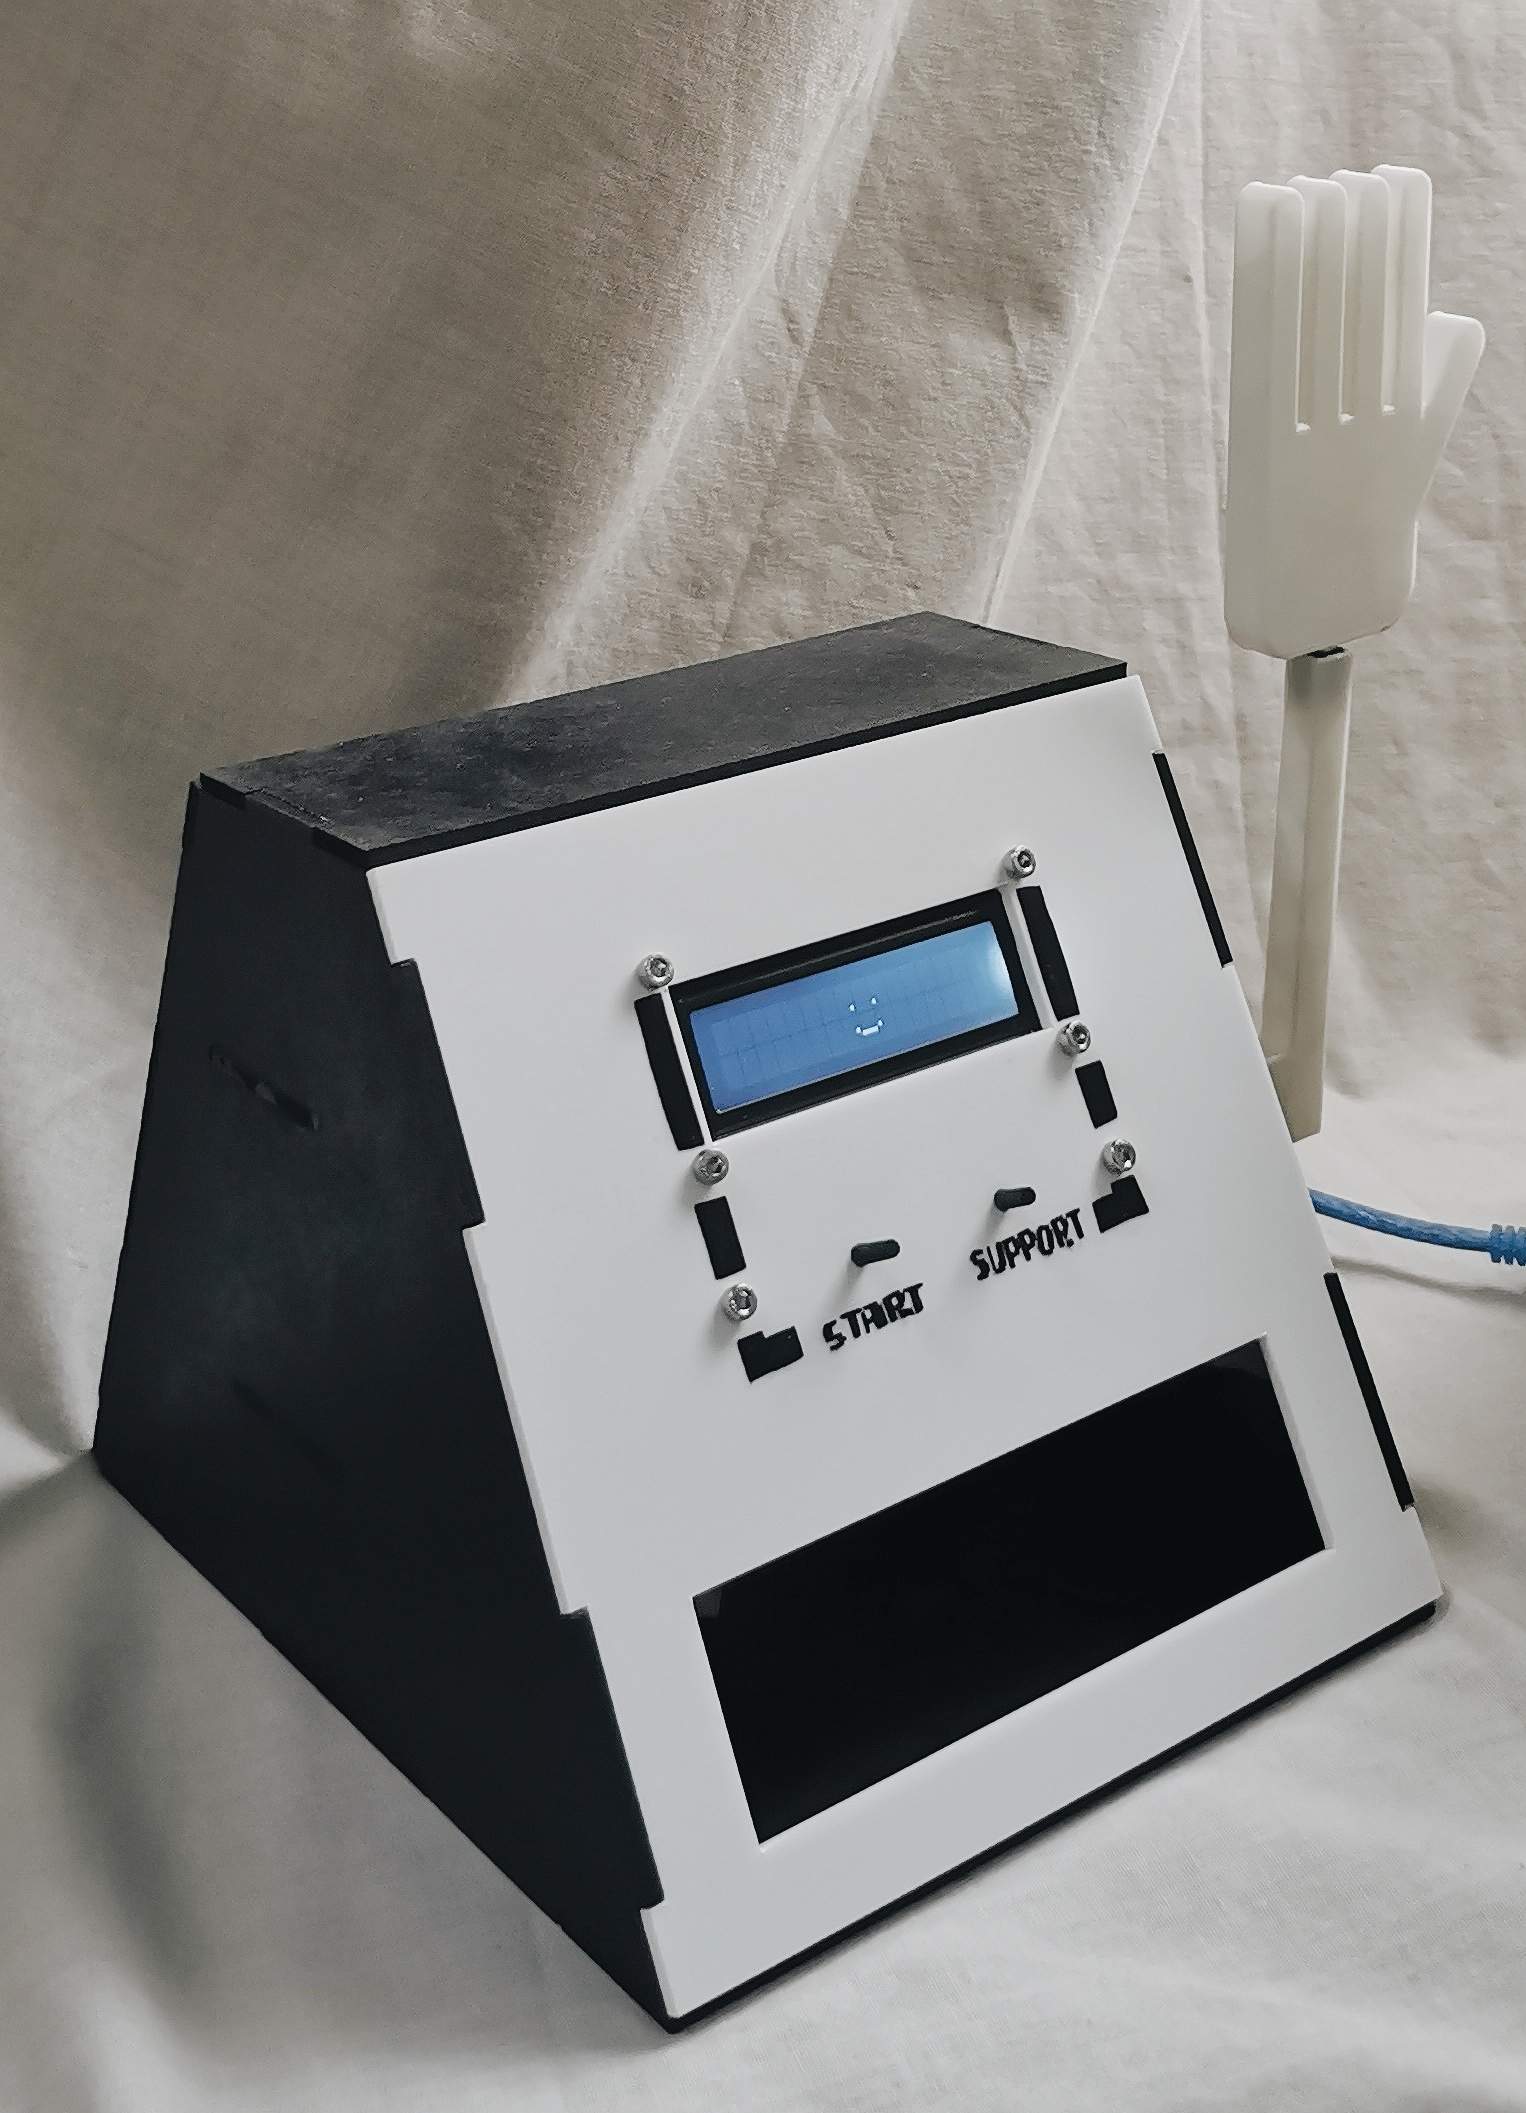
HOW DOES THE PROJECT WORK?
There are 2 buttons on the front panel.
One is labelled as START and the other is labelled as SUPPORT.
When START button is pressed, the 25 minute
pomodoro timer begins and the LCD display changes from the smile emoji to a message saying
"BEST OF LUCK! YOU CAN DO THIS :)"
After 5 Minutes, the display message changes to
"5 MINUTES DONE! KEEP GOING!"
After 15 minutes it changes to
"15 MINUTES DONE WOW! KEEP GOING!"
At the session completion, the message changes to
"YAY!!!! I'M SO PROUD OF YOU."
After this the buzzer tone plays and the dispenser Servo rotates and dispenses the candy.
Lastly the LCD display says
"HERE'S UR REWARD. ENJOY AND REST!"
and after few seconds
the display changes back to the smiley.
When the SUPPORT button is pressed,
the LCD display changes from smile to a message saying,
"LIGHTLY CHILD, LIGHTLY"
while the hand servo rotates 90 degree first then 25 degree then again 90
and after that back to 0 degree animating a shoulder pat. After this the display message changes to
"YOU'LL BE FINE & I'M PROUD OF YOU!"
and again after few seconds the display changes back to the smiley.
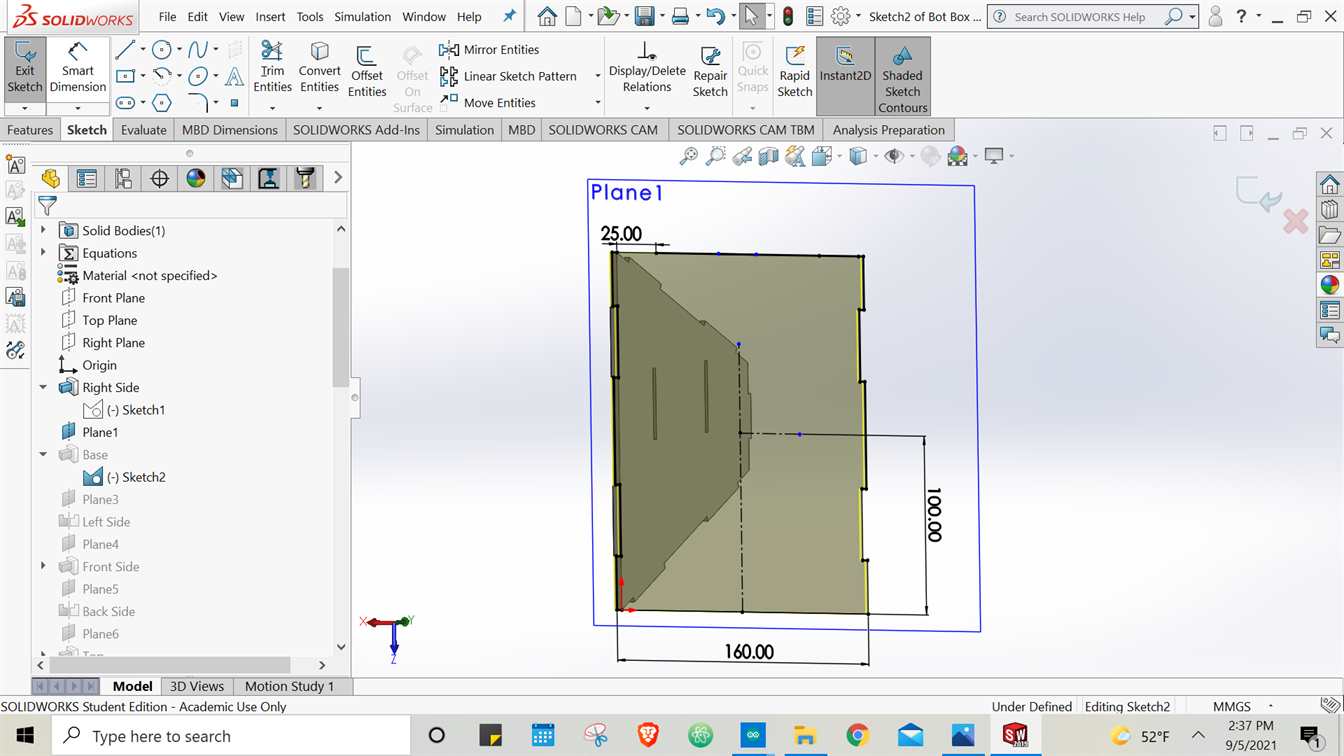
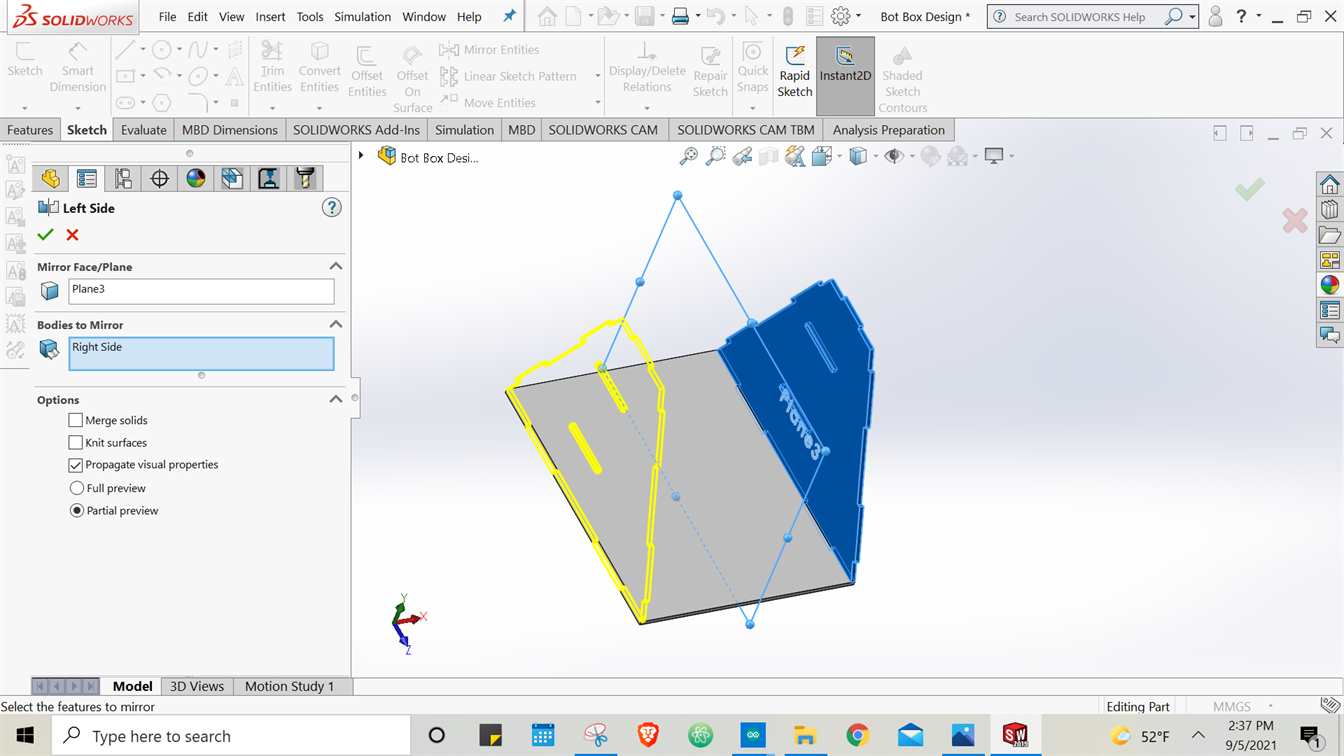
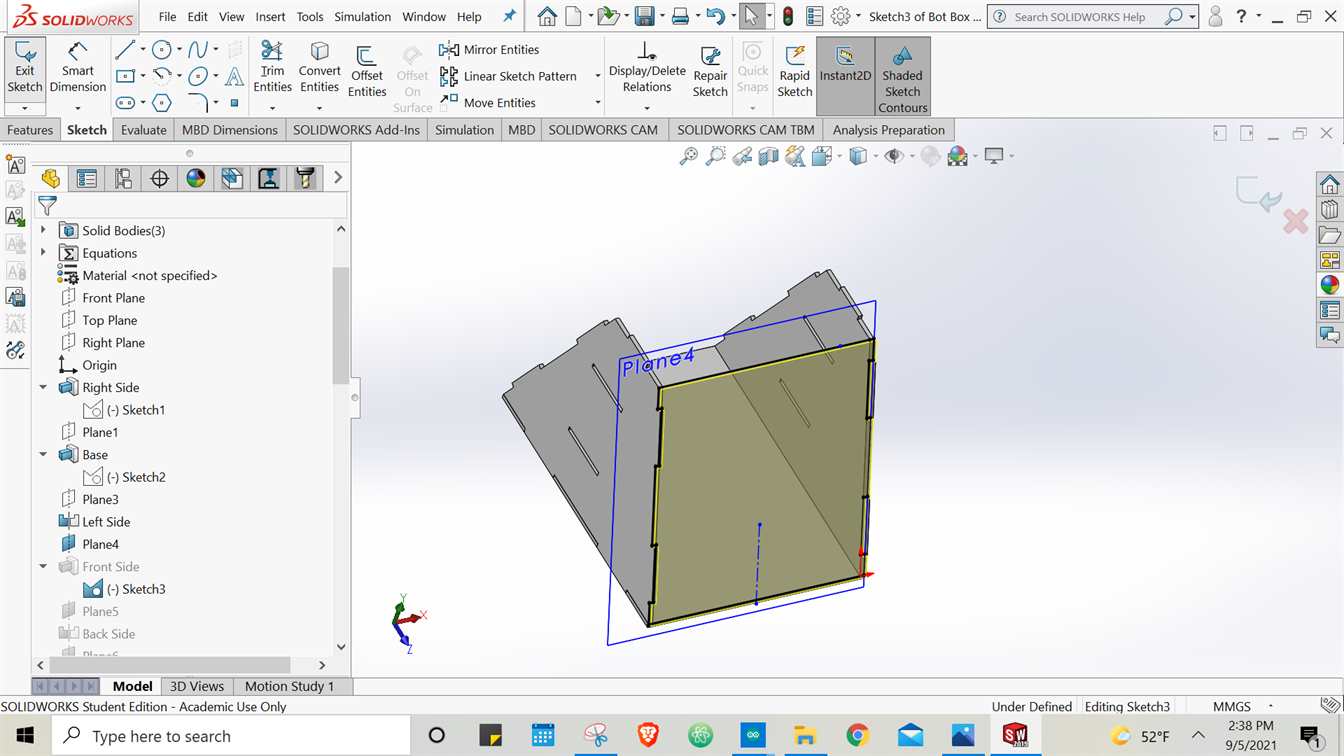
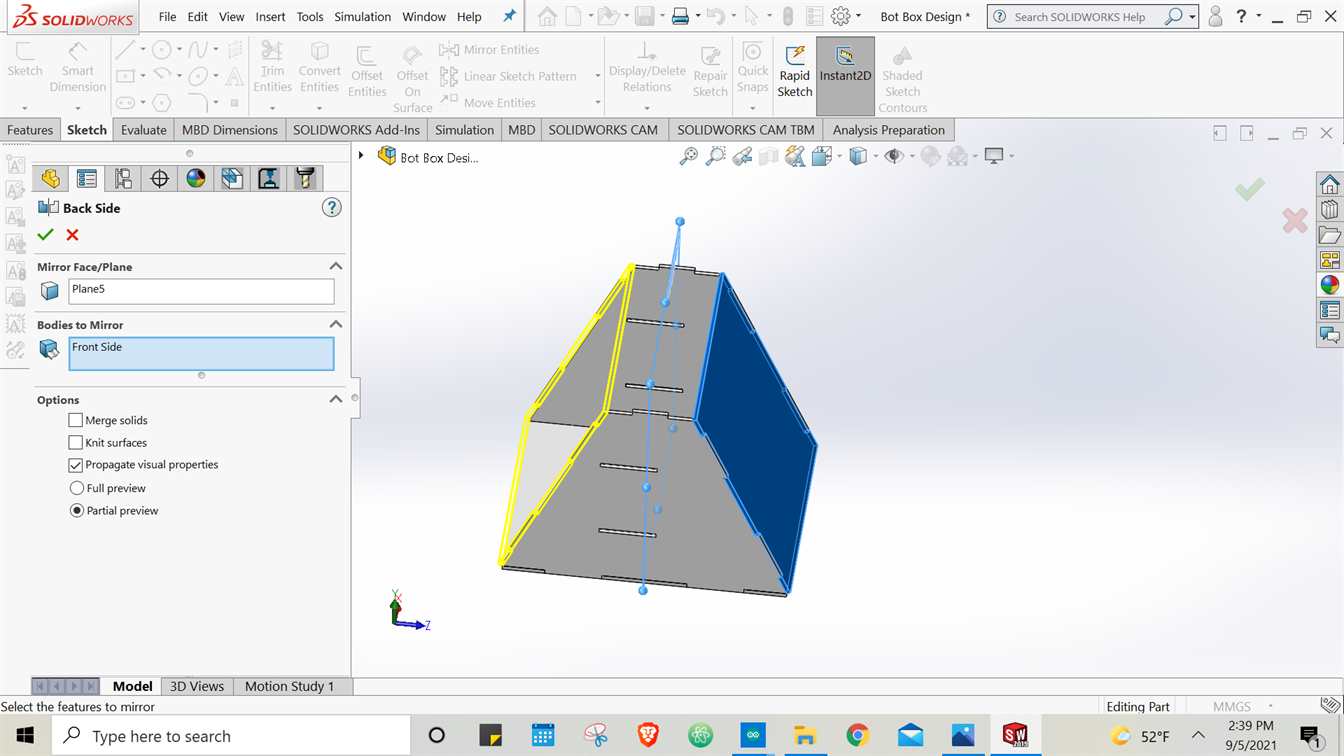
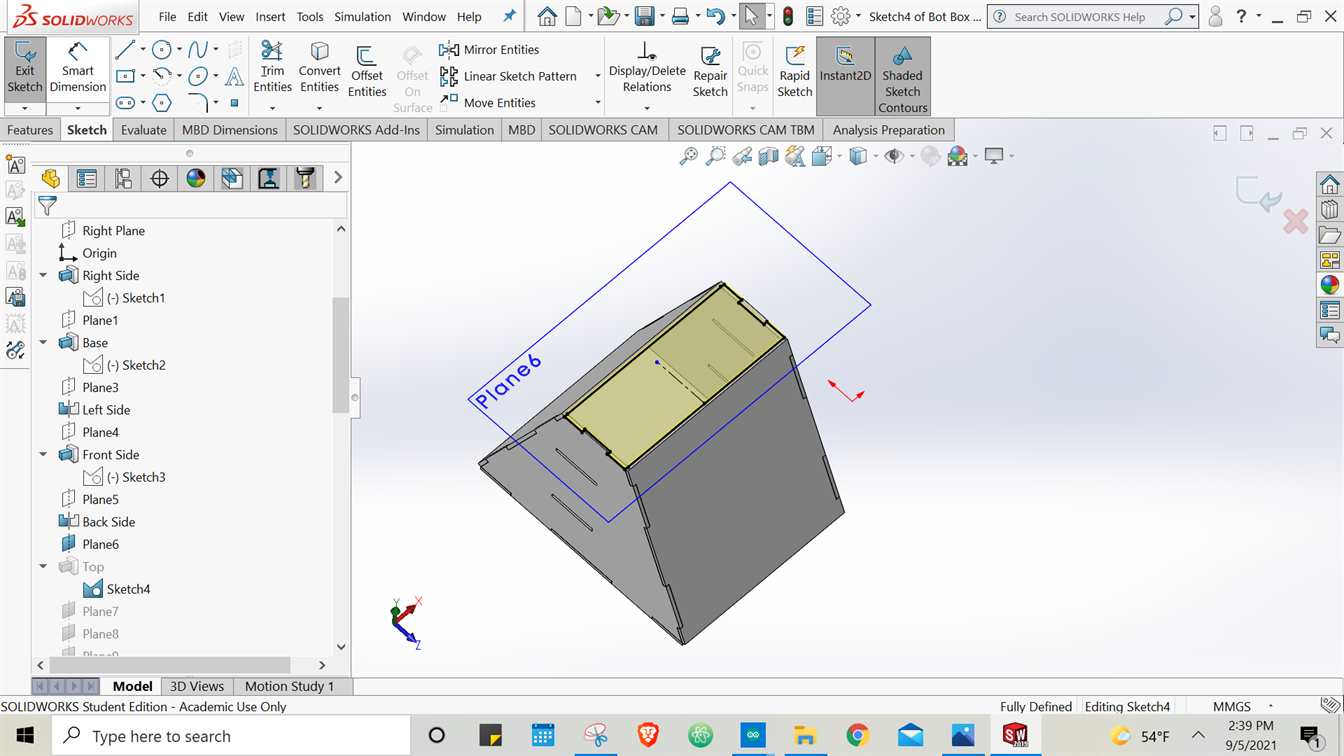
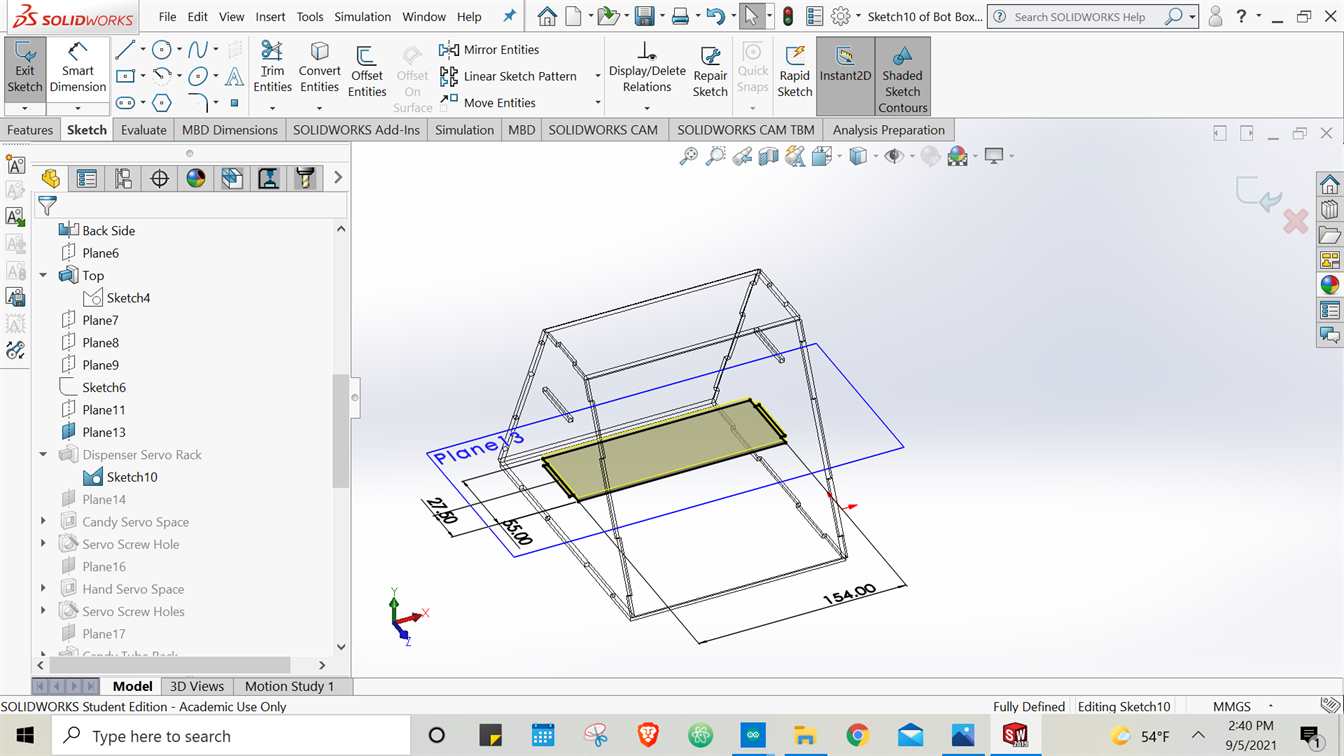
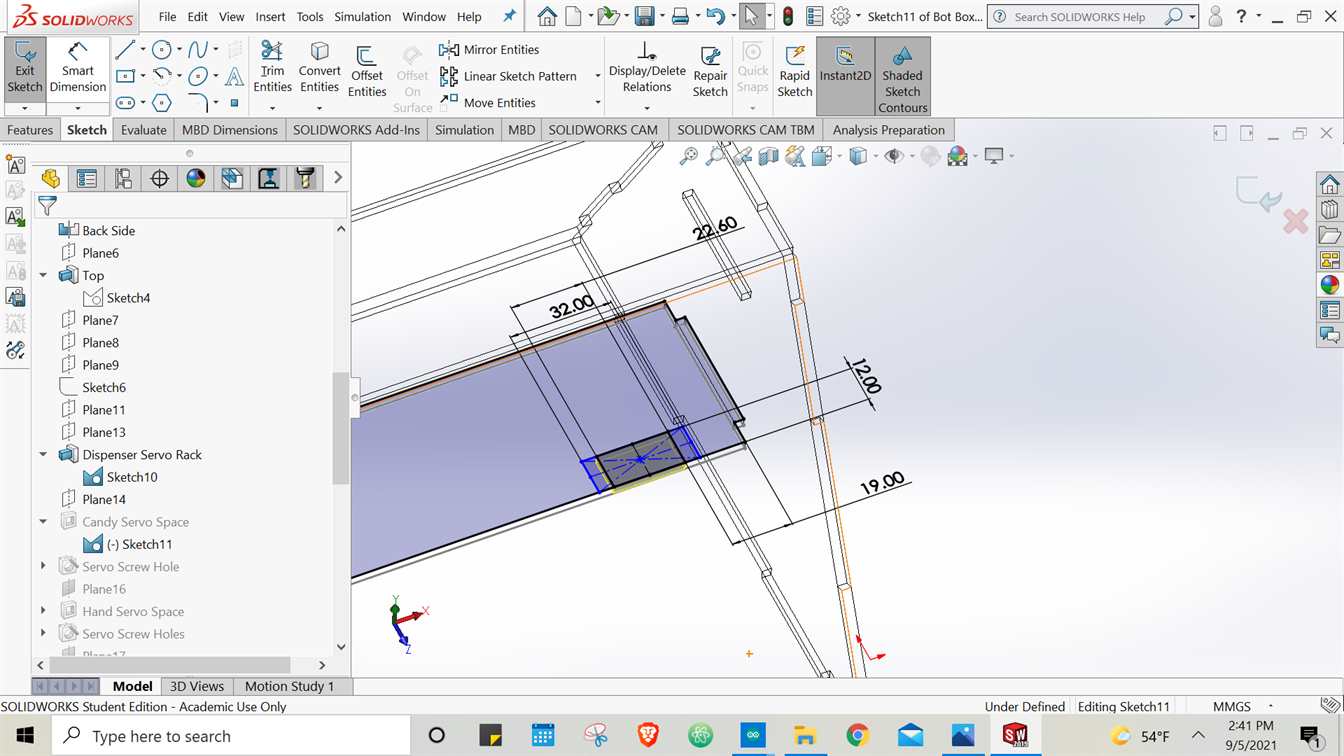
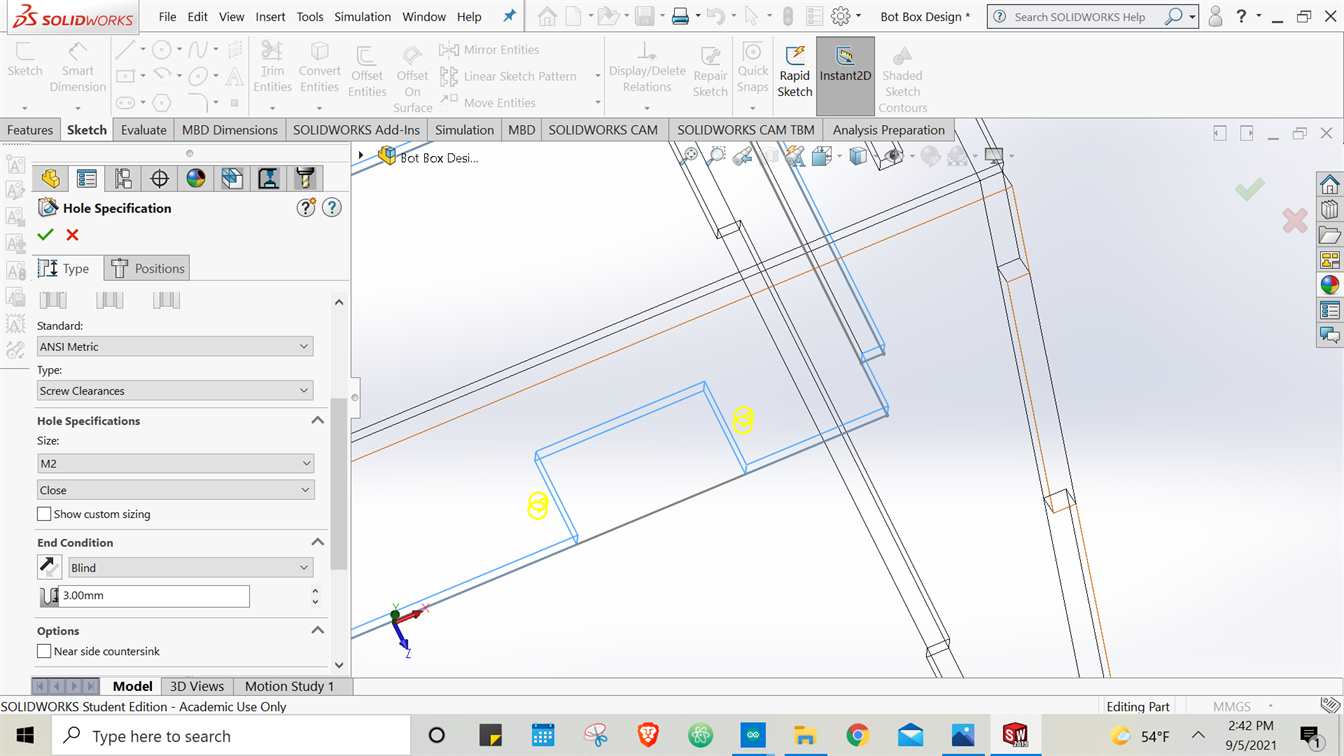
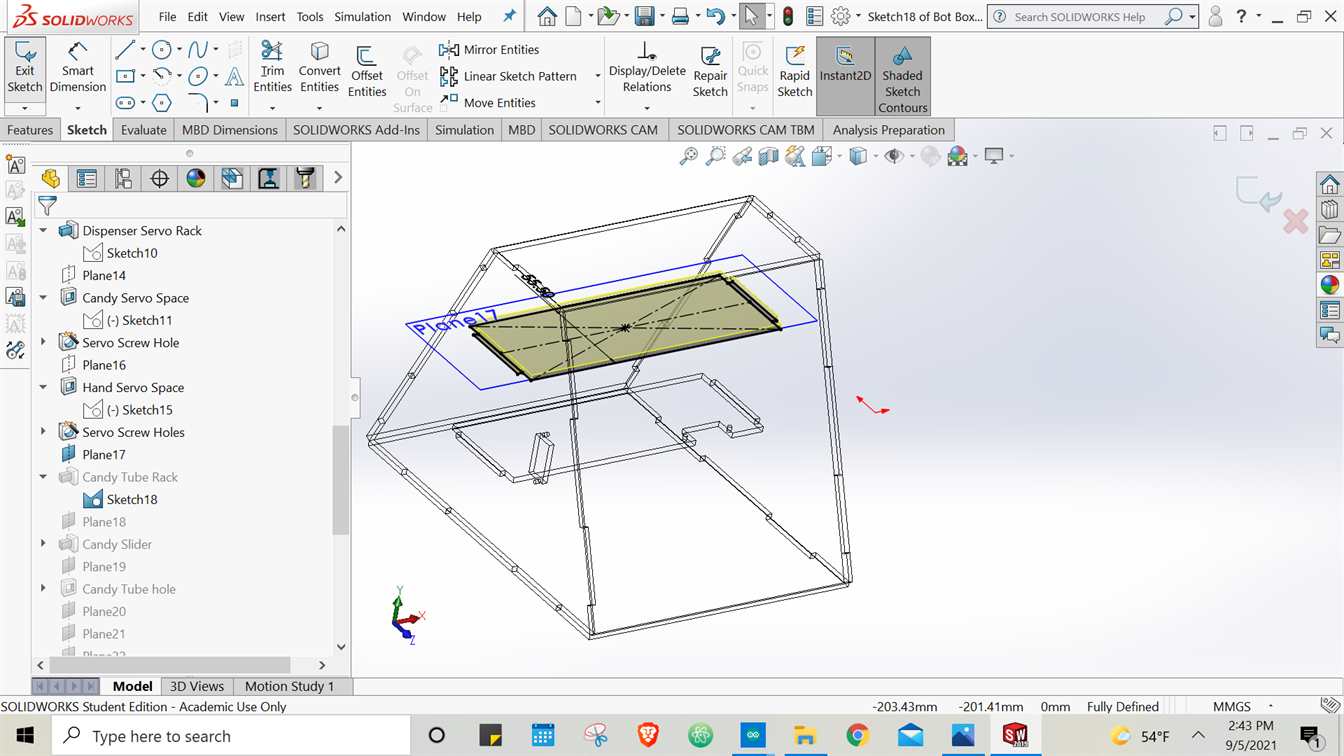
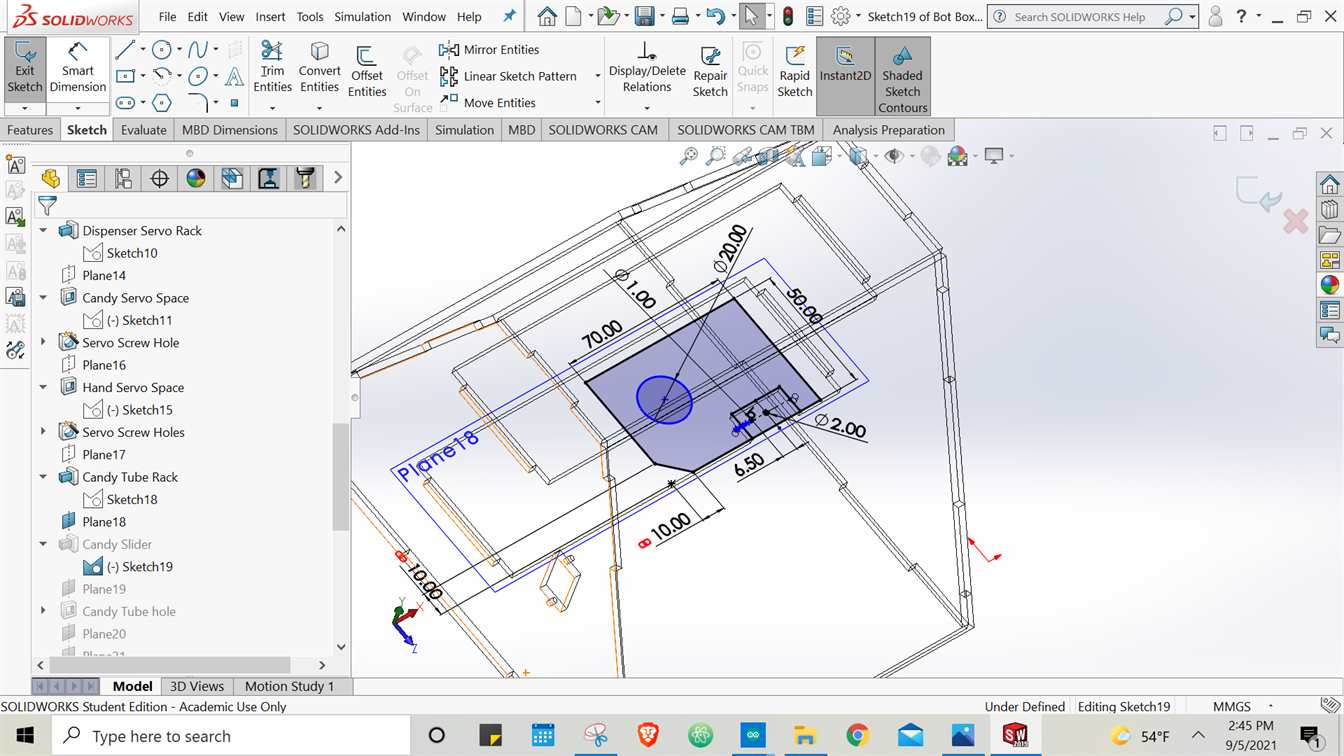
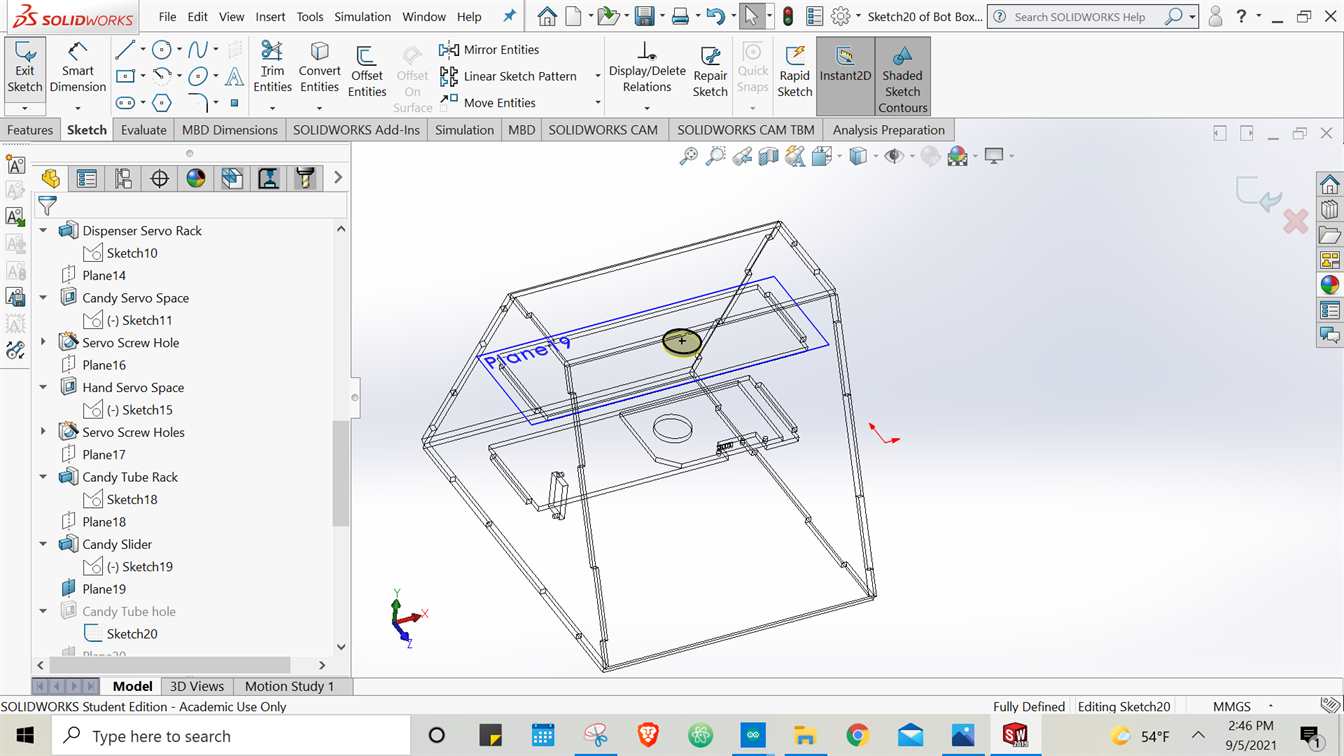
2D & 3D DESIGN PROCESS
FRAME

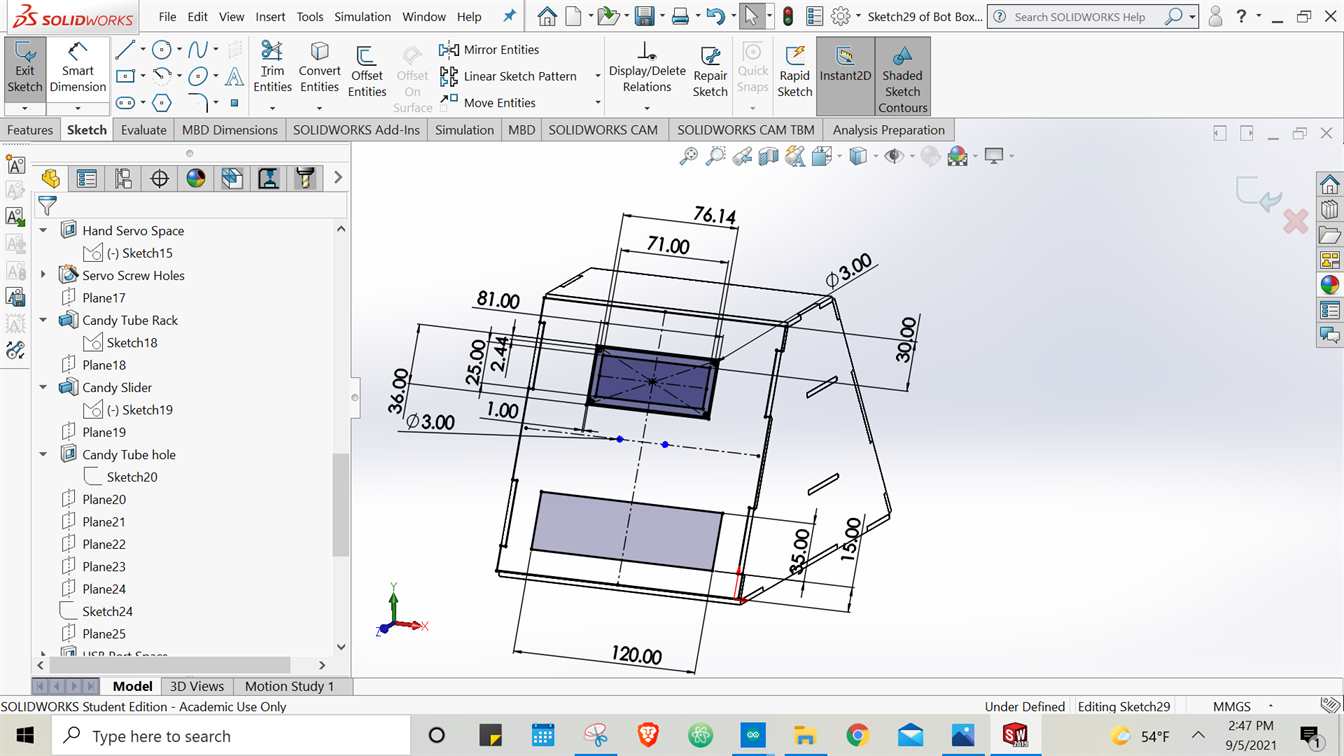
DISPENSER MECHANISM
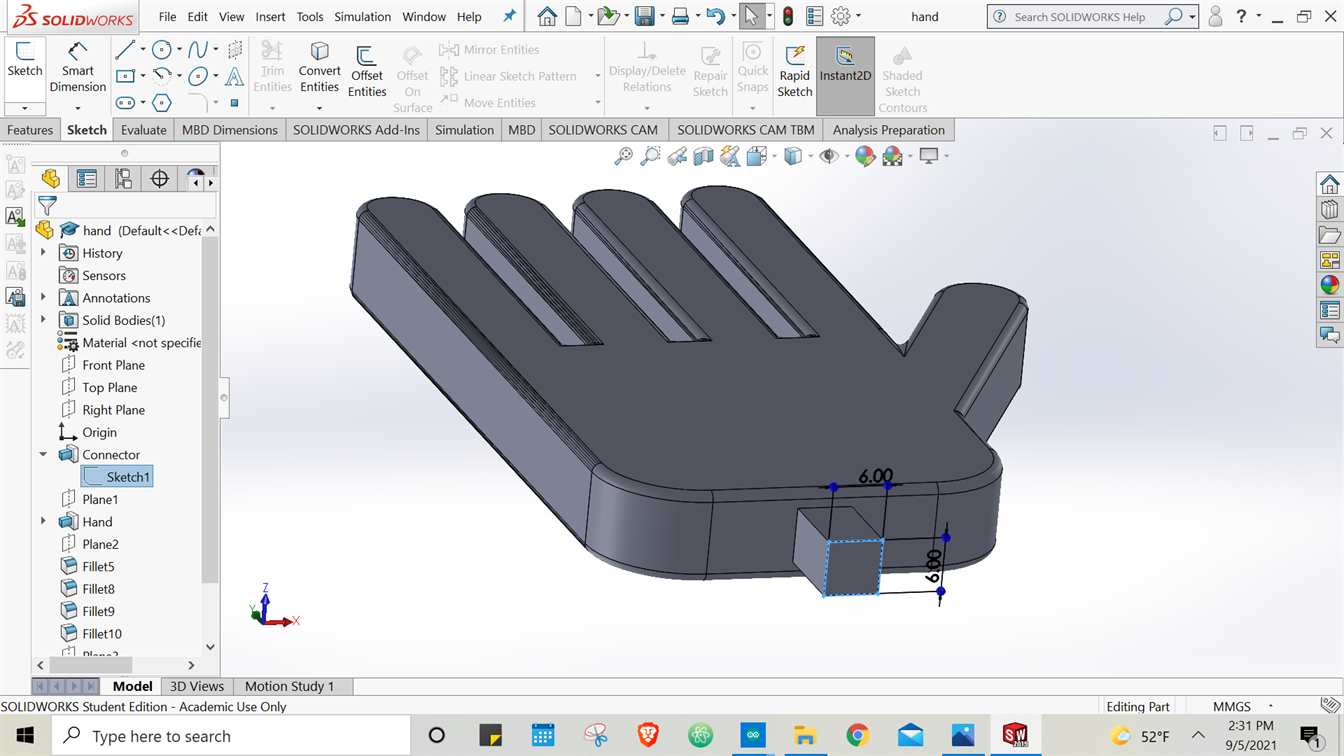
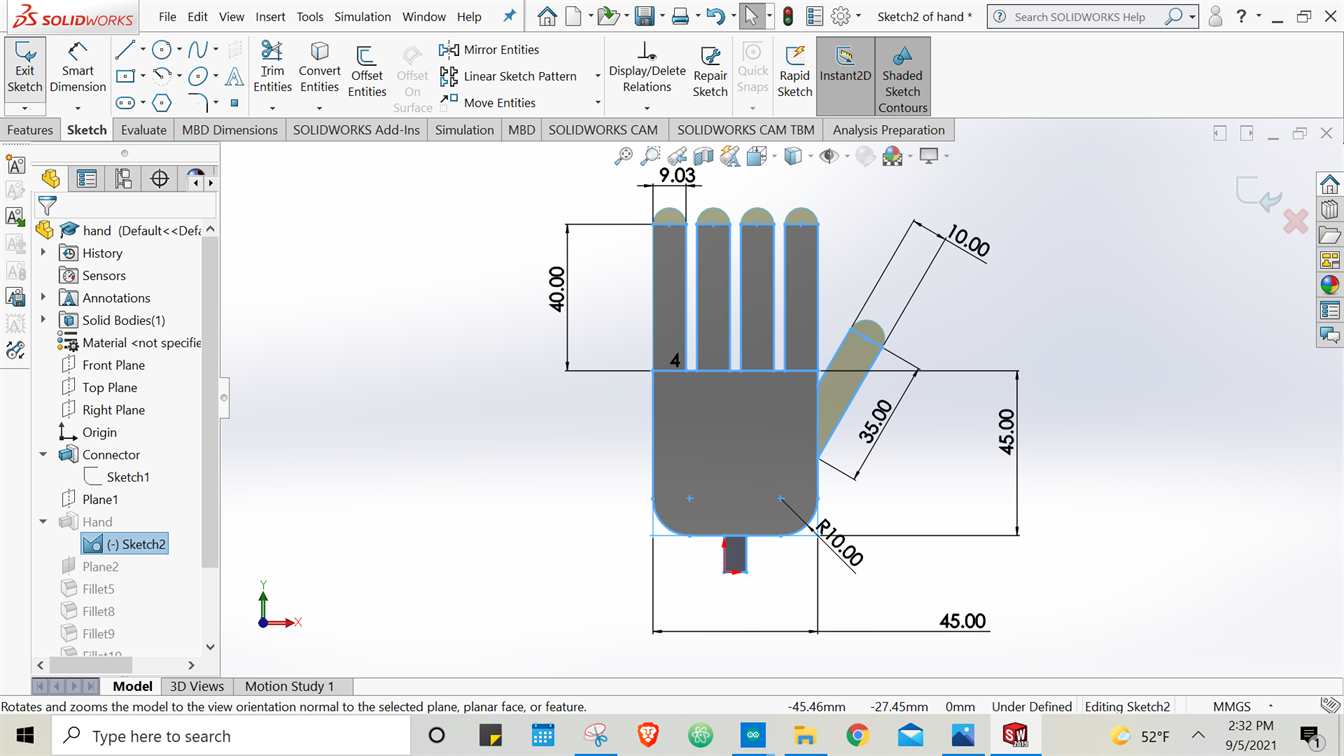
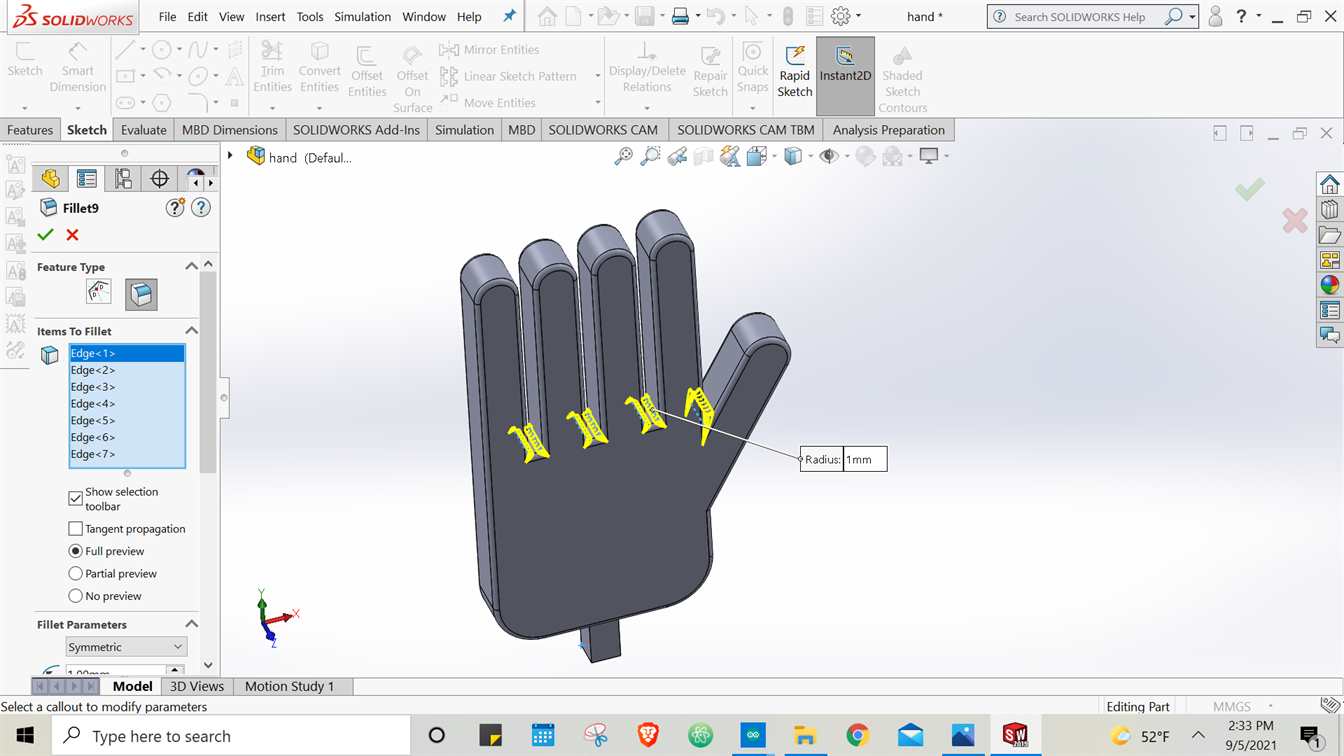
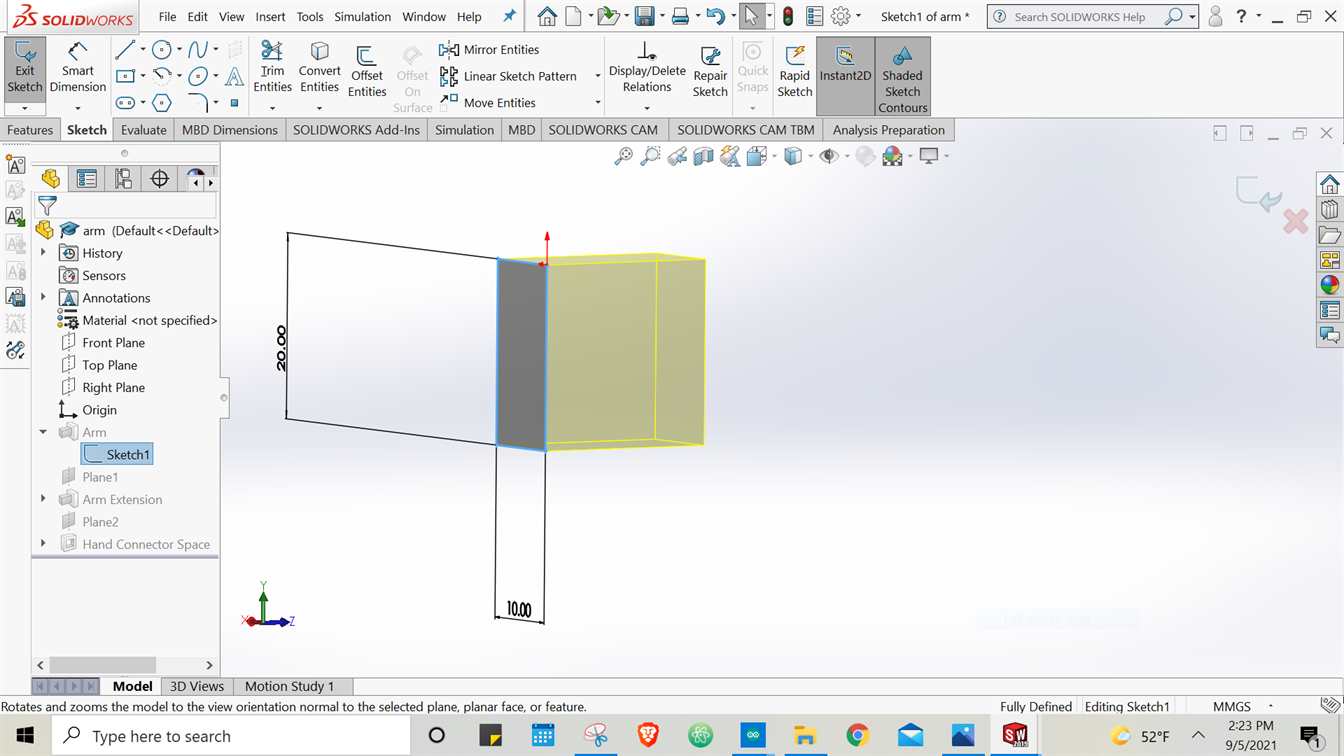
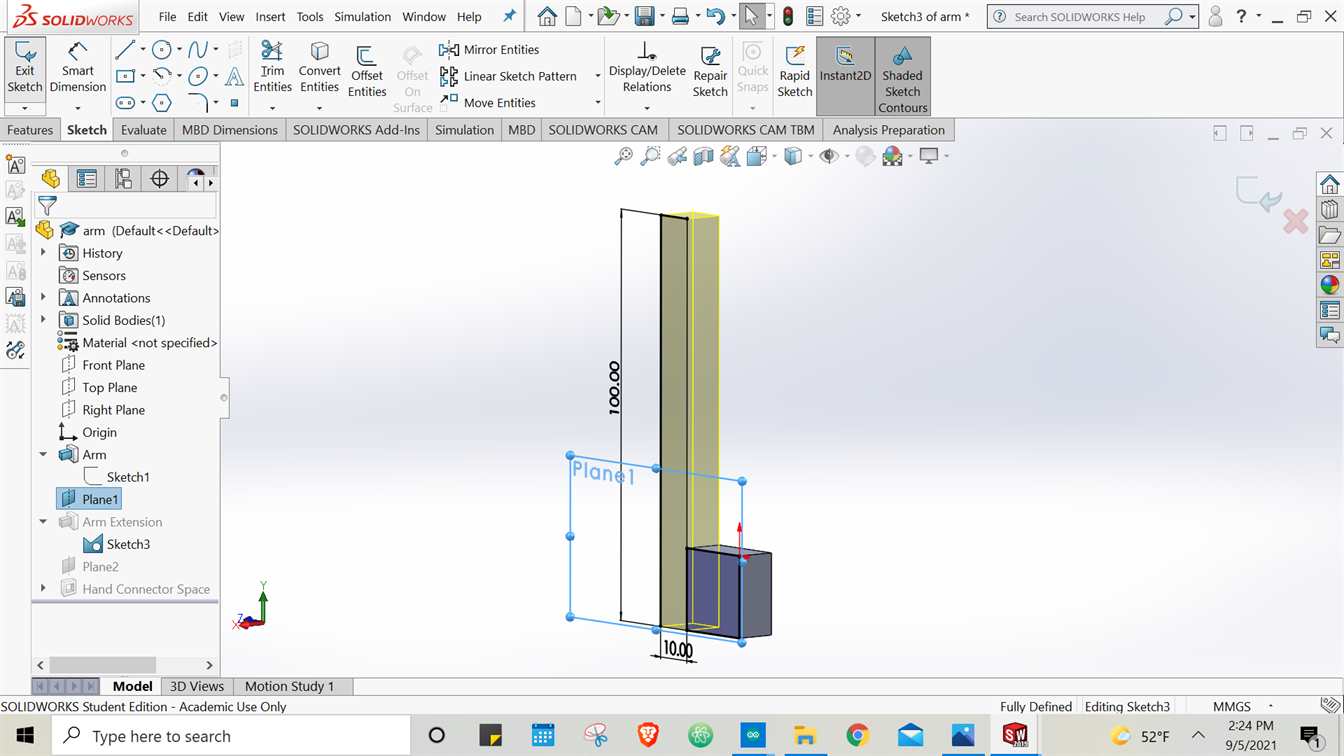
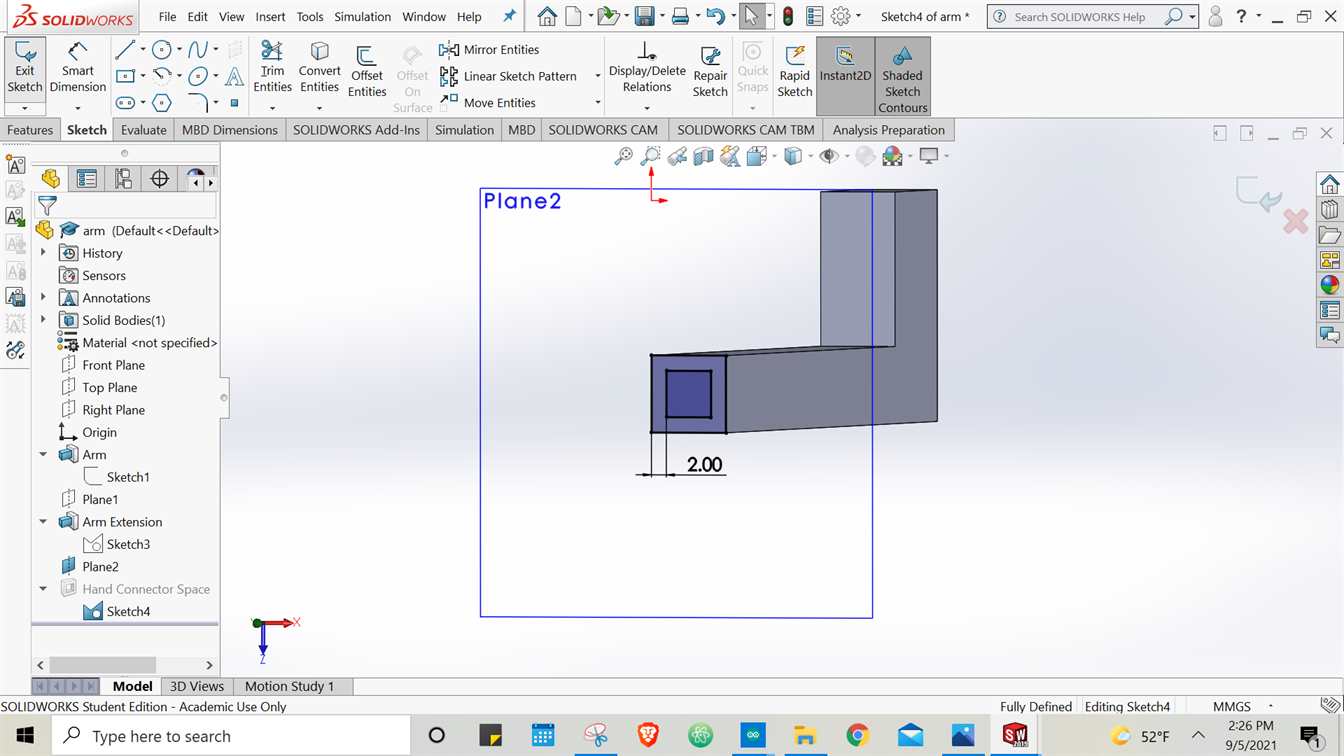
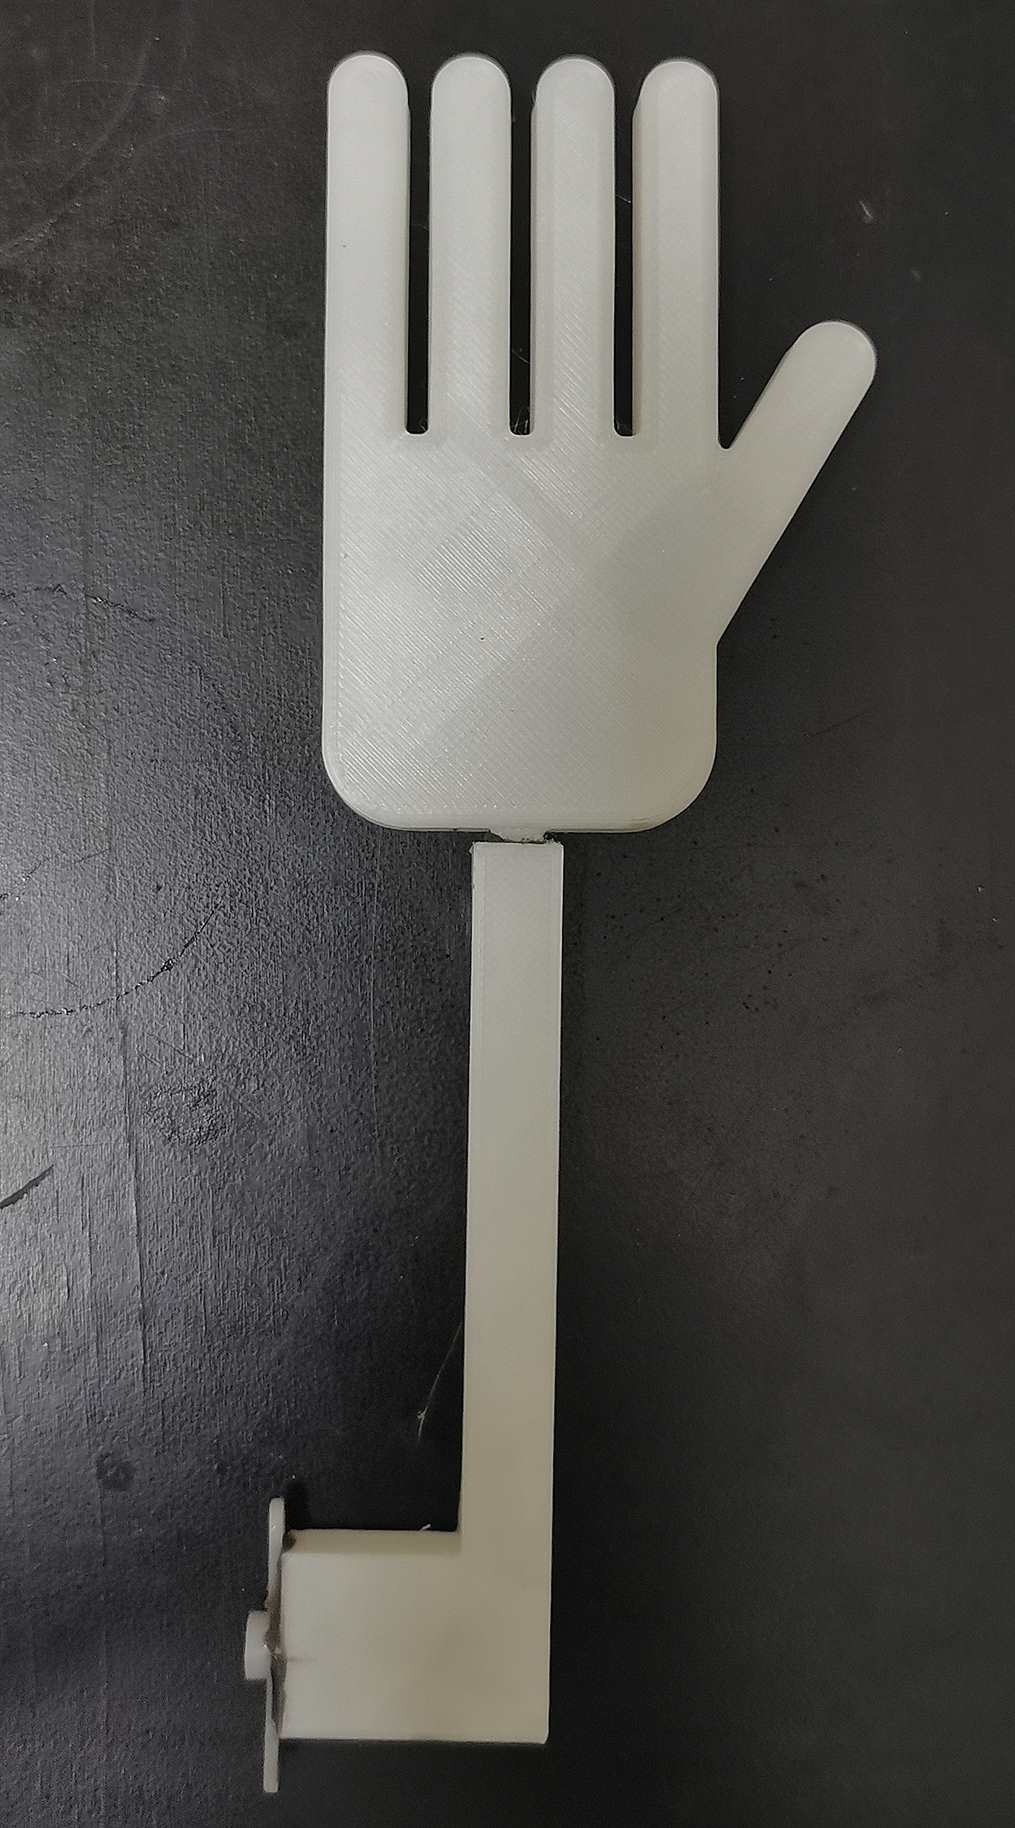
HAND AND ARM

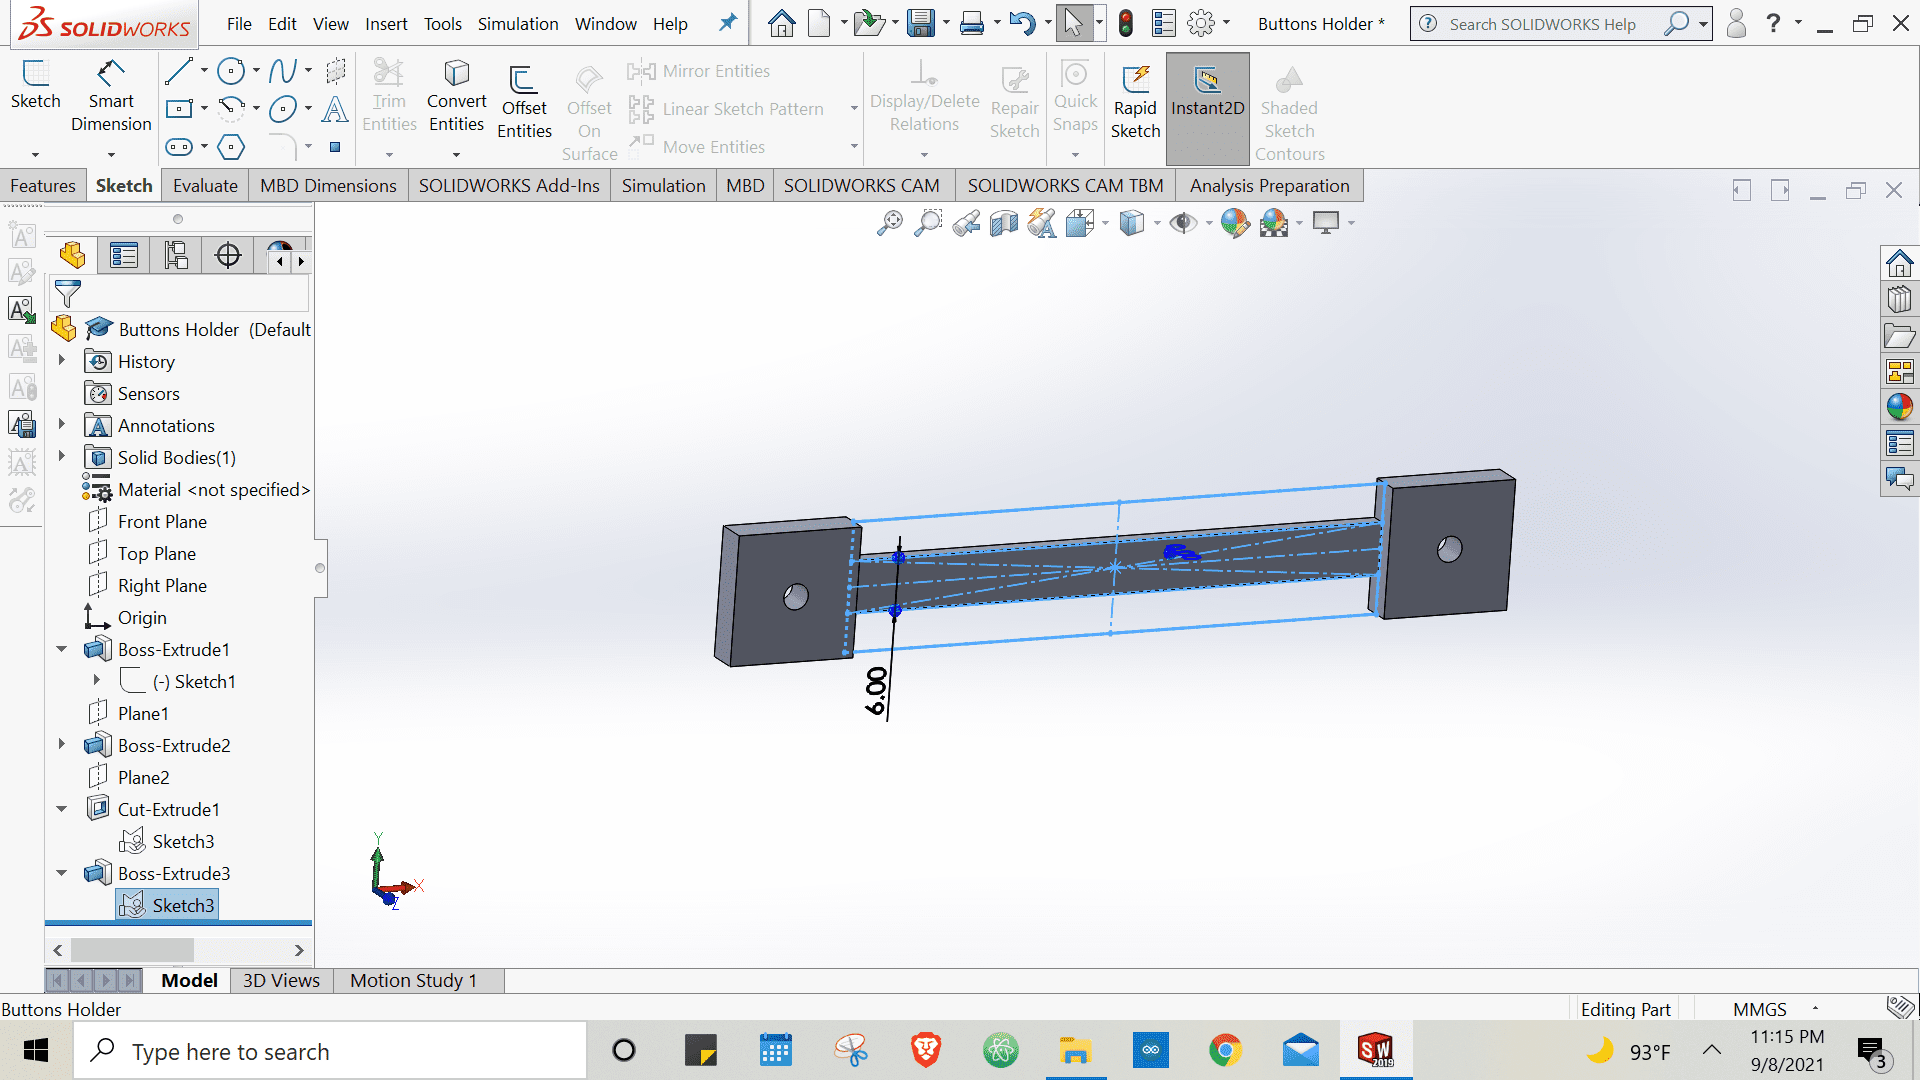
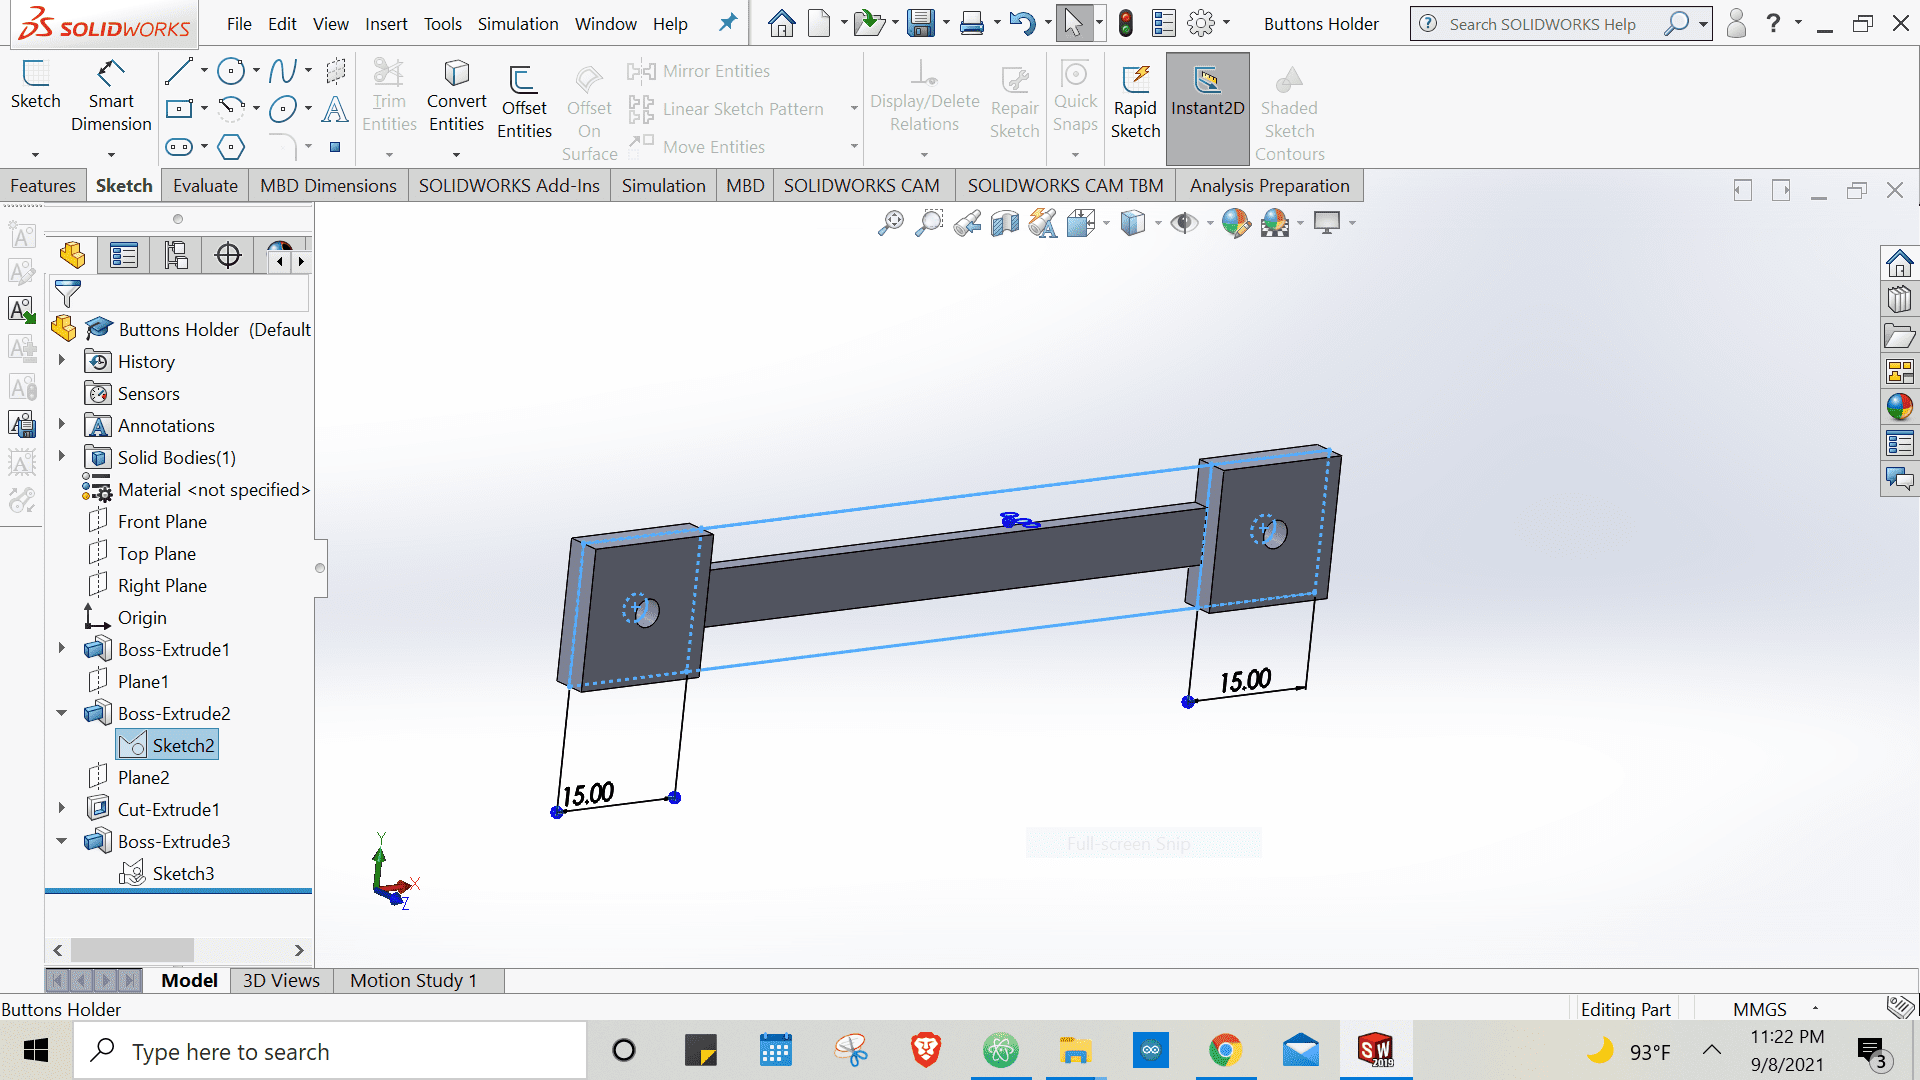
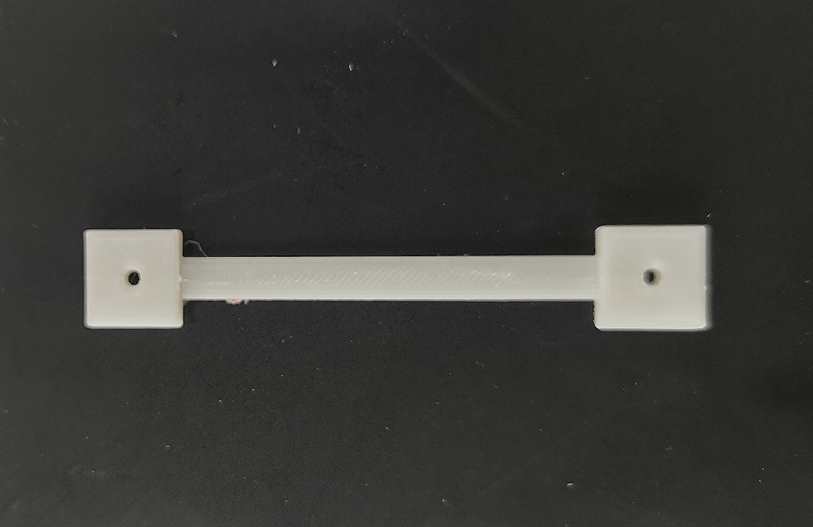
BUTTONS HOLDER
ADDITIVE & SUBTRACTIVE FABRICATION PROCESS
LASER CUTTING - SUBTRACTIVE MANUFACTURING
To cut the main frame of the bot I used the laser cutting machine. Most steps were same as we did in Week 4 except the number of passes setting and material selection. I opened the settings by double click the black box seen on the left.The materials used for the bot frame were: MDF and White Acrylic of 3mm thickness.
For MDF - the MDF material in the parametric library was chosen and passes was set to 3 as it was found to be appropriate amount of passes enough to cut through the 3mm MDF sheet.
For Acrylic - The material was selected in parametric library and passes were set to 2 for the same reason as before.
3D PRINTING - ADDITIVE MANUFACTURING
For button holder and hand-arm I used the 3D printer.Same steps were followed as Week 5. I just played around with the shell thickness and infill percentage to increase/decrease the strength, quality and weight of the parts as per their application.
VINYL CUTTING - SUBTRACTIVE MANUFACTURING
I had two same looking push buttons side by side on the front side which can be confusing without proper labels telling each buttons purpose. For labelling my push buttons fuctions I used the vinyl cutter. Same steps as WEEK 4 were performed here.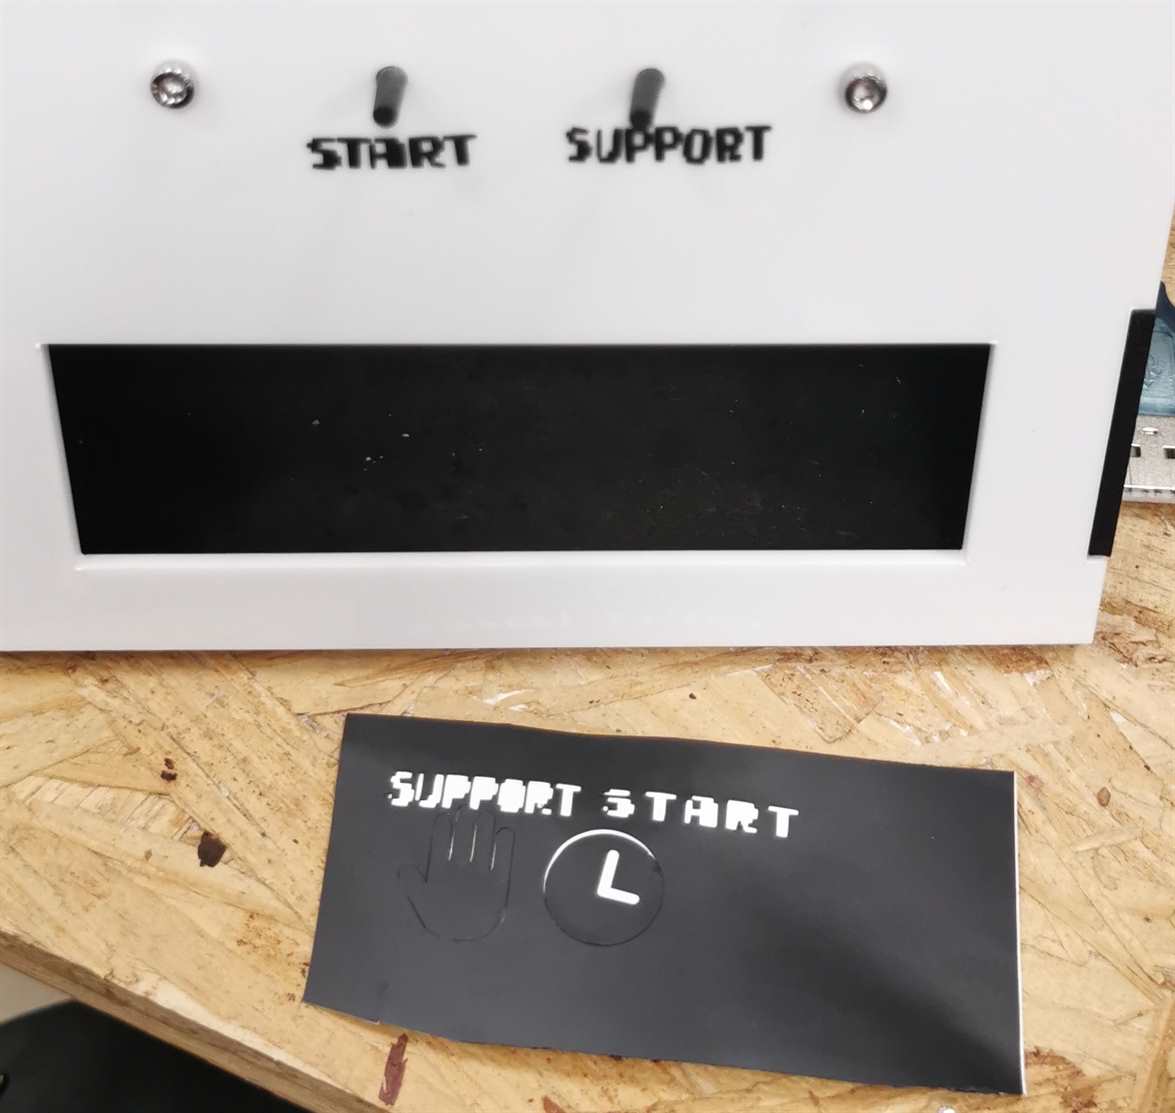
EMBEDDED PROGRAMMING
INPUT DEVICES
For input, I have used 2 Tactile Push Buttons. The 6mm button consists of 4 pins that are paired in 2 internally. One pair of 2 pins that are side by side, is left without any connections as they both the pairs become connected when button is pressed. In the second pair, one pin goes to positive while the other goes to digital pin of the microcontroller through a 10k Ohm resistor in series which is attached to the negative terminal.OUTPUT DEVICES
For output, I have used the following devices:1. 16x2 LCD Screen interfaced with I2C Module
Stands for "Liquid Crystal Display." LCD is a flat panel display technology commonly used in TVs and computer monitors. It is also used in screens for mobile devices, such as laptops, tablets, and smartphones.
2. Buzzer
An arduino buzzer is also called a piezo buzzer. It is basically a tiny speaker that you can connect directly to an Arduino. You can make it sound a tone at a frequency you set. The buzzer produces sound based on reverse of the piezoelectric effect.
It consists of 2 Pins. The negative one goes to GND while the positive one is connected to any one digital Pin of our choice. I have connected a 100 Ohm resistor along the digital pin line as it was making my LCD Screen glitch.
3. Servo Motors
A Servo Motor is a small device that has an output shaft. This shaft can be positioned to specific angular positions by sending the servo a coded signal. As long as the coded signal exists on the input line, the servo will maintain the angular position of the shaft. If the coded signal changes, the angular position of the shaft changes.
It consists of 3 Pins. The negative (black) goes to GND. The positive (red) goes to 5V power supply. The digital pin (orange) goes to digital pin 9. I have two servo's in my circuit which I have connected on digital pins 9 and 10.
SCHEMATIC DIAGRAM
ARDUINO IDE CODE
		#include < LiquidCrystal_I2C.h >

		#include < Servo.h >


		LiquidCrystal_I2C lcd(0x27,16,2);


		Servo servo;    // DISPENSER SERVO

		int angle=73;

		int button = 4; // START BUTTON

		int val;


		int buzzer = 8;


		Servo servo2;   // HAND SERVO

		int angle2=0;

		int button2 = 2; // SUPPORT BUTTON

		int val2;


		byte a[8] = { // eye

		B00000,

		  B00000,

		  B00000,

		  B00000,

		  B00000,

		  B00000,

		  B00001,

		  B00000

		};


		byte b[8] = { //wide smile

		  B00000,

		  B00000,

		  B00000,

		  B00000,

		  B11111,

		  B00000,

		  B00000,

		  B00000

		};


		byte c[8] = { //left

		  B00000,

		  B00000,

		  B00000,

		  B10000,

		  B00000,

		  B00000,

		  B00000,

		  B00000

		};


		byte d[8] = { //right

		  B00000,

		  B00000,

		  B00000,

		  B00001,

		  B00000,

		  B00000,

		  B00000,

		  B00000

		};


		byte e[8] = { // eye2

		B00000,

		  B00000,

		  B00000,

		  B00000,

		  B00000,

		  B00000,

		  B10000,

		  B00000

		};


		 void setup()

		 {

		pinMode (buzzer, OUTPUT);

		lcd.begin(16, 2);

		lcd.backlight();

		pinMode(button, INPUT);

		servo.attach(9);

		servo.write(angle);


		pinMode(button2, INPUT);

		servo2.attach(10);

		servo2.write(angle2);


		lcd.createChar(1, a);

		lcd.createChar(2, b);

		lcd.createChar(3, c);

		lcd.createChar(4, d);

		lcd.createChar(5, e);

		  }

		     void loop()

		 {


		lcd.setCursor(7,0);

		lcd.write(byte(1));

		lcd.setCursor(9,0);

		lcd.write(byte(5));

		lcd.setCursor(7,1);

		lcd.write(byte(4));

		lcd.setCursor(8,1);

		lcd.write(byte(2));

		lcd.setCursor(9,1);

		lcd.write(byte(3));


		val=digitalRead(button);

		if(val==HIGH)

		  {

		lcd.setCursor(0, 0);

		lcd.print("YOU CAN DO THIS!");

		lcd.setCursor(0, 1);

		lcd.print("BEST OF LUCK :)");


		delay(300000); //5 Minutes in Milliseconds

		lcd.setCursor(0, 0);

		lcd.print(" 5 MINUTES DONE! ");

		lcd.setCursor(0, 1);

		lcd.print(" KEEP GOING!");


		delay(600000);


		lcd.setCursor(0, 0);

		lcd.print("15 MINUTES DONE");

		lcd.setCursor(0, 1);

		lcd.print("WOW! KEEP GOING!");


		delay(600000); //10 Minutes in Milliseconds


		lcd.setCursor(0,0);

		lcd.print("YAY!!!! I AM SO");

		lcd.setCursor(0, 1);

		lcd.print("PROUD OF YOU :D ");

		delay(5000);

		lcd.clear();


		//Pomodoro Timer End Notification

		tone(buzzer,659,100);

		delay(150);


		//Turns the buzzer off

		noTone(buzzer);


		delay(1000);


		angle=0;

		servo.write(angle);

		delay(2000);

		angle=73;

		servo.write(angle);


		delay(1000);


		lcd.setCursor(0,0);

		lcd.print("HERE'S UR REWARD");


		lcd.setCursor(0,1);

		lcd.print("ENJOY AND REST!  ");

		delay(2000);


		lcd.clear();


		  }


		val2=digitalRead(button2);

		 if(val2==HIGH)

		  {

		delay(2000);

		lcd.setCursor(0,0);

		lcd.print("LIGHTLY CHILD,");

		delay(300);

		lcd.setCursor(0,1);

		lcd.print("LIGHTLY.    ");

		delay(2000);


		angle2=90;

		servo2.write(angle2);

		delay(1000);

		angle2=25;

		servo2.write(angle2);

		delay(1000);

		angle2=90;

		servo2.write(angle2);

		delay(1000);

		angle2=0;

		servo2.write(angle2);

		delay(1000);


		lcd.setCursor(0,0);

		lcd.print("YOU'LL BE FINE &");

		delay(300);

		lcd.setCursor(0,1);

		lcd.print("I'M PROUD OF YOU");

		delay(6000);

		lcd.clear();

		 }


		delay(2000);

		 }
SYSTEM INTEGRATION AND PACKAGING
BOX ASSEMBLY
For the box assembly we had to use super glue as the laser cutting machine ended up cutting slightly more than the set dimensions and the box was not holding up itself at all without it because of the loose joints. Glue was applied at the joints and clamps were used to keep the structure in place while the glue dried. We left is for a day since I had time. For the dispensers cylindrical candy container- I simple used a plastic sheet and rolled it to the desired diameter.
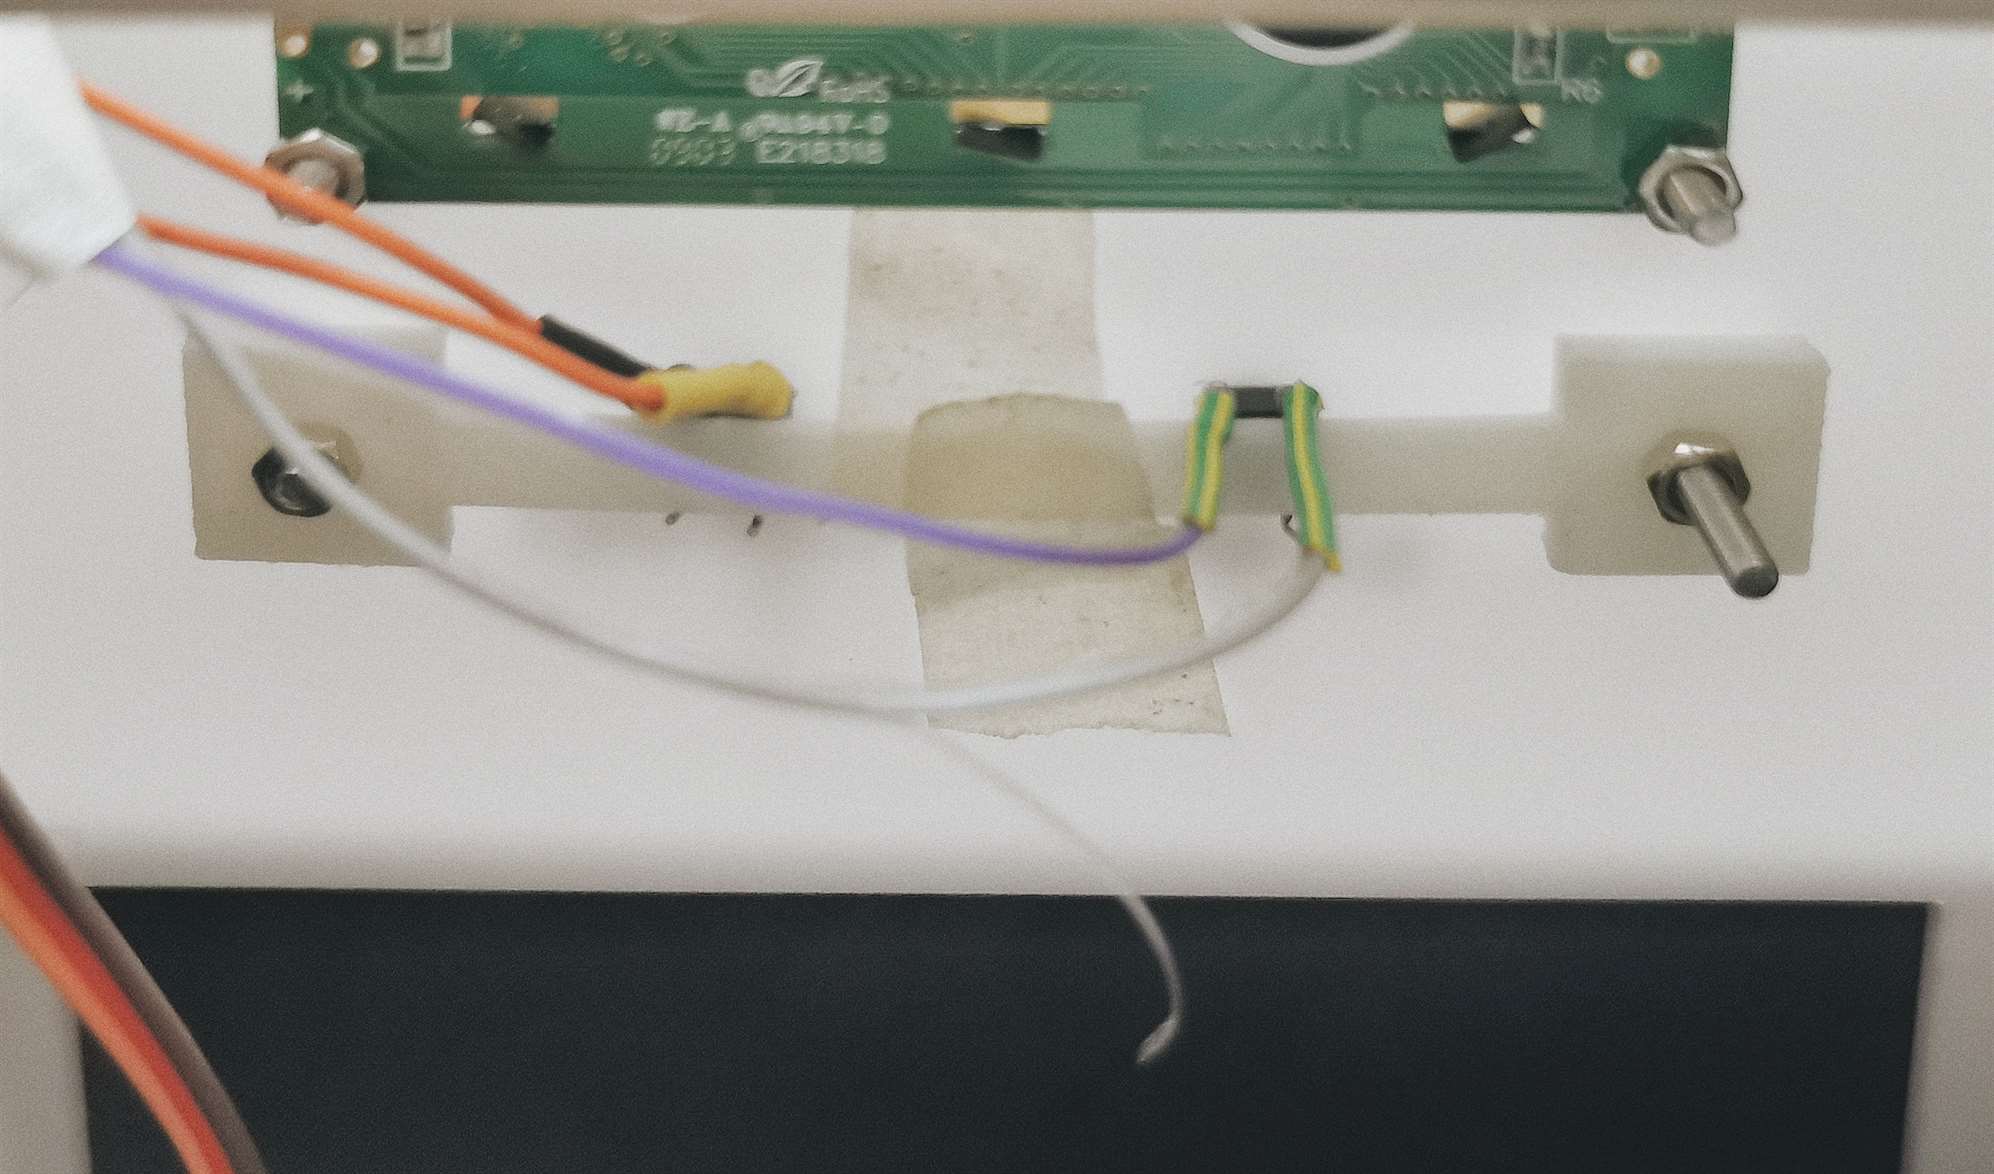
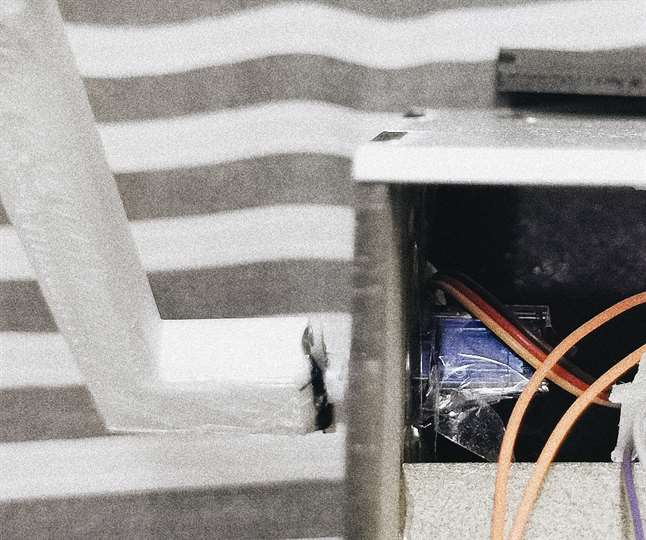
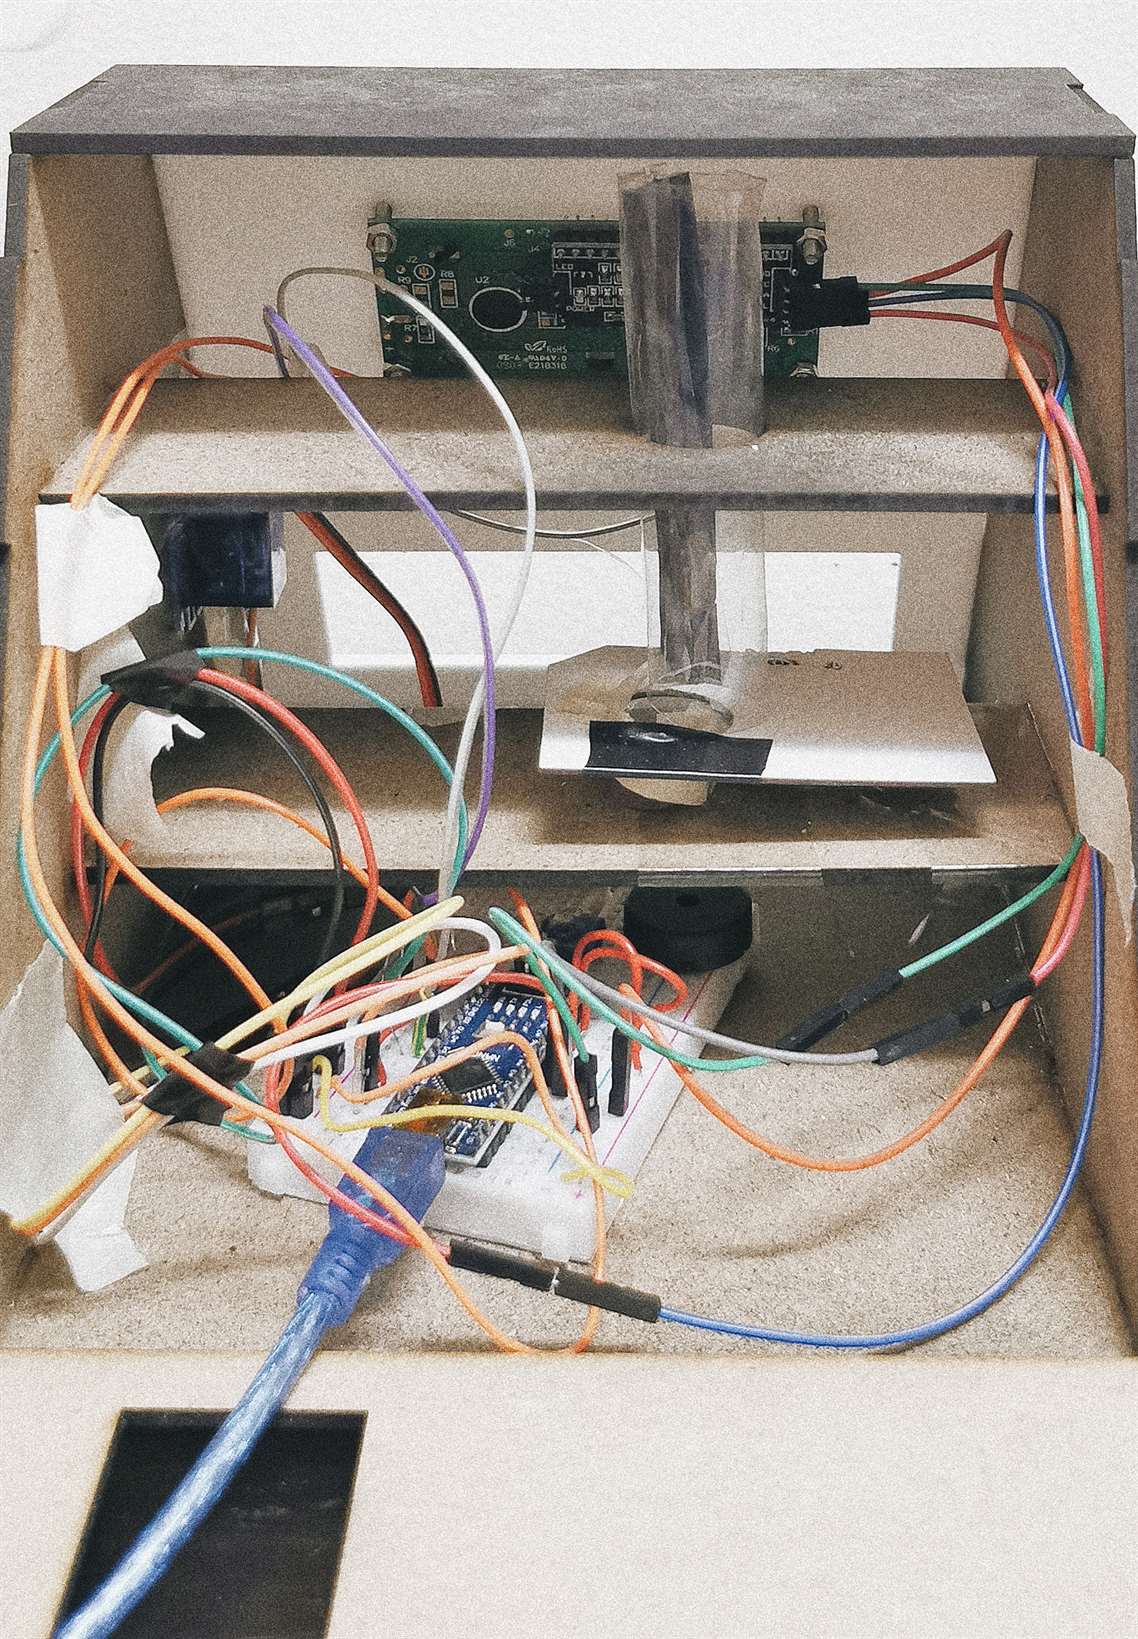
ELECTRONICS INTEGRATION
For electronics integration, everything was taken out of the breadboard first of all.I2C module was soldered with the LCD pins. Female to Female and Male to Female wires were used to make the long connection of I2C module pins till the breadboard with Arduino Nano.
To fix the LCD in place on front panel, 3mm screws and nuts were used.
Two pins of buttons were soldered with long wrires to place the buttons on the front panel and connect to the breadboard. To hold the buttons in place when they are pressed, I placed the 3D printed button holder behind them and fixed it in place using 3mm screws and nuts.
Since the piezo buzzers sound was audible even from inside, it was left as it is on the breadboard. I had already cut the spaces and nut holes for servo but I was not able to utilize the screw holes as the ones that came with the servos were not long enough and also required nuts for fixing. Due to this, I had to use glue and tape for fixing the servos in place which turned out fine.
DECORATION
I wanted a minimalistic look so I did not decorate the frame much. I simply spray painted the MDF pieces with black spray. Looking at it now, I think I should add some black vinyl sheet borders along the screws on front side though.- FINAL ELECTRONICS INTEGRATION -

LICENSE
The license I have chosen is
Attribution-NonCommercial 4.0 International
(CC BY-NC 4.0).
This system allows that the project keep developing and people could improve the
frame design, or add new features to it.
You are free to:
Share — copy and redistribute the material in any medium or format
Adapt — remix, transform, and build upon the material
Under the following terms:
Attribution — You must give appropriate credit, provide a link to the license, and indicate if changes
were made.
You may do so in any reasonable manner, but not in any way that suggests the licensor endorses you
or your use.
NonCommercial — You may not use the material for commercial purposes.
BILL OF MATERIALS
ARCHITECTURE
1. MDF Sheet - 3mm
2. Acrylic Sheet - 3mm
3. PLA Filament
4. Cardboard - 1.15mm
5. Screws and Nuts - 3mm
ELECTRONICS
1. Servo Motor - 2x
2. Tactile Push Buttons - 2x
3. Buzzer - 1x
4. 16x2 LCD Display - 1x
5. I2C Module - 1x
6. Resistor (10k Ohm) - 2x
7. Resistor (100 Ohm) - 1x
8. Small Breadboard - 1x
9. Arduino Nano - 1x
10. Jumper Wires
FINAL PRODUCT
ACKNOWLEDGEMENTS
In order to translate my vision of the bot from theory to engineering and coding,
I took inspiration from two main sources which I would like to acknowledge:
1. Hand Mechanism was inspired by this Proud Parent Machine
by Simone Giertz.
2. Candy Dispenser Mechanism was designed with the help of this
Automatic Candy Dispenser Machine tutorial on YouTube.
Another source that I would like to acknowledge is this
in-depth I2C LCD interface with
Arduino tutorial.
[ARDUINO CODE FILE DOWNLOAD LINK]
---------------------------------------------------------------------------------
💌 SPECIAL THANKS,


to my loveliest instructor, duaa for being a constant source of encouragement
that helped me survive the overwhelming final project week and for
all her help in the building process. without her support, this project
wouldn't have come to life.


also to dr. salman for bringing this innovation heaven that is fablab in bahrain
and for all his teachings and kindness throughout the course.


and to our instructor, abdullah for introducing us to joints design which I have used for my
bot's frame and his continuous kindness throughout the course.


lastly, to the entire team of fablab bahrain for always being there to help and my
fellow students for maintaining
such a peaceful and supportive environment at the lab which made working long hours at the lab
so enjoyable instead of exhausting.