week4
3D Scanning
and Printing
What I did
-
This week
we were introduced to different 3D printers and we examinate their printing results through a group assignment.
we printed 3 different objects.
I worked on my individual assignment to print a 3D object that I designed earlier.
I 3D scanned my colleague.

✎ 3D printing
3D printing is a sort of additive manufacturing in which layers of material are built into 3D things. It prints by adding material (often a kind of plastic) one drop at a time. The 3D printer creates a model by drawing a form on a flat surface and then drawing another on top of it.
✎ Materials
There are many various materials used to build these layers, but as an amateur, you're most likely to utilize melted plastic and UV resin. The kind you use will be determined by the outcome you seek. The greatest 3D printers automate most of the process, but getting it perfect still requires a lot of trial and error.
✎ FDM 3D Printing
Fused deposition modeling (FDM), also known as fused filament fabrication (FFF), is the most popular kind of 3D printing among consumers, due to the increasing number of hobbyist 3D printers. This approach is ideal for basic proof-of-concept models, as well as rapid and low-cost prototyping of simple parts, such as machined parts. When compared to other plastic 3D printing techniques, consumer level FDM has the lowest resolution and accuracy and is not the ideal option for producing complicated designs or items with intricate details.
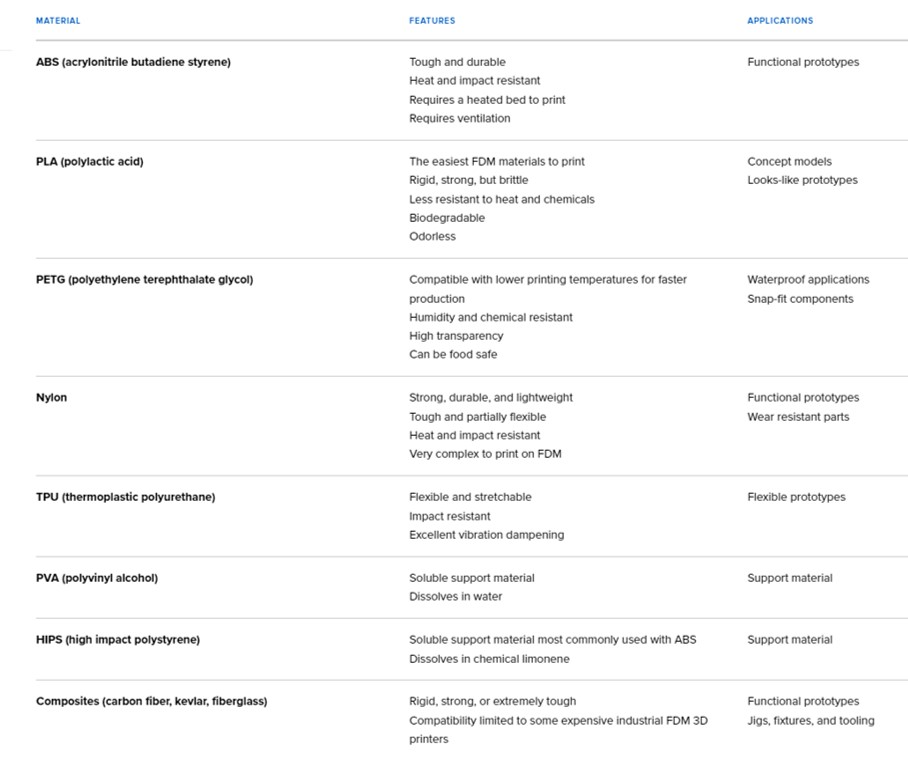
✎ Popular FDM 3D Printing Materials
ABS, PLA, and their many blends are the most popular FDM 3D printing materials. Advanced FDM printers may also print with specialist materials that have increased heat resistance, impact resistance, chemical resistance, and stiffness.
✎ Additive and subtractive manufacturing
3D printing is the inverse of'subtractive manufacturing,' in which the material is carved out or hollowed using equipment such as a milling machine. To manufacture physical items, additive manufacturing does not require a mold or material block. Instead, it builds and fuses layers of material together.
✎ Why couldn't the design be simply created using subtractive processes?
Before the final 3D item is created, the necessary amount of material is added layer by layer in 3D printing. This process is known as additive manufacturing. Subtractive manufacturing, on the other hand, uses material-removing equipment like laser cutters to treat the material according to your digital design before obtaining the finished 3D product. Another reason is that the design can only be produced additively since it features undercuts, overhangs, nested pieces, meshes, etc. Therefore, subtractive fabrication of the design was not possible.
✎ Makerpot Replicator Z18 3D printer

Its dimensions: 30.0 L X 30.5 W X 45.7 H CM
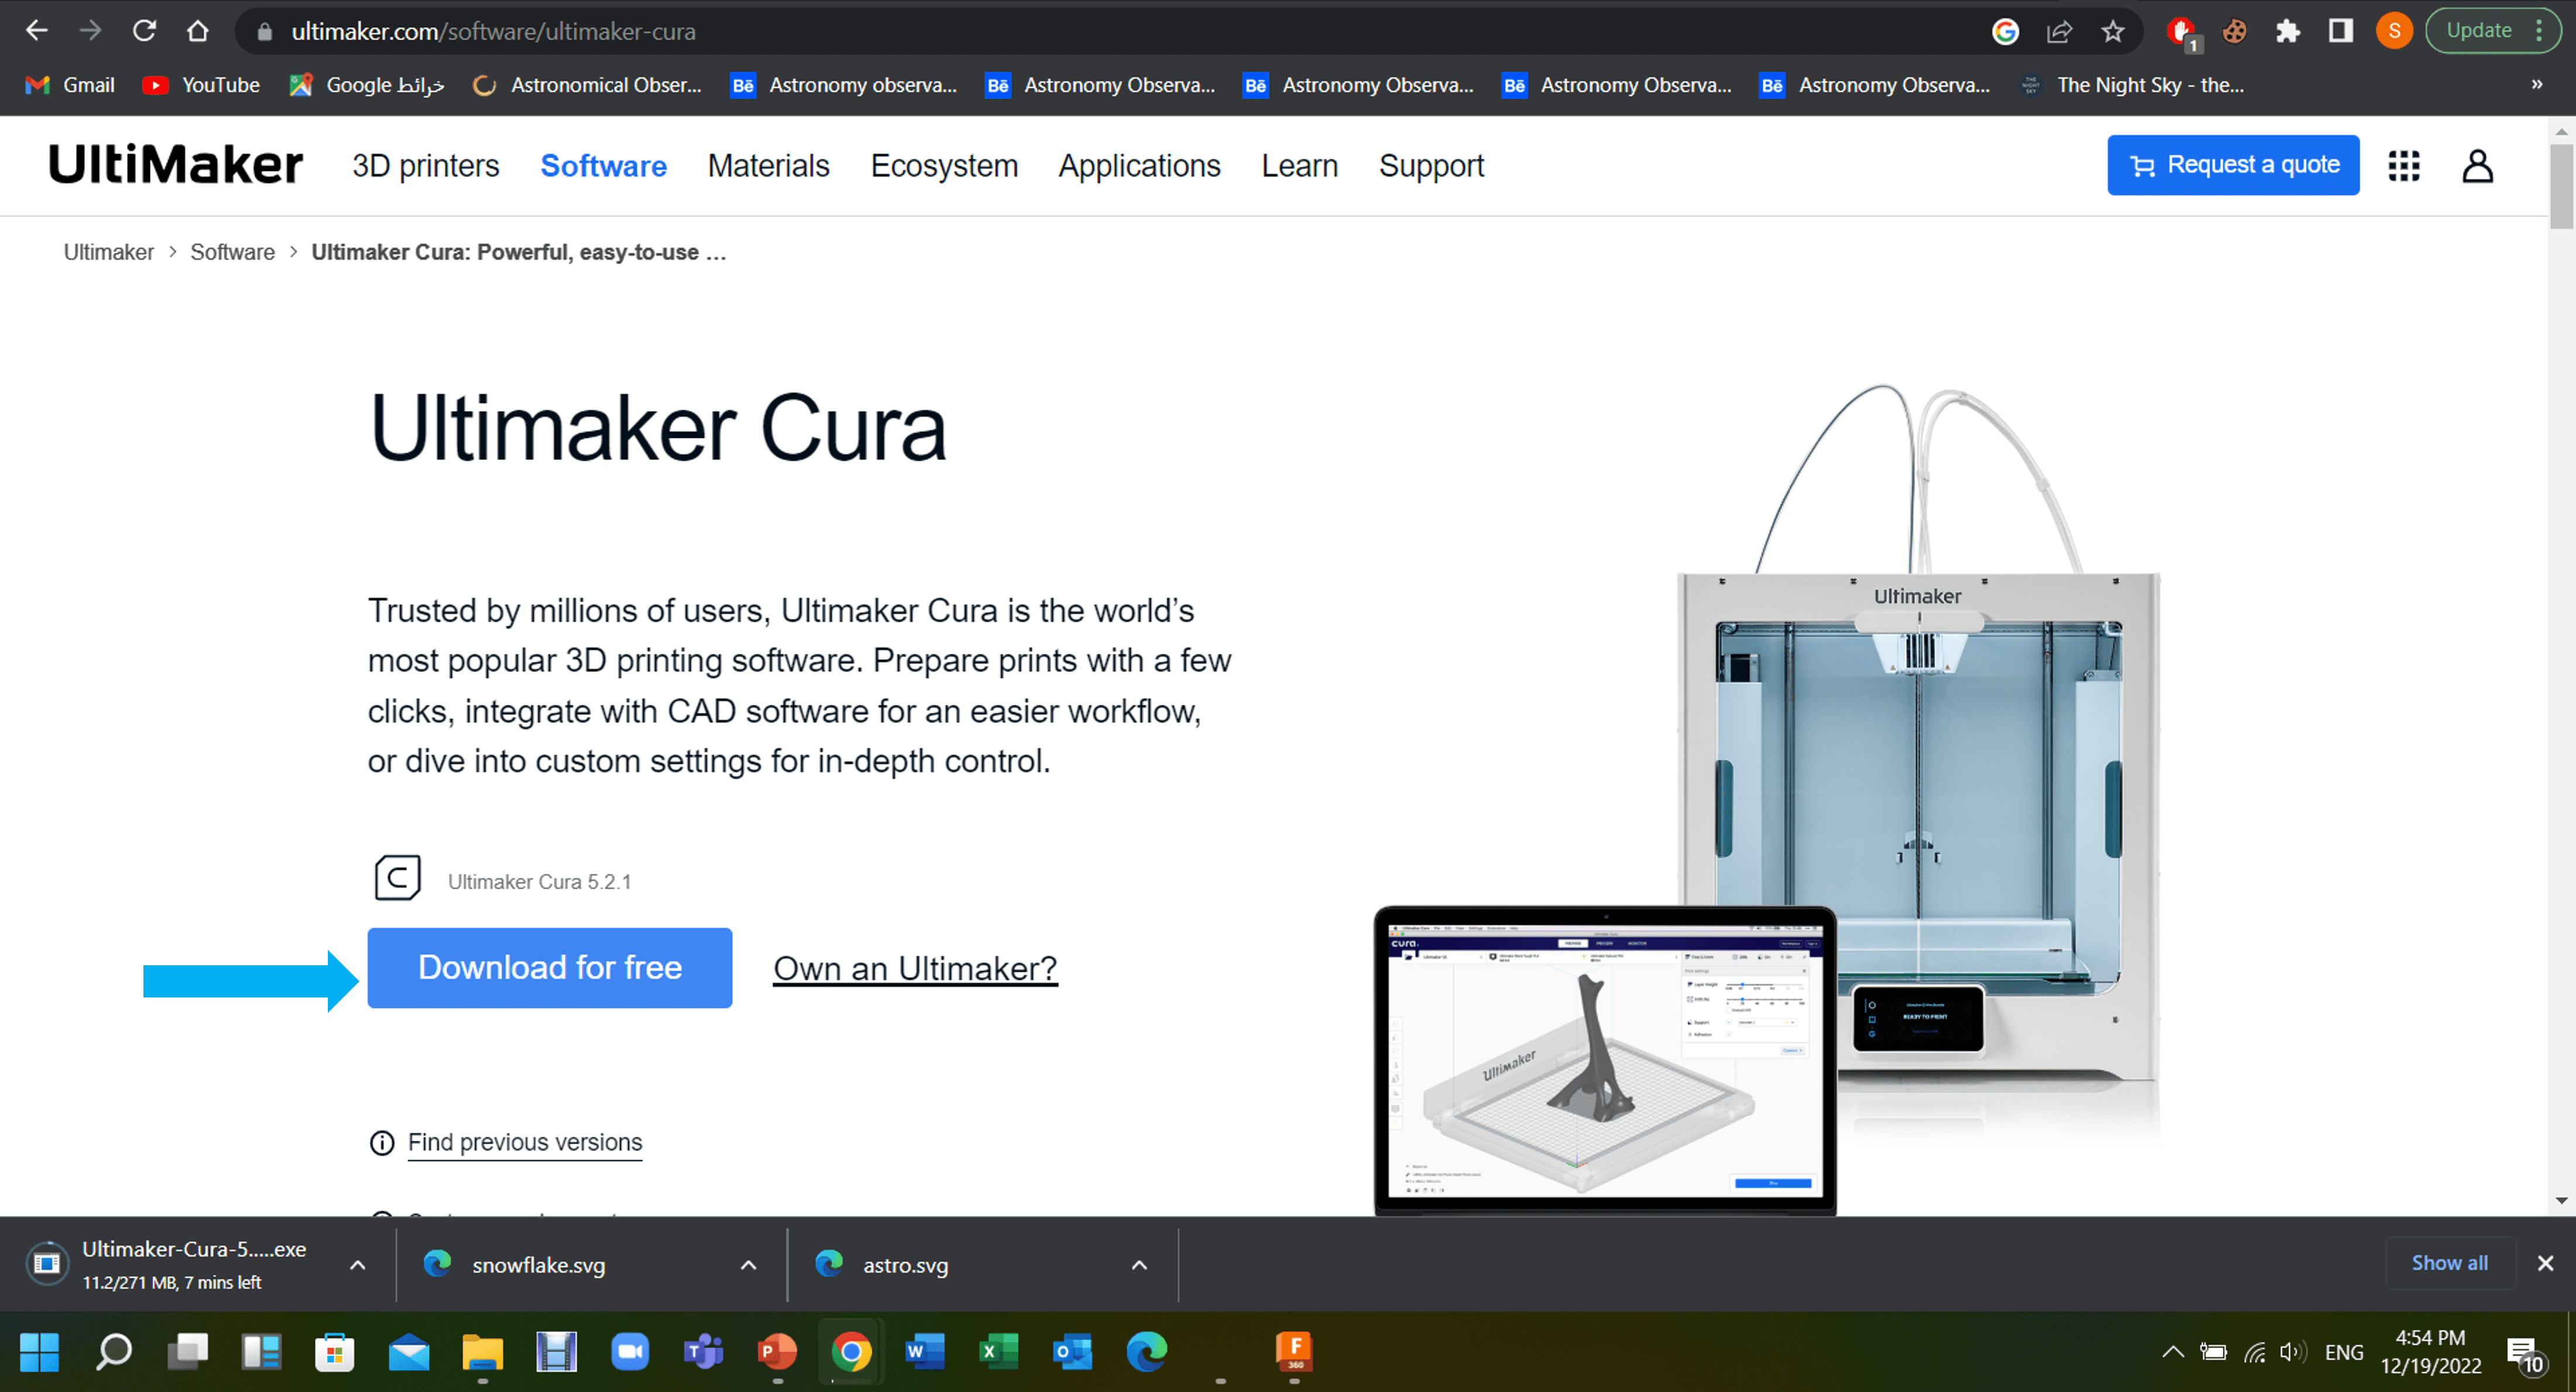
For the other printers I downloaded the software called Cura, while makerbot printer has its own software.
Group Assignment
📝Testing Design Rules for the Printer
You can find the group assignment documantation in my
colleague's page
Indivisual Assignment
📝Design and 3D print an Object
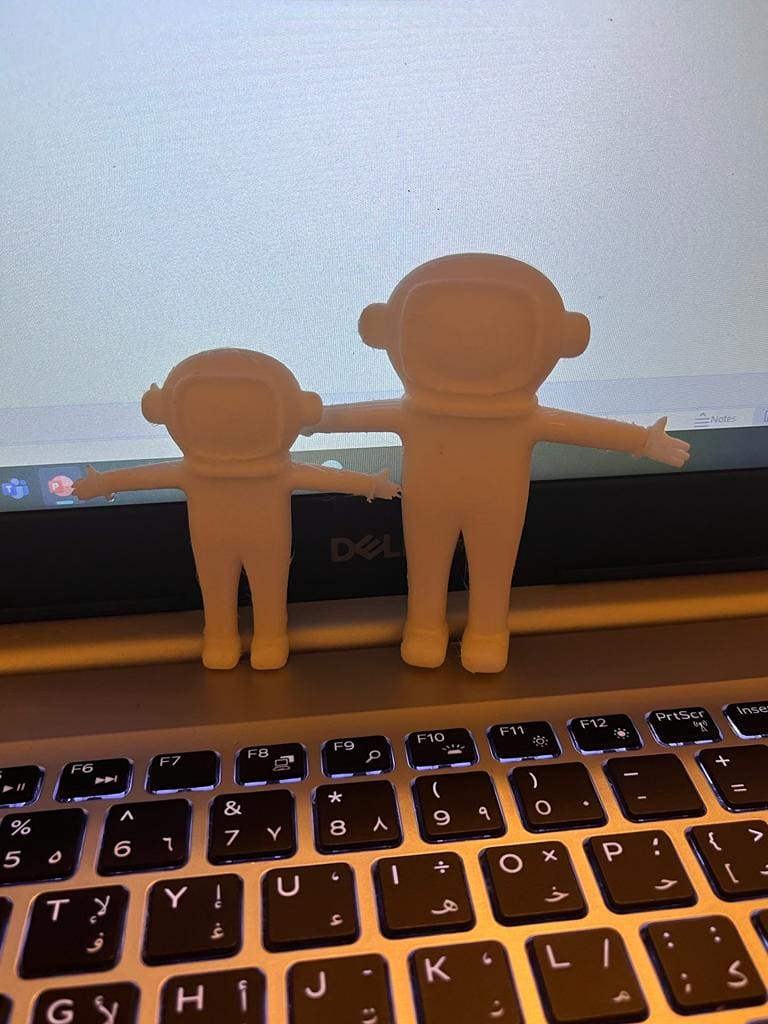
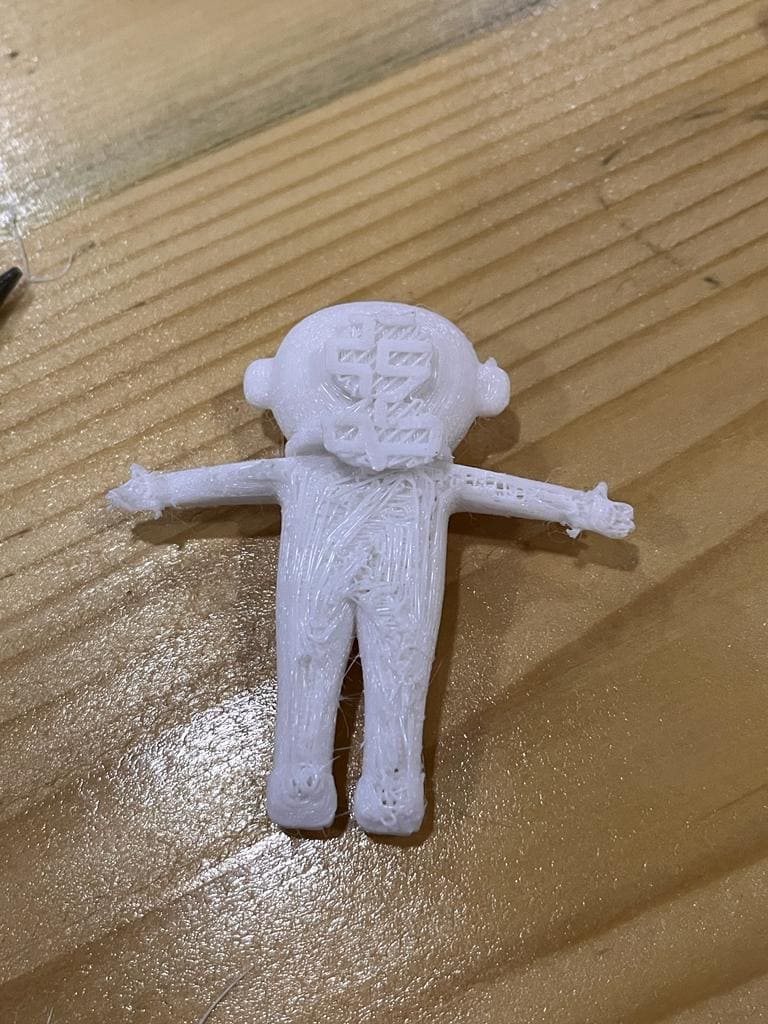
I decided to try and print the astronaut I designed earlier in the previous weeks to look how it will turn out
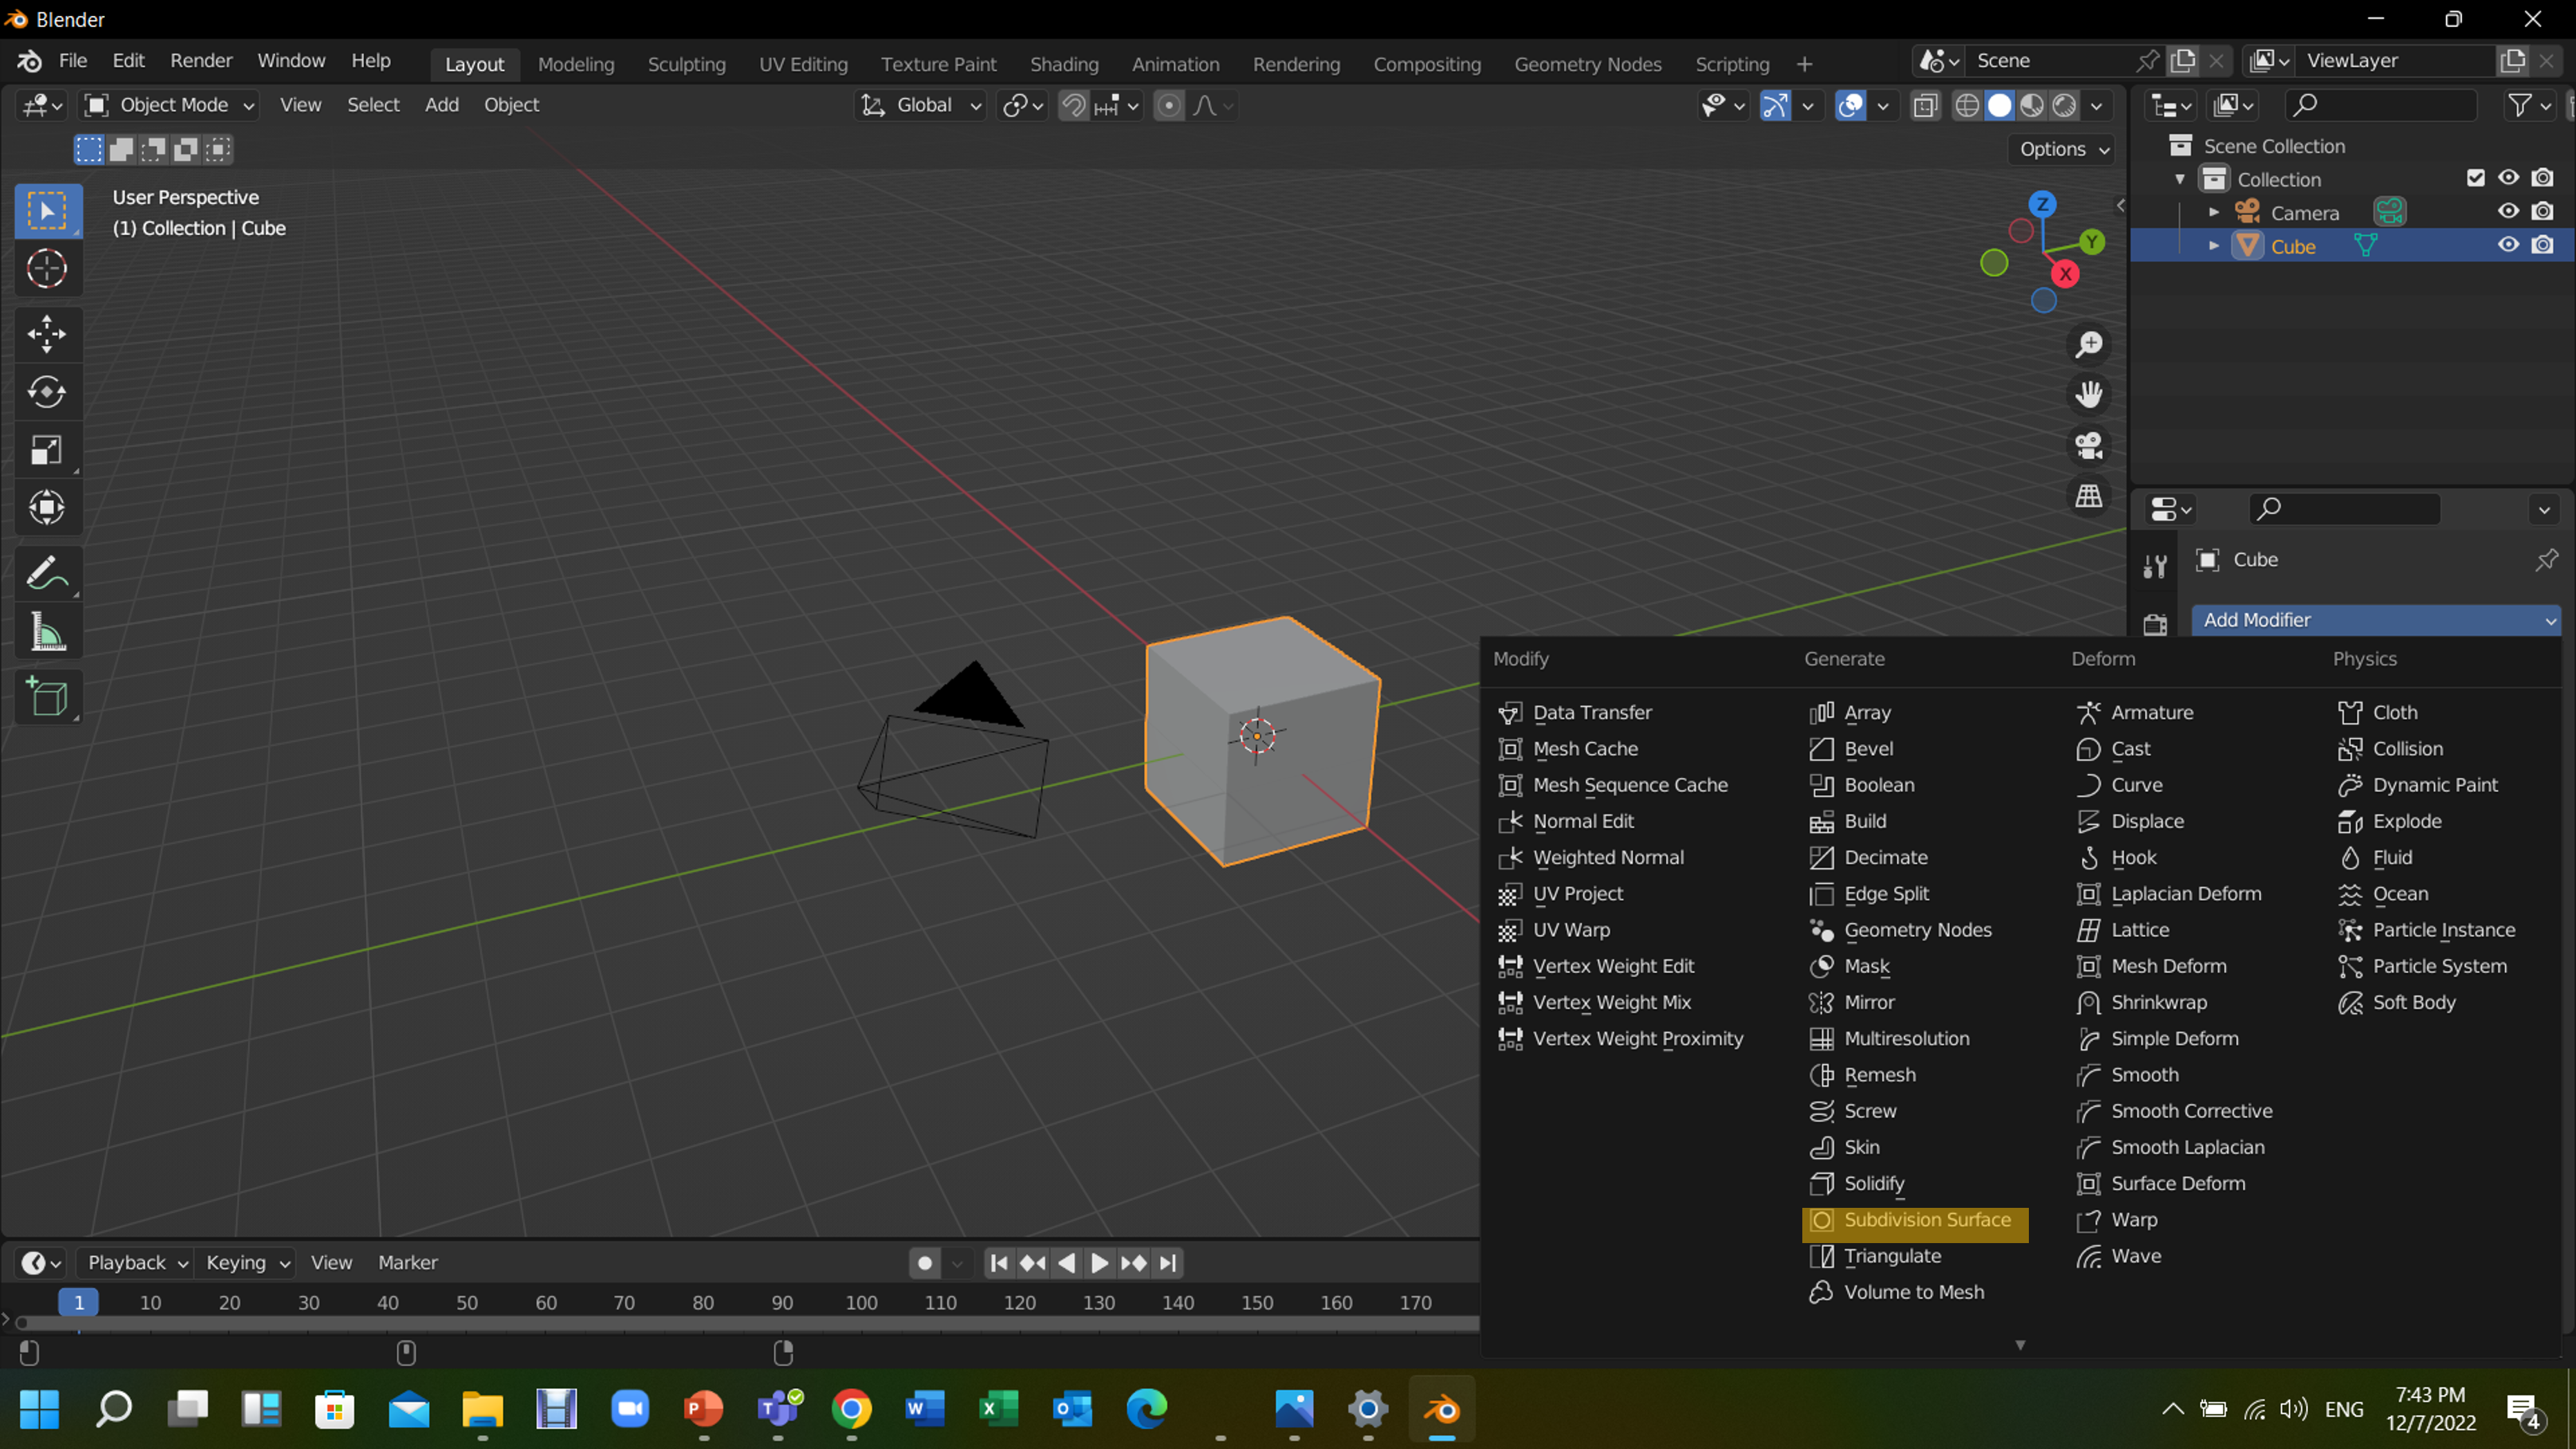
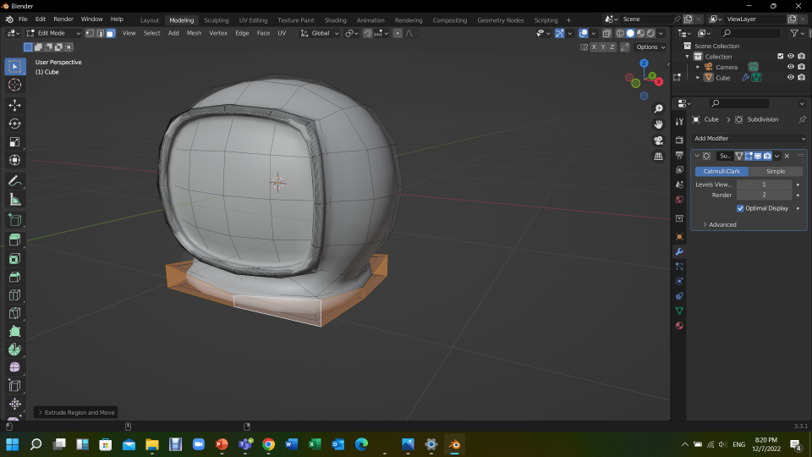
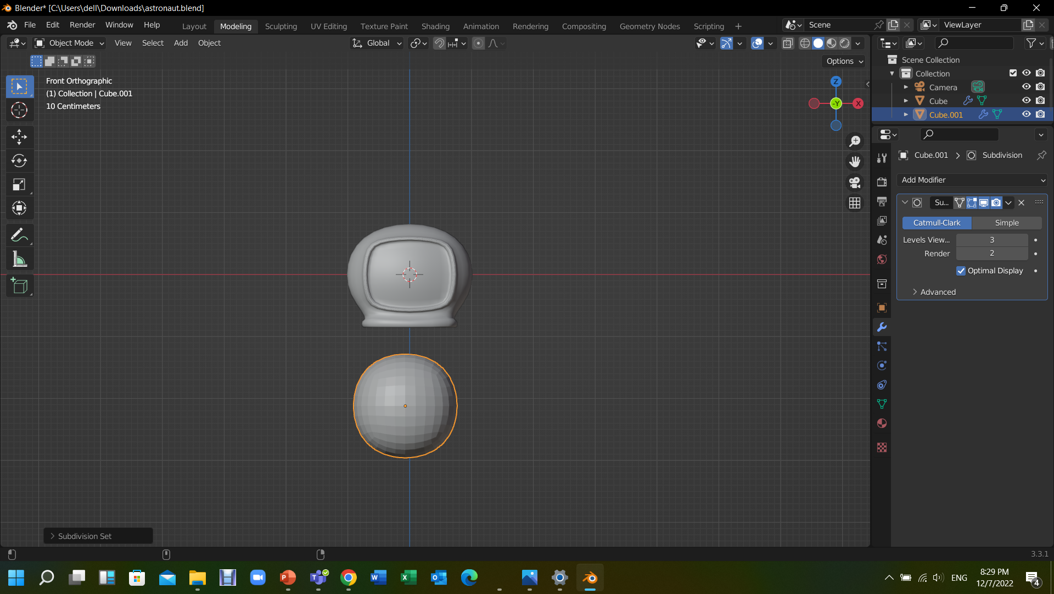
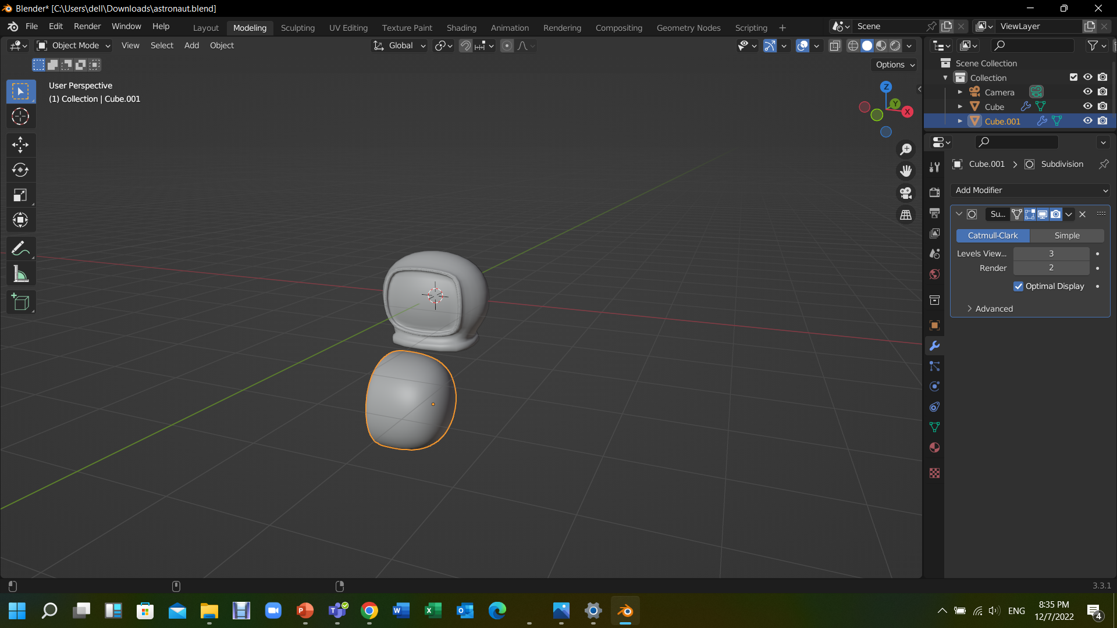
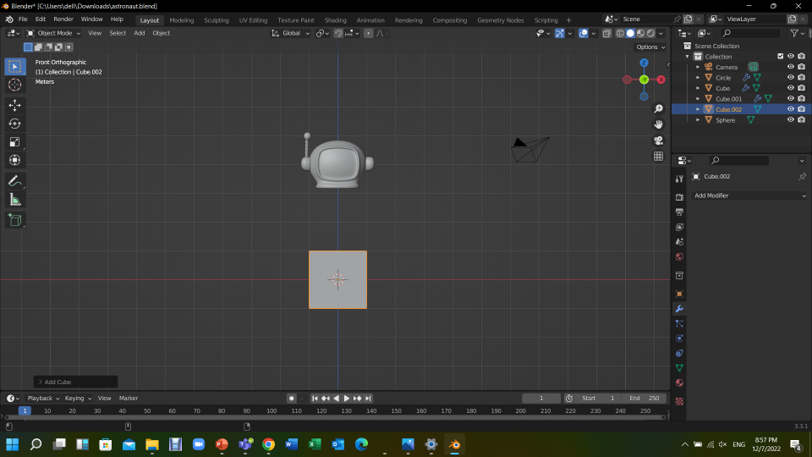
STEP1: Start by deleting everything you have in the scene and added a cube by clicking right click>mesh>cube.

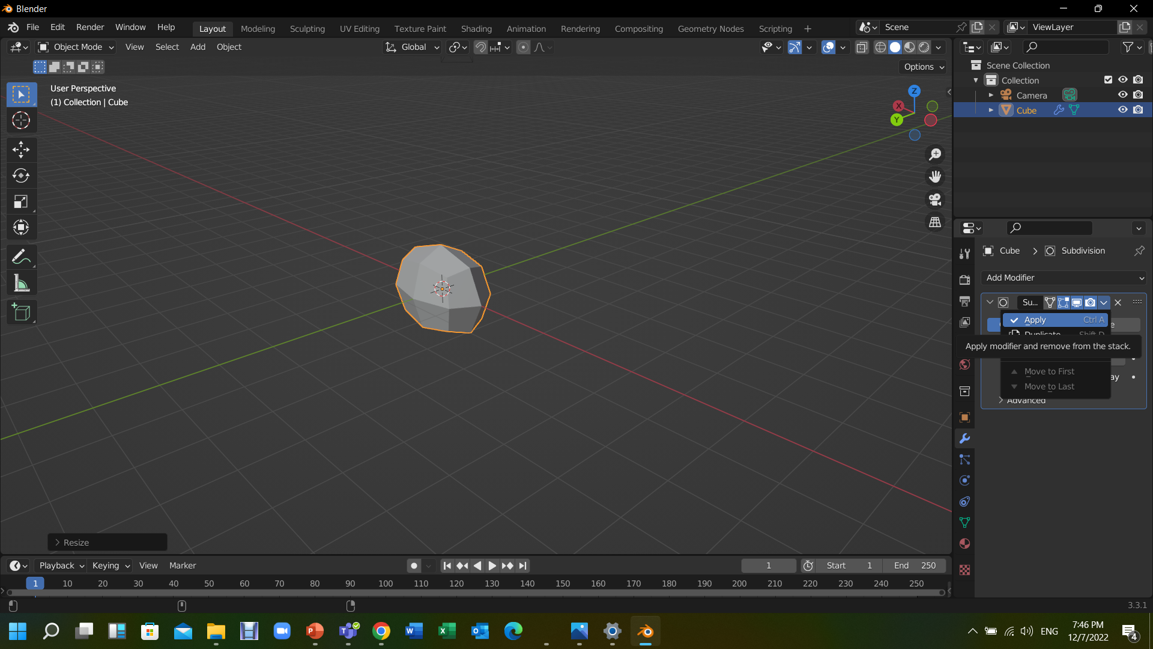
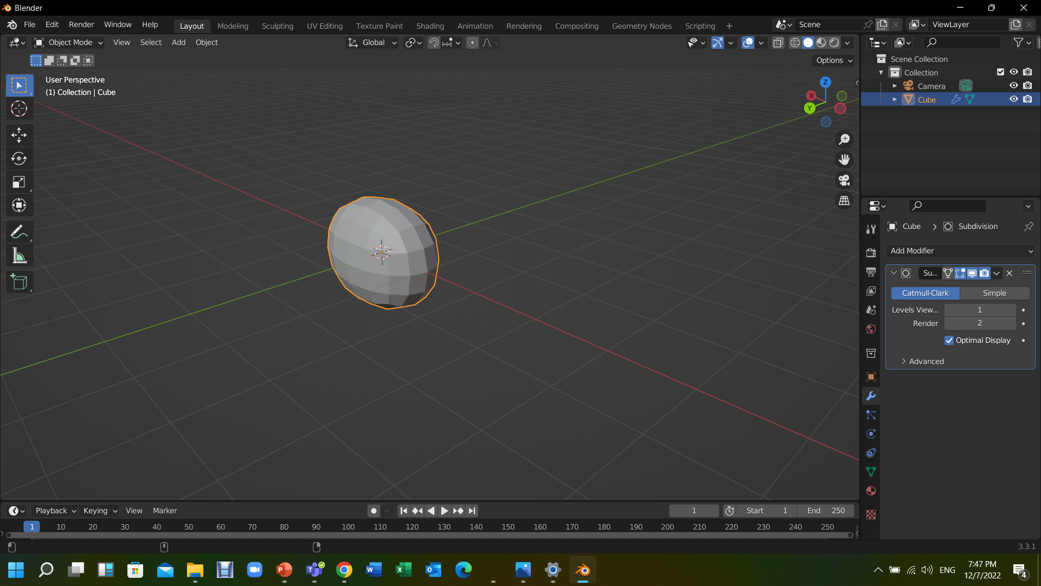
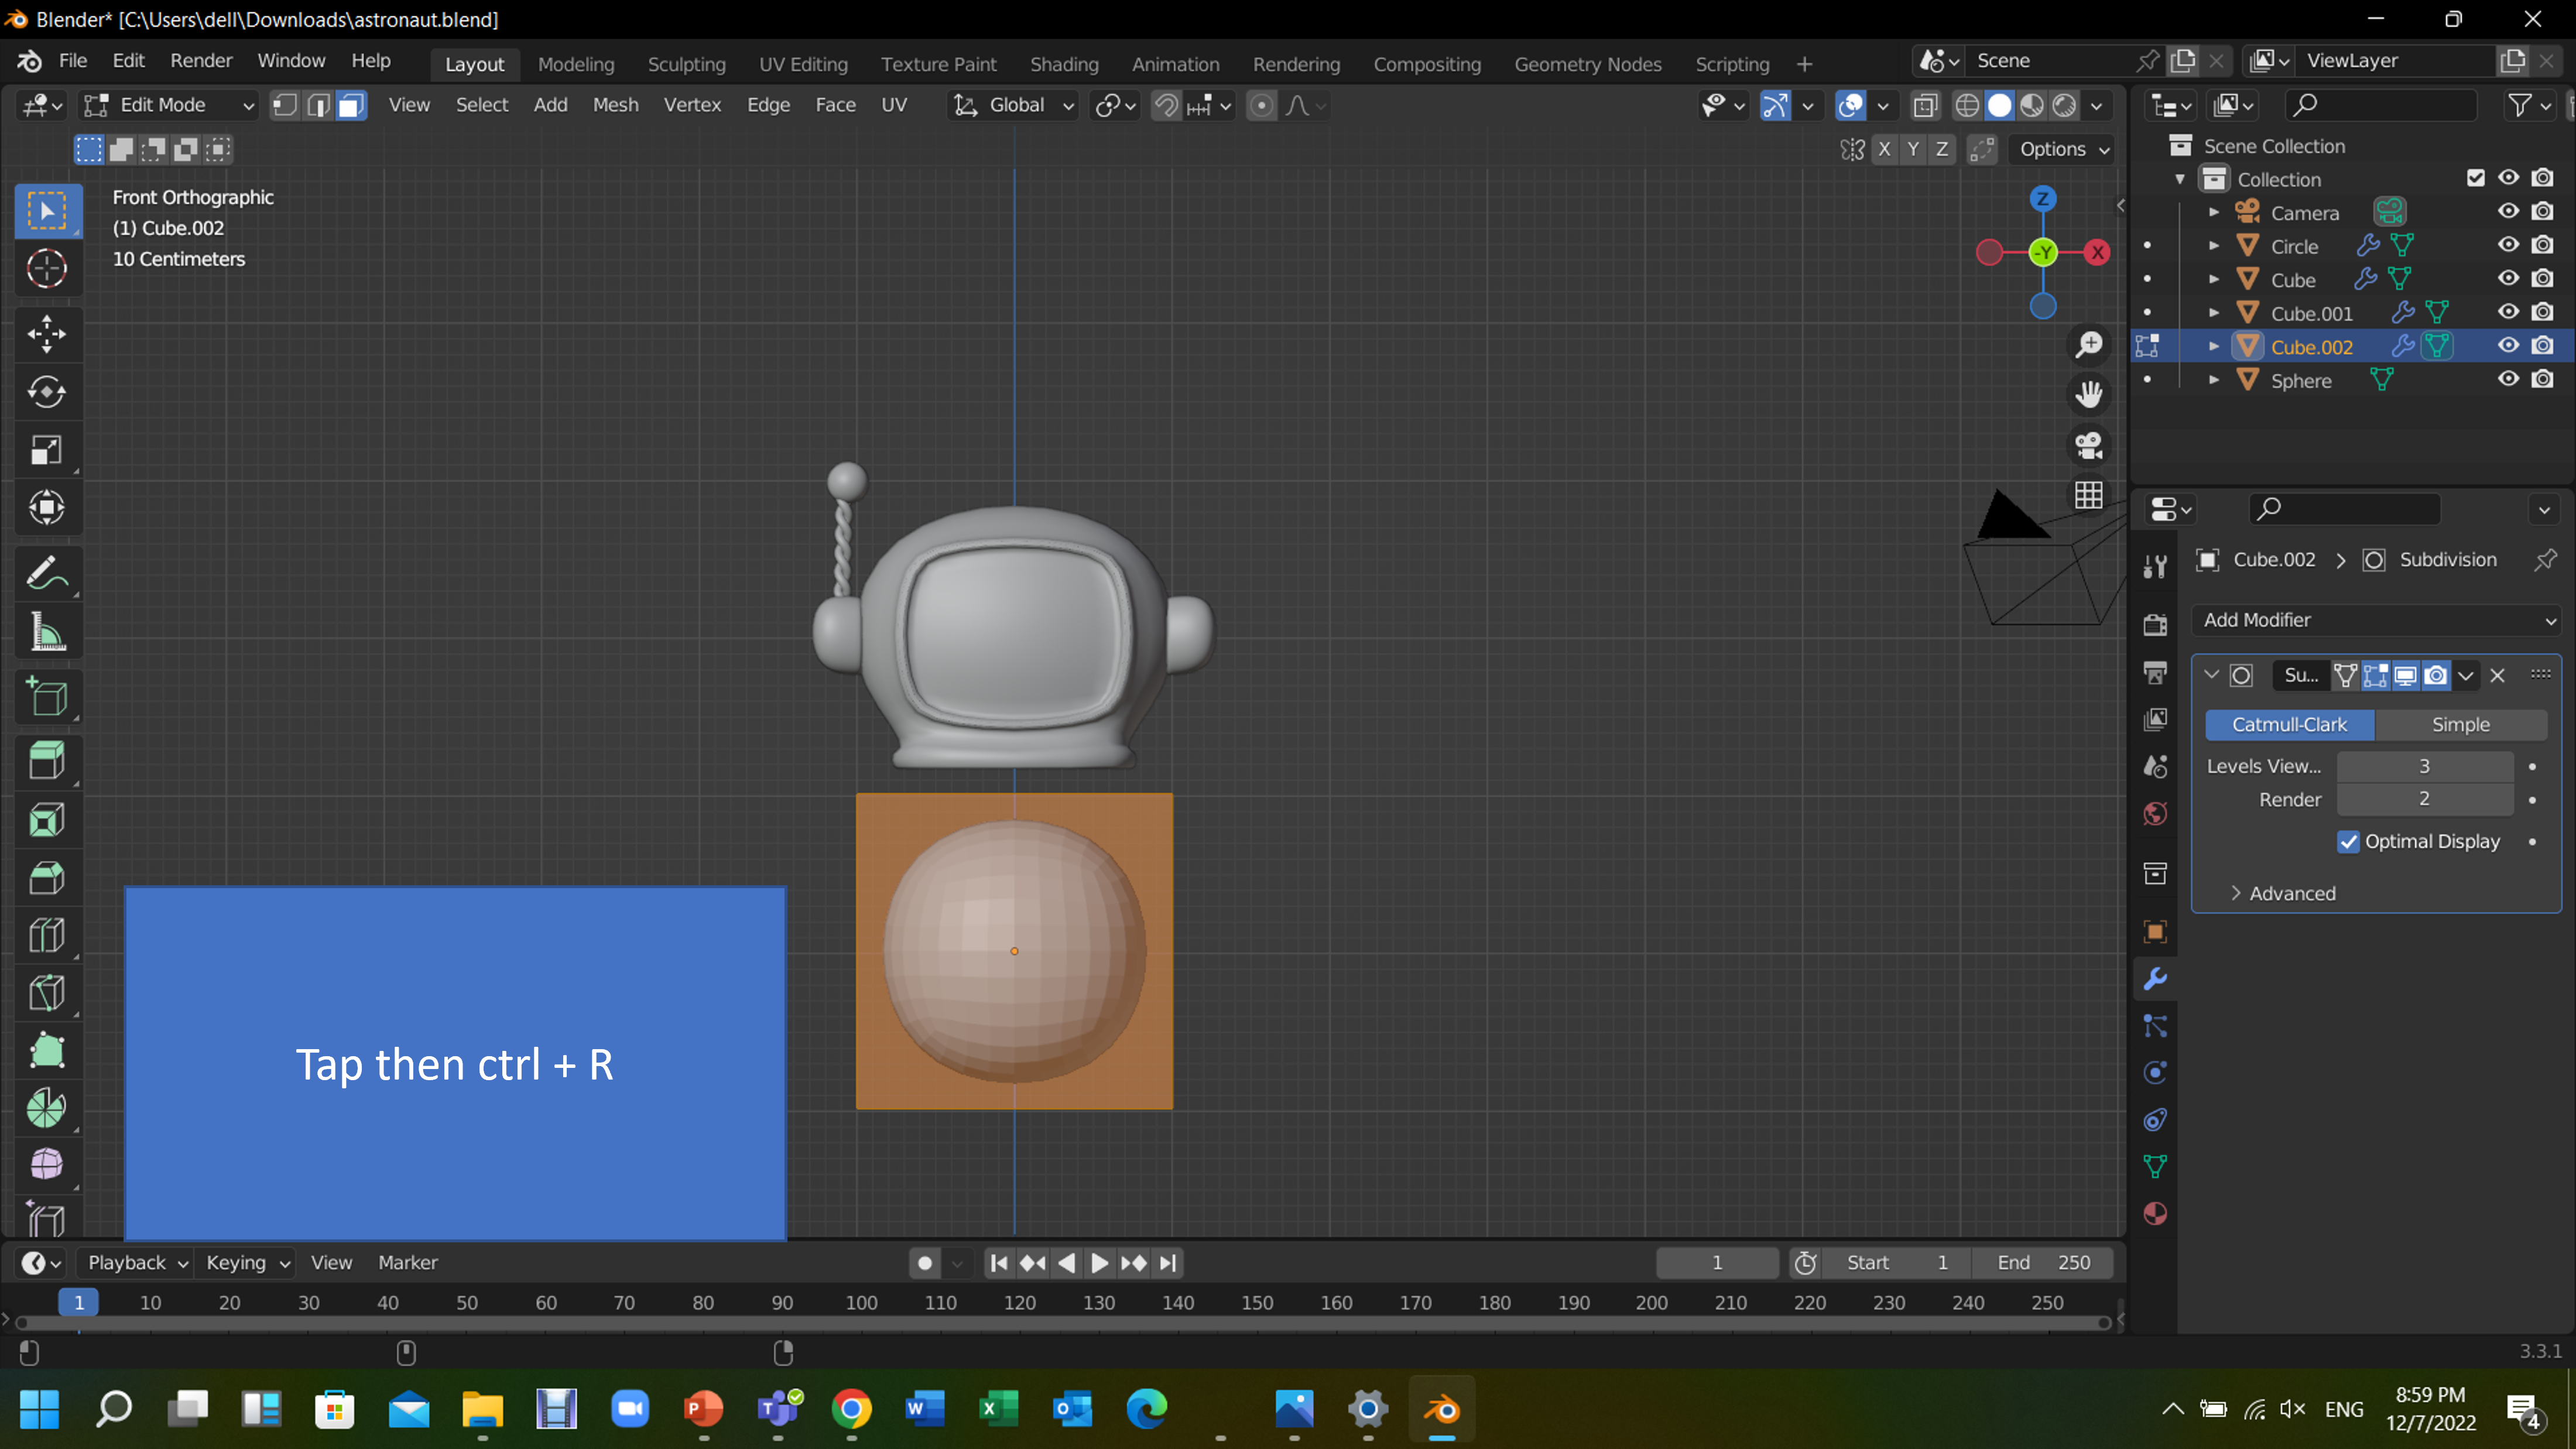
STEP2: press ctrl+2 to add subdivision surfacemodifier which will turn it into a sphere
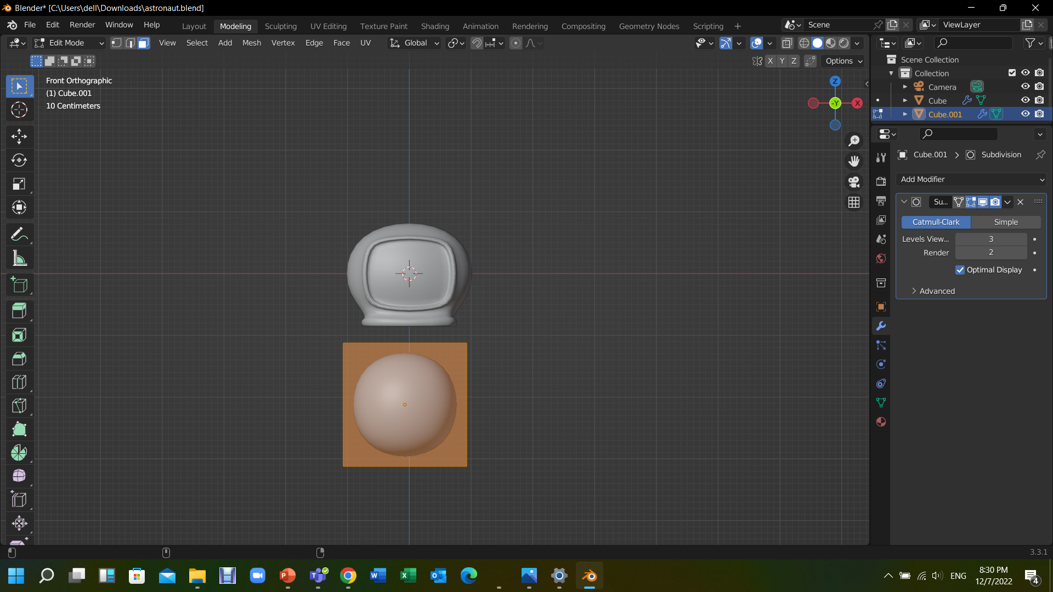
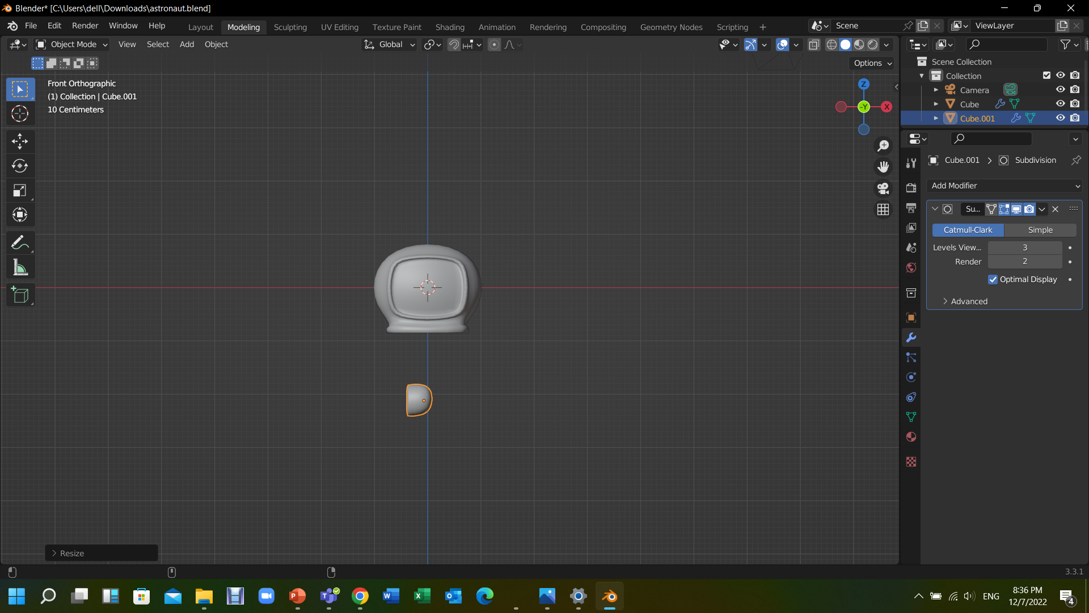
STEP3: After resizing the cube according to your need, apply subdivision so you can get few more faces to work with.
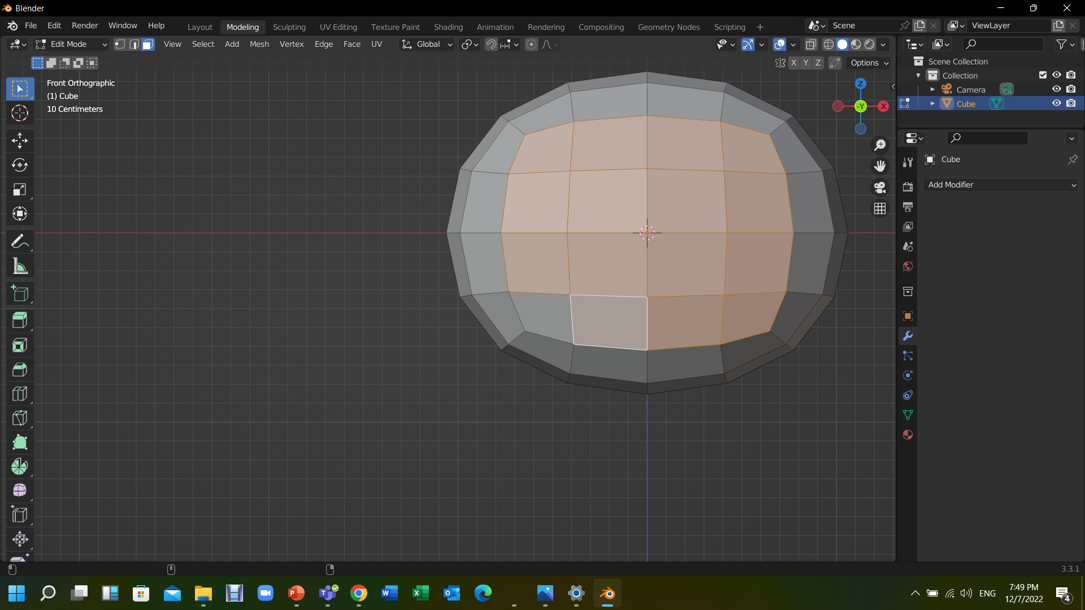
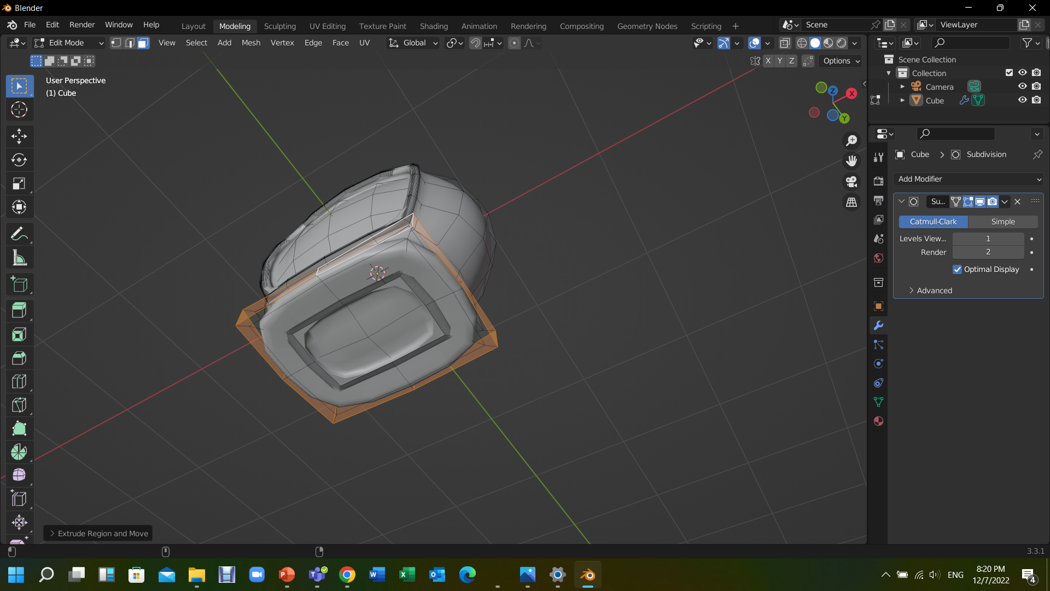
STEP5: Select the faces where you want the glass to be then press (e) to extrude then scale it a bit, then, extrude those faces inward.
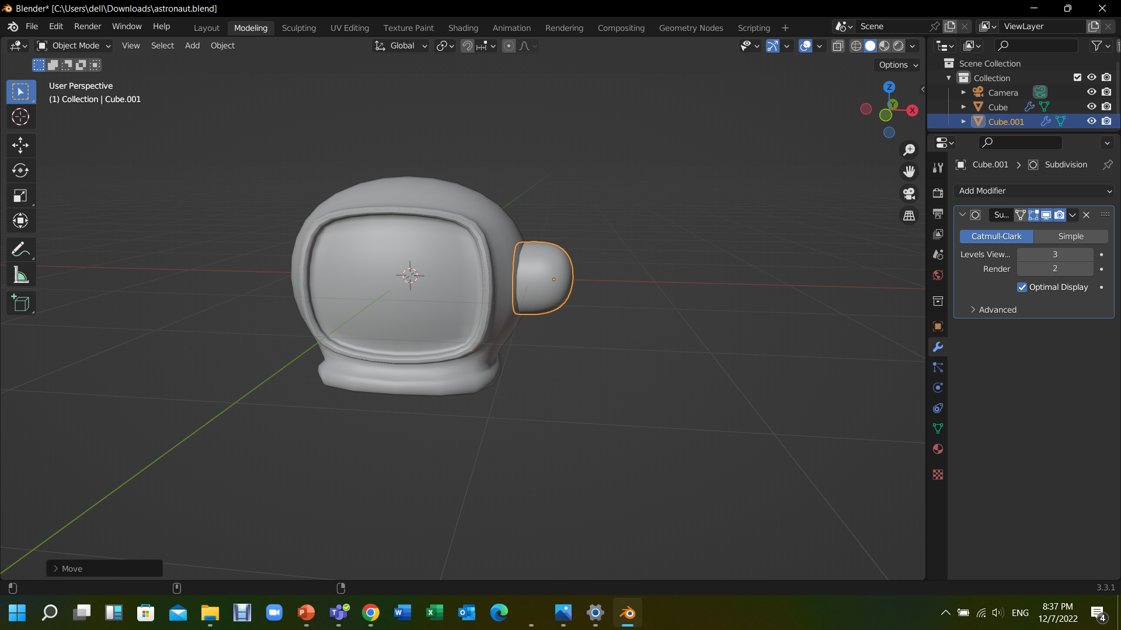
STEP6: Select the outer surrounding faces and extrude them outwards.
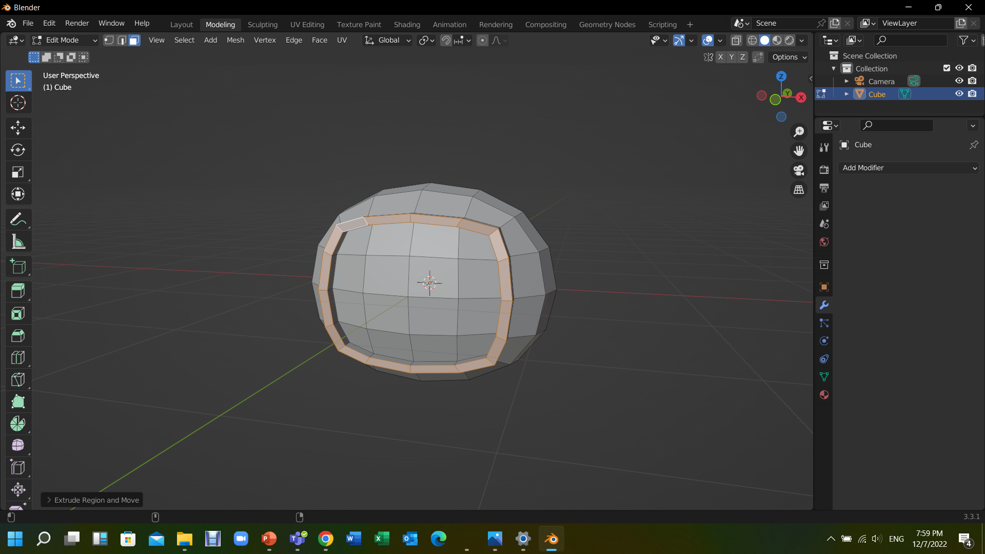
STEP7: Select the outer edges and press (ctrl+b) to bevel them and increase the bevel by scrolling mouse wheel.

STEP8: Select edges from buttom and resize them to create neck.

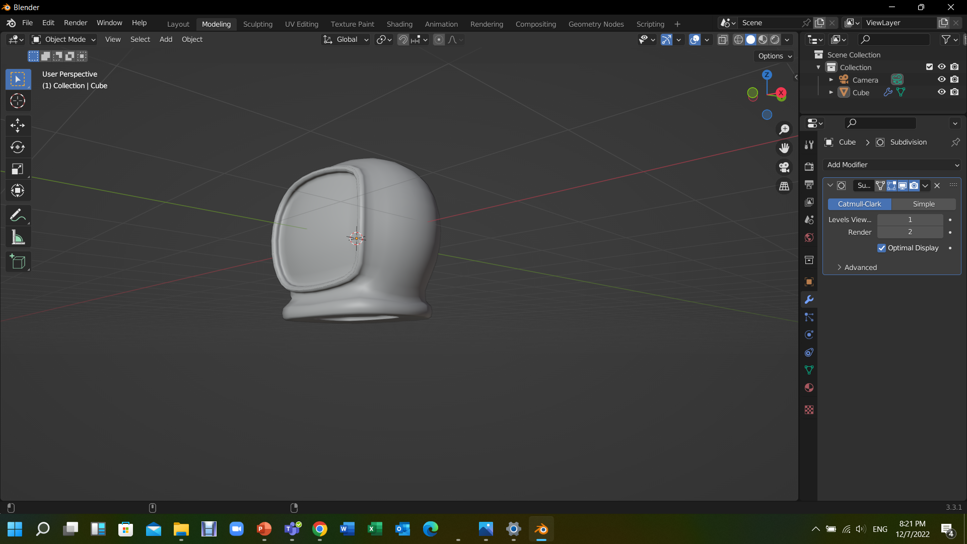
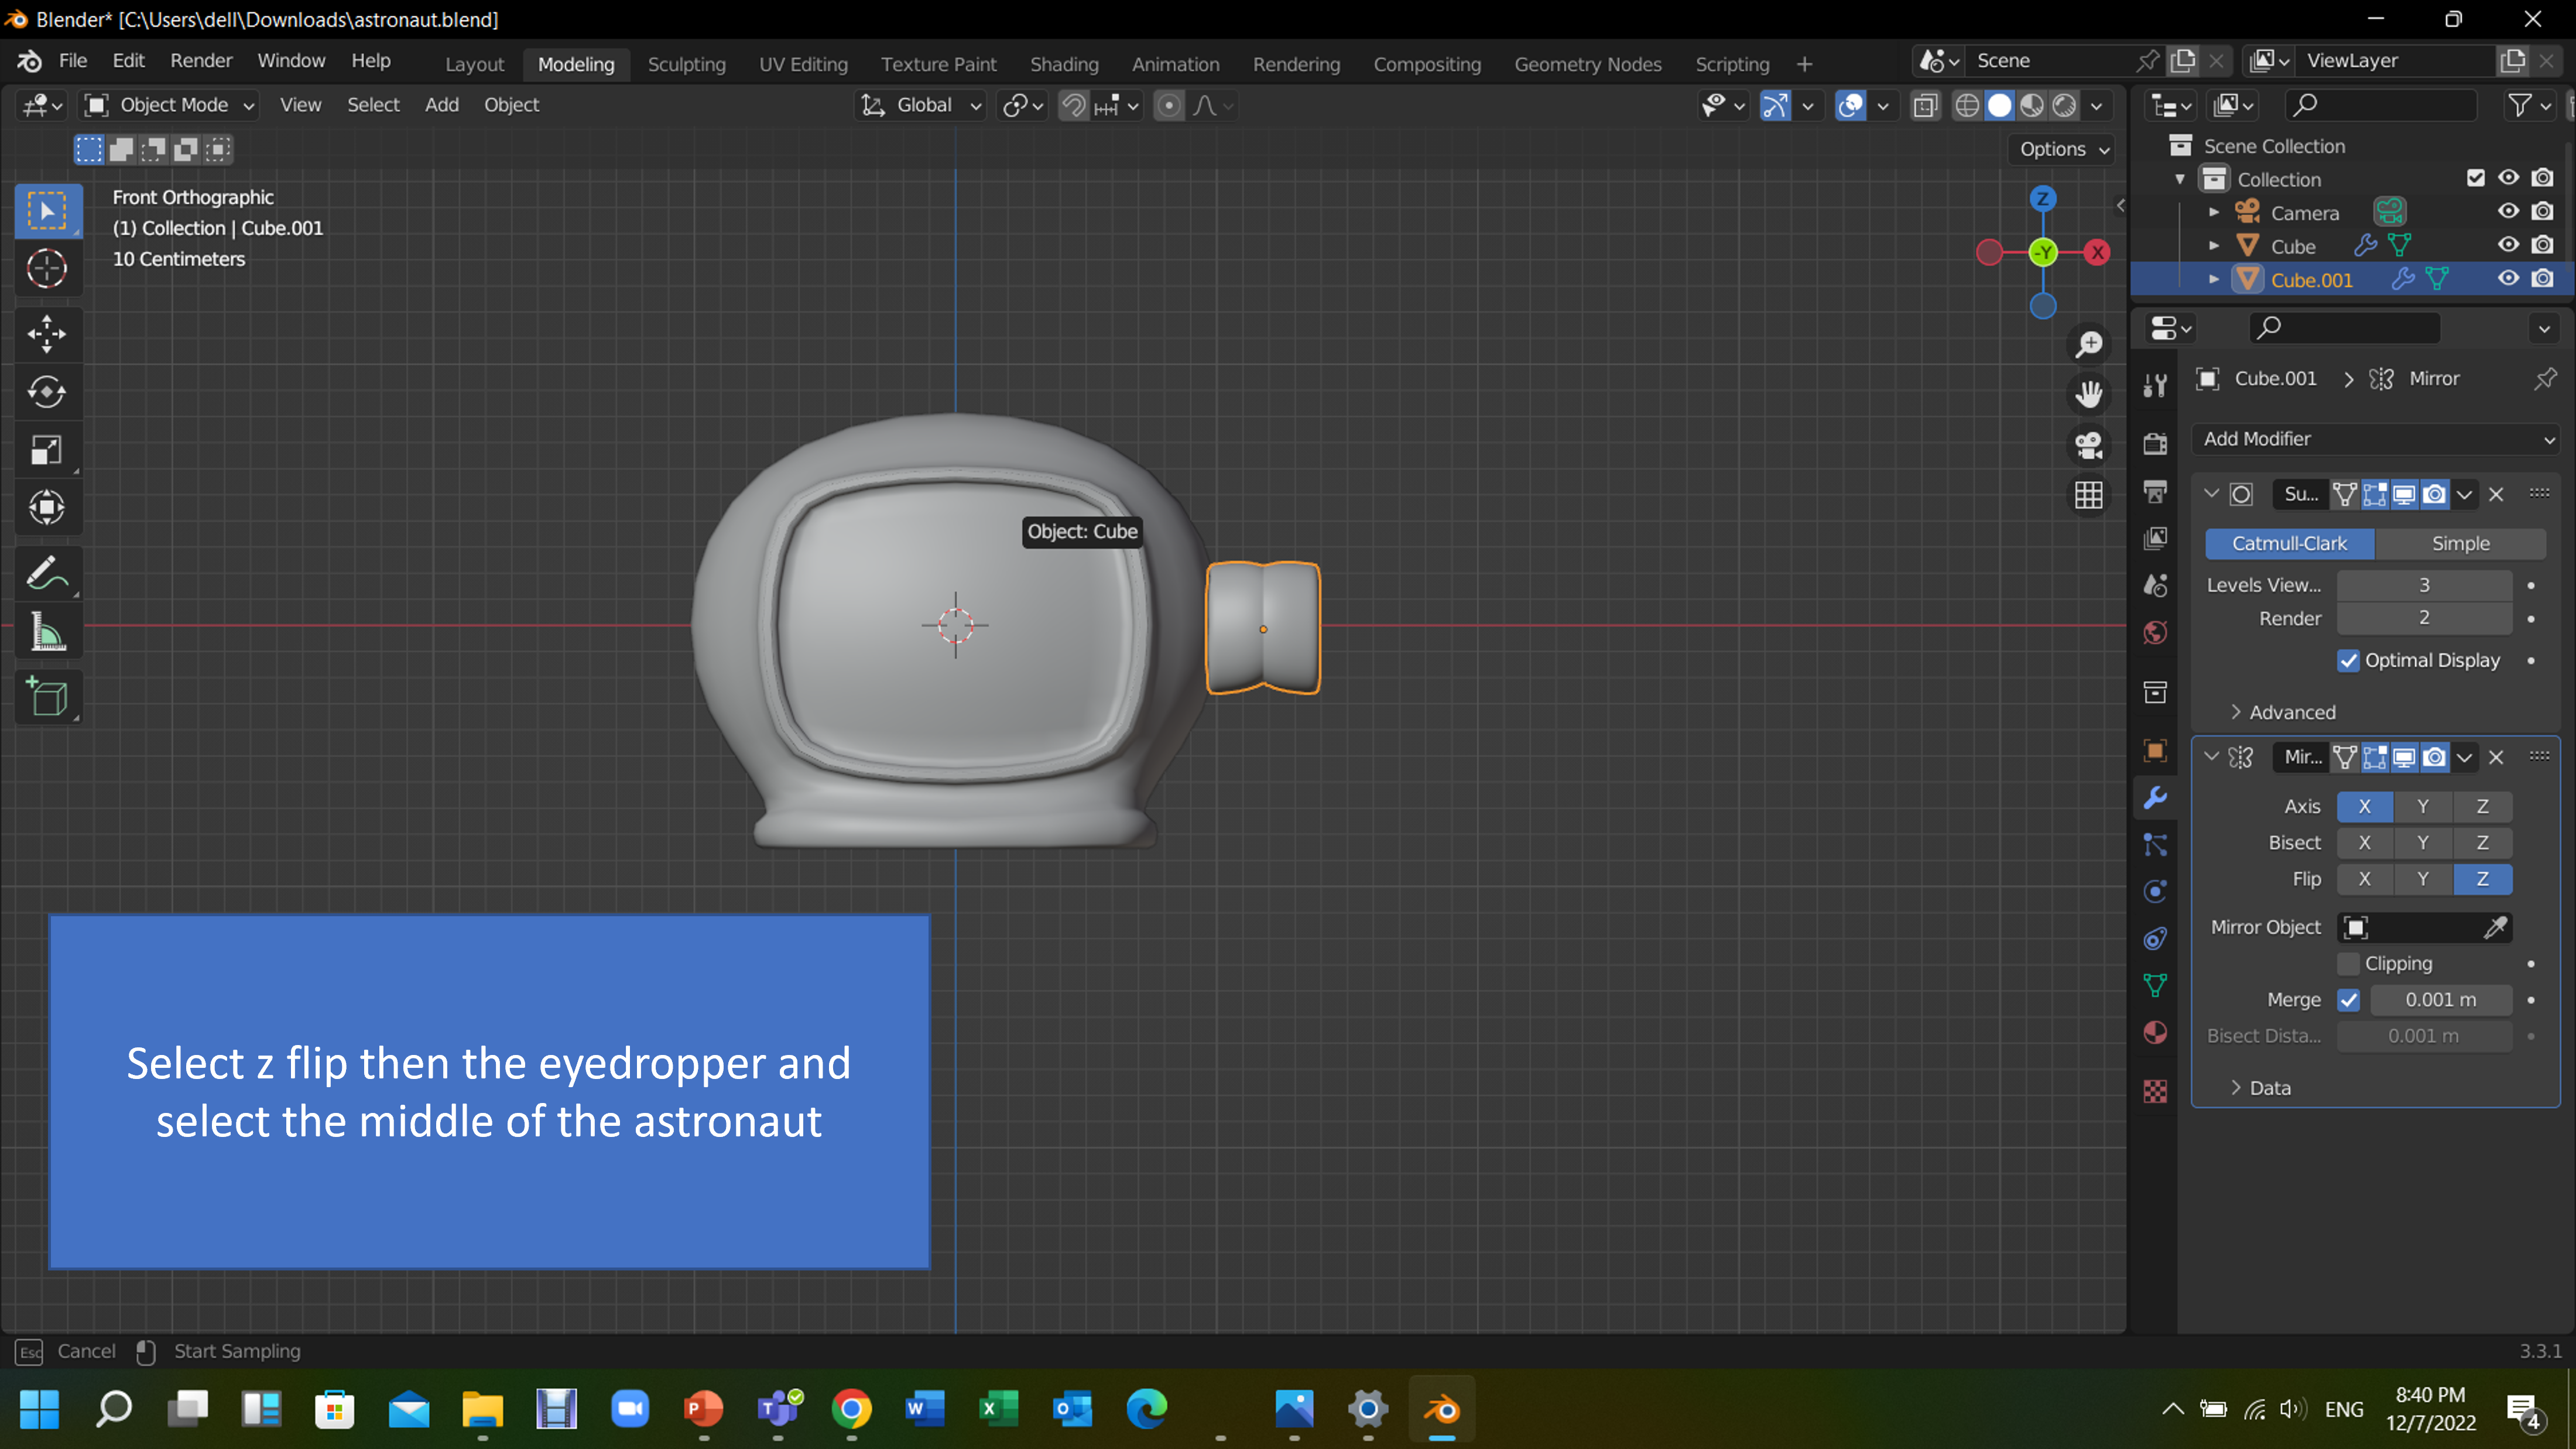
Creating the helmet parts
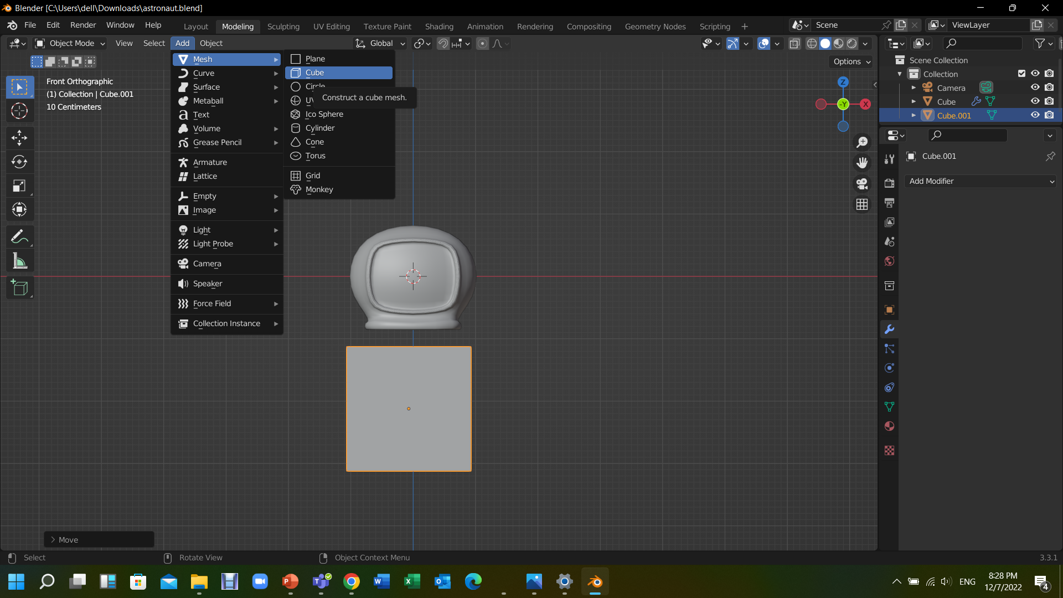


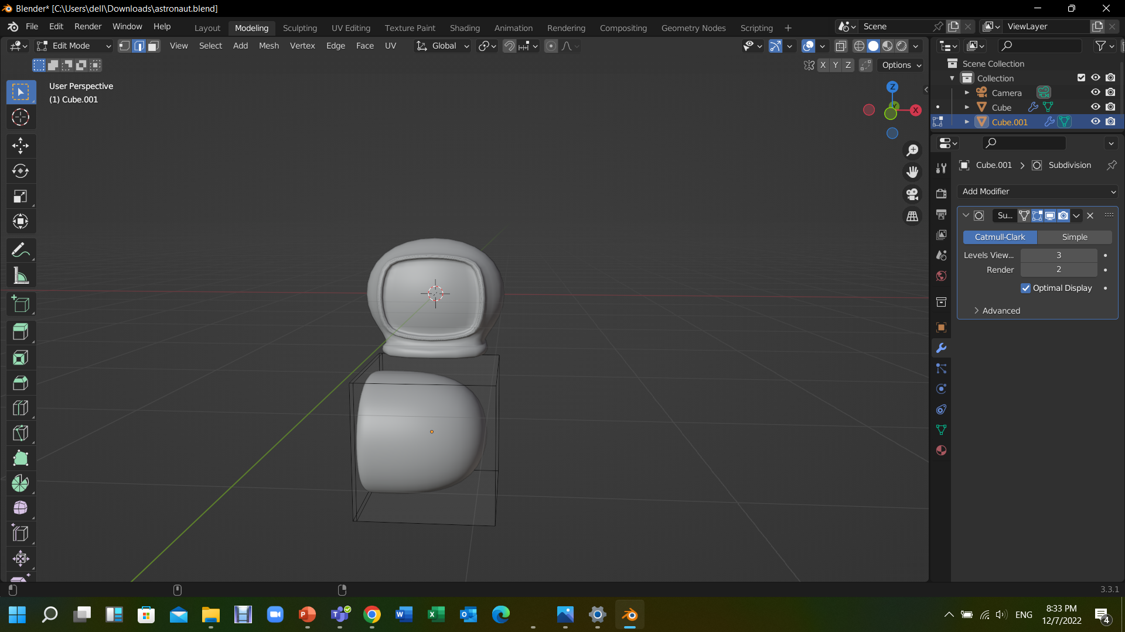
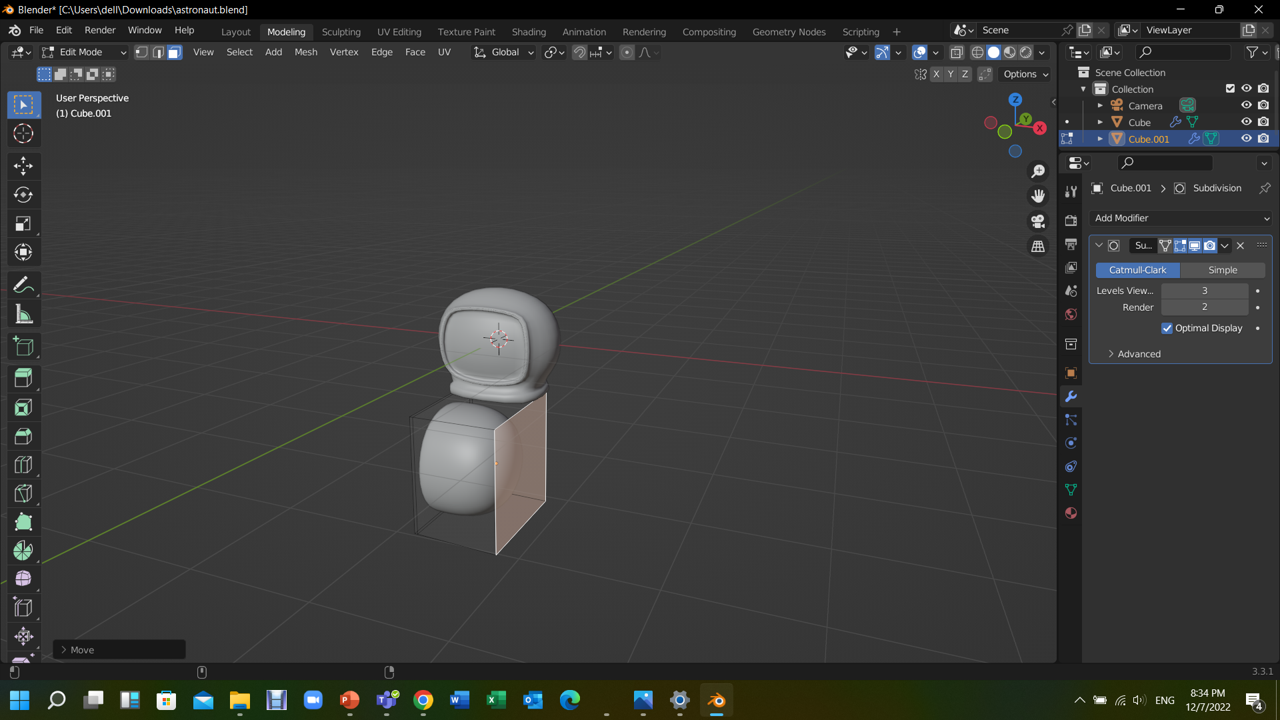
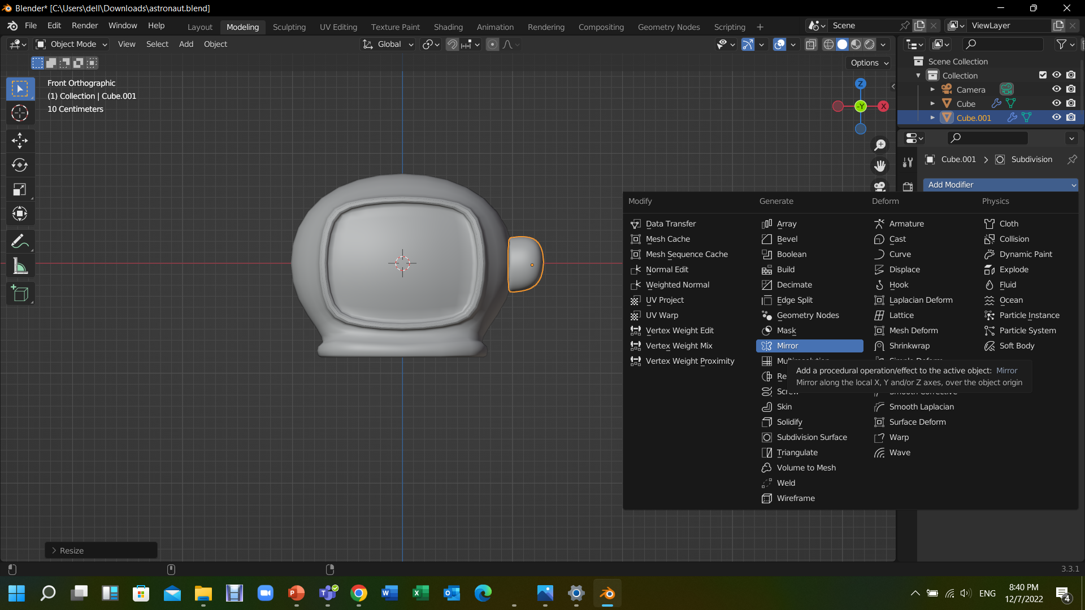
Creating the body


To check how I did the rest of 3D design, refer to week 2 on
My page to watch the full video

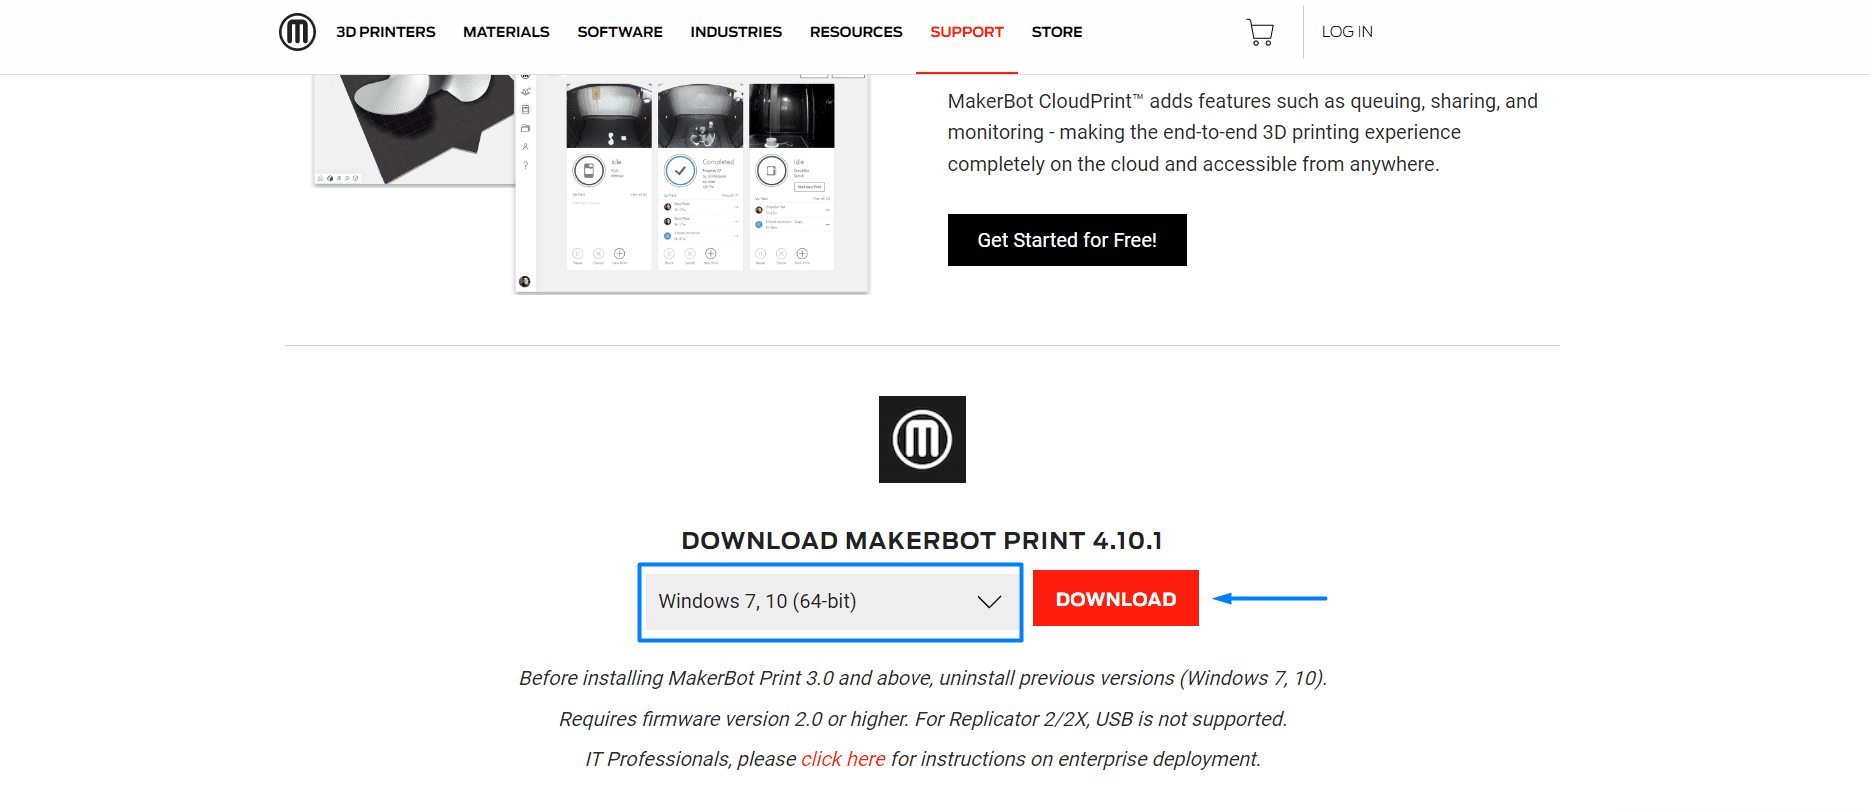
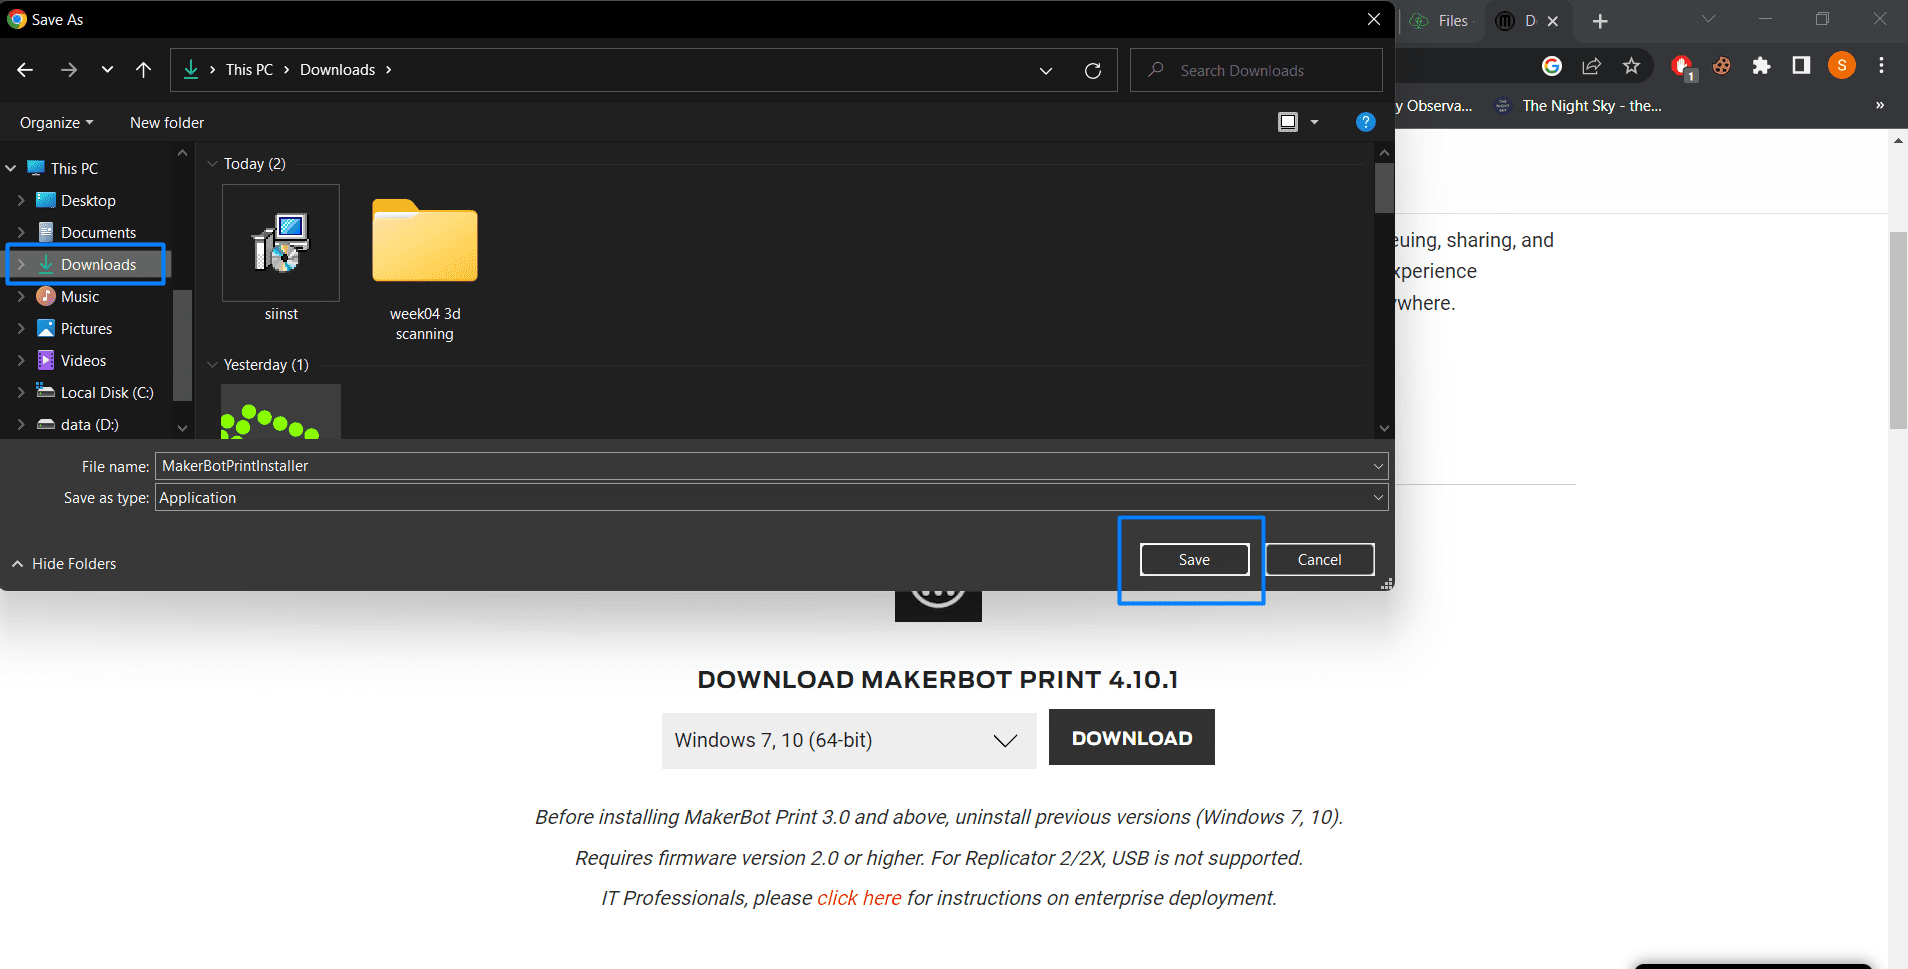
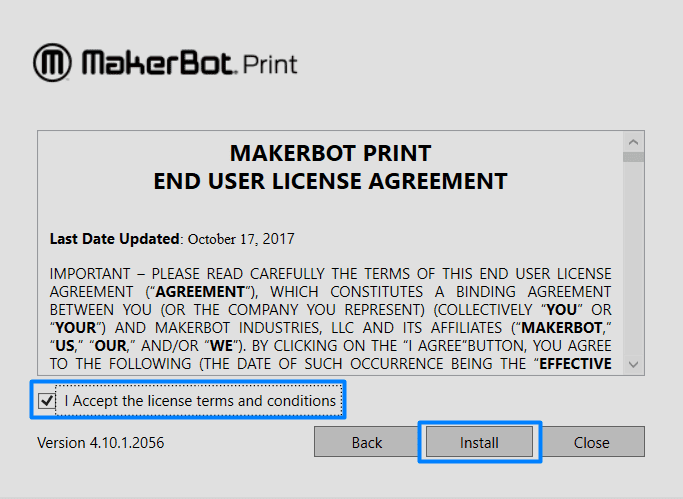
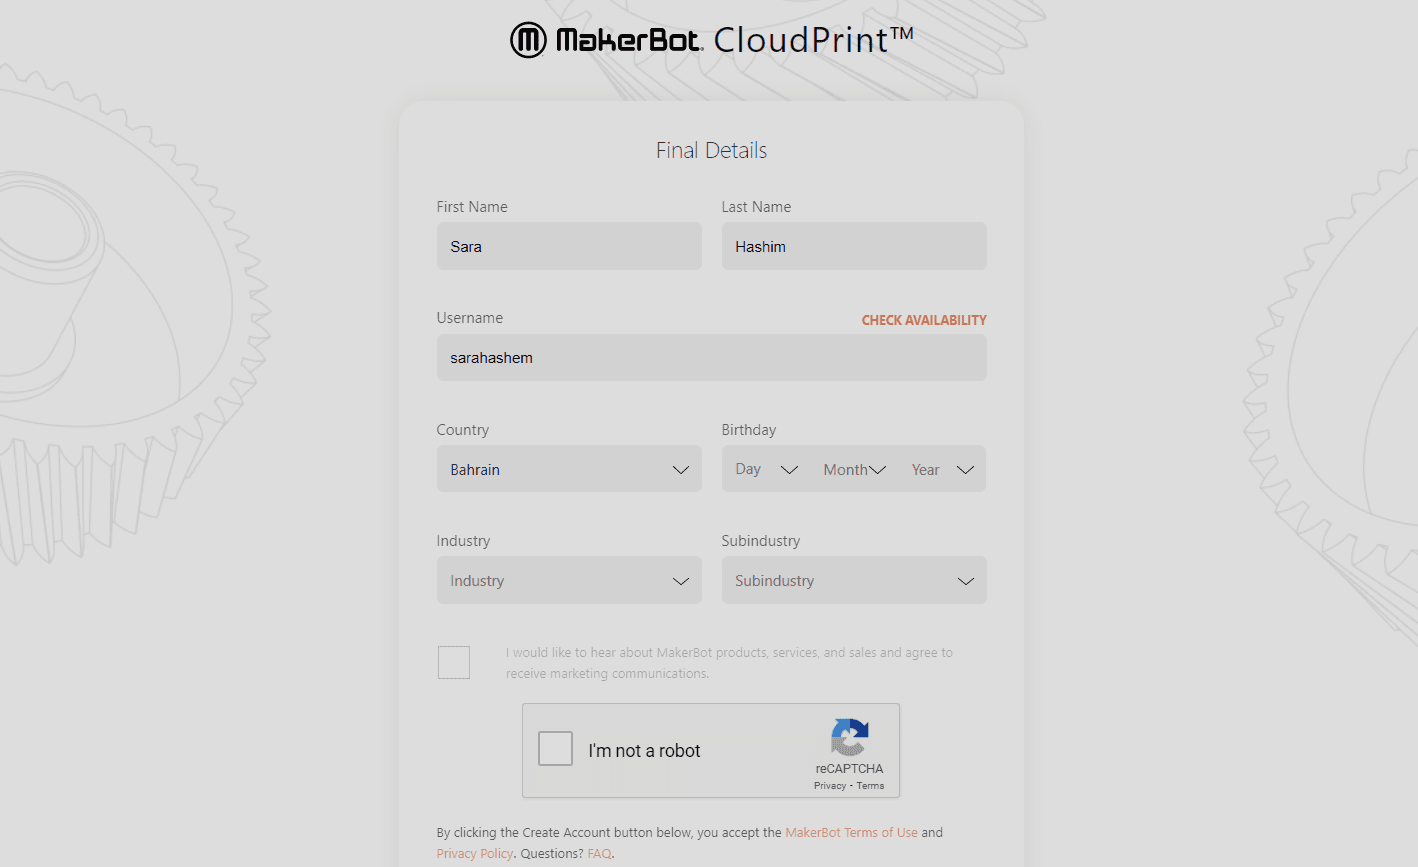
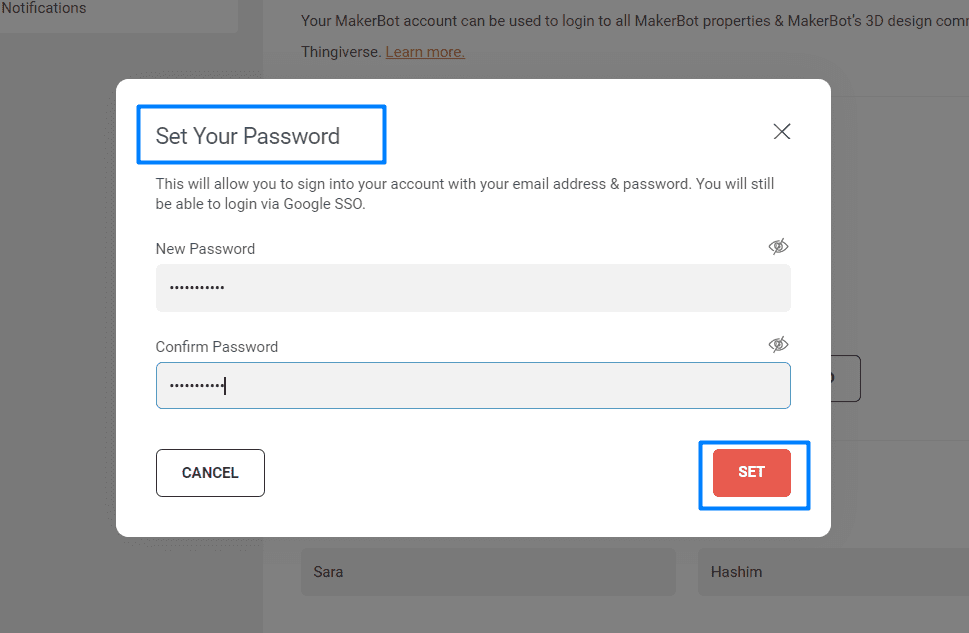
(STEP01) Install MakerBot on your desktop following those steps.
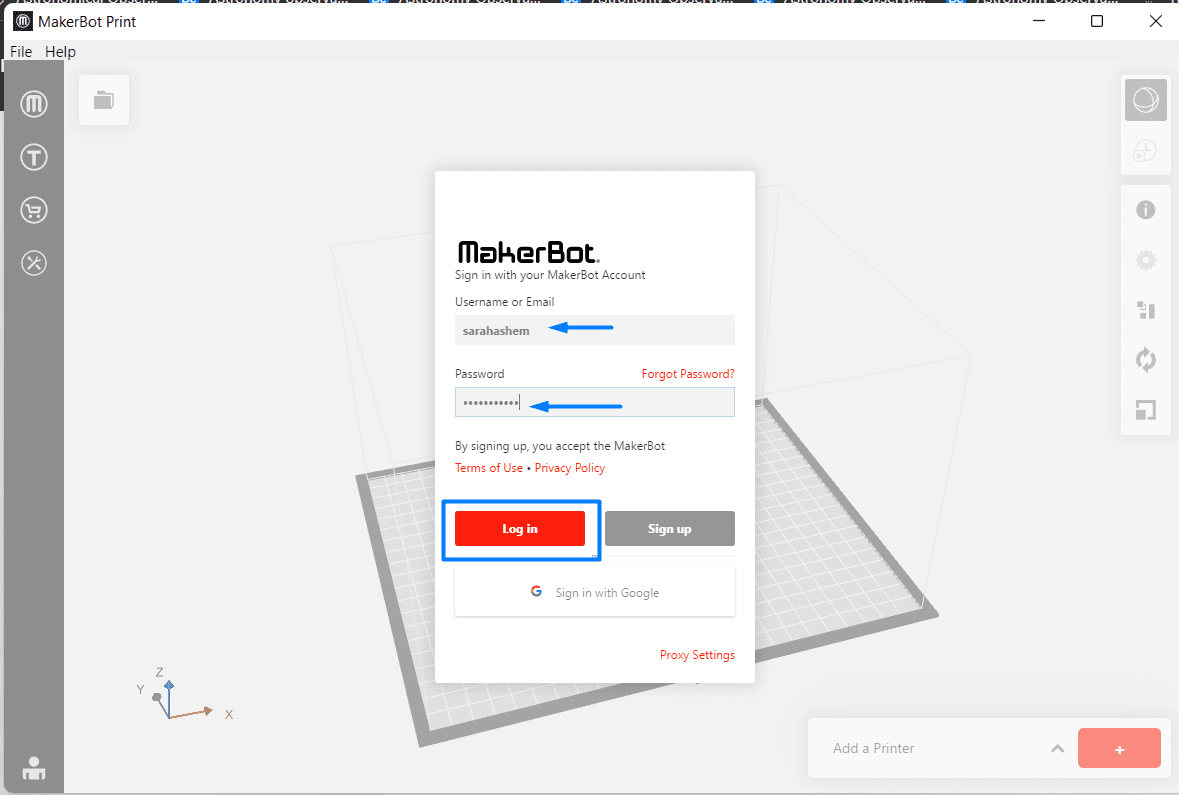
(STEP02) Open your project or drag it directly into the working space

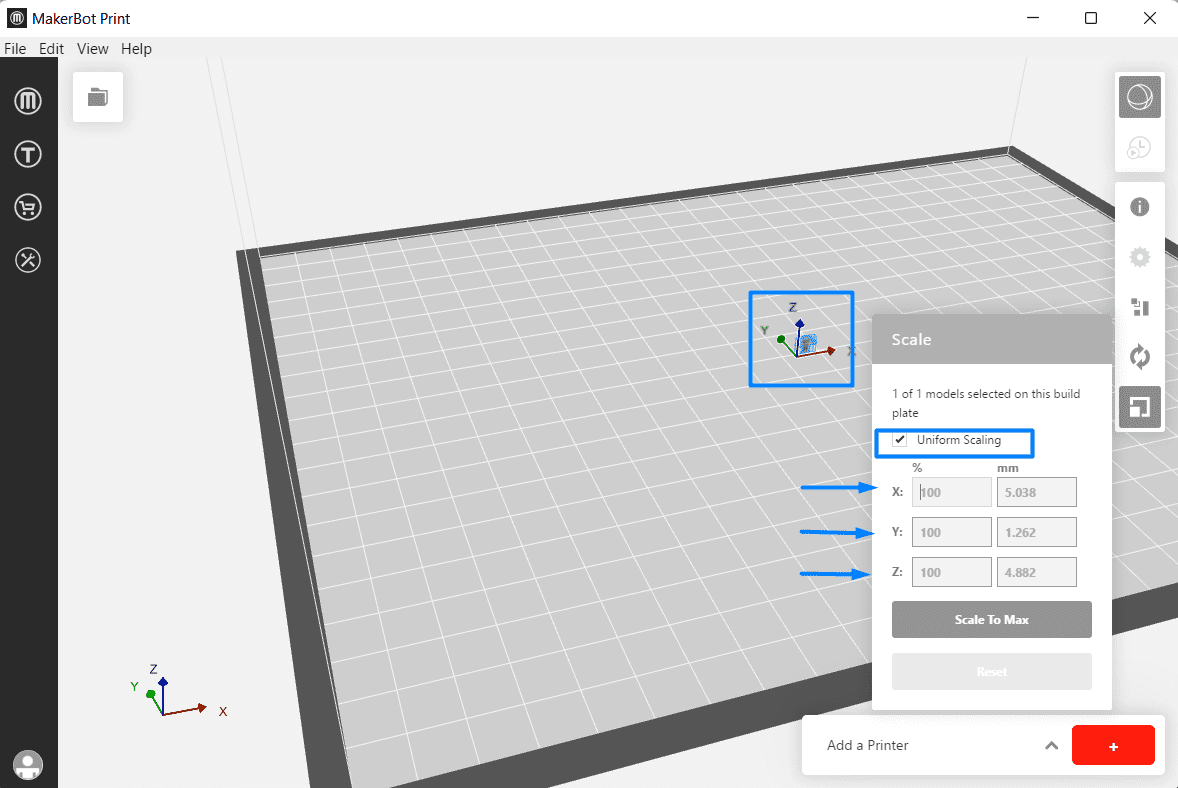
(STEP03) Select Uniform Scaling to adjust the scale of your model equally along the x-, y-, or z-axis. Enter the percentage of how much you want your model scaled.
(STEP04) De-select Uniform Scaling to scale the model by a specific amount along the x-, y-, or z-axis.
(STEP05) Select Place Face on Build Plates to lay your model flat on the build plate..
(STEP06) Rotate your model by 90 degrees or by a specific number of degrees along the x-, y-, or z-axis.

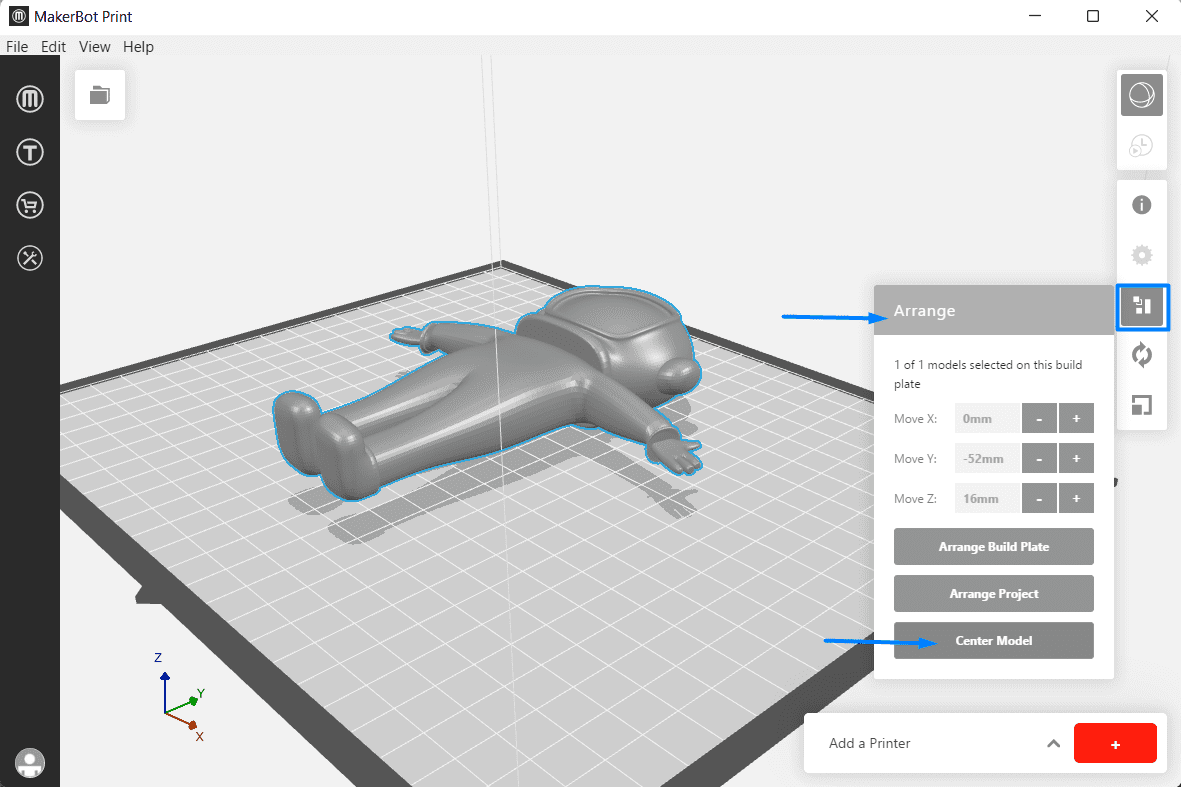
(STEP07) You can center your model by clcking center model.
(STEP08) Use the right-click menu to copy, paste, hide, or delete your model from the build plate.
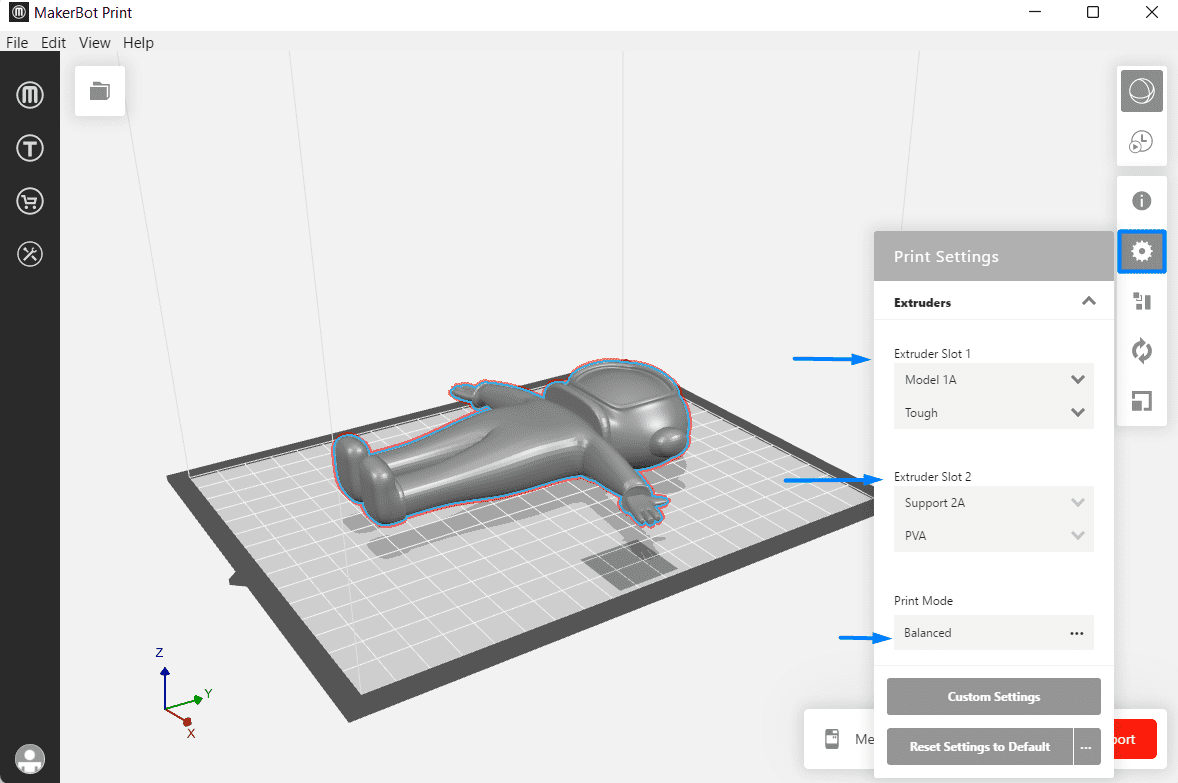
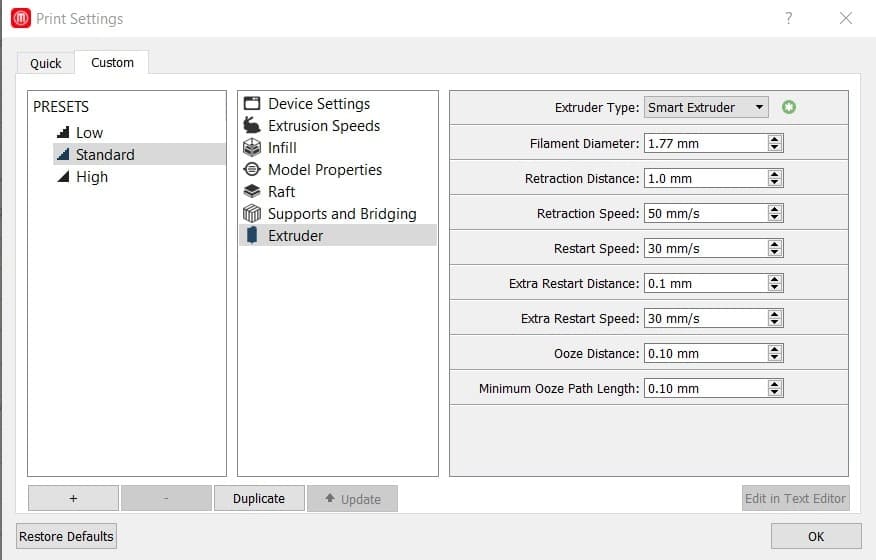
(STEP09) Click on print settings and select Extruder Type to choose which type of extruder you are using.
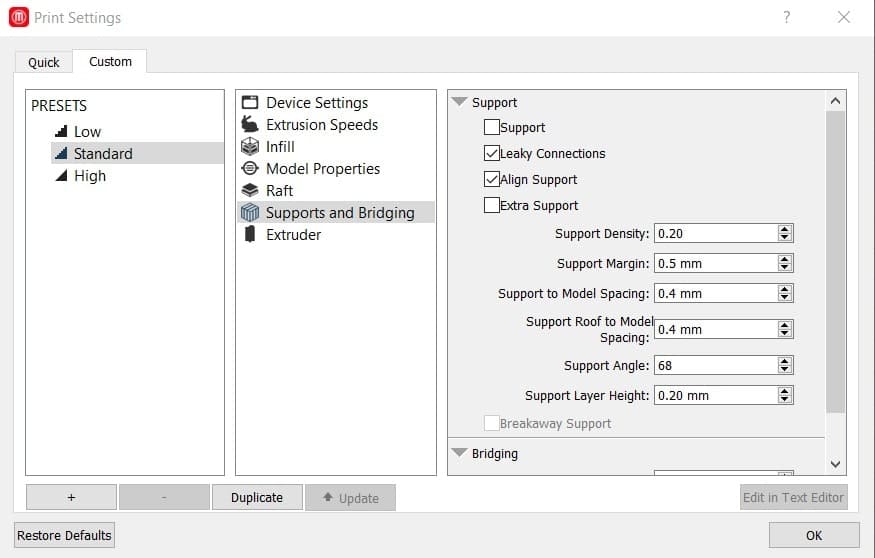
(STEP10) Select the Supports checkbox to have your model print with support structures. MakerBot Print will automatically generate supports for any overhanging sections of your object. Supports will be easily removable once you remove your finished object from the build plate.
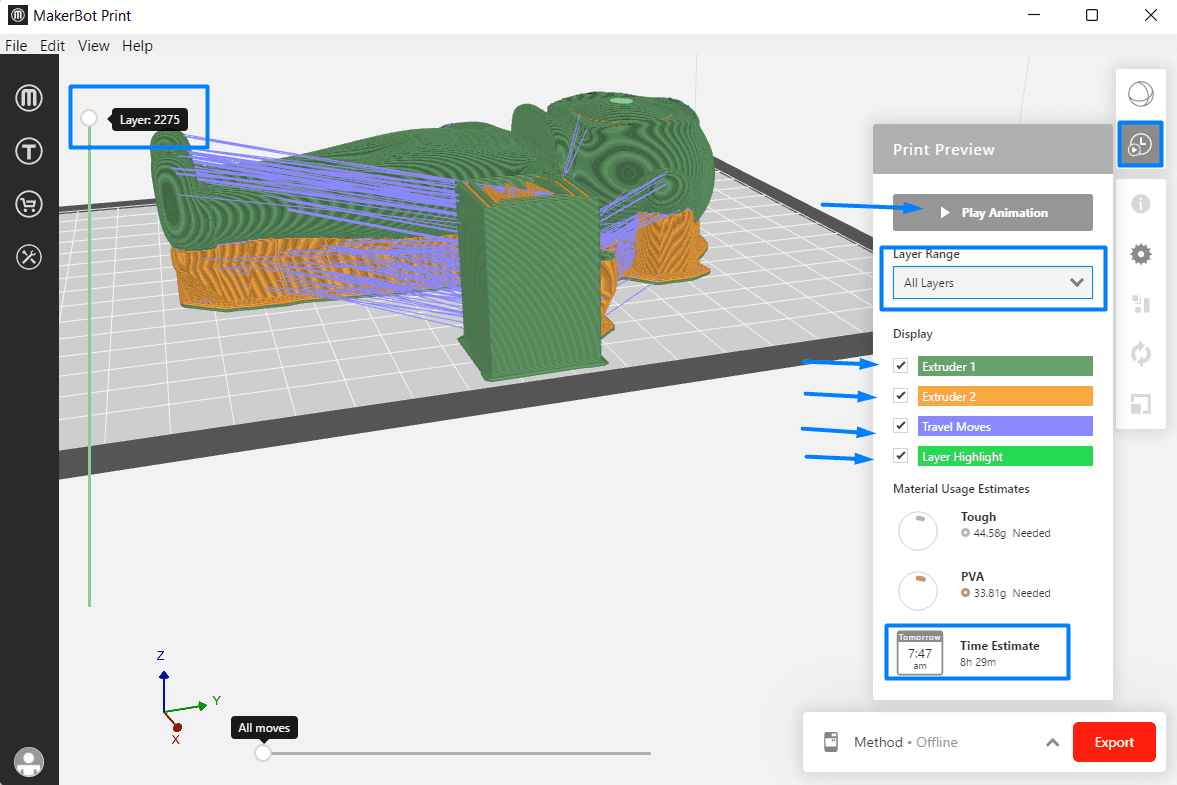
(STEP11) Go to print preview to check your supports. it also shows you how many layers it will print and how long it will take.
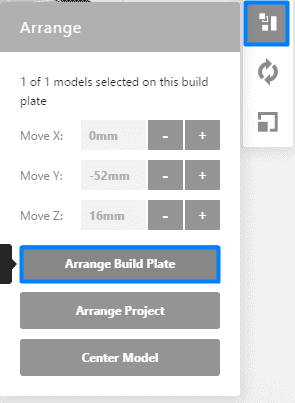
(STEP12) If there are multiple objects on the build plate and all of the objects can’t fit on the original build plate, select Arrange Built plate to arrange the objects to the most optimal placement on the build plate. Objects that can’t be arranged on the original build plate will be moved to another build plate and arranged optimally as well.
(STEP13) To print your model select the printer drop-down and Add a Printer > Add a Network Printer on your local network or Add an Unconnected Printer for exporting files.
(STEP14) Once finished editing your 3D model, select Export to export your model into a USB or Print to print your file if it MakerBot Print is connected to a printer.
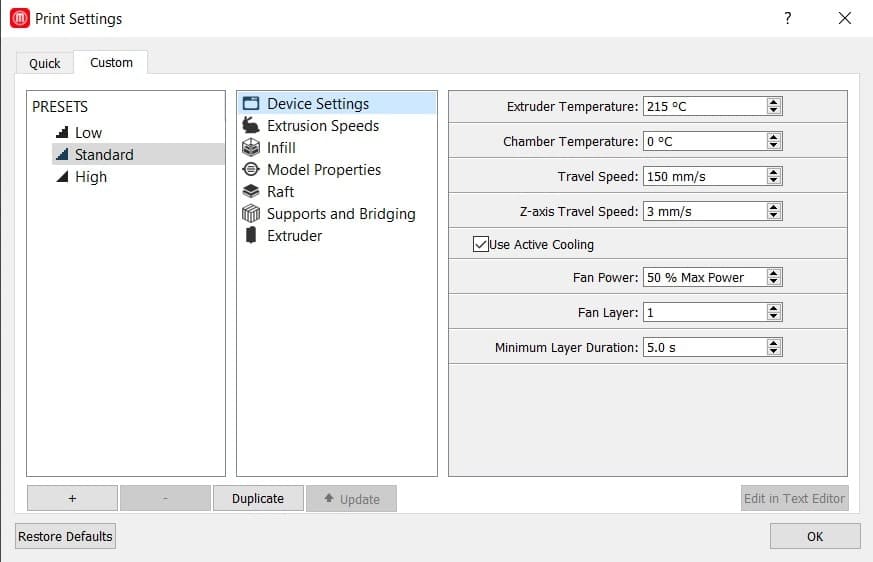
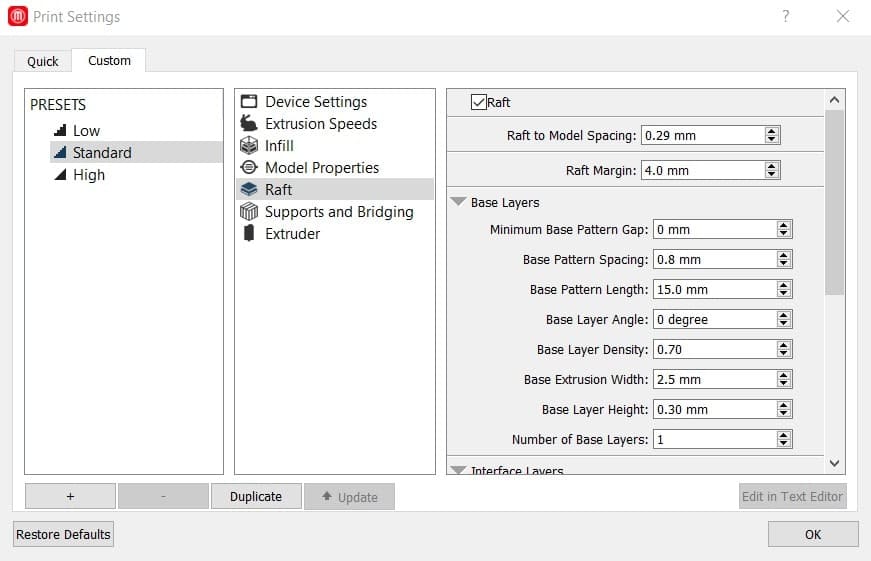
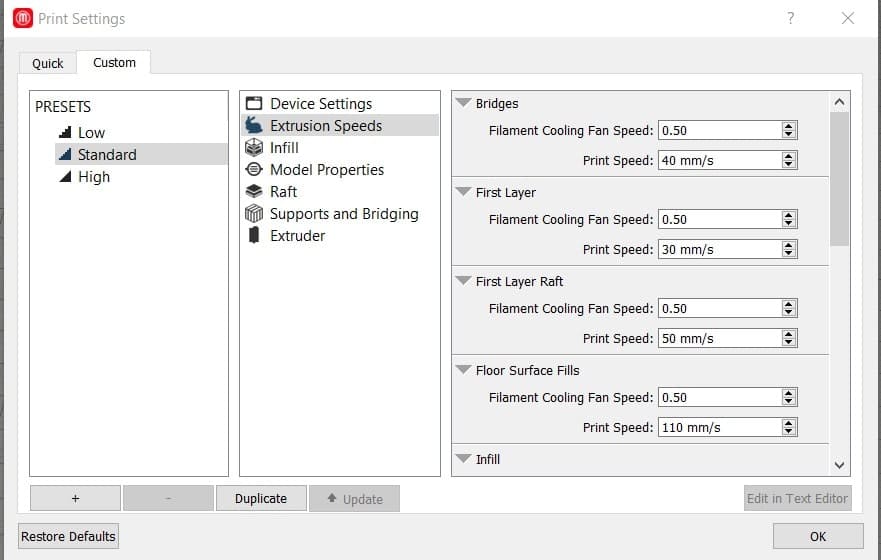
(STEP15) These are the settings I chose before printing the object


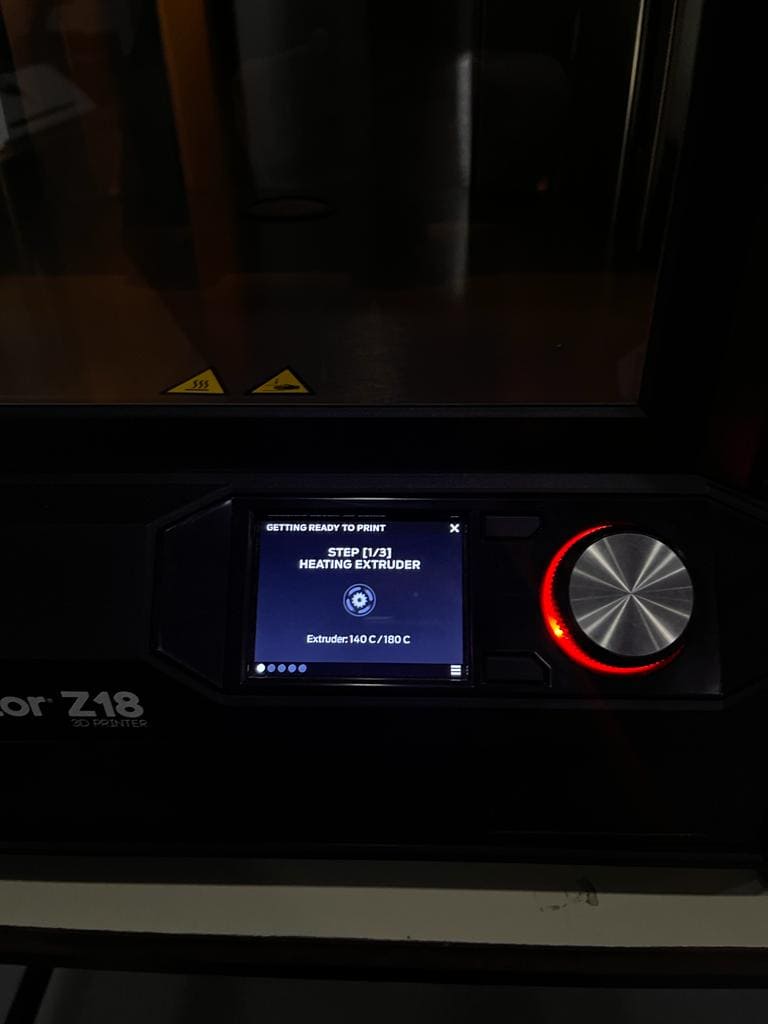
(STEP16) You need to blug your usb and select print, don't forget to put the filament on the left side of the machine.

(STEP16) As shown, the machine is now heating the filament and started to do the printing.
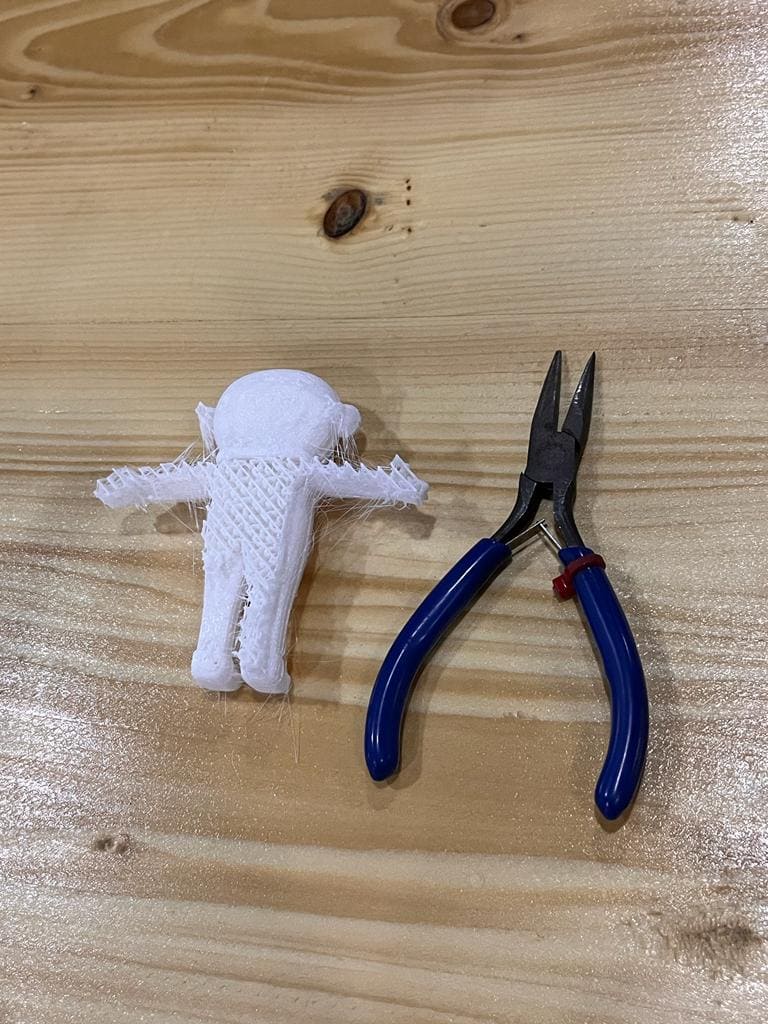
(STEP17) The next image showcase the importance of support. this is a failed 1st attempt because the lower body is not even and it didn't have any support.
(STEP18) when I repeated the process (with step 09-10) that I mentioned above, it worked.

(STEP19) And this is the final result!
3D Scanning
I didn’t know that the first step in a 3D printing project can be 3D scanning. employing 3D modeling software or a 3D scanning technique can enable the creation of a three-dimensional representation of an object from scratch.
✎ What is 3D scanning?
A real-world object is examined using 3D scanning to get all the necessary information to digitally replicate its form and appearance. This procedure allows the item to be converted into a 3D model, which may be used as a starting point for the 3D project you are going to create as well as to rebuild, analyze, or simulate concepts.
✎ How does 3D scanning work?
There are multiple ways to do 3D scanning, the 3D laser scanning is the most popular and widely utilized method. it uses laser light to digitally capture the form of the object to create a digital replica of the real thing. These 3D scanners can take measurements of incredibly small features and record free-form shapes to produce point clouds that are extremely precise. Similar to a camera, a scanner that uses laser light can only record what is in its field of vision. The gadget projects a laser dot or line onto the item throughout this operation, and a sensor detects the distance to the object's surface. This data may be processed to create a triangulated mesh, which can then be used to create a CAD model.
I did a 3D scanning for my colleague Mariam and these are the steps we went through, where each memeber did a 3D scanning for another member.
(STEP01) Download Skanect software by
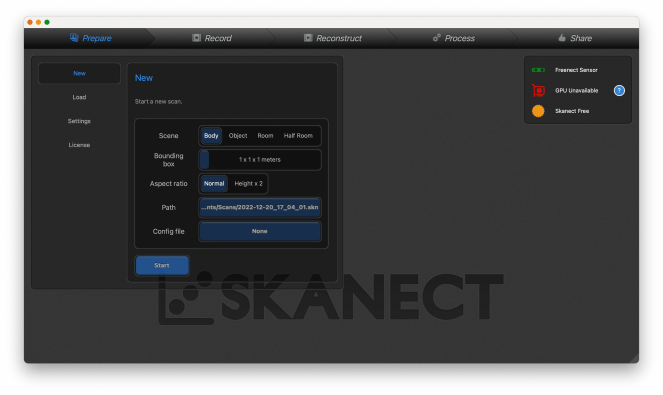
(STEP02) In Skanect open a new file, place the camera where the body show green highlights
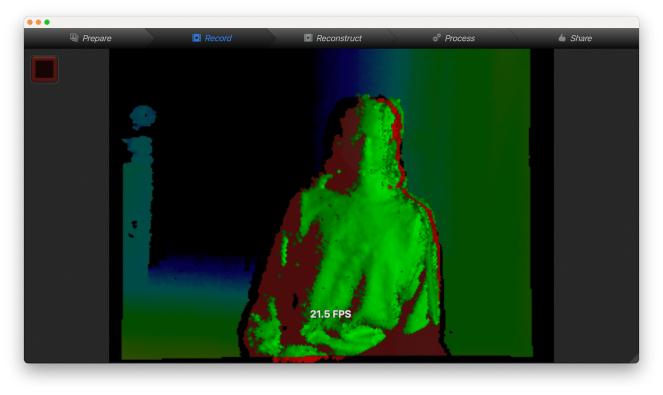
(STEP03) When the object, in this case (Mariam) is gently rotating, hit the spacebar once to begin recording and once you finish hit space again.
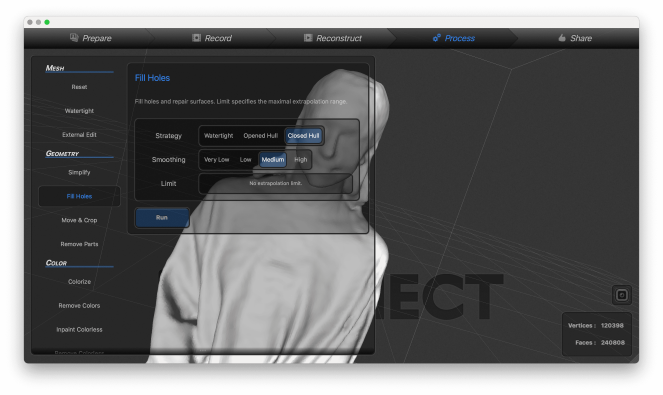
(STEP04) Go to geometry >> fill holes and hit run.
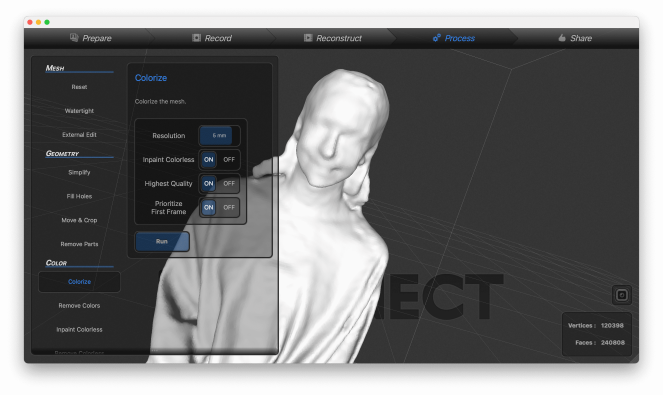
(STEP05) Then head to color >> colorize and hit run.

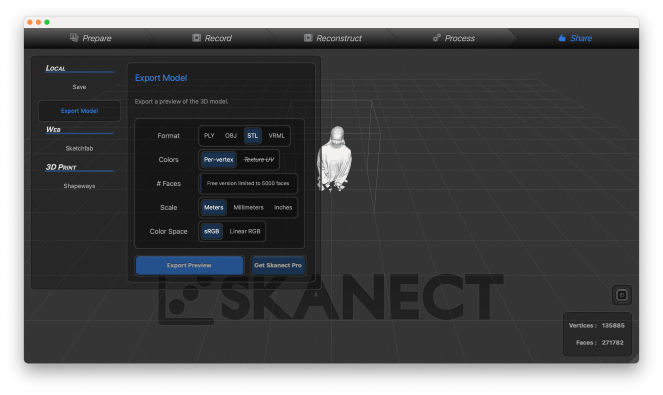
(STEP06) Hit share >> export model and choose stl.
🔎 Learning outcomes
With the ability to create nearly anything, 3D printing is a helpful tool for giving life to your ideas and can solve problems you never would have considered by only printing a single small piece.
3D printing allows you to have design Flexibility. More complicated designs may be created and printed with 3D printing than using conventional manufacturing techniques.
It takes substantially less time to manufacture an object with 3D printing than it would with machined or molded pieces.
The procedure not only conserves resources, but it also lowers the price of the materials utilized and it is environmentally friendly since you can recycle the material.
3D scanning on the other hand quickly captures all of the physical measurements of any physical object, which saves time in design process instead of doing the whole design from scratch.
🔗 Resources
3Dscaning
🔗 Download Files
astronaut blender file
astronaut stl file
3D scanning
04
Contact Me
Mobile Numberr
+973 35011840
sarahashiim18@gmail.com