4. 3D printing and scanning
During this week we learned how 3D printing works and its potential. Furthermore, we learned the different use cases for it and when it is appropriate to use as opposed to other methods. Finally, we had a look at how to 3D scan real life objects and convert them into digital 3D models.
3D Printing
What x How?
3D printing is a manufacturing process in which a three-dimensional object is created by laying down successive layers of material. It is also known as additive manufacturing, because it adds material layer by layer rather than subtracting material as in traditional manufacturing processes. 3D printing can be used to create a wide range of objects, from simple toys to complex mechanical parts and even entire buildings. To 3D print an object, a digital design is first created using computer-aided design (CAD) software. The design is then sliced into thin layers, and a 3D printer follows the digital instructions to build the object layer by layer using materials such as plastic, metal, or composite. The printer follows a pre-determined path called the “tool path,” and it can be guided by a computer numerical control (CNC) system. The process of 3D printing is often faster and more cost-effective than traditional manufacturing methods, and it allows for greater design flexibility and customization. Below is a picture of one of the available 3D printers:
(INSERT 3D Printer picture)
Safety x Points
There are several safety considerations to keep in mind when using a 3D printer. First, it is important to follow the manufacturer’s instructions and guidelines for the printer and any materials being used. Some 3D printing materials, such as certain plastics, may produce fumes that can be harmful if inhaled, so it is important to ensure that the printing area is well-ventilated. In addition, it is a good idea to keep the printer away from flammable materials and to unplug it when it is not in use. It is also important to use caution when handling the printed object, as it may have sharp edges or be hot to the touch. Finally, it is a good idea to wear protective equipment, such as goggles, when working with a 3D printer to protect against any potential hazards
Printing x Types
There are many types of 3D printers available on the market, and the most popular ones tend to vary based on factors such as price, printing technology, and the materials they are capable of using. Here is a brief overview of some of the most popular types of 3D printers:
Fused Filament Fabrication (FFF) printers, also known as Fused Deposition Modeling (FDM) printers, are the most common type of 3D printer. They use a spool of plastic filament, which is melted and extruded layer by layer to create the object.
Stereolithography (SLA) printers use a laser to cure liquid resin into solid layers. These printers tend to produce high-resolution prints with smooth finishes, but they can be more expensive and require more maintenance than FFF printers.
Digital Light Processing (DLP) printers work similarly to SLA printers, but they use a projector to cure the resin instead of a laser.
Selective Laser Sintering (SLS) printers use a laser to sinter (fuse) layers of powdered material, such as metal or plastic, into solid form. These printers are capable of using a wide range of materials and can produce very accurate and strong parts, but they are generally more expensive than other types of 3D printers.
Material x Properties
The below table summarizes some of the materials used for 3D printing and their relevant printing properties:
| Plastic Type | Heat Resistance | Tensile Strength | Moisture Resistance | Toughness | Color Selection | Printability |
|---|---|---|---|---|---|---|
| ABS (Acrylonitrile Butadiene Styrene) | High | High | Low | Moderate | Wide | Good |
| PETG (Polyethylene Terephthalate Glycol) | High | High | High | High | Limited | Good |
| PLA (Polylactic Acid) | Low | Low | Low | Low | Wide | Good |
| PETT (Polyethylene Terephthalate) | High | High | High | High | Limited | Good |
| TPU (Thermoplastic Polyurethane) | Low | Low | Low | High | Limited | Good |
Note that these properties can vary depending on the specific formulation of the material and the printing conditions.
Common issues with 3D printers:
Below is a list of common issues faced when it comes to using 3D printers:
- Clogged nozzle: This can happen if the nozzle becomes blocked by a foreign object or if the filament is not being fed through properly.
- Warping: This occurs when the printed object becomes distorted due to uneven cooling.
- Stringing: This refers to strands of plastic that are left behind between printed objects or on the object itself. It is usually caused by a problem with the retraction settings.
- Layer separation: This is when the layers of the printed object do not adhere properly, resulting in a weak or failed print.
- Under-extrusion: This is when the printer is unable to extrude enough plastic, resulting in thin or incomplete layers.
- Overheating: If the printer or the printed object gets too hot, it can cause problems with the print quality or even damage the printer itself.
- Electrical issues: These can include problems with the power supply, motherboard, or other electronic components.
- Mechanical issues: These can include problems with the motors, belts, or other moving parts of the printer.
Design x Files
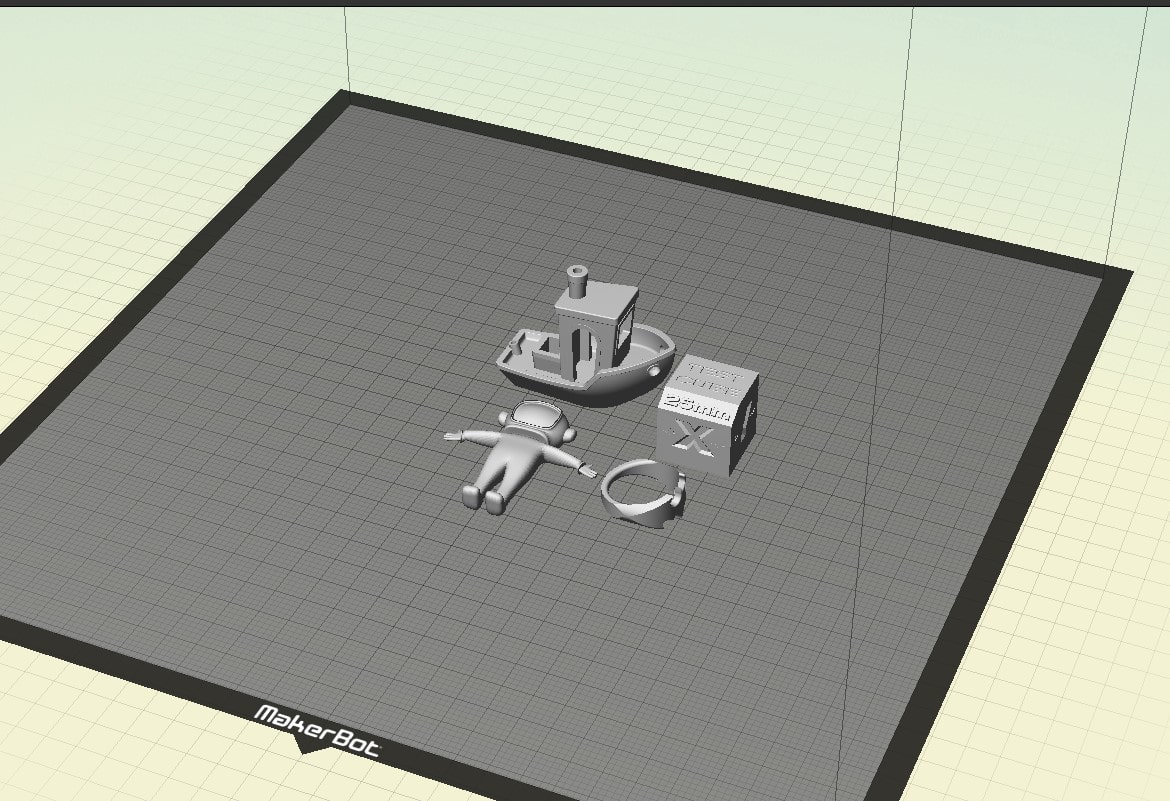
As part of the group assignment, we were paired into different groups where each group would print their initial designs using different 3D printers. For this part of the assignment I worked with Sara Hashem, where we each got different designs that we wanted to print. The picture below shows the imported designs on the Makerbot software which belongs to the printer that we were going to use (Makerbot Replicator Z18):
Insert Makerbot Design Picture
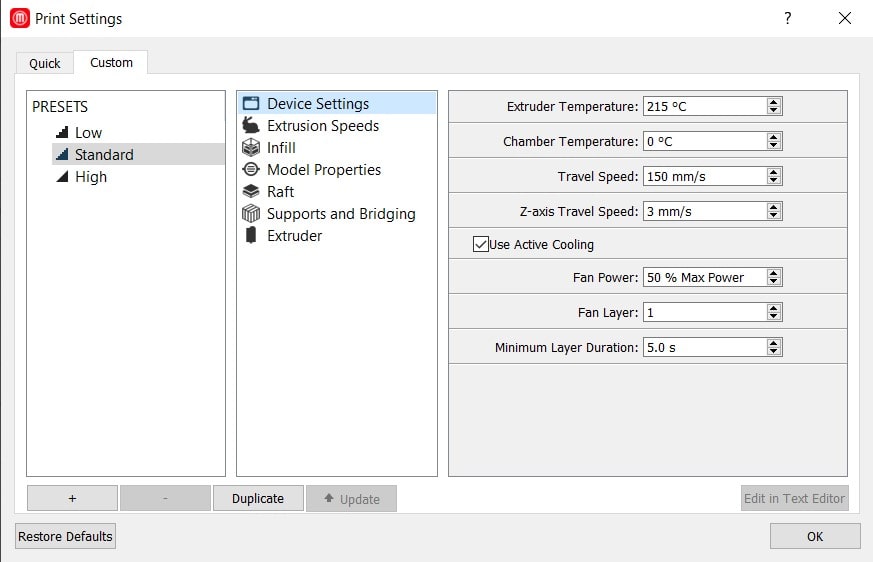
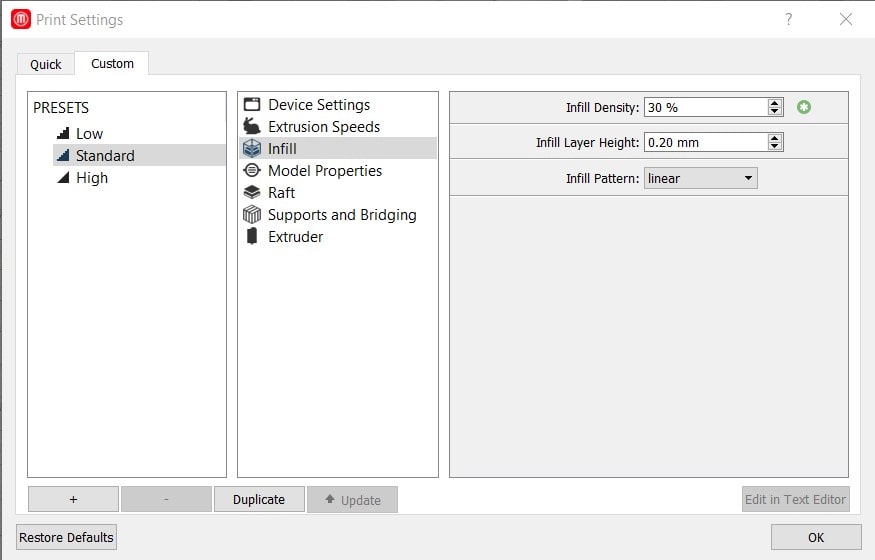
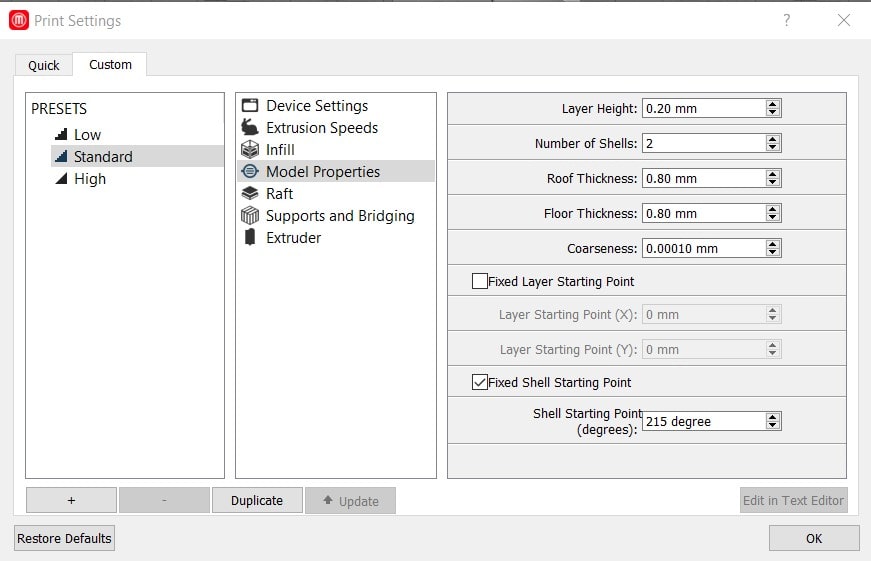
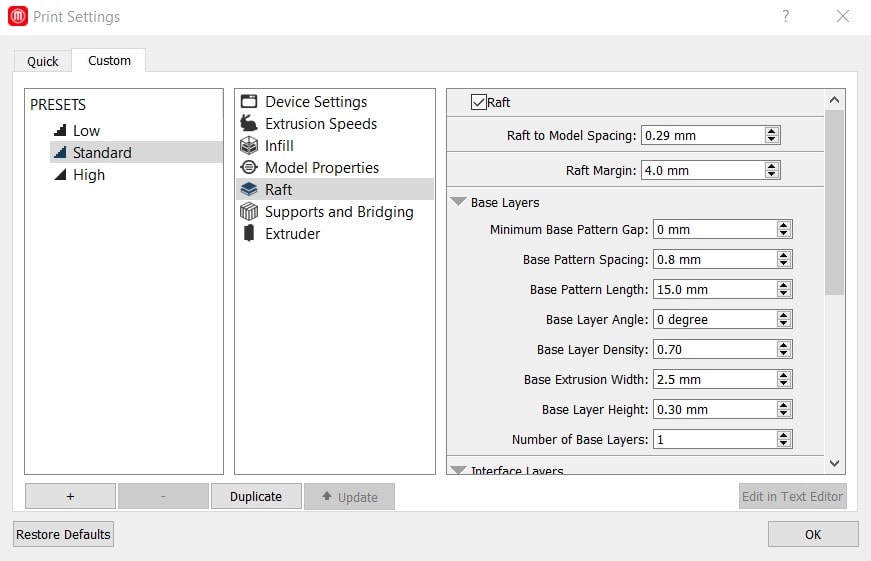
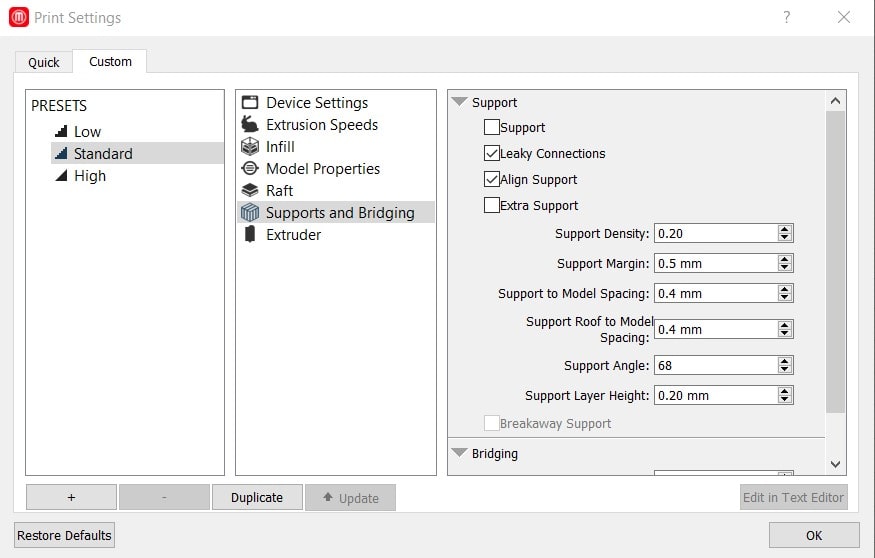
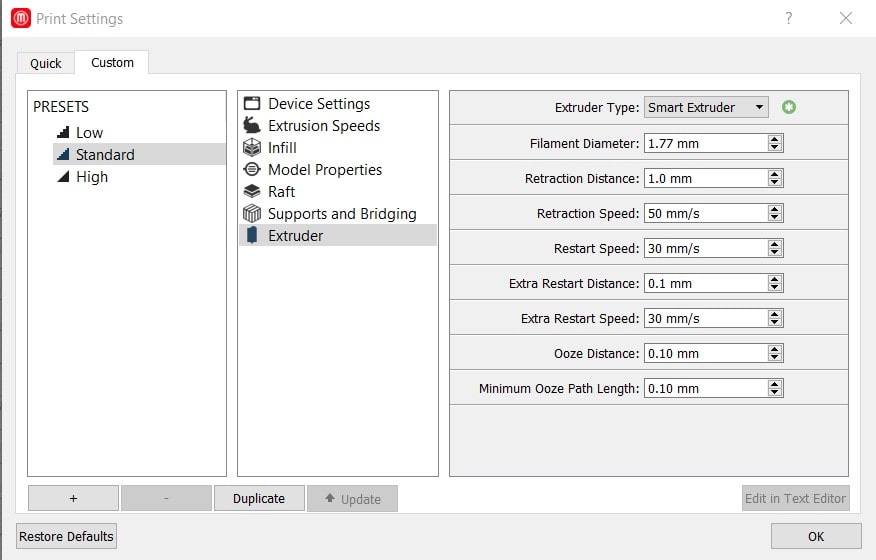
Afterwards we manipulated the scale, orientation, and position of the objects such that they lay flat, and were in close proximity to each other to minimize the time it takes for the extruder to move around. Moving on, with the help of Abdulghafour, we learned to configure the design/print settings to better produce the design. The pictures below demonstrates the complete settings configuration we used:

After configuring the settings, we exported the designs onto a thumb drive as an STL file. This was then plugged into the Makerbot, the file was selected, the filament was ensured to be loaded and finally the printing procedure was executed. The print time was around 3 hours, and below is a picture of the print result:

As seen in the picture there is a lot of filament string around the objects. This can be attributed to the way the design was made and placed such that when the extruder went over it, it had to continue extruding the filament in some areas. Another reason is support brackets which were added in the settings configuration, these help the design stand while the machine is still printing the design. They are thin enough such that they can easily be broken off. After breaking off the supports and filing away the imperfections in the design, here is the final product:
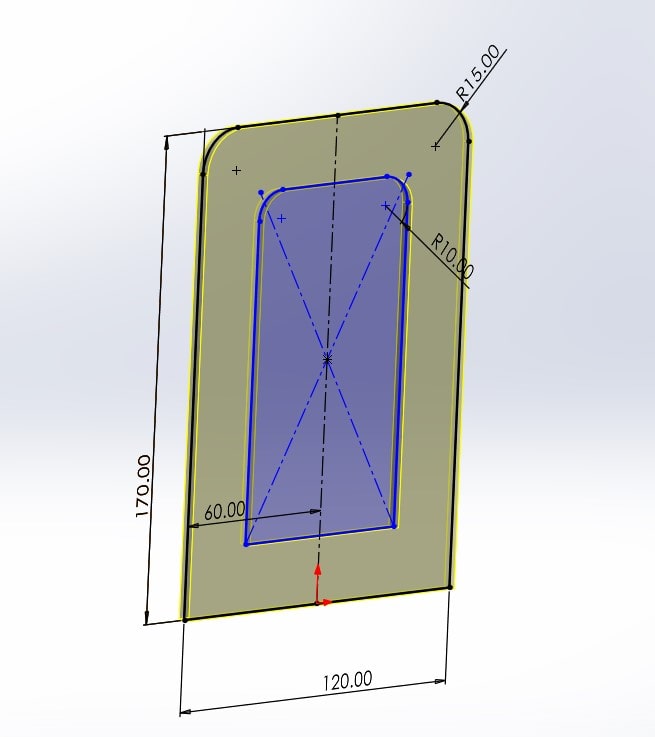
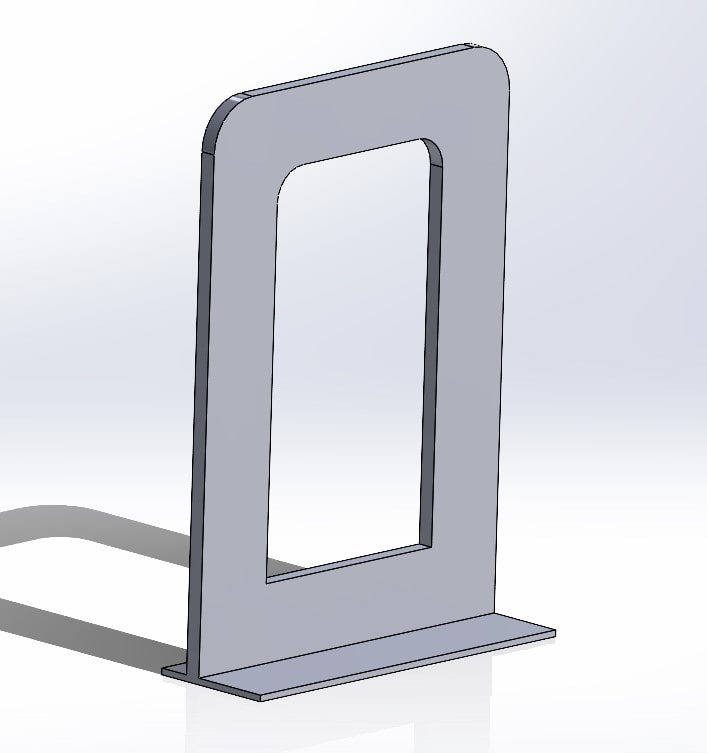
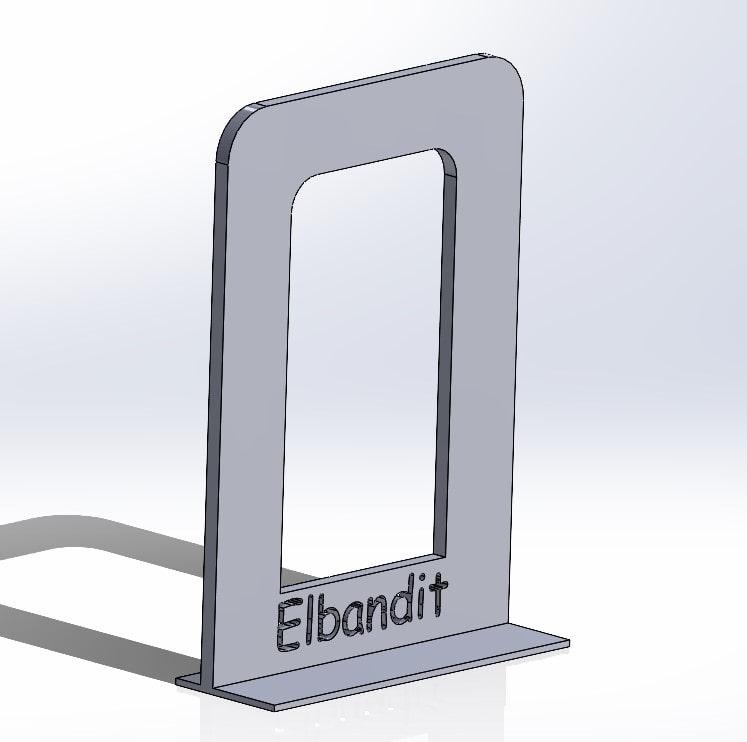
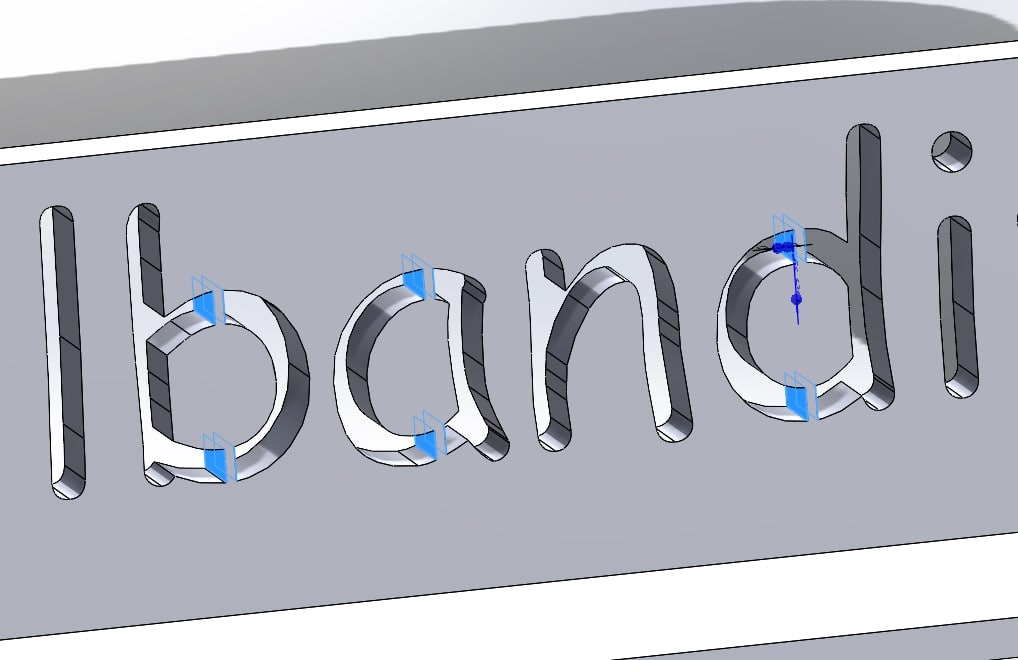
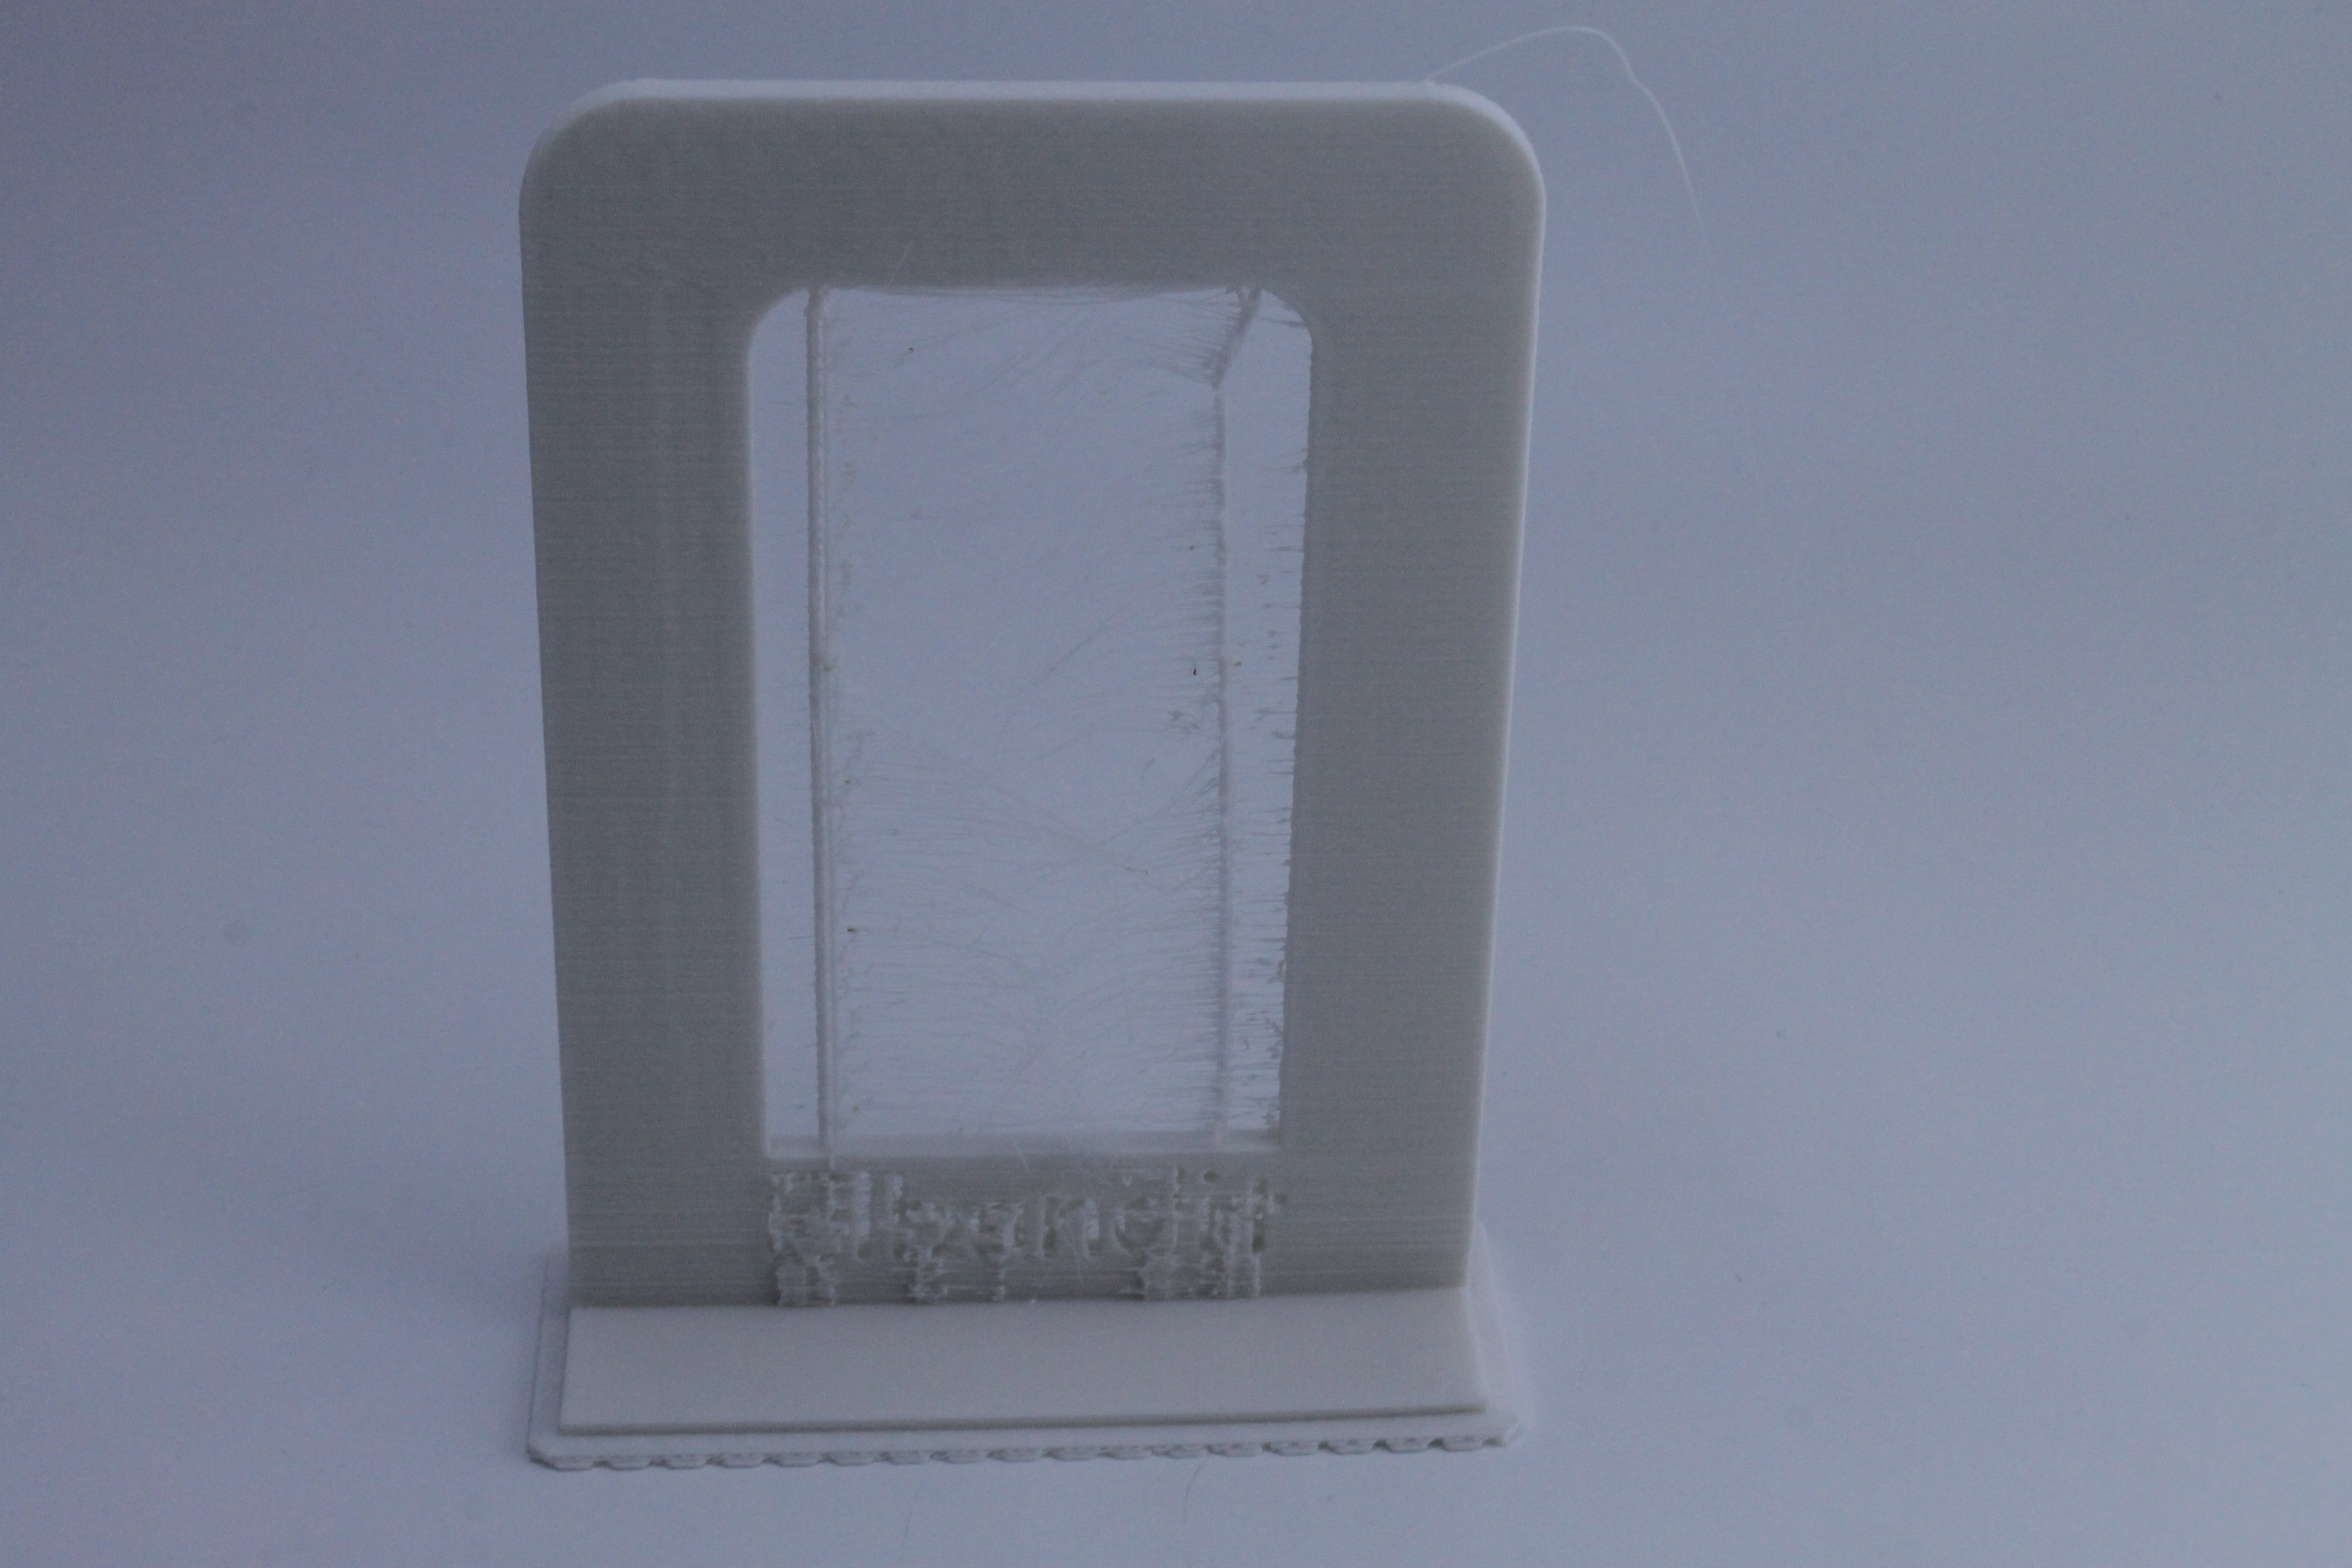
Moving on from the group assignment I set out to design my own product. For that I created a bookstand to hold my books in place at home. Below are a few pictures demonstrating the procedure where I designed the stand:
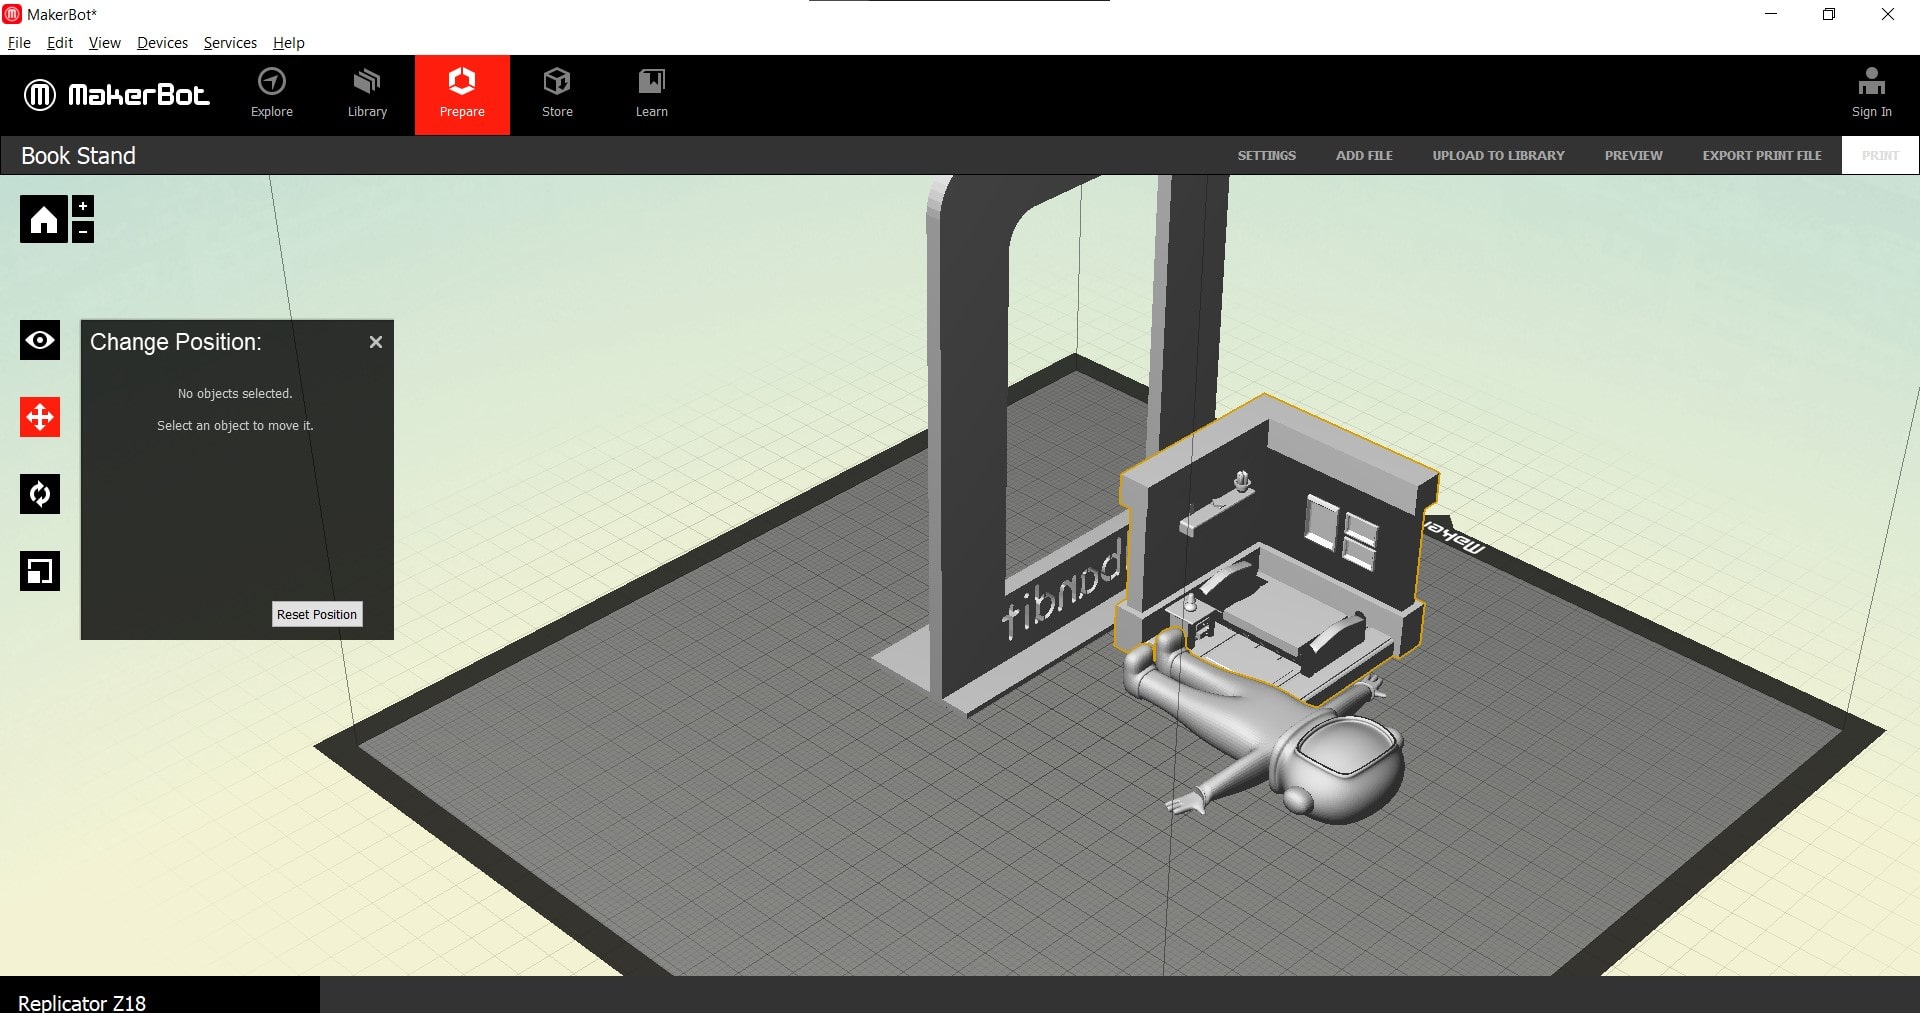
Once the bookstand was finalized it was exported to the makerbot software along with other FabAcademy students’ designs in order to be more efficient with the print time and filament used, below is a picture showing the imported design:
Below is the bookstand after it was printed, as seen there is quite a number of filament residue between each side of the stand and that is to help with the filament extrusion process and to make sure the design is stable during printing.
Afterwards, the bookstand was filed and cleaned up. This is the final product below along with shots of it fulfilling its function to hold books in place:

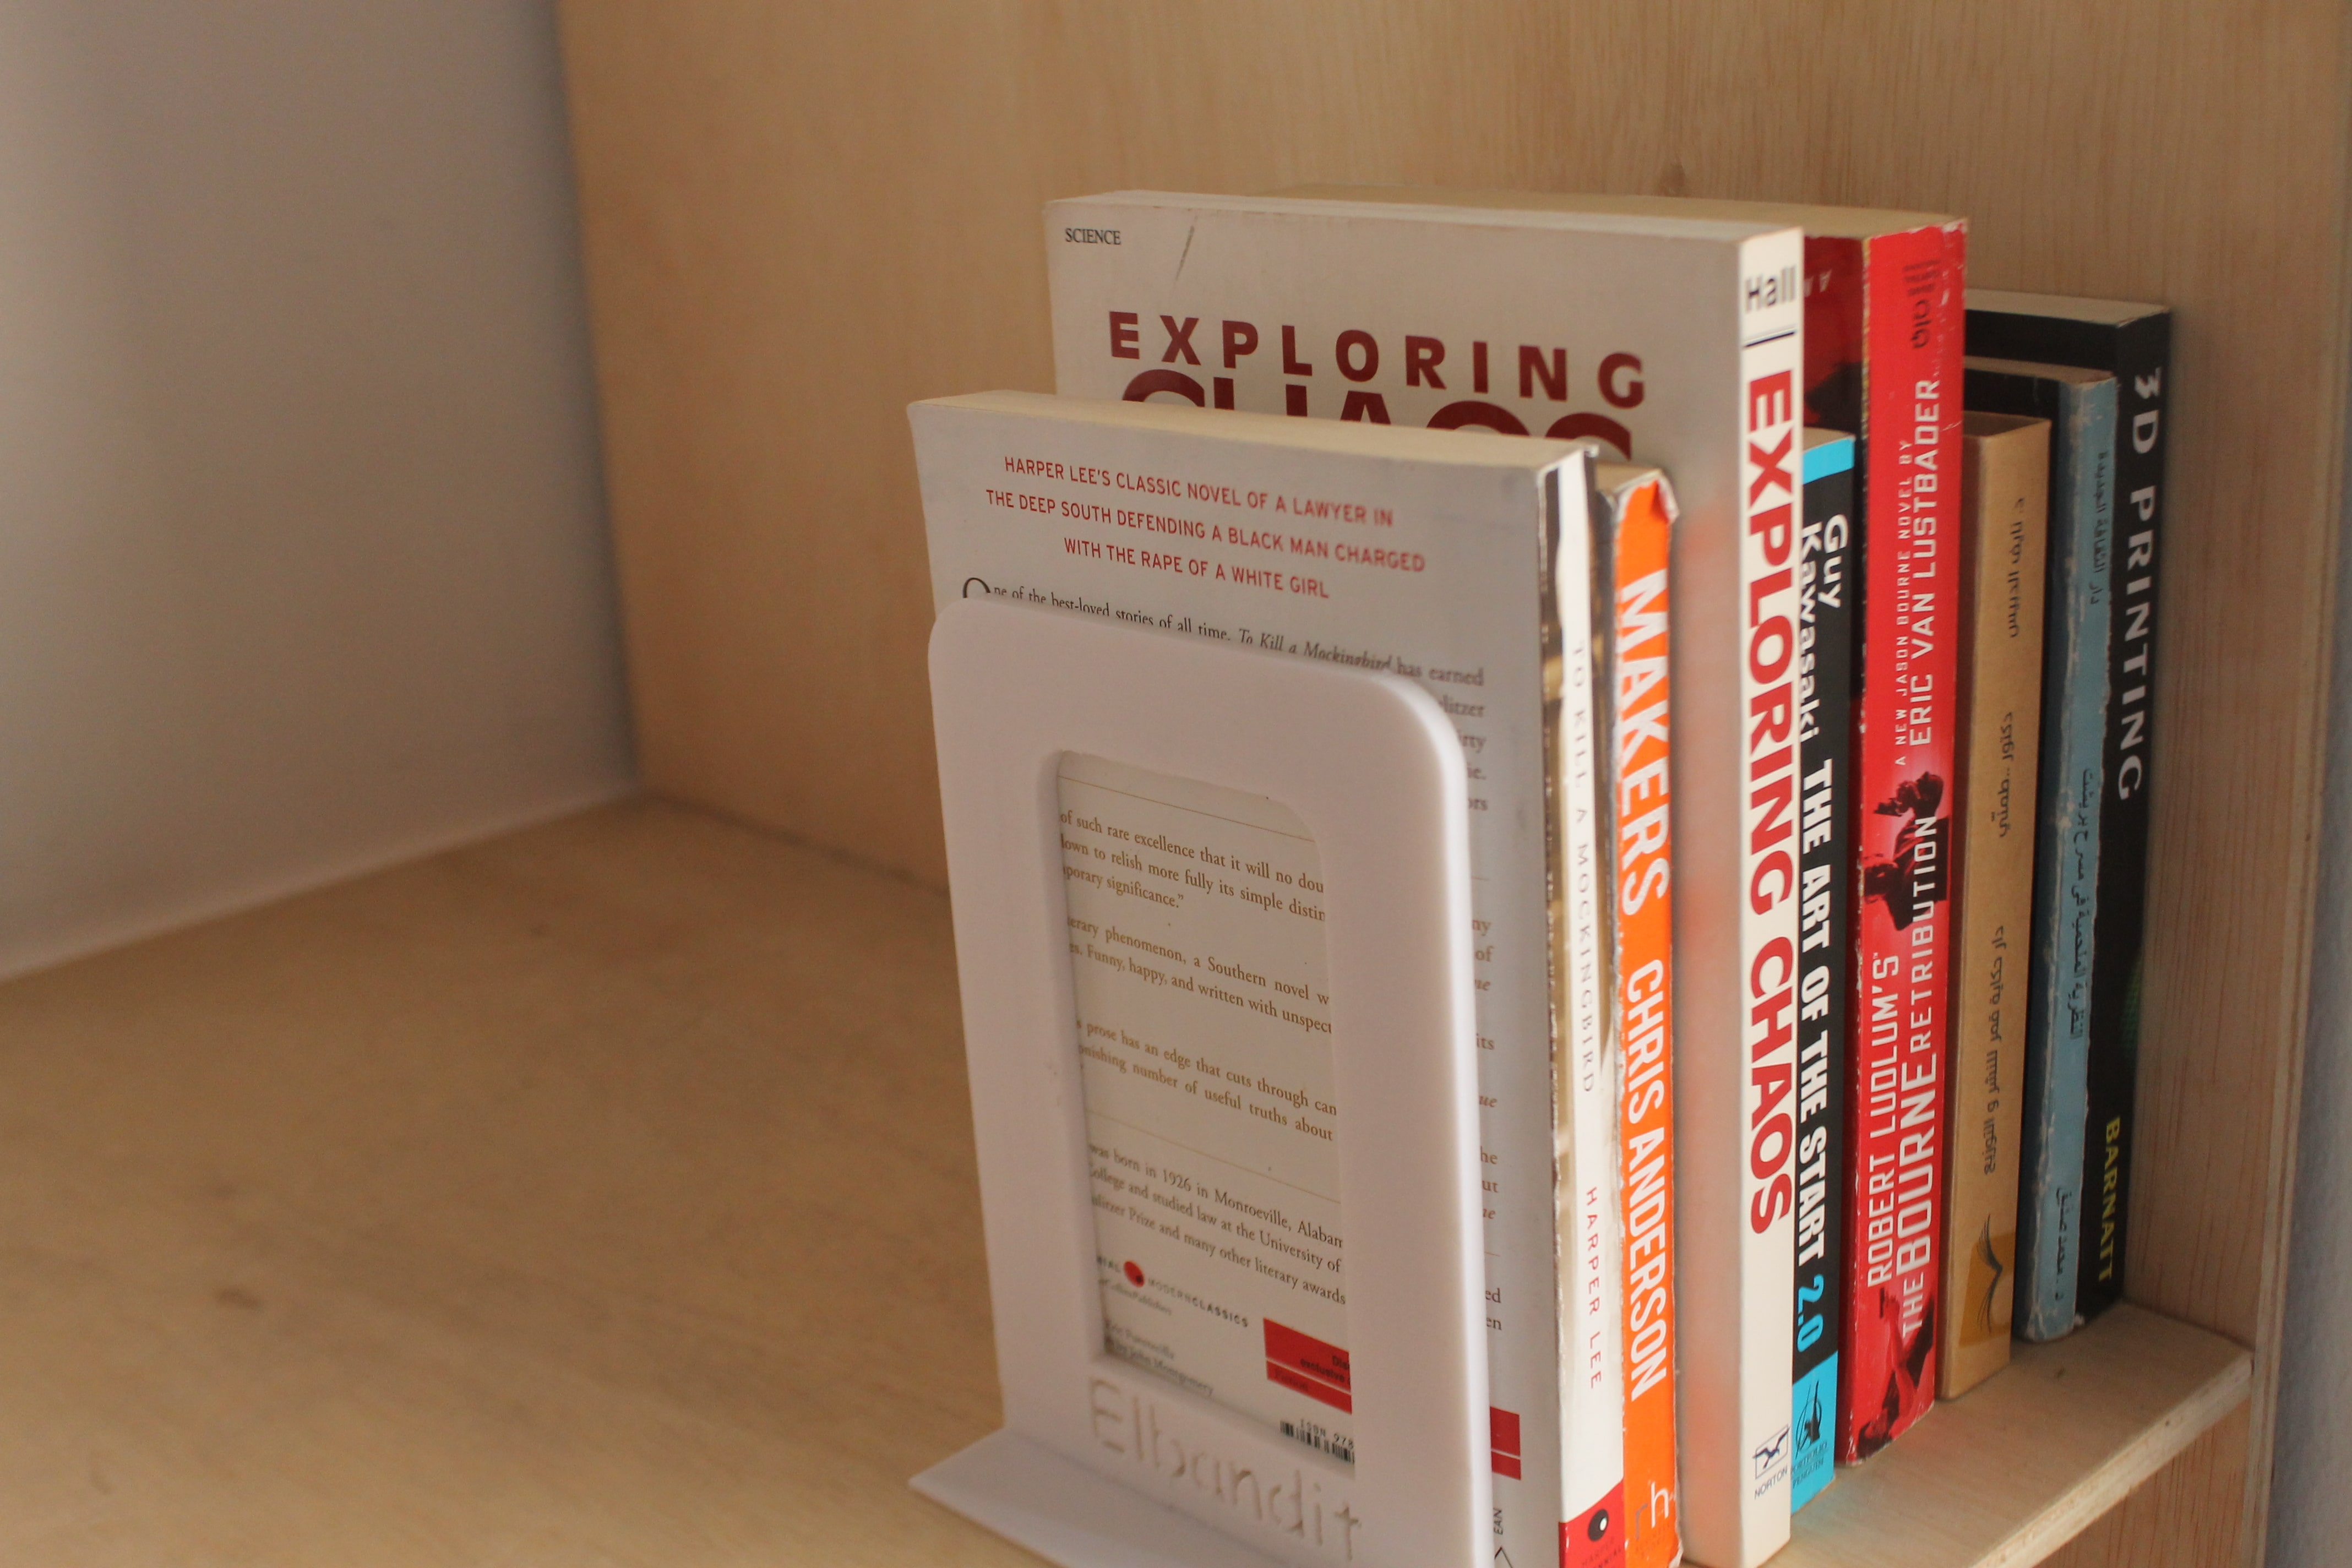
An important thing to touch upon is that the bookstand could only be done using the 3d print is because of its general dimensions, the fact there is a small yet existing fillet between the stand and the base which means it cannot be done using other available digital fabrication methods. Finally, I wanted the bookstand to be a single-piece meaning it had to be 3D printed.
3D x Scan
3D scanning is a process of capturing the shape and appearance of an object or environment using specialized equipment. There are several different methods of 3D scanning, including structured light scanning, laser scanning, and photogrammetry. These methods work by projecting patterns of light or laser beams onto the surface of the object and measuring the distortions or reflections to create a detailed 3D model. Applications of 3D scanning include reverse engineering, quality control, and the creation of digital assets for use in films, video games, and virtual reality. One of the benefits of 3D scanning is that it allows for the creation of highly accurate digital representations of real-world objects and environments. Additionally, 3D scanning can be done relatively quickly and easily, making it a cost-effective alternative to traditional manufacturing methods.
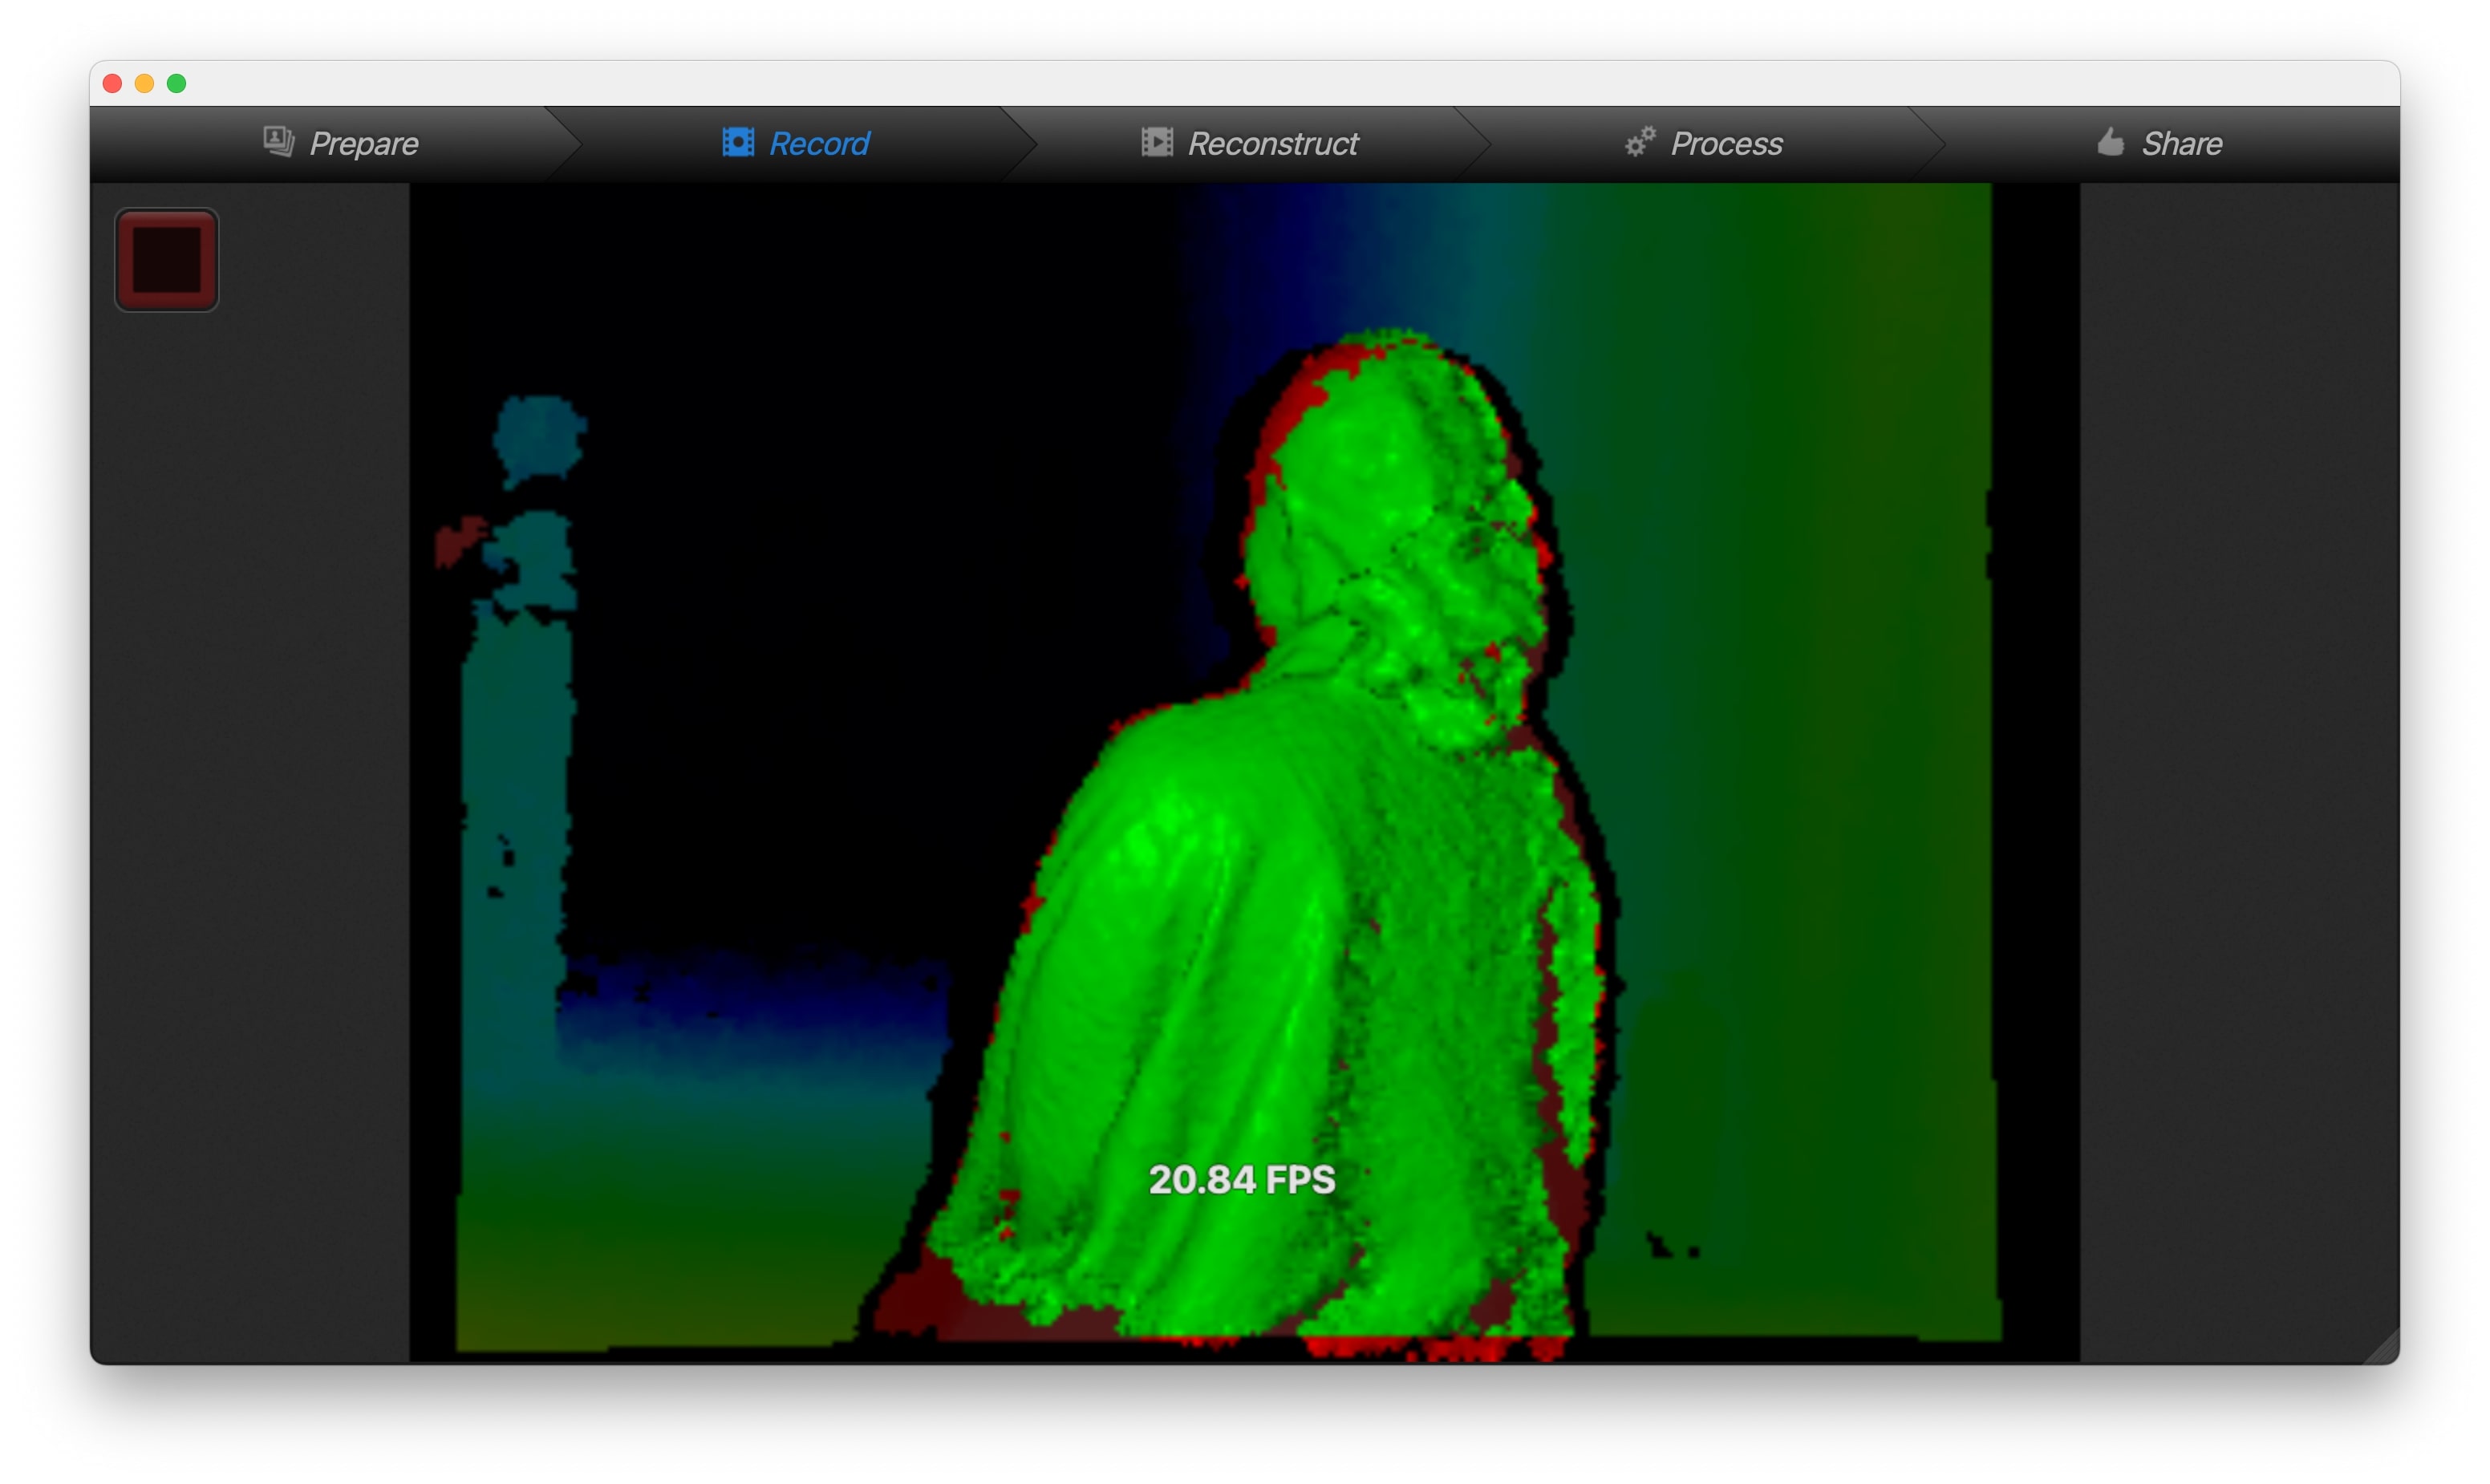
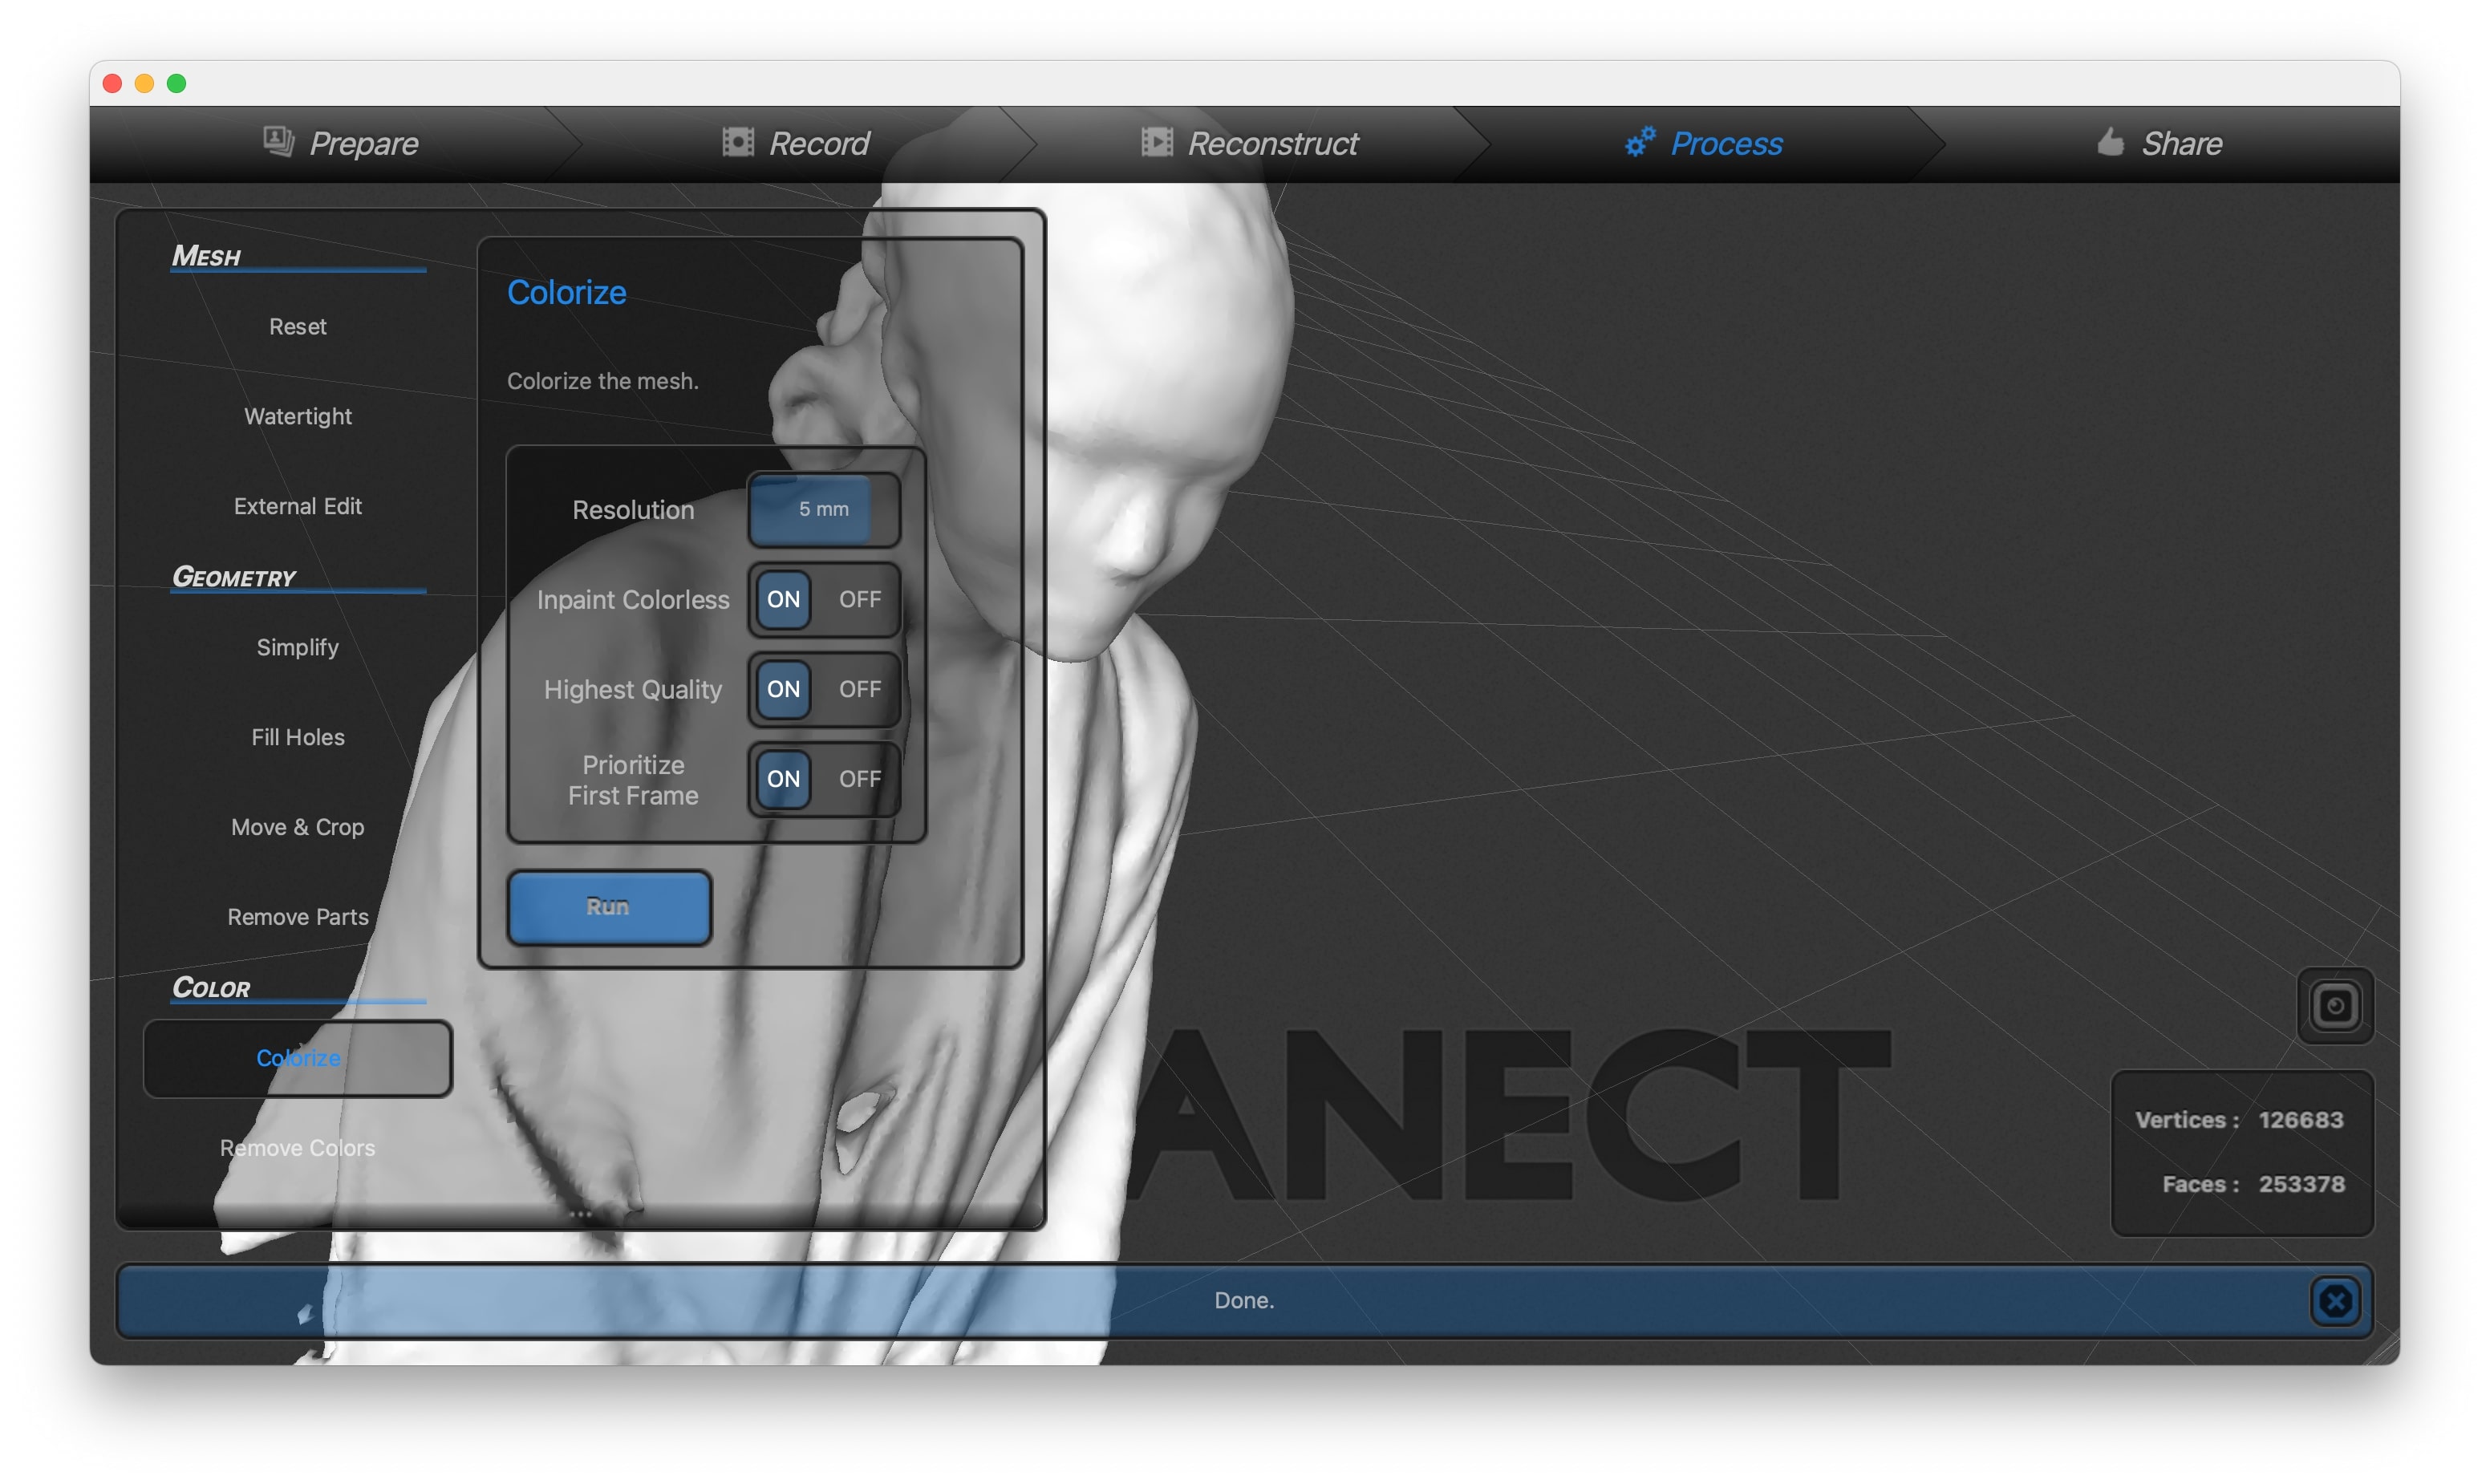
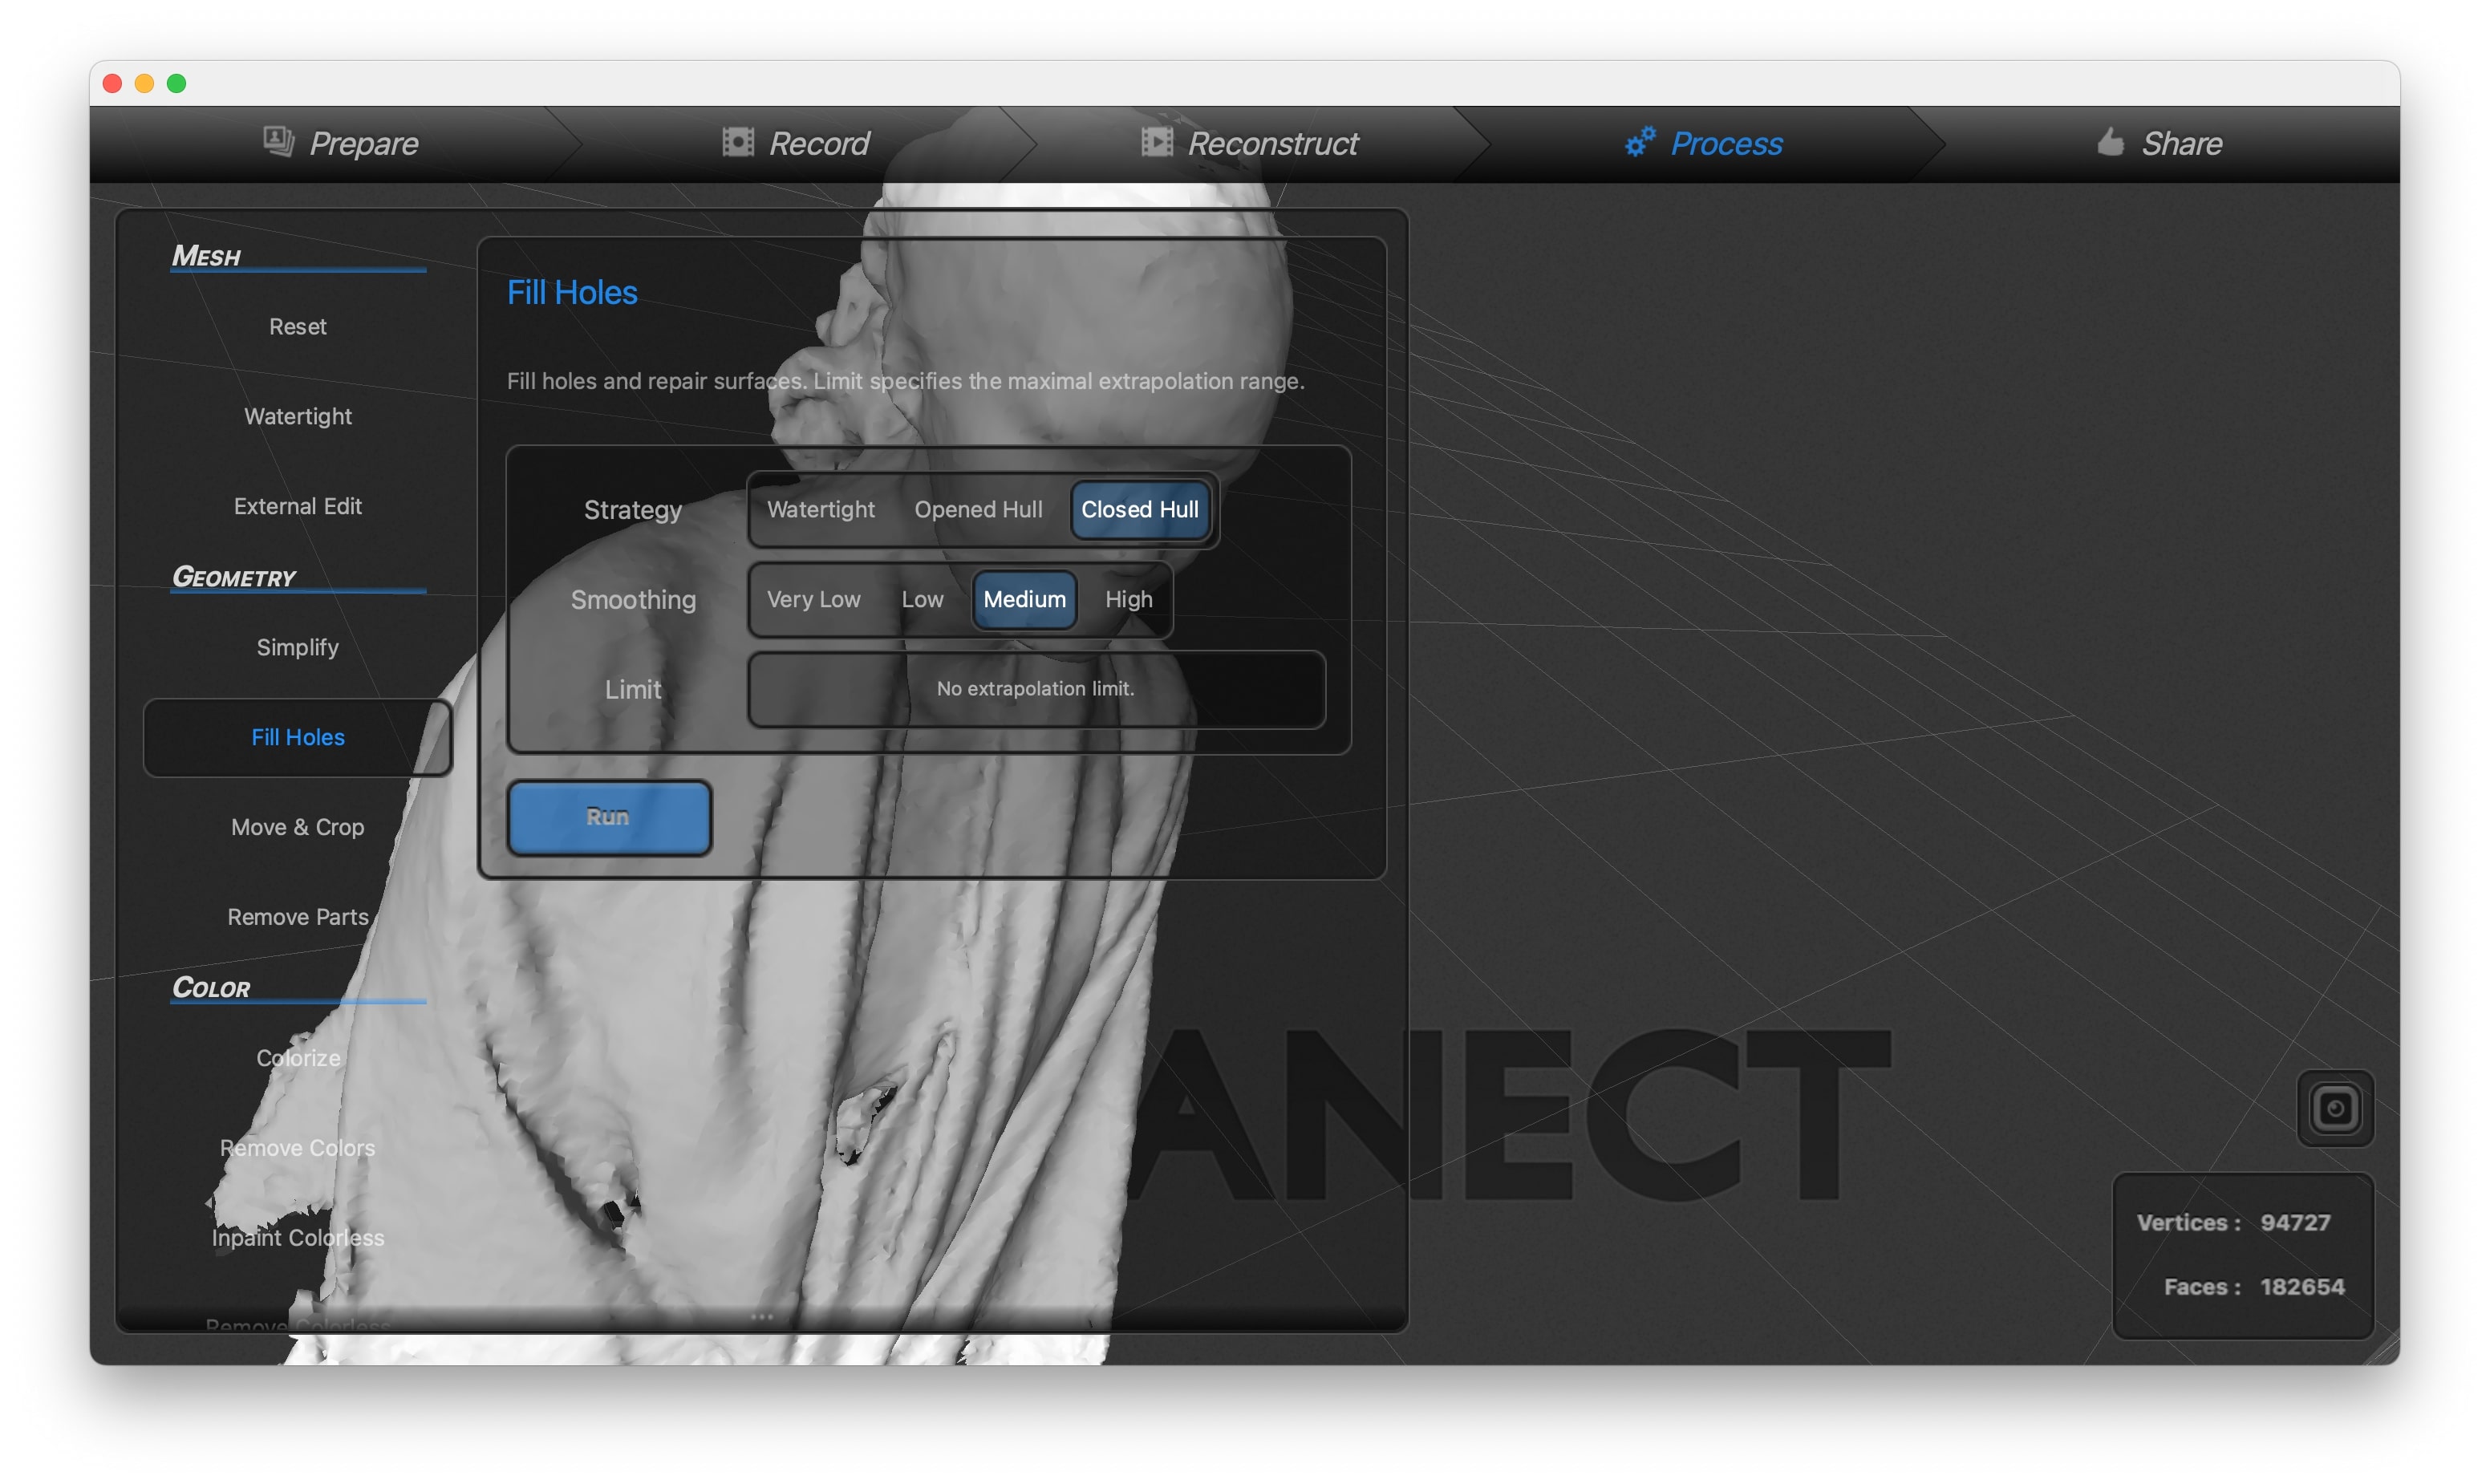
For this week we used an Xbox Kinect camera to 3D scan ourselves which allows us to export it into an STL model file. This can be used for various purposes including 3D printing. The process was quite simple, first the camera was placed, and then the subject sits on a rotating chair. Then on the software the scan record is executed where the subject has to slowly rotate until the camera is able to capture a complete 360 degree scan of the subject. Once that is done the scan can be exported as an STL file.
Below are pictures of the process:
Download x Files
You can find the links to download the design files produced below: