MOLDING AND CASTING
The aim of this week was to create a 3D computer aided design that we wish to cast as our final product but on a condition that it must have some curves which cannot be simply done as a 2D design on laser cutting machine and then mill it on a machinable wax bar, create a flexible mold from it and finally use the flexible mold to cast our design!
WHAT IS MOLDING
Molding is the process of manufacturing by shaping liquid or pliable raw material using a rigid frame called a mold or matrix. This itself may have been made using a pattern or model of the final object. ... The liquid hardens or sets inside the mold, adopting its shape. A mold or mould is a hollowed-out block that is filled with a liquid or pliable material such as plastic, glass, metal, or ceramic raw material. A mold is the counterpart to a cast.
WHAT IS CASTING
Casting is a manufacturing process in which a liquid material is usually poured into amold, which contains a hollow cavity of the desired shape, and then allowed to solidify. The solidified part is also known as a casting, which is ejected or broken out of the mold to complete the process. Casting is most often used for making complex shapes that would be difficult or uneconomical to make by other methods.
DESIGN PROCESS
My design
is an incense stick holder with a small tray like extension for its ashes to fall on.
It has rounded inner and outer edges which I don't think can be cut on a laser cutter.
Here's how I designed it on Solidworks:
1. I created the basic outline shape - A semi-circle + rectangle.
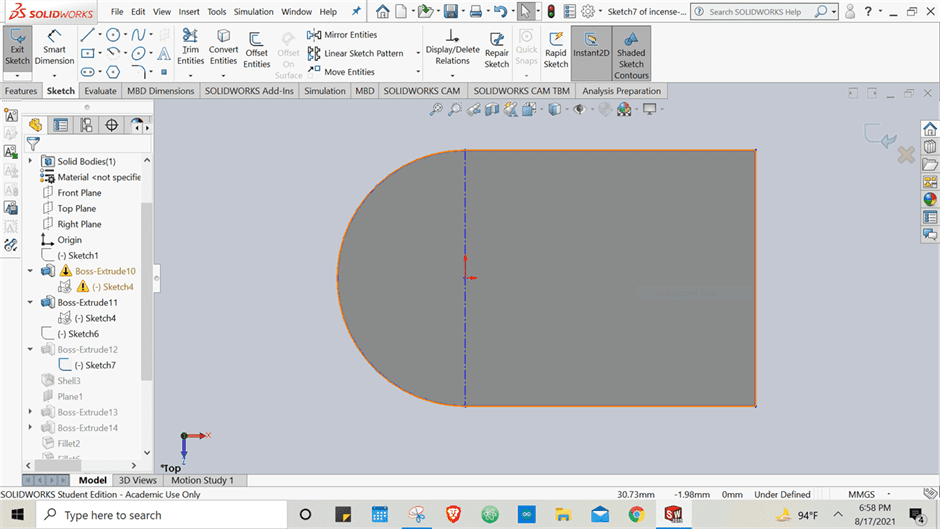
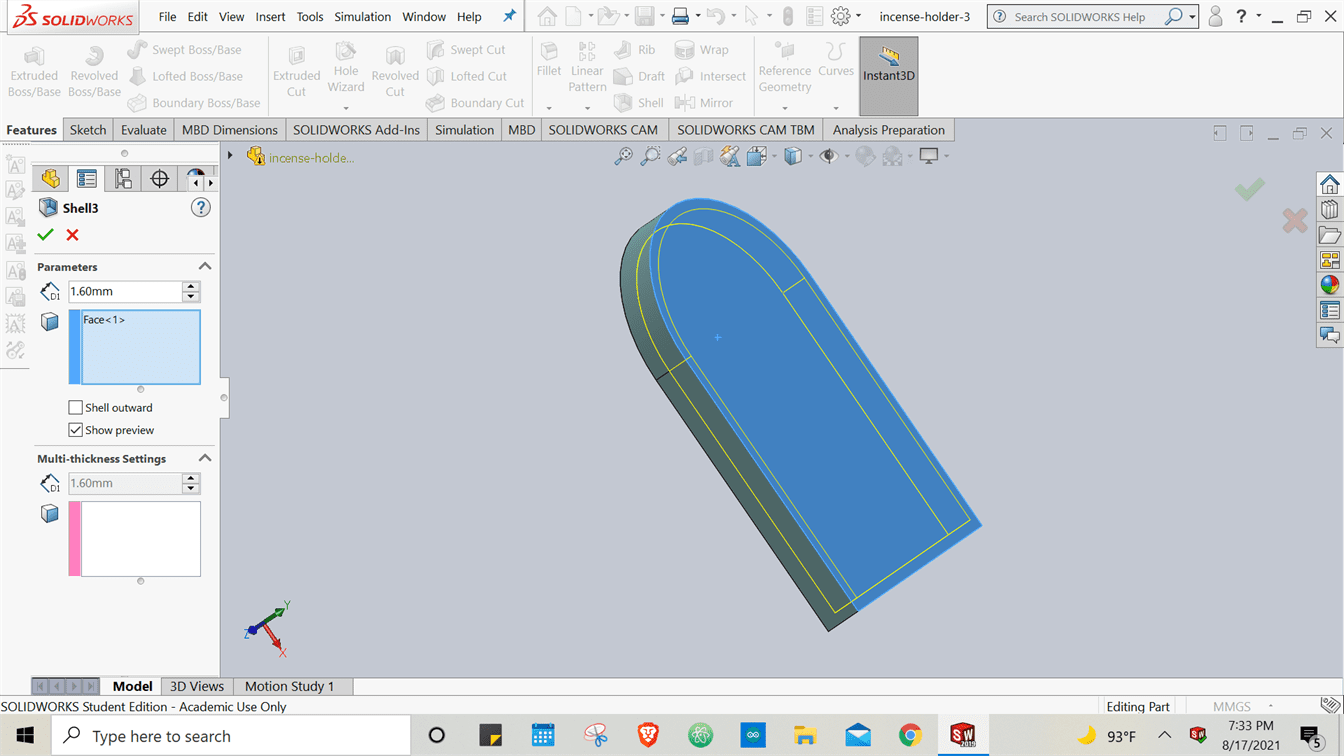
2. As mentioned above I wanted a tray so I hollowed the from the inside
using the shell feature.
3. I drew my flower shape and the inside hole which is to hold the incense stick.
I drew one petal and used the circular pattern feature to create the remaining ones.
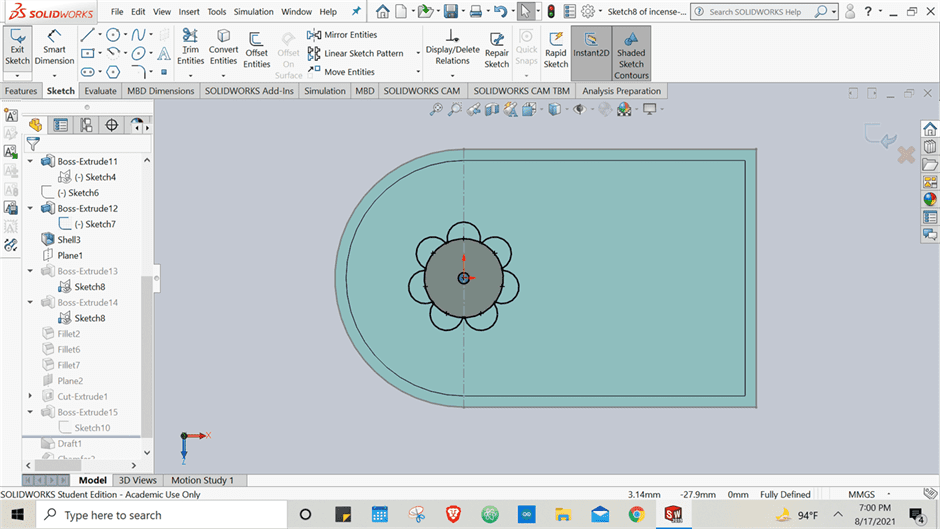
4. Then I extruded my sketch.

5. Finally, I added the rounded fillets on the inside and upper borders of the object.


MILLING PROCESS
Milling was done
on Roland monoFab machine on a machinable wax bar using 2 drill bits of 1/8 and 1/16 inch.
Just like the big CNC machine, this machine also uses a computer software generated
code to mill the designs. The axis, drill bits sizes, etc - everything was set on the
machine's own compatible software.
The key points of the process on the software
were as follows:
1. We entered the dimensions (L,W,H) of my final design and also set its orientention.
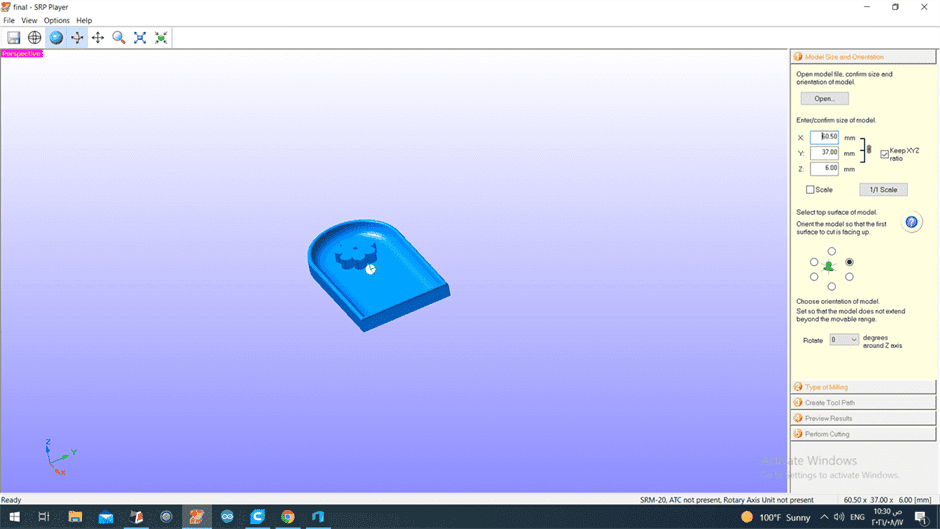
2. Milling settings were set.
Firstly, the surface finish. Two types were available, one for better surface finish, other
for quick cutting (may be rough).
We chose 'Better Surface Finish'.
Secondly, as per my design with alot of curves, we selected the 'Model With Many Curved Surfaces' option.
Thirdly, we selected the 'Cut Top Only' options as we had no undercuts etc.

3. We added margins and created Toolpath.

4. We just viewed what the final cutting would look like. Very helpful.
5. Then we did a little bit of manual work like marking a centre point on the wax bar
using a scale and tweezer. Then we centered the drill bit on the bar using the softwares
control panel by playing around with the X,Y and Z buttons.

6. Lastly we selected the 'Start Cutting' button. Which opened up a dialog box
confirming the drill bit which is going to be used.
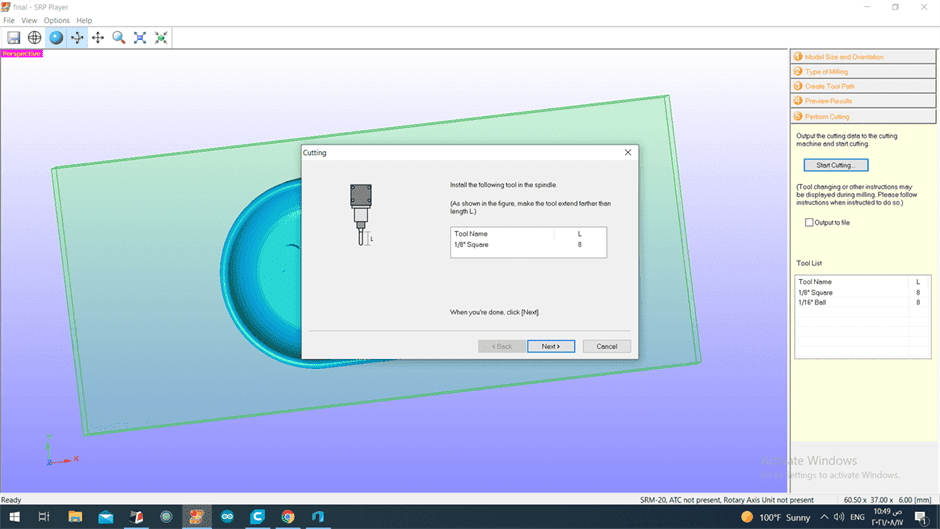
The next button is followed by another dialog box asking to set the origin point.
We had set it earlier so we selected next and finally started milling.

On the right side it can be seen that we have 2 drill bit sizes in our Tool List.
How did that work in real time on machine? Following the toolpath setting that we set the
machine did the 'Surface Finish' of design with 1/8 in. drill bit and once it fulfilled the
setting it stopped and gave a message to change the drill bit. After changing drill bit,
we again set the Z-axis origin point and started cutting again. Then the machine
again followed the toolpath settings and did the 'Finishing' with 1/16 in. drill bit.
MOLDING PROCESS
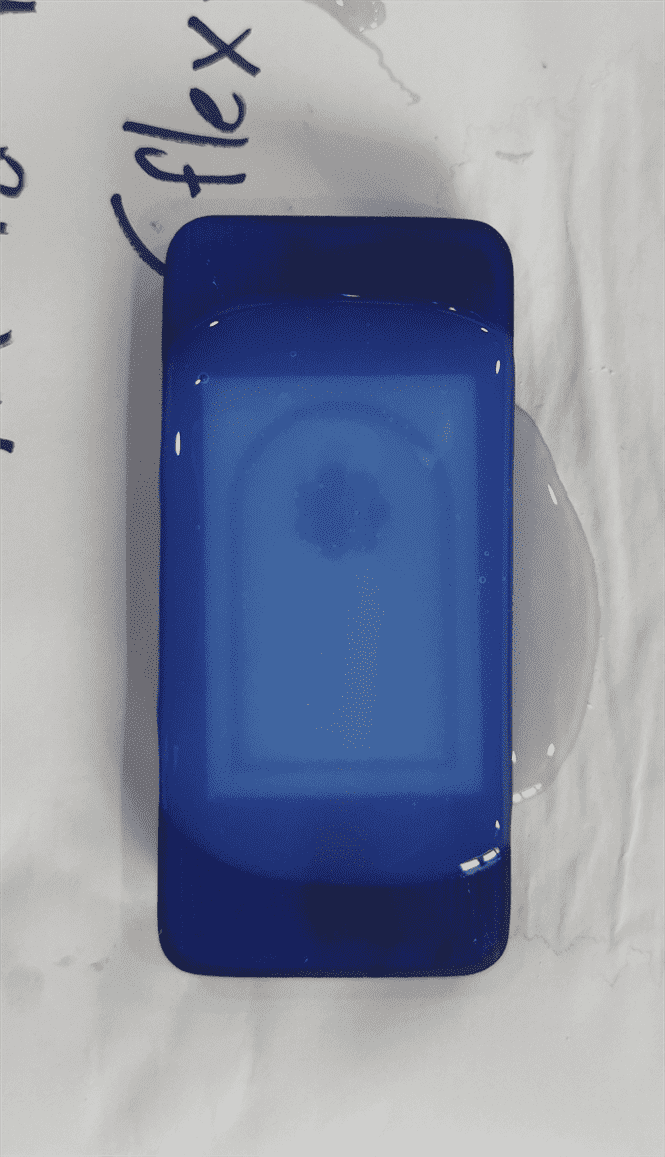
After milling we created a
flexible mold out of the milled mold as the plastic-wax mold is too stiff to be able to eject the casted parts
out.
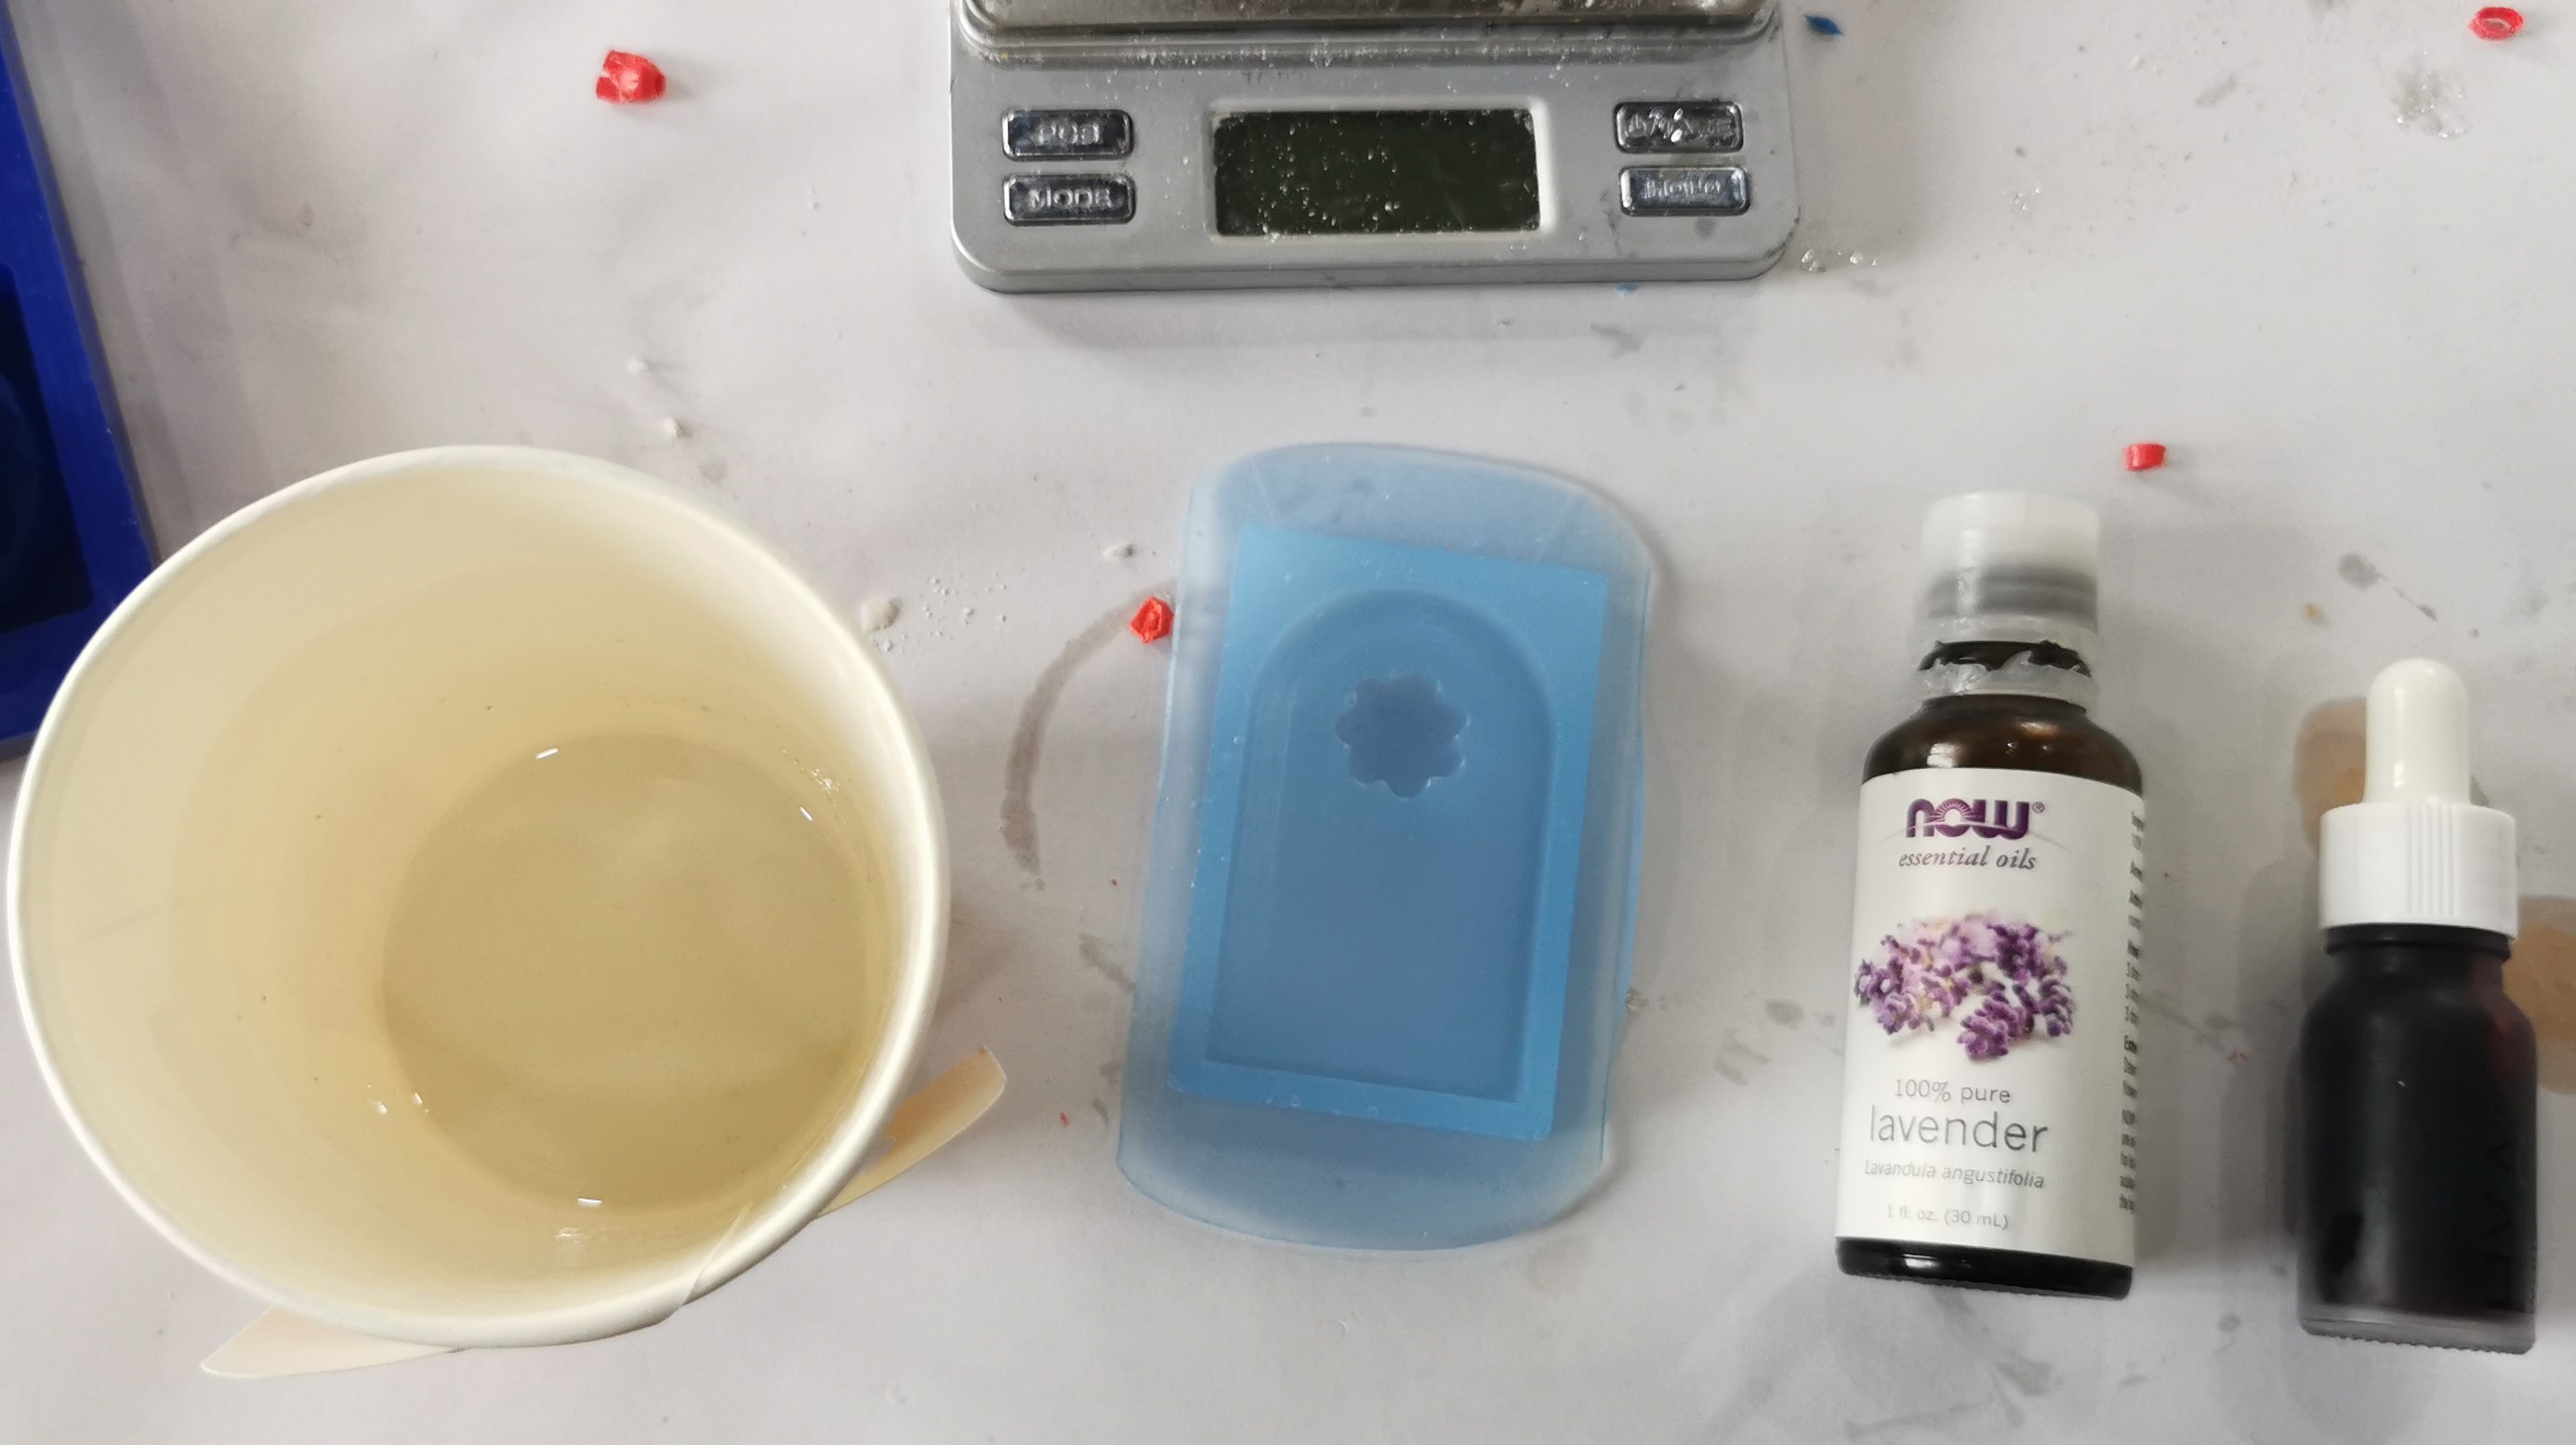
The apparatus we used can be seen below.

The following steps were performed to create a liquid silicon mold:
1. Cup was placed on the weighing scale and scale was zero'ed to count out the weight of the cup
and measure only the amount of the material.
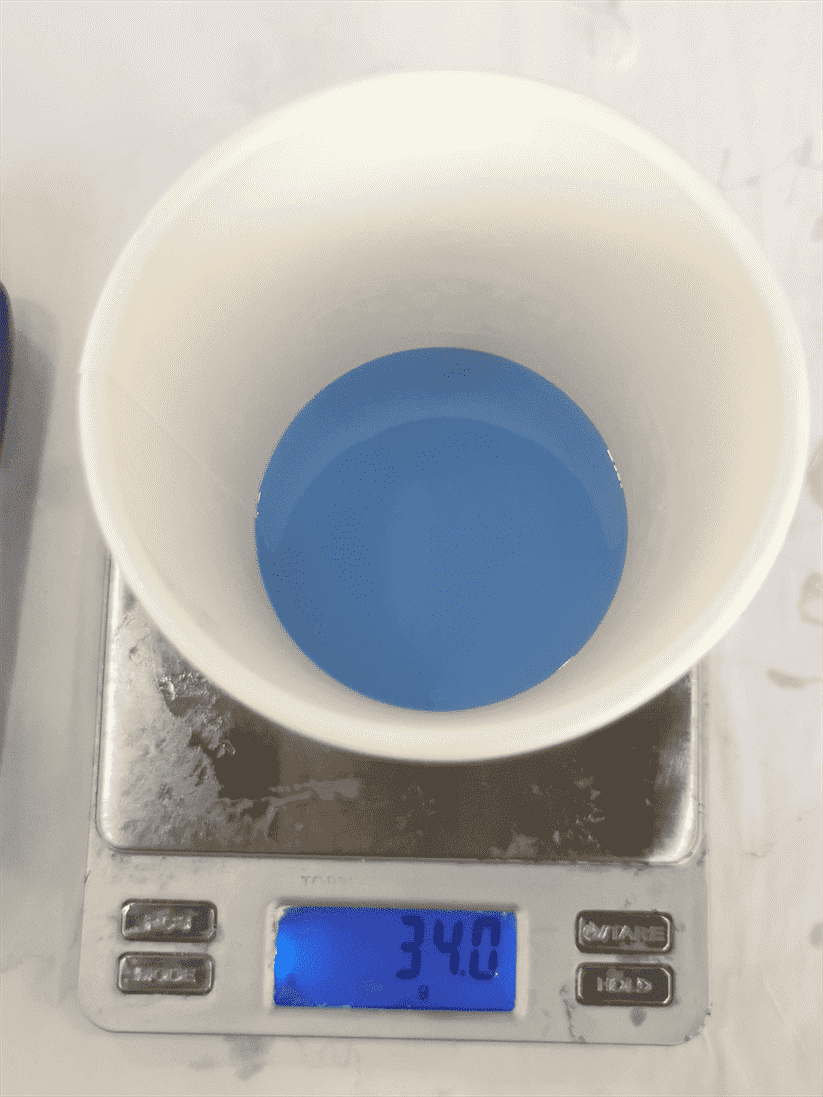
2. Two materials were added in this process by a 1:1 ratio i.e., in equal amounts.
Firstly, I poured material A and noted the material weight. Then without moving
my cup, I reset the scale again and poured material B up till the exact same value as material A.
3. I slowly mixed both the materials together in order to avoid formation of bubbles
that can effect the fine details of our design. You can tell the mixing is done when
both the colors of the materials are fully mixed and have formed a new color.

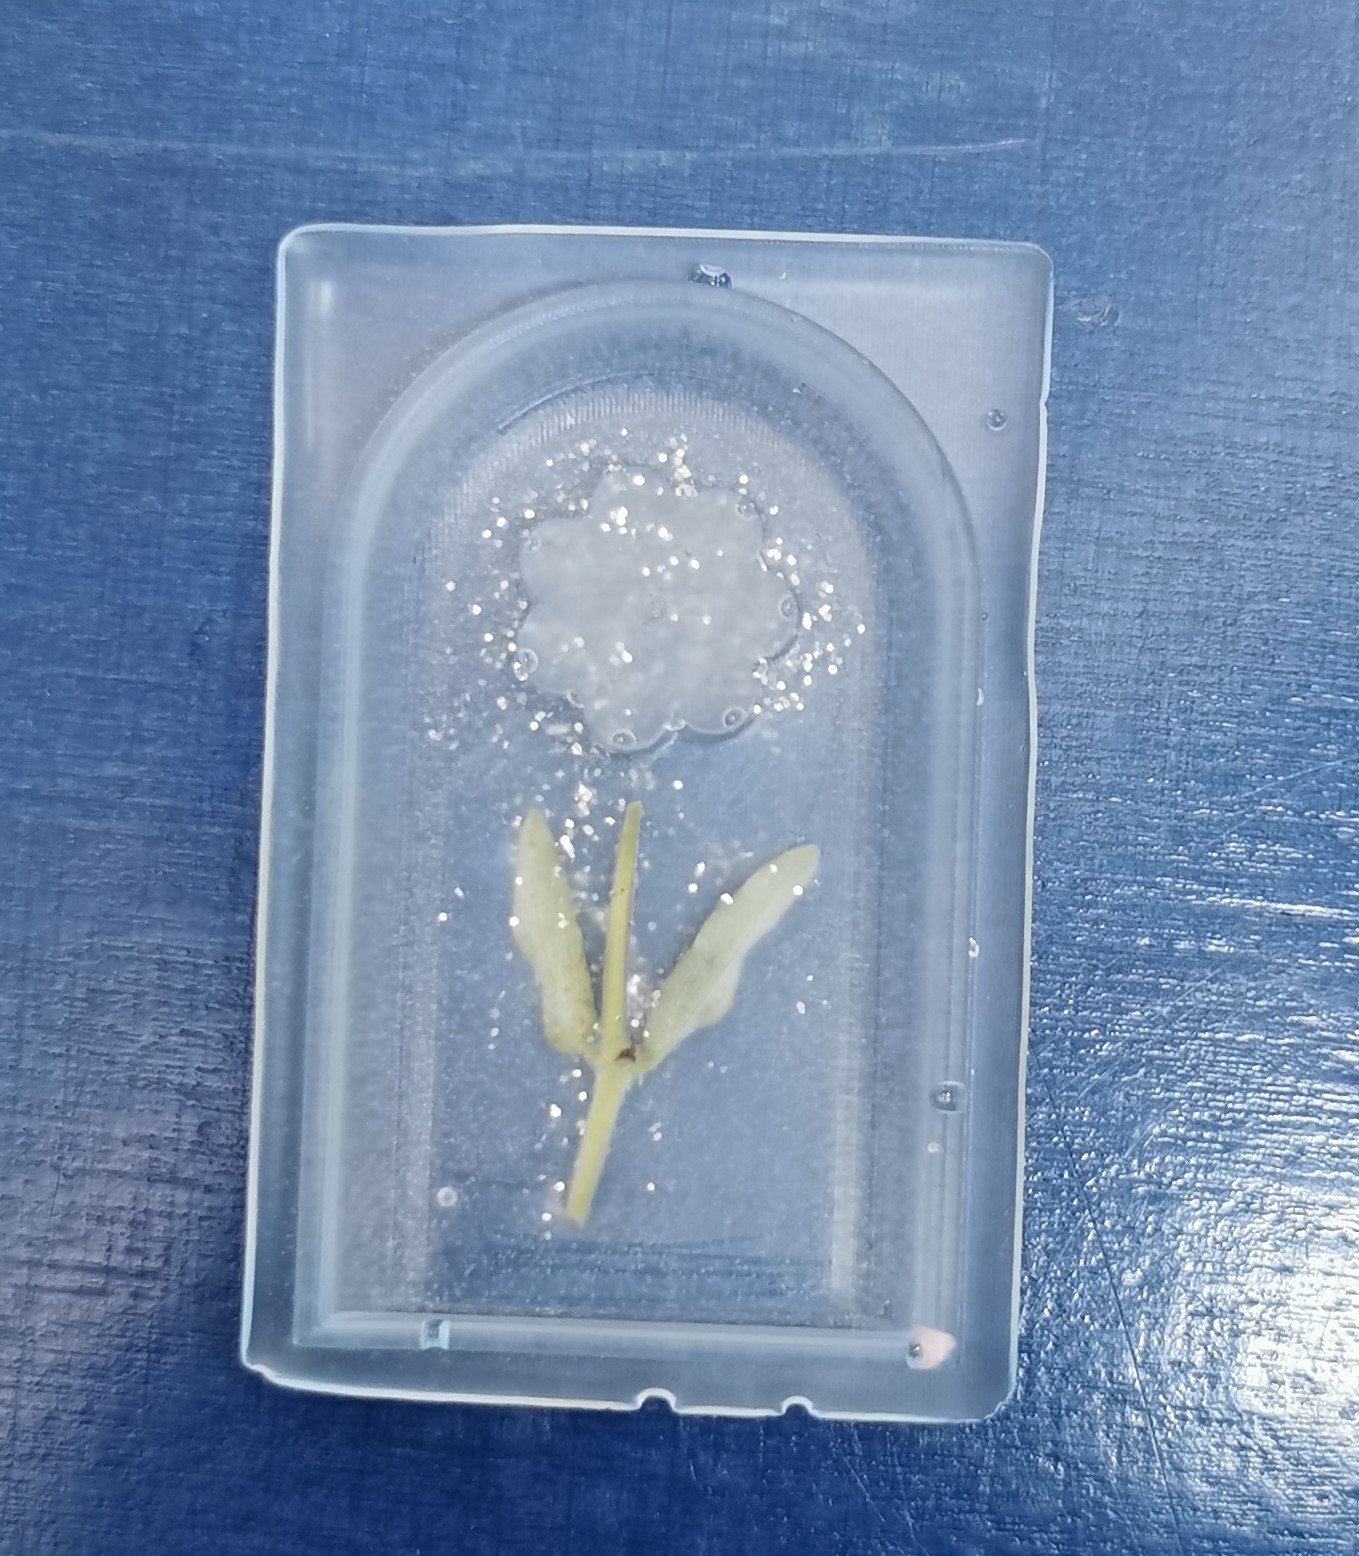
4. Lastly I just poured the mixture over my milled wax-plastic mold and left it for a day to dry.
CASTING PROCESS
After my silicon mold
solidified, I had several material options for casting my final design in it. I did 2 types:
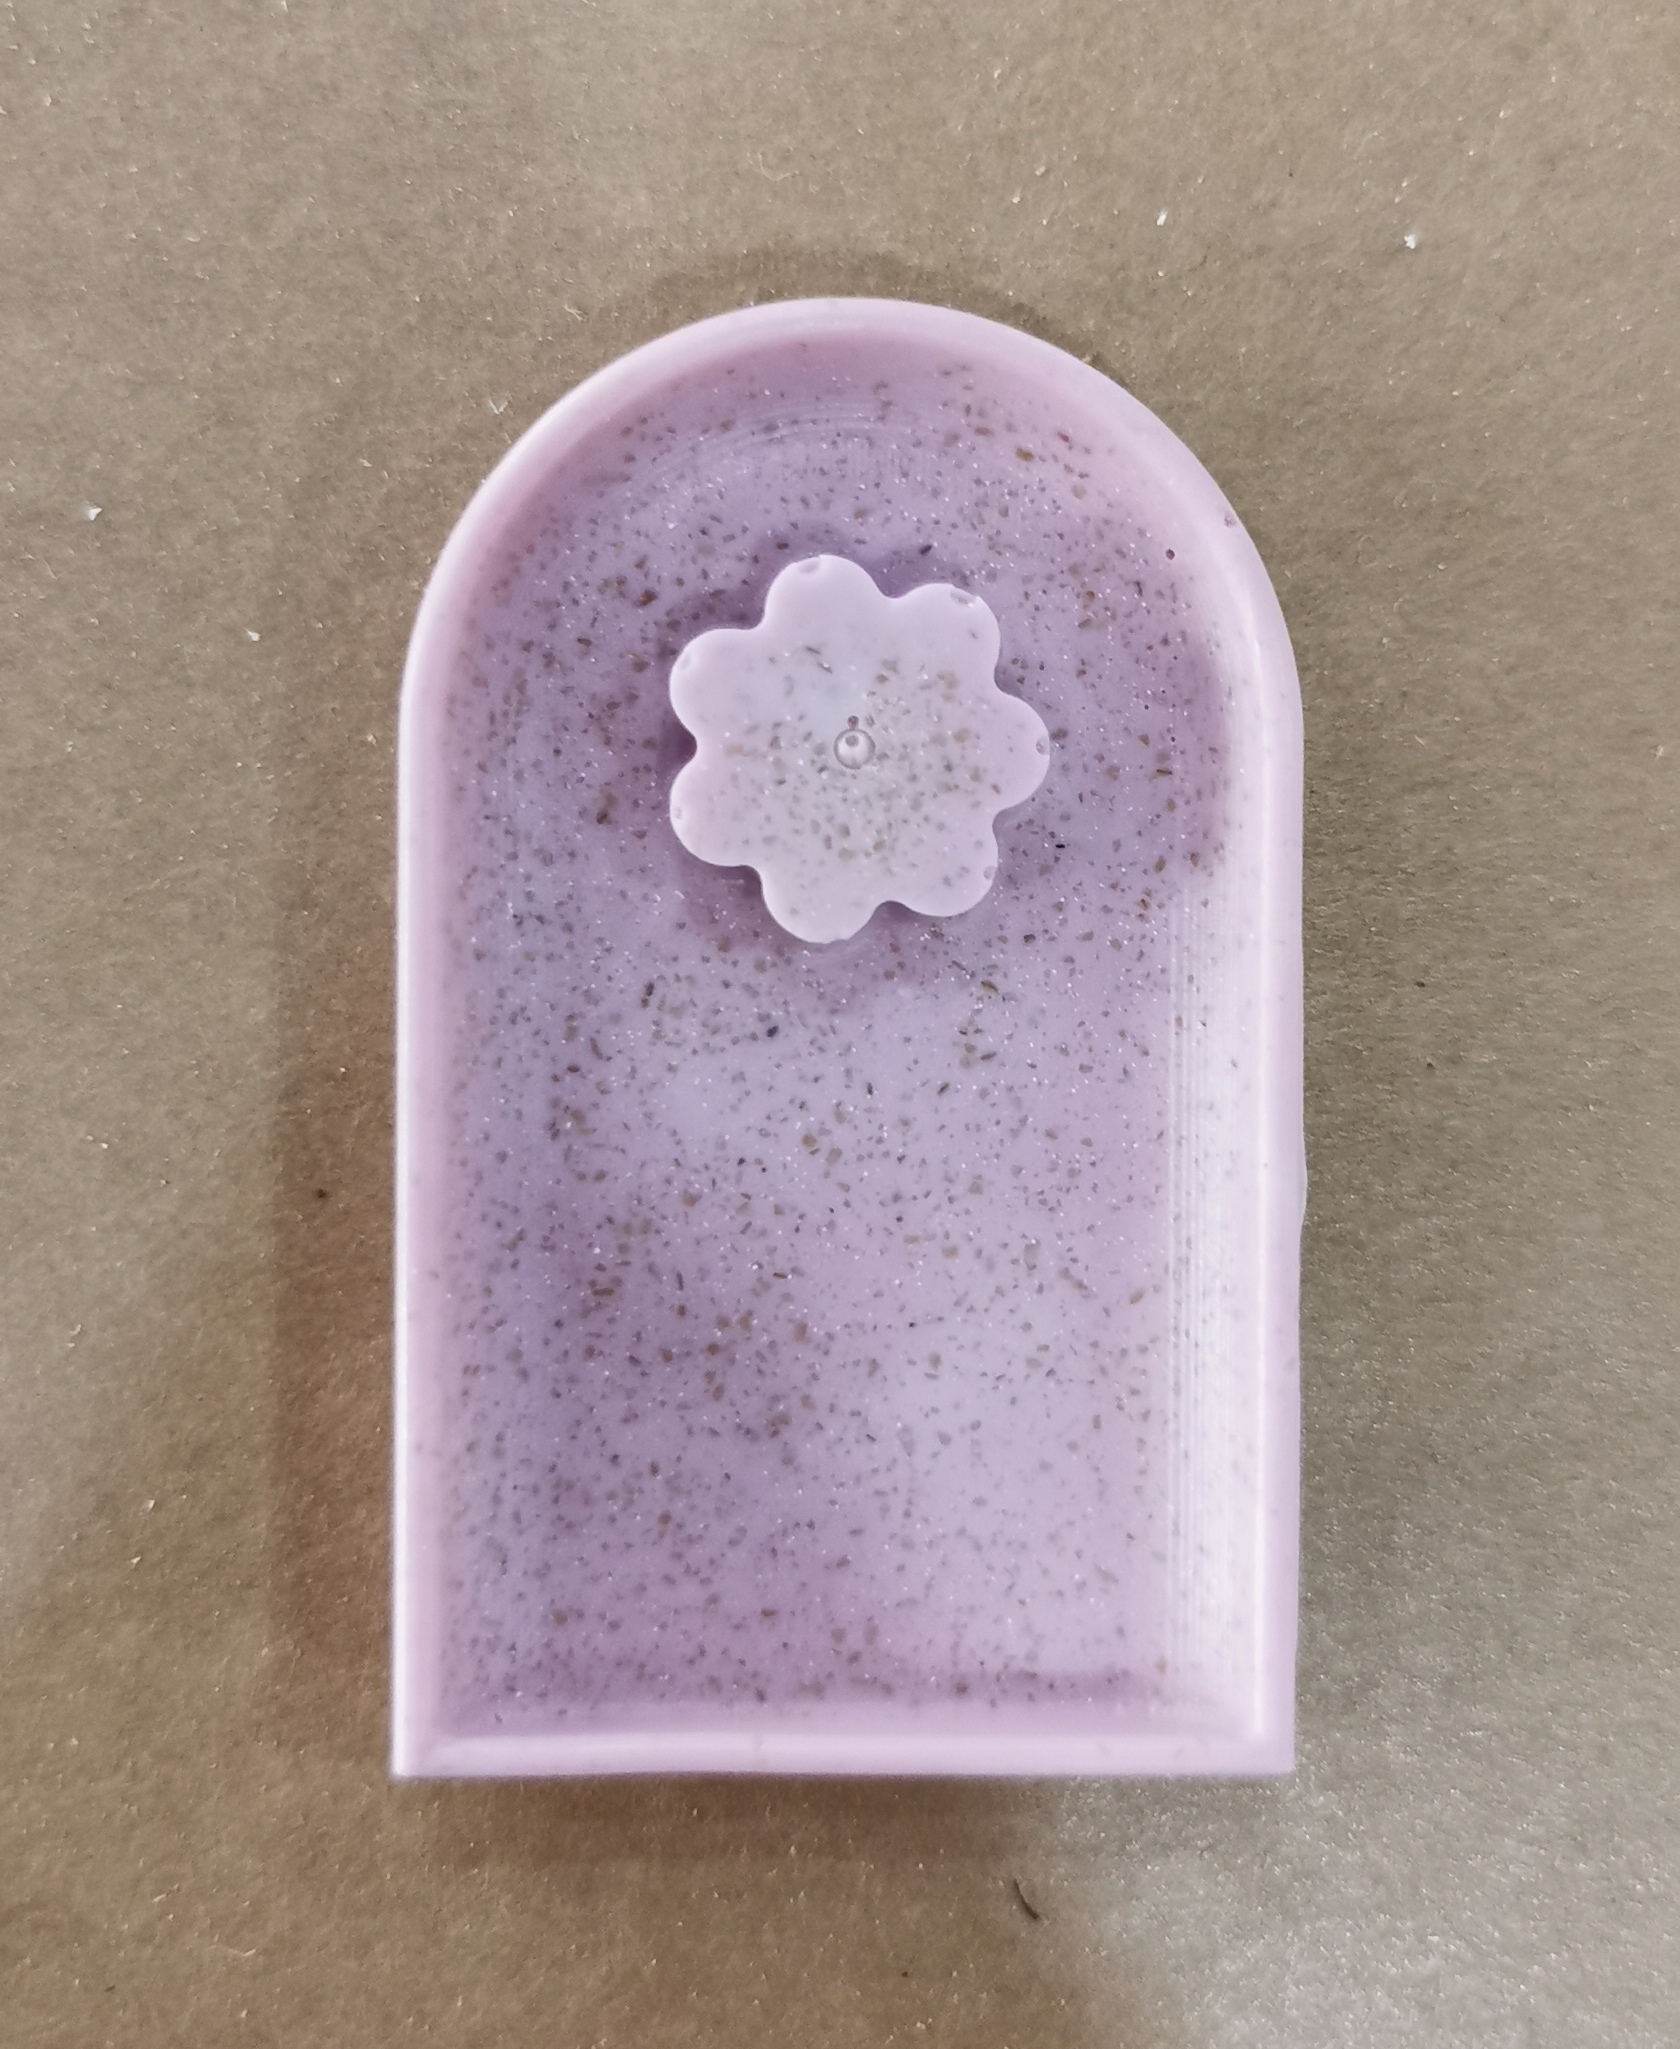
1. Soap
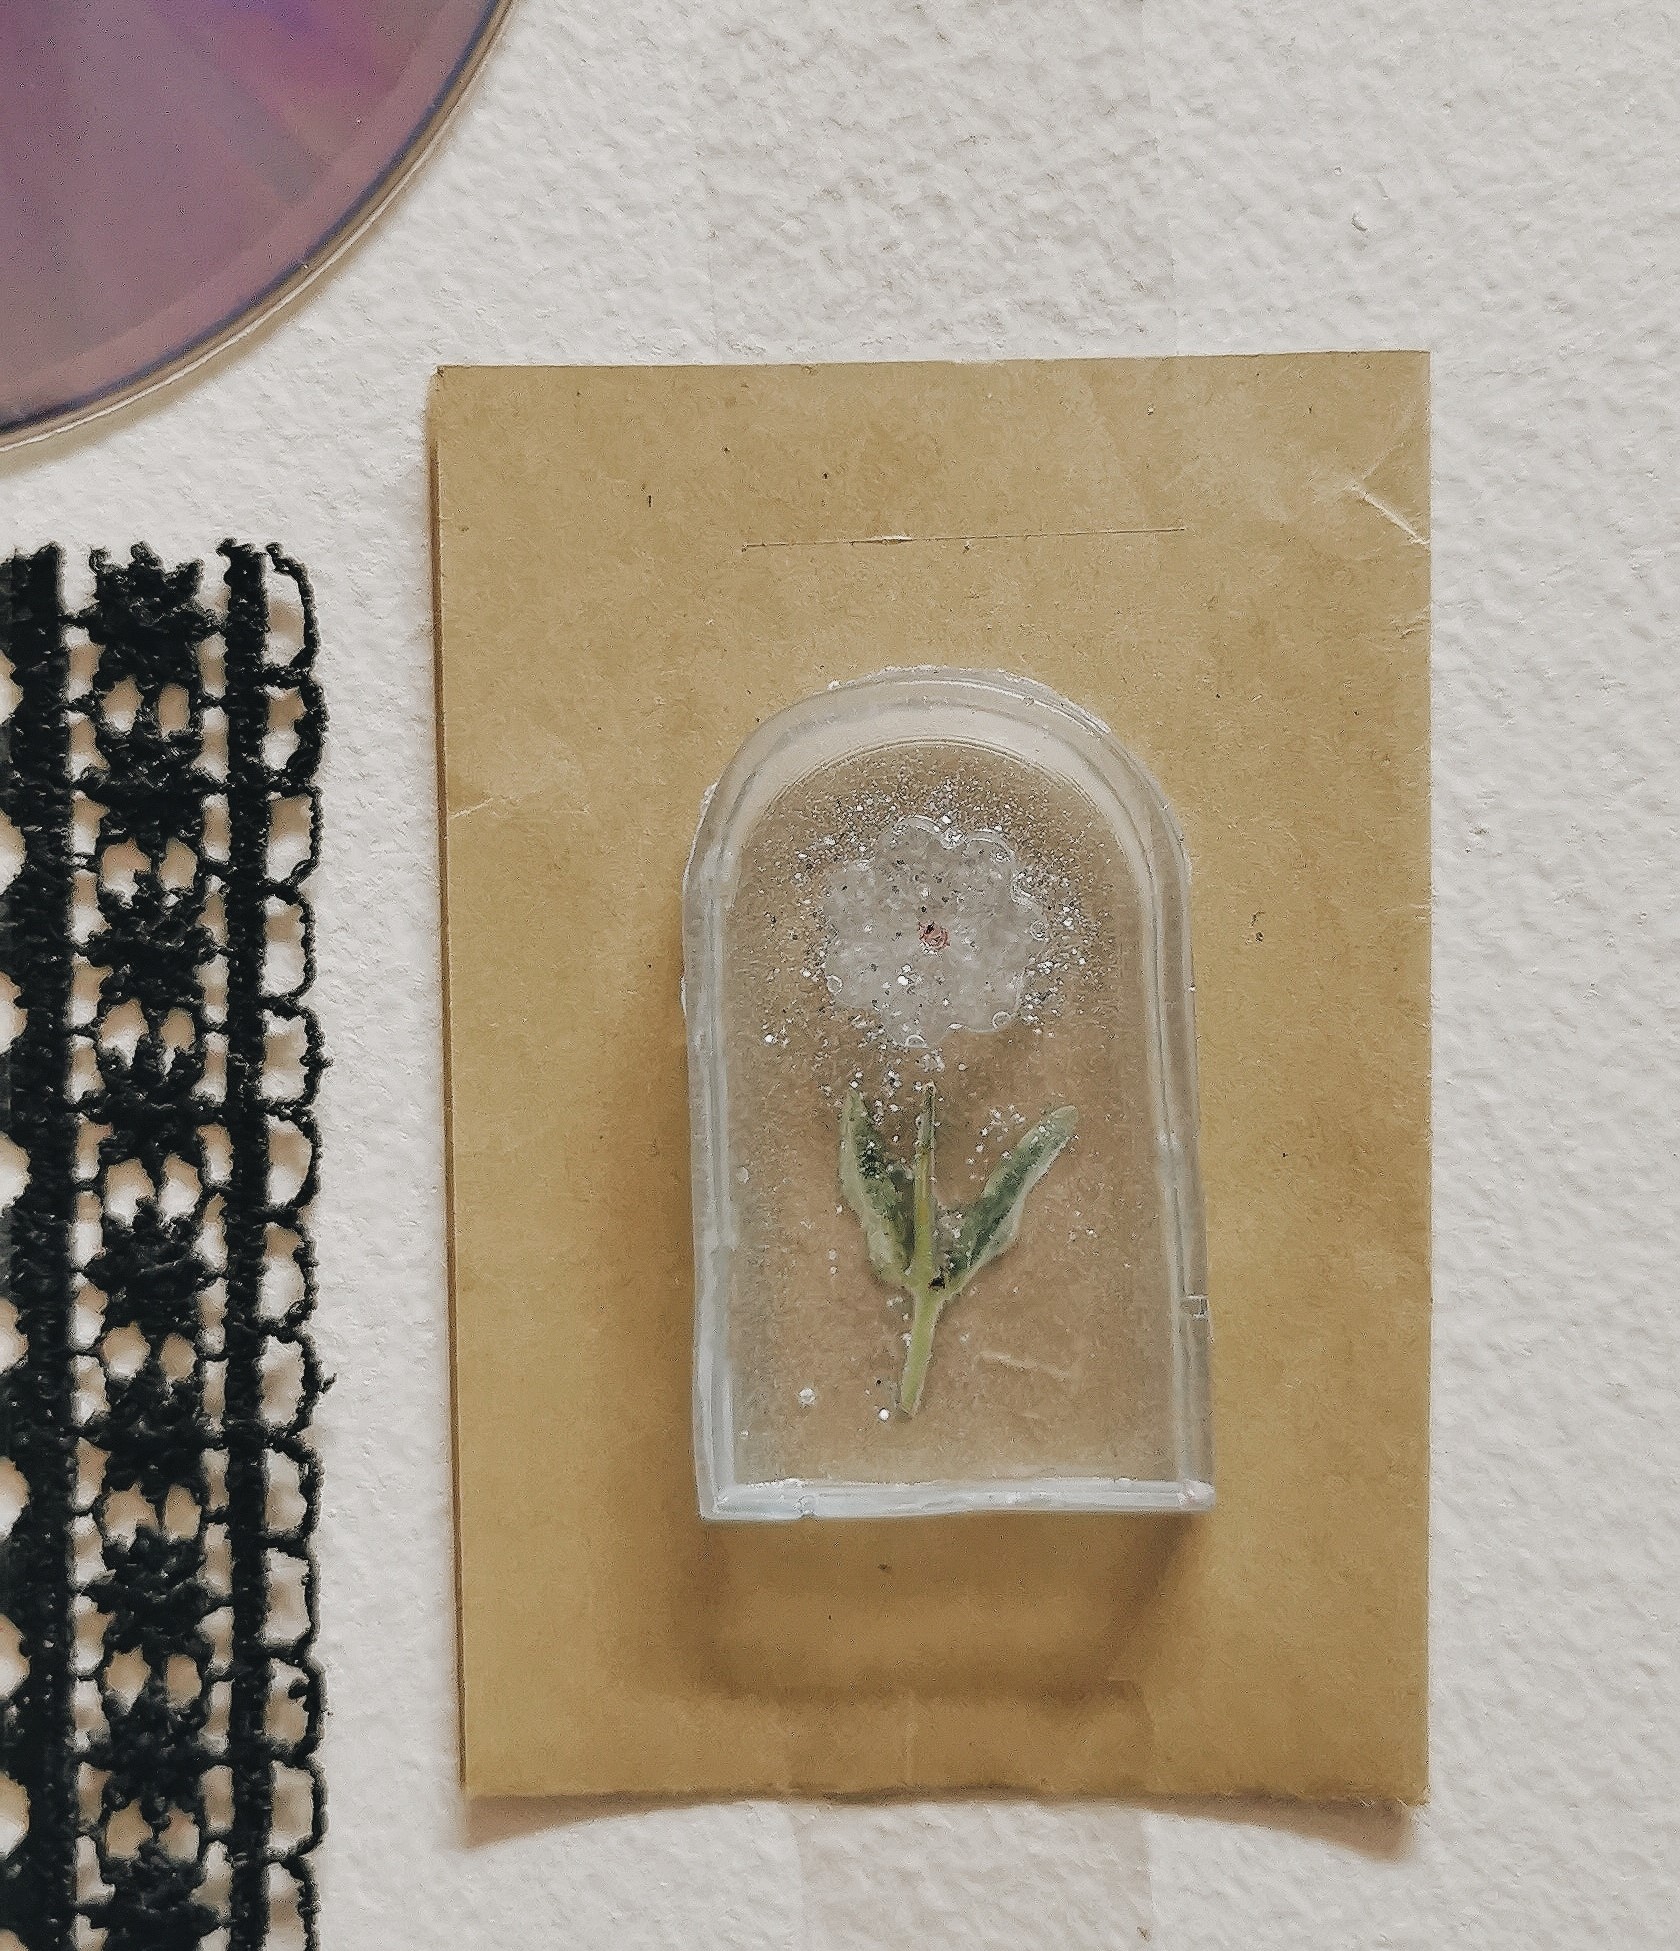
2. Resin
The following steps were performed to cast the soap:
1. Soap bar was melted in the microwave.
2. Coloring liquid and Lavender oil drops were added and
the mixture was stirred. [Optional step]

3. Finally. to cast, the mixture was poured into the silicon mold and left to
solidify for about 15 minutes.

The following steps were performed to cast with resin:
1. Resin casting requires two types of liquids. Liquid A is resin and Liquid B is the
hardner.

2. Same as molding process I used a measuring scale and added a certain
amount of liquid A in a cup and noted the reading.
3. Liquid B is supposed to be added 1/3rd of the amount of Liquid A
so I took another cup and on the measuring scale repeated step 2.
4. I combined both mixtures and mixed them for a few minutes.
5. I poured the mixture into the silicon mold and waited for 24 hours for it to solidify.
6. I poured a little too much so I ended up with extra border around my design which
I had to cut off with a cutter.
🌼 HERO SHOT 🌼