1. Project management
During the start of the first week, I managed to launch a website that would be utilized in the next few weeks to document the knowledge and progress gained during each week of the fab academy program. Some program/softwares have been downloaded to conveniently edit the website online or offline mode.
2. Introduction
There are a variety of softwares that can be used to ease the process of editing and designing a website, such as:
- Git Bash is a software that acts like a terminal to connect atom and other softwares that uses code command to edit or create websites.
- Atom is an open-source website code editor that can be used online and offline.
- Mkdocs is a software used to help document projects for a personalized website.
- Markdown can be considered as a converter tool that helps by converting editing texts into HTML format, the difference between HTML and Markdown is that HTML is more advanced and uses opening and closing tags .
I have downloaded both Git Bash and Atom as I have found them beginner friendly and more convenient to work on for my website. The steps will be discussed.
3. Getting Started
In order to successfully create a website, there are a few steps that should be done and taken into consideration. the steps listed below:
3.1. Creating Website
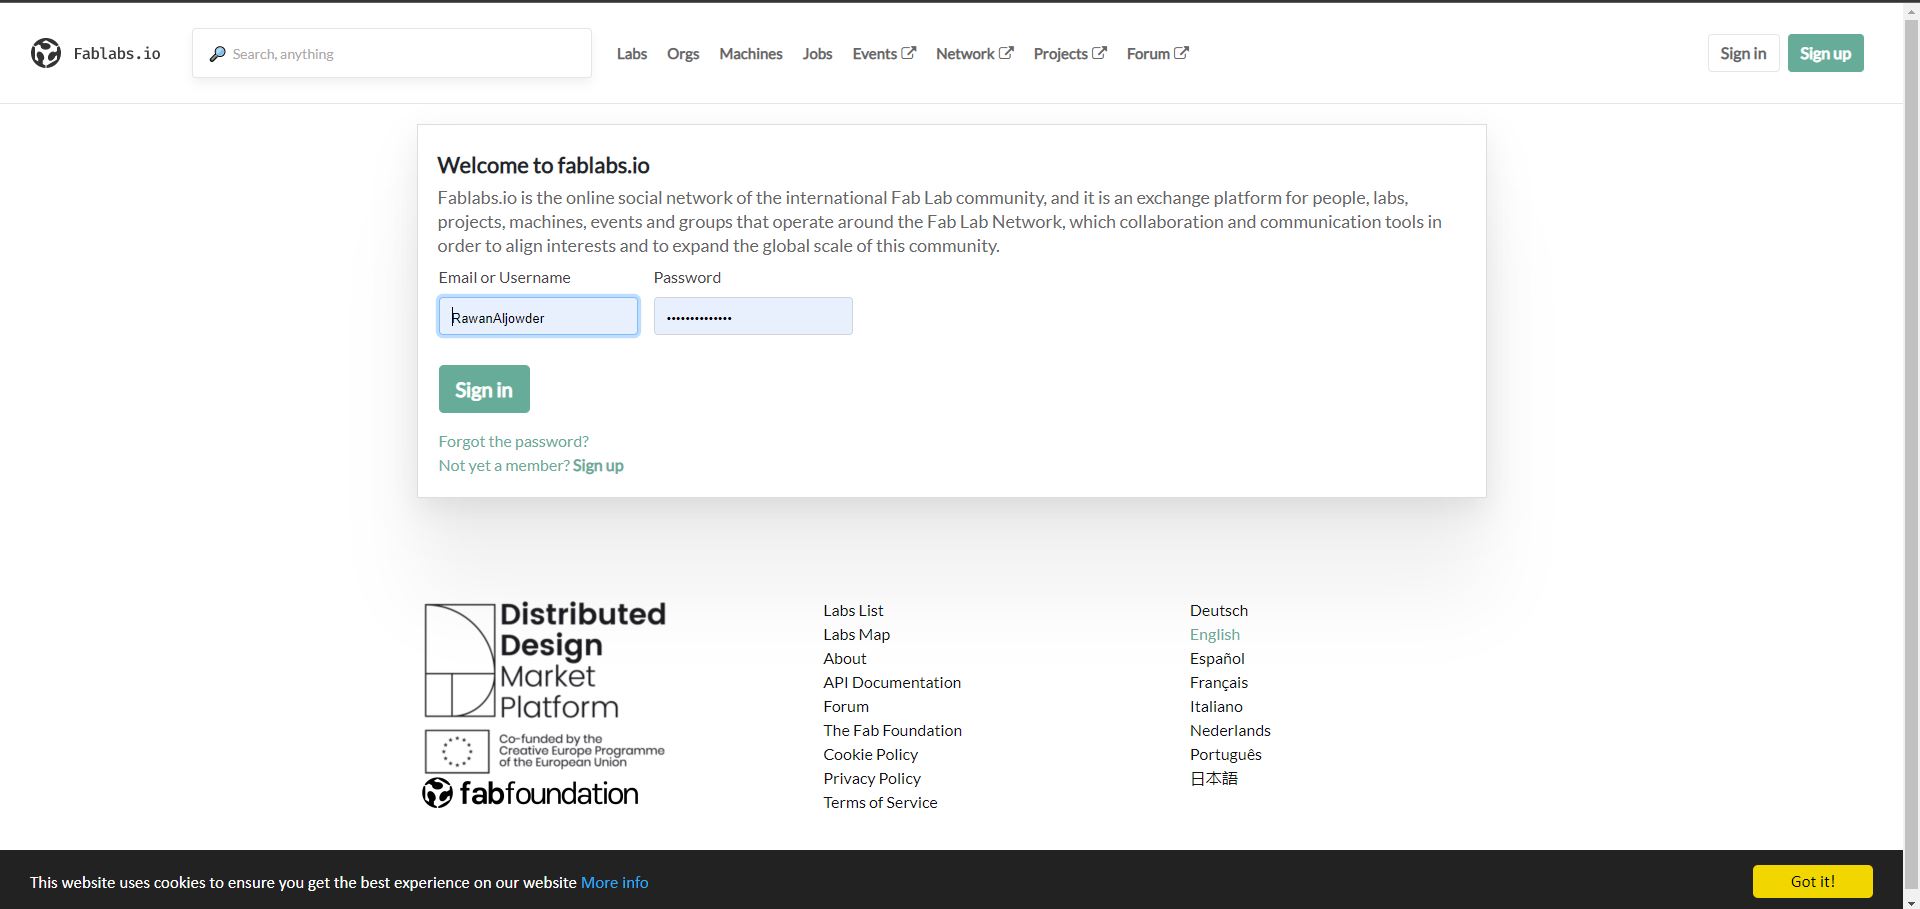
3.1.1 Create Account
Create an account in git lab website by signing up. The gitlab website is a ready made template written using markdown and will be used in the upcoming weeks
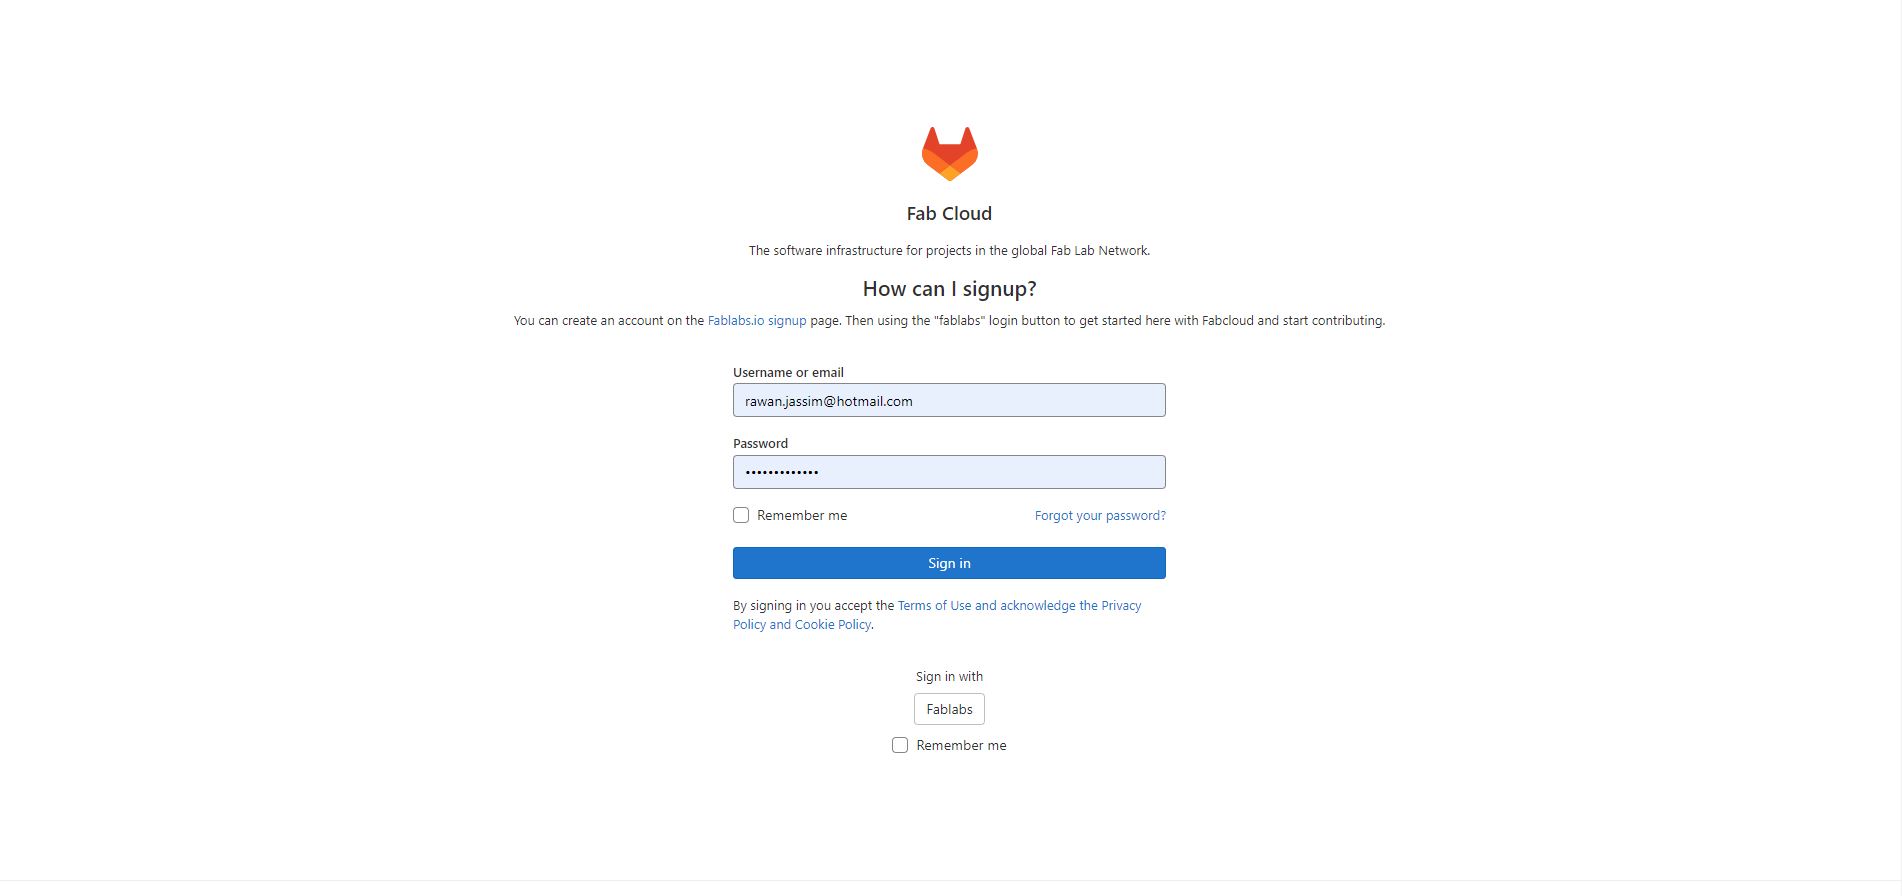
3.1.2 Sign in
After creating an account using an email and a password > sign in to the account.
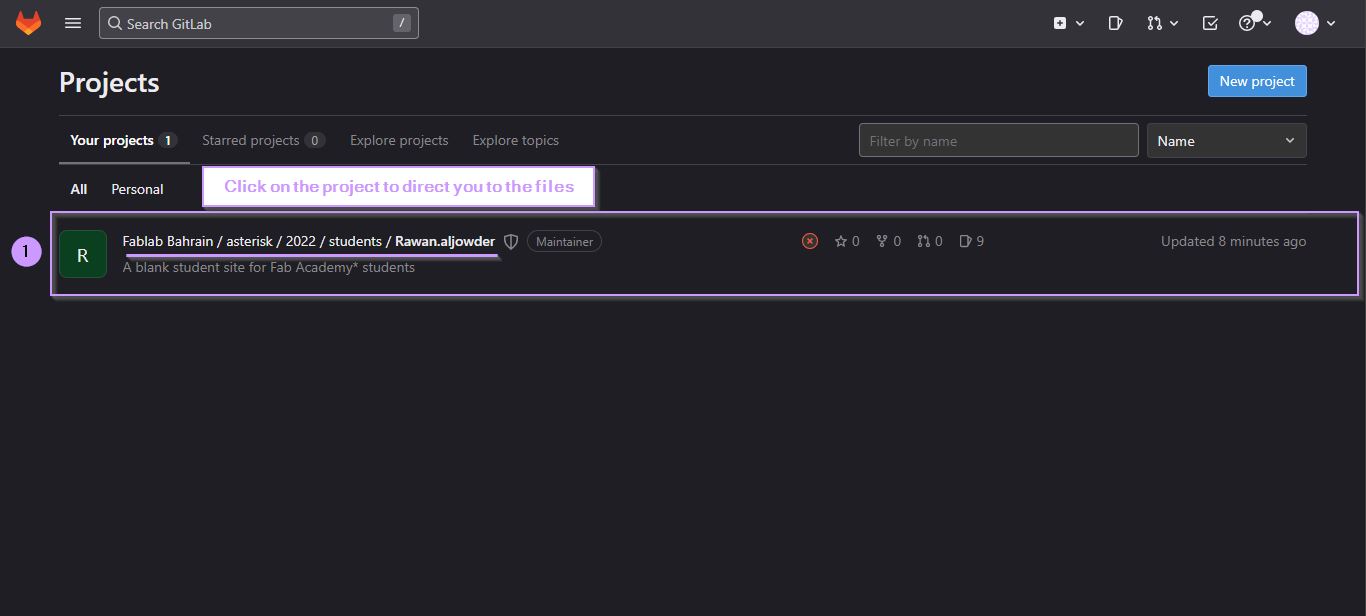
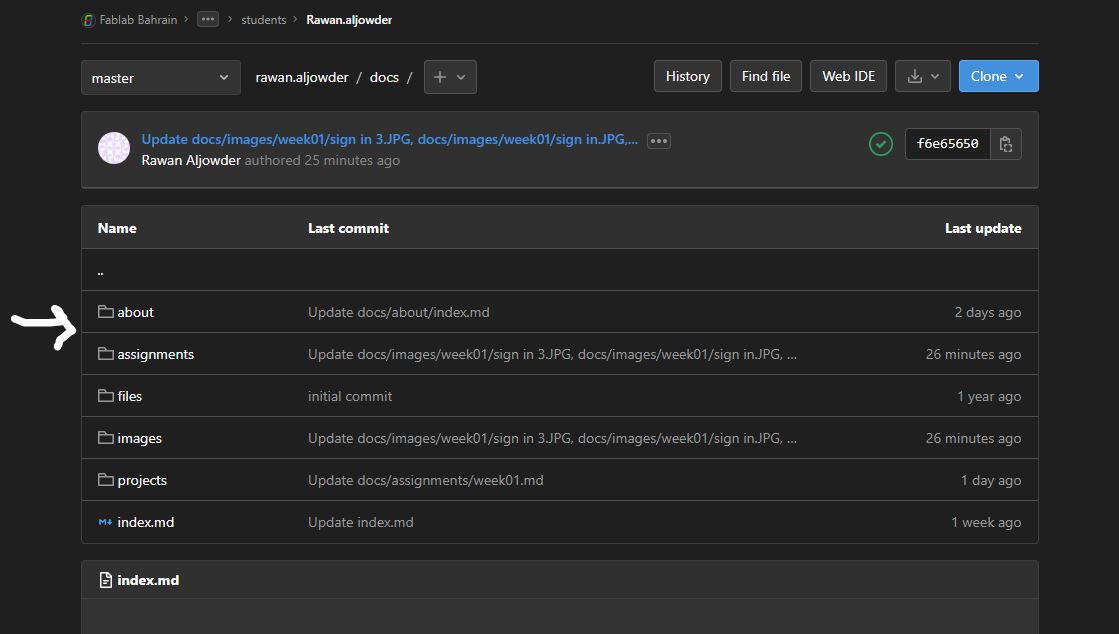
3.1.3 Gitlab Web Page
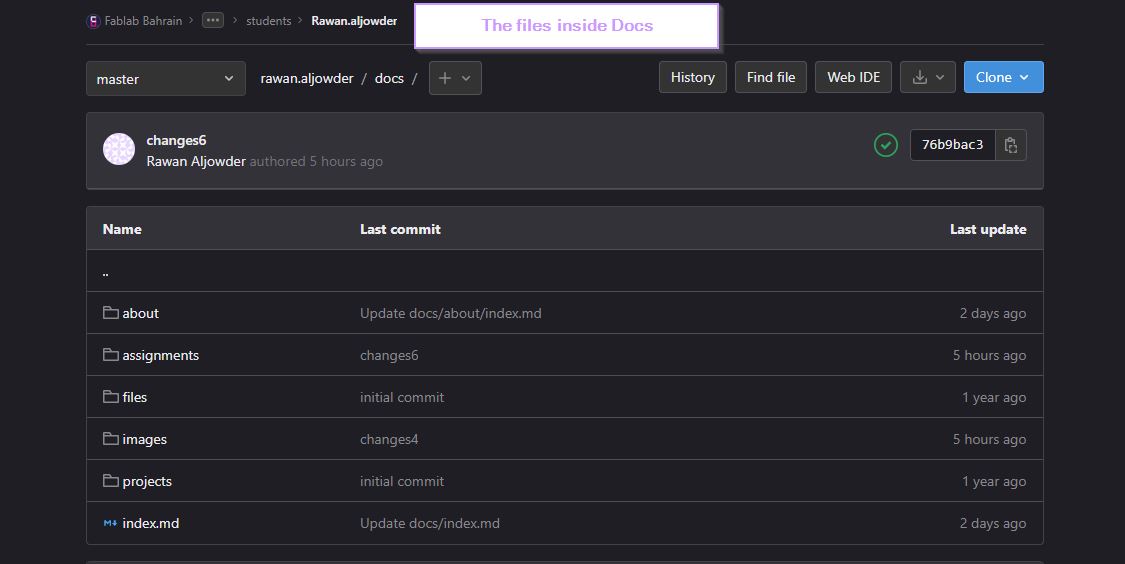
A page that looks like the image shown below would be an indicator that the account has been created successfully. Clicking on the project will direct you to the files that make up the entire website, where you can make some changes.
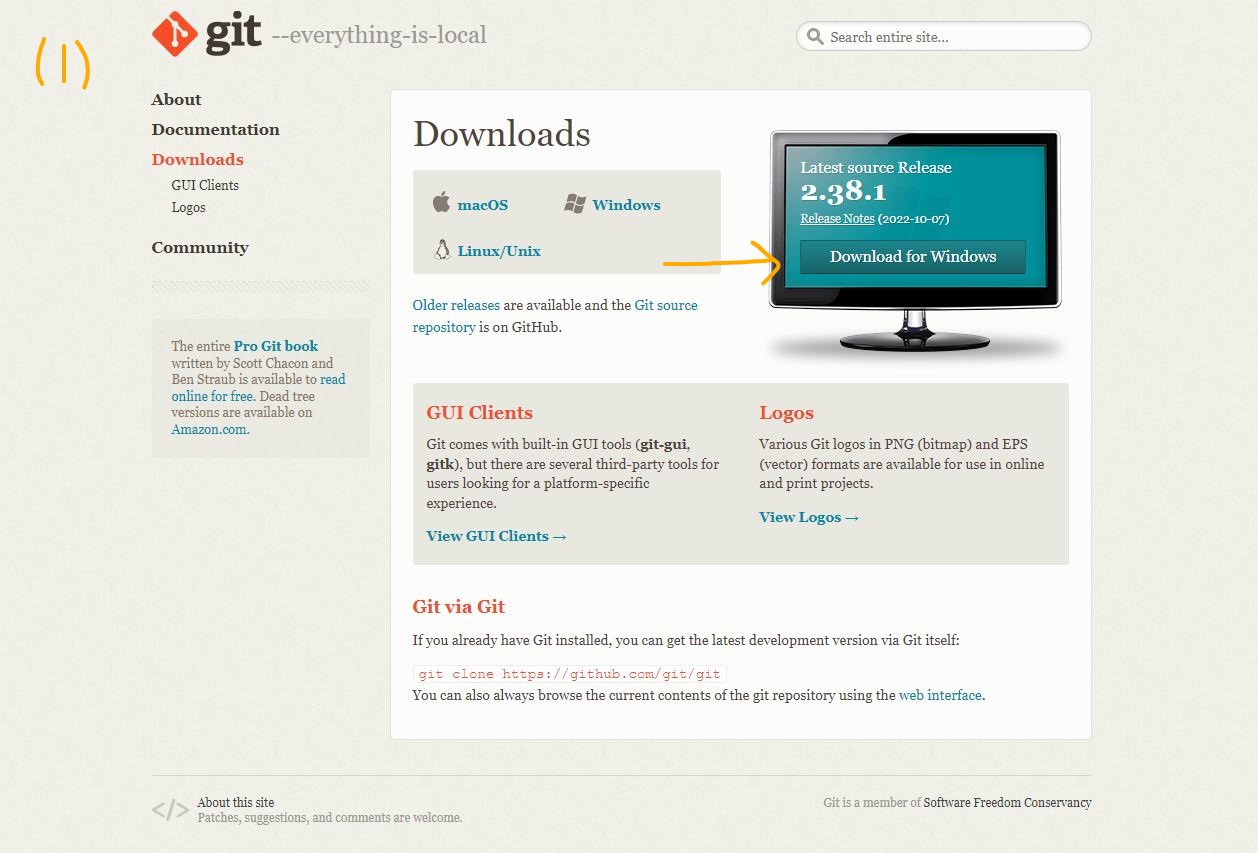
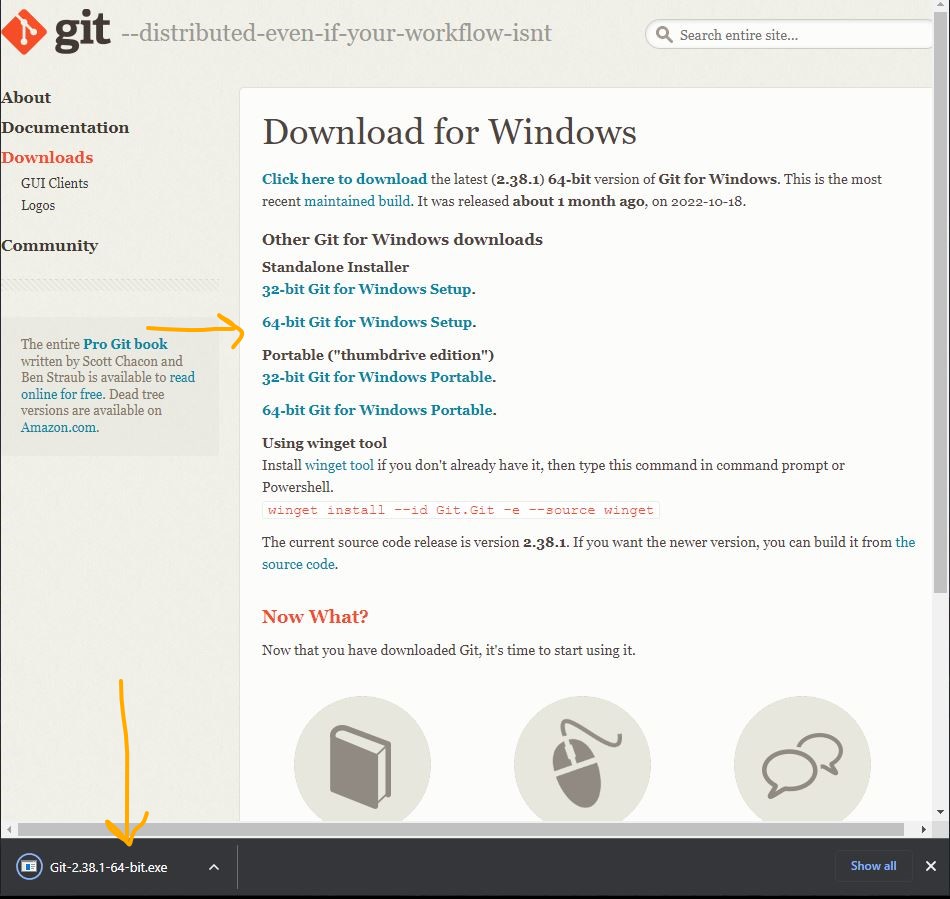
3.1.4 Download Git Bash
Visit Git Bash > click on Download > choose the appropriate Git software that works on the model of your laptop. In my case i have chosen 64-bit Git for window setup. > download the software file, once its complete > click on the downloaded file and launch the software by following the steps shown in the figures below.
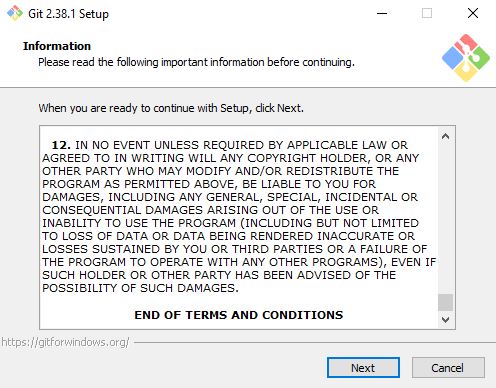

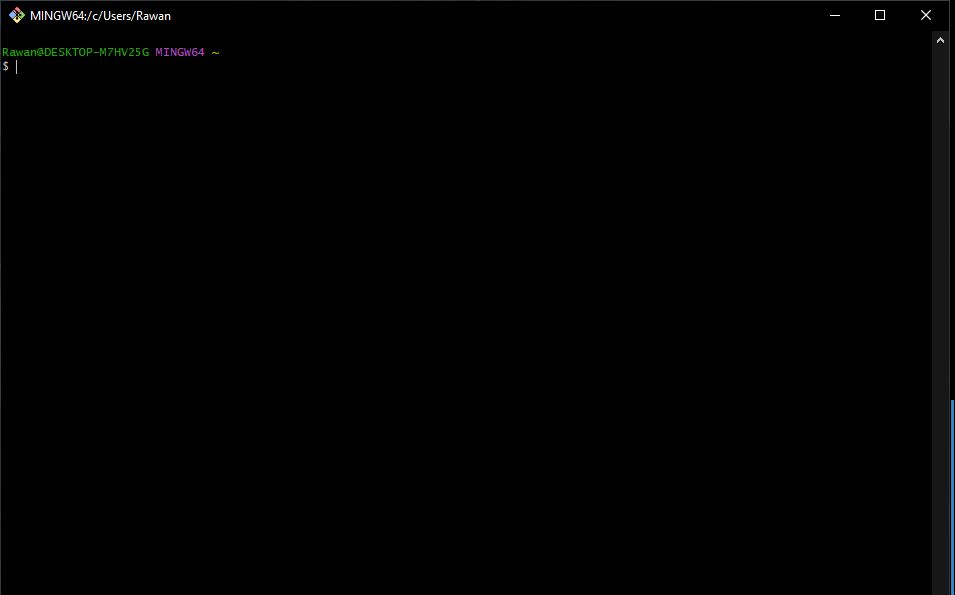
Once the steps mentioned have been followed thoroughly and the software completely downloaded and launched > open Git bash and the page should look like this
Step.5. link Git Bash
To link Git to your website and make changes
Steps to link Git Bash:
1. Visit your [git lab](https://gitlab.fabcloud.org/users/sign_in) personal page2. click on your account
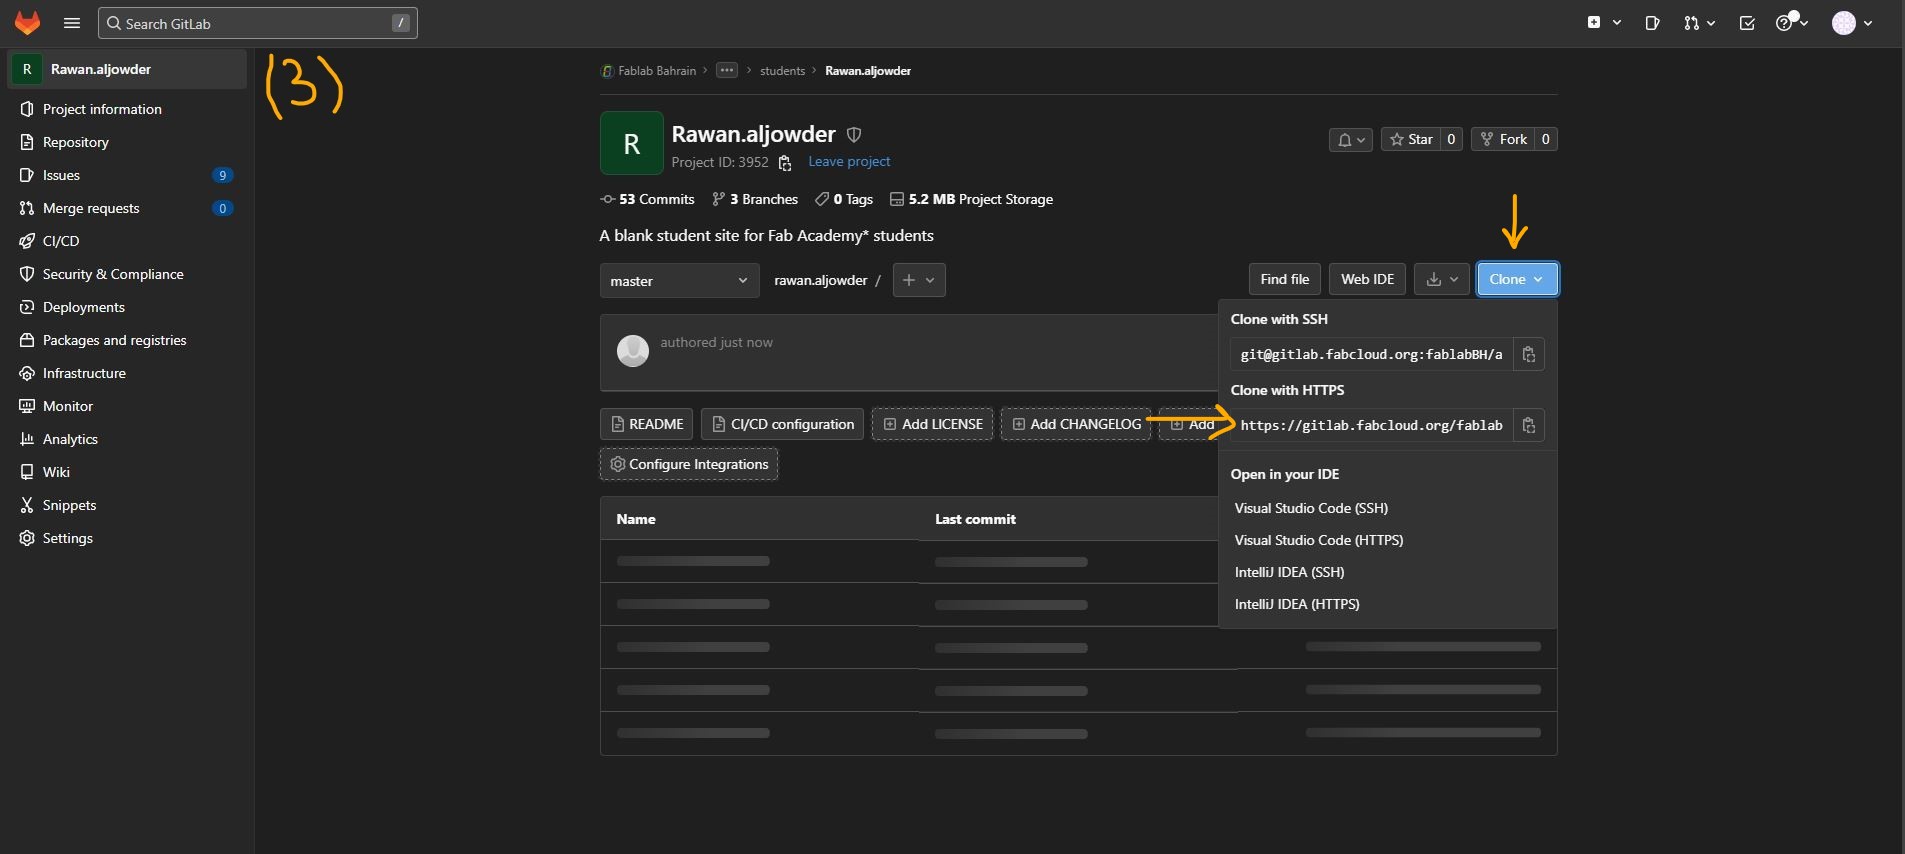
3. click on clone shown on the top right of the page
4. choose clone with HTTPS to copy the link
5. Open Git Bash software
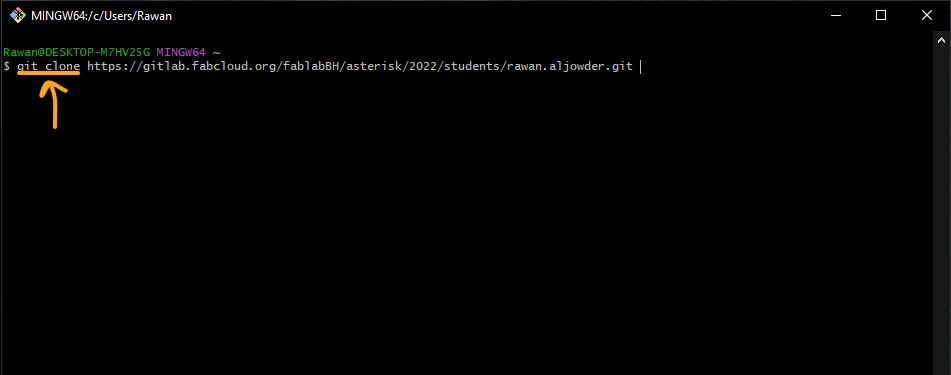
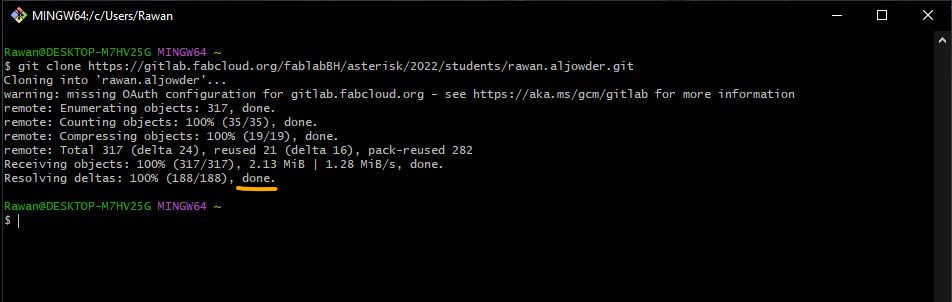
6. Type "git clone" and paste the HTTPS link next to the text
7. Click enter
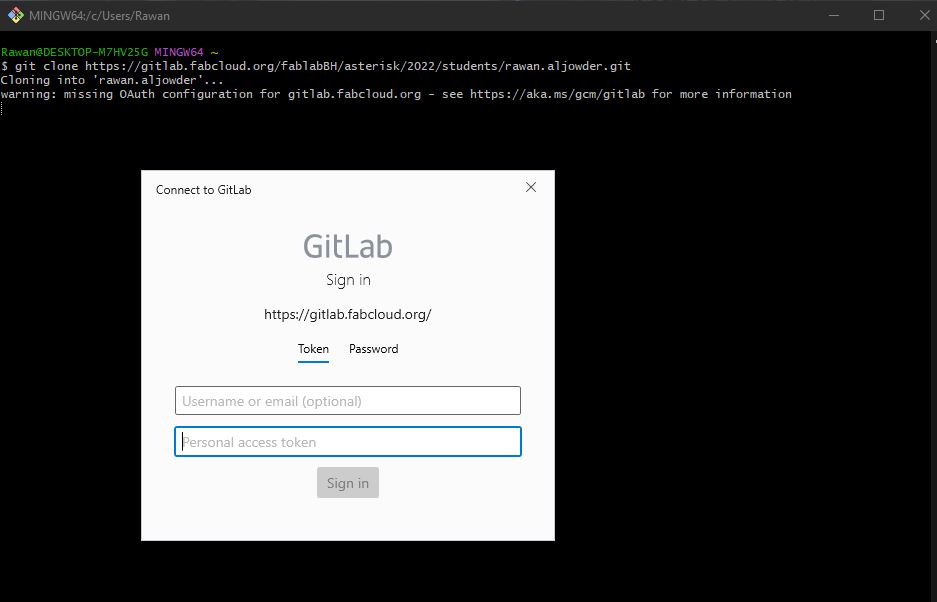
8. Log in using the email and password
9. Once the process is completed successfully, you will notice a "Done" message
Step.6. Download Atom
Steps to Download Atom:
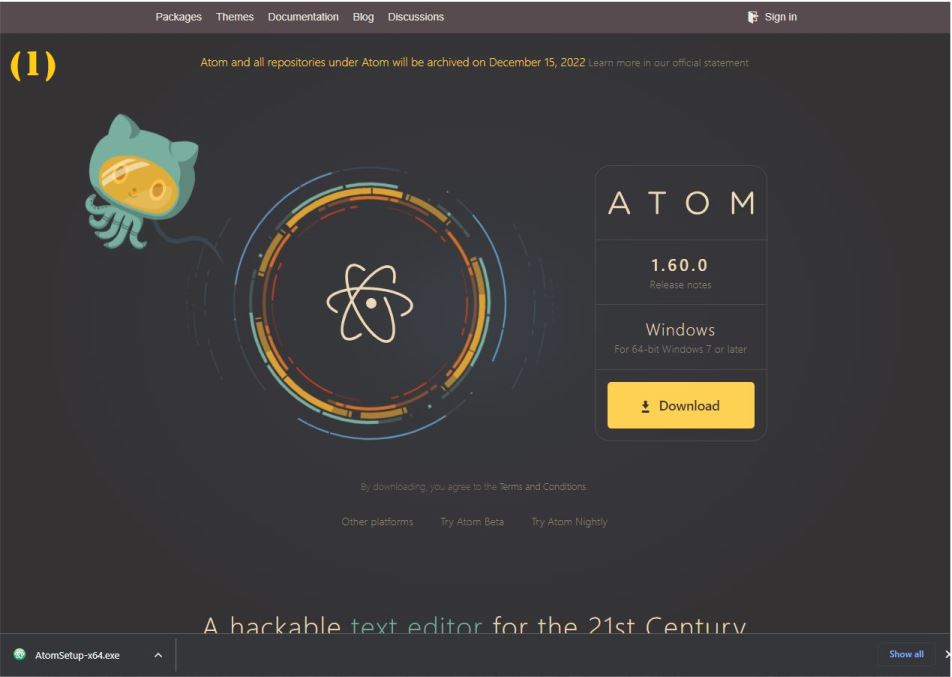
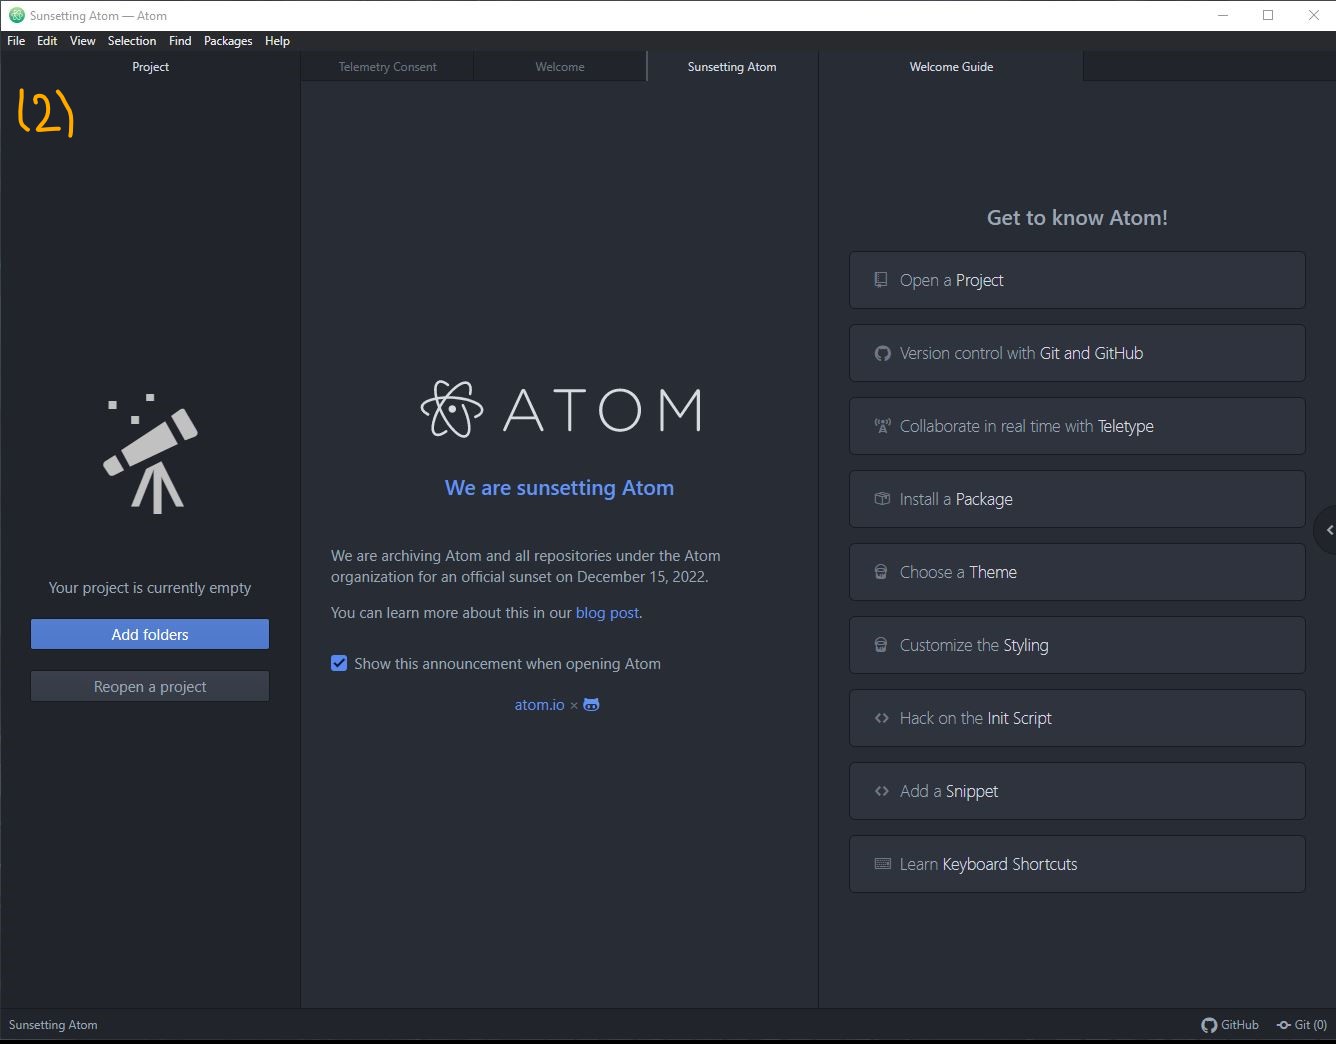
1. Visit [Atom](https://atom.io/)2. Click on download
3. Click on the downloaded file to start the launching of the software
4. choose clone with HTTPS to copy the link
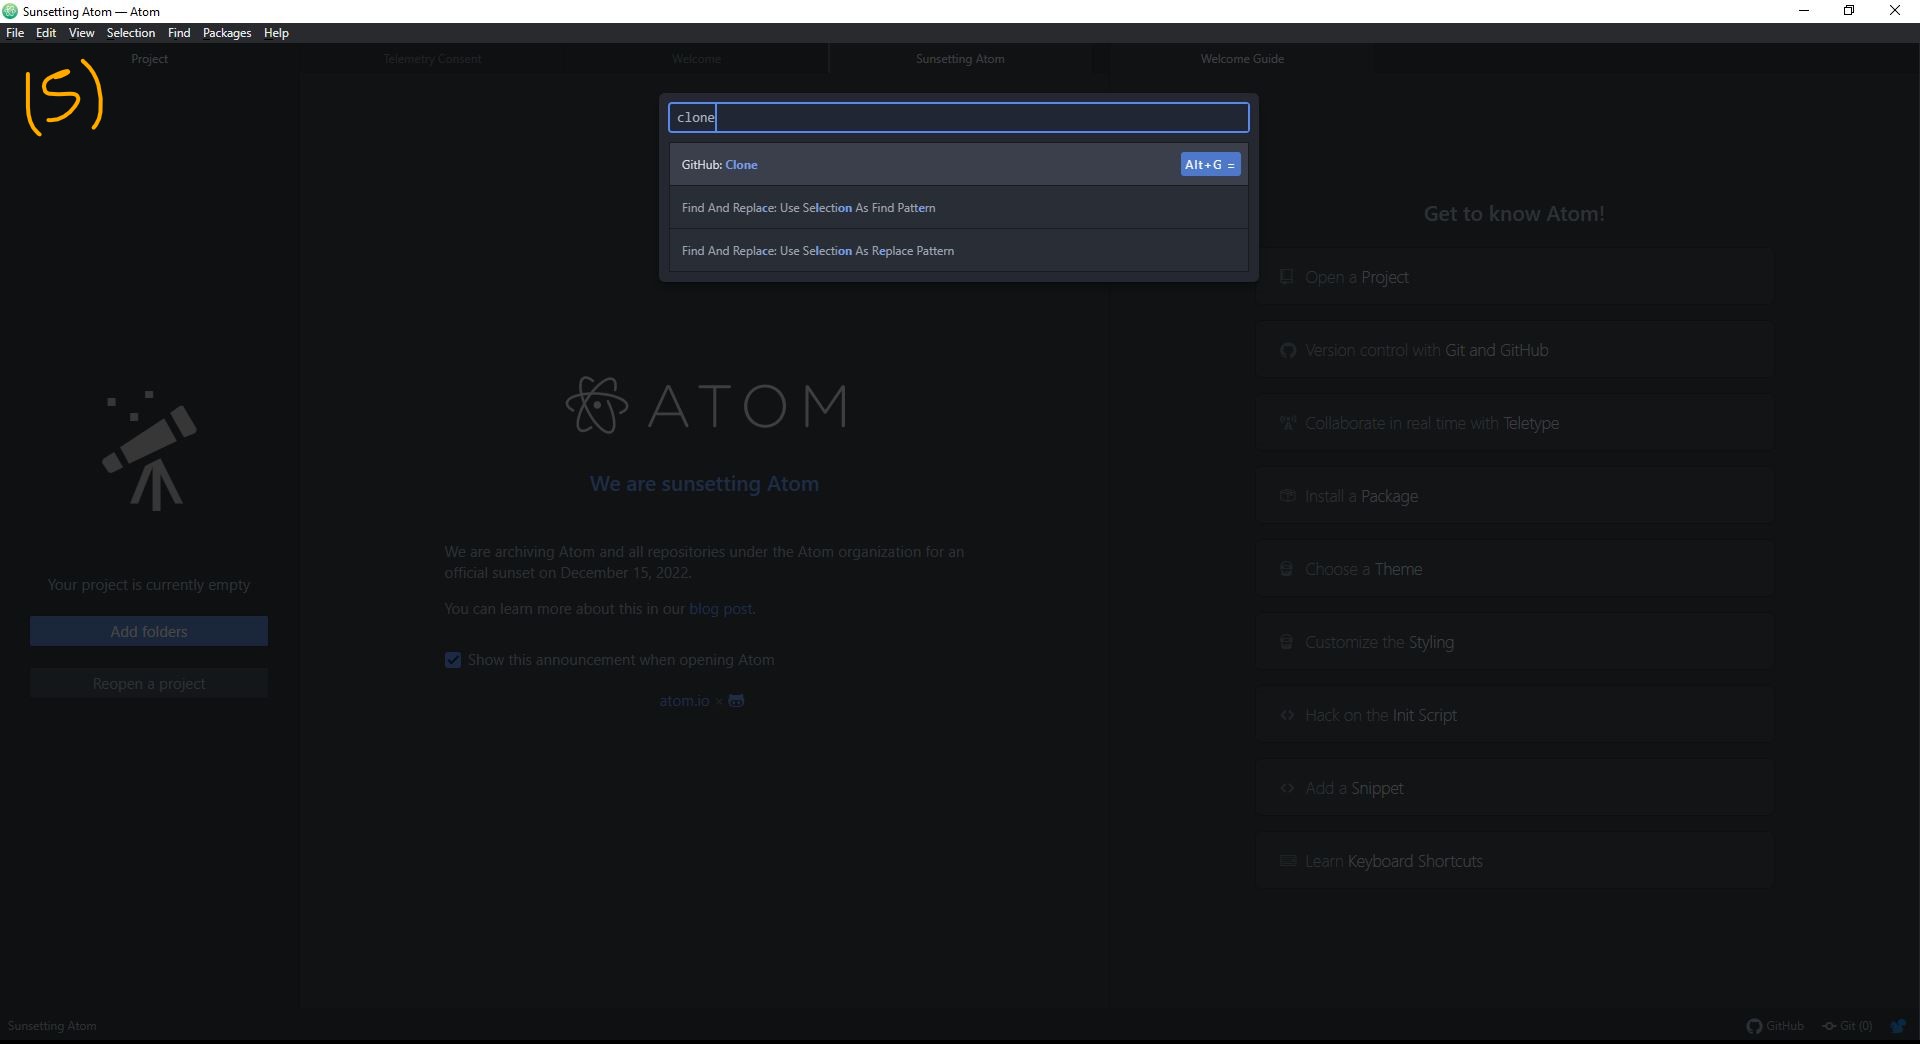
5. Open the software, the first page should look like the figure below.
Step.7. Clone in Atom
Steps to Download Atom:
1. Visit your git lab personal page2. click on your account
3. click on clone shown on the top right of the page
4. choose clone with HTTPS to copy the link
4. Customizing a website
To customize the website, mkdocs will be utilized as it is a well known and an easy site generator that generates wesbites for the purpose of documentation while using markdown as the langauge of documentation and customization.
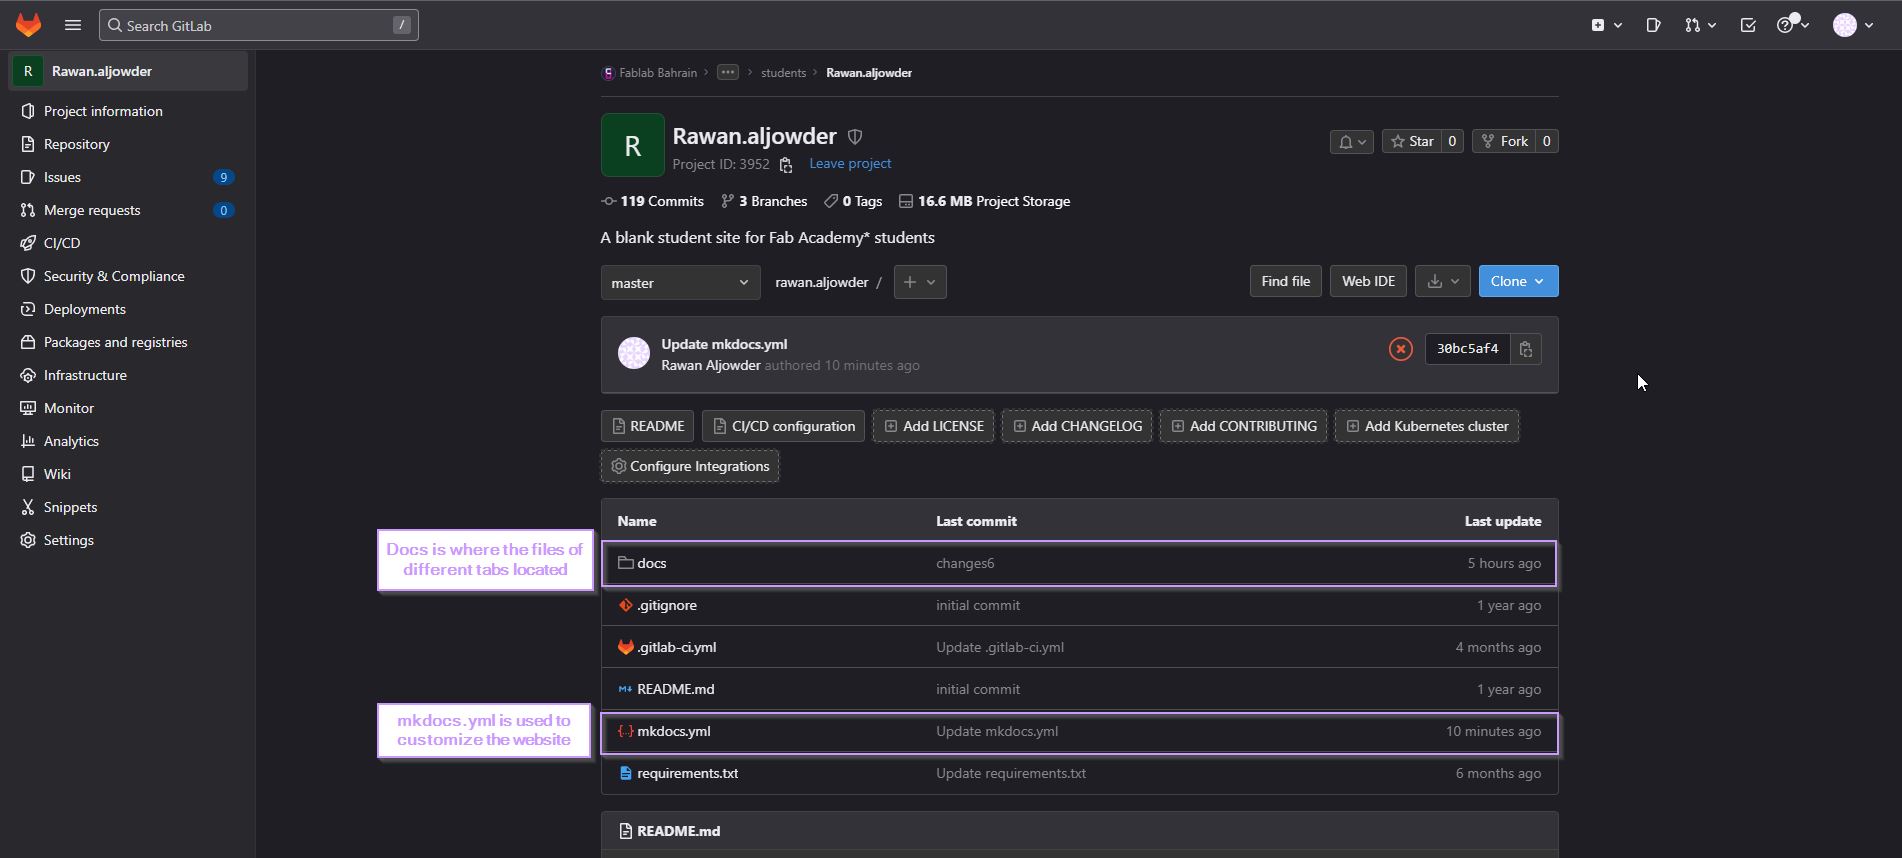
4.1 Mkdocs.yml File
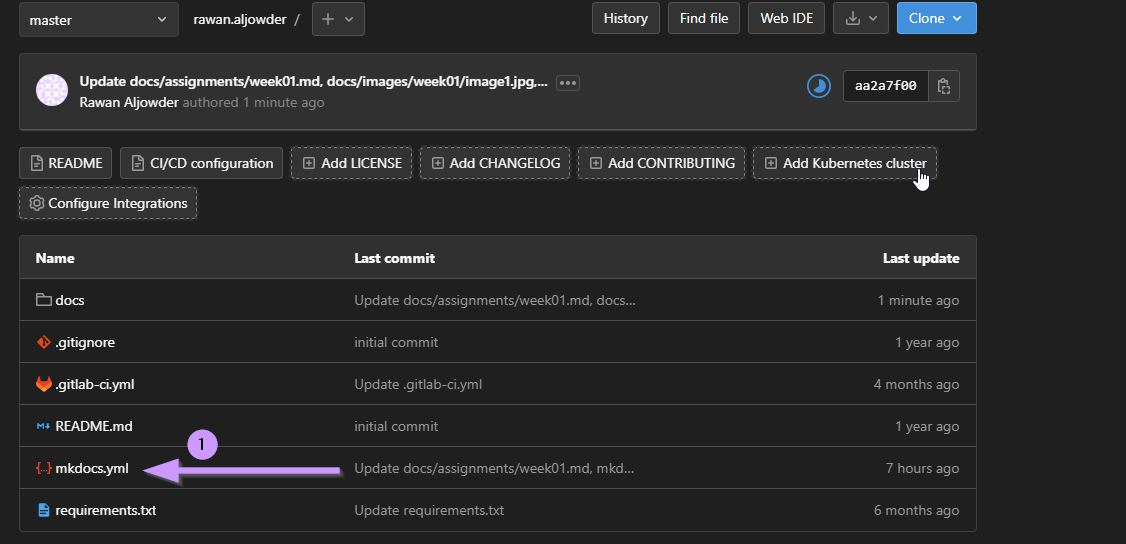
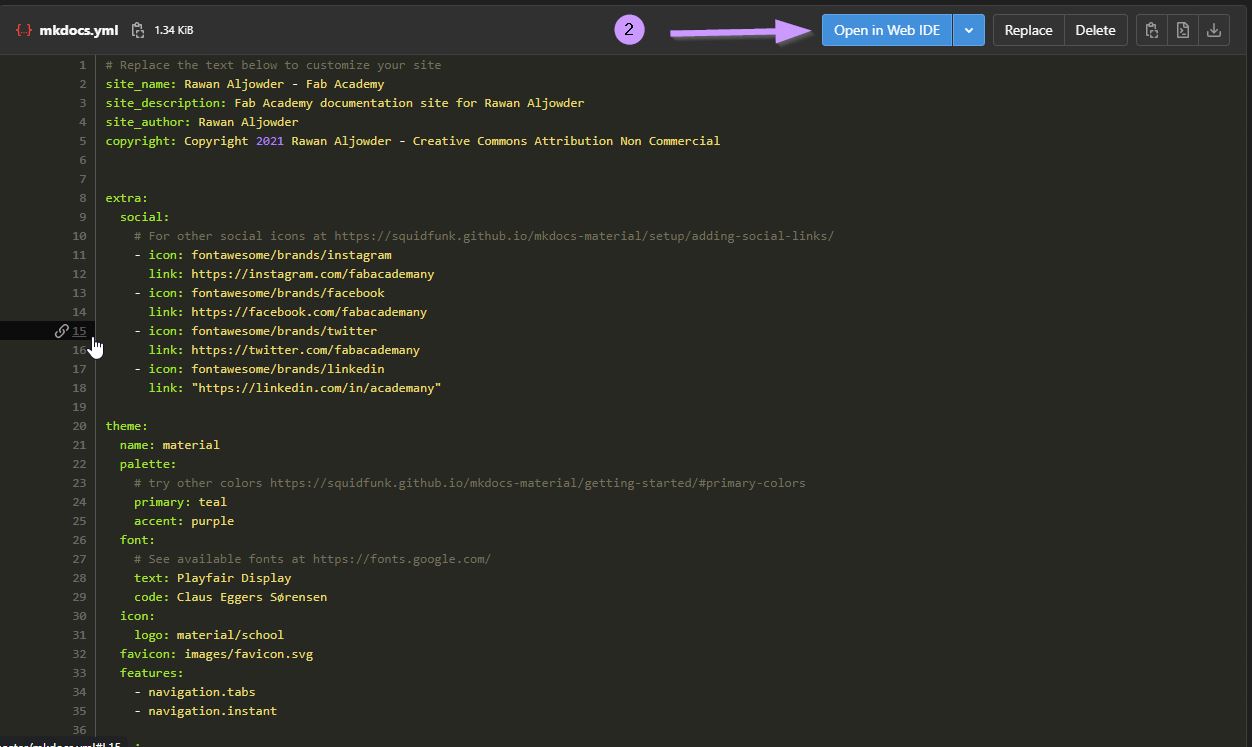
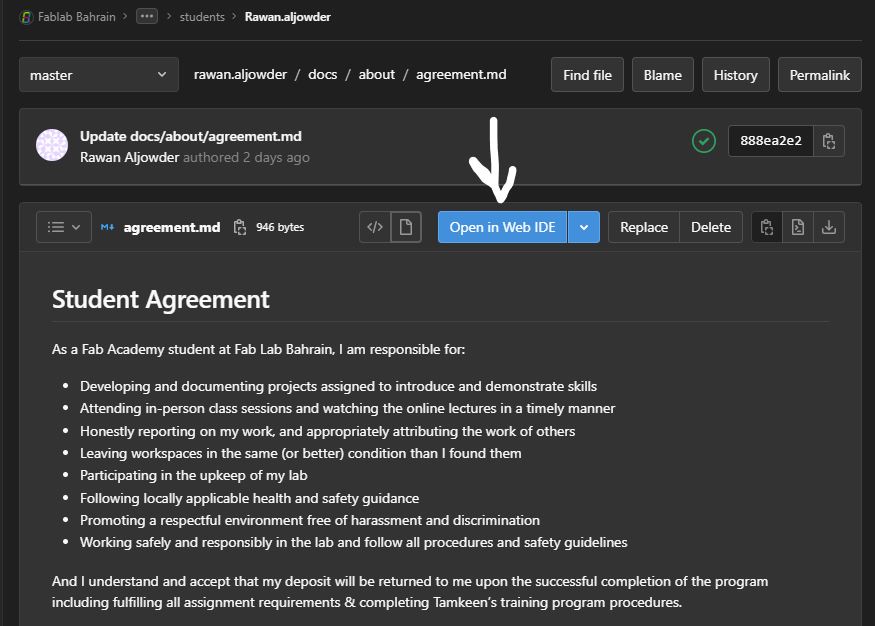
To be able to freely and easily customize the website, click on the Mkdocs.yml file found on the repository in git lab web page > Click on “Open in Web IDE” to edit.
4.1.1 Changing Theme Color
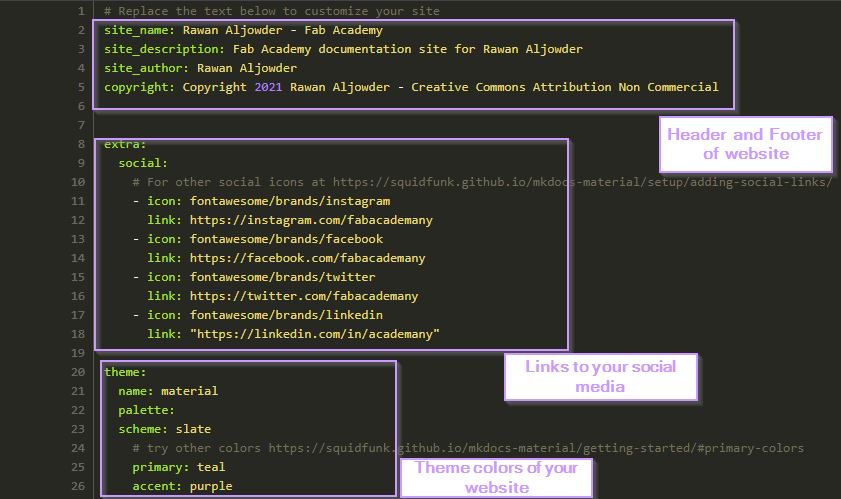
This section of the Markdown code/command helps customize the colors of the website

Scheme
Scheme is used to customize the background color of the website pages/tabs.
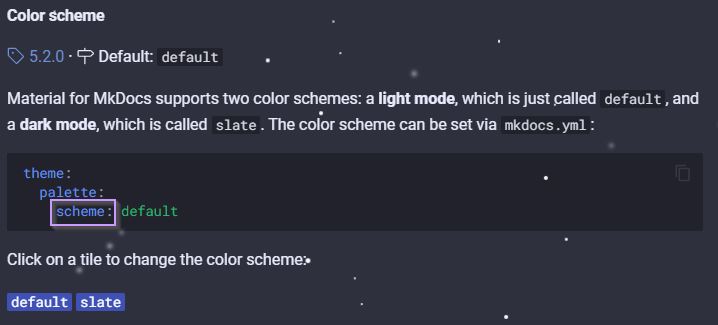
Note
incase you dont have “Scheme:” in your mkdocs.yml file, you can simply add it under “palette:” as shown in the figure above
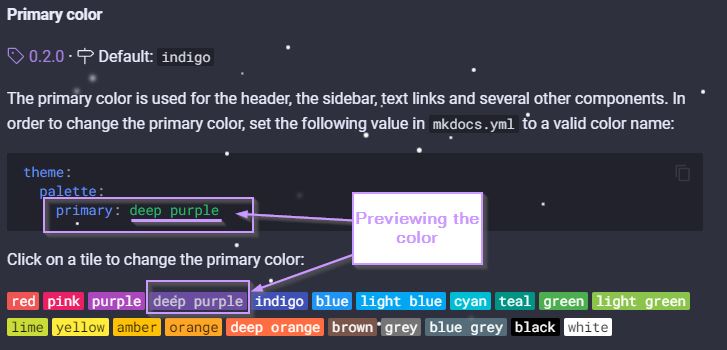
Primary Color
Primary is used to customize the color of the top header of the website page or also known as the navigation bar. you can find a variety of colors to try in materials for mkdocs before settling on a specific color.
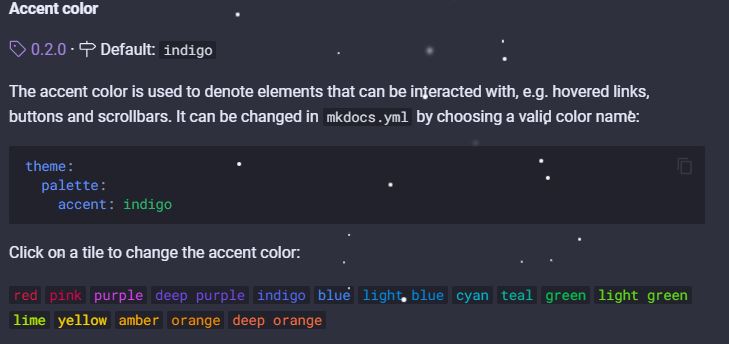
Accent Color
Accent is used to customize the color of the interactable elements such as a hovered links, scrollbars and buttons. there are a number of colors that you can choose from and try in materials for mkdocs.
4.1.2 Changing Text font
This section of the Markdown code/command helps customize the text font of the website

To change the text font > search for Google Fonts website or by searching the browser for other websites. in my case i have chosen Playfair Display font. write the name of the font next to “Text:” command.

The text font of the website would look like the image below.

5 Editing website
5.1 Remote Branch (Git lab)
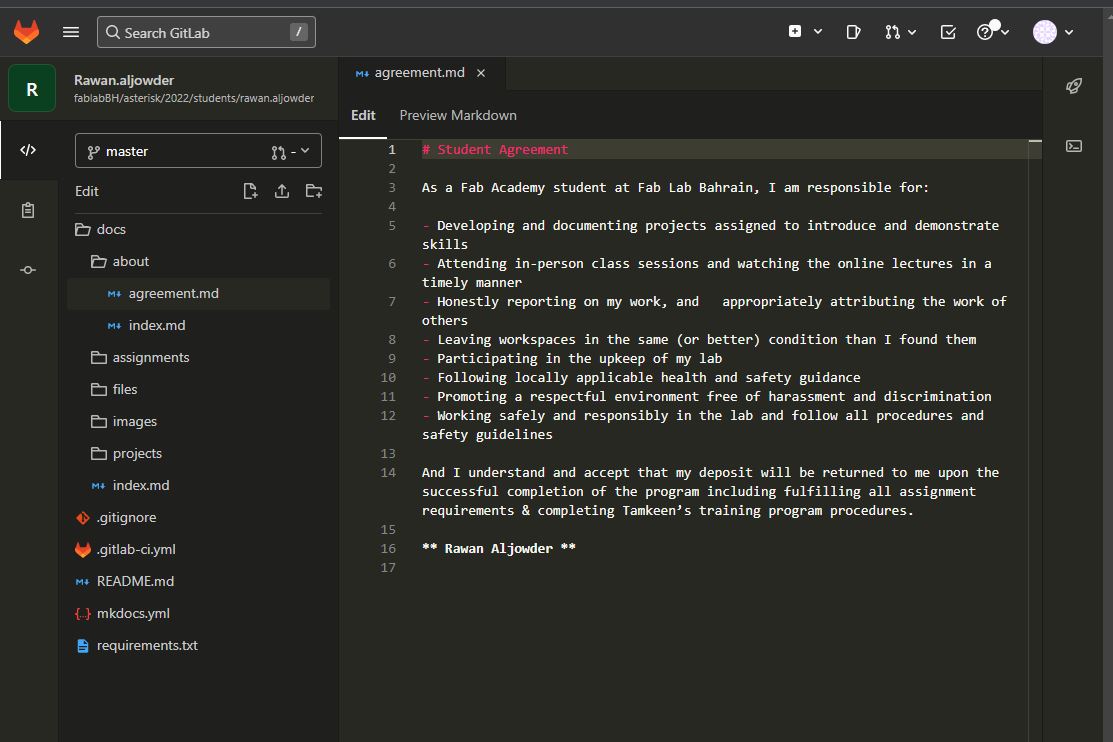
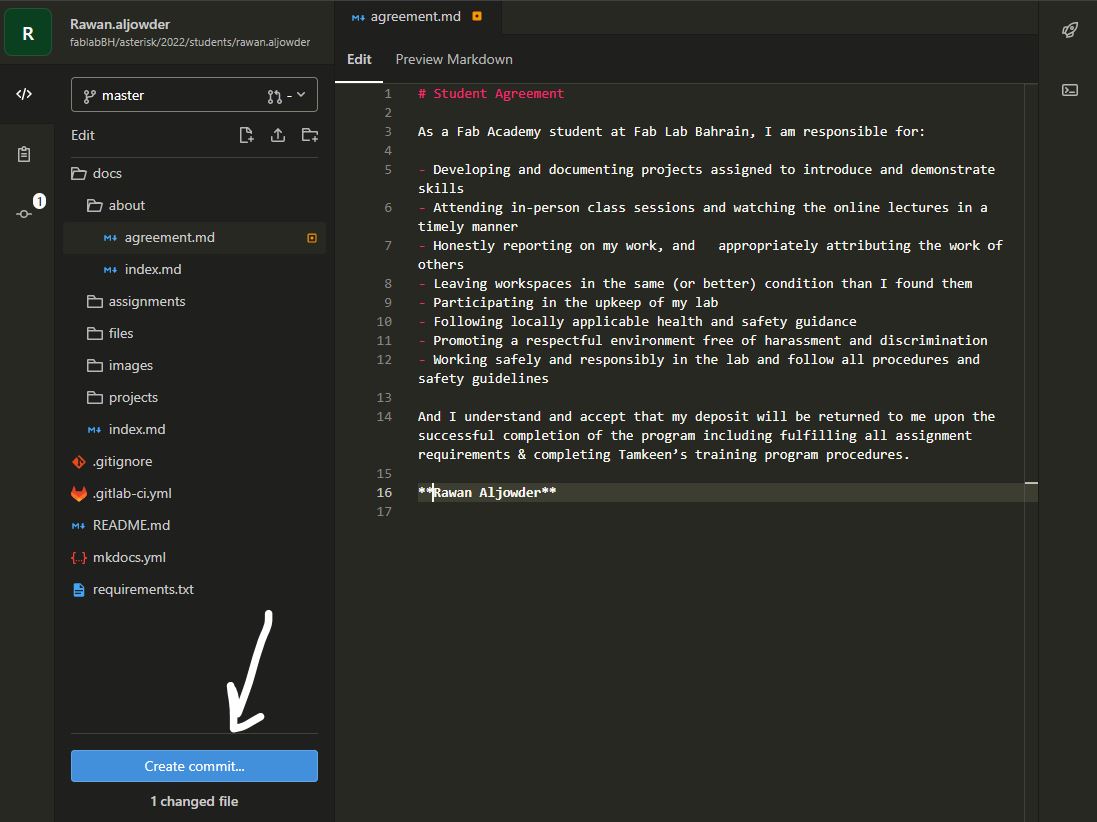
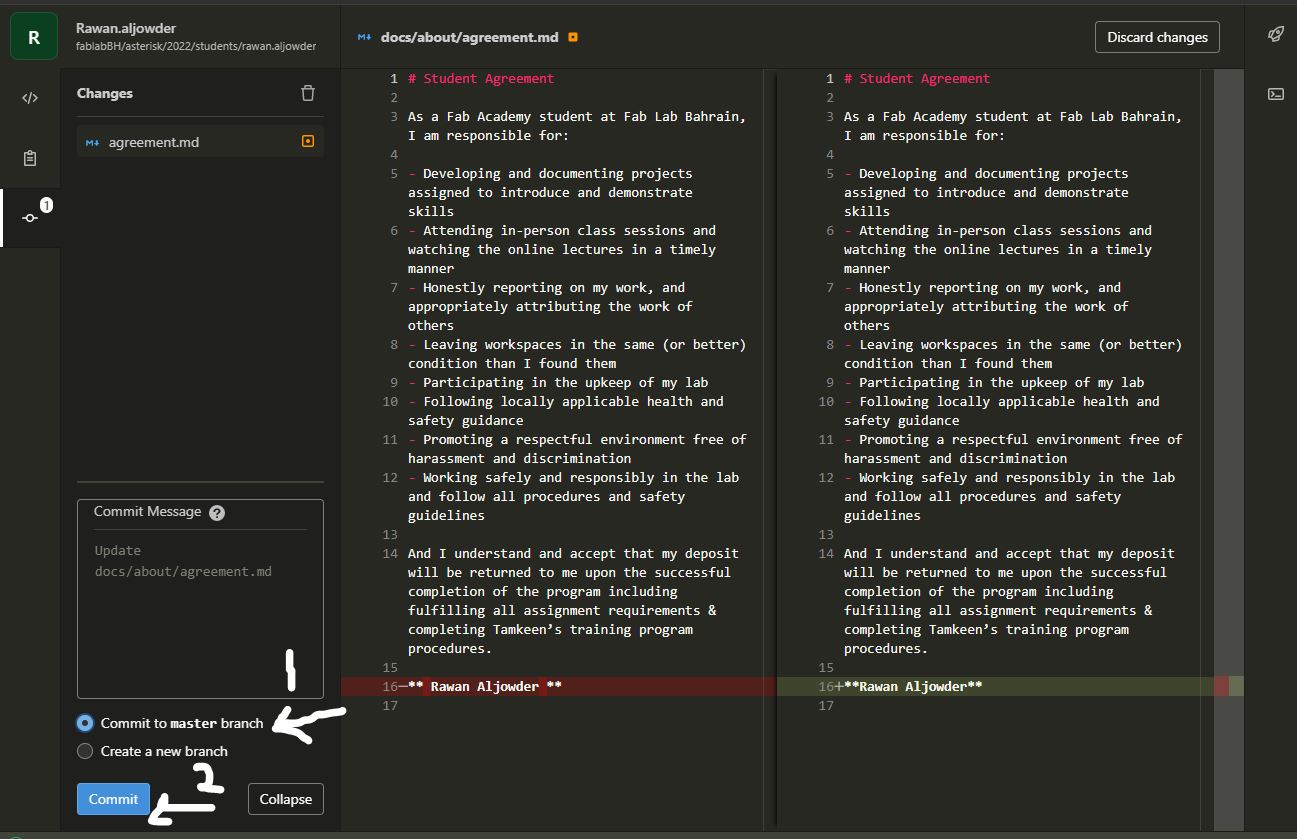
To start with editing the website directly online > sign in > go to documents > click on any file (in my case i clicked on about and then agreement file) > click on open in web IDE to start editing > once done with the editing click on commit to save the changes > choose commit to master branch and then click on commit to finalize the website.
The text Highlighted in Red is the old text to be changed, meanwhile the green is the new text that will be finalized once you click on commit
Note
you can preview how the website would look like by clicking on Preview Markdown tab shown at the top next to edit tab

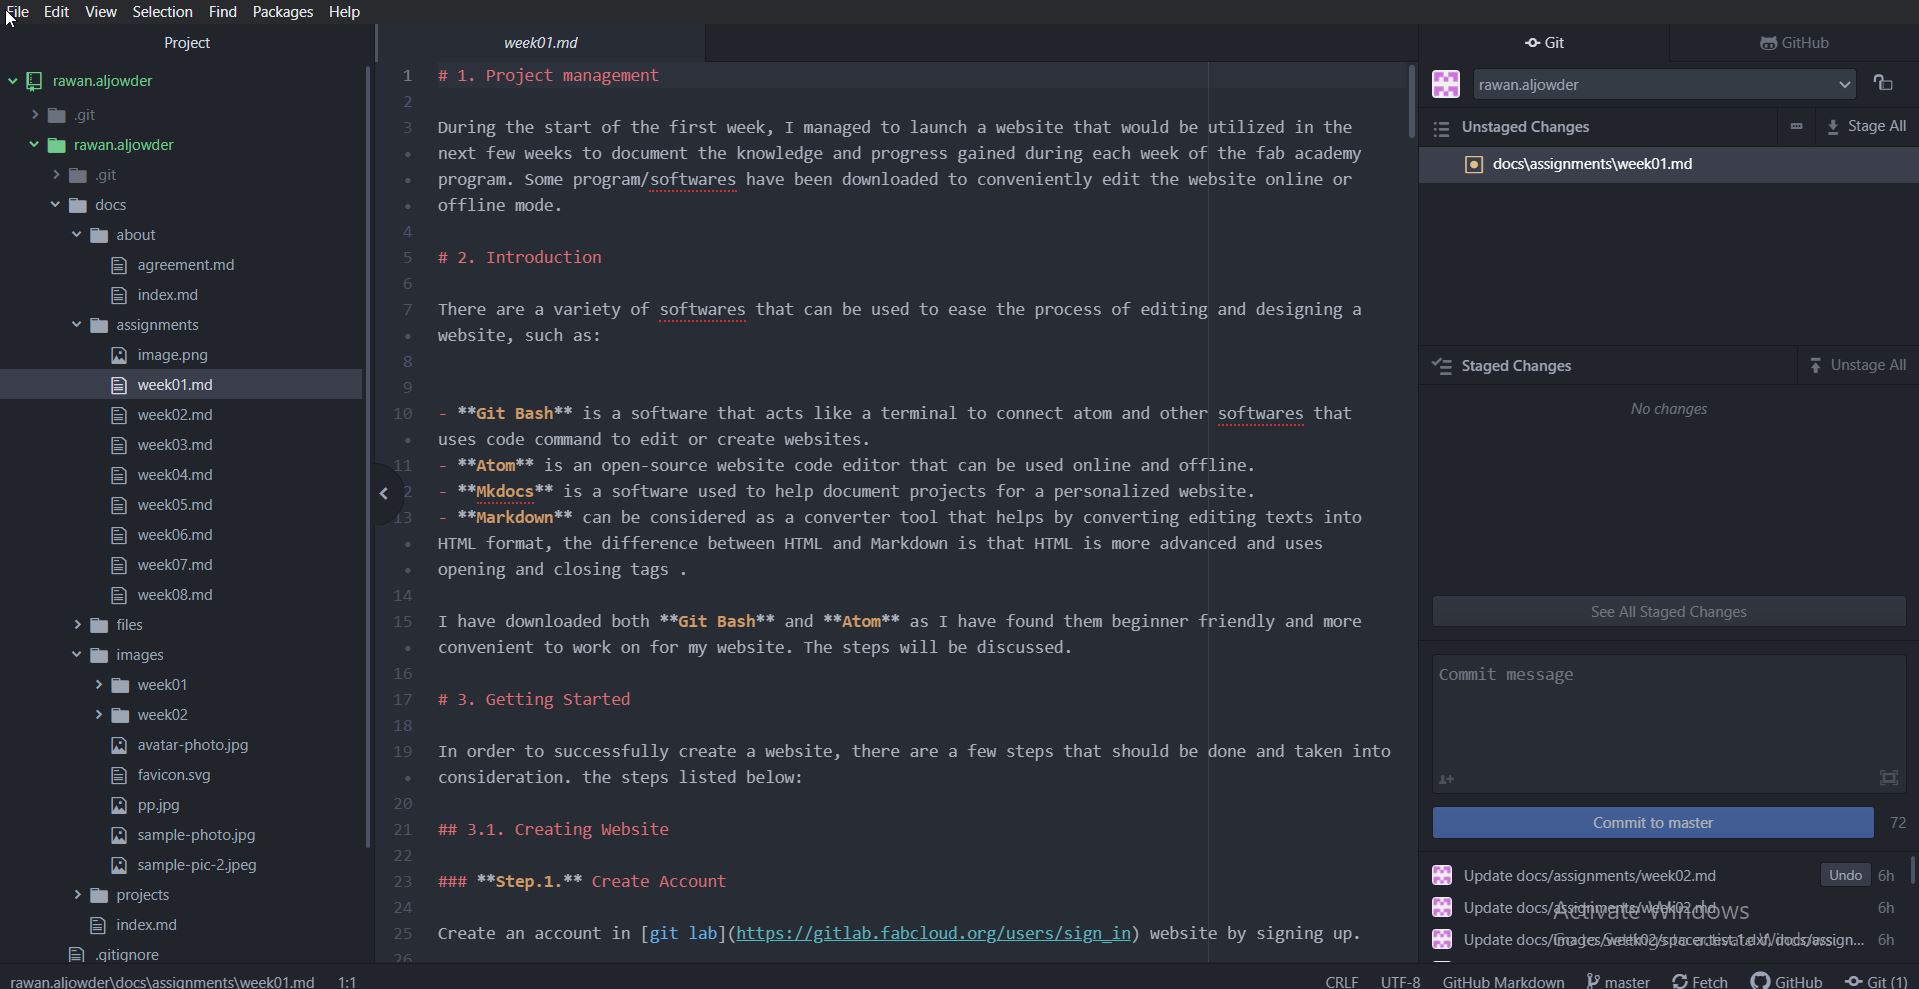
5.2 Local Branch (Atom)
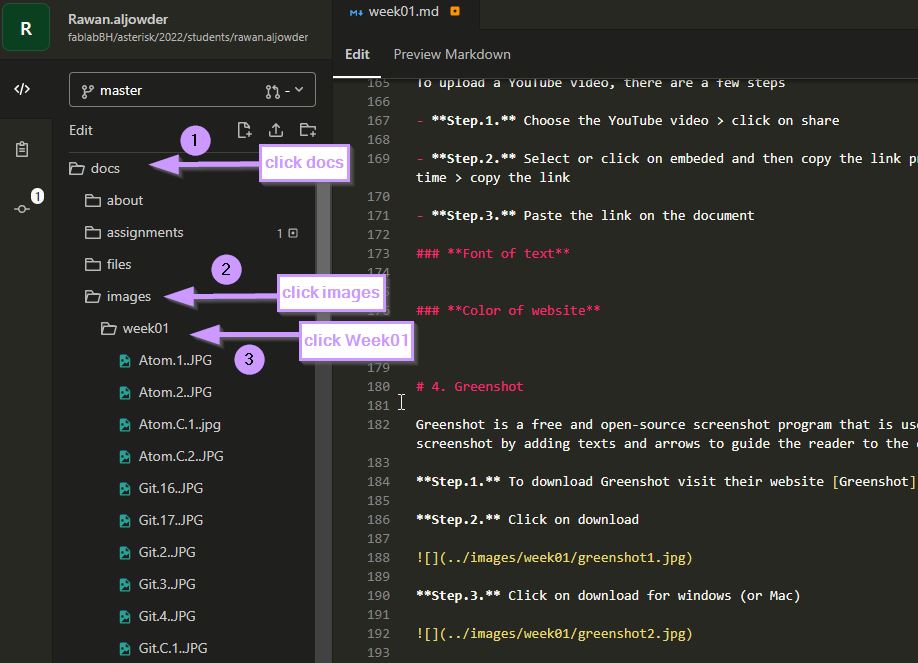
To edit the website locally using Atom (Offline or online), the steps and method is similar to that of the router branch, as well as, the codes or commands are the same. Open Atom software > Click on Docs > assignments > week01 > this is how it should look like
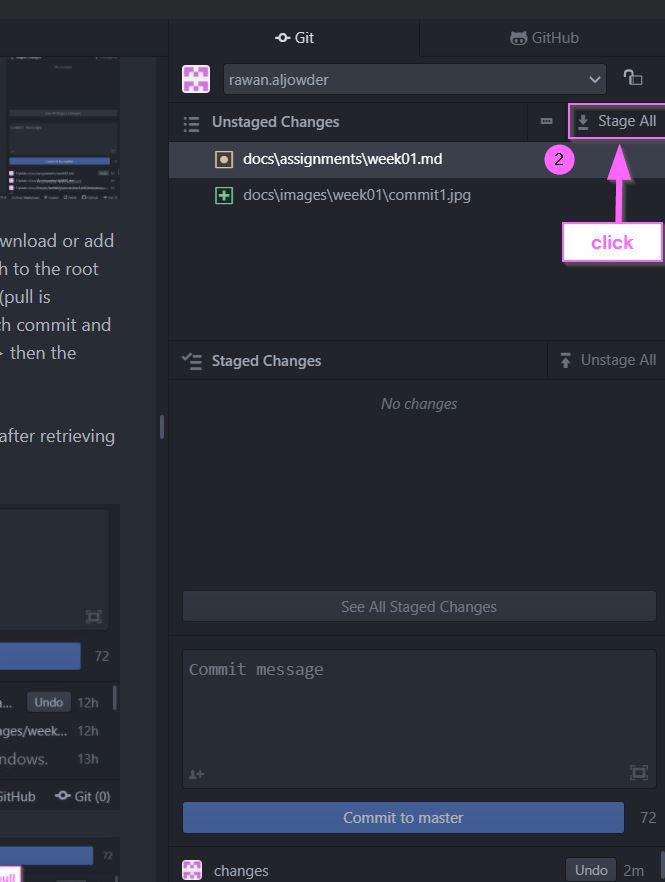
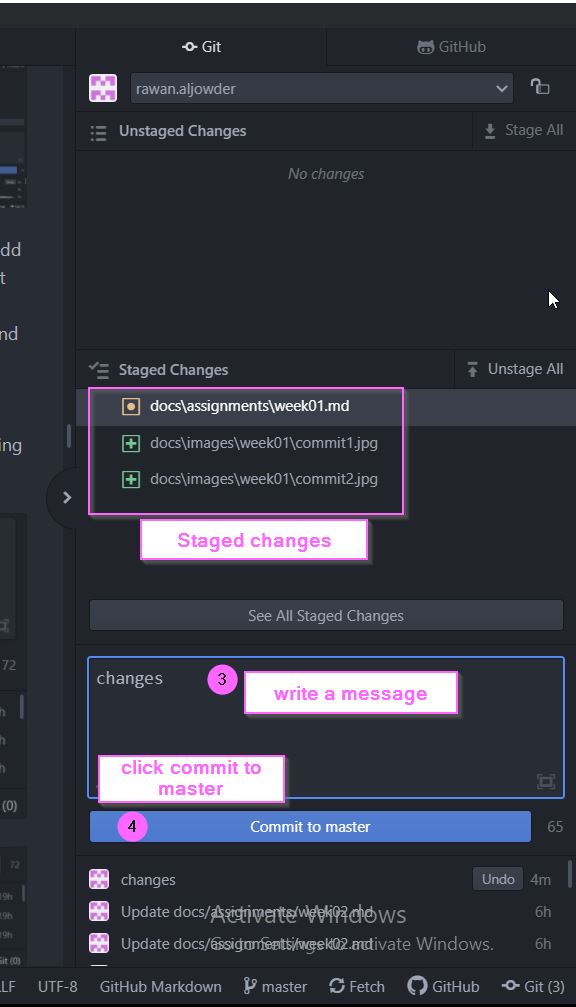
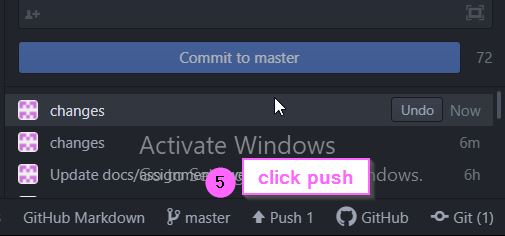
then edit as you would normally do on the remote branch using similar commands and codes to upload images edit color and etc. then you will save > click fetch > click stage all > write a message in the commit message area > click commit to master > click Push (push updates the remote branch with the changes made in a local branch)
Note
To preview the website > right click on the week > click markdown preview


Additional
when you have been using remote branch to edit and then decided to make some changes using the local branch, there are few steps that should be followed to ensure the changes made in the remote branch remains or appears in the local branch. the steps are discussed below ;
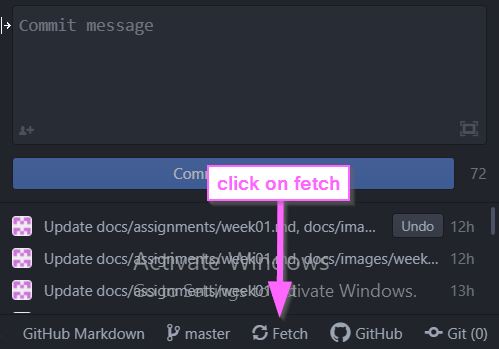
Step.1. After opening atom, click on the week you have made changes to
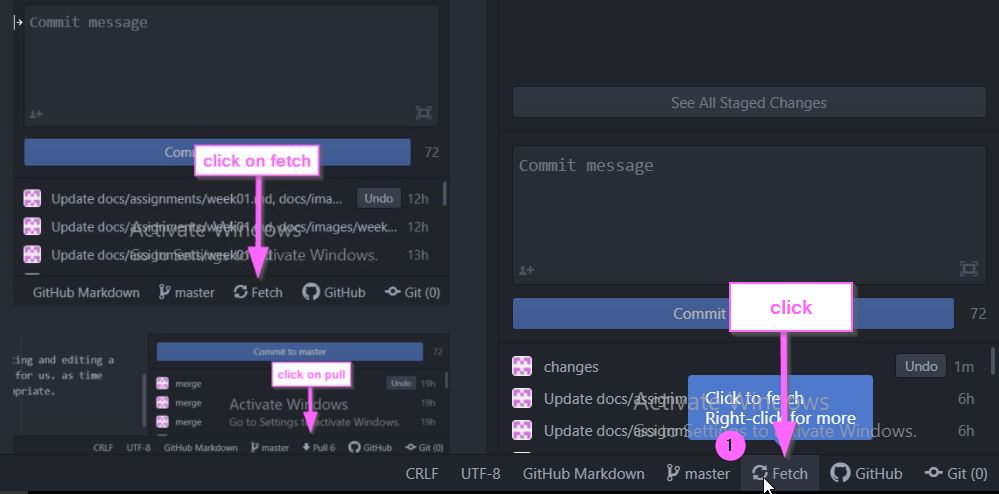
Step.2. Click on fetch (fetch basically helps download or add the content edited on the remote branch to the root of the local branch) that can be found in the bottom right of the page as shown below, then it will take few seconds fetching.
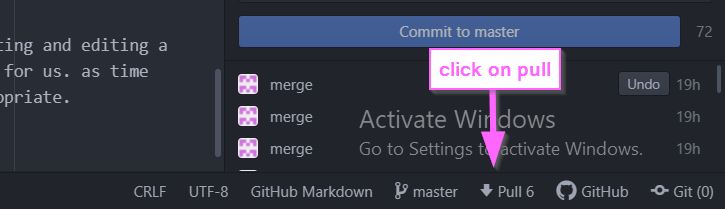
Step.3. A pull (pull is downloading or retrieving remote branch commit and update them into the local branch file) icon will be shown in the same place of fetch (bottom right of the page), a pull sign will be shown along with a number, this number indicates the number of changes that have been made on the remote branch. click on the pull
Step.4. after its done pulling, the changes will appear on the page
NOTE: incase the changes don’t appear after retrieving try to close the tab and reopening it
5.3 Useful Commands
There are a number of ways to edit the website by making it appropriate and understandable for the viewers. here are few editing commands that i have used to enhance my website visually.
5.3.1 Title
To add a title to a paragraph or a page, use # command at the beginning of the title as shown below.

5.3.2 Secondary Title
To add a secondary title which is smaller in size than the actual title, use ## command at the beginning of the secondary title as shown below.

5.3.3 Bullet Points
To add bullet points, use - command before each bullet sentence

5.3.4 Bold text
To emphasize on specific words by using a bold text, use while writing the text you want in bold between the asterisk symbols

5.3.5 Linking a Website
To link a website to a specific word, use [] command to write the word you want to link between the square brackets, while using () command to paste the link between the parentheses symbol

5.3.6 Insert Image
To insert an image, use 

To upload a picture to the “images” file follow the steps below
Step.1. Click on the docs file > images folder > Week01 folder (keep each weeks images in different week folders to avoid confusion and mistakes)
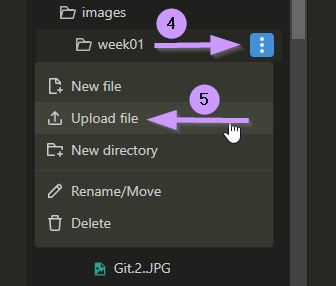
Step.2. click on the 3 dotted symbol next to week01 > click on upload file
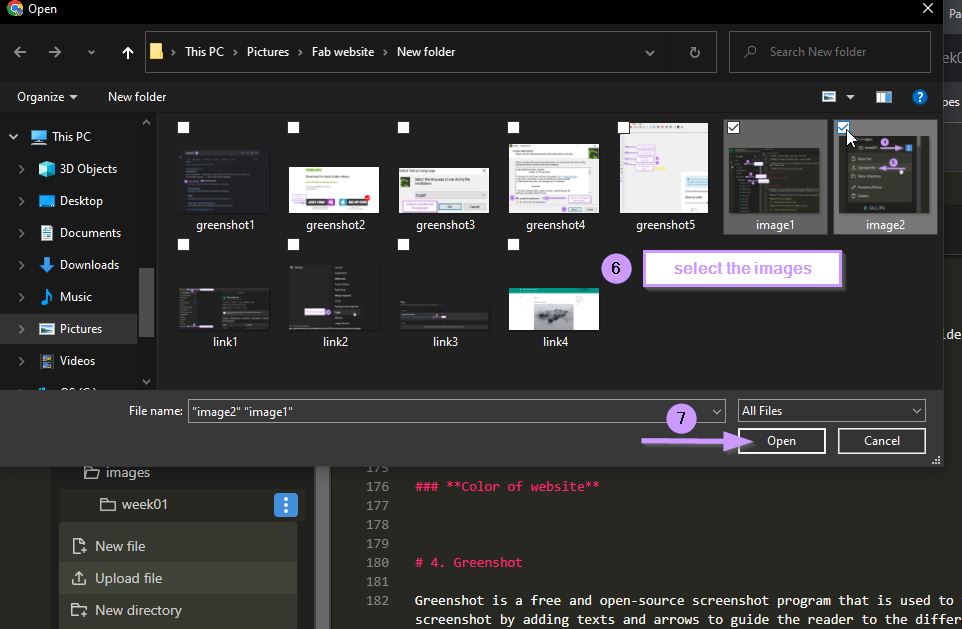
Step.3. Select the images > click open to upload
5.3.7 Upload a YouTube Video
To upload a YouTube video, there are a few steps
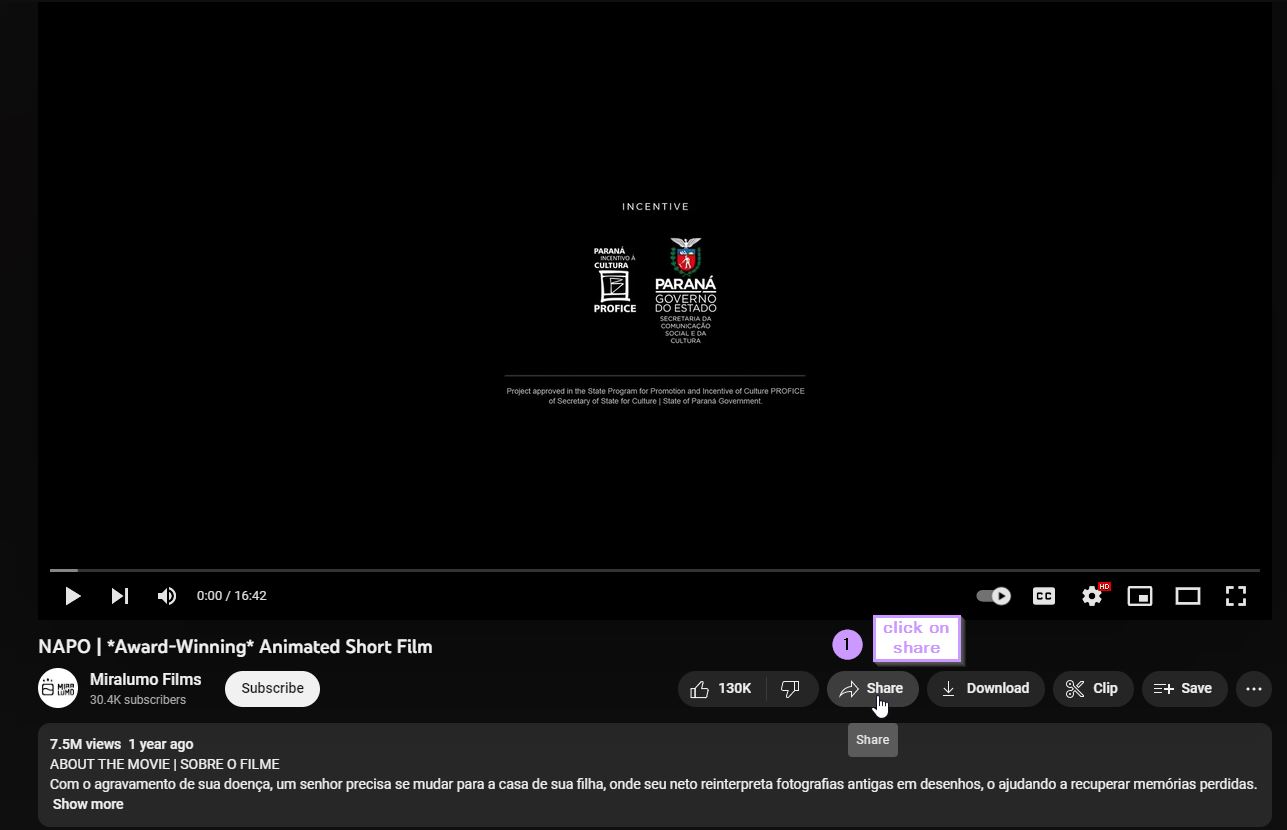
- Step.1. Choose the YouTube video > click on share
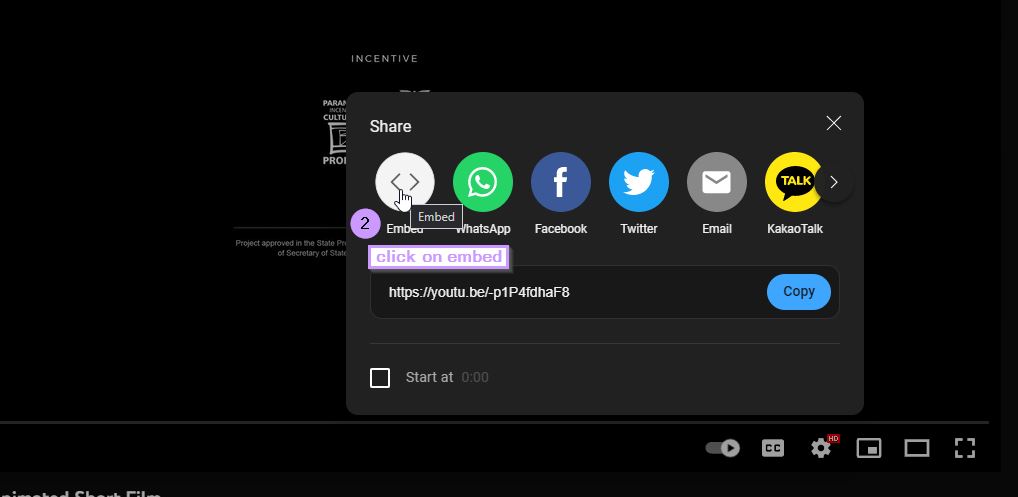
- Step.2. Select or click on embed and then copy the link provided. (Note: incase you wanted the video to start at a certain time) you can click start on > then choose the time > copy the link
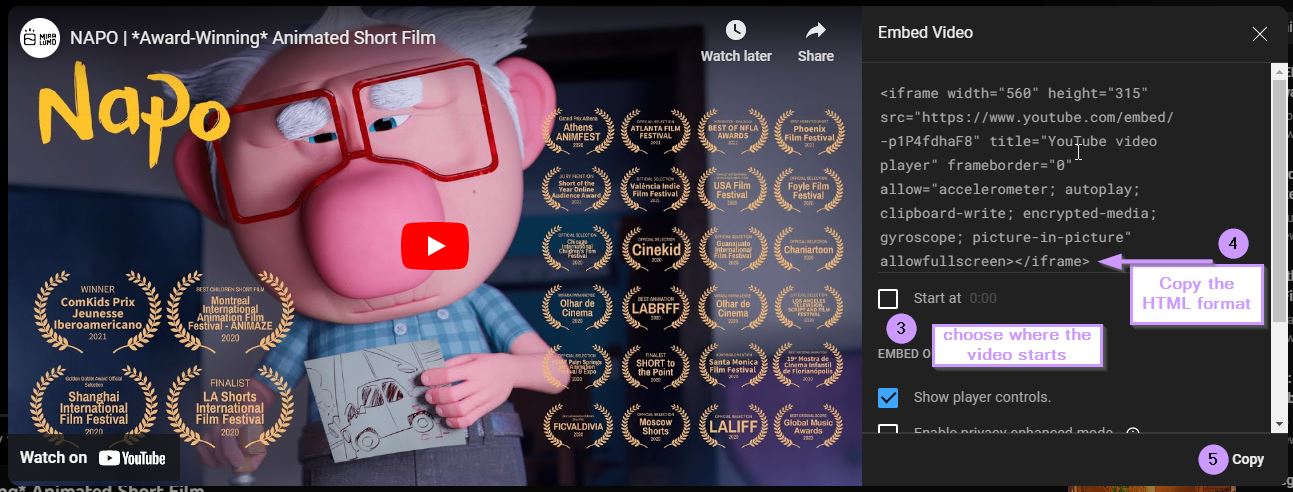
- Step.3. Paste the link on the document, then the YouTube video should appear below. (The video is a award-wining short film that i quite enjoyed)
6. Greenshot
Greenshot is a free and open-source screenshot program that is used to take easy screenshots of your screen. a beneficial feature of Greenshot is that you can easily edit the screenshot by adding texts and arrows to guide the reader to the different steps.
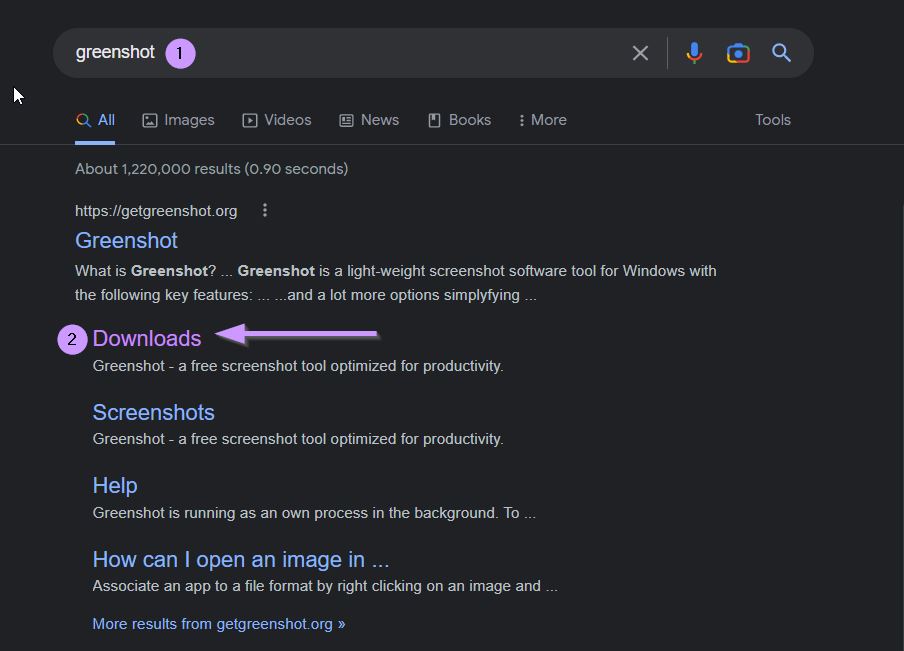
Step.1. To download Greenshot visit their website Greenshot or by searching Greenshot on your browser
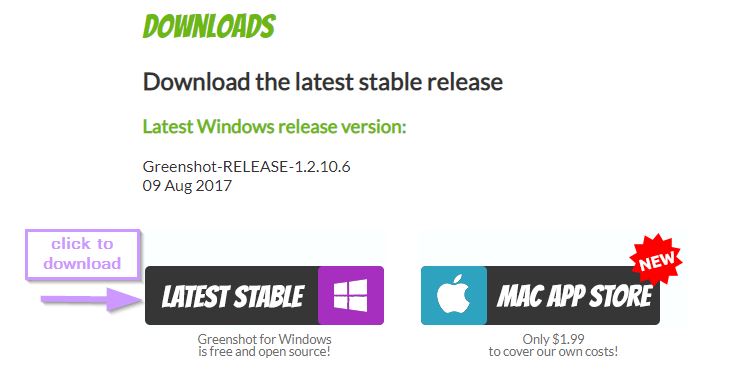
Step.2. Click on download
Step.3. Click on download for windows (or Mac)
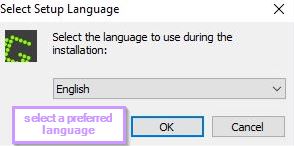
Step.4. Click on the downloaded file
Step.5. Select the preferred language to install
Step.6. Select on ” i accept the agreement”, proceed with the installation. in order to use the Greenshot to take a screenshot of your screen. Press on prt scrn key on your keyboard

Some Great features of Greenshot
- Arrows
- Text Box
- Counter (Steps)
- Highlight
- Draw
- Crop

7. Website Page Link
To view your live website page, you can find the link by following the steps below:
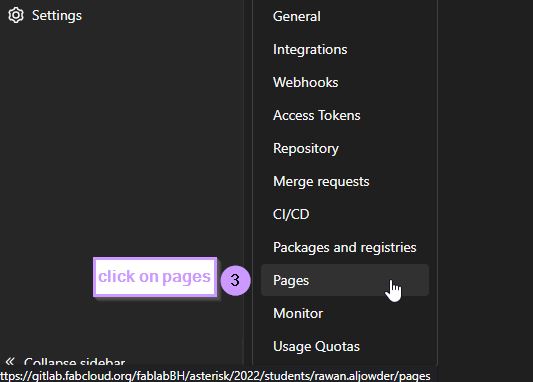
Step.1. Click on the main menu found on the top left of the page > click on setting

Step.2. After clicking on setting a list of different tabs will be shown > click on pages
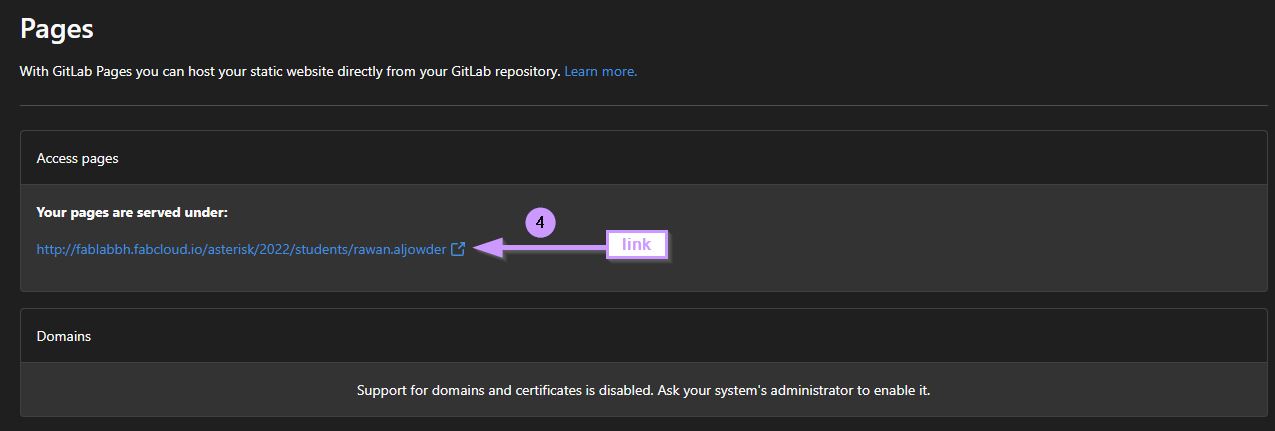
Step.3. Copy the link and paste it on the browser
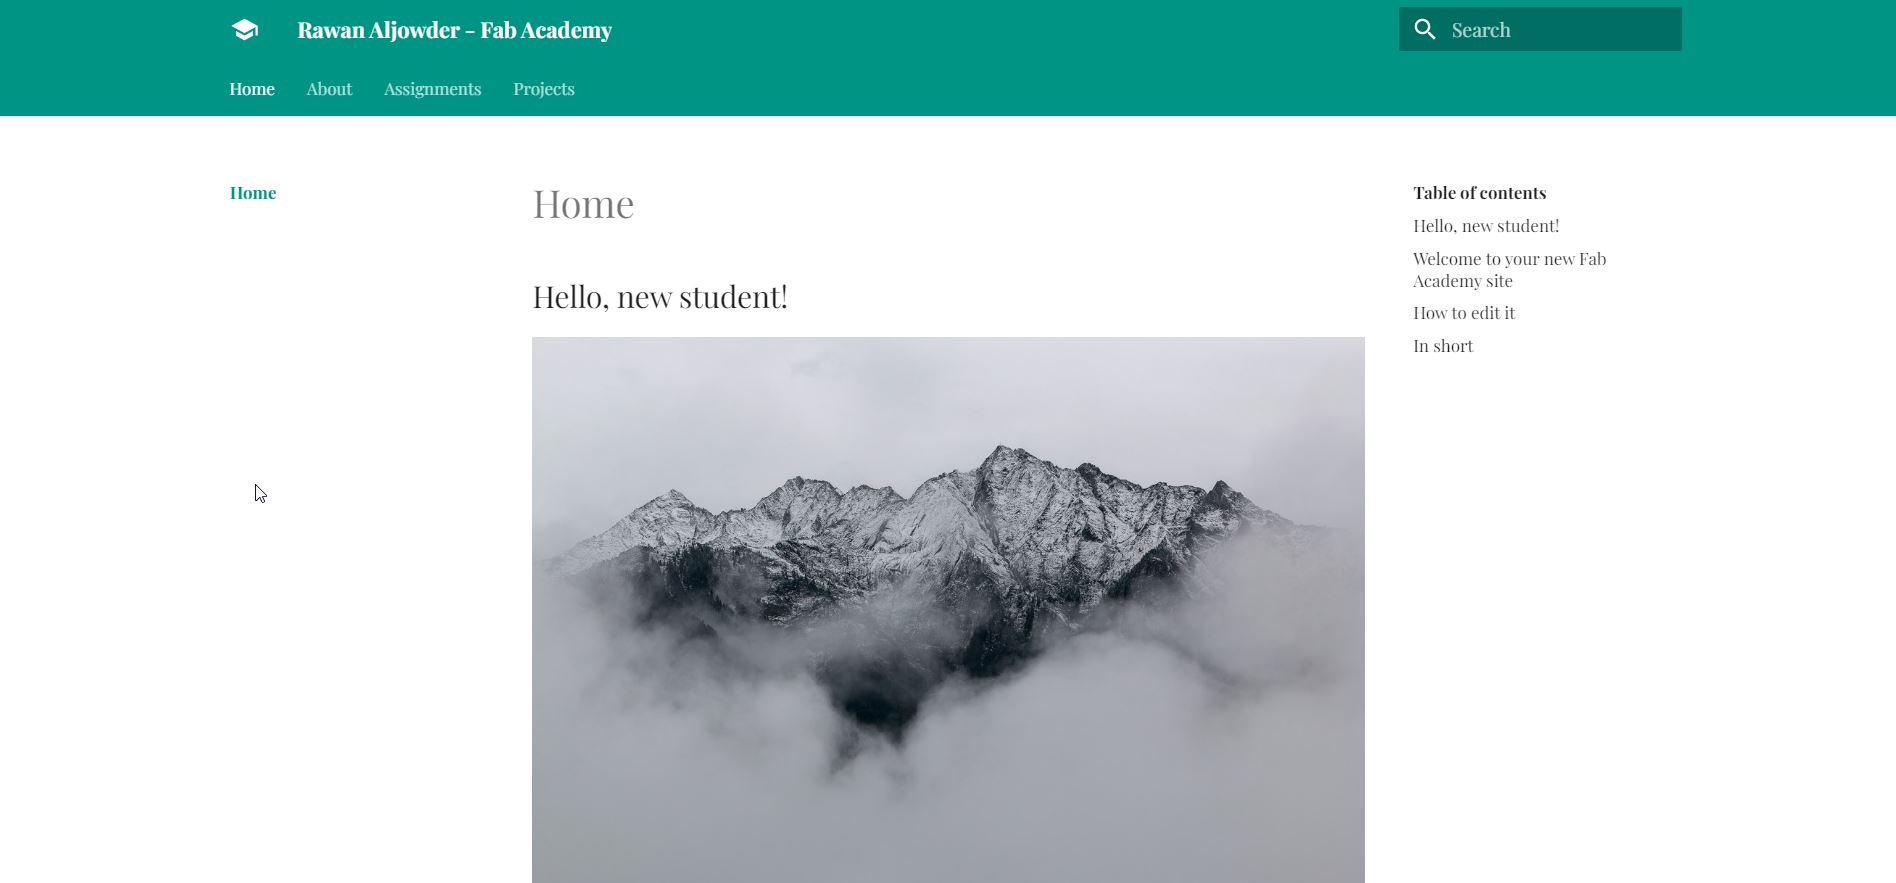
Step.4. After pasting the link on the browser, your website should look like the image below.
8. Conclusion
During this first week i have managed to learn different things regarding creating and editing a website, as time passes i became quicker at documenting and editing my website wherever is appropriate as i keep on learning new commands that can help enhance my website. i was able to customize my home page from color to font and write a brief introduction of the website, as well as, edit the about page where i have signed the agreement and wrote a little bit about myself in about me tab. Moreover, i have documented everything i have done during the first week in the assignments tab for week 1 (project management).