3. Computer controlled cutting
During this week the objectives were to be introduced to Computer Controlled Cutting machines, in order to be able to cut and assemble the designs made in fusion360 or any other software. the aim for the laser cutting machine was to learn more about how it operates, safety measures, different materials that can be used to cut using the machine, as well as, parametric press-fit kit. while, the same goes for the vinyl machine, the aim was to learn how to operate it and cut different kid of designs and materials using the appropriate setting for each.
1. Introduction
1.1 Parametric Design
Parametric design is a feature that can be found in fusion 360 and other CAD softwares as well. the purpose of parametric design is to ease the process of changing the parameters of a design as a whole instead of changing each individual parameter at a time which can be time consuming. The way it works is that you set a parameter with a specific name (E.g. Wall), while you are defining the sketch you can just write “Wall” and the parameters will change.
2. Group Assignment
During the Group assignment, we have managed to learn more about the laser cutting machine and how it operates as well as the safety precaution measures. Moreover, we have tested different power and speed settings to determine the best outcome. All these information can be found on Sarah’s website
3. Individual Assignment
3.1 Laser Cutting Machine
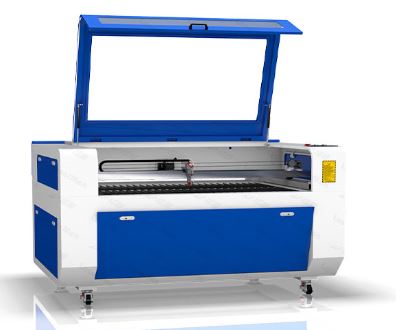
CO2 laser machine
The laser device generates a beam of light and directs it towards the outlet via mirrors at the start of the laser cutting process. The mirrors form a resonator, which increases the amount of light energy in the beam. It passes through a focusing lens, which concentrates the beam. A nozzle in the cutting head directs the beam onto the working piece. The metal is melted by the focused laser beam.

Gas is emitted during the cutting process. When mild steel is cut, pure oxygen is released to begin the burning process. When laser cutting stainless steel or aluminum, the laser beam simply melts the metal. The cutting gas is then replaced with nitrogen to expel the molten metal and keep the cuts clean. The material must absorb the emitted heat for lasers to function. A large portion of the light is reflected back by metals. As a result, despite reflection, a powerful laser is required to generate the necessary heat for cutting.
The CO2 laser can cut different materials such as; - Wood (MDF, PLYWOOD) - Acrylic - Plastic - Rubber - Fabric - Paper - Cardboard - Leather
Note
The laser can only cut a certain thickness of the listed materials, E.g. the laser cannot cut 15mm wood instead it can cut 20mm of acrylic. therefore it depends on the material itself.
Laser machine interface
the figure shown below is the interface of the laser machine control panel that will be used to adjust the bed (Z-axis) or the direction of the laser beam (X & Y-axis) as well as other settings
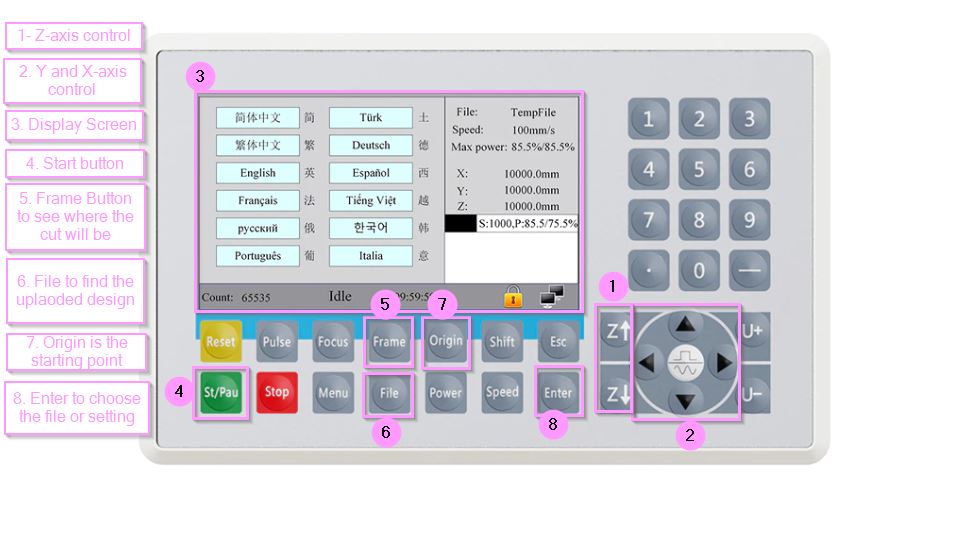
Note
The image above of the control panel buttons differ than the one in the lab (The arrangement of buttons differs), however its the same interface.
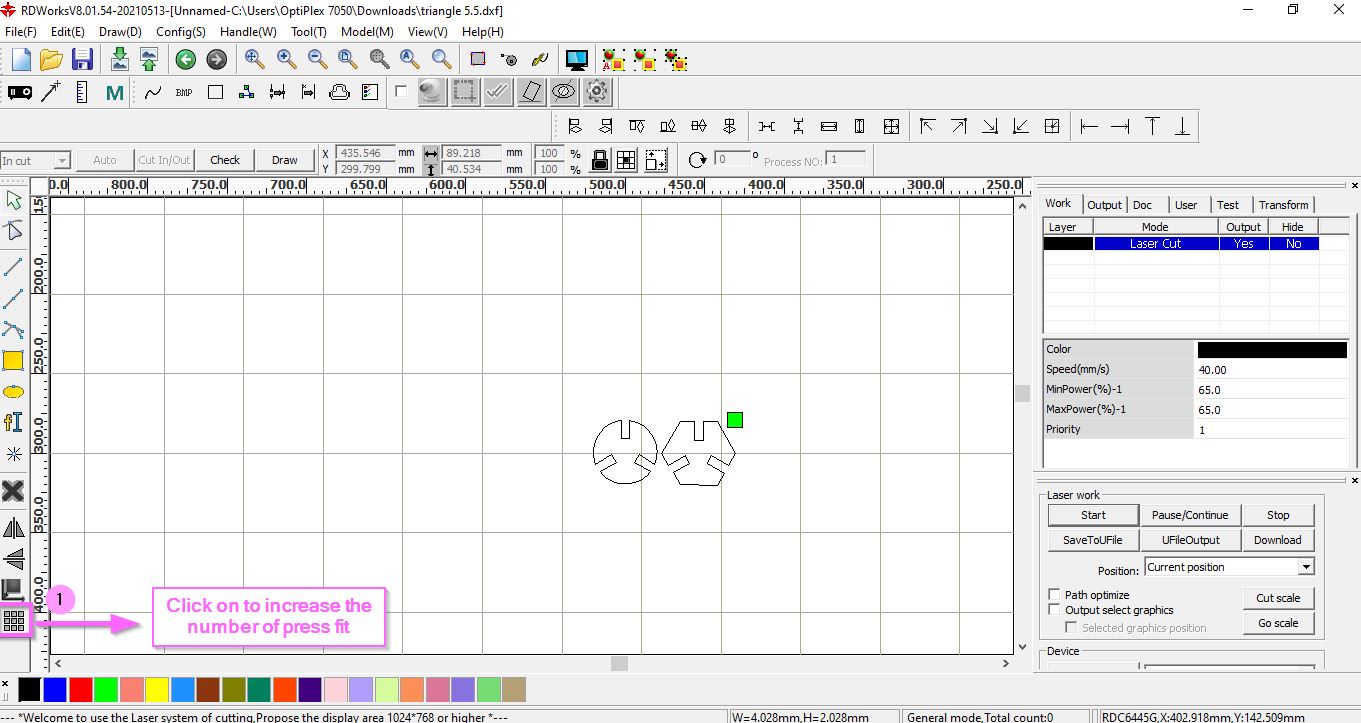
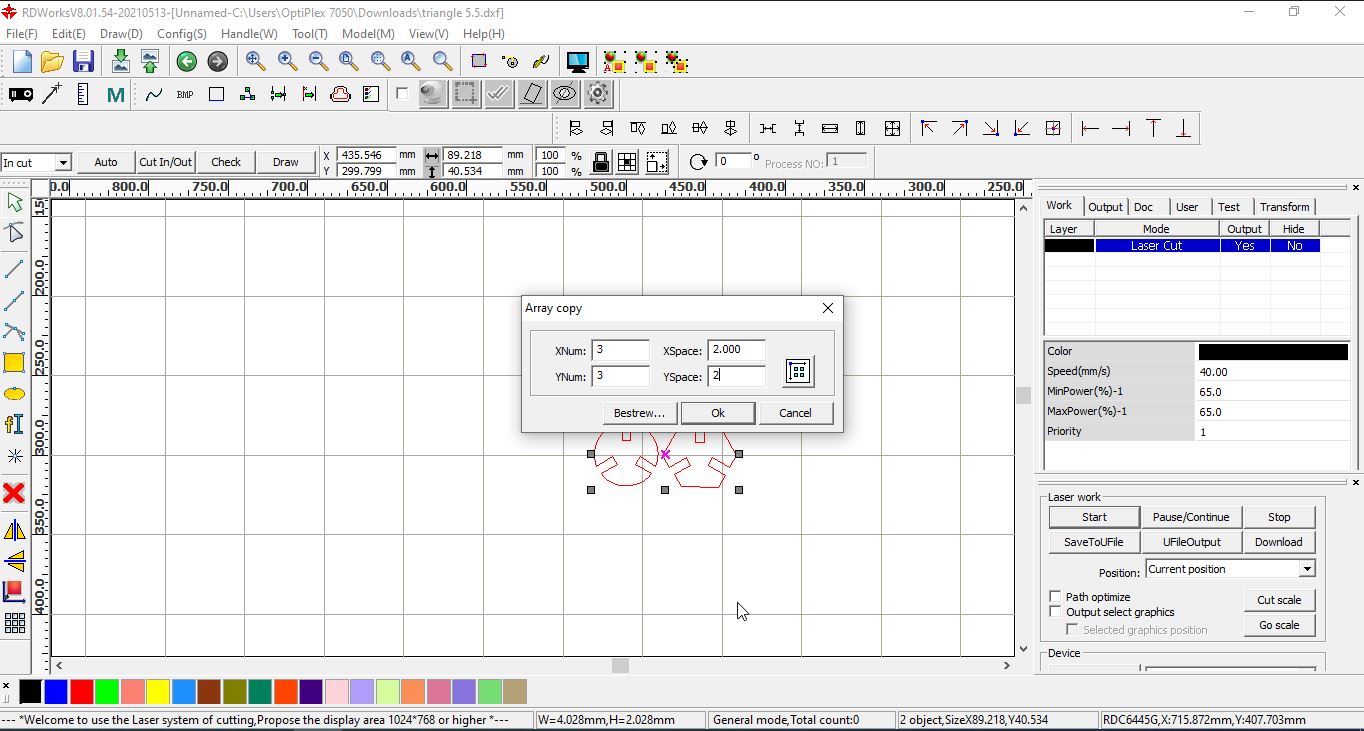
Press Fit Design
To design a parametric press fit using fusions 360 follow the steps shown below
The steps to use design press fit :
1. Open fusion 360 software2. Click on top plane > sketch > choose plane
3. Click on circle > create a circle > click on line
4. Create a vertical line on the middle of the circle > make the line into a construction line
5. Click on rectangle > create a rectangle at the mid point between the circle and rectangle
6. click on modify > change parameters > user parameter > name the parameter slit1 and slit 2
7. Select the top horizontal line > sketch dimension > write slit1 > choose the vertical line > write slit2
8. Select the rectangle > click create > circular pattern > select the mid point > click ok
9. Click on create > select polygon > repeat the same steps as above for the rectangle part
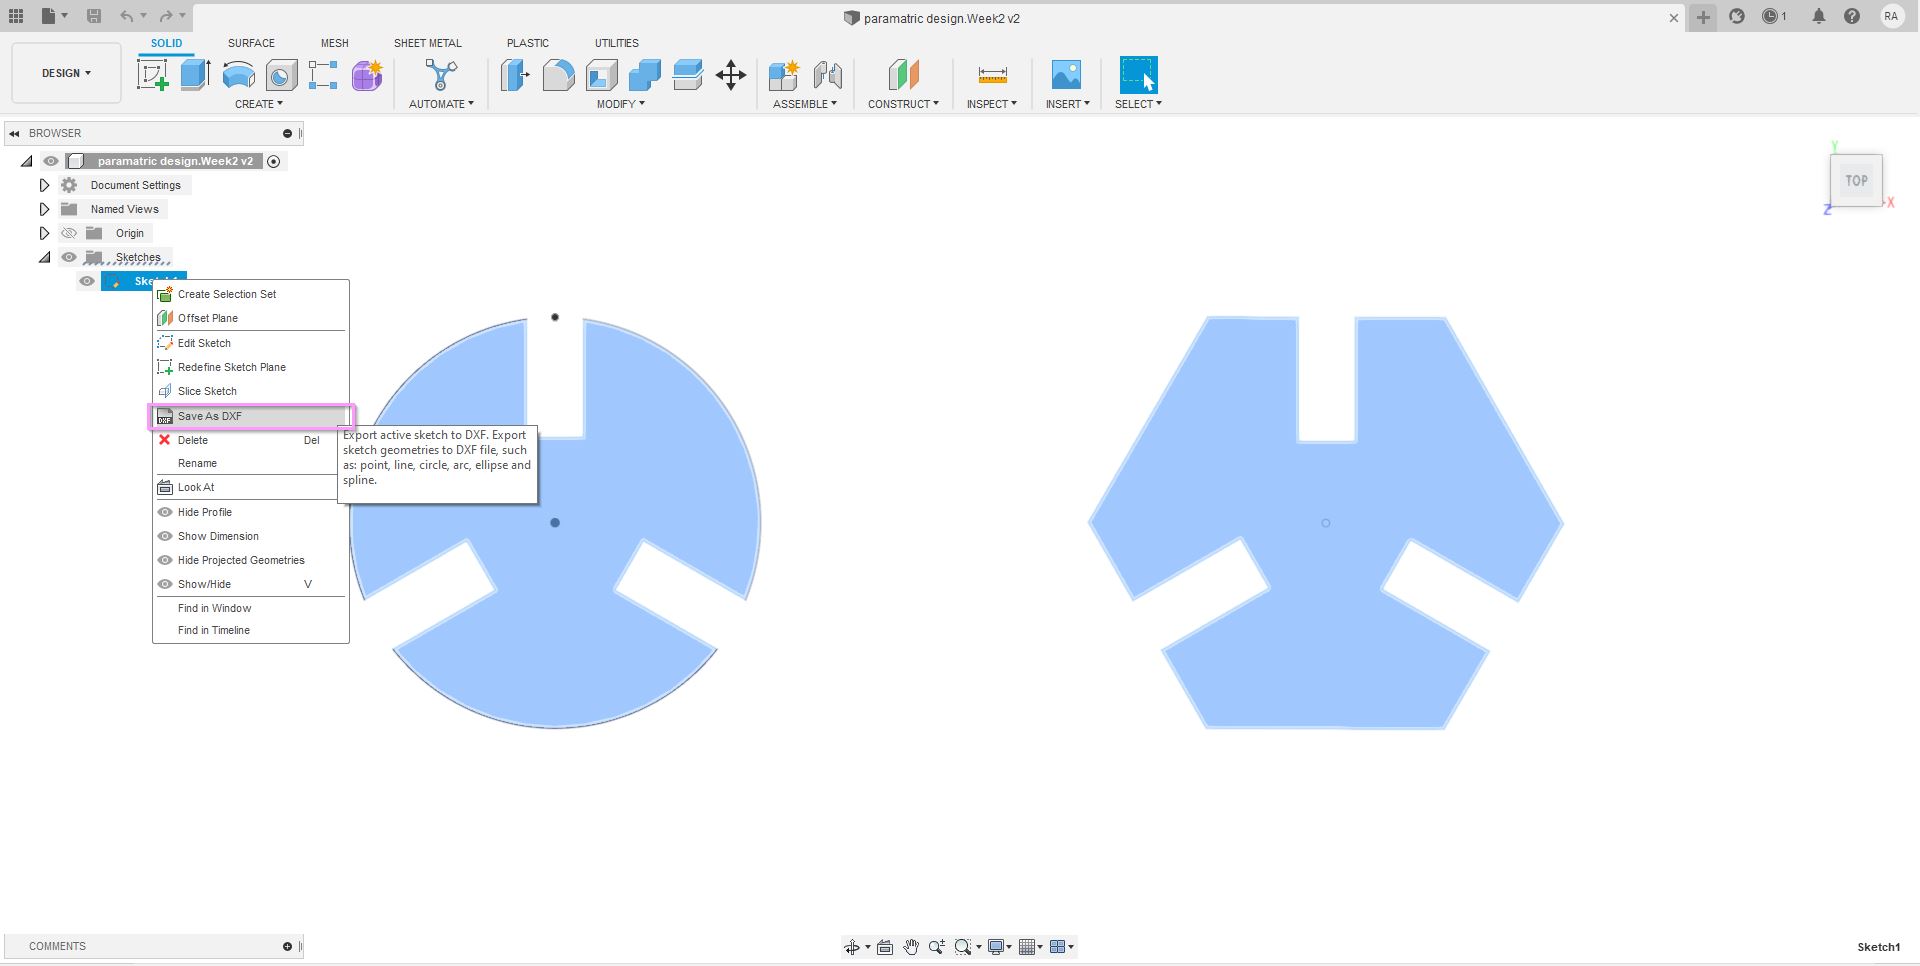
Saving DXF File
In order to be able to upload the design into RDWorks (a software that controls the laser machine) the design file MUST be in DXF format.
The steps to save DXF file:
1. Click on the sketch2. Right click on the sketch
3. Click on "Save as DXF"
4. Name the DXF file
RDWorks software
RDWorks is a software used to control the laser machine by connecting it to a USB cord. RDWorks can control the power and speed of the laser depending on the material and the thickness, as well as, controlling other settings such as engraving etc.
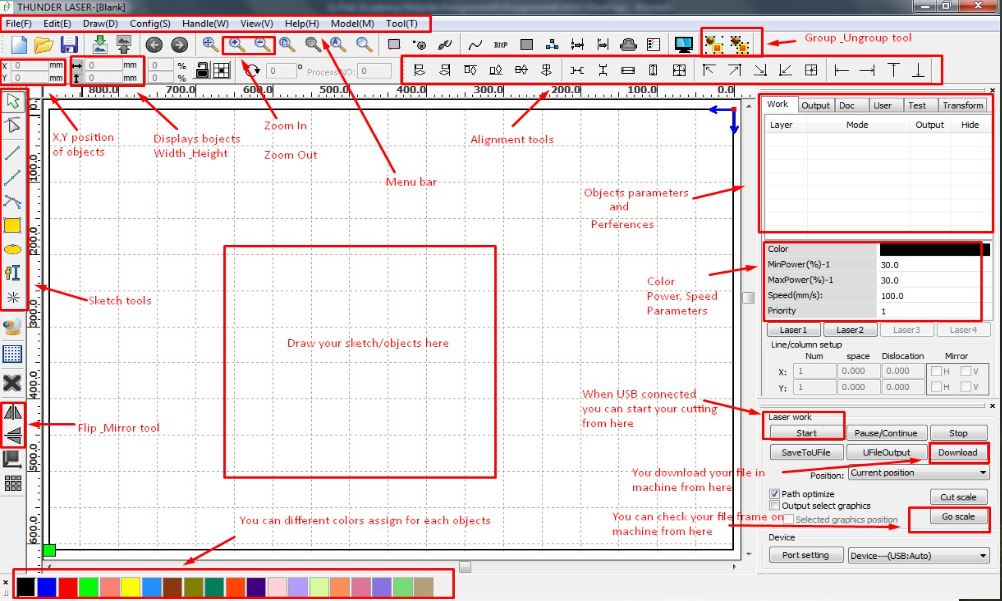
Operating the Machine
The steps to laser cut :
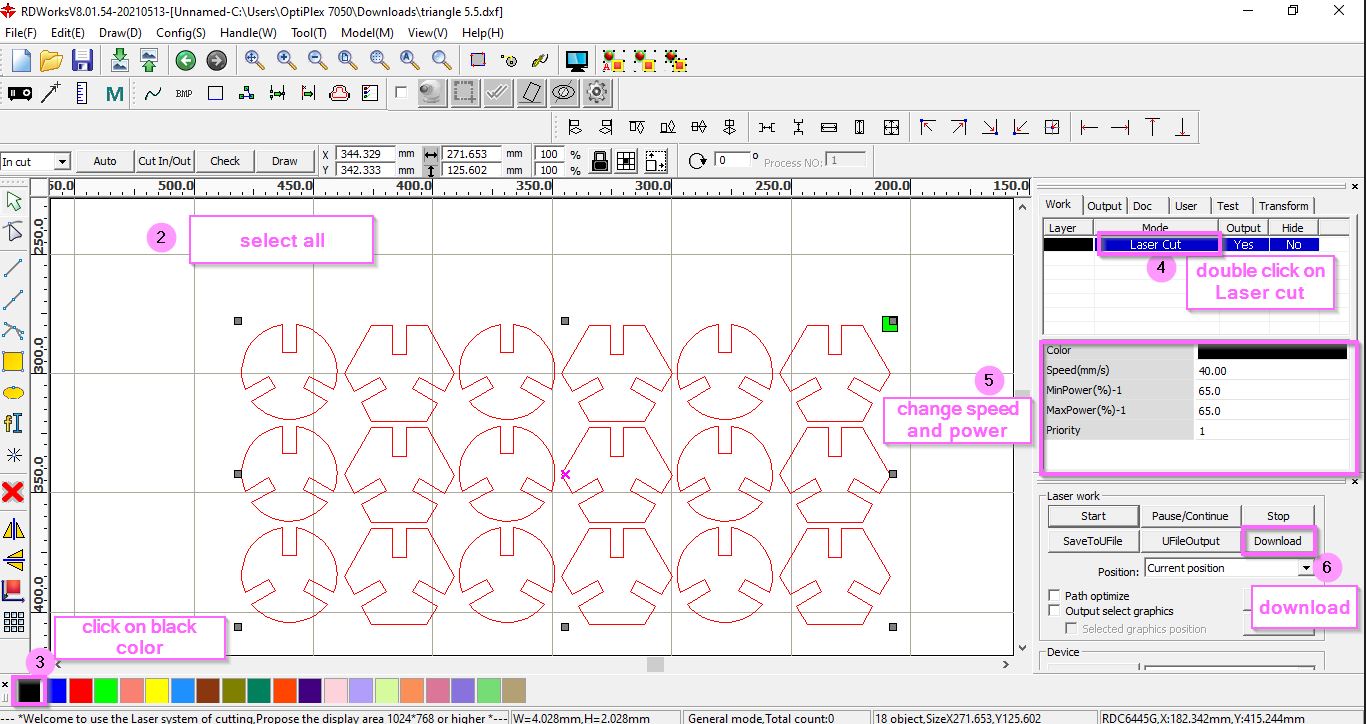
1. Upload the DXF file to RDWorks by double clicking on it2. Select the design > click the color black
3. double click on the "laser cut" under mode
4. Adjust the setting based on material and thickness or click on library as you will find a set of settings for each material and thickness
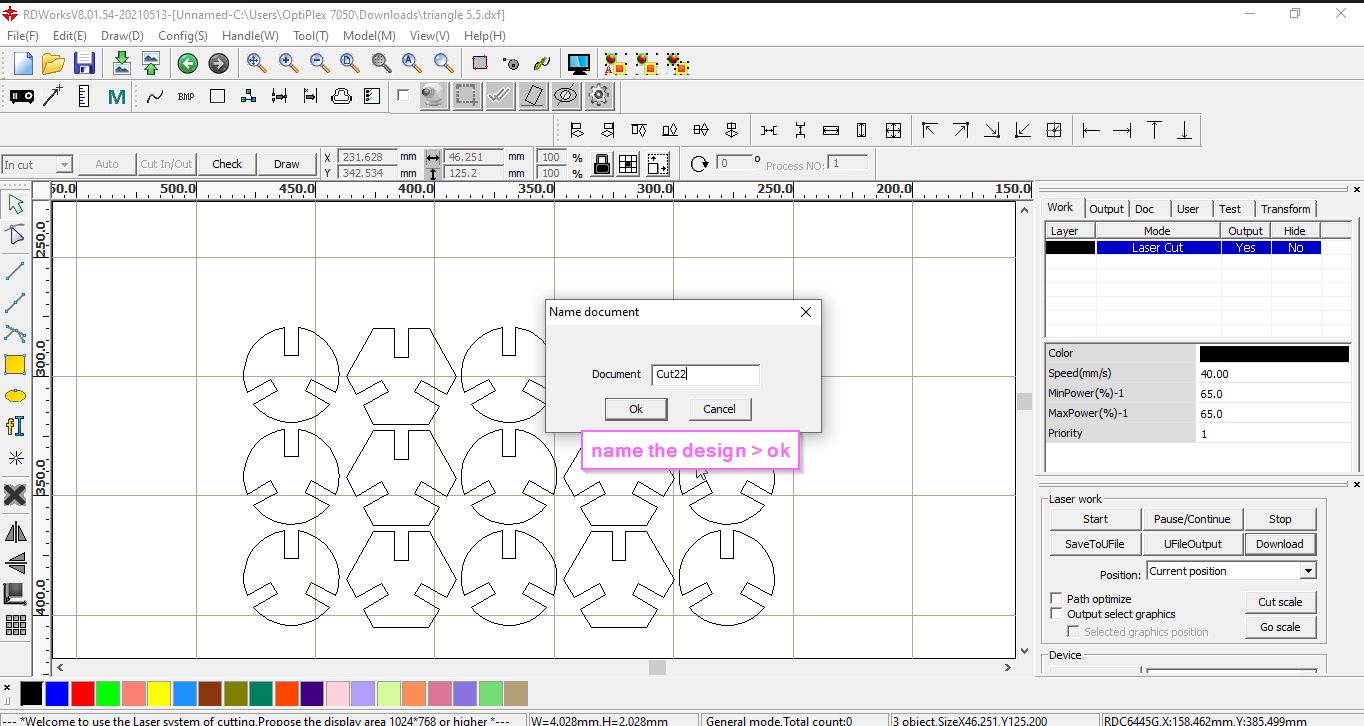
5. Click on download > write a name for the file > click ok
6. Place the material on the bed of the machine
7. Adjust the Z-axis of the material by pressing on the Z+ & Z- buttons on the control panel to reach the right focal point (using the lego)
8. Adjust the laser beam to where you want it to start > press on origin in the control panel
9. press on file > select the file by pressing enter > press frame to have a preview of where the cut will be
10. Press St to start the laser machine
Warning
before pulling up the door of the machine after the cutting is done, wait for 10-5 seconds until the fumes is vacuumed using the extractor to avoid inhaling toxins.
The lego part used to determine the focal point, the lego is placed on top of the material while the Z-axis bed is adjusted until the space between the lego and laser beam 1-2mm depending on material

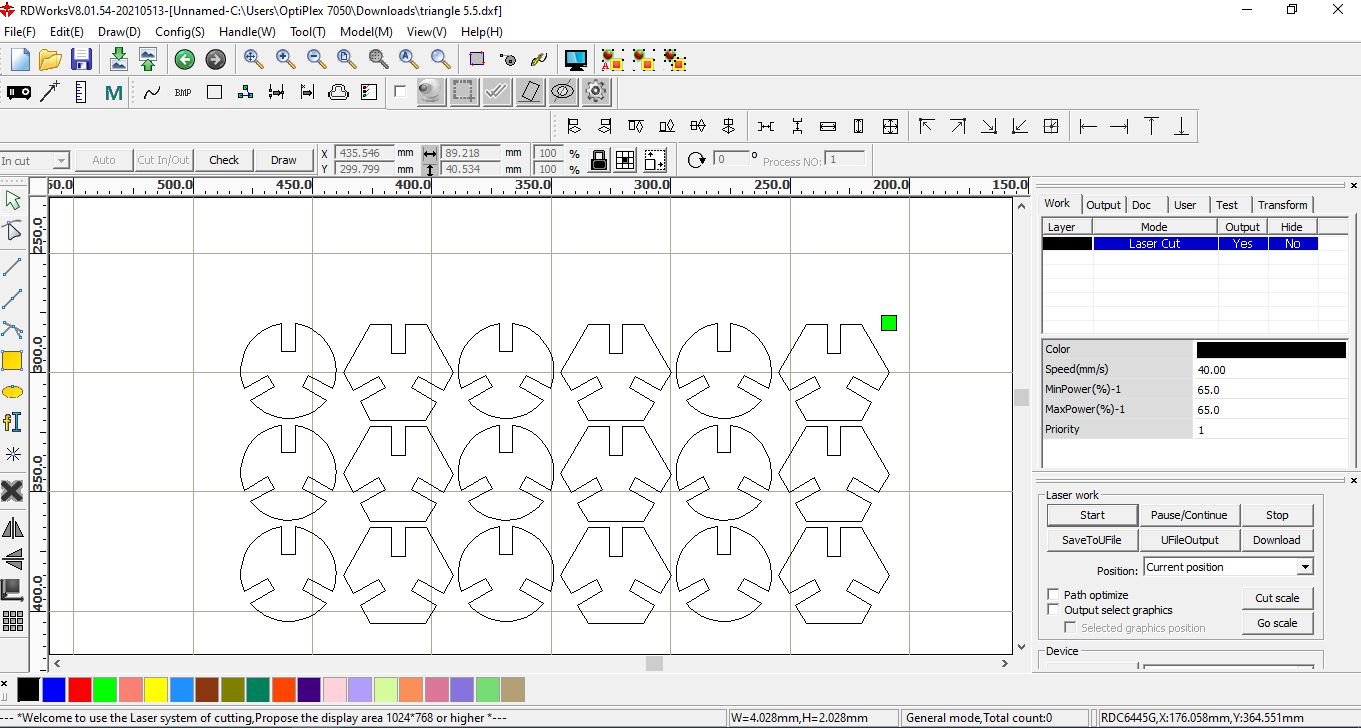
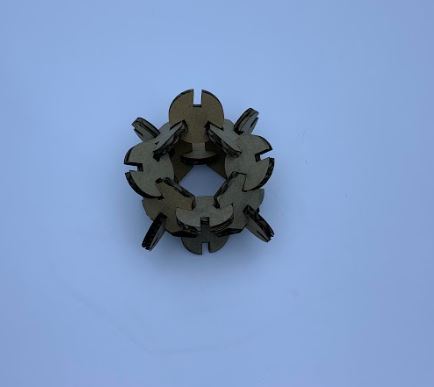
The first prototype of the press fit was a bit too big meanwhile the rectangular slits were too short to fit with each other, therefore, the design has been enhanced
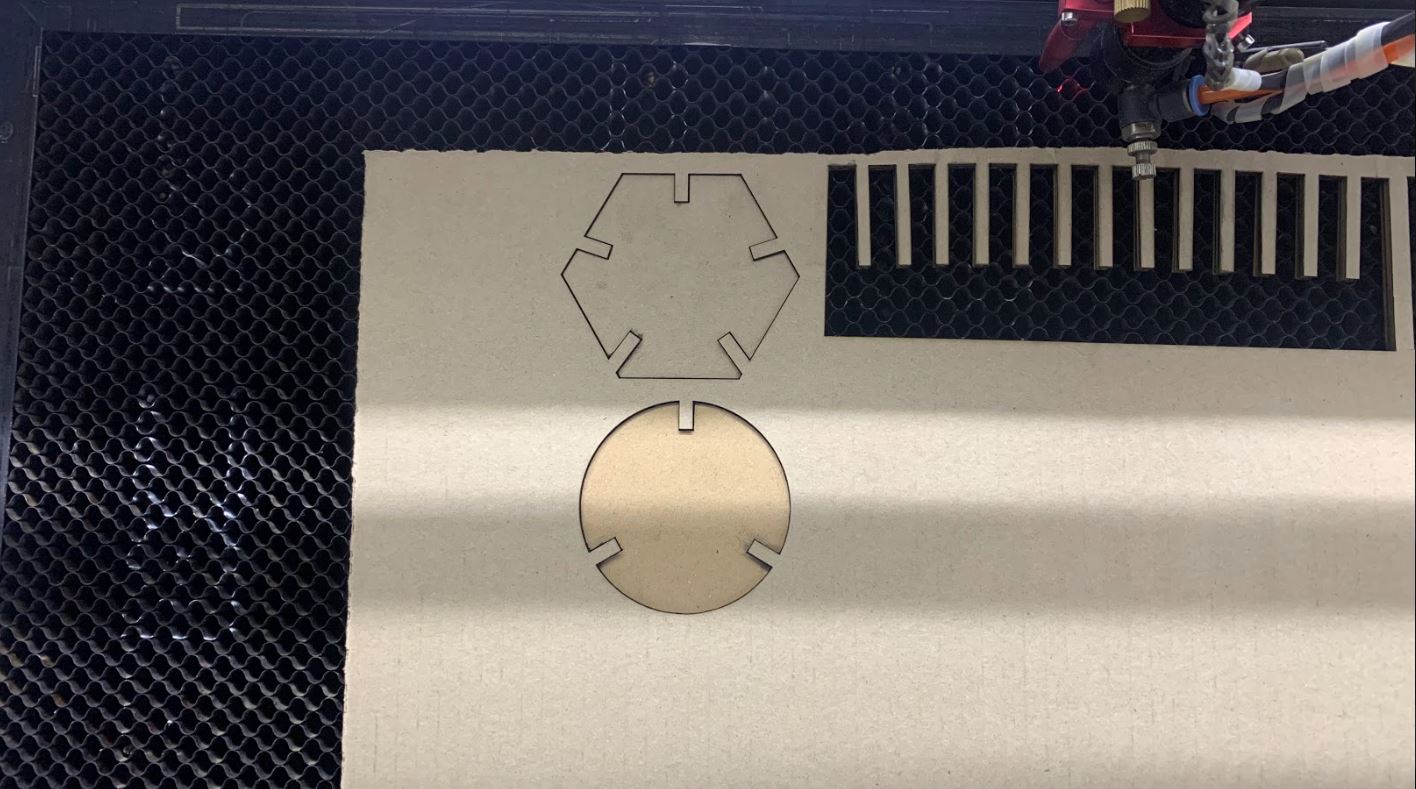
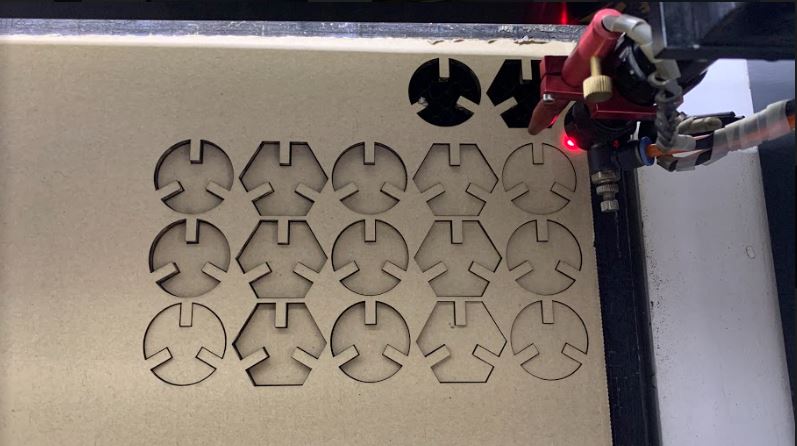
The process of laser cutting of the final design after enhancement.
This is the enhanced and final design some changes have been made to the design such as dimensional changes.
Top View of the press fit
3.2 Vinyl Cutting
Cricut Vinyl cutter
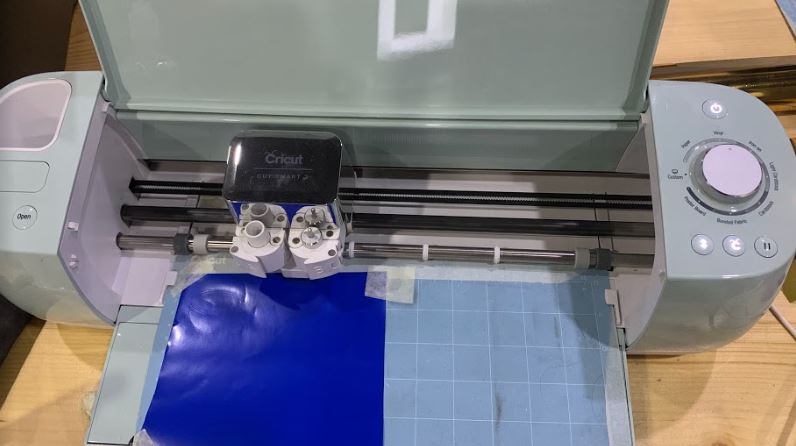
A small knife is used by the vinyl cutter to precisely cut the outline of figures into a sheet or piece of vinyl, but without releasing the liner. The knife moves side to side and turns as the vinyl moves beneath it. The cut process produces an image cut into the material, that you will need to remove and then can be placed anywhere.
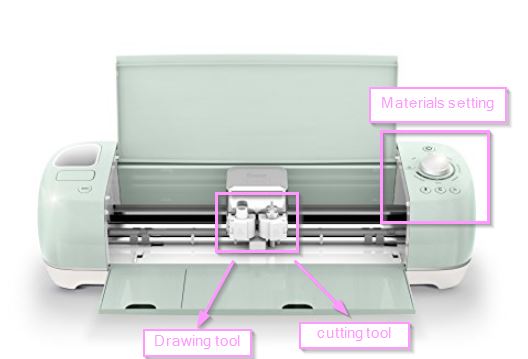
Cricut machine interface
The first step would be to download the Cricut program, then connect the vinyl machine to the laptop via a USB cable. The shown below are the control or setting panels that can be used to adjust based on the material used.
Cricut Design Software
The steps to vinyl cut :
1. Open Cricut design software2. Click on New project > go to Upload > Upload image > browse > select file > click on open
3. select complex as omage type > click continue > Remove background by clicking on it
4. Click on Apply & continue > select cut image
5. Click on image > Click on Add to canvas so that the image can be uploaded on the canvas
6. Adjust the size using the resizing tool
7. Click on Make it
8. Adjust the placement of the image on the mat
9. Click on continue
10. Connect the laptop to cricut vinyl cutter using USB cable
11. Place the vinyl sheet on the mat while securing the corners with tape
12. Press the "place in" button on the cricut machine to insert the mat inside securely
13. Press on start button on the machine to start cutting
14. Once done, press on "place in" button once again to release the mat.
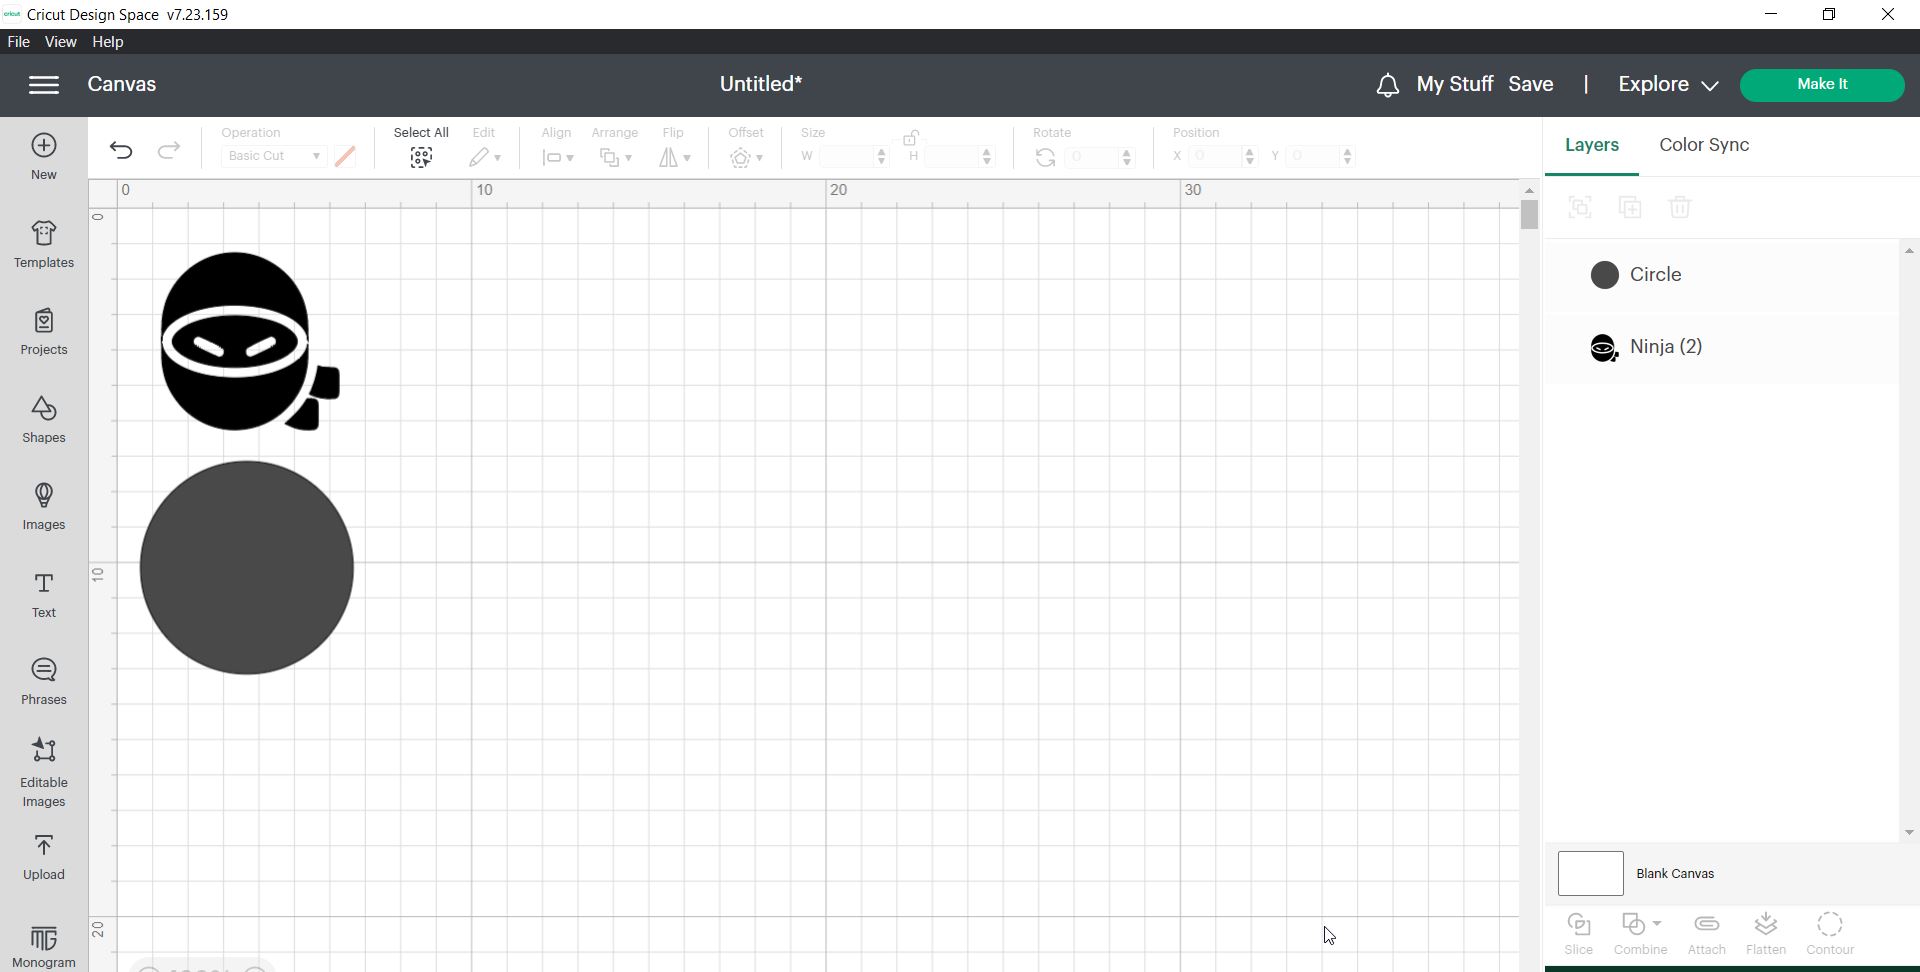
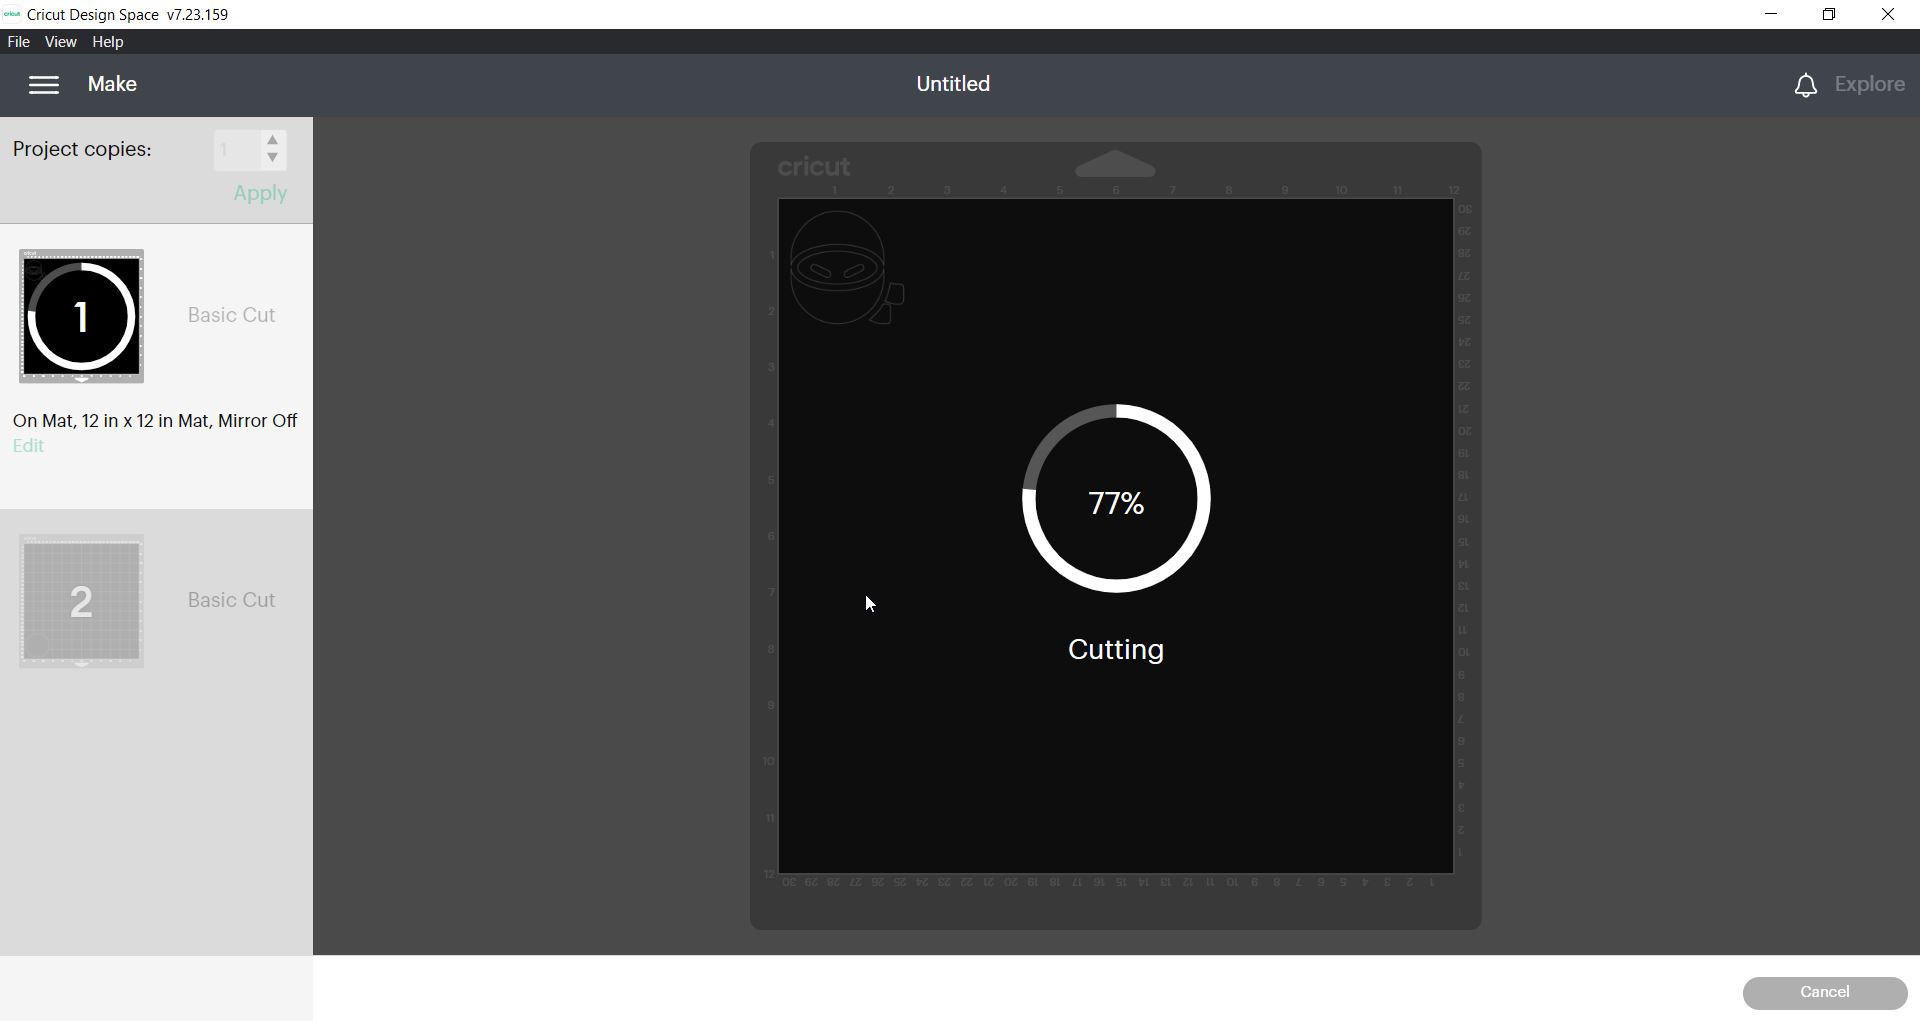
Upload the image to canvas, adjust the dimensions. > click on make it to start vinyl cutting
click on Mat > continue
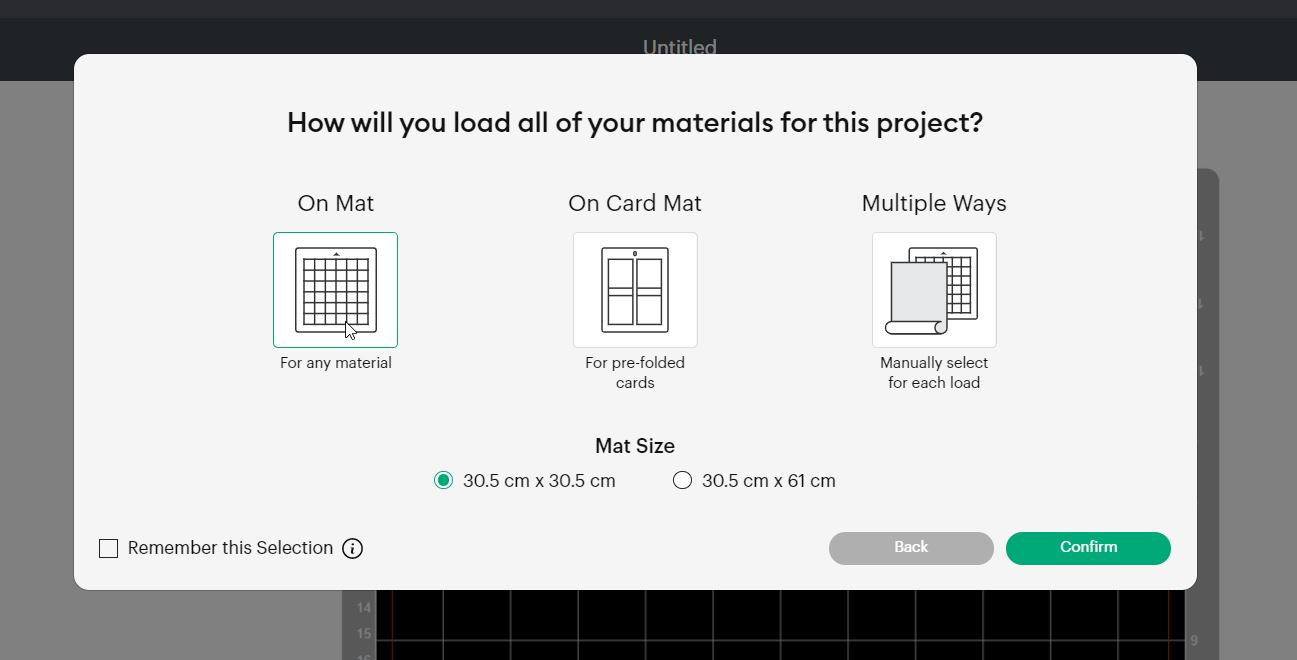
Place the image where ever you want on the mat > continue
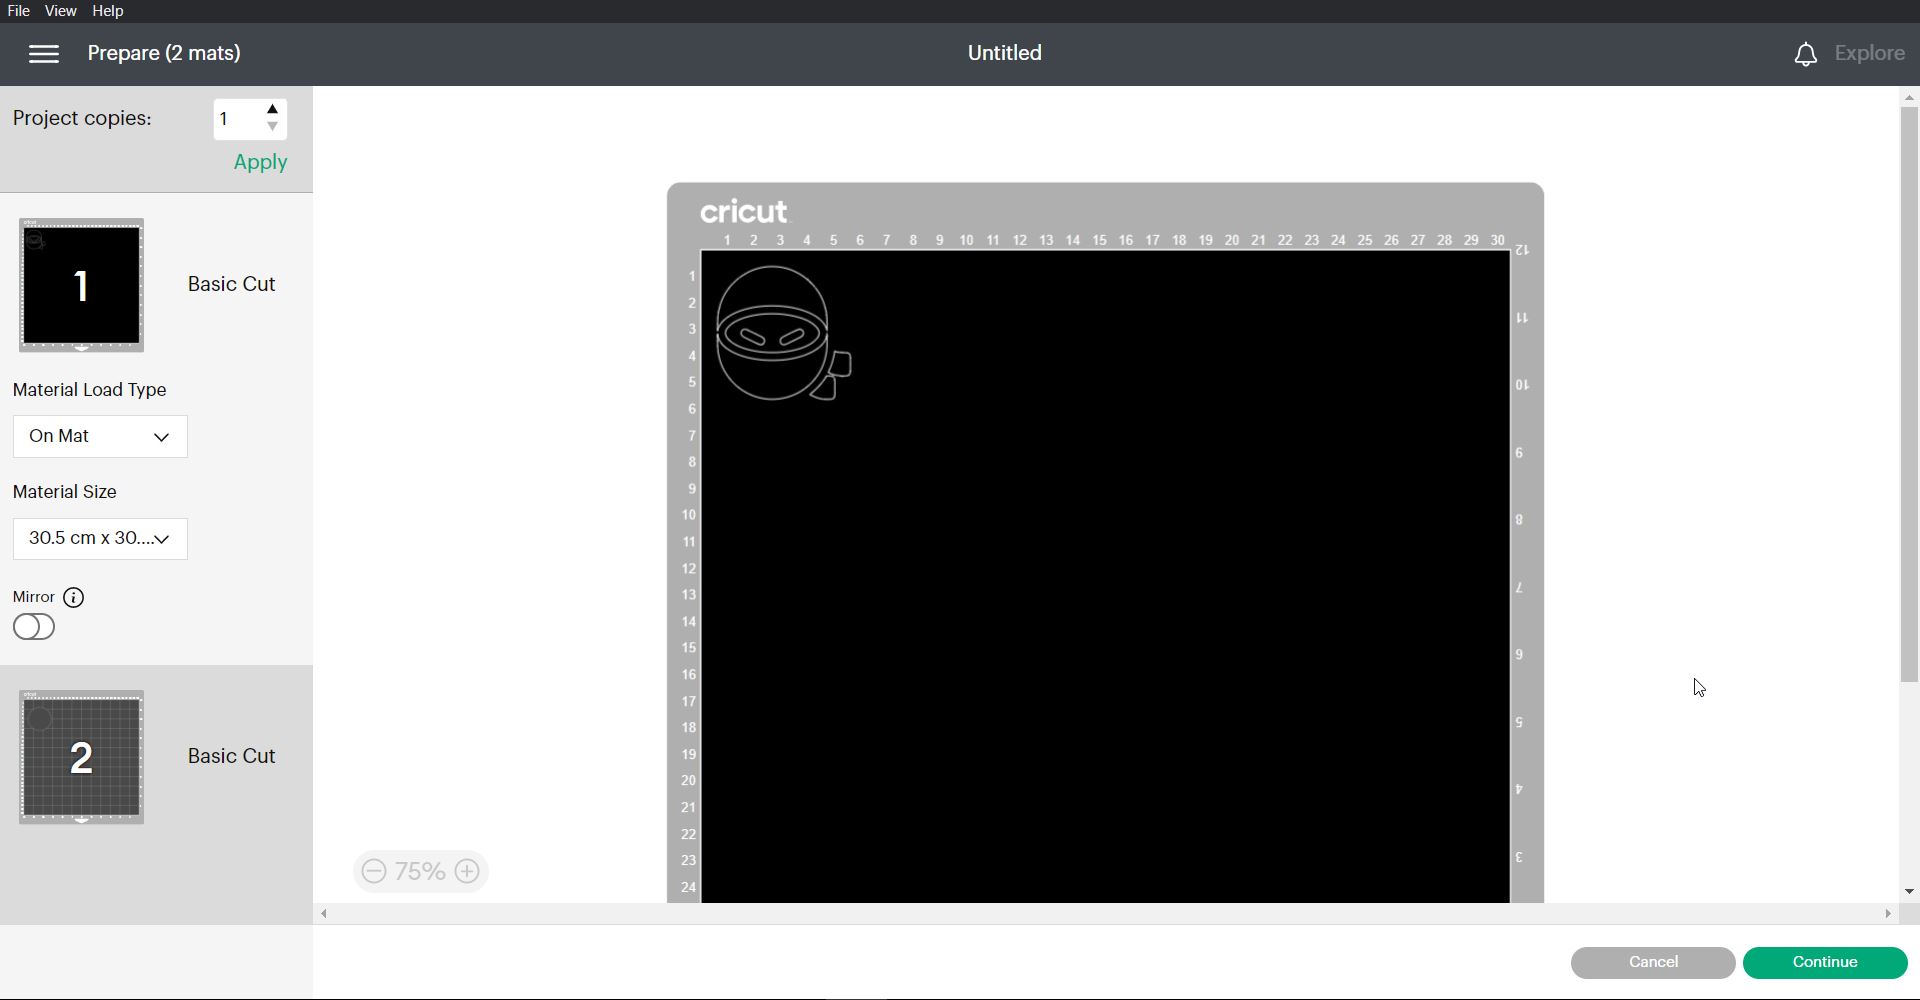
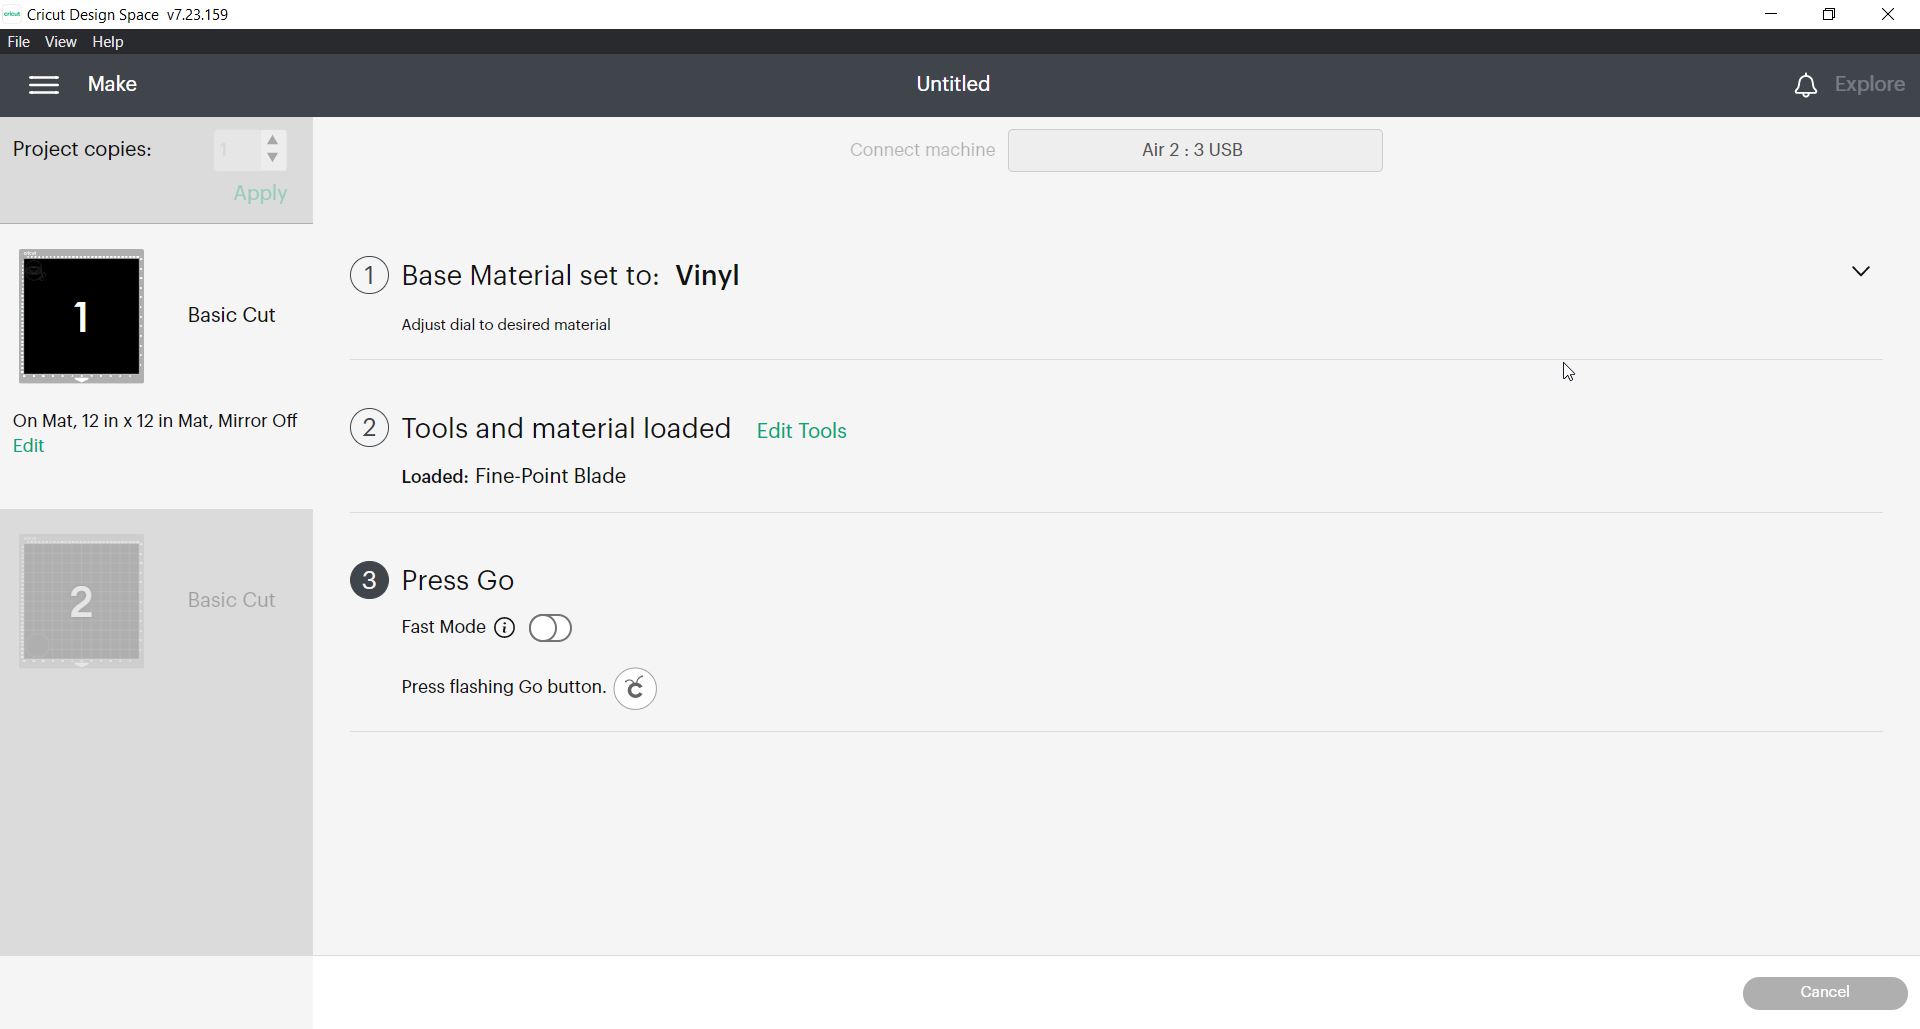
Press on Start on the Vinyl machine to proceed with the process.
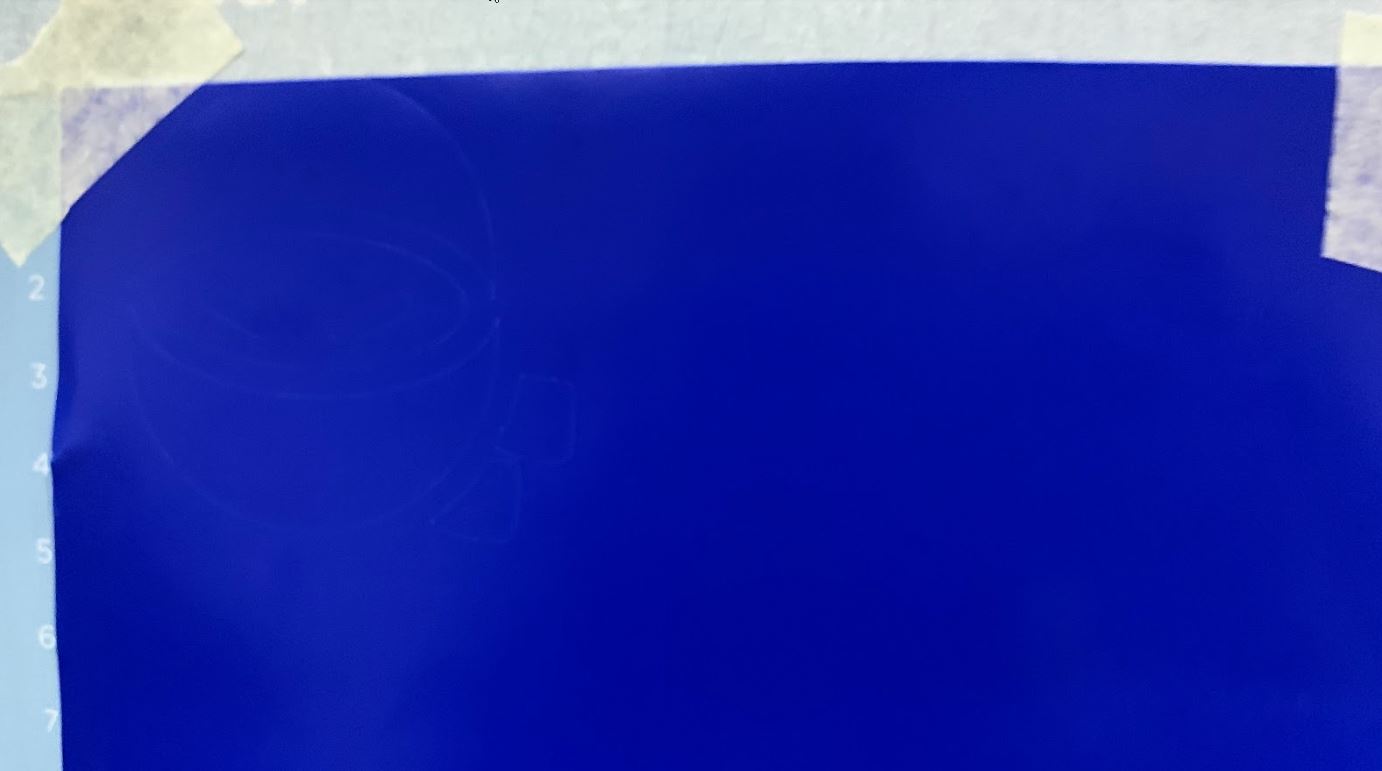
if you look closely you can see the cut lines of the image
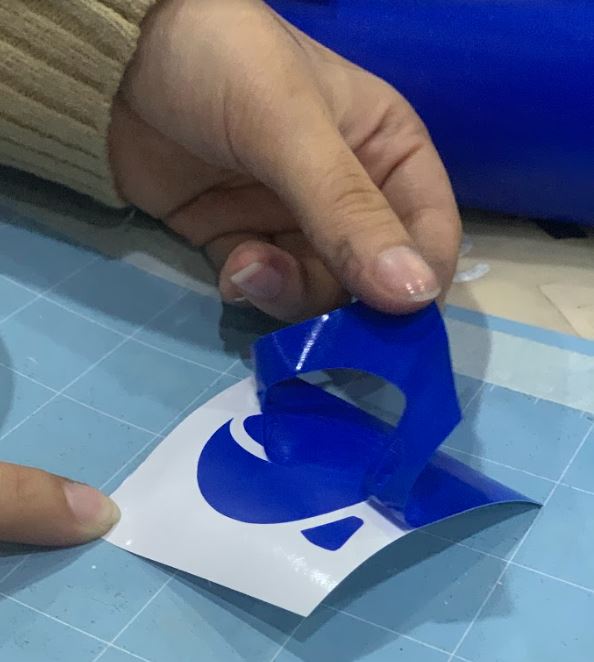
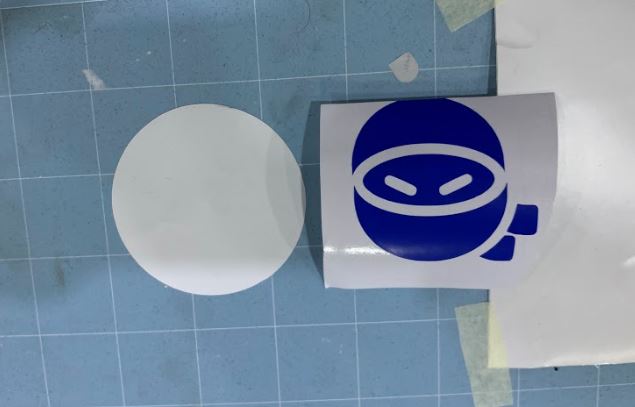
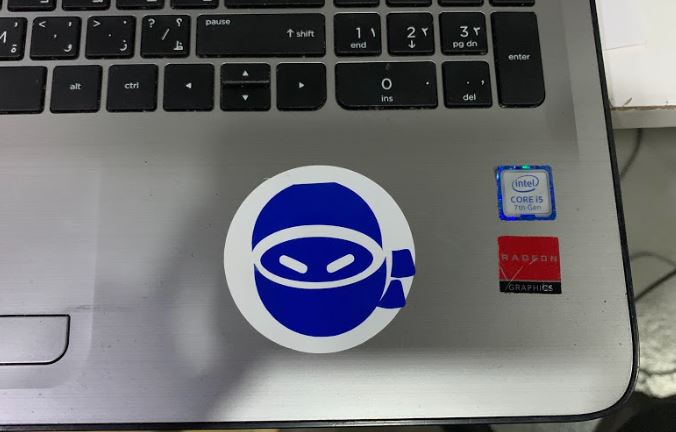
The final result, i added the white circle below the ninja to add contrast.
4. Conclusion
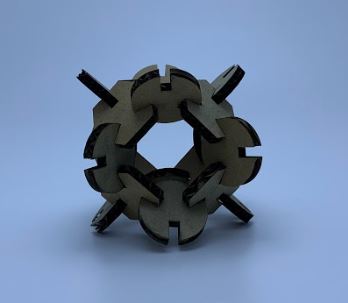
During this week i have managed to learn a lot about the machines and most importantly how to create designs, fabricate them and watch how they look like in real life. i managed to design a simple press fit kit design made out of two shapes a circle and a polygon to give a better look and contrast to it. moreover, using the vinyl i made a sticker for my laptop by uploading a photo from the internet of a ninja however i added a circle shape in white to highlight the blue ninja cut when combined together.