7. Input & Output device
Input is said to devices like sensors, buttons, etc..
Output devices is like motors, LEDs, sound devices, etc..
In a very simple way.. Input devices gives information to the microcontroller while output devices requires information from the microcontroller to work.
In this weak I did:
-
1: control output device
-
2: read input devices
-
3: use input device to control output device.
Output:
The device that I used is stepper motor. stepper motor is not a regular motor… it requires a stepper motor driver.
this makes the connections more tricky.
Schematics:

After connecting the motor, the next step is to write the code…
first we need to download stepper motor library,, this is found online in many sites.. I will attach a link here:
download the latest version

now we are ready to write the code.
#include <Stepper.h>

const int stepsPerRevolution = 200;  // change this to fit the number of steps per revolution
// for your motor

// initialize the stepper library on pins 8 through 11:
Stepper myStepper(stepsPerRevolution, 8, 9, 10, 11);

int stepCount = 0;         // number of steps the motor has taken

void setup() {
  // initialize the serial port:
  Serial.begin(9600);
}

void loop() {
  // step one step:
  myStepper.step(1);
  Serial.print("steps:");
  Serial.println(stepCount);
  stepCount++;
  delay(500);
}
This code essentially tells the stepper motor to move number of steps then stop for a certain time.
Input:
My input this week is a button… the idea behind buttons is very simple, the circuit is open when it is off and closed when it is turned on.
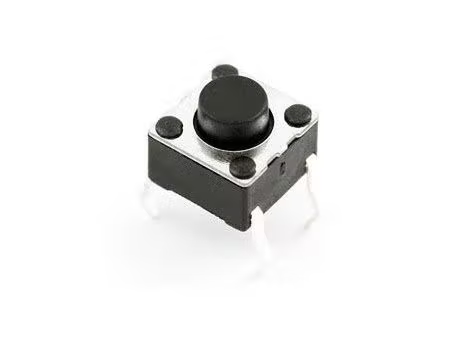
Buttons is one of the most simple inputs you can see.. it does not requires libraries..
We are ready to write the code:
int pushButton = 2;

// the setup routine runs once when you press reset:
void setup() {
  // initialize serial communication at 9600 bits per second:
  Serial.begin(9600);
  // make the pushbutton's pin an input:
  pinMode(pushButton, INPUT);
}

// the loop routine runs over and over again forever:
void loop() {
  // read the input pin:
  int buttonState = digitalRead(pushButton);
  // print out the state of the button:
  Serial.println(buttonState);
  delay(1);        // delay in between reads for stability
}
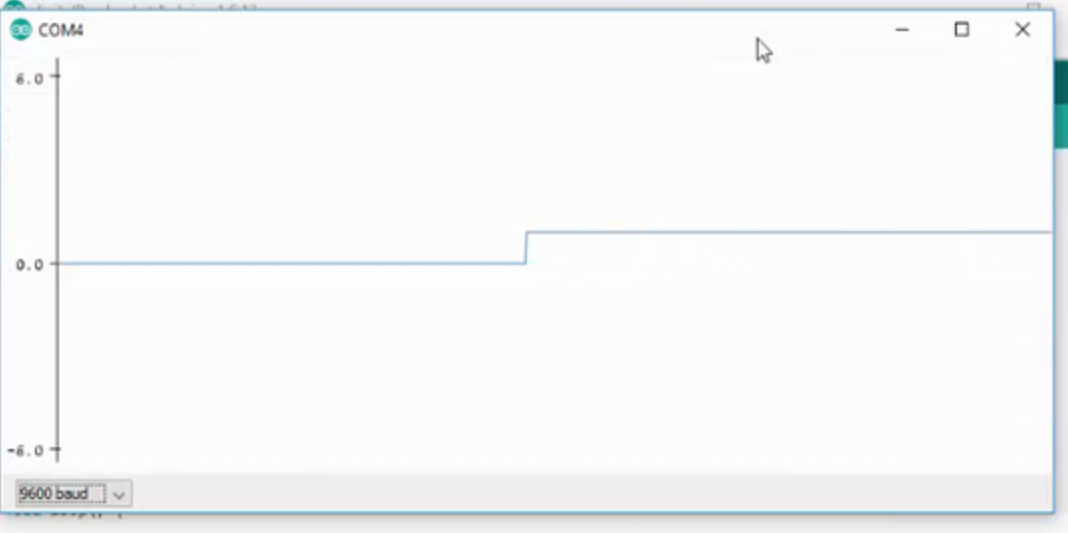
As you can see in the picture when the button is pressed the signal rises from 0 to 1.
combining input and output:
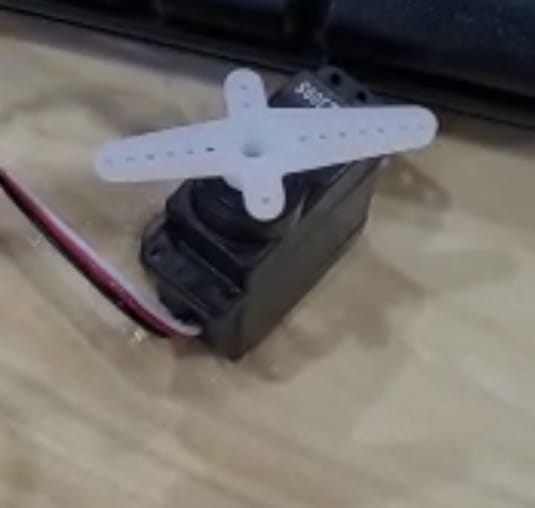
For this part I combined my knowledge of inputs and outputs… I used a button to control a servo motor.
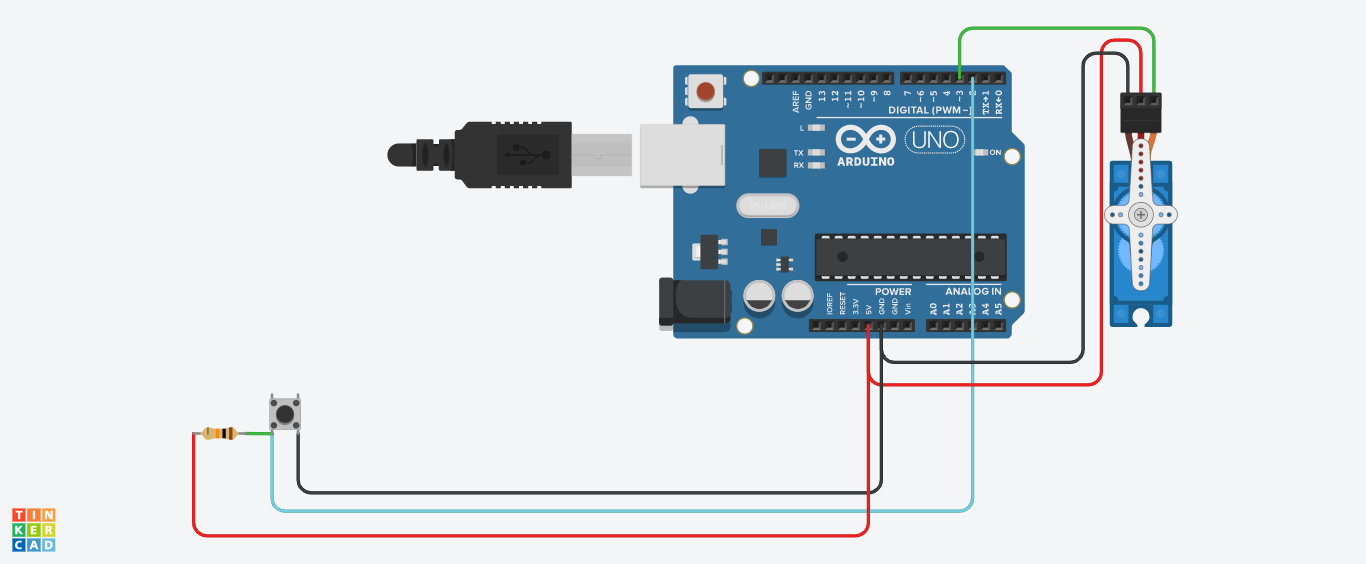
The first thing is to connect everything together.
the button is connected to pin number 2 and to the ground.
the motor is connected to the pin number 3, 5v, and GND..
Schematics:
Now we are ready to write the code.
include<Servo.h>
Servo Myservo;
int pos=0;
void setup()
{
  pinMode(2,INPUT);
  Myservo.attach(3);
}

void loop()
{
  if(digitalRead(2)==LOW){
    Myservo.write(180);
  }
  else

 Myservo.write(0);

}
the code is very simple.. it says that if the button state is low –> the servo motor will not move
and if the button state is high –> the servo motor will move
NOTE: servo motor library must be downloaded
RESULTS: