7. Input & Output device
This week I learned about the Input & Output device
Research about the input and Output
basacilt the input is what we do in real life to the machine/sensor and the output is the result to that action.
if we have a senser and the input that we come close to it or click on it (this consider to be the Input), and after we come close to it there is light shining from the object (this consider) to be the Output.
click here to read a simblified explination about the input and the output
switching on LED
this week start lerning about the Input & Output devices. i follow the titorial below to switch an LED light by cliking on a botton.
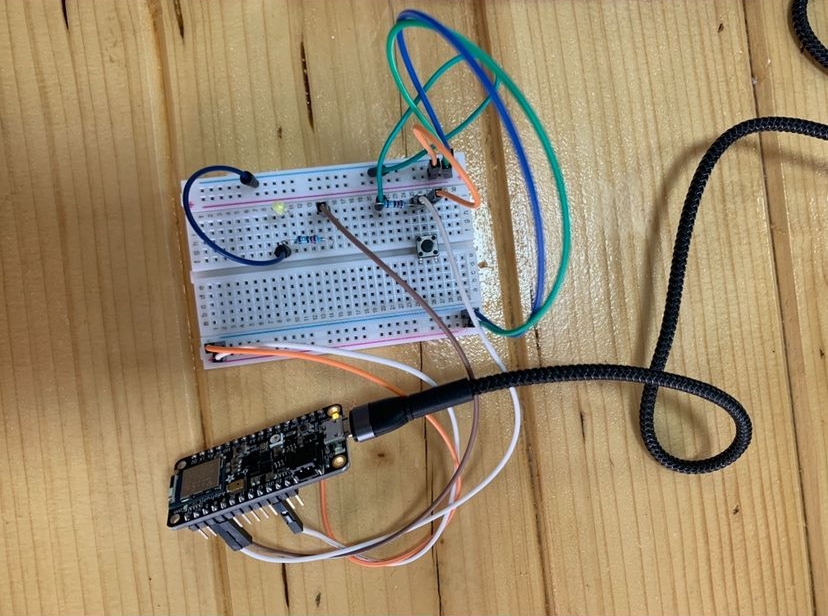
LED final result
This video shows the end result
LED code
//pin 3: Input for reading the Button
//pin 2: output for controll the LED
int ButtonValue = 0;

int Button = 5;
int LED = 6;

void setup() {

pinMode(Button, INPUT);
pinMode(LED, OUTPUT);
}

void loop() {

ButtonValue = digitalRead(Button);  `
if (ButtonValue !=0){
//if (Button is presssed then turn LED ON!
digitalWrite(LED, HIGH);
}
else{
  //else the button is pressed, turn it of
  digitalWrite(LED, LOW);
}
}
OUTPUT
1-this shows that I attached the servo
2- the name of the servo that I used (myservo)
3-number 6 is where I attached it in the ..
4- where I want the servo to move (from which degree to which)
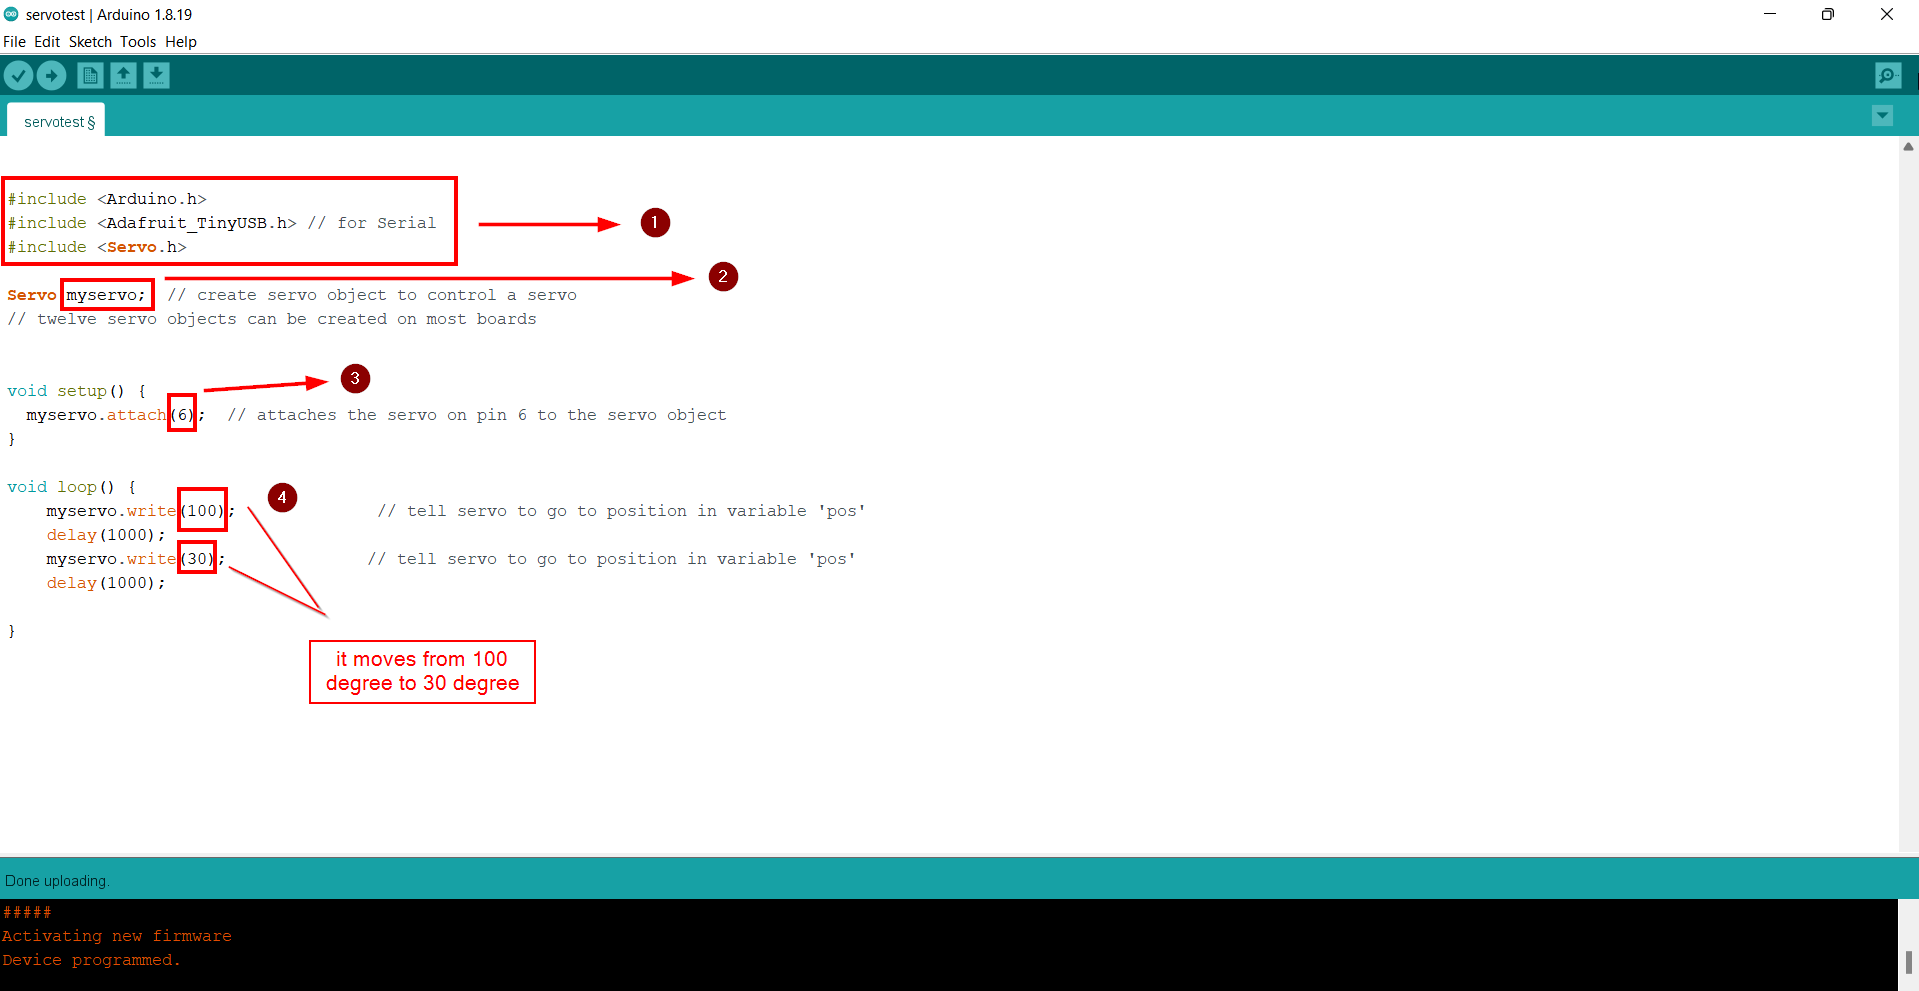
After I click on Upload the servo started moving non stop according to the data I wrote down.
#include <Arduino.h>
#include <Adafruit_TinyUSB.h> // for Serial
#include <Servo.h>

Servo myservo;  // create servo object to control a servo
// twelve servo objects can be created on most boards


void setup() {
  myservo.attach(6);  // attaches the servo on pin 6 to the servo object
}

void loop() {
    myservo.write(100);              // tell servo to go to position in variable 'pos'
    delay(1000);
    myservo.write(30);              // tell servo to go to position in variable 'pos'
    delay(1000);

}
INPUT
As for the Input I used the sensor that is already available in the Adafruit. so I brought an object and started moving it back and forth and seeing the numbers that are appearing to me (for each distance a different number is given), I decided on the distance that I wanted and memorize the numbers related to it. and write it in the code.
the video below shows the proses of moving the object and how the numbers are changing.
/*
  APDS-9960 - Proximity Sensor

  This example reads proximity data from the on-board APDS-9960 sensor of the
  Nano 33 BLE Sense and prints the proximity value to the Serial Monitor
  every 100 ms.

  The circuit:
  - Arduino Nano 33 BLE Sense

  This example code is in the public domain.
*/

#include <Arduino_APDS9960.h>

void setup() {
  Serial.begin(9600);
  while (!Serial);

  if (!APDS.begin()) {
    Serial.println("Error initializing APDS-9960 sensor!");
  }
}

void loop() {
  // check if a proximity reading is available
  if (APDS.proximityAvailable()) {
    // read the proximity
    // - 0   => close
    // - 255 => far
    // - -1  => error
    int proximity = APDS.readProximity();

    // print value to the Serial Monitor
    Serial.println(proximity);
  }

  // wait a bit before reading again
  delay(100);
}
INPUT & output
Since I made the Input and the Output separately, I decided to combine the two. so I will have a movement from the outside world and this movement will give the servo the information that it should move to a certain degree.
#include <Arduino_APDS9960.h>

#include <Arduino.h>
#include <Adafruit_TinyUSB.h> // for Serial
#include <Servo.h>

Servo myservo;  // create servo object to control a servo
// twelve servo objects can be created on most boards

void setup() {
  myservo.attach(6);  // attaches the servo on pin 6 to the servo object

  Serial.begin(9600);
  while (!Serial);

  if (!APDS.begin()) {
    Serial.println("Error initializing APDS-9960 sensor!");
  }
}

void loop() {
  // check if a proximity reading is available
  if (APDS.proximityAvailable()) {
    // read the proximity
    // - 0   => close
    // - 255 => far
    // - -1  => error
    int proximity = APDS.readProximity();

    // print value to the Serial Monitor
    Serial.println(proximity);
    if(proximity>50 && proximity<200){
      myservo.write(90);
    }
    else
    {
      myservo.write(0);
    }

  }

  // wait a bit before reading again
  delay(100);
}