Final Project
We had last two weeks to work on final project. It was not easy to make final functional project that can do the work we want, but with the help from instructors and their experience we could manage and build our project.
Background of the Project
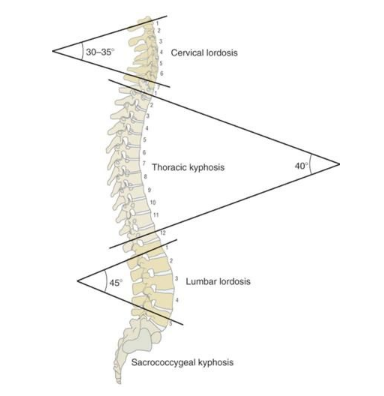
Most of job tasks require tedious work, some jobs require stick your face to your screen 24 hours without taking into account back posture. Also jobs require many kinds of back posture that is medically wrong. As shown in image below the right angles for every back’s position to get the right posture.
Project Idea
Our idea is posture corrector by using sensor that could inspect if person’s in right posture or not. Whenever you are in worng posture it will give you sound as indicator to adjust the way you do your task. So by putting three sensors to inspect we decided to make one for the upper back just as prototype. So we eliminated some features to finish our work within one week.
Project process
Step 1: Find example of products that exist
When you have an idea and want to impelement it you should know the functioning of the project so first we looked for different examples of our idea to reshape how we will build it. So from this example we could get first sketch of designing our idea

Step 2: Test out the accelerometer(sensor)
The kind of sensor used is accelerometer from Adafruit nrf52840, we got readings of angles using example codes on sense Adafruit
![]()
Step 3: Find the angle for humans
Here my role was to find the appropiate code that will show the right results, and Nawraa tested the code. To put data we had to find the right angle for human back posture by searching from trusted medical resources. Then, the other step is write the logic to start coding. By the using example code we put the code that will give the result we want.
#Thecode
// Basic demo for accelerometer/gyro readings from Adafruit LSM6DS33

#include <Adafruit_LSM6DS33.h>

// For SPI mode, we need a CS pin
#define LSM_CS 10
// For software-SPI mode we need SCK/MOSI/MISO pins
#define LSM_SCK 13
#define LSM_MISO 12
#define LSM_MOSI 11
const int buzzer=11;

float startMillis;
bool state = 0;
Adafruit_LSM6DS33 lsm6ds33;
void setup(void) {
  Serial.begin(115200);
   pinMode(11, OUTPUT);

 // while (!Serial)
   // delay(10); // will pause Zero, Leonardo, etc until serial console opens

  Serial.println("Adafruit LSM6DS33 test!");

  if (!lsm6ds33.begin_I2C()) {
    // if (!lsm6ds33.begin_SPI(LSM_CS)) {
    // if (!lsm6ds33.begin_SPI(LSM_CS, LSM_SCK, LSM_MISO, LSM_MOSI)) {
    Serial.println("Failed to find LSM6DS33 chip");
    while (1) {
      delay(10);
    }
  }

  Serial.println("LSM6DS33 Found!");

  // lsm6ds33.setAccelRange(LSM6DS_ACCEL_RANGE_2_G);
  Serial.print("Accelerometer range set to: ");
  switch (lsm6ds33.getAccelRange()) {
  case LSM6DS_ACCEL_RANGE_2_G:
    Serial.println("+-2G");
    break;
  case LSM6DS_ACCEL_RANGE_4_G:
    Serial.println("+-4G");
    break;
  case LSM6DS_ACCEL_RANGE_8_G:
    Serial.println("+-8G");
    break;
  case LSM6DS_ACCEL_RANGE_16_G:
    Serial.println("+-16G");
    break;
  }

  // lsm6ds33.setGyroRange(LSM6DS_GYRO_RANGE_250_DPS);
  Serial.print("Gyro range set to: ");
  switch (lsm6ds33.getGyroRange()) {
  case LSM6DS_GYRO_RANGE_125_DPS:
    Serial.println("125 degrees/s");
    break;
  case LSM6DS_GYRO_RANGE_250_DPS:
    Serial.println("250 degrees/s");
    break;
  case LSM6DS_GYRO_RANGE_500_DPS:
    Serial.println("500 degrees/s");
    break;
  case LSM6DS_GYRO_RANGE_1000_DPS:
    Serial.println("1000 degrees/s");
    break;
  case LSM6DS_GYRO_RANGE_2000_DPS:
    Serial.println("2000 degrees/s");
    break;
  case ISM330DHCX_GYRO_RANGE_4000_DPS:
    break; // unsupported range for the DS33
  }

  // lsm6ds33.setAccelDataRate(LSM6DS_RATE_12_5_HZ);
  Serial.print("Accelerometer data rate set to: ");
  switch (lsm6ds33.getAccelDataRate()) {
  case LSM6DS_RATE_SHUTDOWN:
    Serial.println("0 Hz");
    break;
  case LSM6DS_RATE_12_5_HZ:
    Serial.println("12.5 Hz");
    break;
  case LSM6DS_RATE_26_HZ:
    Serial.println("26 Hz");
    break;
  case LSM6DS_RATE_52_HZ:
    Serial.println("52 Hz");
    break;
  case LSM6DS_RATE_104_HZ:
    Serial.println("104 Hz");
    break;
  case LSM6DS_RATE_208_HZ:
    Serial.println("208 Hz");
    break;
  case LSM6DS_RATE_416_HZ:
    Serial.println("416 Hz");
    break;
  case LSM6DS_RATE_833_HZ:
    Serial.println("833 Hz");
    break;
  case LSM6DS_RATE_1_66K_HZ:
    Serial.println("1.66 KHz");
    break;
  case LSM6DS_RATE_3_33K_HZ:
    Serial.println("3.33 KHz");
    break;
  case LSM6DS_RATE_6_66K_HZ:
    Serial.println("6.66 KHz");
    break;
  }

  // lsm6ds33.setGyroDataRate(LSM6DS_RATE_12_5_HZ);
  Serial.print("Gyro data rate set to: ");
  switch (lsm6ds33.getGyroDataRate()) {
  case LSM6DS_RATE_SHUTDOWN:
    Serial.println("0 Hz");
    break;
  case LSM6DS_RATE_12_5_HZ:
    Serial.println("12.5 Hz");
    break;
  case LSM6DS_RATE_26_HZ:
    Serial.println("26 Hz");
    break;
  case LSM6DS_RATE_52_HZ:
    Serial.println("52 Hz");
    break;
  case LSM6DS_RATE_104_HZ:
    Serial.println("104 Hz");
    break;
  case LSM6DS_RATE_208_HZ:
    Serial.println("208 Hz");
    break;
  case LSM6DS_RATE_416_HZ:
    Serial.println("416 Hz");
    break;
  case LSM6DS_RATE_833_HZ:
    Serial.println("833 Hz");
    break;
  case LSM6DS_RATE_1_66K_HZ:
    Serial.println("1.66 KHz");
    break;
  case LSM6DS_RATE_3_33K_HZ:
    Serial.println("3.33 KHz");
    break;
  case LSM6DS_RATE_6_66K_HZ:
    Serial.println("6.66 KHz");
    break;
  }

  lsm6ds33.configInt1(false, false, true); // accelerometer DRDY on INT1
  lsm6ds33.configInt2(false, true, false); // gyro DRDY on INT2
}


void loop() {
    Serial.println("Adafruit LSM6DS33 test!");

  //  /* Get a new normalized sensor event */
  sensors_event_t accel;
  sensors_event_t
   lsm6ds33.getEvent(&accel, &gyro, &temp);

  /* Display the results (acceleration is measured in m/s^2) */
  Serial.print("\t\tAccel X: ");
  Serial.println(accel.acceleration.x);
  delay(100);
  if (accel.acceleration.x<8){ gyro;
  sensors_event_t temp;

    Serial.println("wrong posture!");
    if (state==0){
    startMillis = millis();  //IMPORTANT to save the start time of the current LED state.
    Serial.println(startMillis);}
    state=1;
    if (millis() - startMillis > 10000){
        digitalWrite(11, HIGH);   // turn the LED on (HIGH is the voltage level)
}

}

  else {
    state=0;
    digitalWrite(11, LOW); ;
  }
  }
- test the code:
Step 4: Design a body, make it with cardboard
Nawraa role was designing.
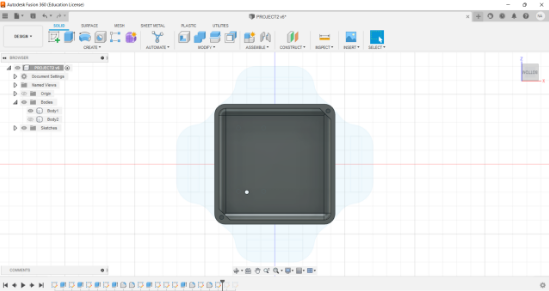
She started our design on Fusion360. She designed base to put electronics and can be holded by the fabric stretch and we took into consider that design is not annoying when is hanging in the middle of person’s back and that is important that when developing any product you have design something usable and flexible
To make the design, it was determined first what would be used to run the code, so a piece of cardboard was used and the required size was determined.
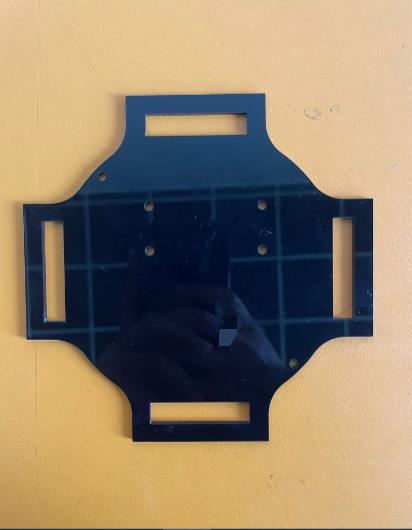
second , the base was designed and took a circular shape. At the sides, cut rectangles were placed so that the belt could be inserted through them. In addition, small circles were made on the base slip and thus to install the microcontrollers
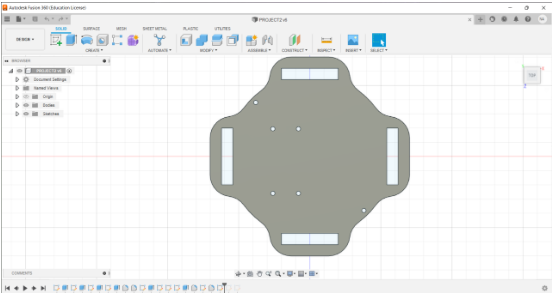
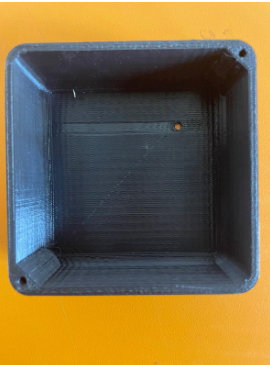
Third, the box in which we will put the microcontroller with the battery, cold board, wires and sound sensor, so its size was (7cm x7cmx3cm). At the corners, two circles were made to fix the box with the base using the scrub.Also, there is Small circle so that the buzzer sound can be heard clearly.
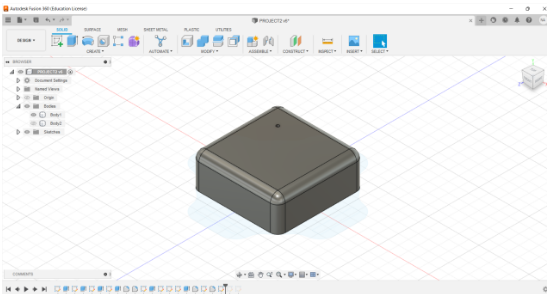
3D model: Design file
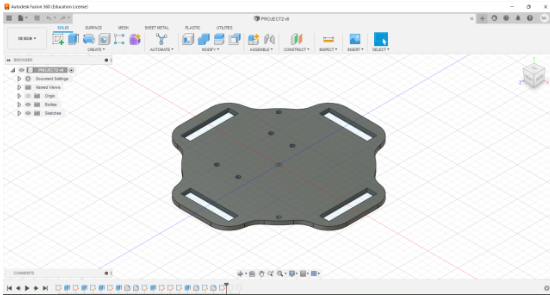
Step 5: 3D print the final shape
After the design is ready we printed them by 3D printer. The base was designed and took a circular shape. At the sides, cut rectangles were placed so that the belt could be inserted through them. In addition, small circle
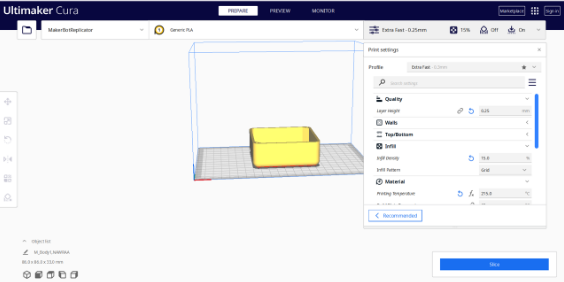
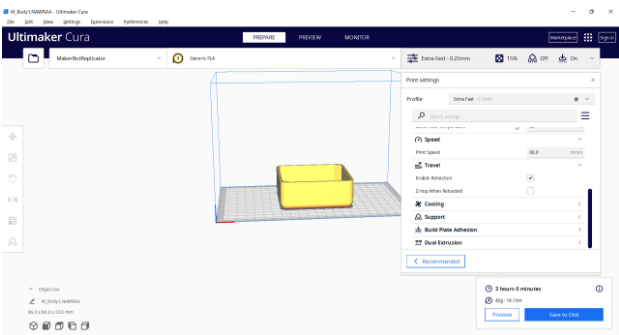
- The box was printed by 3D printing ,with plastic material and took about 3 hours.because it is 3D shape so we convert it to ultimaker Cura application and edit the sitting of the printing machine .
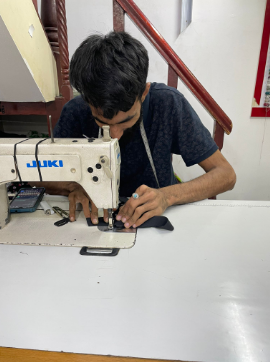
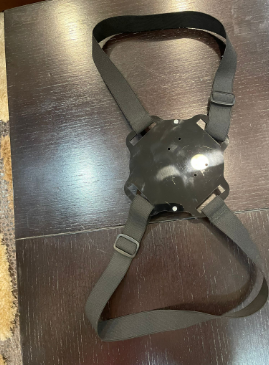
- Nawraa went to the tailor to make the belt.
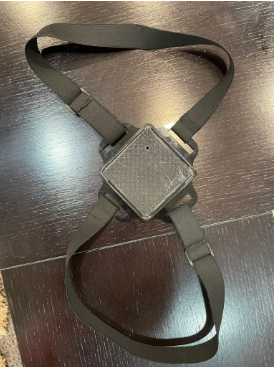
- Final look tdaa !
Step 6: Assemble and test
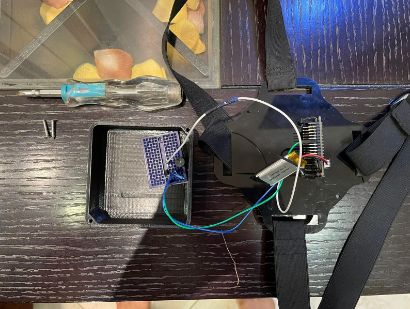 Final testing made by Nawraa