7. Input/Output devices
This week I learn and work on Arduino program with some input and output devices to do some features using them.
Input part:
1- Humidity sensor
I try to link sensor to my works to get some values from it. There are a many different sensor to do or calculate different values like humidity sensor that you can got from it the values of the humidity and the temperature in the environment. A humidity senses, measures both moisture and air temperature. The ratio of moisture in the air to the highest amount of moisture at a particular air temperature is called relative humidity. Humidity sensors work by detecting changes that alter electrical currents or temperature in the air.
There are three basic types of humidity sensors: 1- Capacitive 2- Resistive 3- Thermal
I worked on Resistive humidity sensor. The Resistive humidity sensors utilize ions in salts to measure the electrical impedance of atoms. As humidity changes, so do the resistance of the electrodes on either side of the salt medium. There are two type of this sensor one has 3 pins and the other has 4 pins. I used 3 pins sensor and this sensor called DH11.
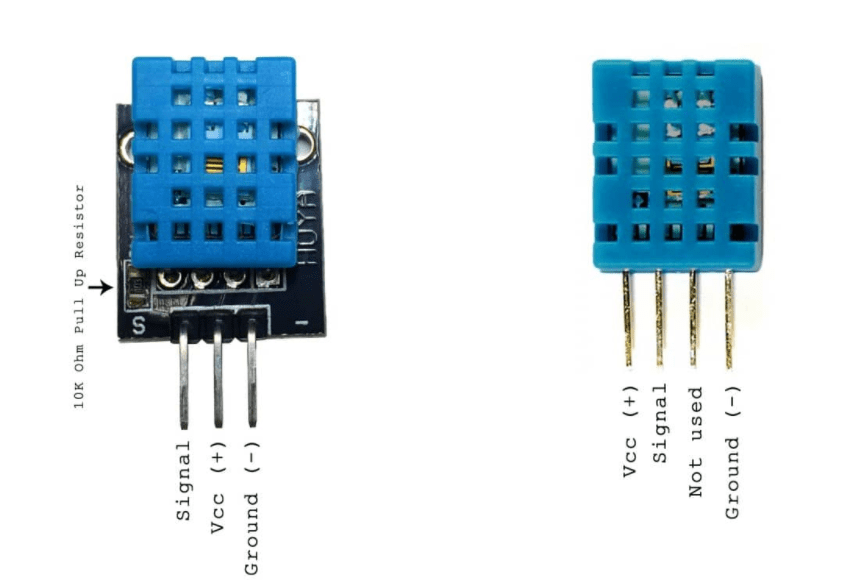
This sensor DH11 have some ranges and accuracy.

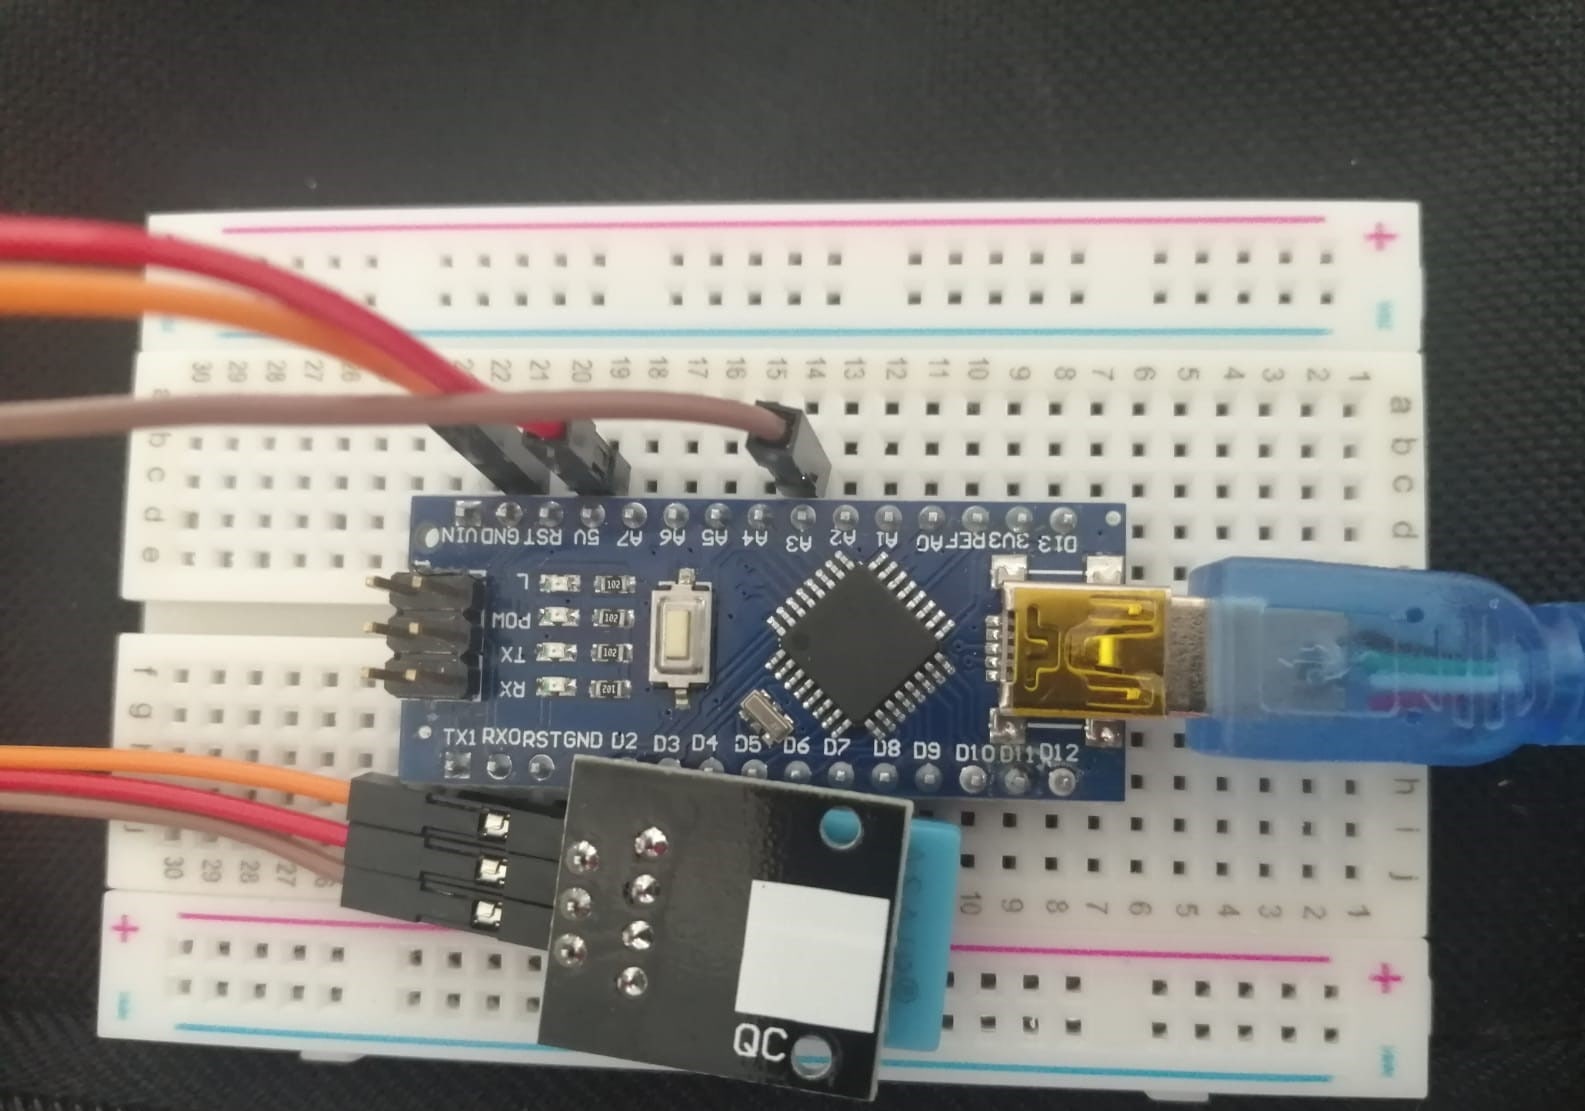
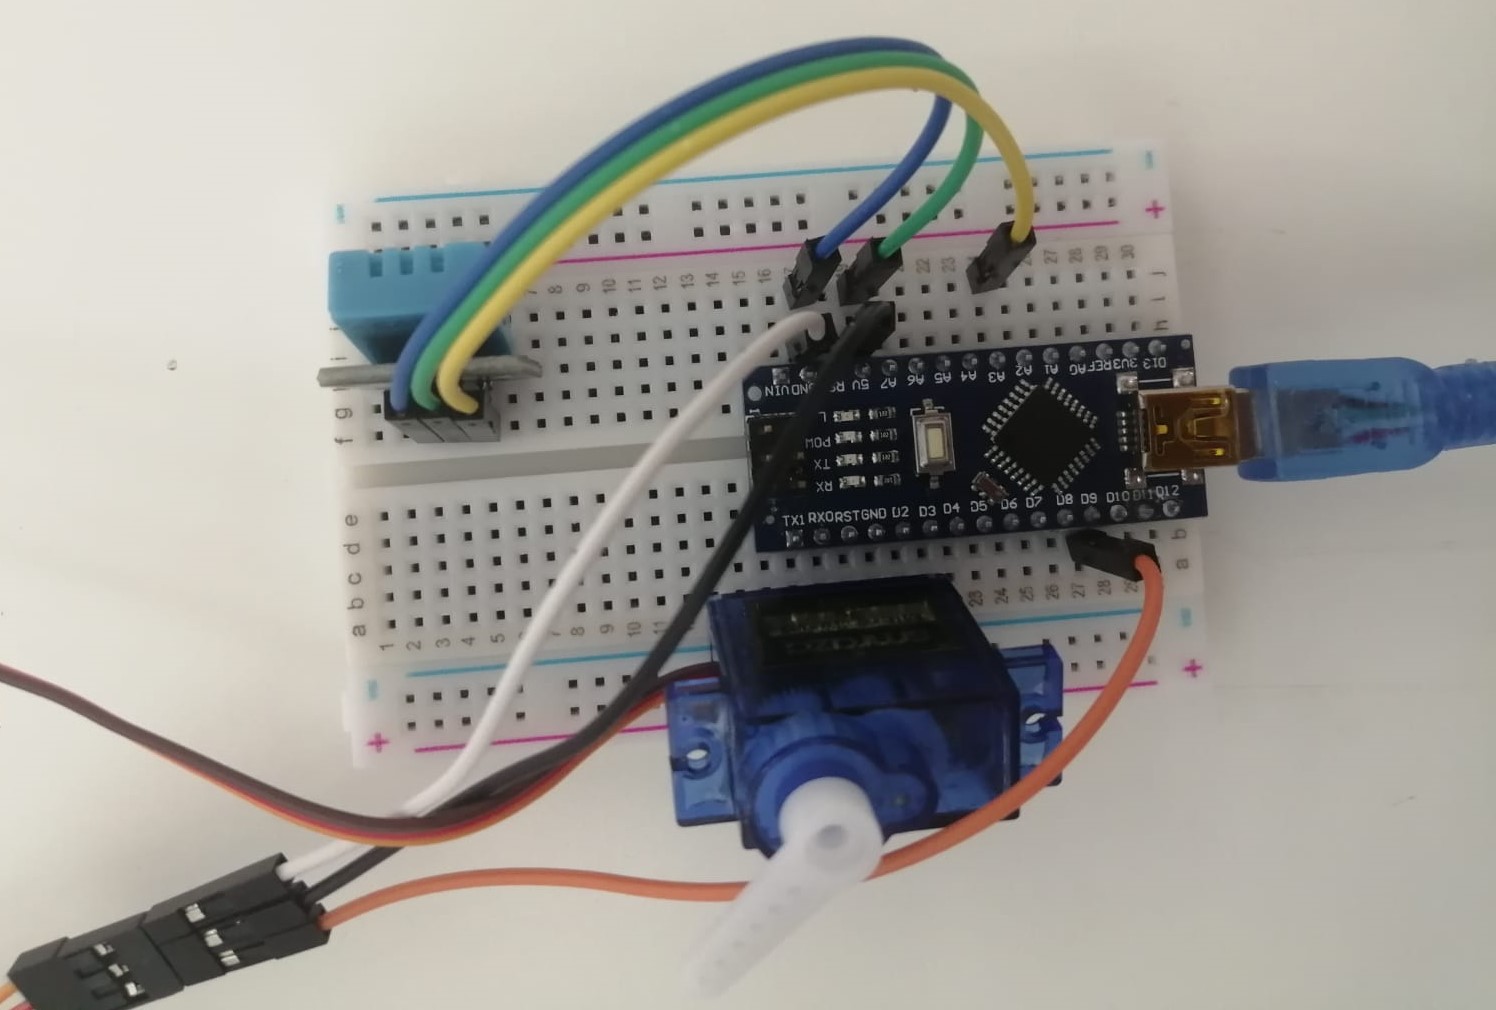
To run the Arduino program and calculate the humidity and temperature first you need to link the HD11 with the Microcontroller using a jump wires and bread board and they will look like this.
Then, we download a file or DHTLib library from this link - Circuit Basics_ setup DH11 because the Arduino need this information or library to run the code and get the results also we can get from this link some code that help us using the sensor.

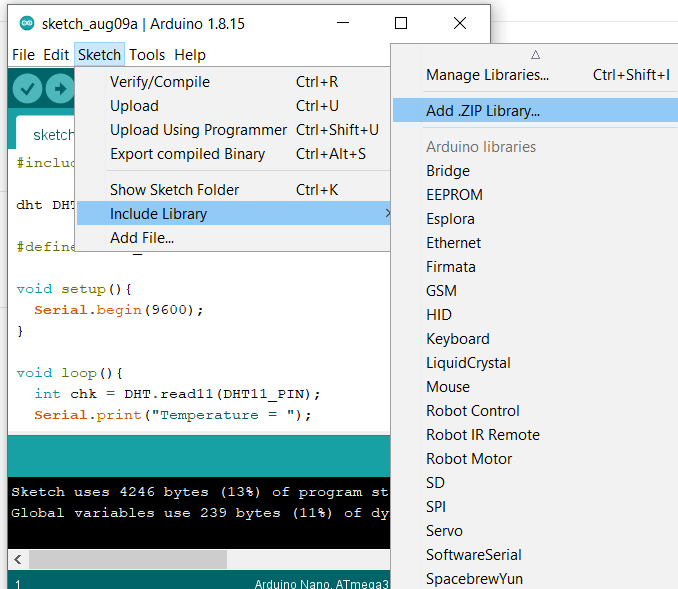
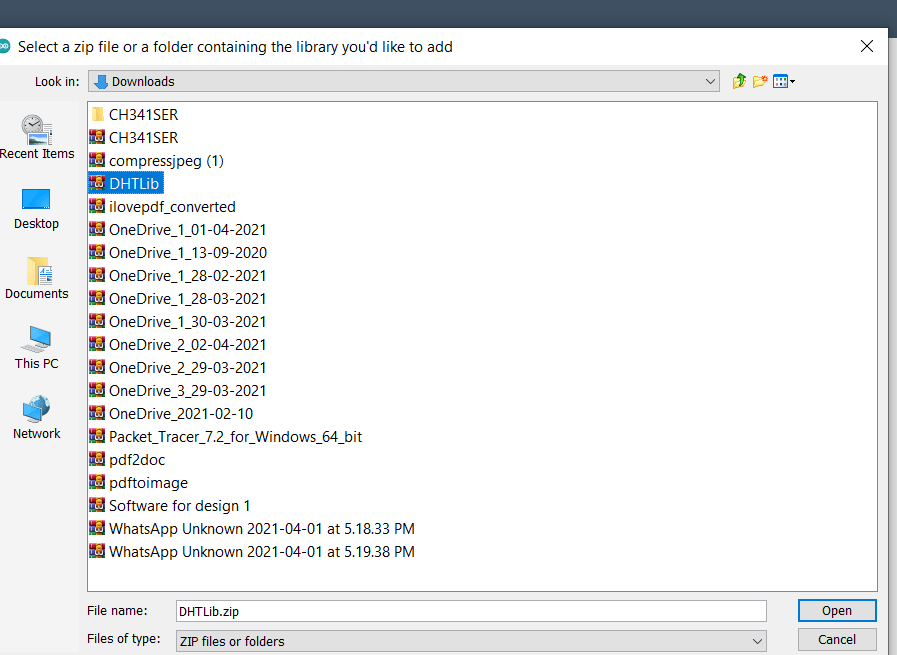
After that, we open Arduino and go to sketch option than to include library than click to Add.ZIP Library and upload the DHTLib that we download it from above links.
Then, from the same links we copy a code that will give us the humidity and temperature and put it in the Arduino that we open it.
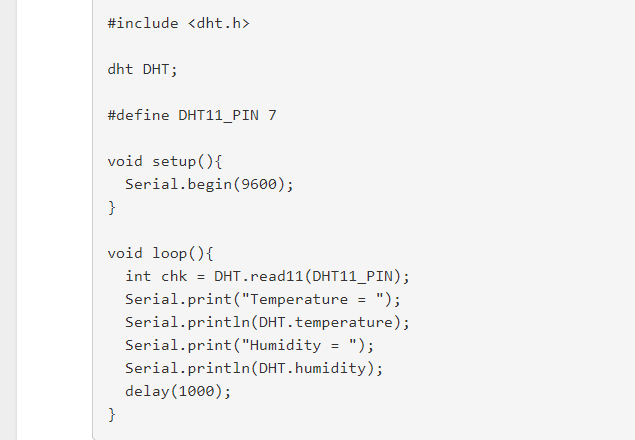
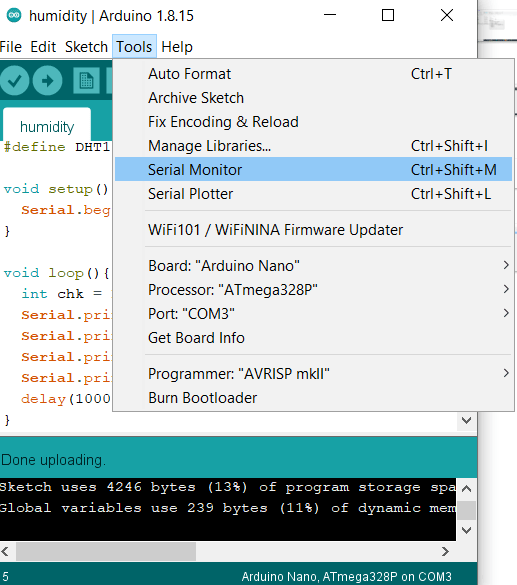
Next, to get the values from the code after we run it we go to Tools option then click on serial monitor.
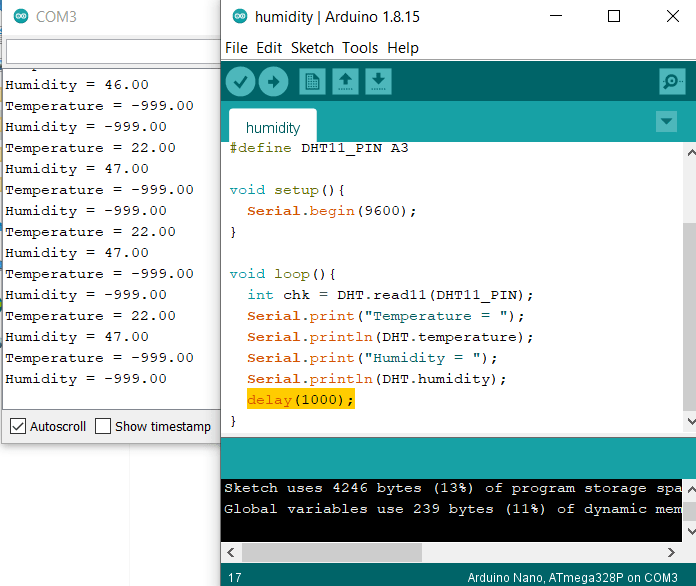
After that, we run it but it doesn’t work, so I try to see or search what happen and I find that the pin in the code not the same the pin I put it for signal wire. It is written A7 in the code but I put it A3 in my works, so I need to change it to A3 or the program will not work. After that, I run it again and have some values about the humidity and temperature but we can note that we got the first correct value but the second is in the negative sign that is means there is somethings wrong.
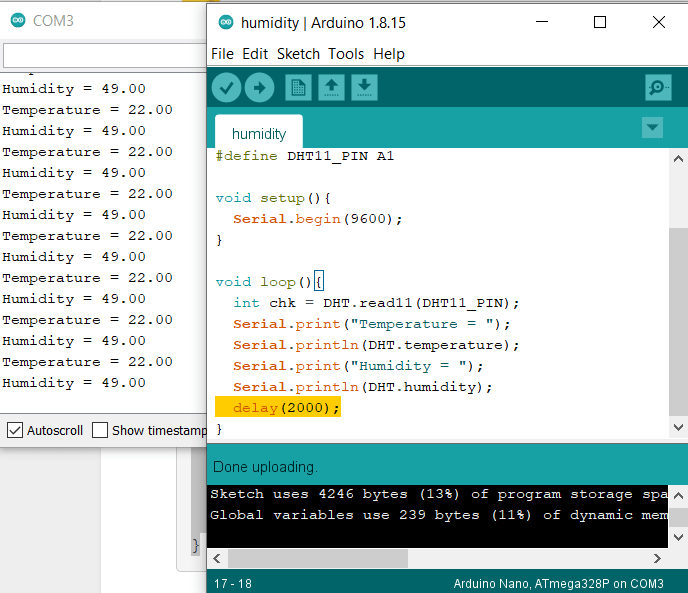
I not that the program gives us value every second and every two seconds we note the value is correct, so I do some change on the code and change the calculated value from every second to every two seconds.
2- mercury tilt switch-hw_505 (position sensor)
Mercury switches have one or more sets of electrical contacts in a sealed glass envelope that contains a small quantity of mercury. Tilting the switch in the opposite direction moves the mercury away from that set of contacts, breaking that circuit.
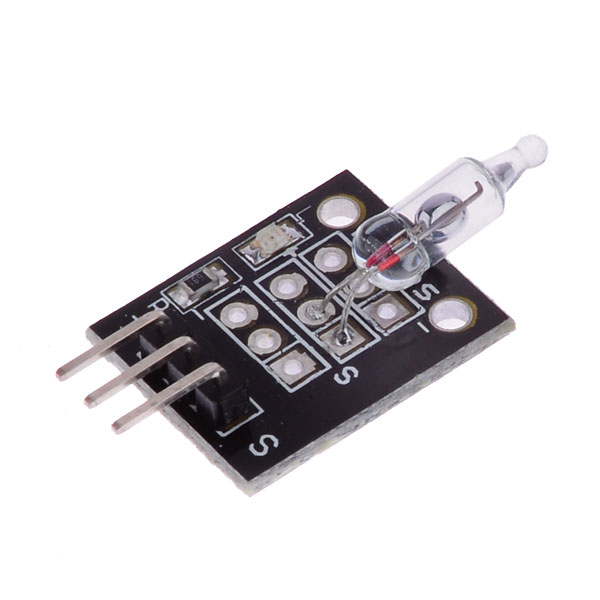
And this sensor have 3 pins you can connect it with the Microcontroller using the bread board and jumping wires and they will look like this:
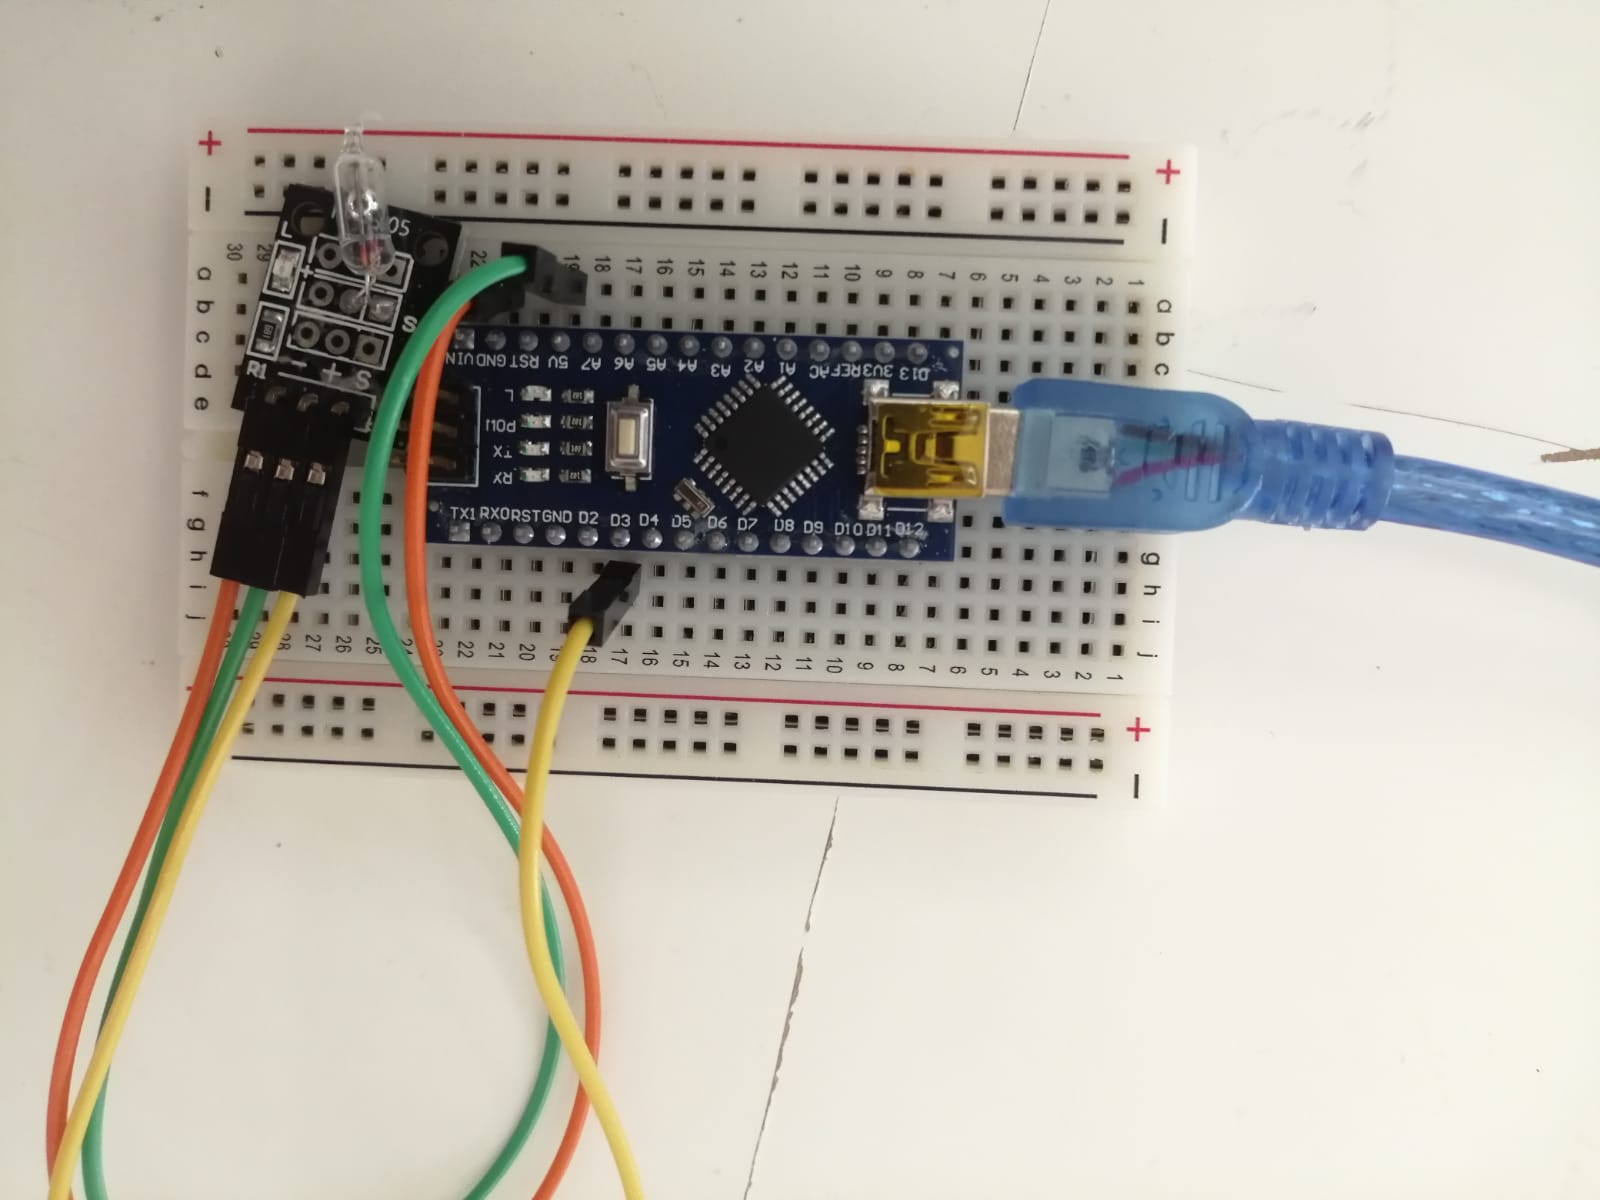
Then by connect them with the computer and using Arduino to write codes or get it from some website.
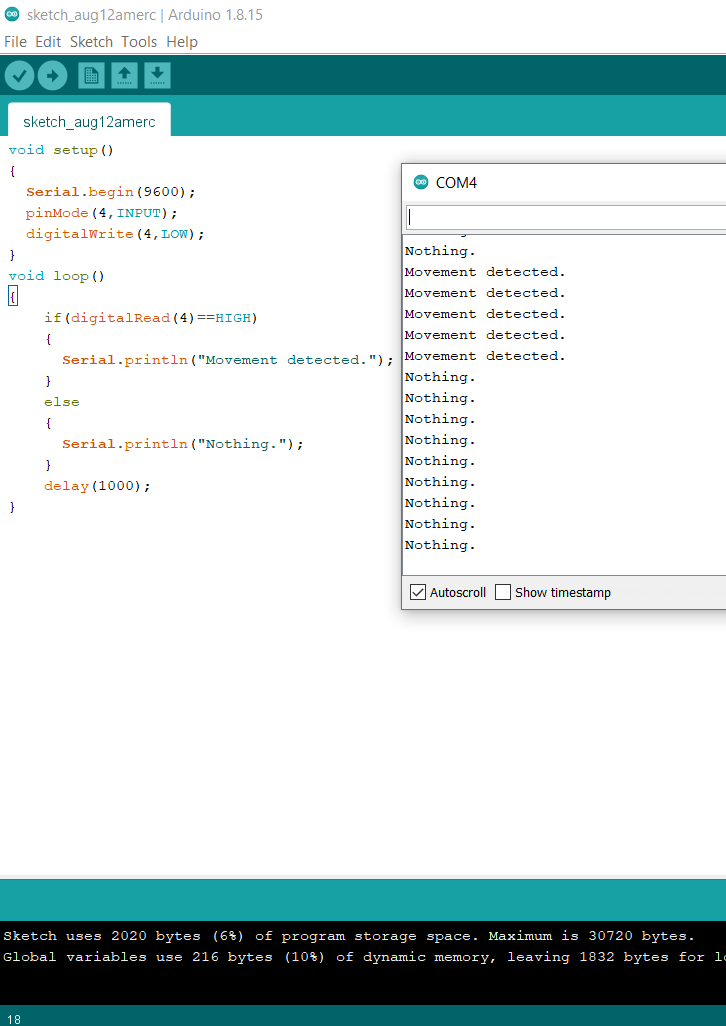
This code means if I move the sensor up the Arduino will give me or display to me words ‘movement detected’. And if I don’t move it or move it down the Arduino will display words ‘nothing’.
Output part:
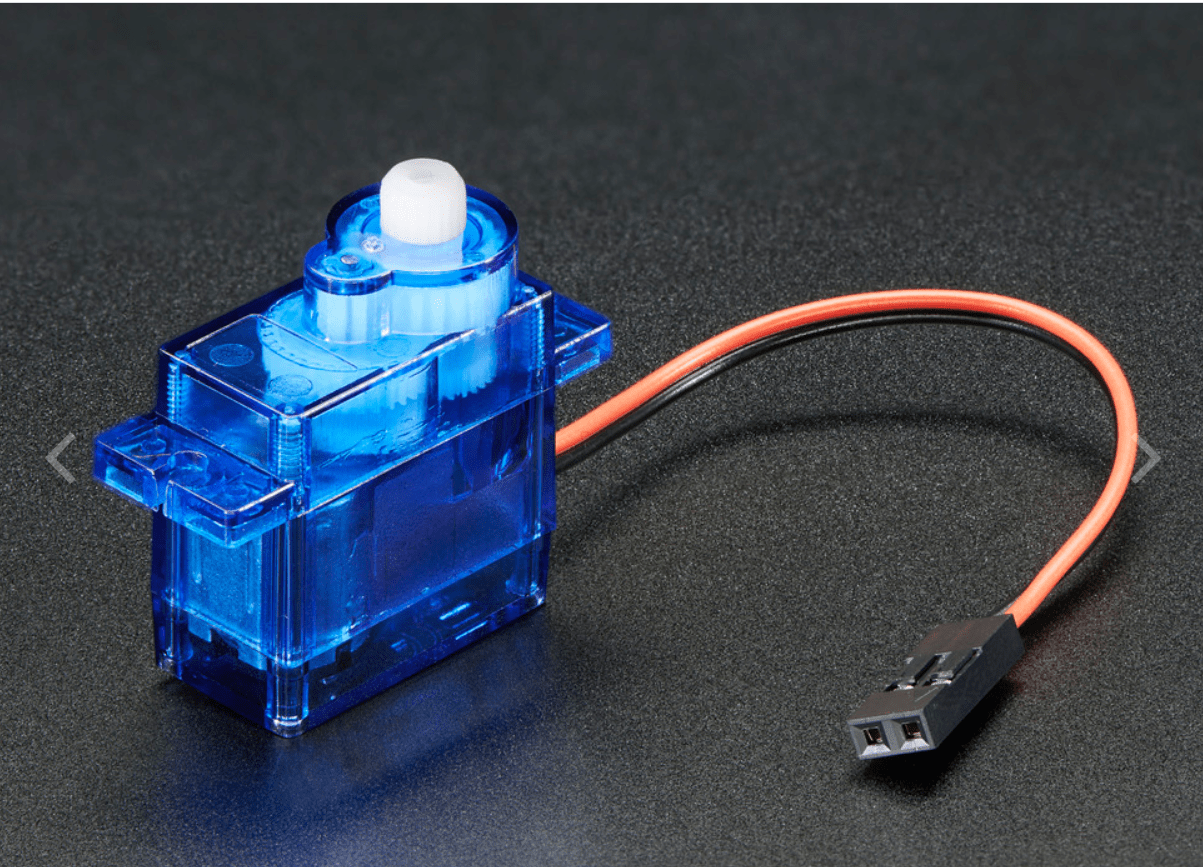
1- Smaraza (S51) or servo motor
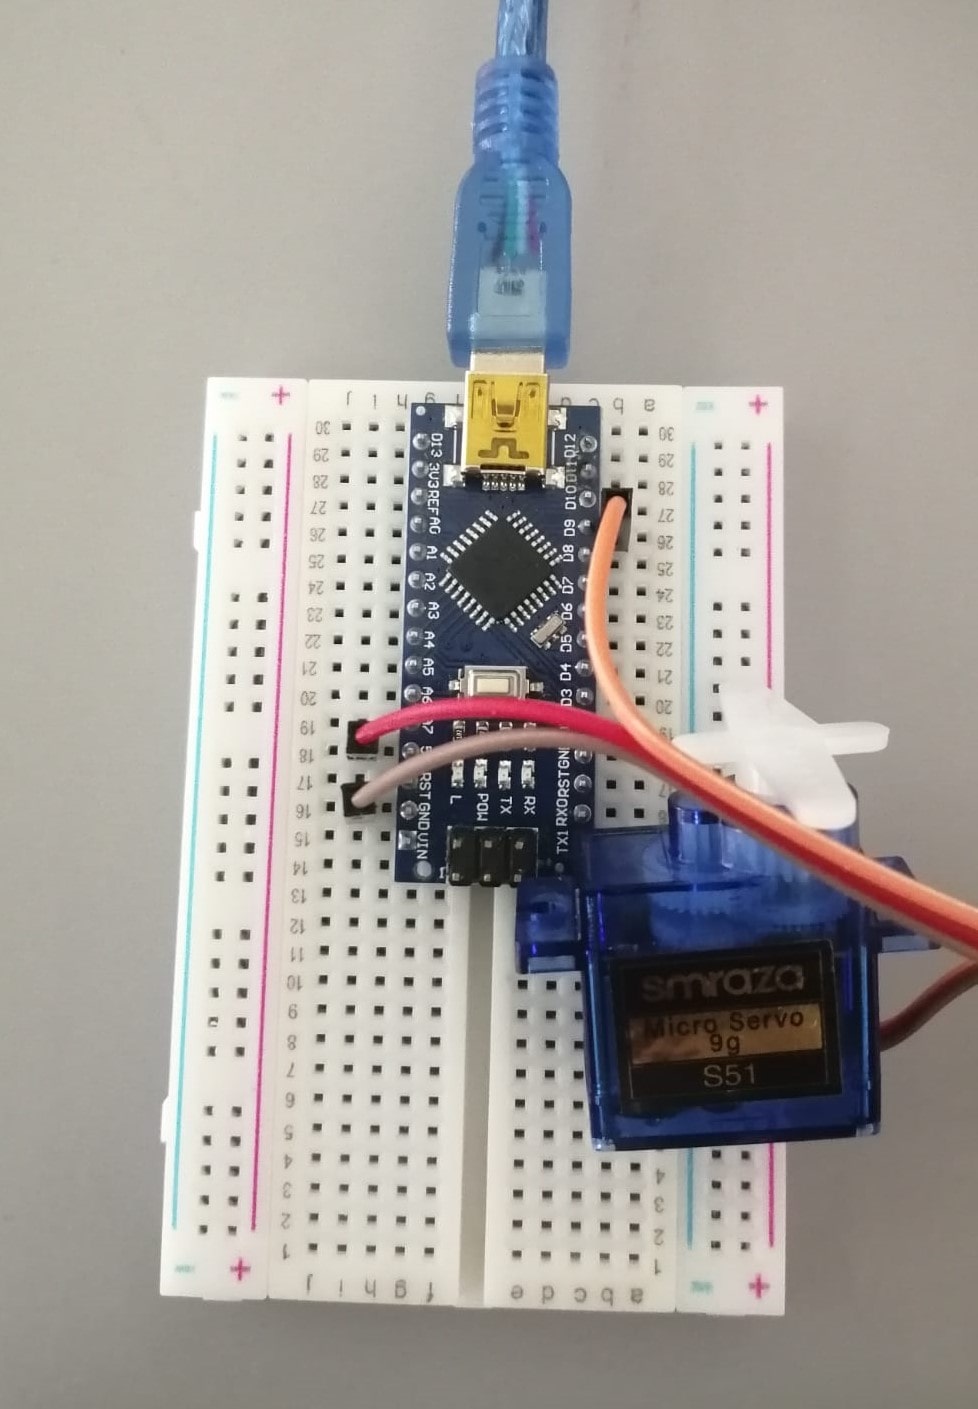
Now we will work about output part using Arduino program we will do the same steps by using Microcontroller and line it with Smaraza(S51) on the bread board.
After we link them together then connect them with the laptop the laptop or computer they look like this.
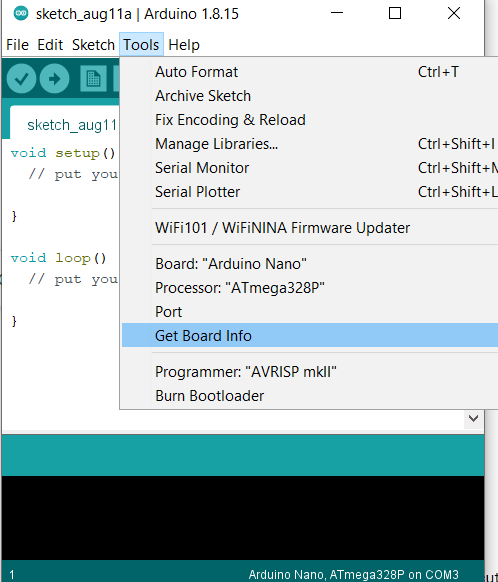
Then, open Arduino and see if the option we do it before are the same or we need to put them again.
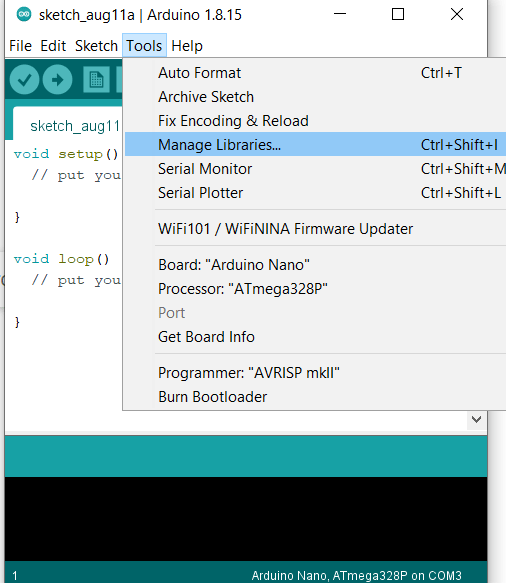
We go to Tools option and click on manage libraries it will show you window about libraries.
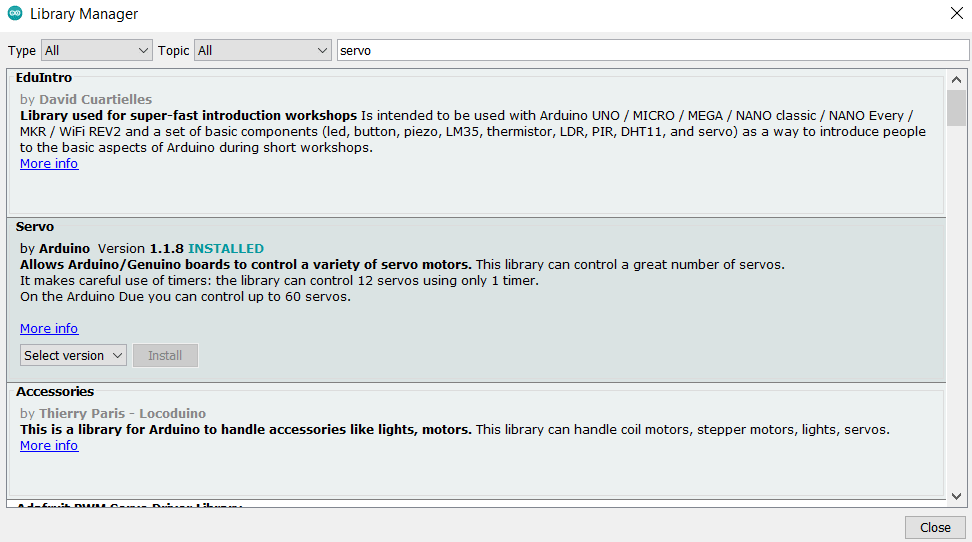
 From this window you can search about servo library that allowed you to control a variety of servo motors. It makes carful use of timers: the library can control a 12 servos using only 1 timers.
Next, we go to file then examples option and search about servo that you can see it down it have two option knop and sweep.
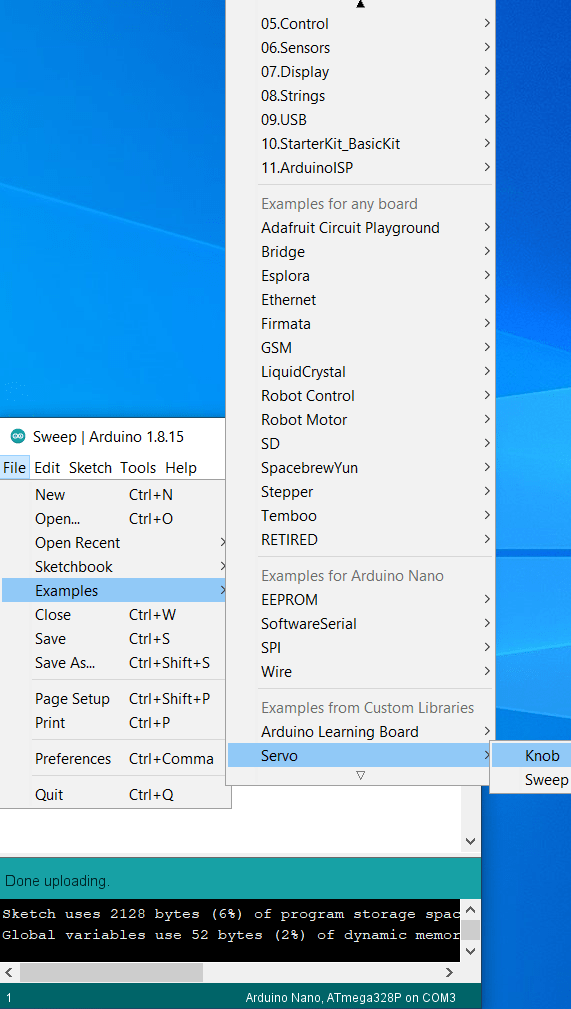
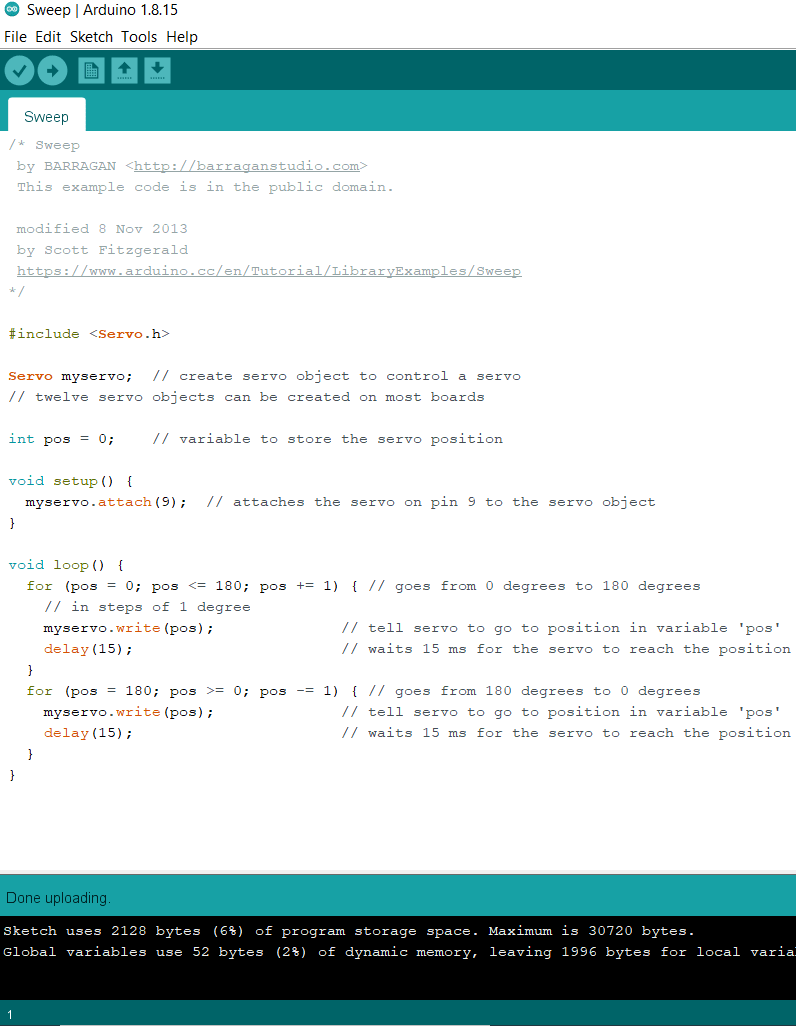
We try to click on of them to see what it will gives you then try the other one. We find that Sweep gives you this simple code that makes the motor move 180 degree than stops and move to the other side to 180 degree to the starts point.
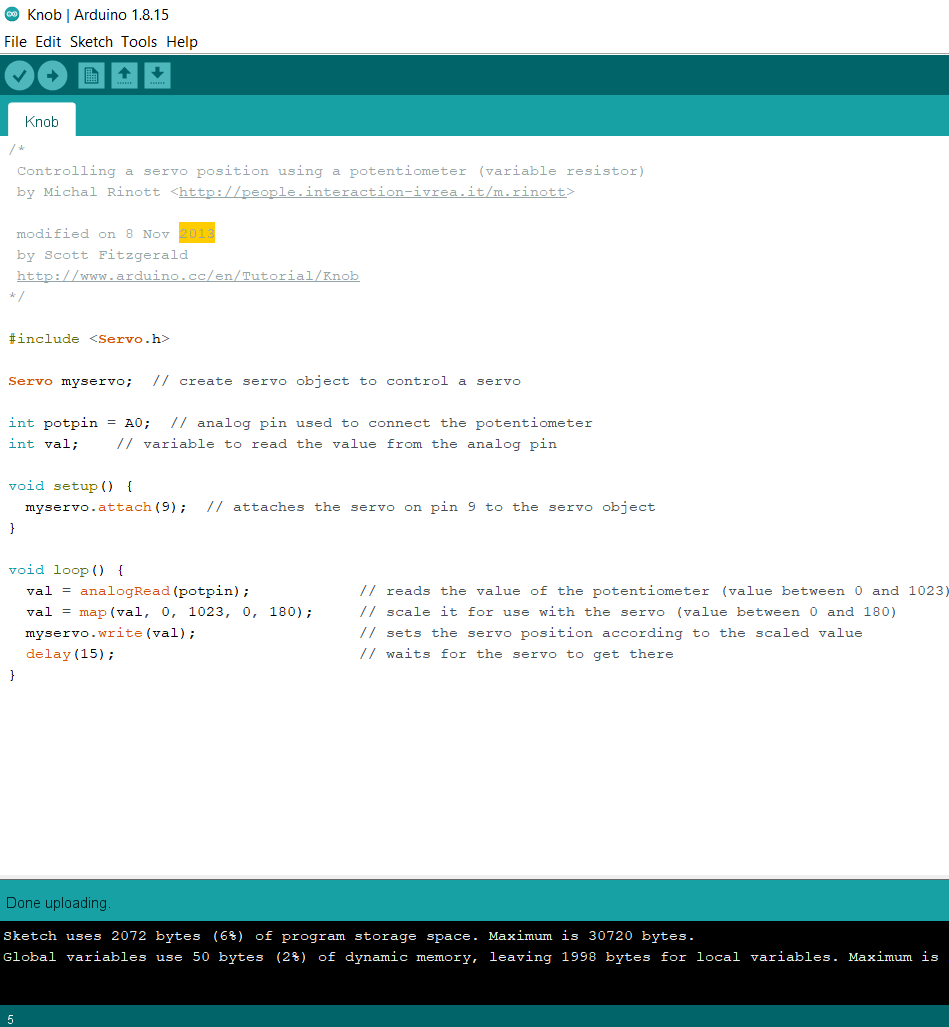
And knop will gives you code make the motor vibrate.
Finally, click to verify than upload you can find it above under the option to run the codes and make the servo motor works.
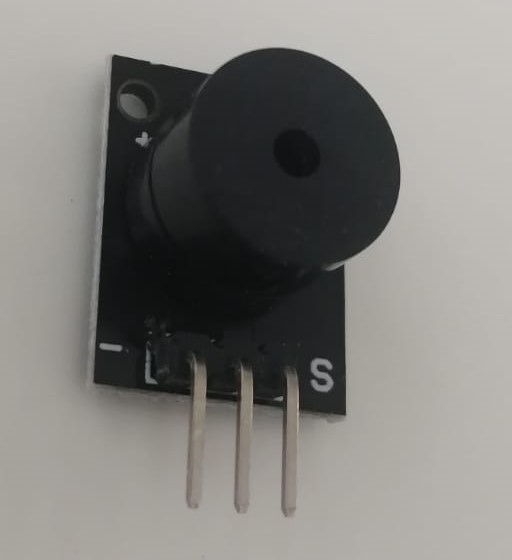
2- buzzer device
The buzzer will give us a sound using tone command with Arduino. The buzzer consists of an outside case with two pins to attach it to power and ground. When current is applied to the buzzer it causes the ceramic disk to contract or expand. Changing the This then causes the surrounding disc to vibrate. That’s the sound that you hear.
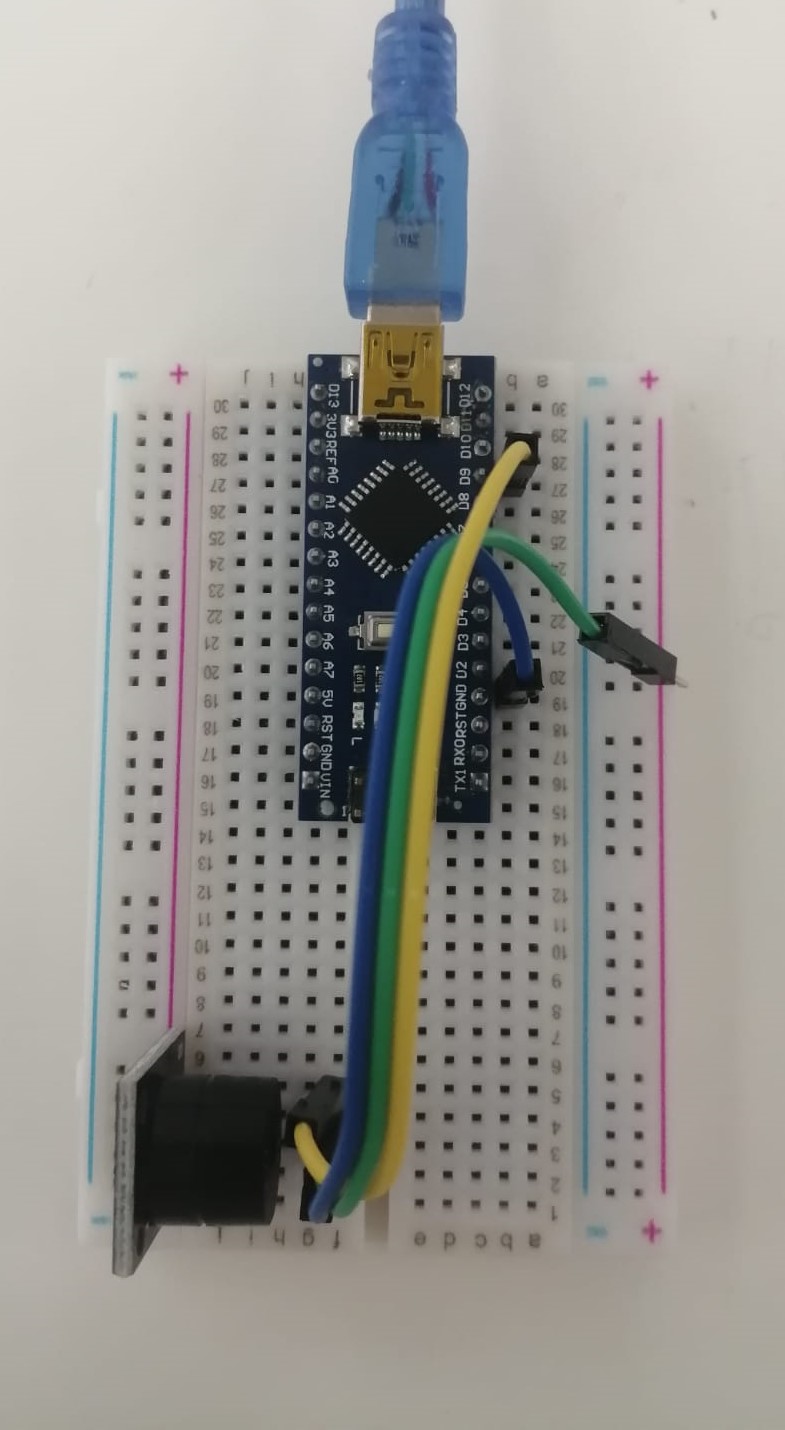
I First connect the device with the Microcontroller on the bread board using the humping wires.
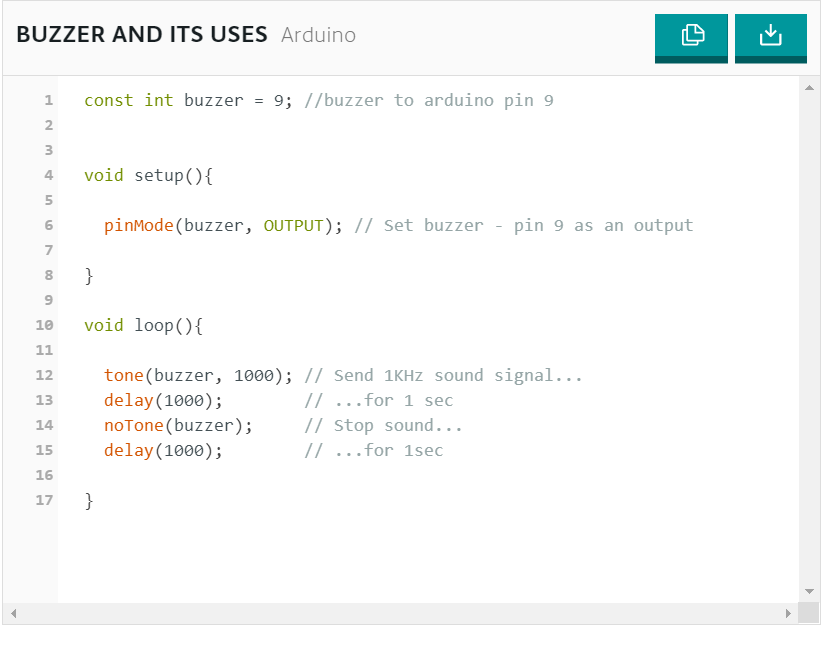
Then, I search about some codes from google and I find this website USE a BUZZER MODULE that has a codes and some guideline that make the buzzer works and give us sounds. This code means the buzzer will give us 1KHz sound signal for 1 second then stop for another second after that works for another second and so on.
This website also talk about buzzer how you can make it works and the needed part for connection and the way of it.
Compiled Two Devices
1-First Test:
First I tried to connect the humidity sensor with the Smaraza.
 I complied the codes for humidity sensor and smaraza or servo motor and finally get this codes.
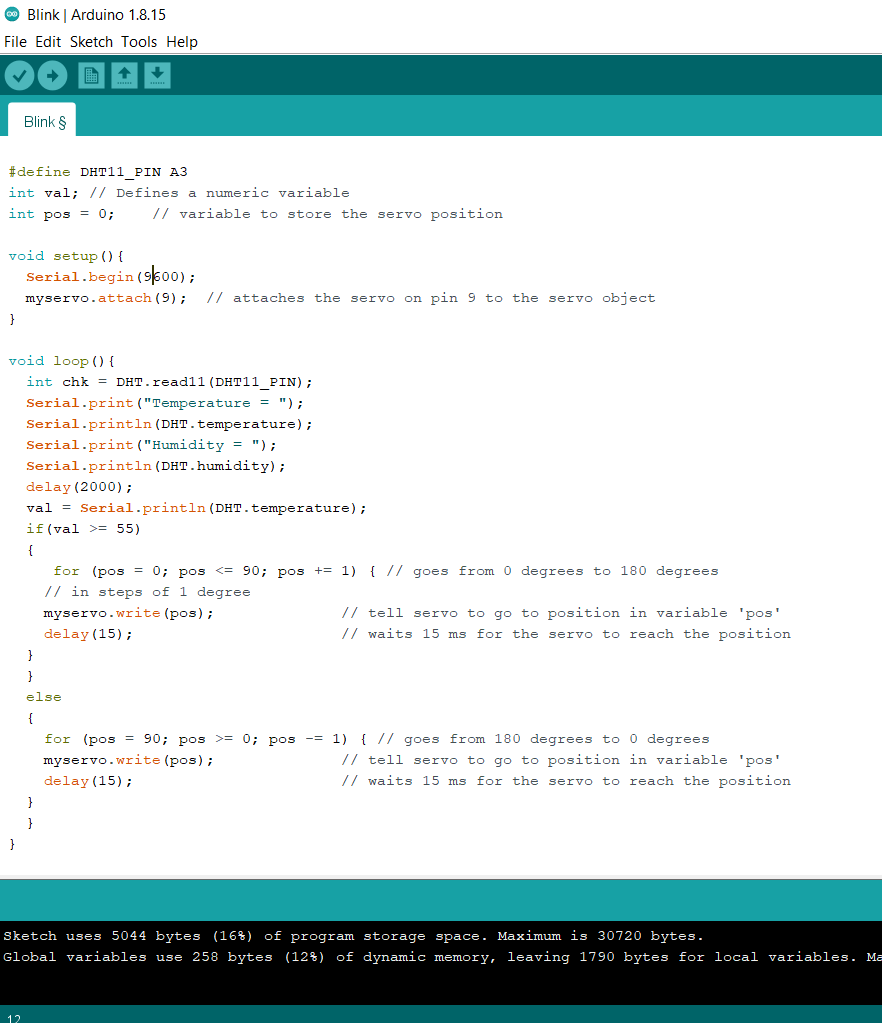
Then, I run the code using Arduino and the devices start working. When the temperature below 55 the motor goes from 180 degrees to 0 degrees, then after I rise the temperature using heater the motor goes from 0 degrees to 180 degrees.
2- Second Test:
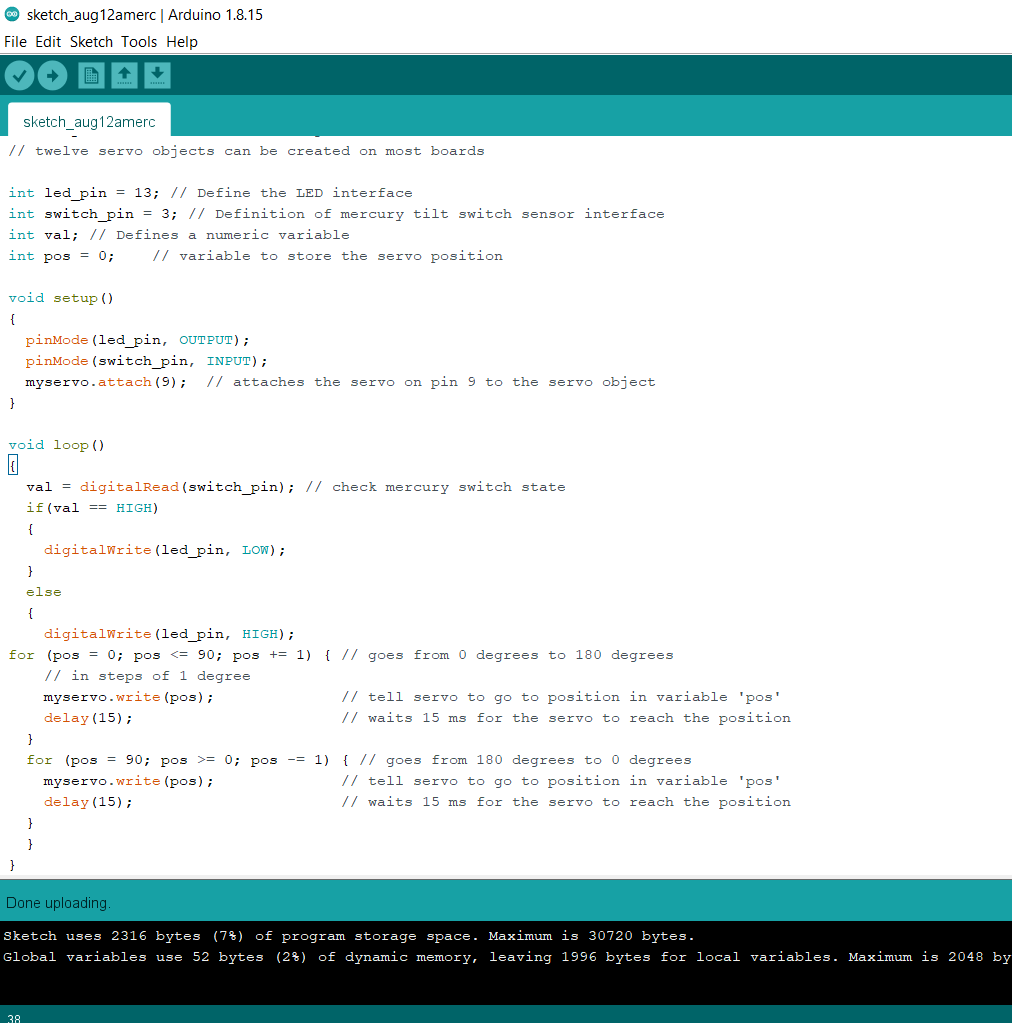
I tried other devices like mercury tilt switch with the servo motor.
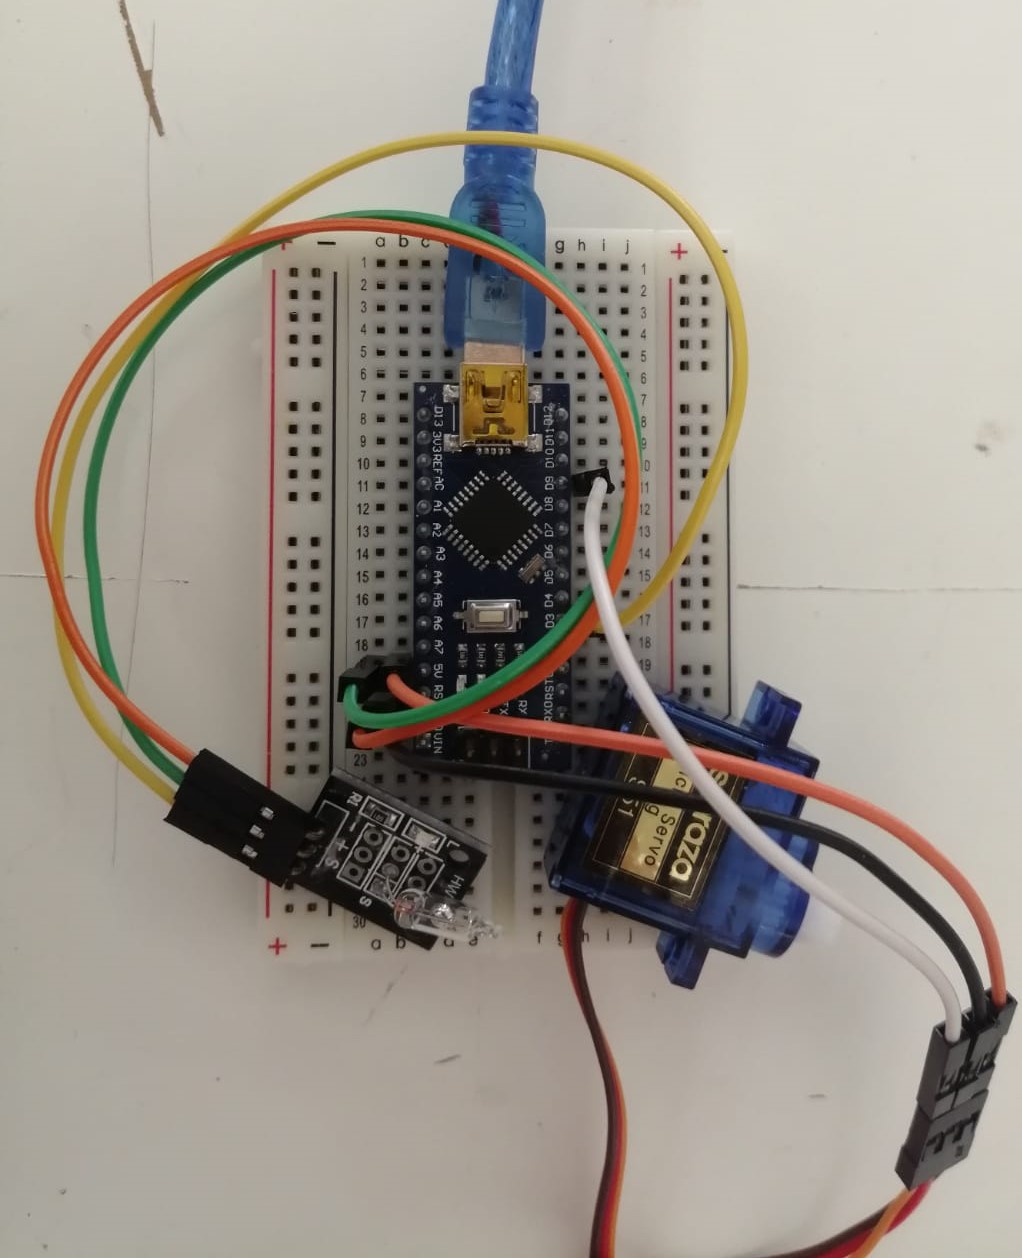
After I complied the codes of them together they look like this.
3- Third Test And Final One:
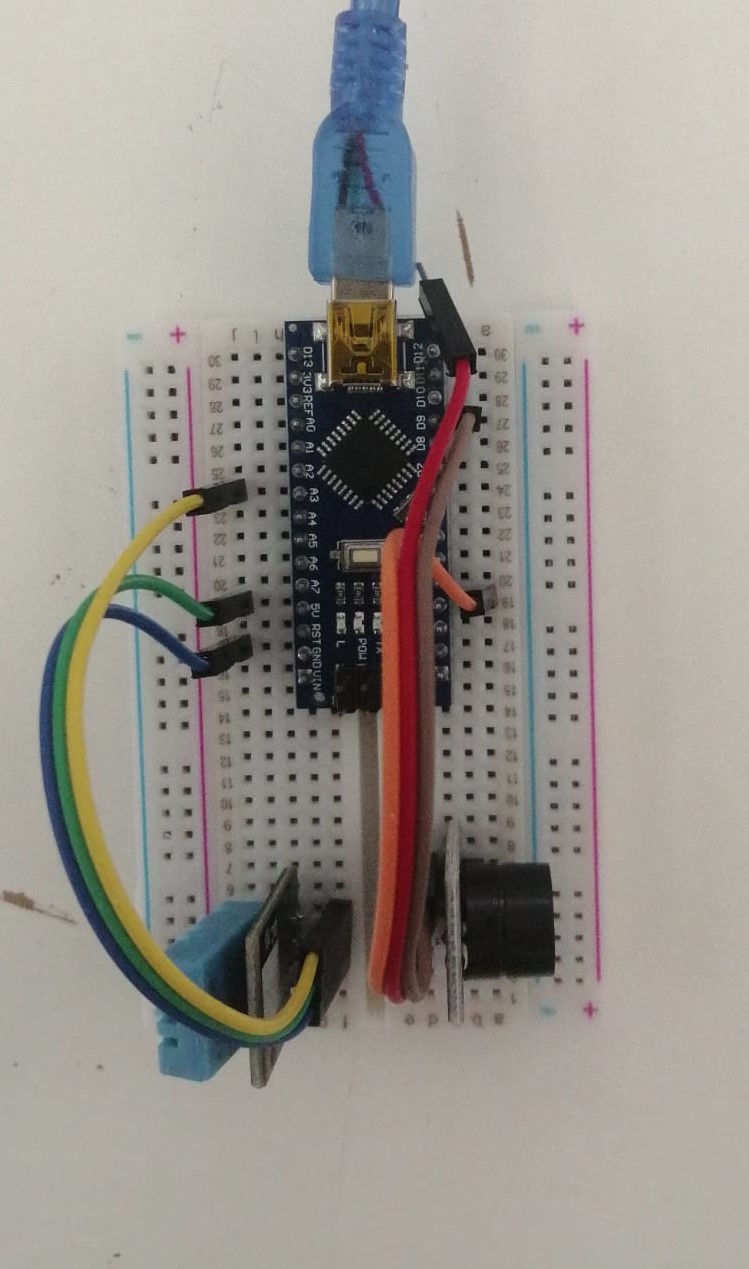
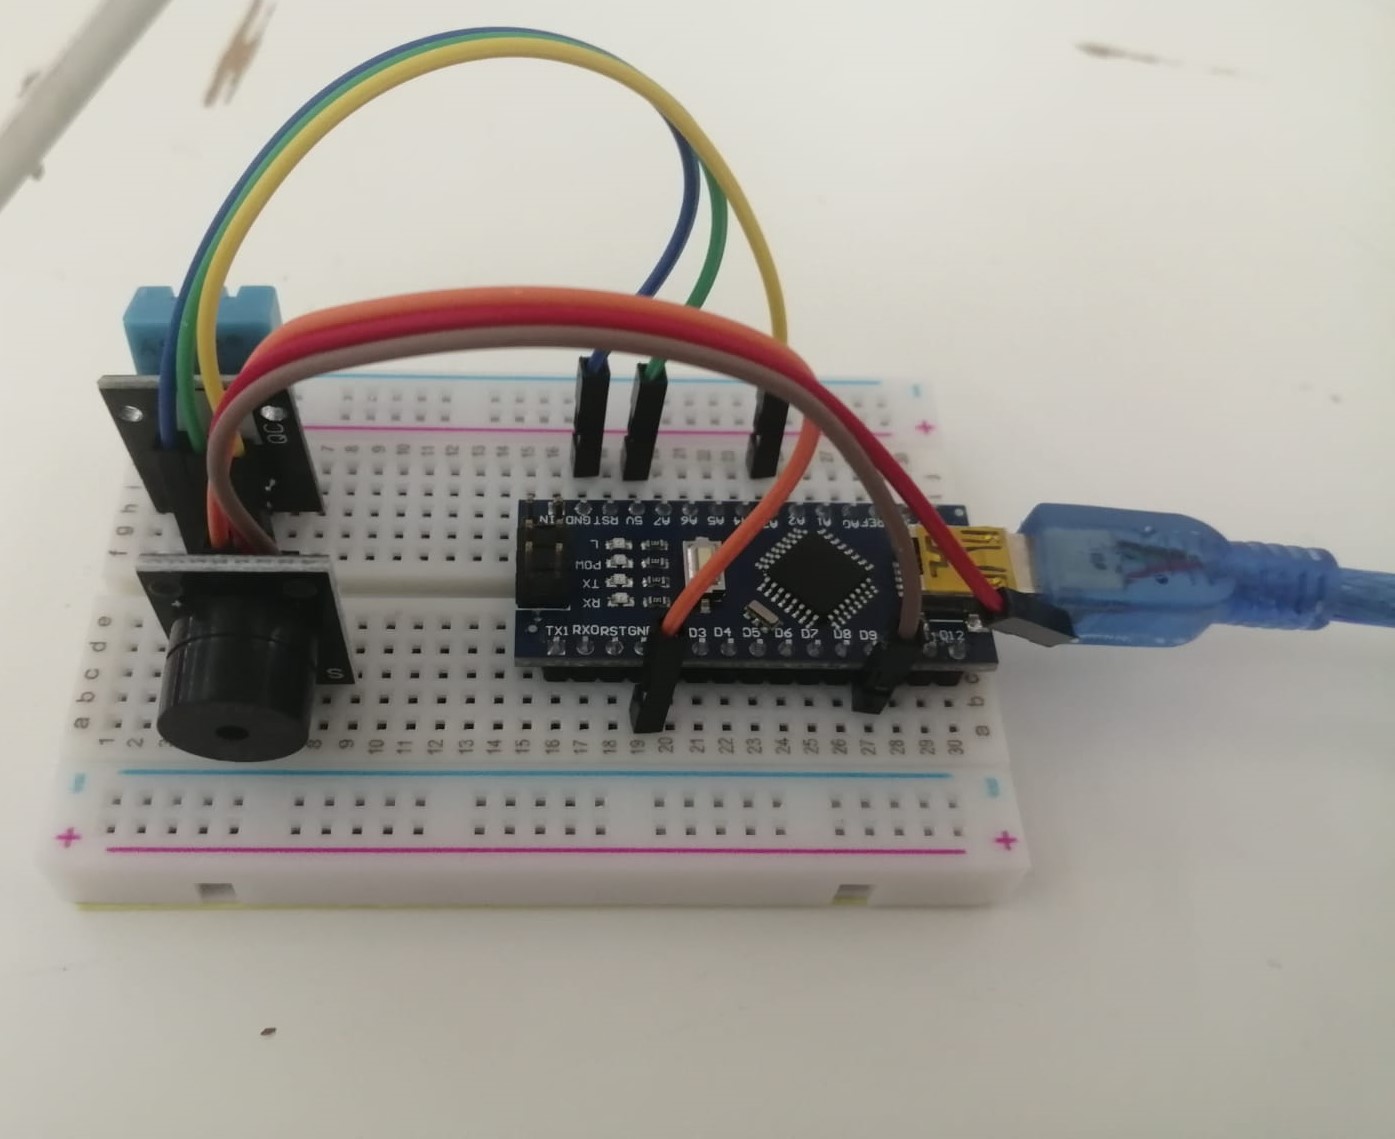
I tried to complied the buzzer device and humidity sensor. the buzzer will give us a sound using tone command with Arduino. The buzzer consists of an outside case with two pins to attach it to power and ground. When current is applied to the buzzer it causes the ceramic disk to contract or expand. Changing the This then causes the surrounding disc to vibrate. That’s the sound that you hear, so after I link these two devices together with the Microcontroller they look like this:
Then, I complied there codes together and tried to make them works by changing the codes and delete the codes that we don’t need it to get something that we will get benefit from it.
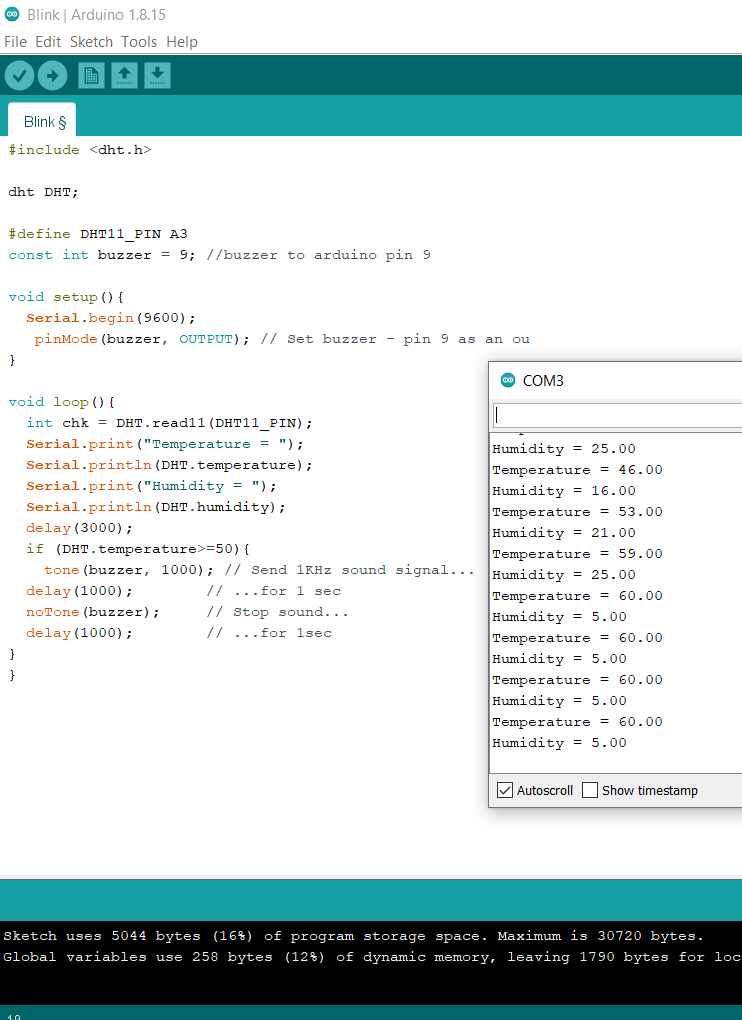
This codes using the two devices will give us a sound when the temperature be above 50 degree. I use heater to rise the temperature above 50 degree because the temperature of the room equal 22 degree. At the end after the reading of the temperature of the humidity sensor rised above 50 the buzzer device give us a sound for 1 second and stop. And the sensor take a reading every 2 second so the loop of the code rework every 3 second. And this maybe used in industry on the factories or on certain machine that we want sound warning us if the temperature of it goes above certain one.
Useful links
- Guideline about Humidity sensor
- Guideline about mercury tilt switch
- Guideline about servo motor-Smaraza (S51) or
- Guideline about buzzer device