8. Molding and Casting
Molding and casting is another kind of procedure, in order to do new molded parts.
Safety First
In order to have a safety gaudiness to your process, you should follow couple of steps. While doing the milling machine work, you should stay away of the drill bit when it starts to operate and cover the machine with the lid; then start the machine. Make sure you open the lid after the process is finished and not during to prevent any kind of injuries. On the other hand, to do the silicon mold you should wear gloves, to prevent your hands of being dirty or sticky with the material you are working with. And also while pouring your casting material you should make this considerations too.
In order to know more about the material you are using follow these data sheets provided on the following headings topics. And the characteristic, and behavior of the material you are using is discussed on the following heading.
Molding Material
The material discussed in this section are the material I have used, to know more about the other different materials here is a link to the group assignment.
Machinable wax
The material used in order to do the permanent mold in the milling machine is called “machinable wax”, which comes in the form of blocks. They are purchase already and ready to use. If you want to make your own machinable wax you can follow the below video
A block of purple machinable wax was used in the milling process. It is solid at room temperature. It is non hazardous, non toxic, and it does not pose any risks to the environment. However, at elevated temperatures, it must be handled with heat-resistant gloves. It can catch fire when heated above flash point (240 degrees Celsius). It is chemically stable, but must be kept afar from strong oxidizing agents, to avoid the production of carbon dioxide and carbon monoxide. More information is given in the link below.
Silicone
It calls as the rubber mold making. The material is not classified as hazardous on the EC regulation, but it contains some hazardous components that’s why you need to knw the safety data sheet of the material. The following pdfs are the safety data sheet of the silicon which is “ACC Silicones ACD”.
Casting Material
Epoxy Resin
Resin material can include both solid and highly viscous materials, but commonly refers to liquids which harden based on heat, setting agents, or light. Typically, modified or synthetic resins are used for manufacturing – they can be produced from natural components with additives or consist of artificial polymers. Resins also naturally give off fumes, and unless you work in a well-ventilated area, molecules from the fumes will get into your lungs and cause irritation there, too. Harmful when exposed to eyes or ingested: Never let resin near or into your eyes or mouth unless they’re specifically marked as non-toxic.
Gypsum
Gypsum is a soft sulfate mineral, it comes in powder form. It is mixed with a water, in a 1:1 ratio, to form a solid. It takes around 15 mins to solidify. Prolonged exposure by inhalation to this material is harmful to the human body. It may cause cancer through inhalation, and may cause damage to lungs, kidneys, and autoimmune system. Also, it causes skin irritation and eye irritation. More information can be found in the link below. * Gypsum Safety Data Sheet
Machine Settings
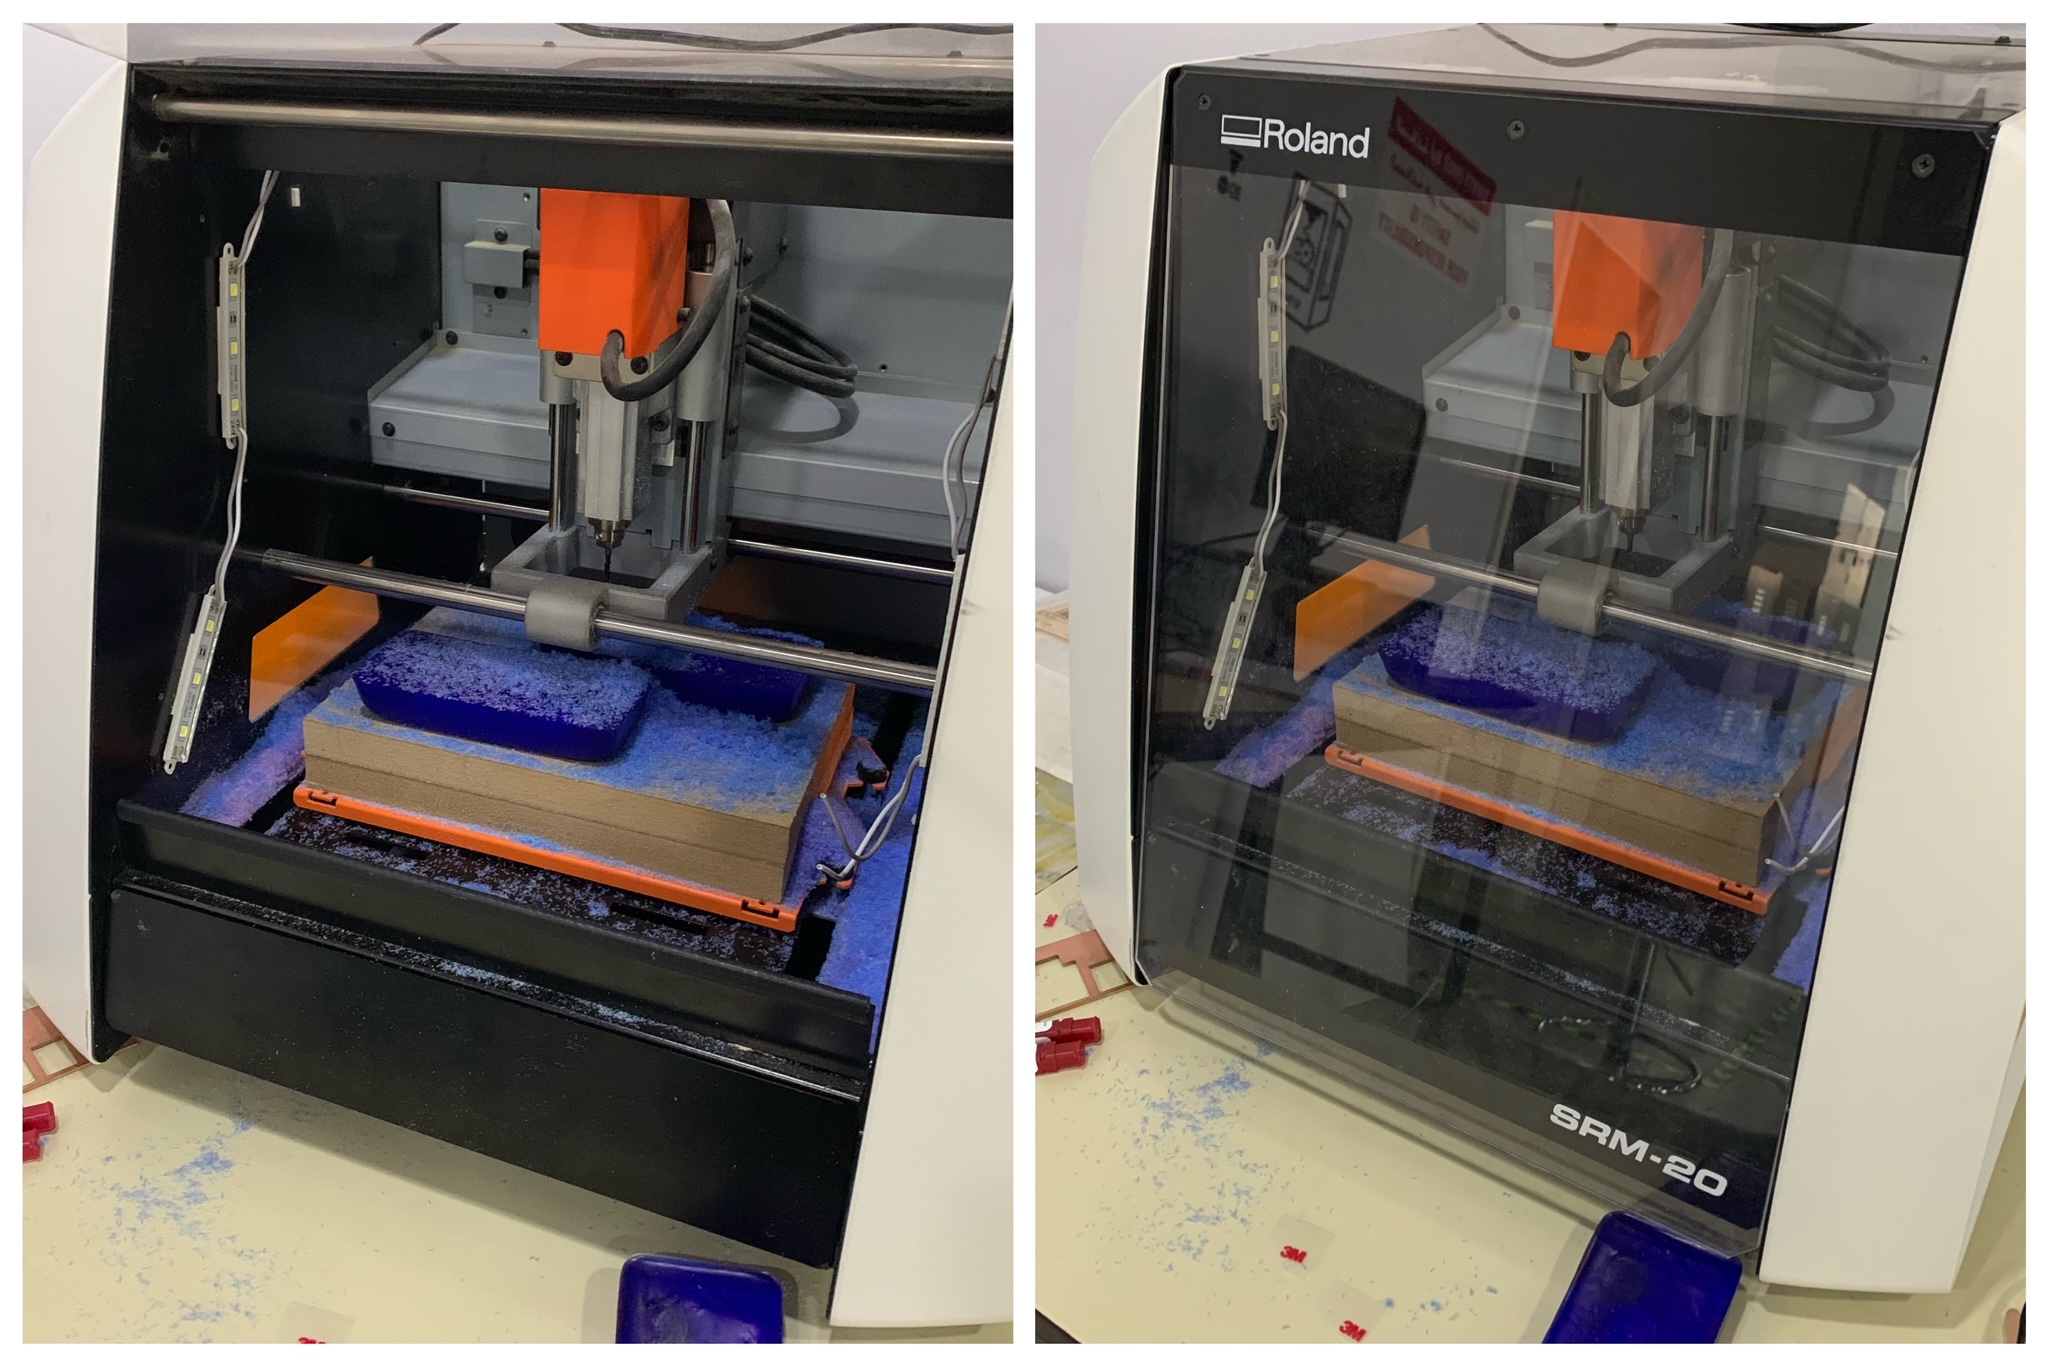
In order to do the molds we are going to use a milling machine in order to cut engraves of the molds. Our used milling machine is the “Roland”, which is shown in the following attached photo below:
 We are required to set the machine to our preferred settings using a program called as “SRP Player”, As shown below on the screenshots what I have done in order to set the machine to my configurations.
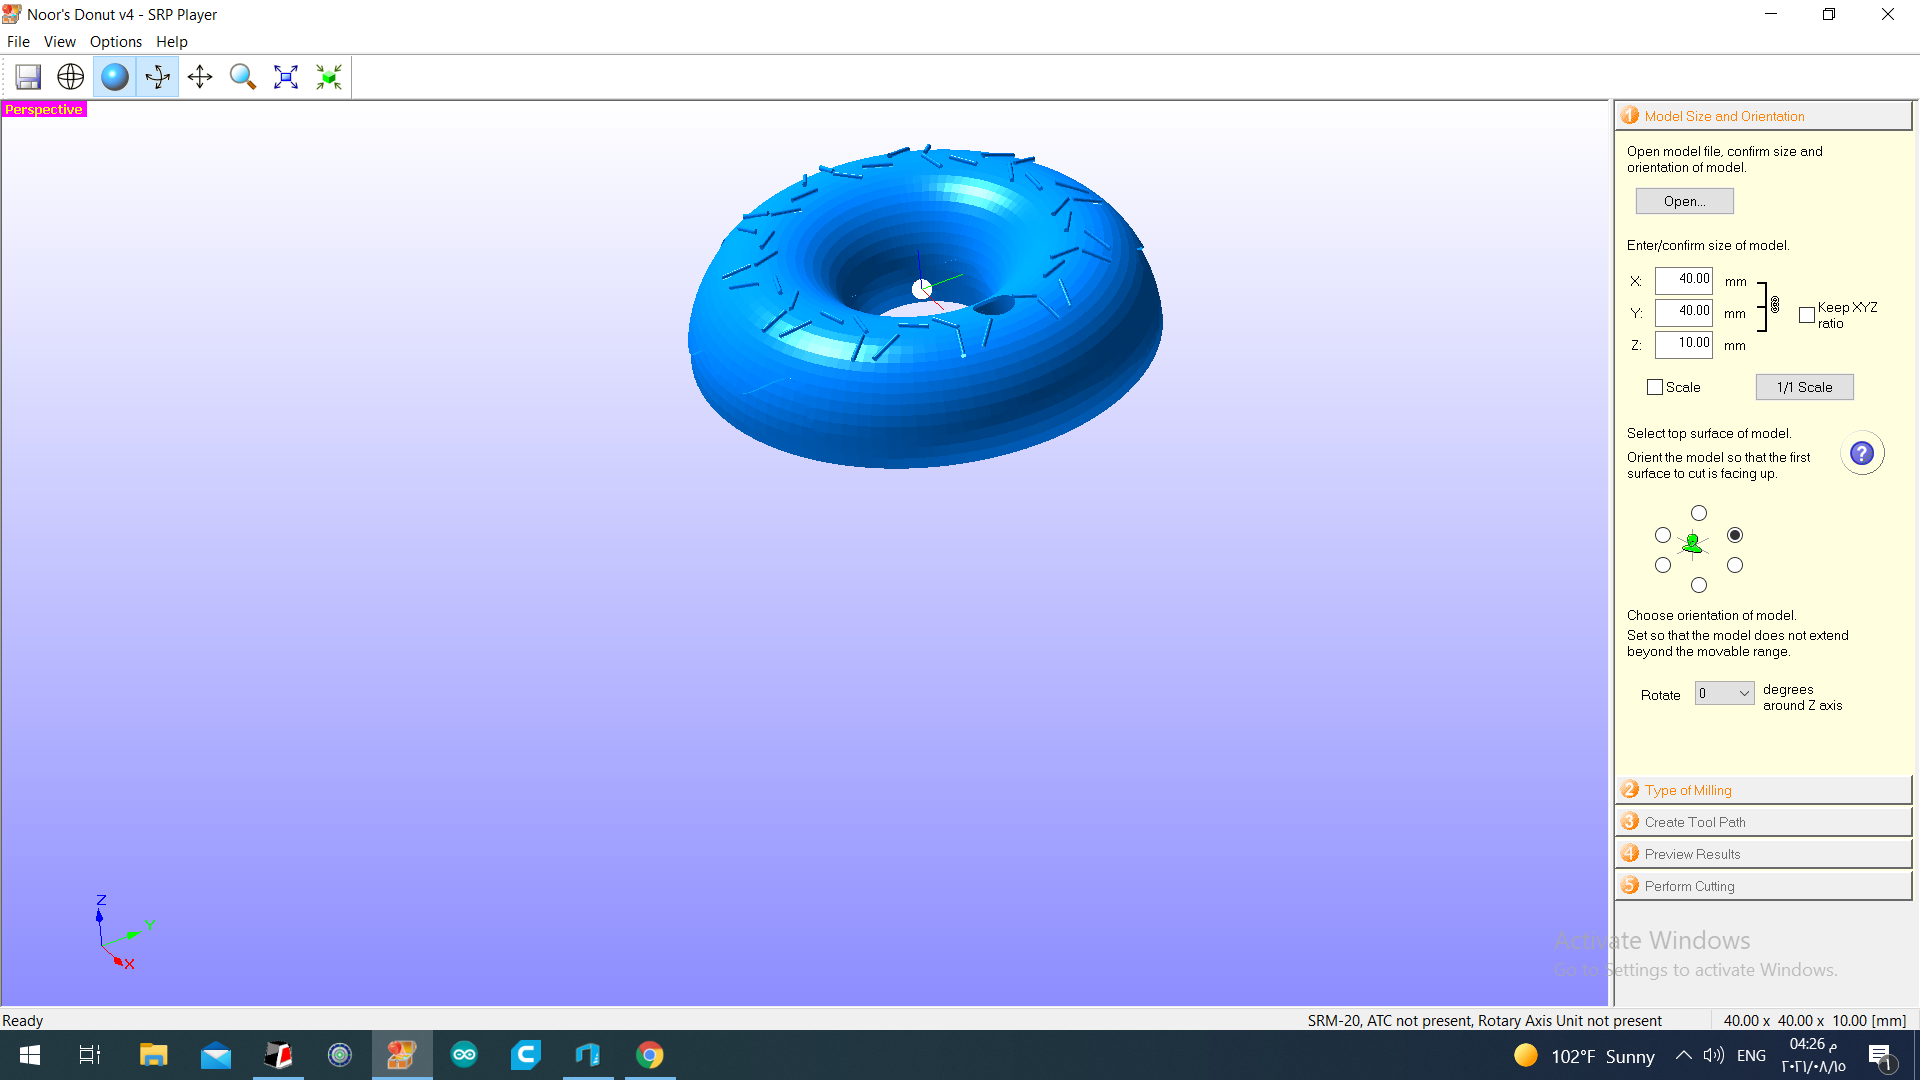
In model size and orientation, we should make sure that the (x,y,z) axis are all the same set up as the axis on the milling machine. I have edited the model size and scaled it down to make sure that it fits by the parts I have in the wax piece. It was about 5.5cm * 5.5cm. So I have selected my piece to be about 40mm by 40mm which is 4cm*4cm with the depth of 10mm pre set up.
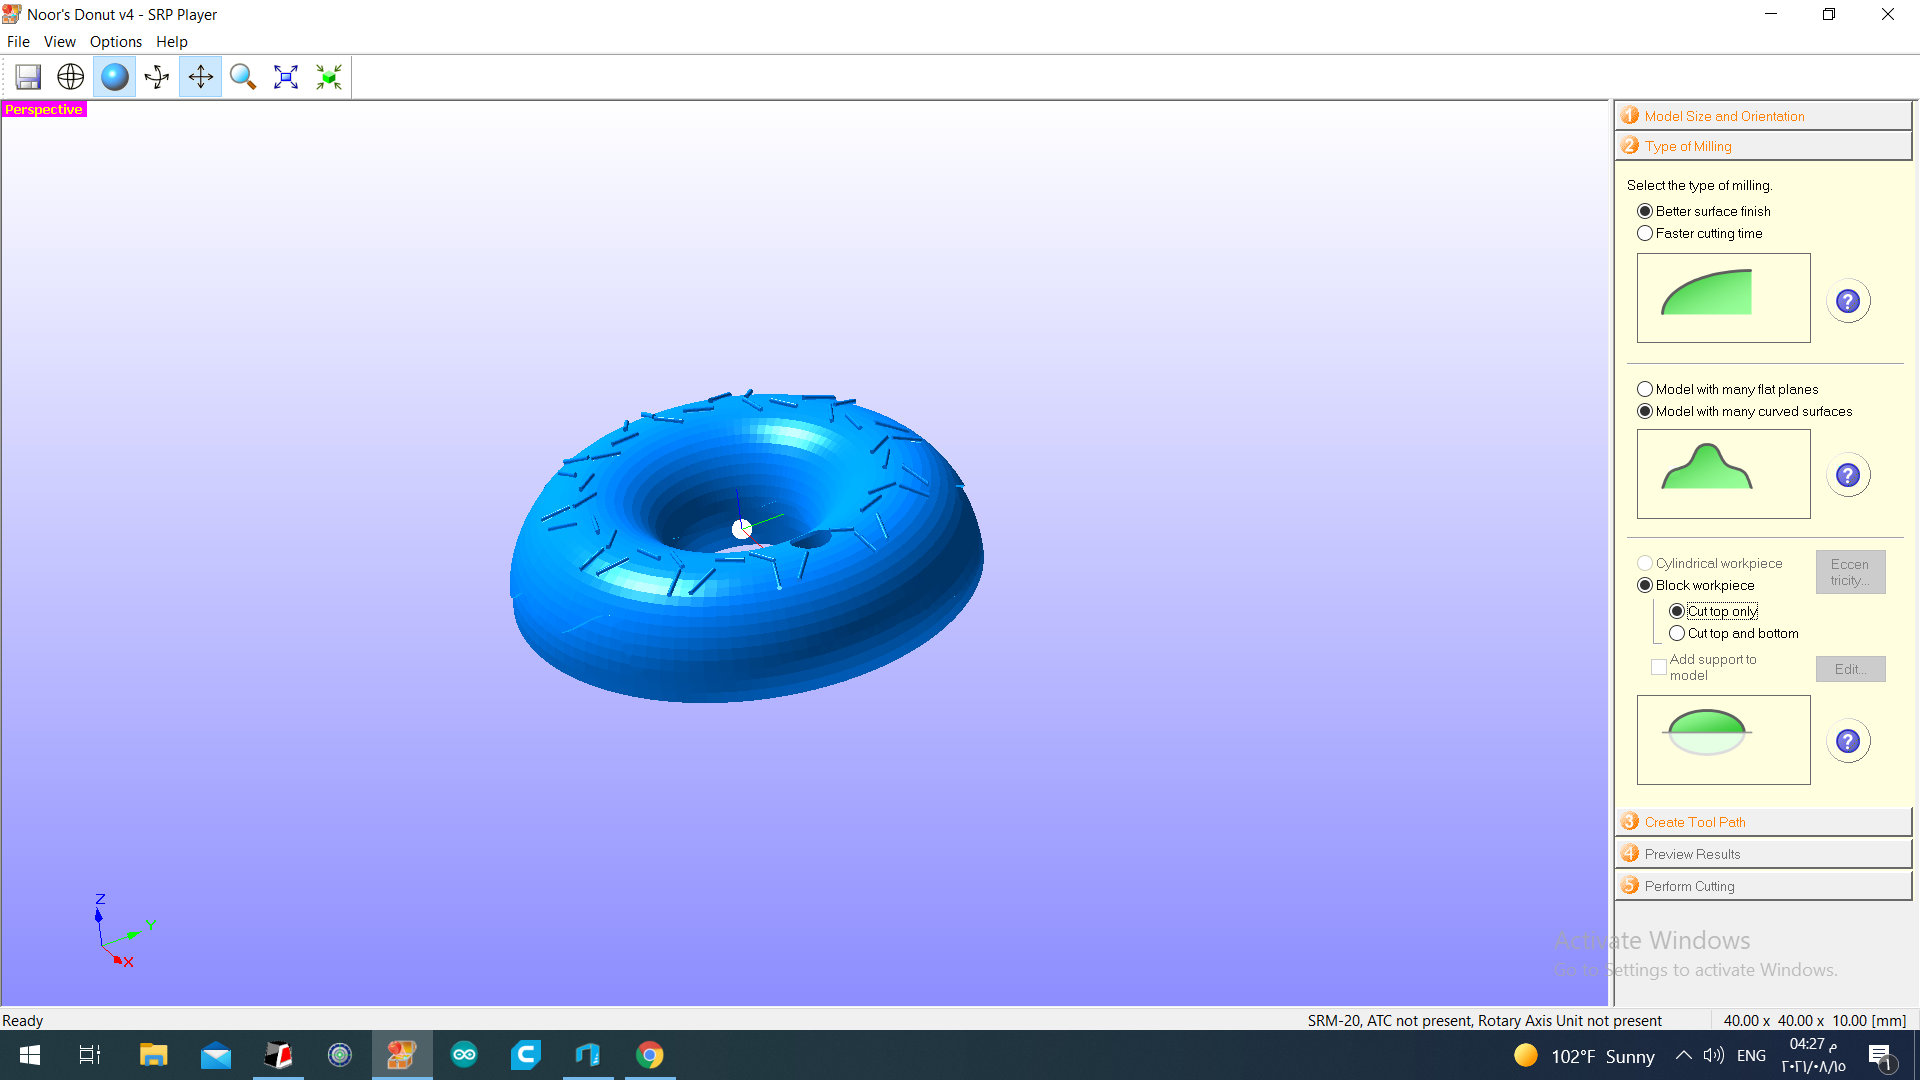
The second step is to choose the type of milling, so we have to select it as shown in the following picture.
Third step is to create a tool path, the tool path will show you how the milling machine works to do the mold. To prepare the work piece which I mentioned earlier that has a dimension of 5.5*5.5cm
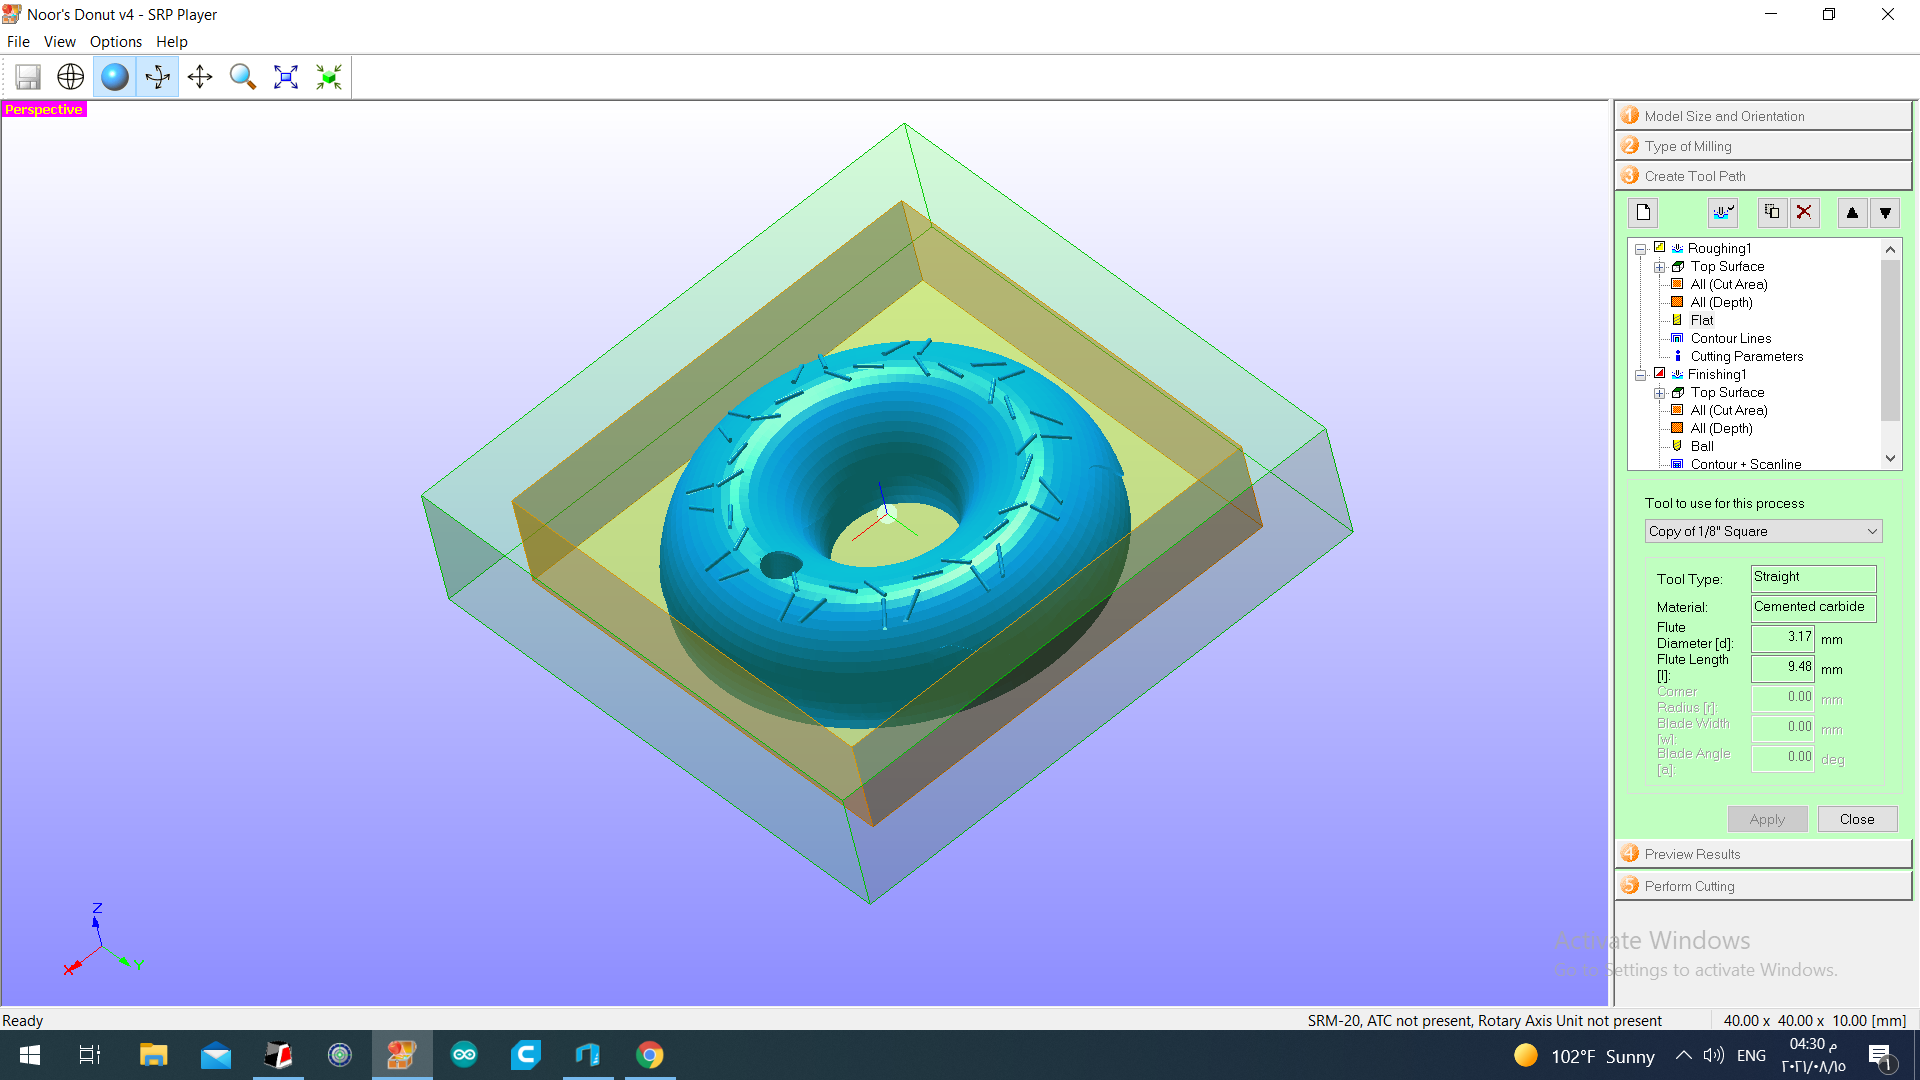
This following screenshot shows the step where you can adjust the ball of the drill bit to do a roughing with a bigger in diameter bit than the one that selected by the machine. By this step is actually sometime is done after the following step.

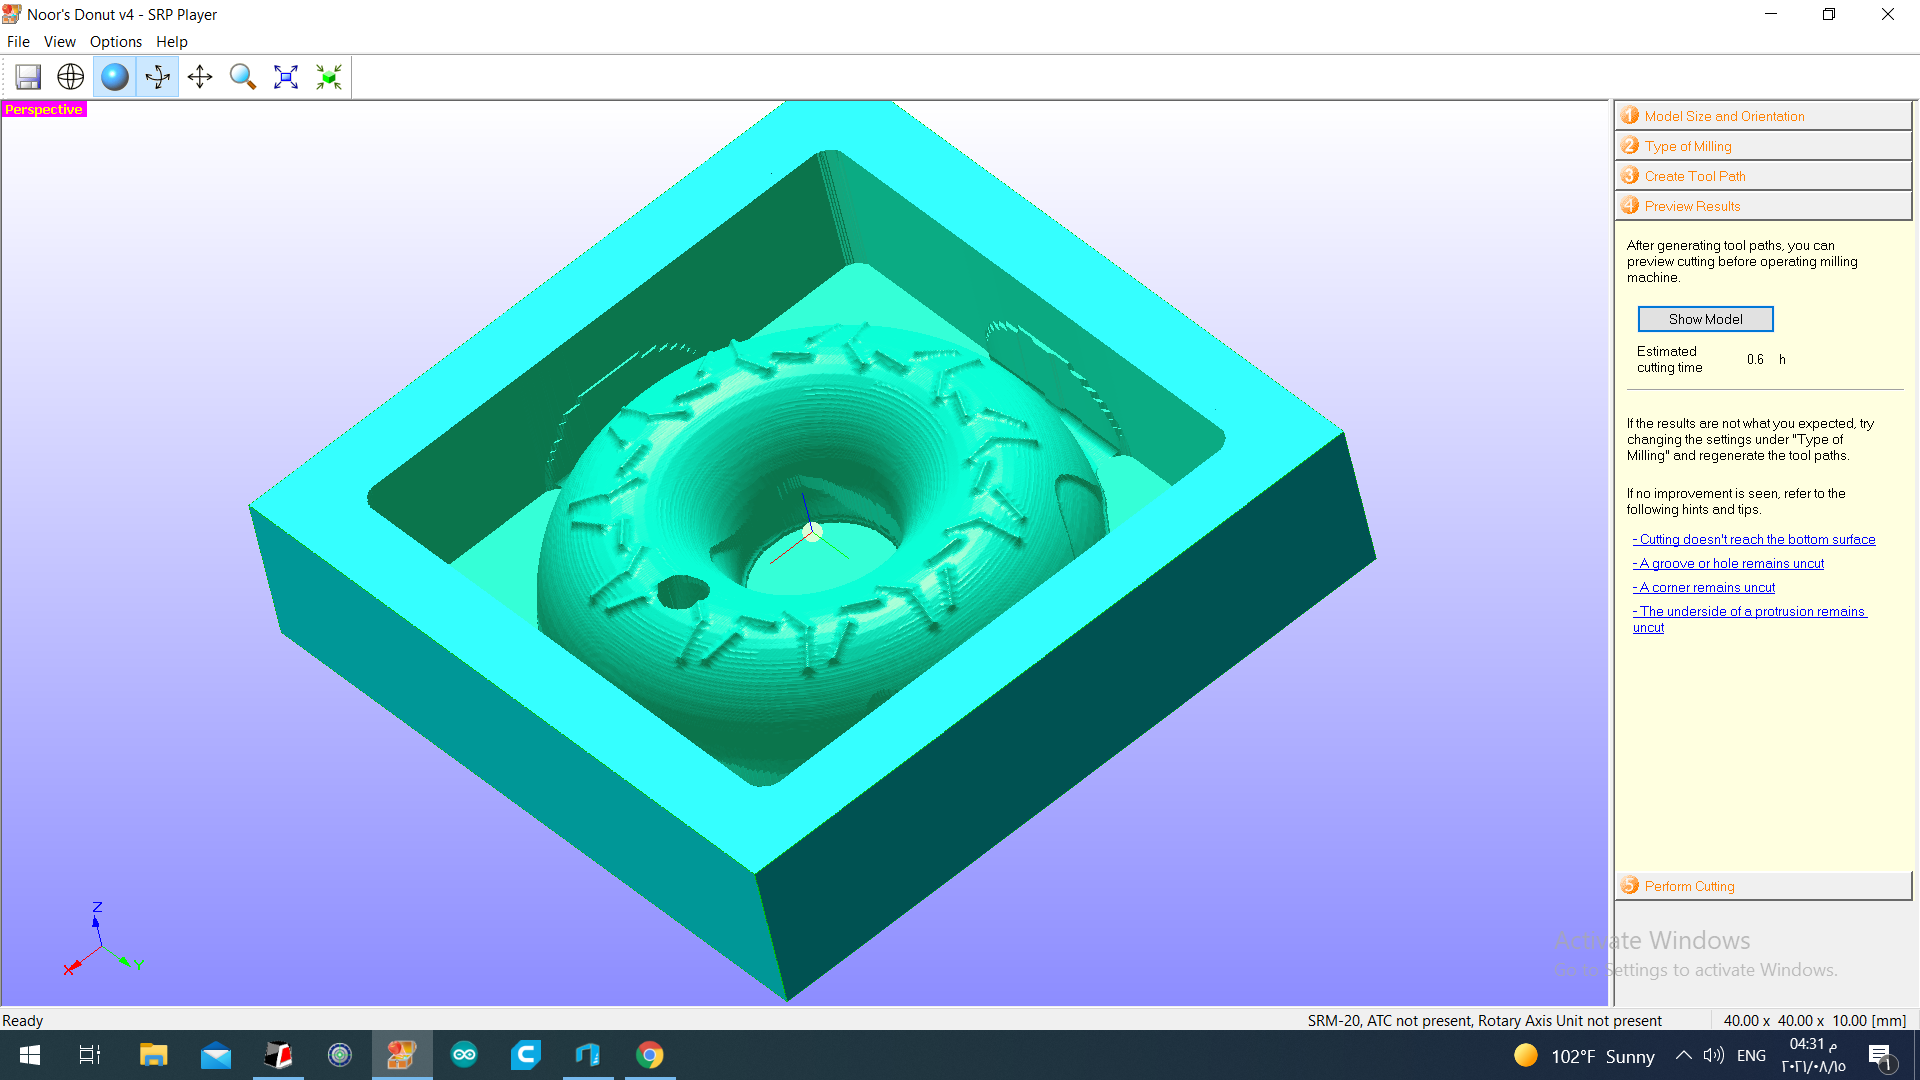
Now you can preview a model of how the cut will be made. As you can see that it shows that it will be done in 6h with the drill bit of 1/16 inches which is not required for roughing. That’s why in the previous step we have changed the drill bit chosen size to 1/8 inches in diameter.
The last step is to start cutting the machine and make sure that the drill bit selected all right. The program will take you into further disclaimers.

Before the last step above, we have to calibrate the x-y-z of the tool use in the milling machine by moving it to a center point created by us on the wax piece we are using. The center point is created by measuring the center line easily with a roller and draw with a pencil a point that indicates the point where you can guide your drill bit to. After fixing the axis you should select origin the desired values.
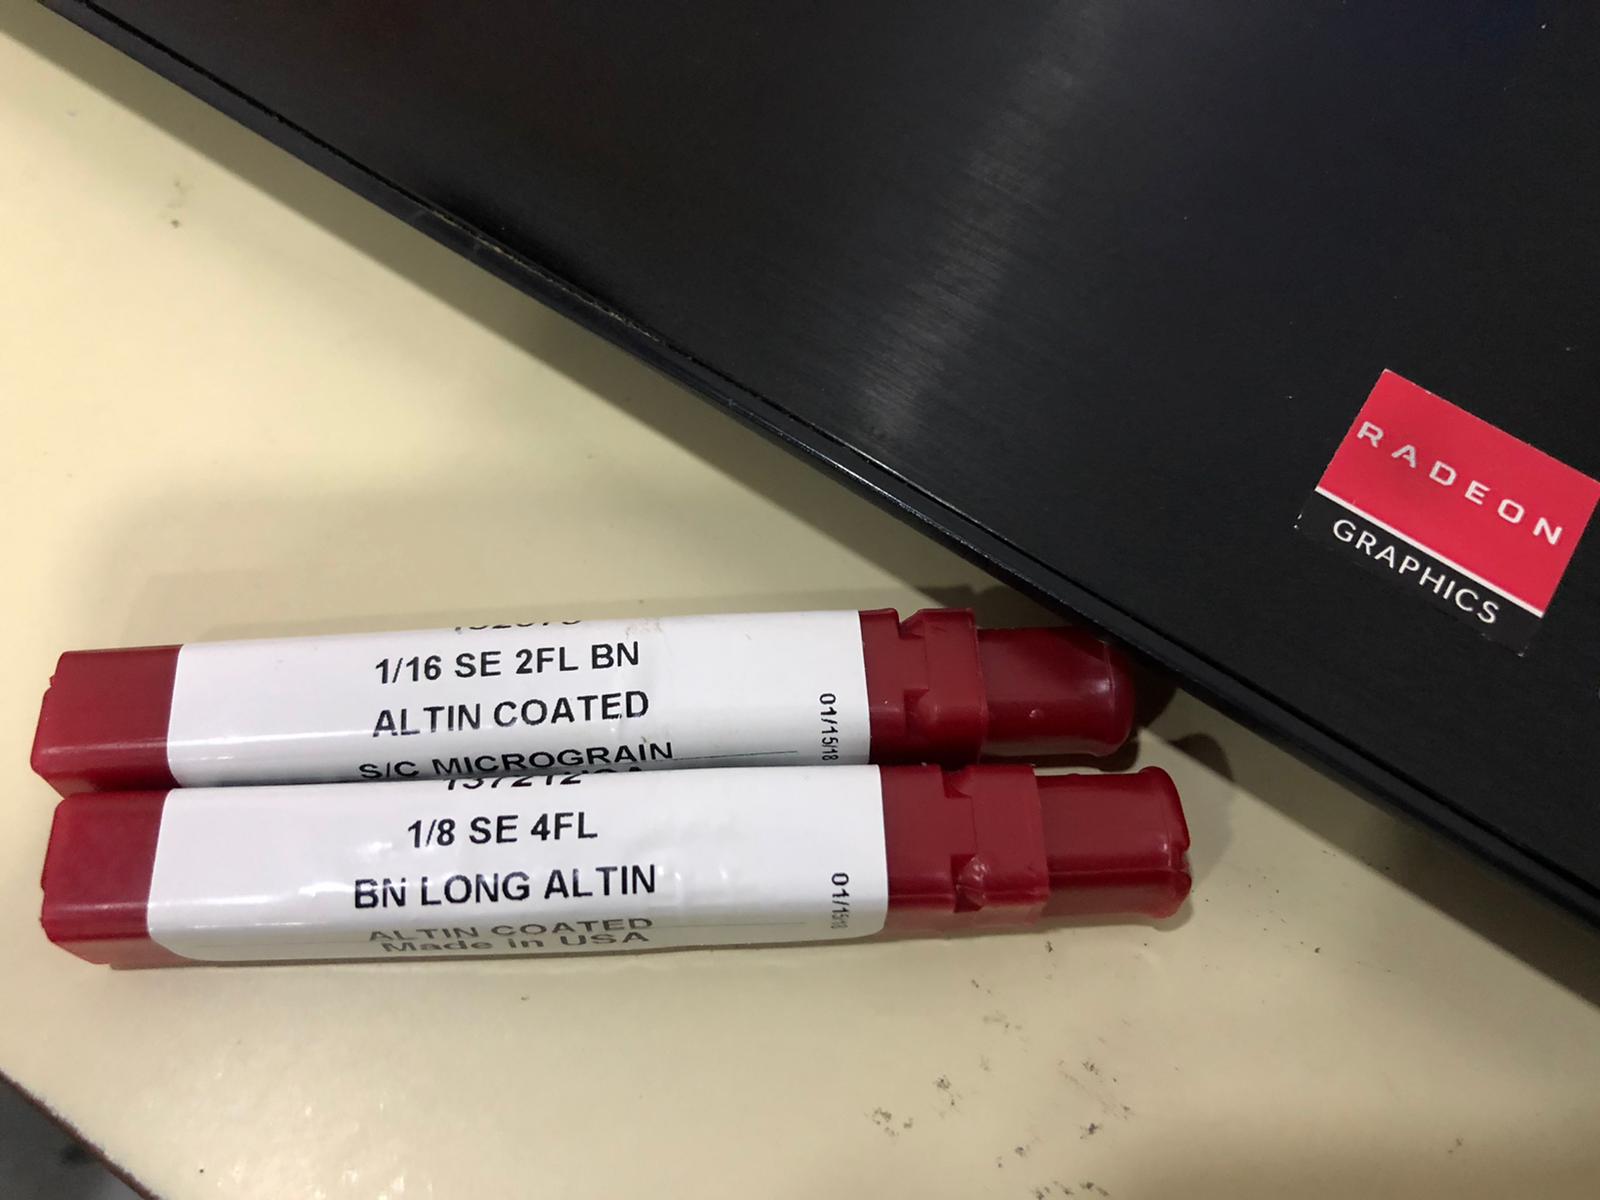
Regarding the tools we are using, we are using drill bits with diameter of 1/8 inches which is a drill bit for roughing and on the other side 1/16 inches drill bit is for finishing, both are shown in the following photo.
The machine is going to engrave the wax piece shown below mixed with other materials, in order to the desired mold.

Design
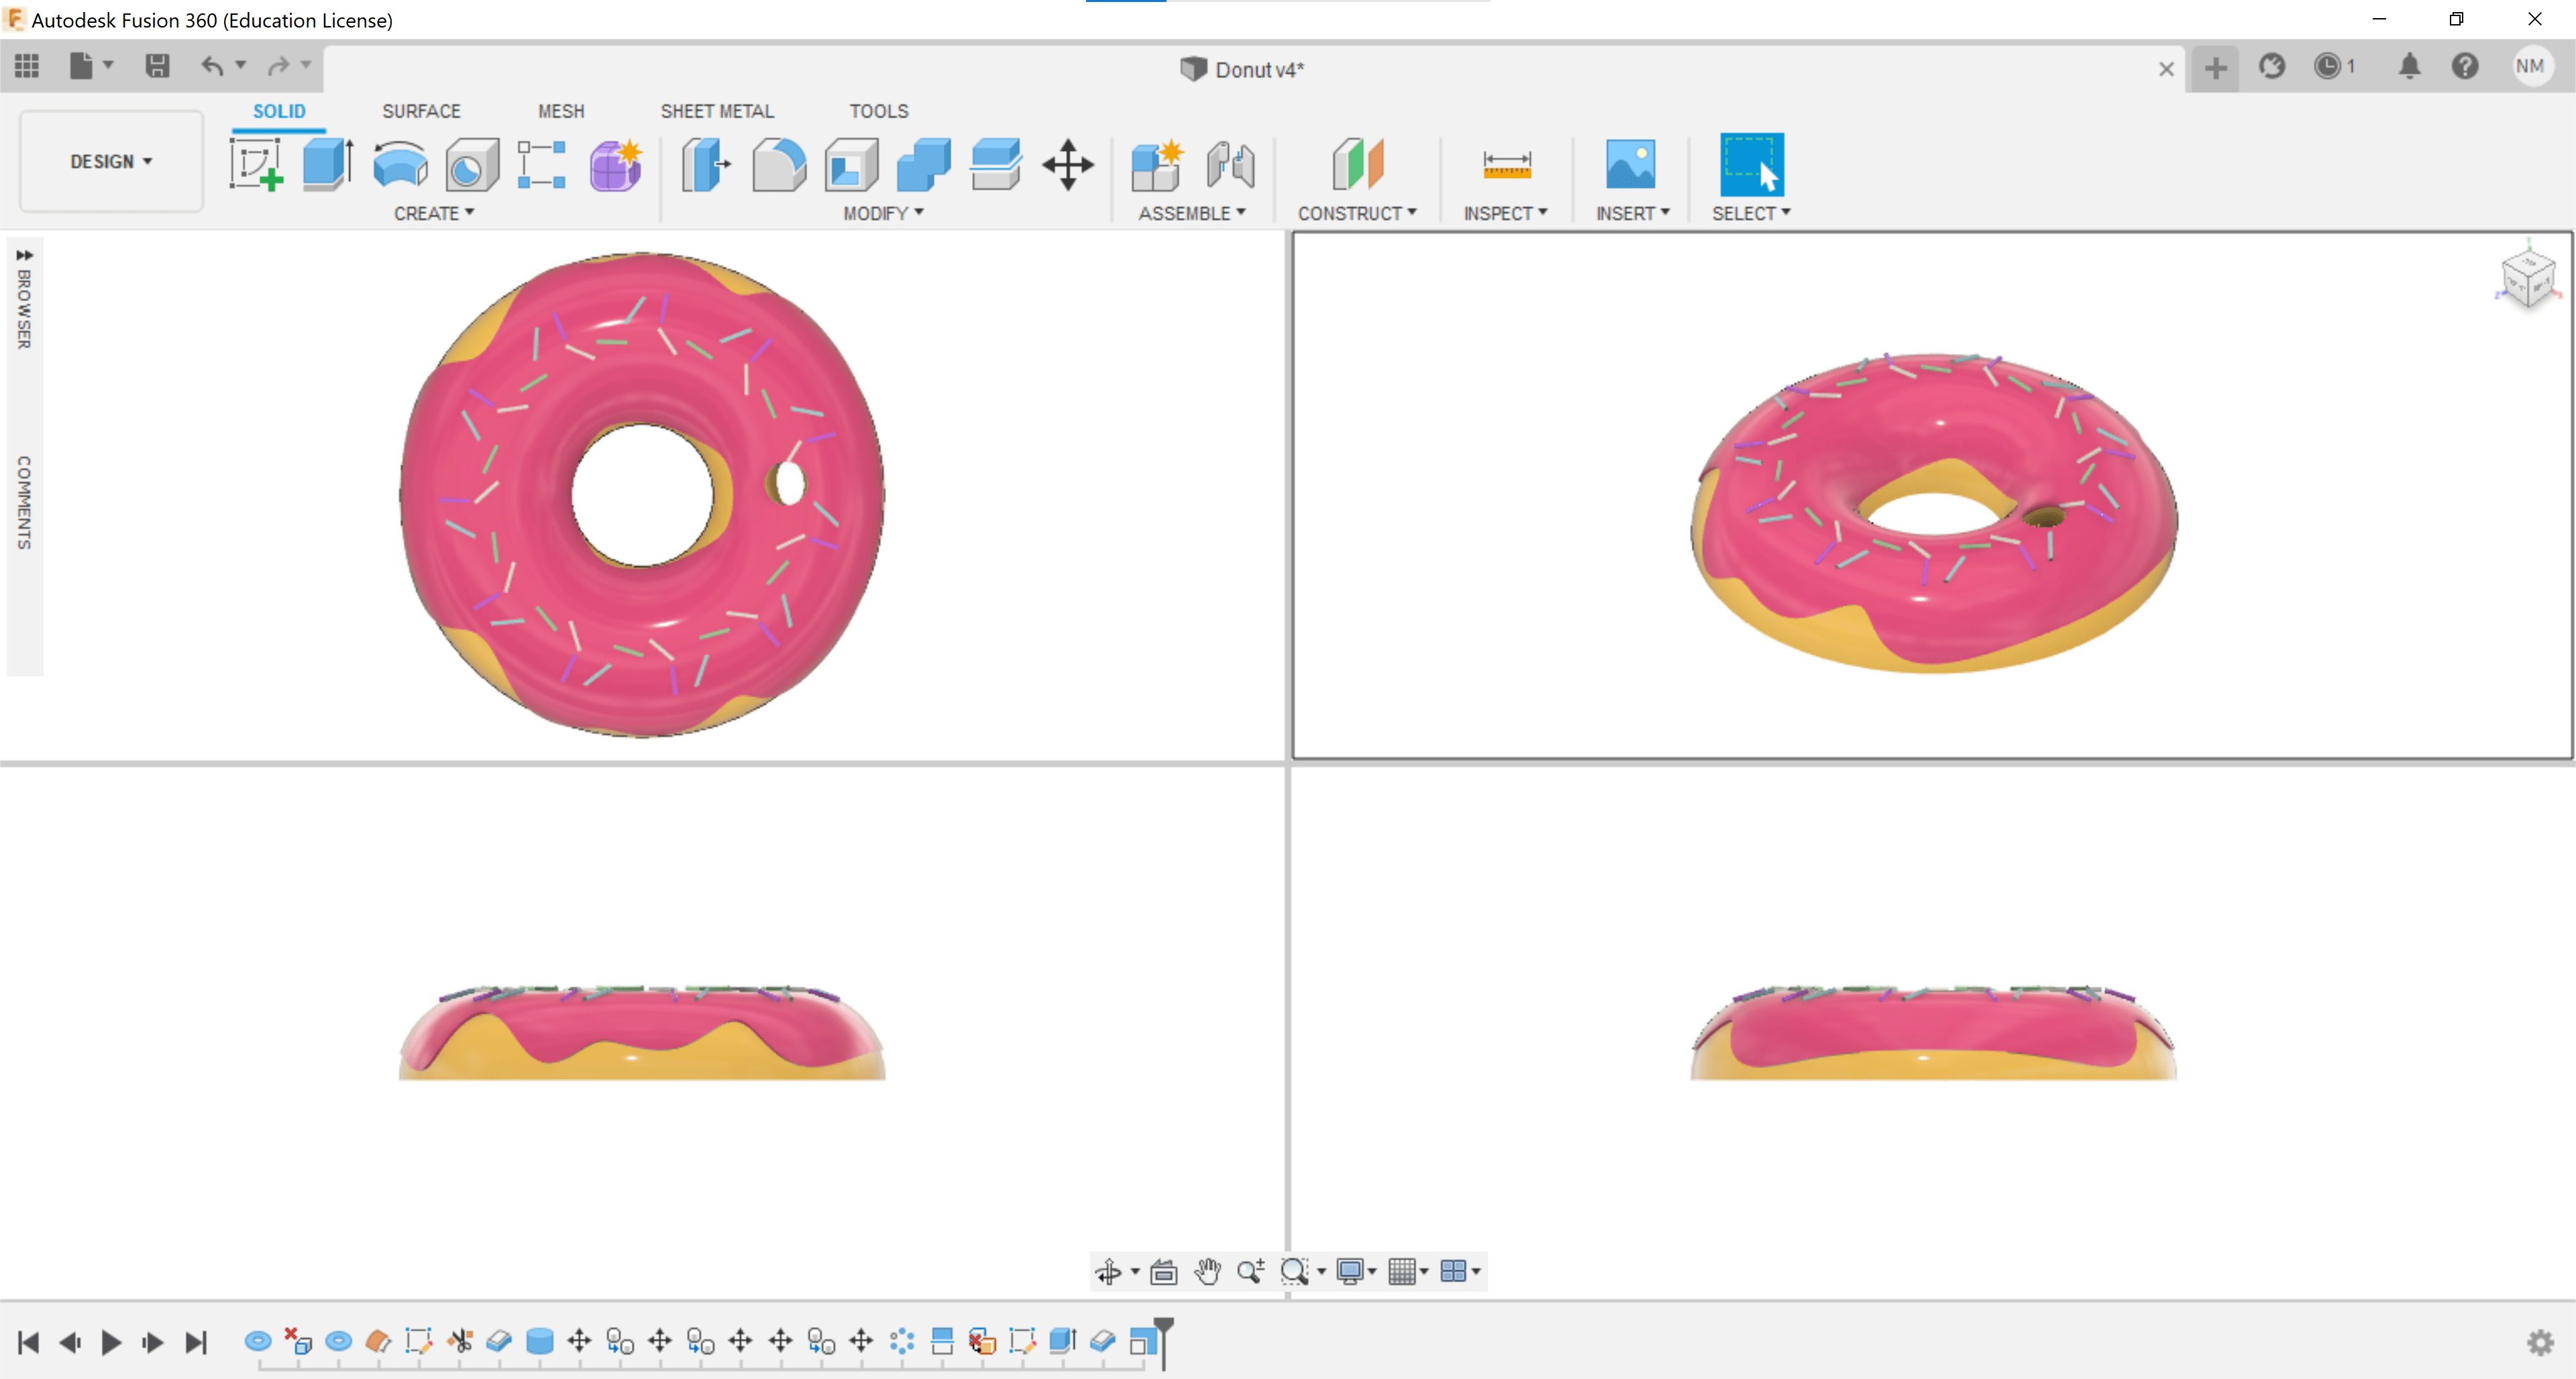
The design should be made using a 3D CAD program, the one I have chose to do with is FUSION360. I have decided to do a donut shape keychain. The following video shows animation of the steps of the design I have made.
And the following screenshot shows some views of my design.
After cutting
 The above photos shows my designed mold ready to be used. I had to clean it from the extra wax particles and collect them to reuse them in other molds pieces.
Thus, after having the mold we should do some other steps in order to mold the solid work we are going to make. the following part on this assessment is the part where I discuss how I made the silicon mixture for casting.
2 Parts Silicone Mixture
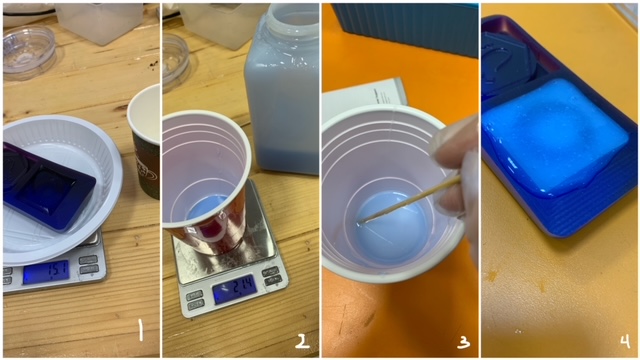 In order to know the volume amount of poured silicon mixture needed to my mold. We can take some water and pour it in the mold, and after take the weight of the scaled water and double the amount of it to do the desired mixture. As you can see in the photo I have about roughly 15 grams. So I have mixed the ration of the two material 1:1, in order to perform 40 grams in total. After this is the mixing process is shown. And after pouring the material inside the mold, it should be covers the mold part completely, as it looks in the above picture. I have to wait for it to solidify for about 5 hours. And this is how it looks after solidifying.
Silicon Casted Part
The casted parts from the first mold is another mold where we can perform the final casted part in, which is the keychain. the following photo shows the problems that I have faced in order to do the casted part.
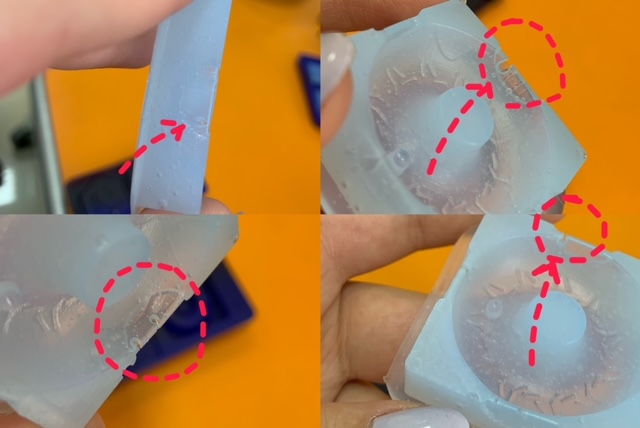
As you can see in the above photo some problems occurred while molding the casted silicon mold. The problem is that while mixing the silicon mixture to pour it into the wax mold some bubbles of air was trapped in the mixture, causing some holes and cavities in the design. Hence, we either poured the material too fast or too slow. Another theory I have is, while mixing the materials I have gone too fast that air did not escape by this from the mixture. These problems is mostly known in forming cast molds.
After molding the silicon mold we should pour the material.
Casted keychain
In order to do the casting we should select the material we want to use to do the desired object with. The material we have is resin, gypsum, cement. And the suitable material for my application is gypsum. Gypsum is a mineral found in crystal as well as masses called gypsum rock. The material in it’s solid states like a powder where you can see in the following heading selected pictures. The mixture of gypsum and water solidifies after it gets dry. It should be easy to color on which is I am looking to make.
The following photo shows the steps which I followed in order to the gypsum and water mixture. which is a 1:1 mixture ratio. From left to right is the process that I made to do the casted part made with gypsum. The
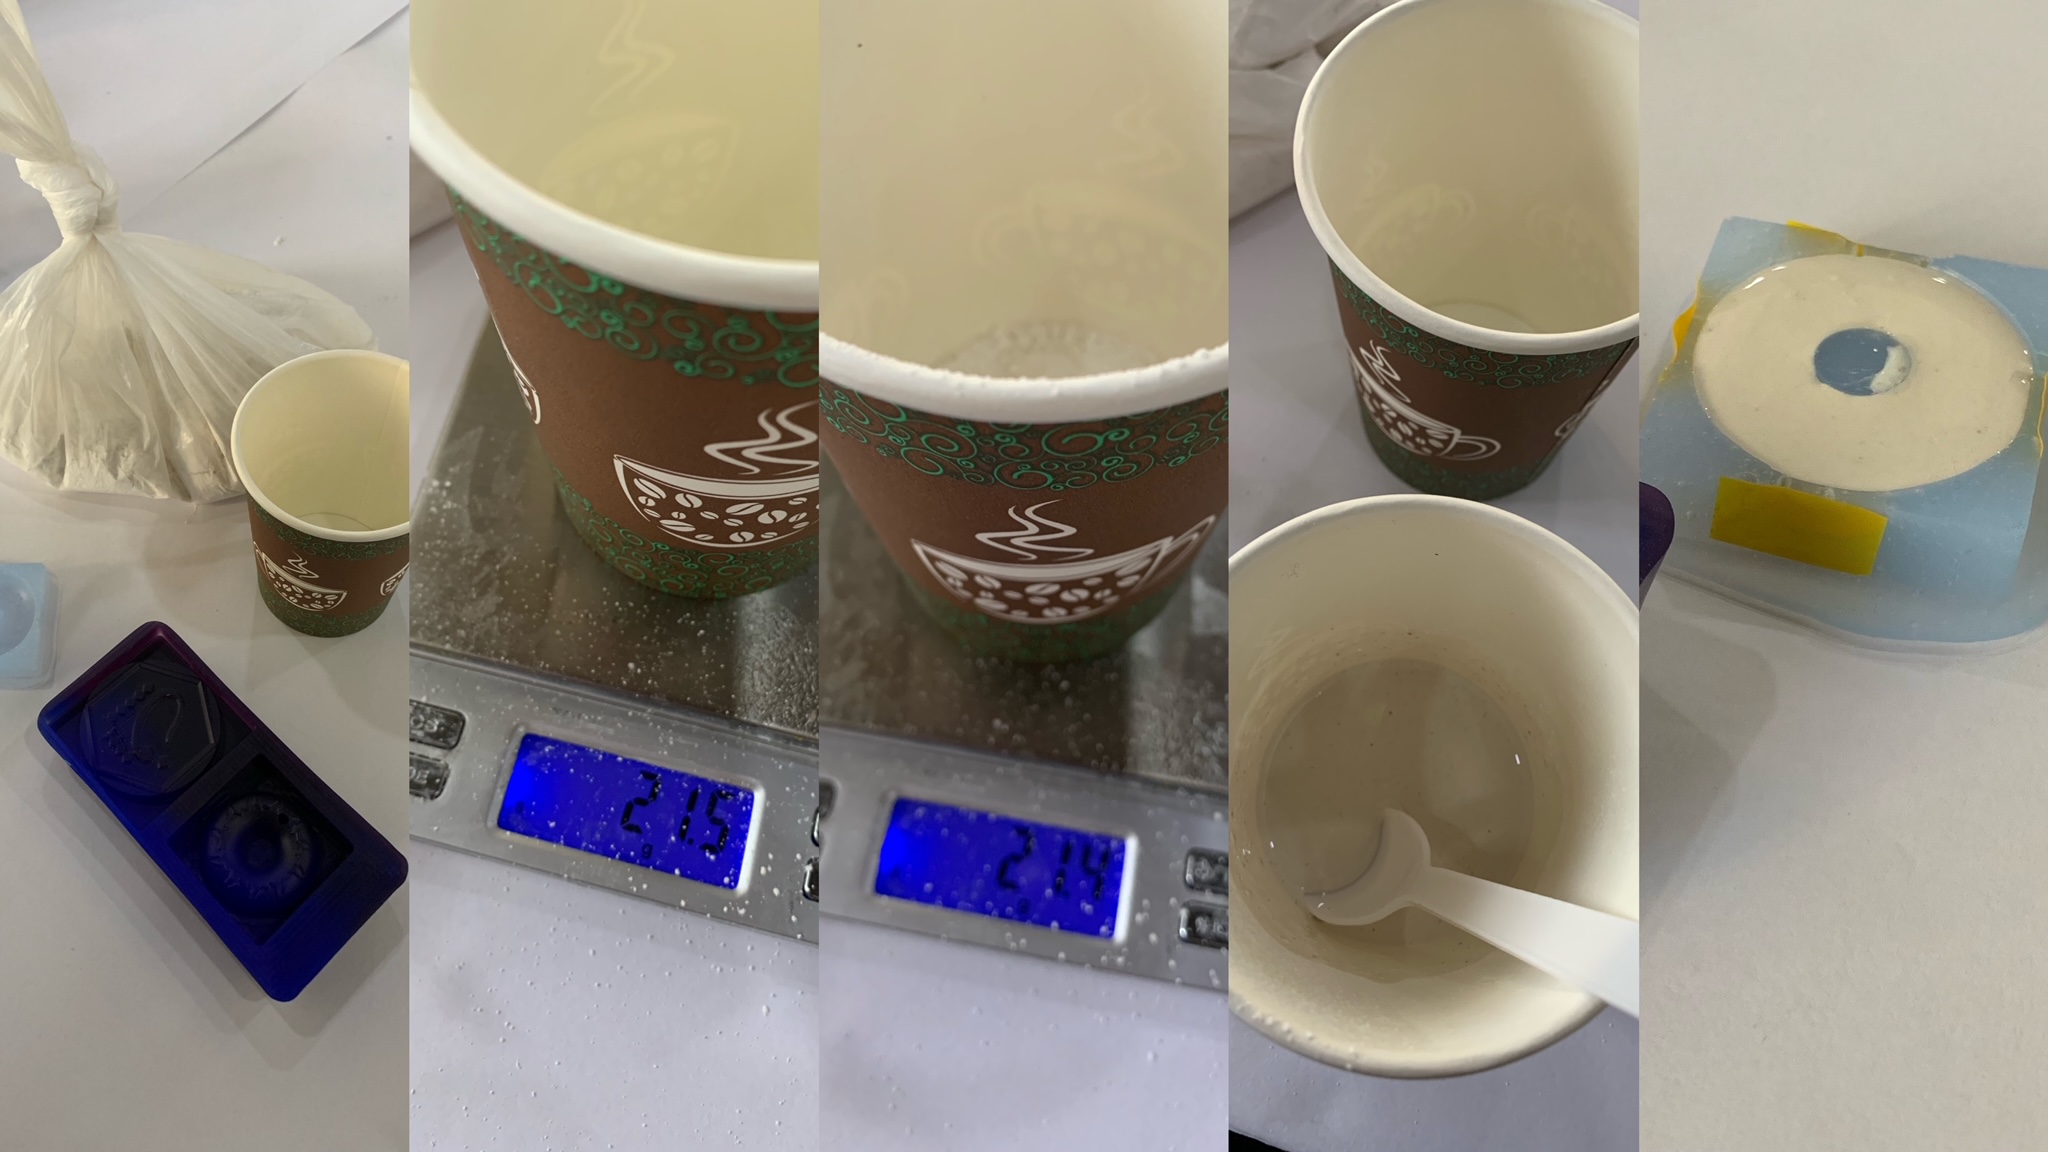
The weight of water is equal to the amount of gypsum as you can see which is about 21 grams. Then, mix the both material together. Thus, pour the mixture into the silicon mold. The double quantity of both material is in order to prevent and make sure that no excess material is stocked or spilled somewhere while mixing. The rest amount of the mixture is poured into another mold in order to do the group assignment.
After waiting for the material to solidify in the mold for around one day, this is how it looks like in the next picture. I can see that the taped walls of the mold worked very good; thus there is no spillage to the material outside the mold.
One of the other problems that I had concern about, is that the hole of the keychain I have made will not go all through; and it did not get all through.
In the next step, I am planning to color the gypsum with water colors.
Final Results
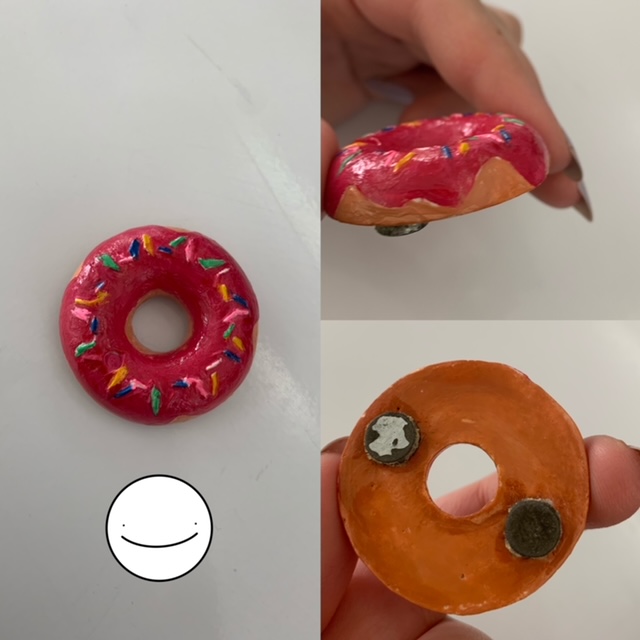
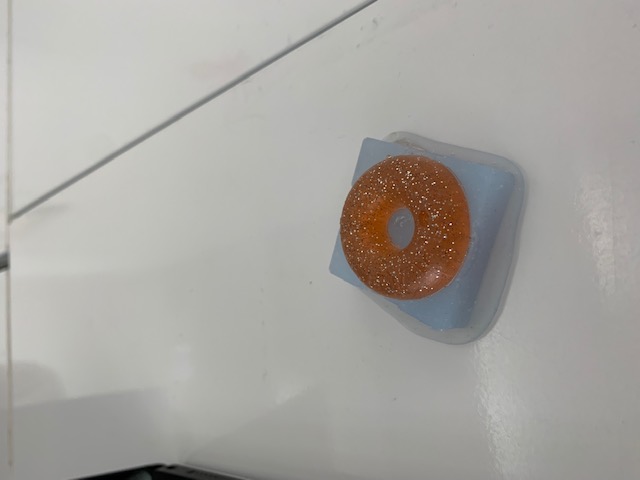
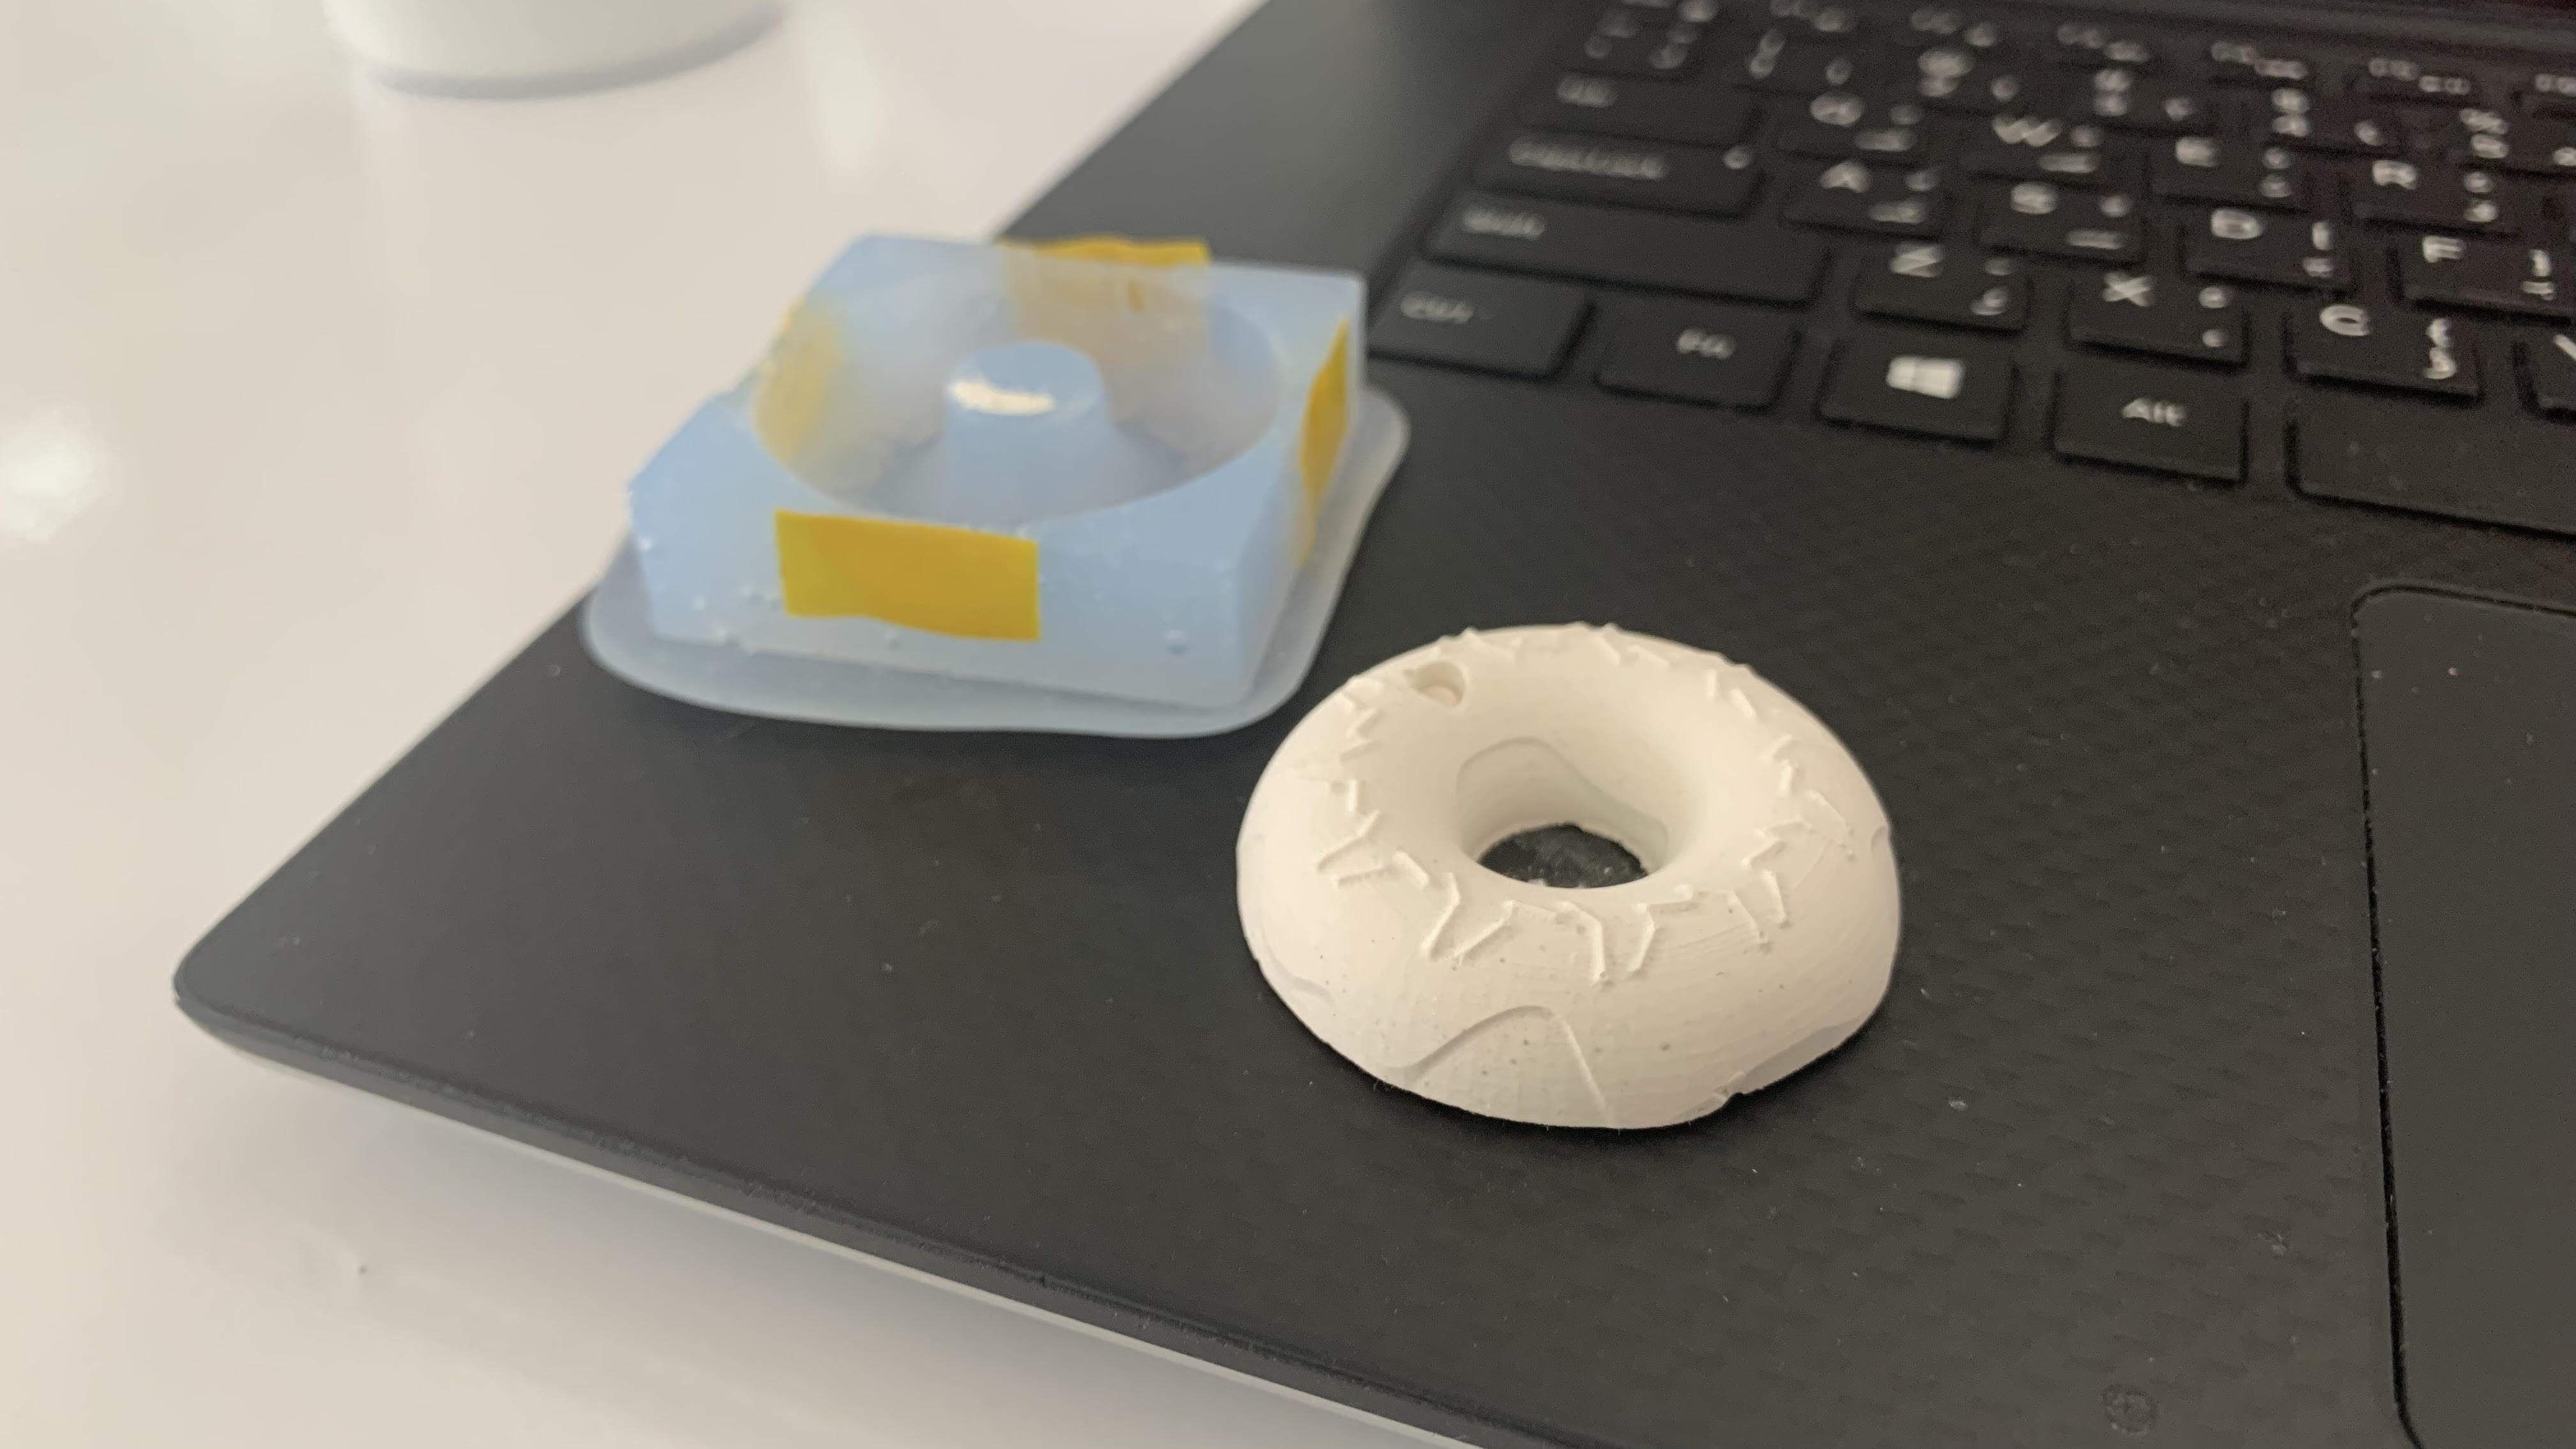
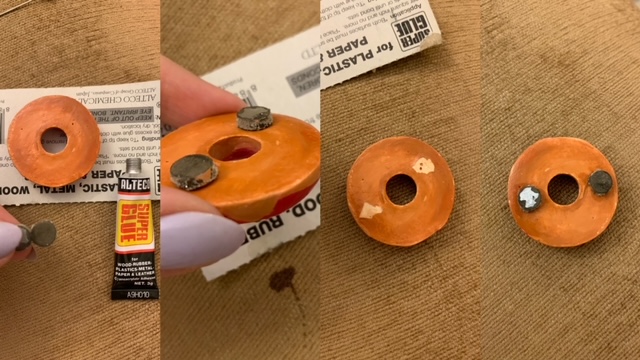
In the above photo you can see the results of my donut, I was afraid to punch the hole again where I might face a breakage in the design. So I have left it as it is. I will put some glossy coating to my design where it will have a better surface finish and acts like a protection layer to my paint. I have decided to do my donut as a magnet. The following photos layout shows the process of me sticking the magnet to the donut. Firstly, it did not stick to the magnet. So, I have retried to put the magnet up to the donut, and now it works as you can see.
I have done another donut shape one made with resin, it turned up a bit sticky even though I have left it for more than 48 hours. The following photo shows the resin donut.