6. Embedded programming
In this week we have learned to do the design of the microcontroller. We have downloaded the ARDUINO program which is the program linked to our microcontroller. By this after downloading the application we should install the driver. All links found on the resources page of FabLab Bahrain.
Steps to download Arduino
The program logo is shown below

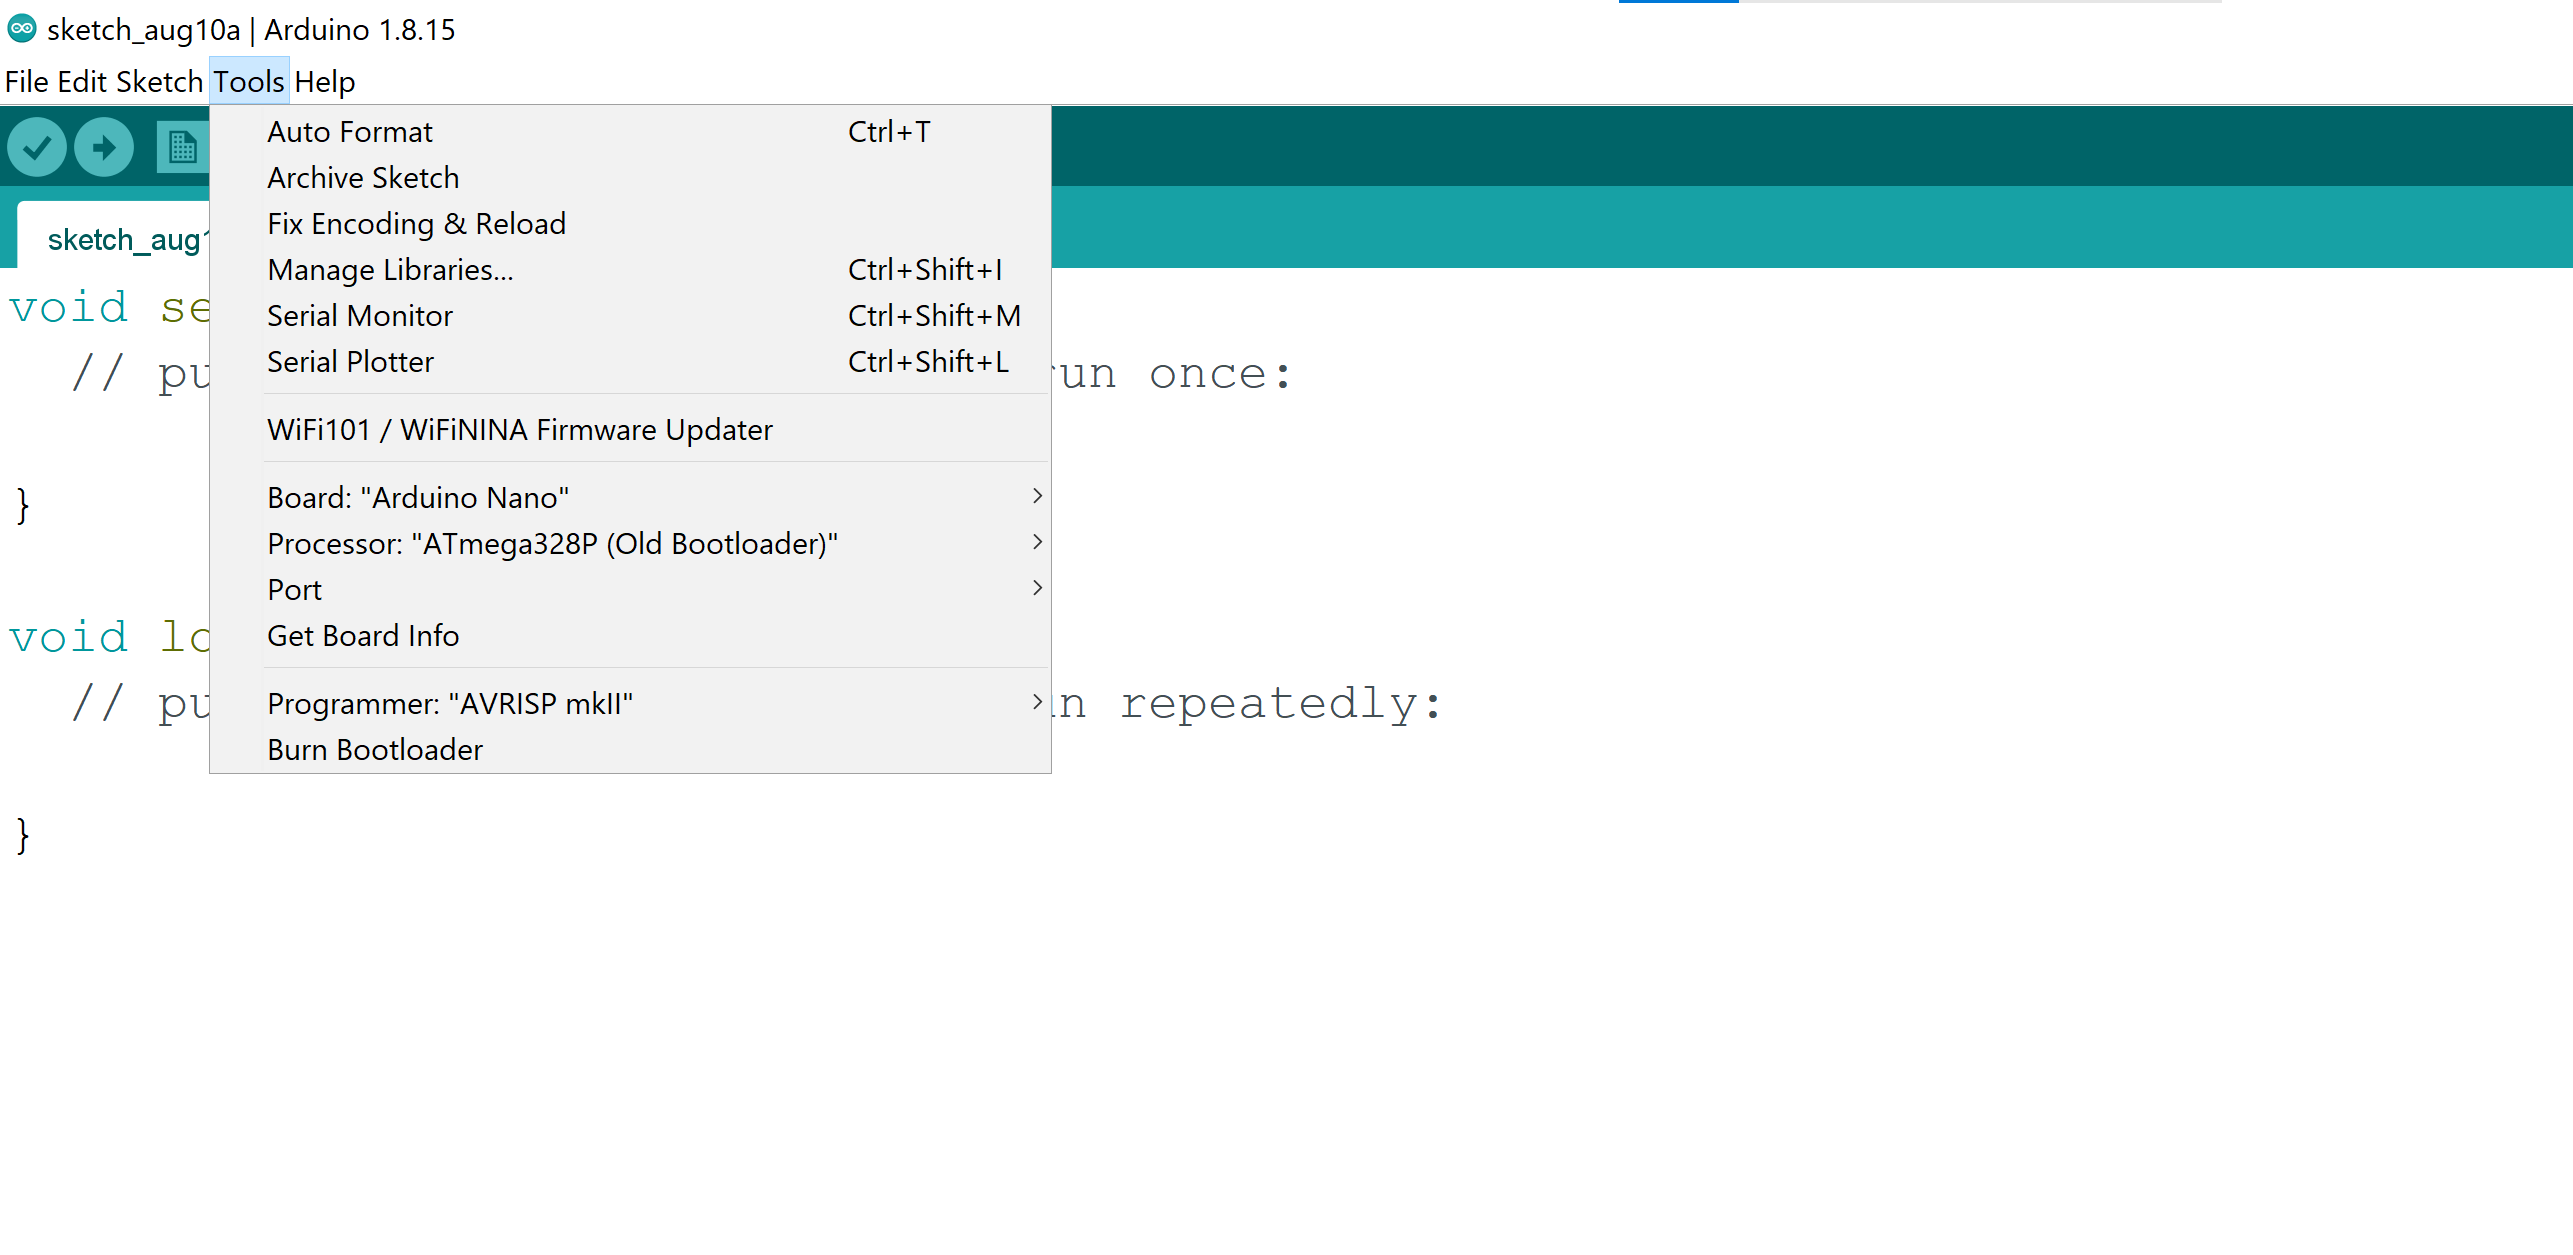
After completing the installation of the Arduino we should do the following steps in order to know the micro controller. My microcontroller is (Arduino Nano), has the old processor which is “ATmega328P (Old Bootloader)”, the choose of the ports depends on the USB you are using. To know which USB you are using weather it is COM 2,3,4.. go to your device:
Control Panel> Device Manager> Ports. You will see the one you are using by following these steps.
These above setups are shown in the following picture
Steps to download the driver
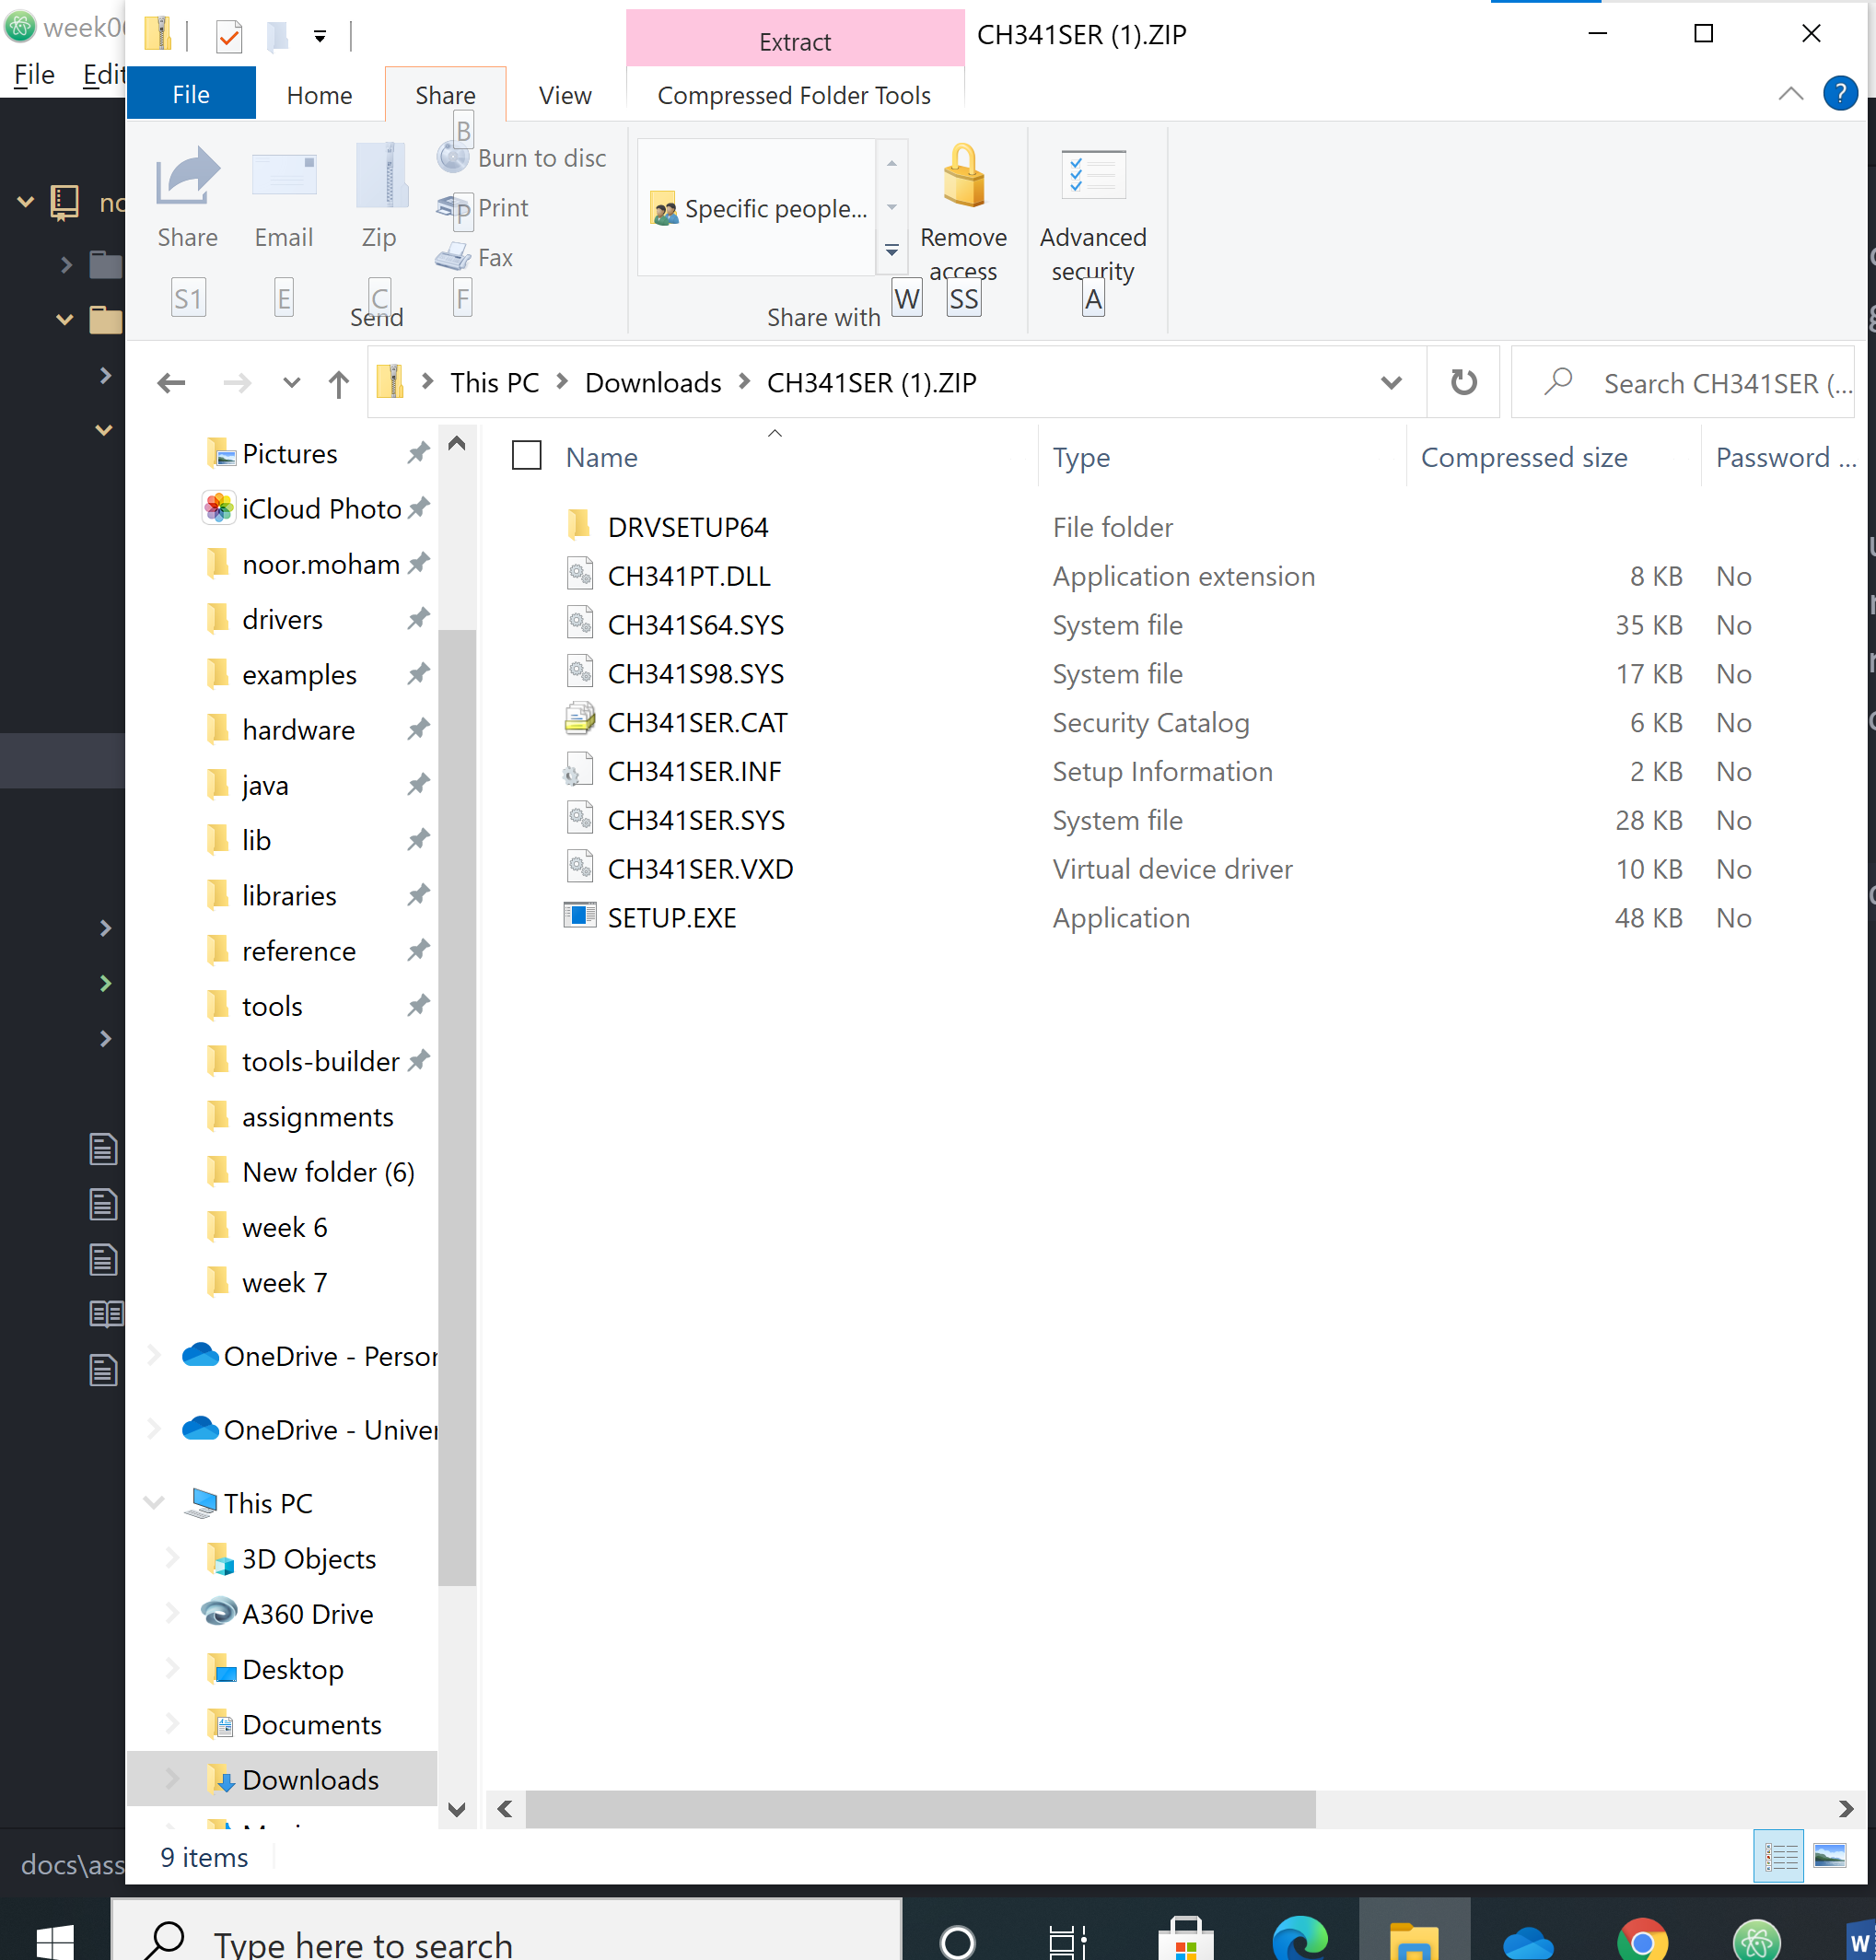
the driver install link is on the resources page. After downloading the driver you have to extract the whole folder and open the app to install it, it will be installed directly after doing these steps. The following picture shows the ZIP folder of the driver before extracting.
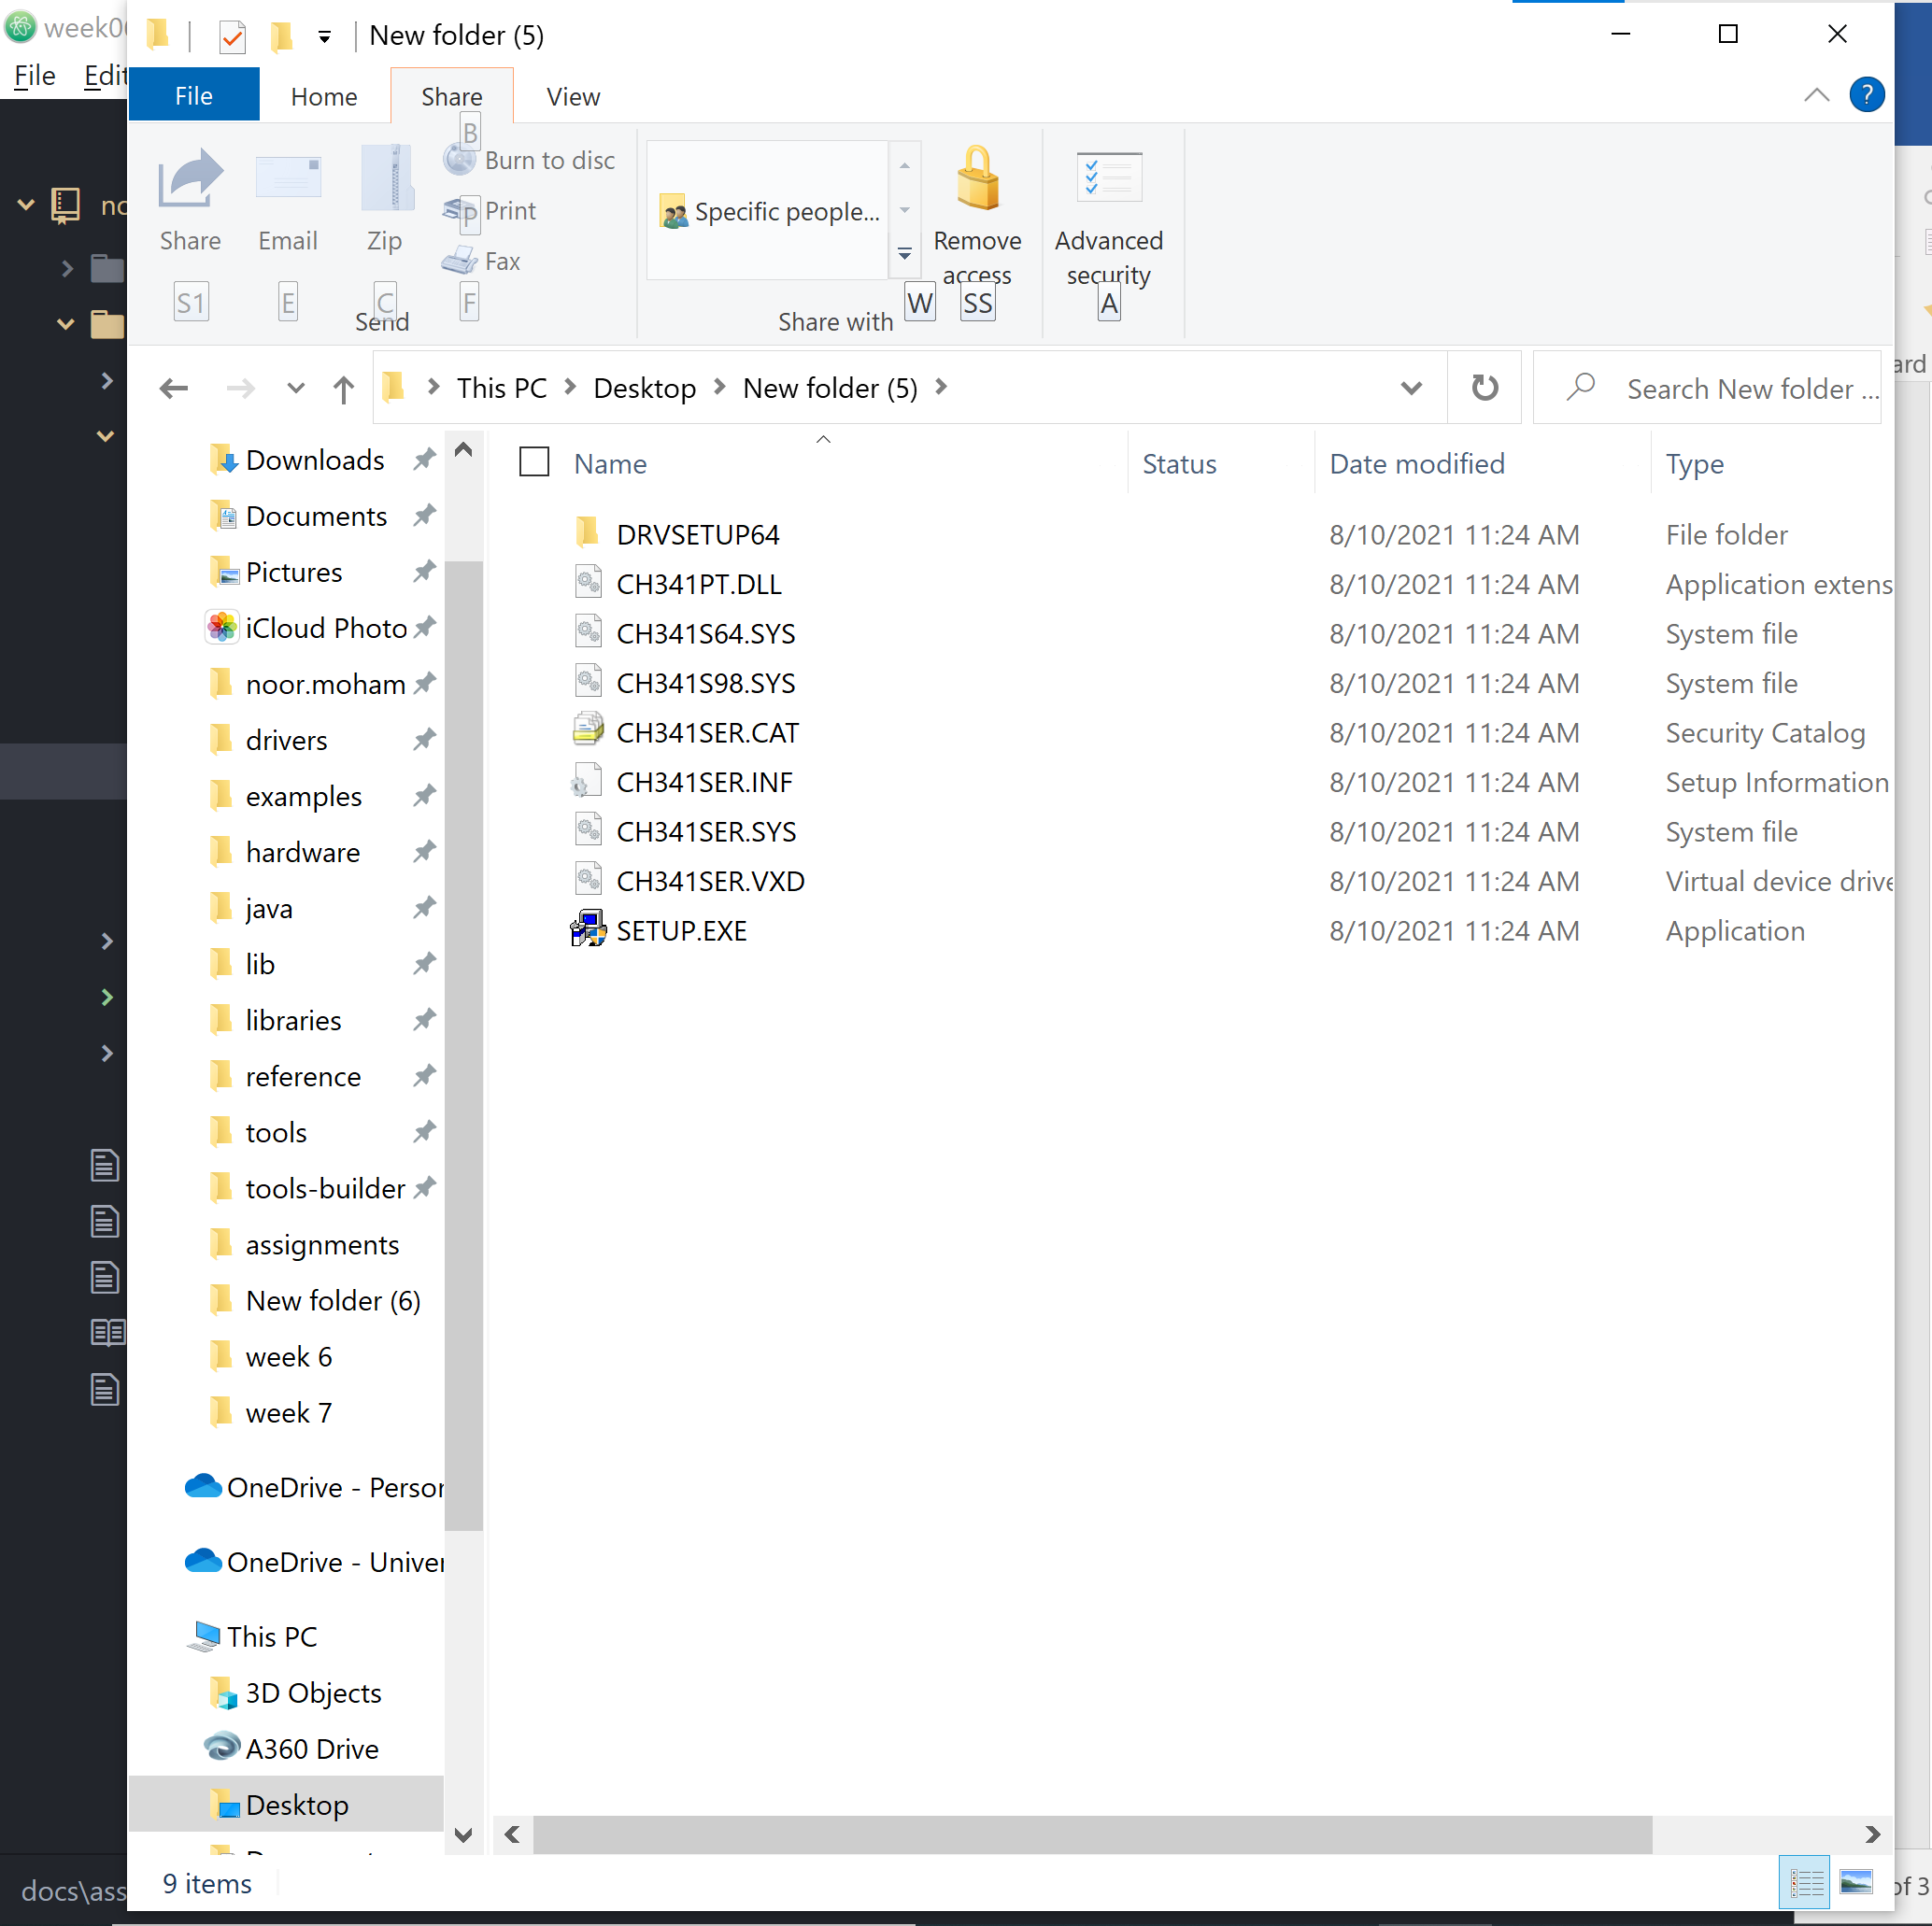
 And this is what it should be look like after extracting the files:
 This is how the driver should be looked like after opening the extracted application of the driver.
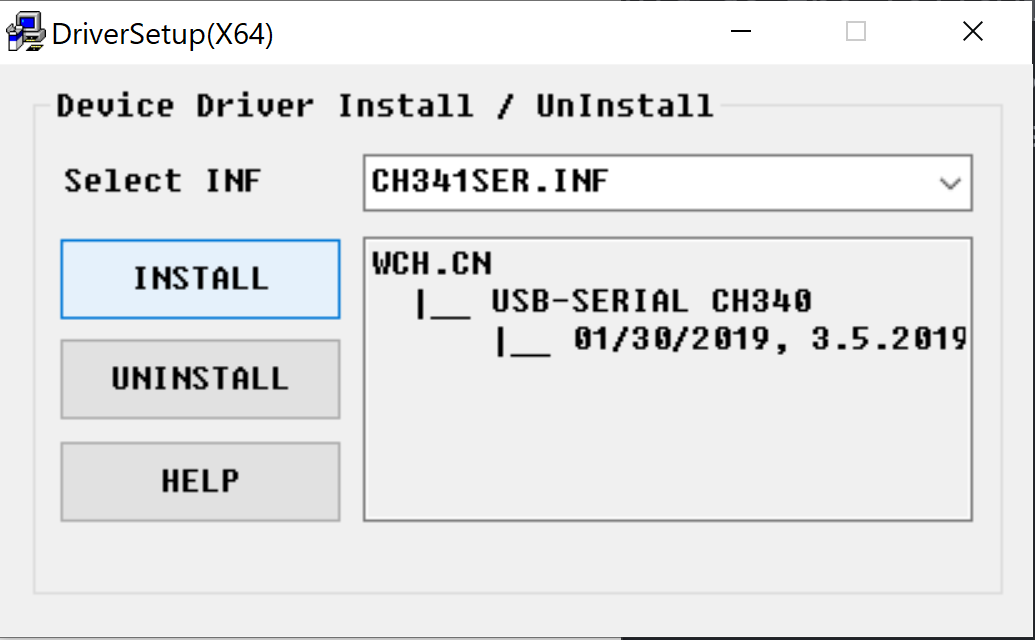 As you can see our device driver has a setup information file ” CH341SER.INF”, Just click install and the driver should be installed directly to your device. The driver tells the computer how to interact with Arduino.
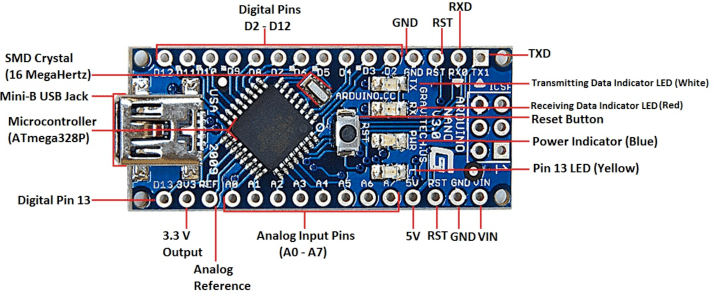
Arduino Nano
The following photo shows the “ARDUINO NANO MICROCONTROLLER”
 The following website shows the specifications of our Arduino microcontroller. Click me!
Assessments
Assessment 01
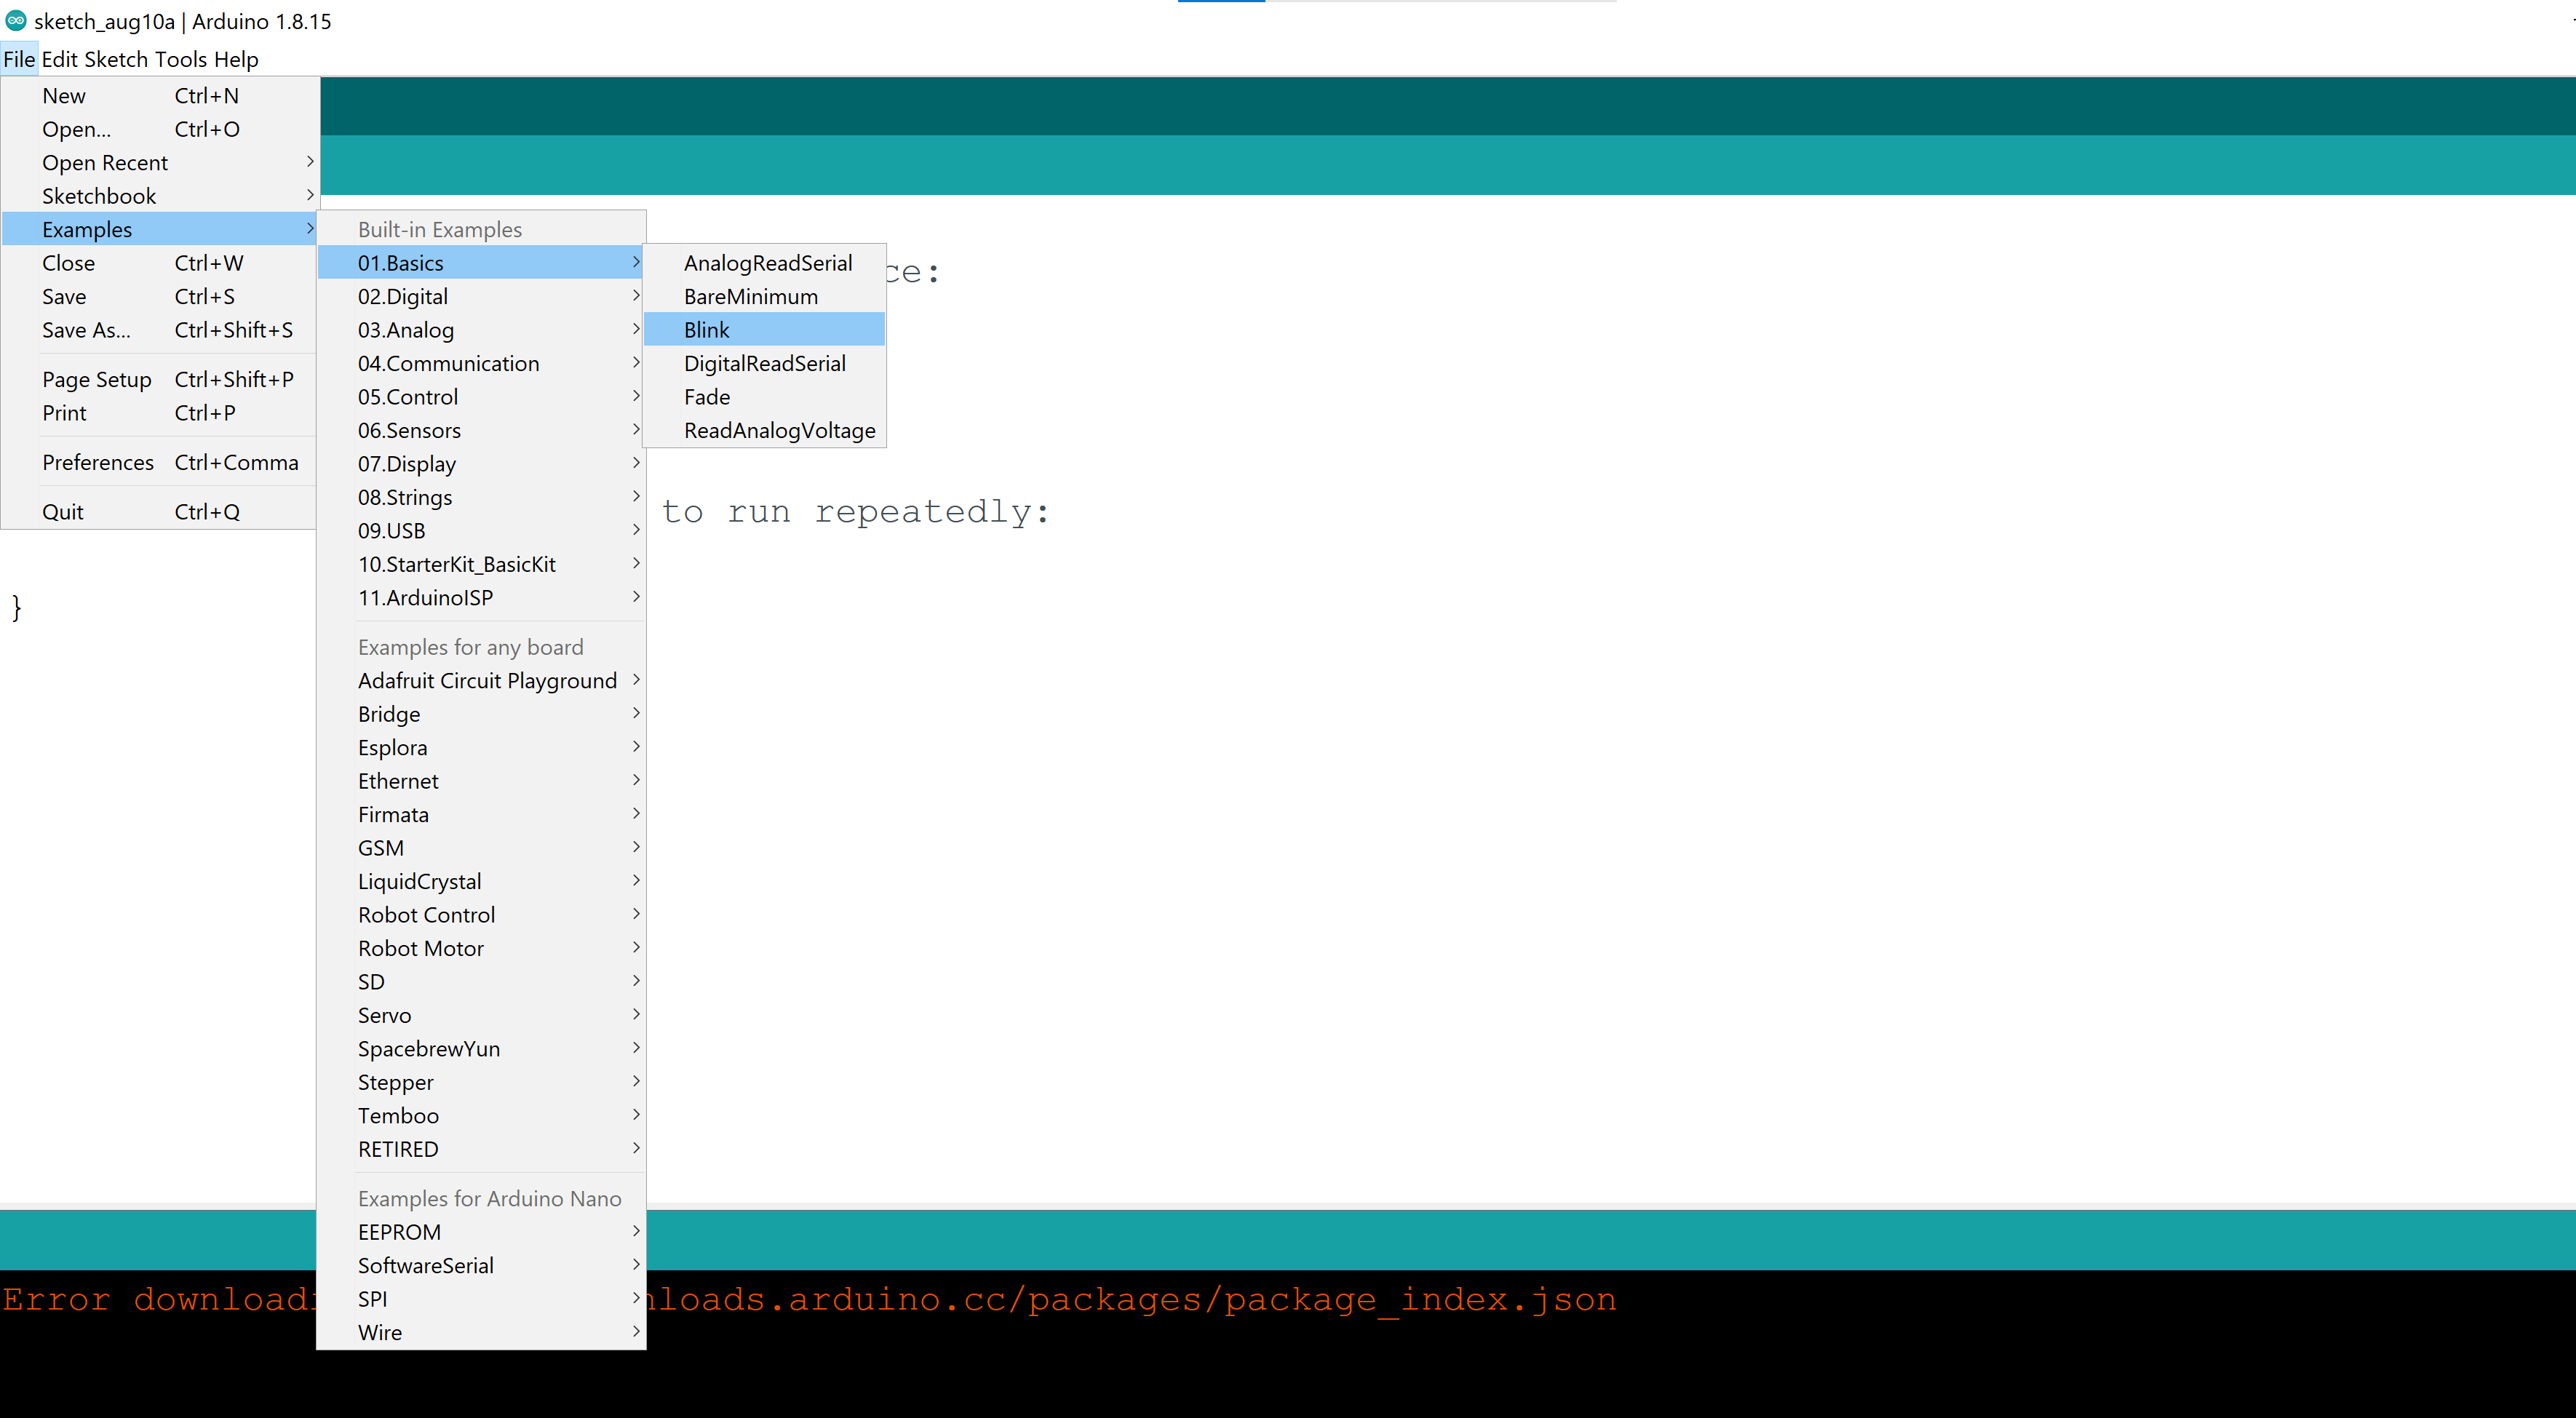
As our first assessment we are required to do a “Blink” example to our sensors. So in order to find the Blink example you should followed the steps shown in the following picture.
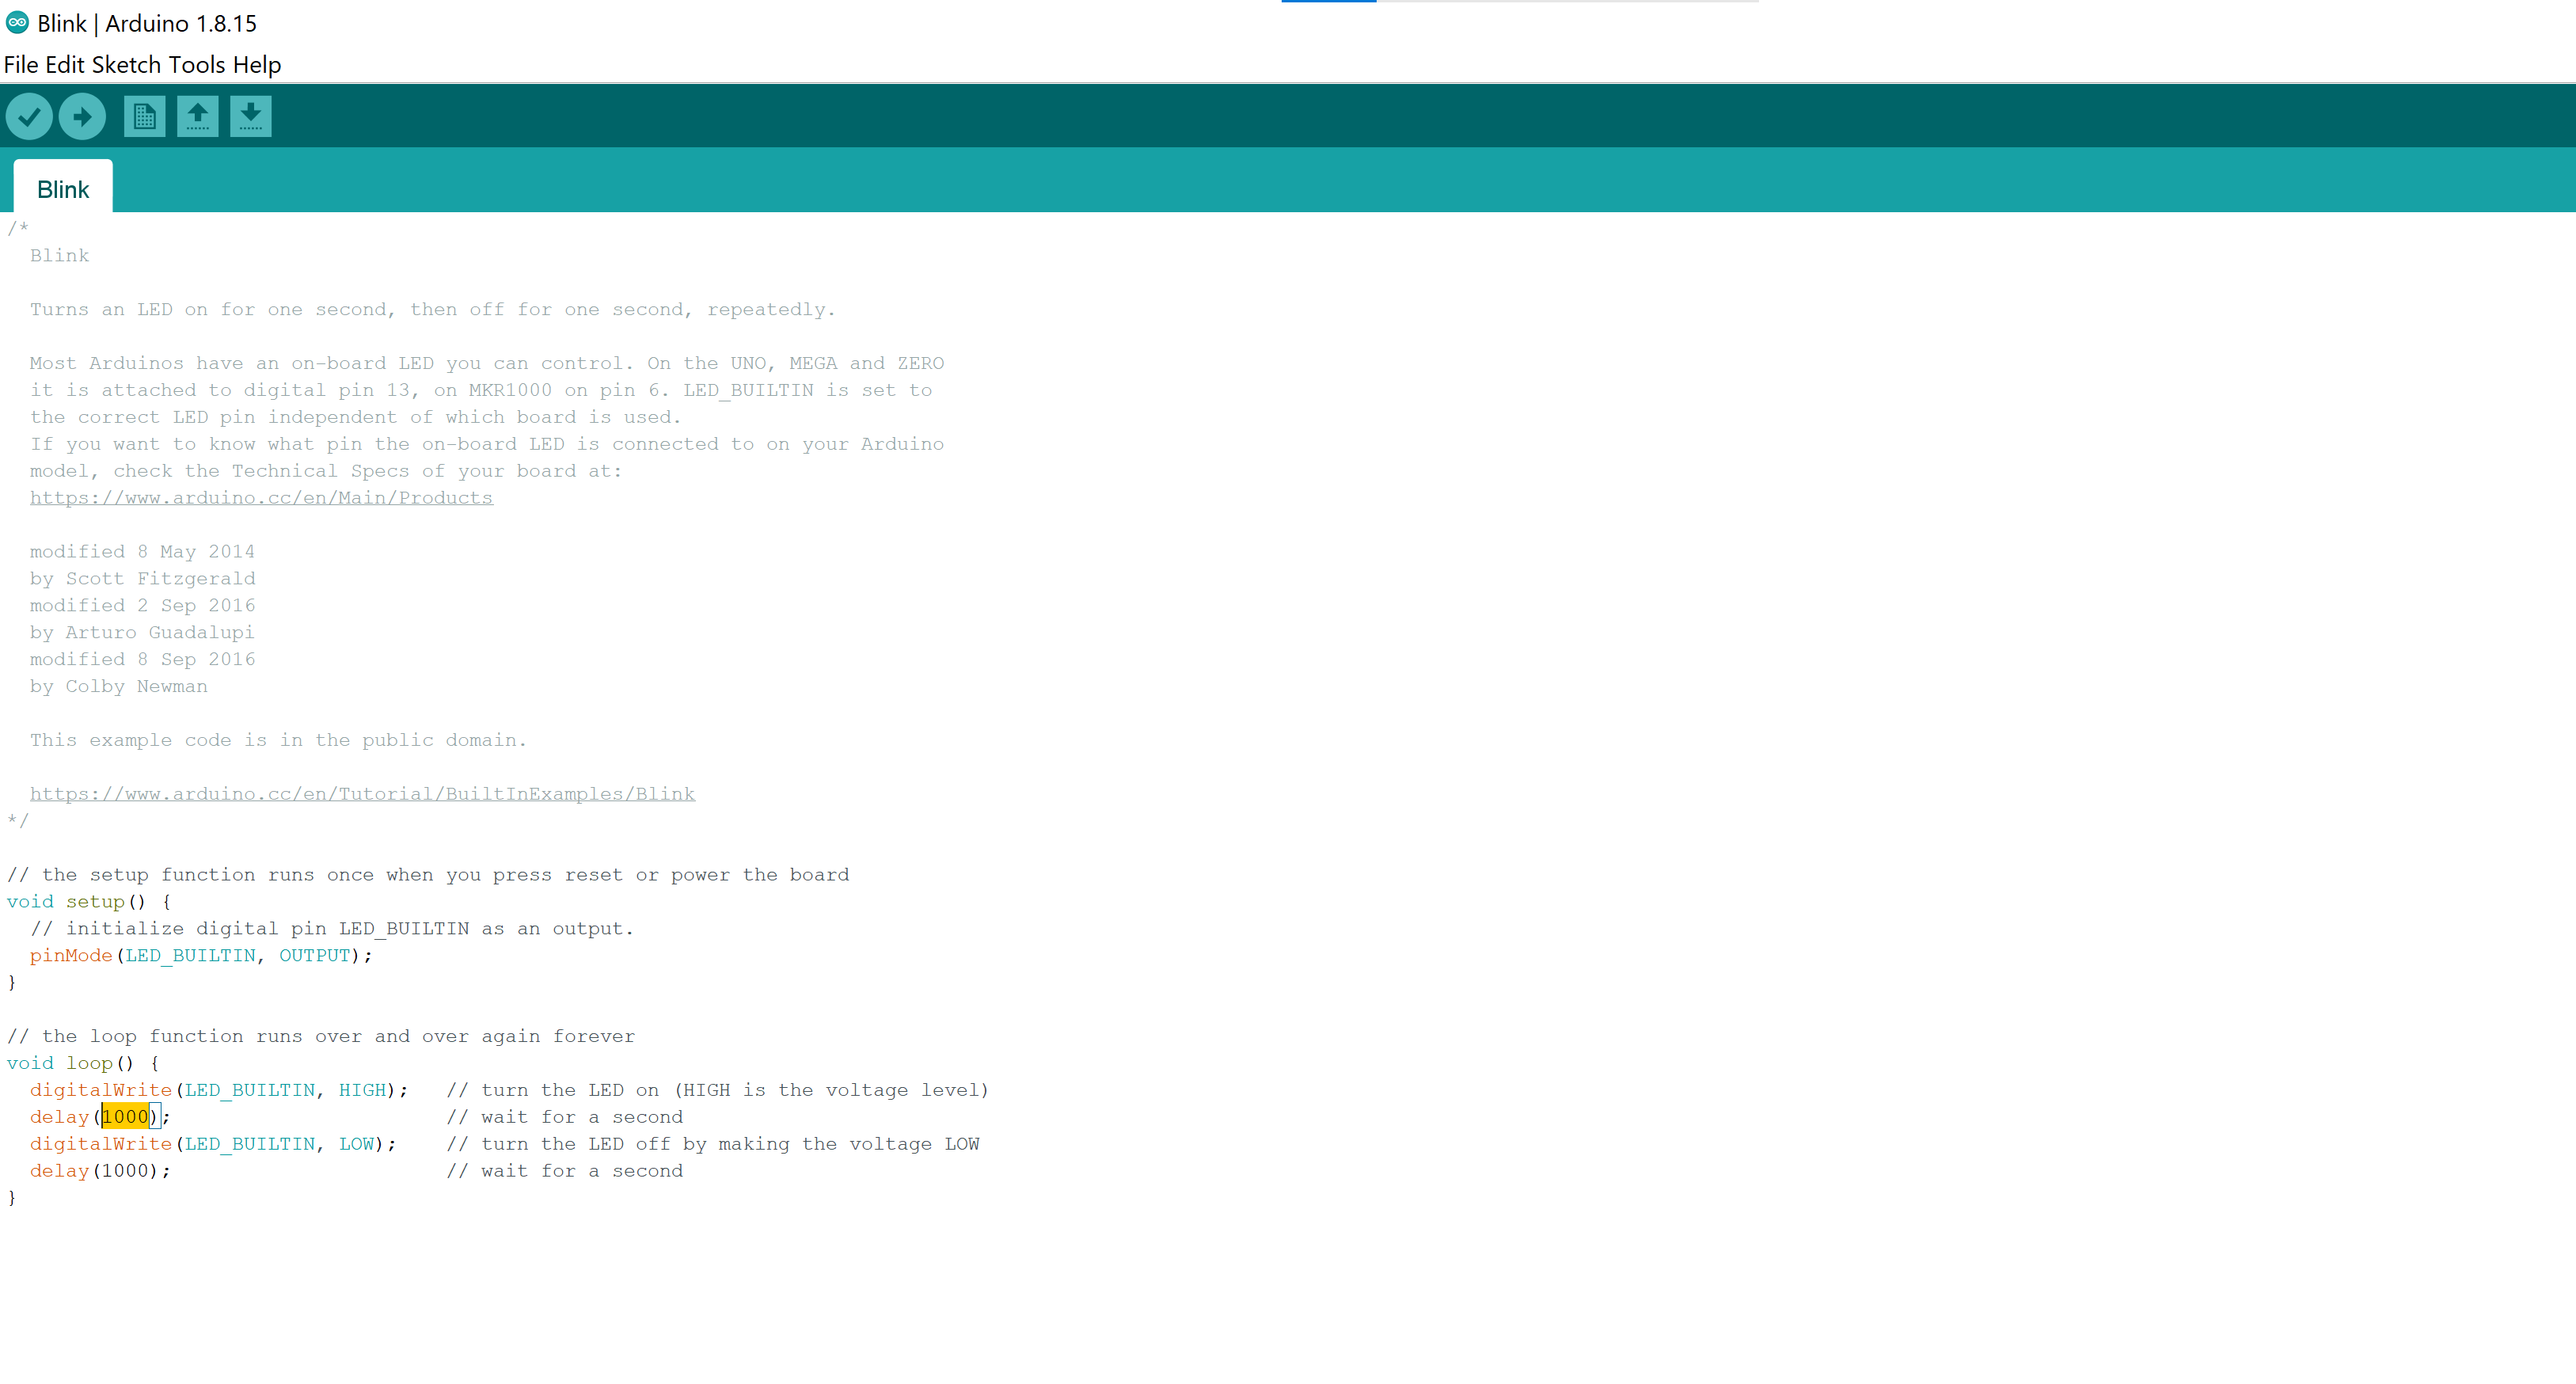
 After doing these steps another new sketch where you can see the blink code, the highlighted number on the code represents the delay you can edit to do your blink. the steps shown in the following picture.
Assessment 02
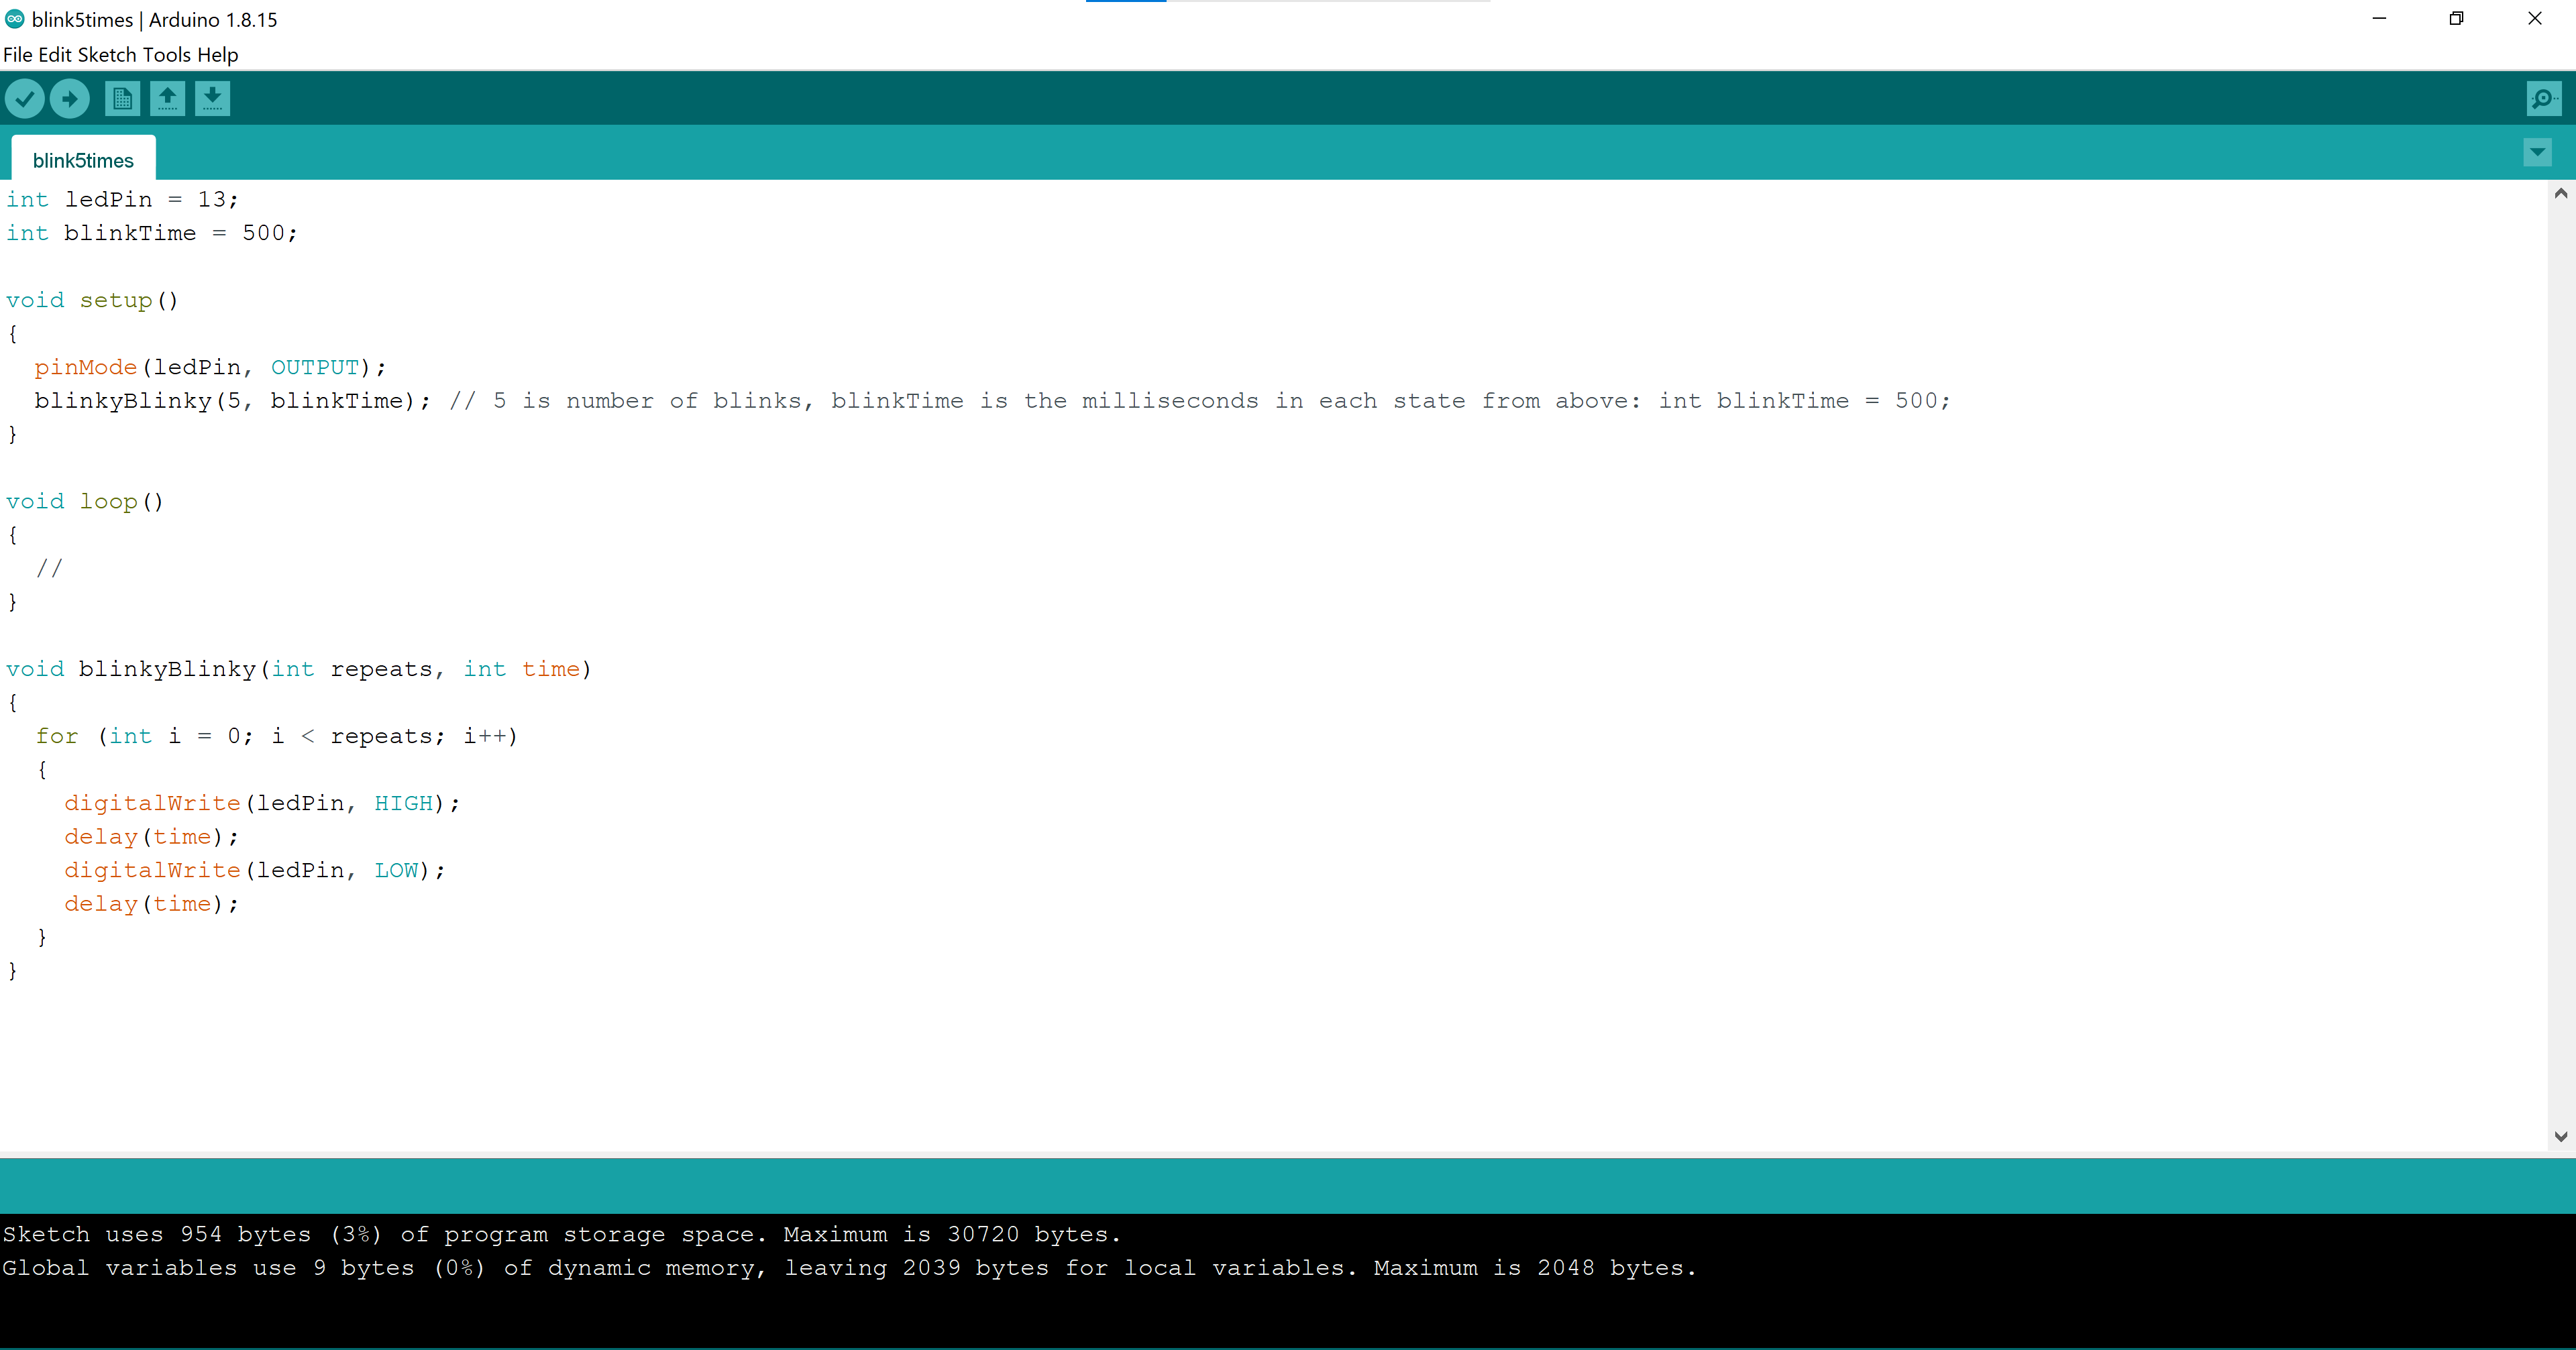
Do another example to the microcontroller LED, so I have tried to do a code that could blink the LED light 5 times. the code was taken from the following source. Click me!
The following code shows the code used.
 On the following video you can see how the code works
Another Programming Options
PlatformIO
In order to install the program I have followed my coworker steps Zahra
Code
#include <Arduino.h>

int dot=500;
int dash=1000;

void setup() {
 // put your setup code here, to run once:
 pinMode(LED_BUILTIN, OUTPUT);
}

void switchLED_BUILTIN(int timing) {
 digitalWrite(LED_BUILTIN, HIGH);
 delay(timing);
 digitalWrite(LED_BUILTIN, LOW);
 delay(500);
}

void loop() {
 // put your main code here, to run repeatedly:
 switchLED_BUILTIN(dash);      // for N
 switchLED_BUILTIN(dot);

 delay(2000);

 switchLED_BUILTIN(dash);
 switchLED_BUILTIN(dash);       // for O
 switchLED_BUILTIN(dash);

 delay(2000);

switchLED_BUILTIN(dash);
 switchLED_BUILTIN(dash);       // for O
 switchLED_BUILTIN(dash);

 delay(2000);

 switchLED_BUILTIN(dot);
 switchLED_BUILTIN(dash);      // for R
 switchLED_BUILTIN(dot);


 delay(2000);
}