1. Project management
Introduction
In my first week of the FabAcademy I achieved the main objective of launching this website and cloning a local Git Repository of it to edit it. Below are highlights of my journey accomplishing this:
Existing X Stuff
-
GitLab To begin with the repository for the website was already ready and hosted on GitLab which is a software and framework that allows for the development, deployment, and operation of software. Furthermore, it utilizes Git for version control of the software which in this case is this website. This allows one to save (commit) incremental changes and also to work locally and then have that work pushed to the existing repository.
-
MKDocs The website is built on MKDocs which boils down to a site generator that simplifies the creation of webpages and websites. It also utilizes Markdown which is a lightweight markup language that is made such that the user writes (almost) plain text and it converts it into HTML. This makes creating a website quicker and easier for users especially beginners. Of course there are extra features beyond just writing plain text easily to stylize the page. These are summarized in the table below:
Code Example
Use the three backticks to separate code.
Some code goes here
Besides acting as a simple text processor to convert plain text to HTML, MkDocs allows the insertion of images to the webpage. The way this is done is shown via the line of code shown in the picture above. You may observe that a few dots precede the “images” folder referenced. These dots denote the number of parent subfolders to the images folder. Another thing that was important to consider when uploading images to the repository is the size of the image file. Generally more pixels means a larger file size, however depending on the variety in the picture, the image could be smaller depending on the compression algorithm used.
Installing Git and Atom
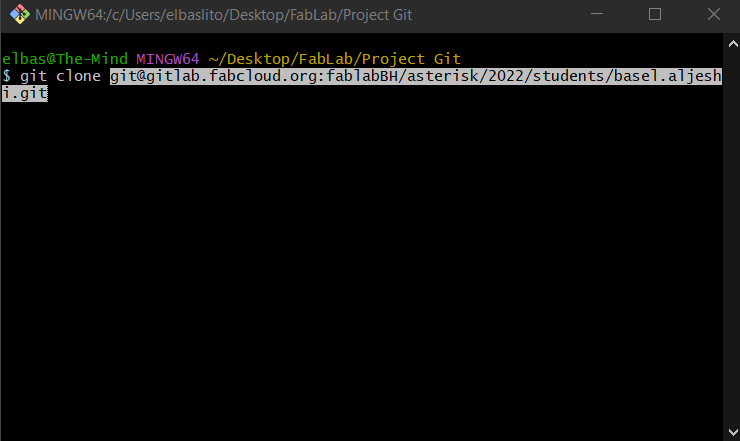
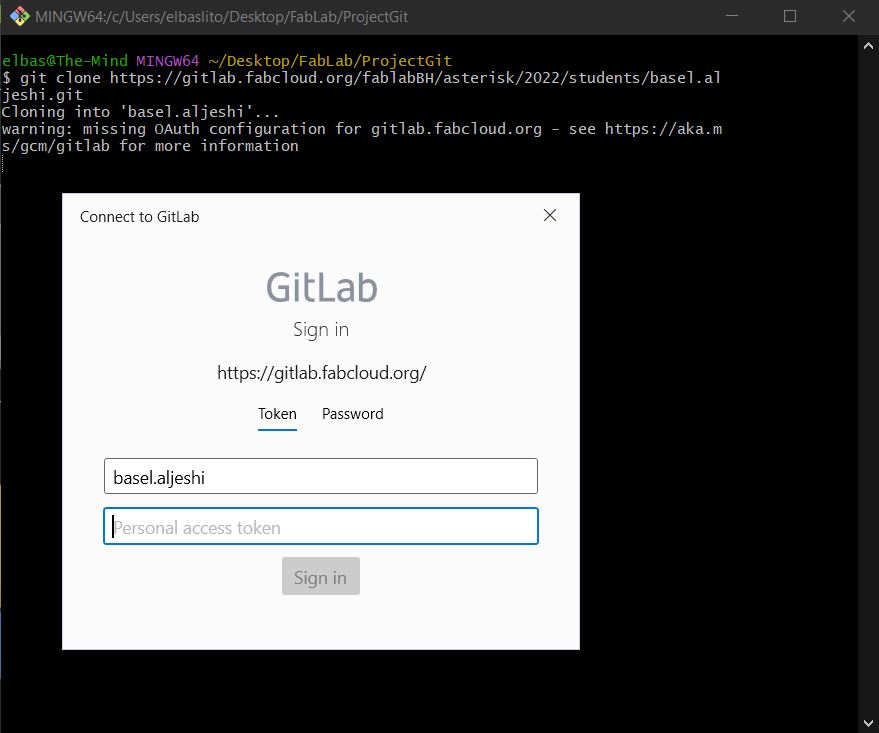
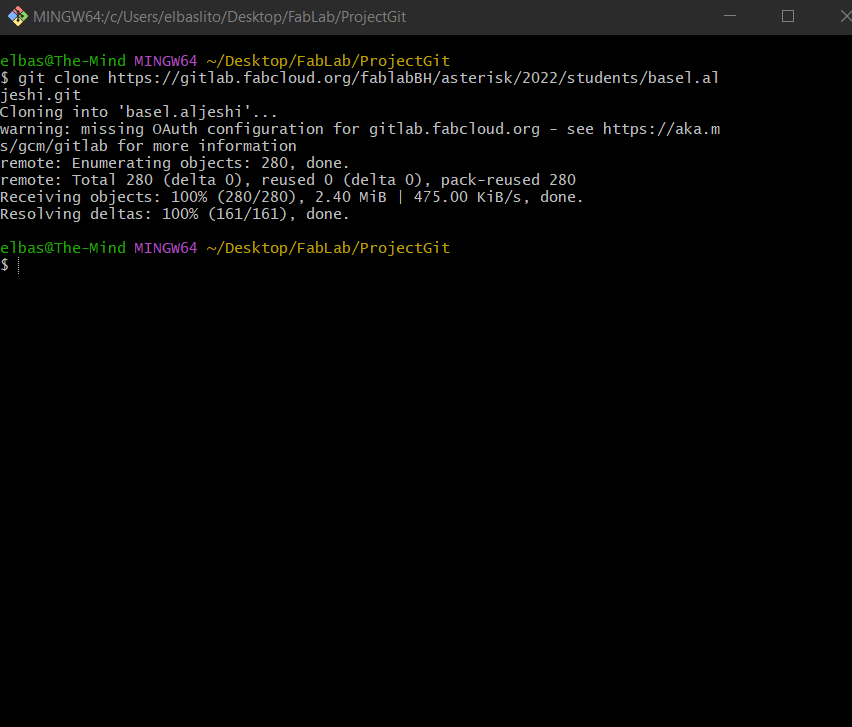
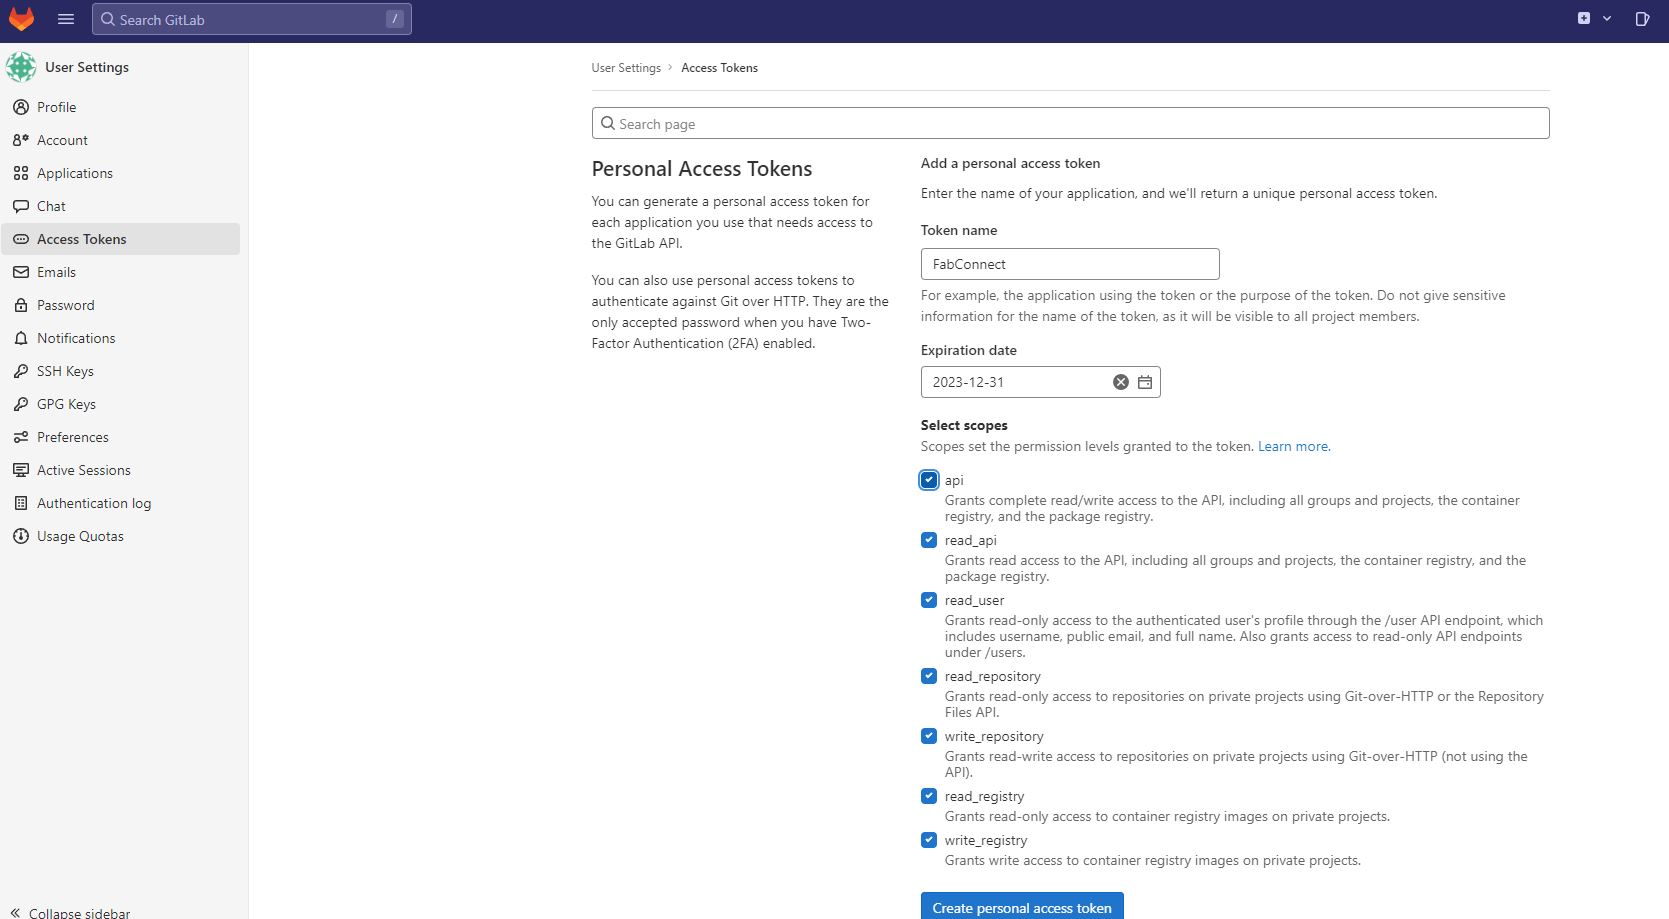
To work with Gitlab offline on my local machine, I installed Git Bash and proceeded to clone the repoistory that is hosted on GitLab. Of course I had to sign in via my Fablab Gitlab credentials for authentication and so that I can directly contribute to the repository through the cloned copy. I did this by creating a personal access token which I then used to connect the repositories. Finally, I installed Atom and connected to the cloned repo which was connected to the Gitlab repo by then. The pictures below highlight a few of the steps to do this:
Actually X Uploading
Now that everything is all setup and good, uploading your code is super easy. All you have to do is either create a file in the local repository on the disk or edit some file or copy some file, as long as any change happens in the repository it counts. Then all you have to do is use the command:
git add .
This command will stage all the changes that you made which is indicated by the dot added at the end.
Then the next command that should be run is:
git commit -m "some change comment thingy here"
This command will commit the change to the master branch which if you work in a big corporation and have to do this it will probably be a super scary action to do because you could be screwing up a lot (that’s why other branches exist and forks amongst other things). The comment at the end is just for you and others to title/know what change you made so it should probably be something relevant and useful.
Finally the last command is:
git push
This command basically ‘pushes’ the new code to be run through the pipeline so that it is published and made as a live change to be run.
While these are the commands usually run to make changes, sometimes when you make changes on other machines the code on your local machine might not be up to date which could cause continuity issues which results in the headache that is merge changes. Which especially happens when you are collaborating with others on this. So to update your code to the latest version that is live all you have to do is run this command:
git pull