7. Moulding and casting
This week we explored moulding and casting.
Moulding x Casting (very original)
Molding and casting are manufacturing processes used to create objects by shaping liquid or pliable materials and solidifying them into a desired shape. Molding involves pouring liquid material, such as plastic or metal, into a mold and allowing it to harden. Casting involves pouring liquid material into a mold and allowing it to harden, and it is typically used to make complex shapes and intricate designs. Both molding and casting are used in a wide range of industries, including automotive, aerospace, construction, and medical. They are also used to create a wide variety of products, including toys, tools, and industrial parts.
Materials x Moulding
A group assignment was done to research different moulding materials and how to use them along with safety information and process steps. I was paired with Maryam AlSadadi where we researched Silicone Rubber. I would link to the group assignment page, however, the link is still not up. So I have taken the liberty to reformat all the text written and showcase it below because I can:
Materials used:
Dry Putty Gypsum Resin Silicon Rubber
Material 1: Dry Putty
Safety:
Avoid contact with skin and eyes Wear suitable protective clothes (overalls, goggles, dusk masks and gloves) Use a barrier cream Ensure that there is adequate ventilation in the area where the product is being applied. Do not breath vapor or spray. In event of splashes, flush eyes with warm water Wash skin thoroughly with soap and water - do not use solvent or thinners.
Process steps:
Mix water and dry putty gradually to a smooth paste. Set aside for 5-10 mins then re-mix for one minute. Apply the paste using a putty knife or trowel. Build up the thickness in multiple coats (maximum 2.5 mm per coat). Allow each layer to dry completely before adding the next. Final coat should be sanded with fine emery paper (#200, 220) after it has dried for at least 1 hour. Mix ratio: 4-5 parts water to 10 parts of dry putty
Work time: 1 hour Cure time: 2-4 hours
Cured material state: Matt, smooth, white, 100% solid
Datasheet and sources: Click for link
Process pictures and comments:
First, we added the water (10 g) Then we added 20 g of the mix then we mixed them using a spoon. Lastly, we added the mixture to the cast We had more of the mixture, so we experimented with it by adding acrylic paint We added the green mixture as well. Result pictures:
As you can see, the original one (white) came out very good, and in good shape, while the green one is a bit weaker and it also chipped on the side while we were trying to remove it. We concluded that the acrylic paint might have weakened the mixture or caused issues with the ratio. Overall, dry putty is very easy to work with but you have to be careful while dealing with it after it dried because it might be damaged easily.
Material 2: Gypsum
Safety: Non-toxic, non-flammable and non-irritating to skin, but slightly irritating to eyes. Wear eye protection glasses and gloves when handling. In case of contact with eyes, wash thoroughly with water.
Process steps:
In a clean bucket, mix approximately 32 L of cool, clear water, and 40 Kg made plaster together. (4 mL : 5 g) Stop dosing once powder is exceeding the water level. After 1 minute of soaking - properly mix by hand or a mixer. Mix ratio: 4 mL of water to 5 g of gypsum
Work time: 5 minutes approxim Cure time: 5-15 min approx
Cured material state: solid, light color concrete look Datasheet and sources: Click for link
Process pictures and comments:
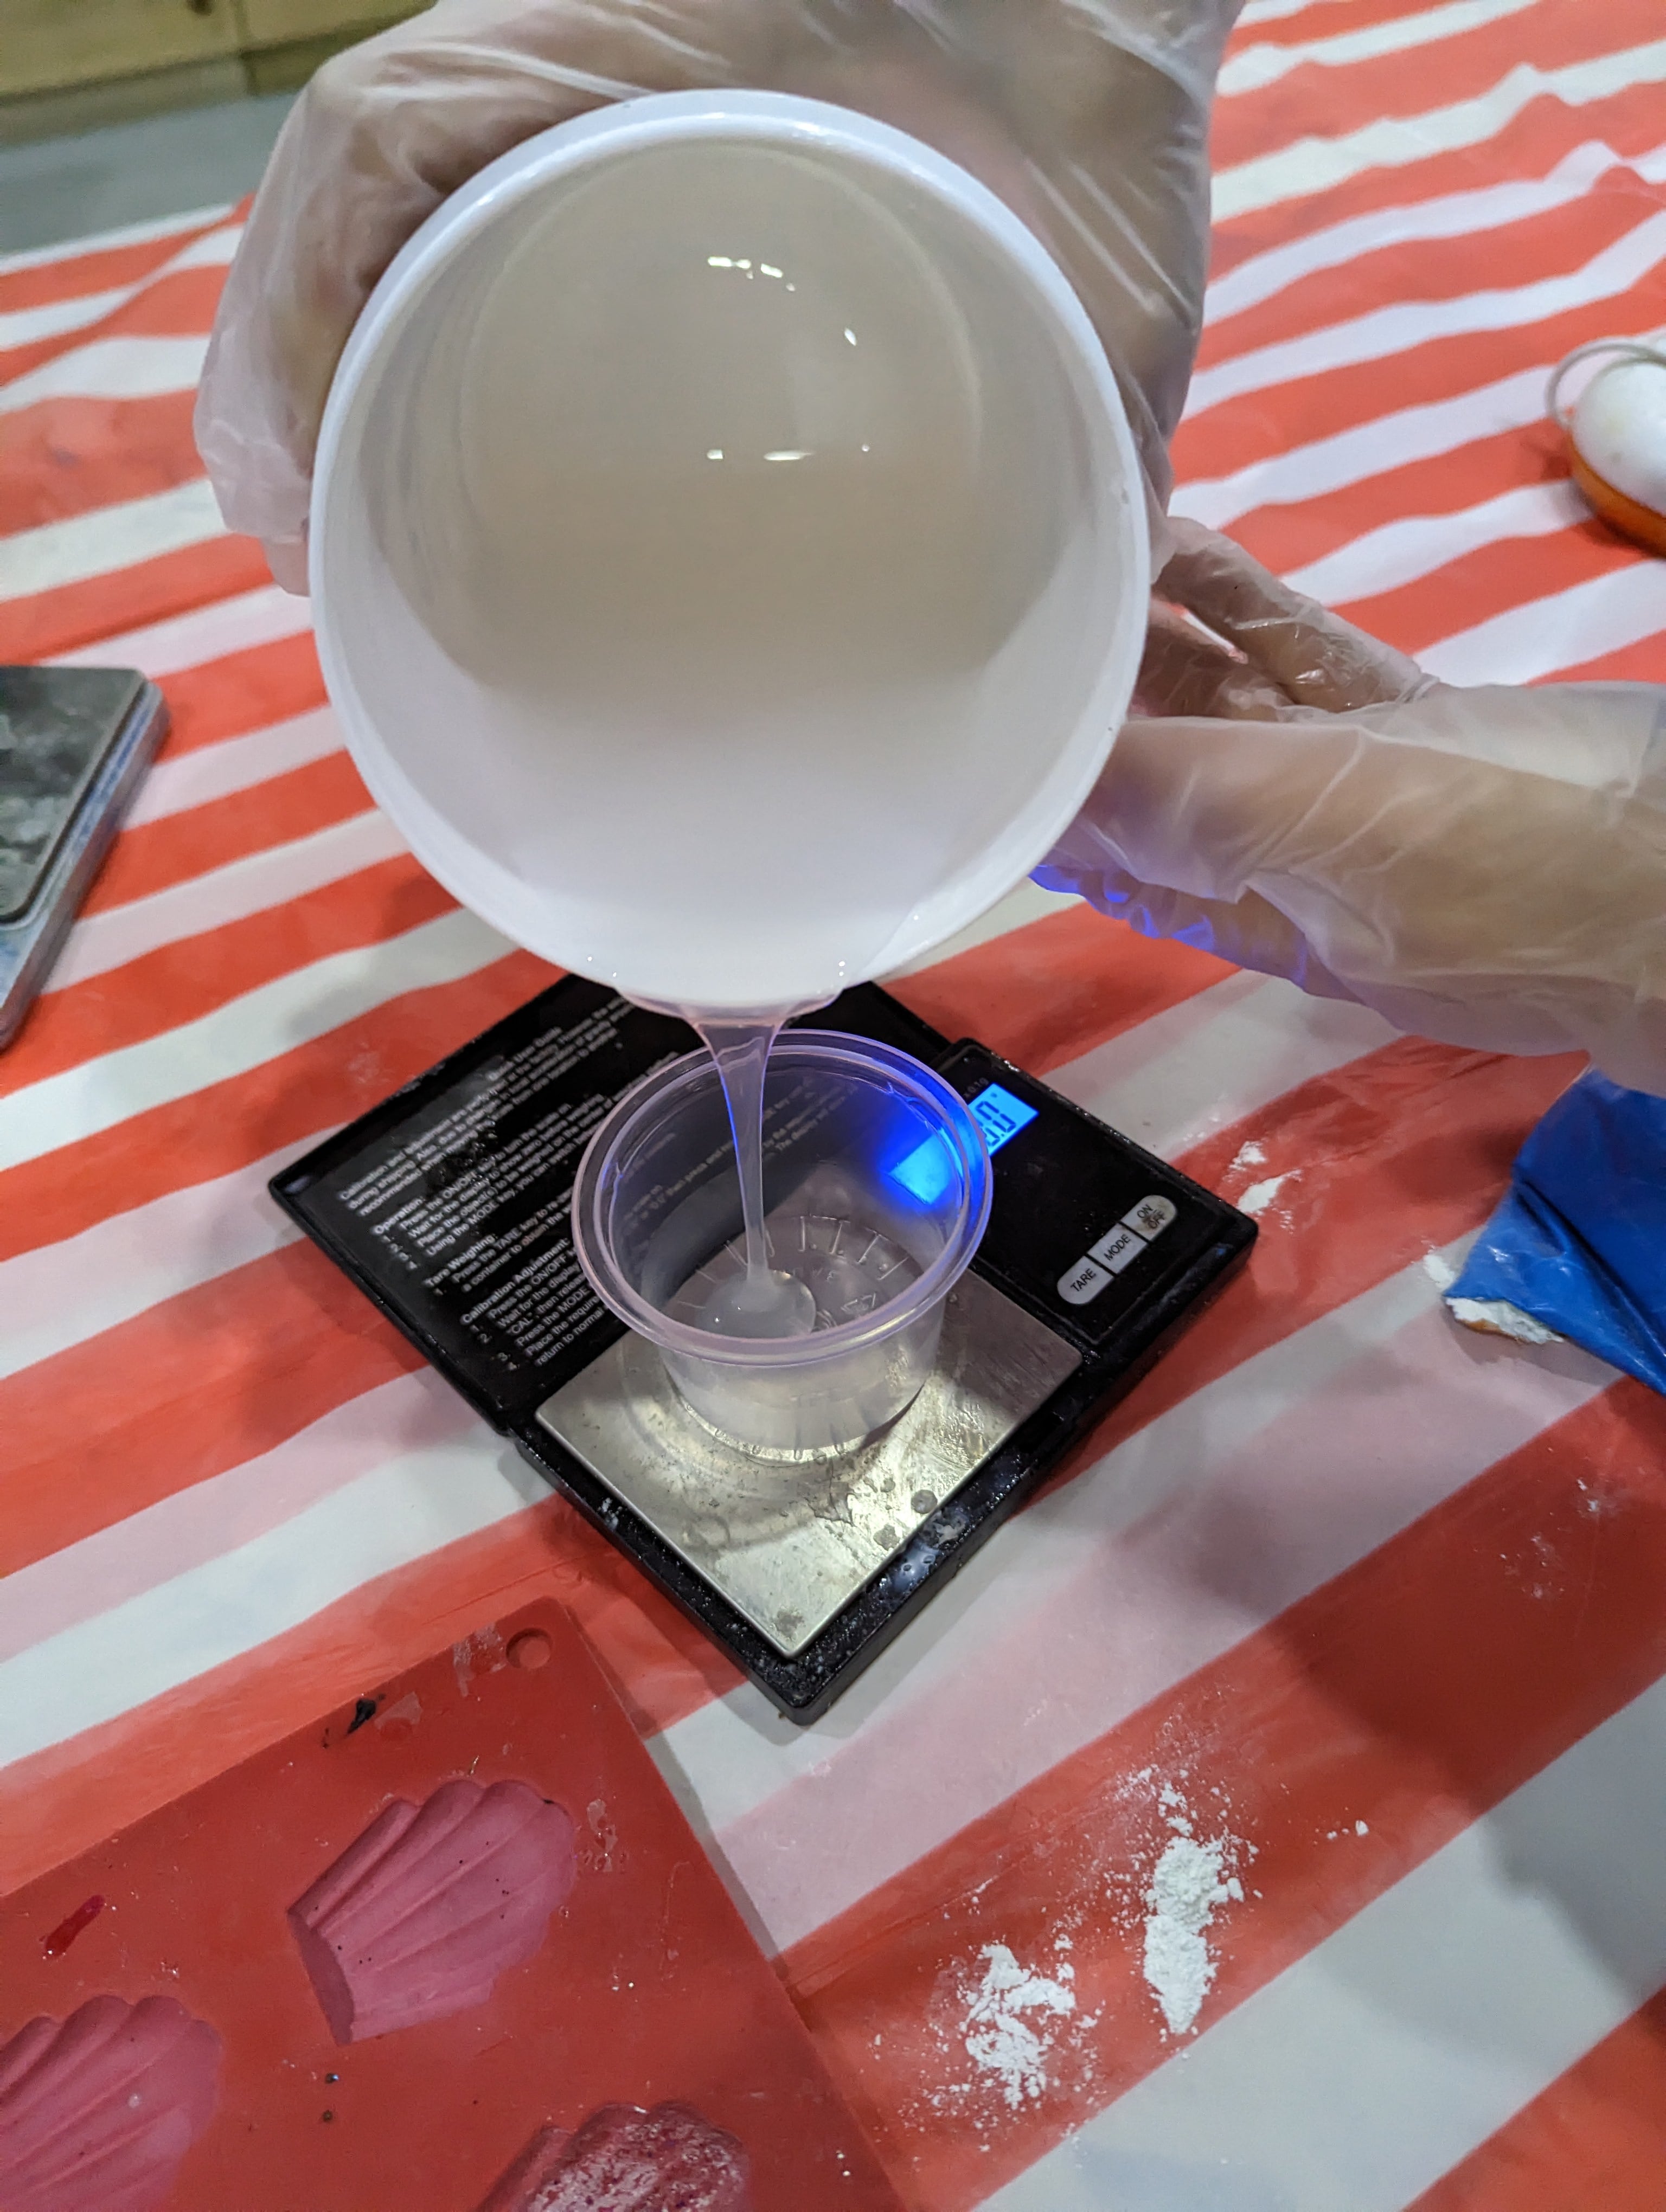
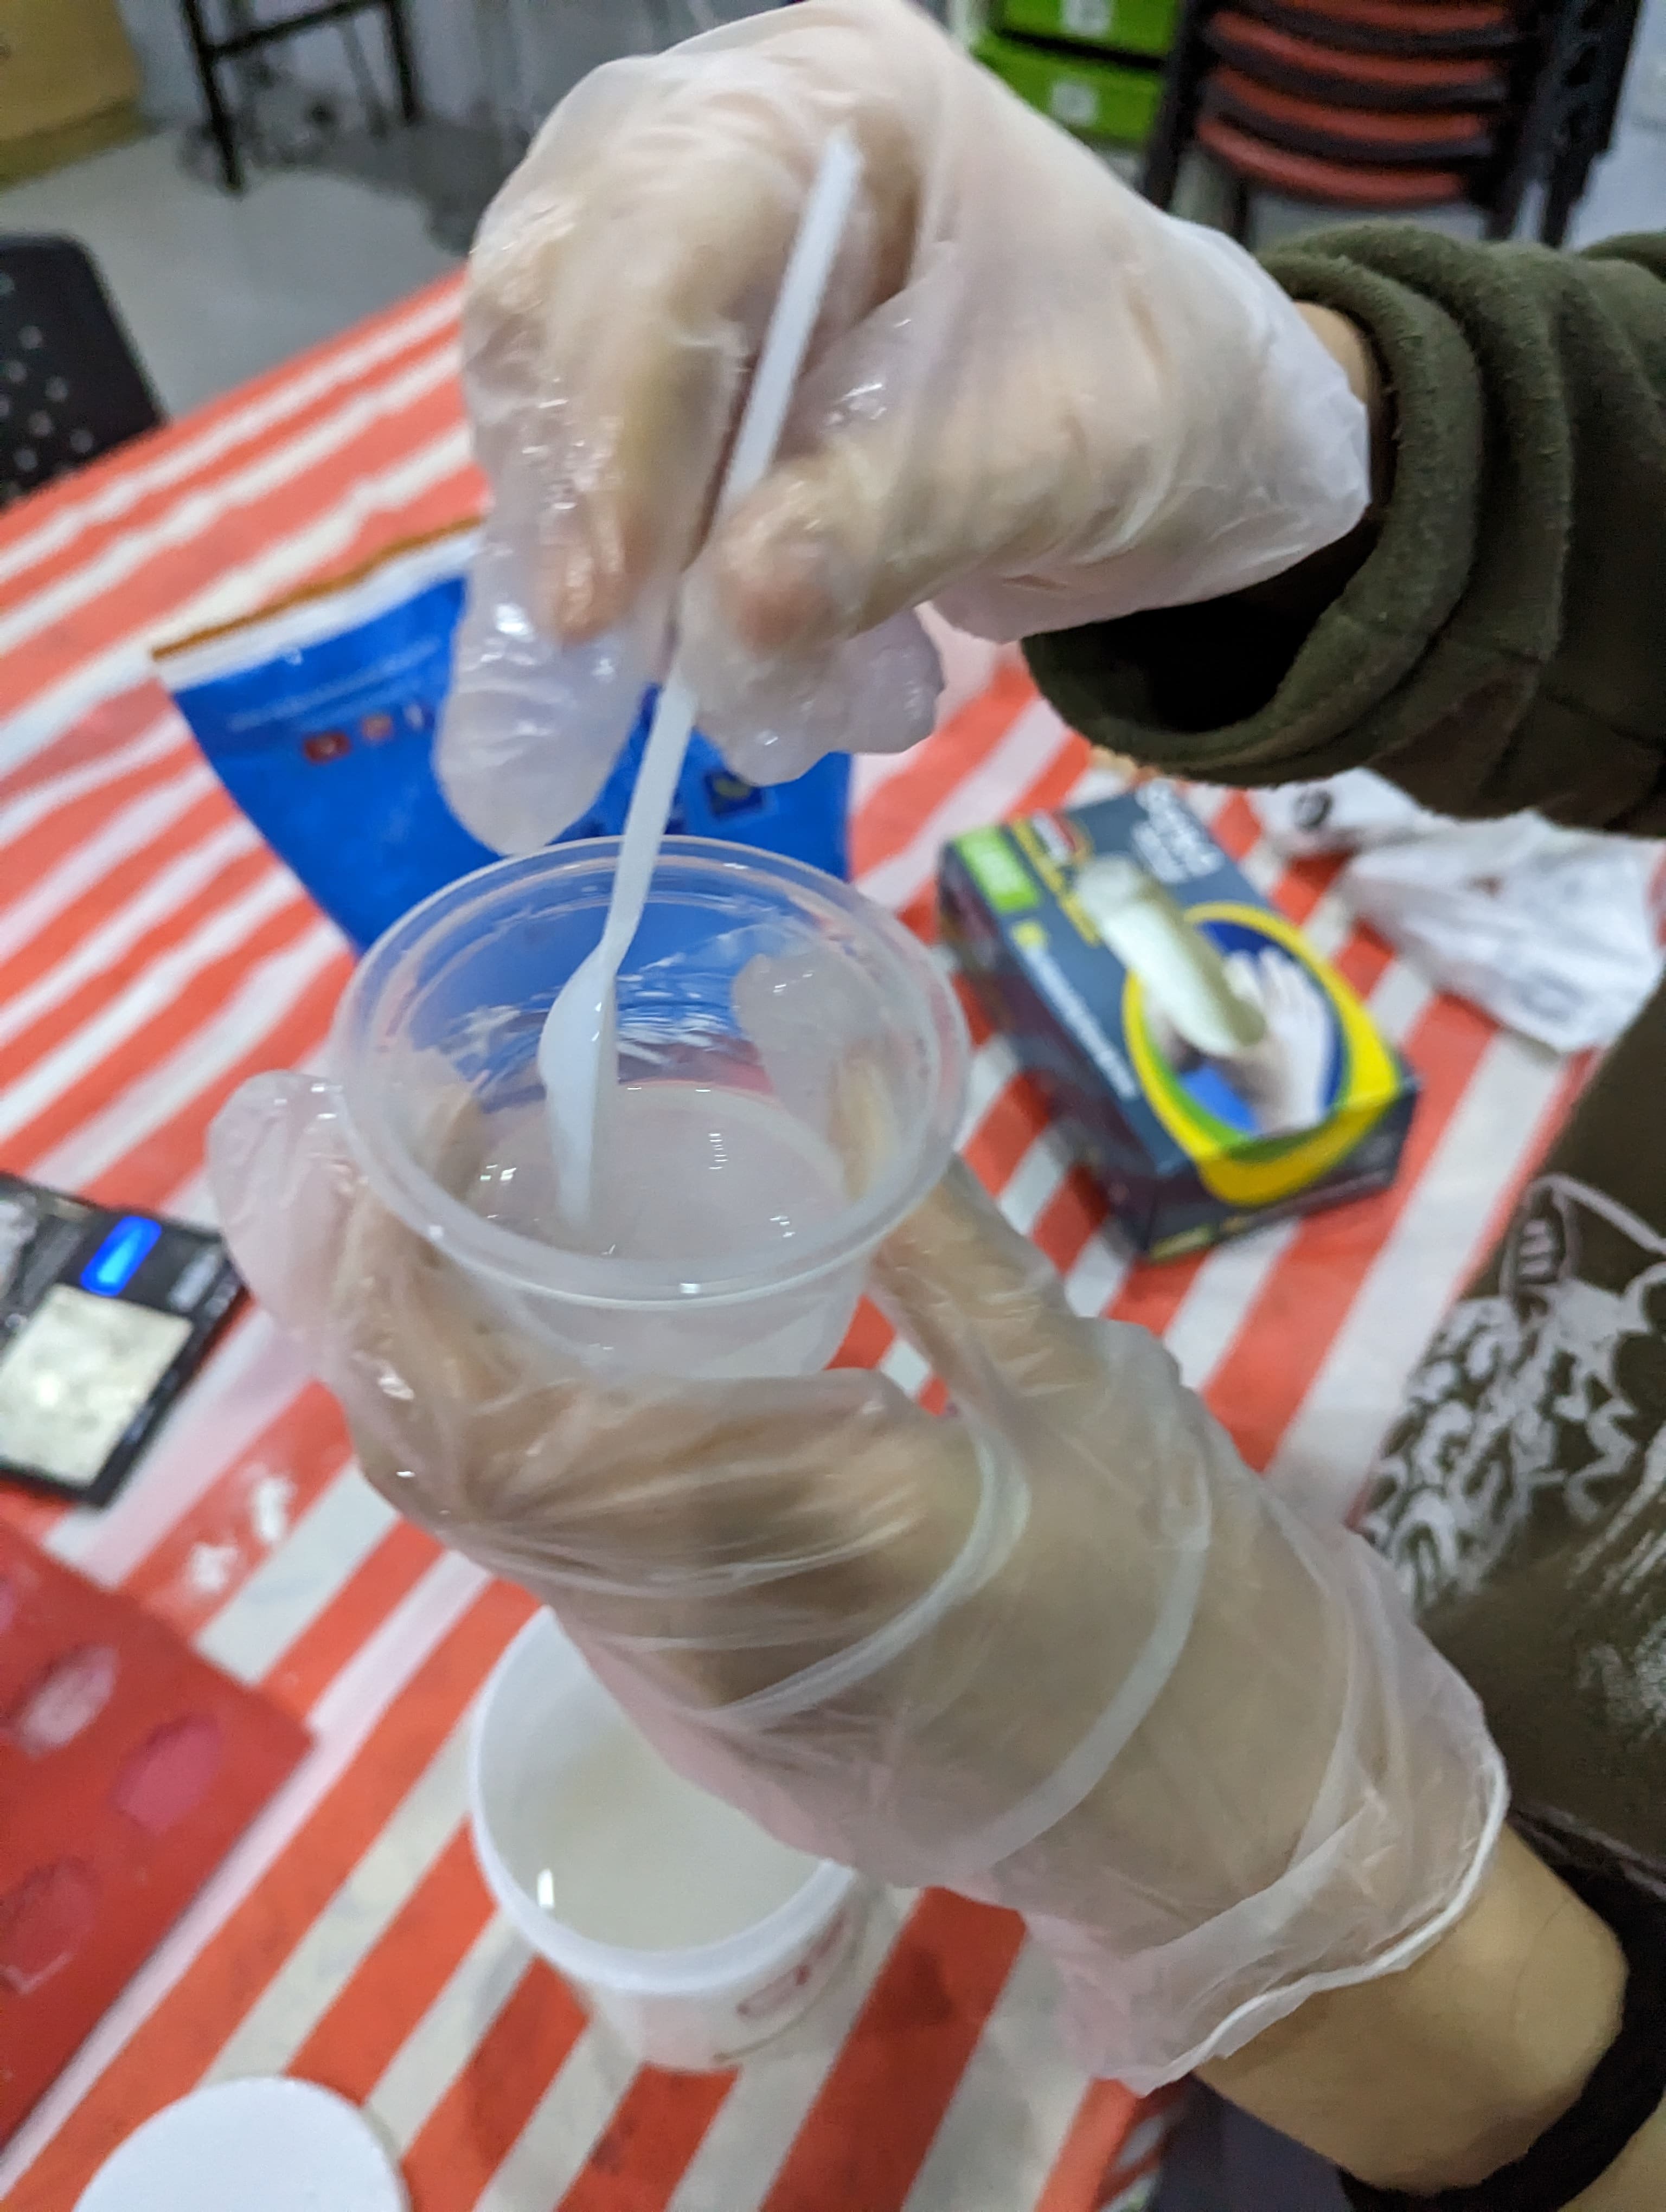
The sample of the gypsum material that we used. Measuring out 15g of gypsum. Measuring out 12mL of water. Soaking gypsum in water before stirring to combine mixture. Pouring the mixture onto the silicone mold. We felt that our mixture was too thin and runny, so we measured the remaining mixture before adding more gypsum. After adding 2.3g of gypsum. Pouring the second mixture onto the silicone mold. Result pictures:
It is pretty easy to work with, and it cures pretty quickly too.
Material 3: Resin
Safety:
Read and understand the safety data sheet before using the product. Wear appropriate personal protective equipment, such as gloves and goggles. Avoid skin and eye contact. In case of contact, wash the affected area thoroughly with soap and water. Store in a cool, dry place, away from heat and direct sunlight.
&&Process steps:**
Mix the resin and hardener according to the manufacturer’s instructions. Pour the mixture into the mold. Allow the mixture to cure completely before removing it from the mold. Mix ratio: Varies depending on the specific resin used, refer to manufacturer’s instructions.
Work time: Varies depending on the specific resin used, refer to manufacturer’s instructions. Cure time: Varies depending on the specific resin used, refer to manufacturer’s instructions.
Cured material state: Hard and durable, can vary in color and transparency depending on the resin used. Datasheet and sources: Varies depending on the specific resin used, refer to manufacturer’s instructions.
Process pictures and comments:
The sample of the resin material that we used. Measuring out the correct ratio of resin and hardener. Pouring the mixture into the silicone mold. Allowing the mixture to cure completely before removing it from the mold. Result pictures:
Your opinion (advantages and disadvantages): Resin is a versatile material that can be used to create a wide range of products. It is hard and durable, but the curing time and work time can vary depending on the specific resin used. It is important to carefully follow the manufacturer’s instructions and use the appropriate safety equipment when working with resin.
Material 4: Silicon Rubber
Safety:
Wear gloves and eye protection when handling the material. Avoid skin and eye contact. In case of contact, wash the affected area thoroughly with soap and water. Store in a cool, dry place, away from heat and direct sunlight.
Process steps:
Mix the silicon rubber and curing agent according to the manufacturer’s instructions. Pour the mixture into the mold. Allow the mixture to cure completely before removing it from the mold. Mix ratio: Varies depending on the specific silicon rubber used, refer to manufacturer’s instructions.
Work time: Varies depending on the specific silicon rubber used, refer to manufacturer’s instructions. Cure time: Varies depending on the specific silicon rubber used, refer to manufacturer’s instructions.
Cured material state: Flexible and durable, can vary in color depending on the silicon rubber used. Datasheet and sources: Varies depending on the specific silicon rubber used, refer to manufacturer’s instructions.
Process pictures and comments:
The sample of the silicon rubber material that we used. Measuring out the correct ratio of silicon rubber and curing agent. Pouring the mixture into the silicone mold. Allowing the mixture to cure completely before removing it from the mold.
Result pictures:
Silicon rubber is a popular choice for creating flexible and durable parts. It can be used to create a wide range of products, from molds for casting to flexible parts for automotive and industrial applications. However, the curing time and work time can vary depending on the specific silicon rubber used, so it is important to follow the manufacturer’s instructions carefully. Additionally, it is important to use the appropriate safety equipment and avoid skin and eye contact when working with silicon rubber.
Group x Assignment x Part2
For the second part of the group assignment, me and Maryam made quick molds via a ready machinable wax counter-mold using Silicone rubber, the procedure for which is showcased through the pictures below:


Design x Hemmah
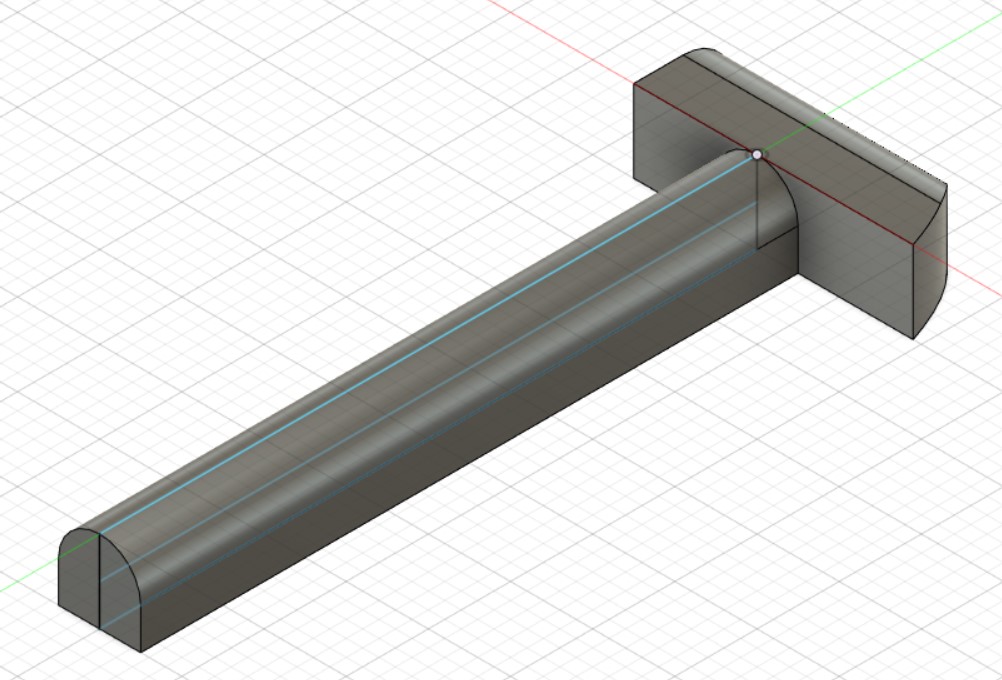
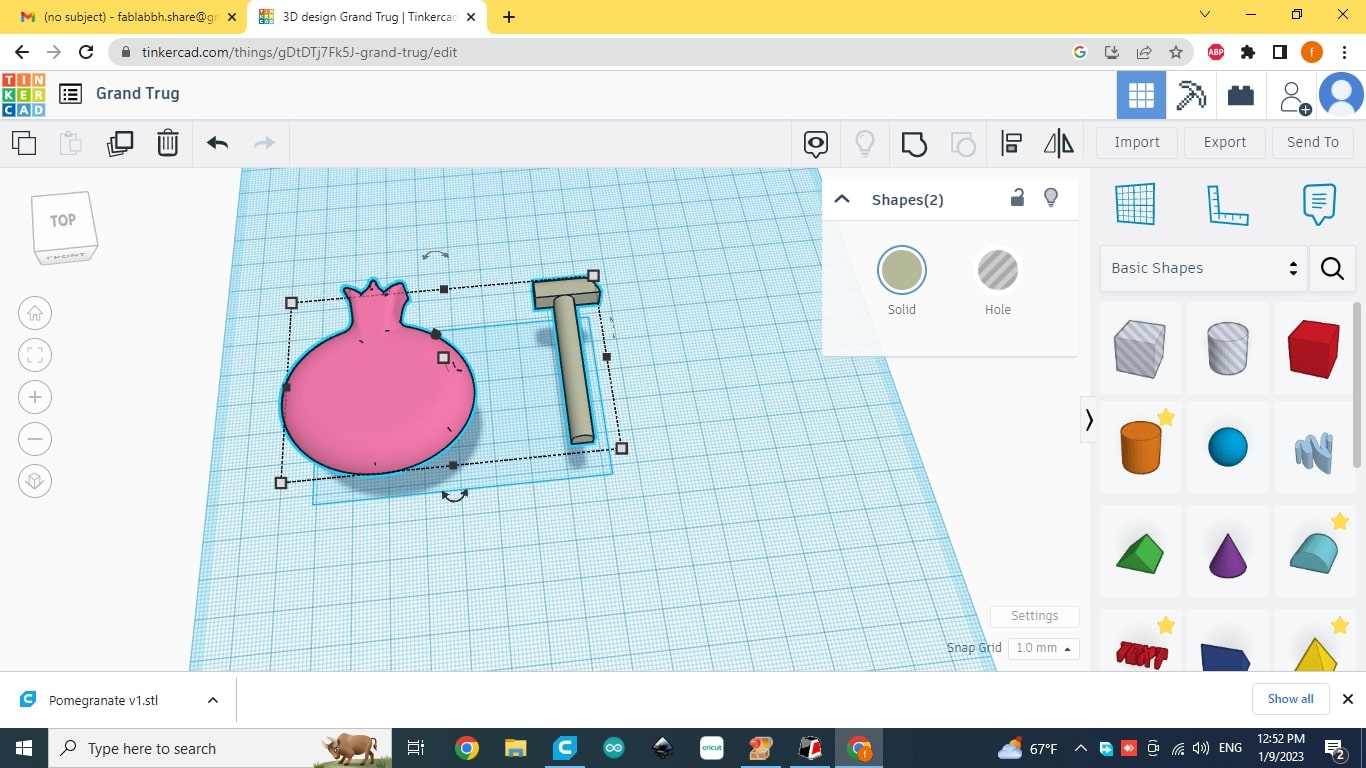
For my cast design I went with a simple curved hammer which can be used as a fridge magnet when a magnet is glued to it.
The requirements for the design size are as follows: Smallest gap: 1.6mm (That’s the smallest milling bit) Design height max: 8mm Design width and length max: 60mm
Remember to keep your design 2.5D (no undercuts) but don’t keep it flat (you shouldn’t be able to cut it with the laser cutter)
File format required: STL
And to quote Duaa: “+ one thing I wanna make sure is clear we are designing the final shape so no need to add walls or anything like that in the design. Just design the final object you want to have” -New Rules ‘17
The design procedure to make the hemmah can be seen below:


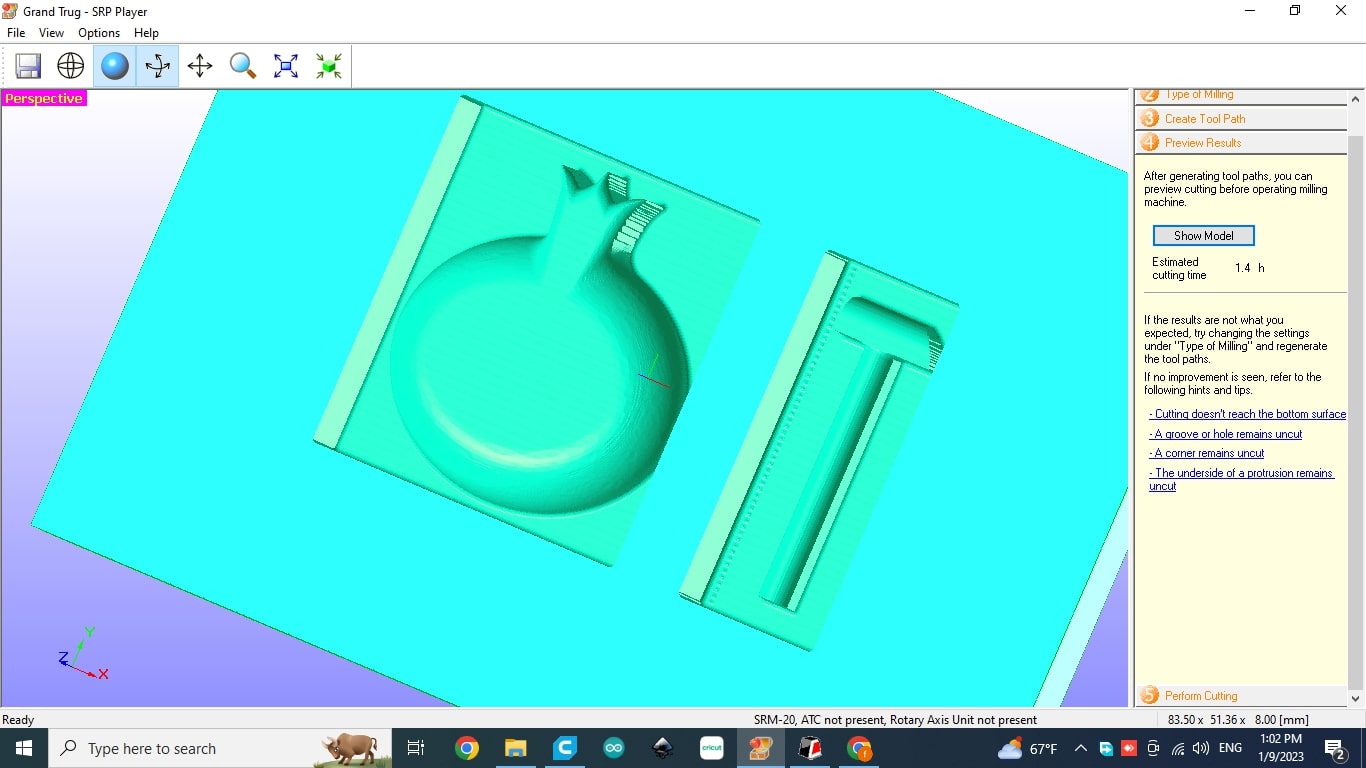
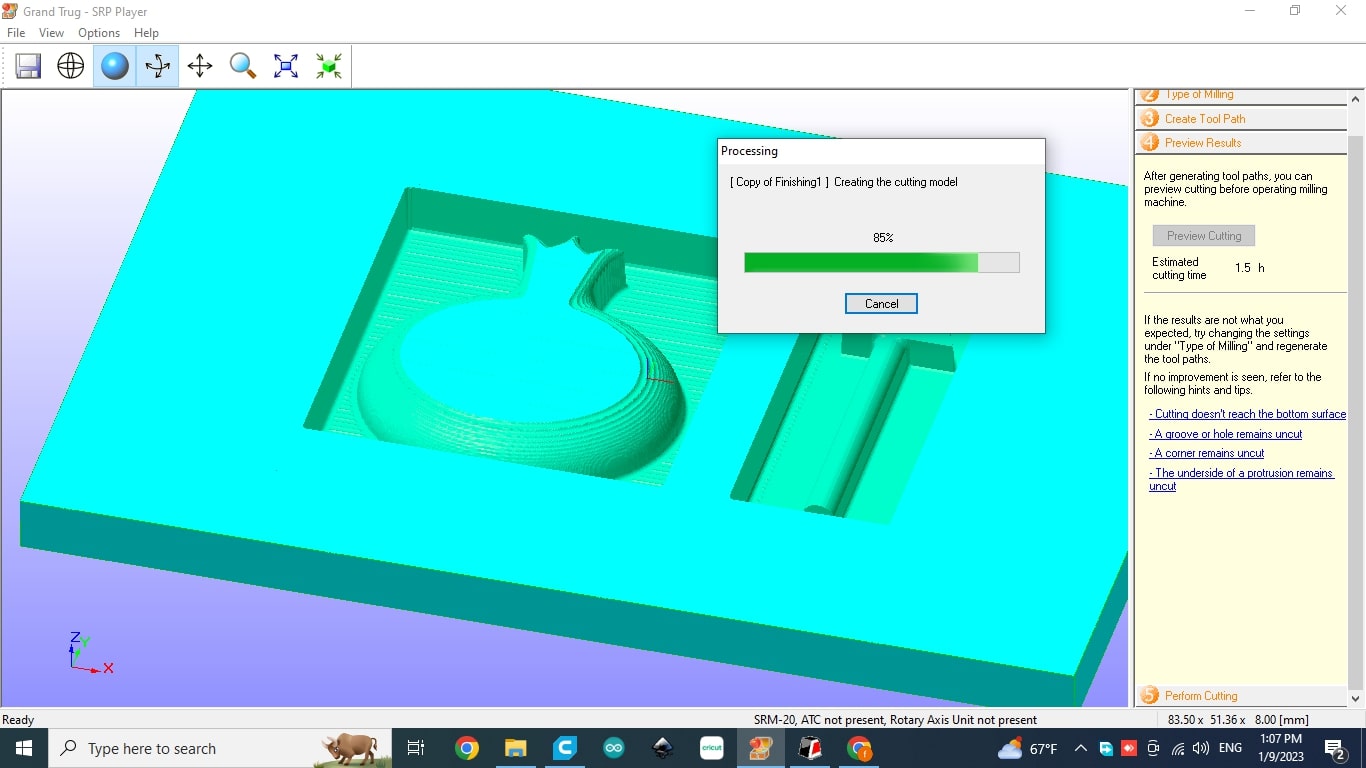
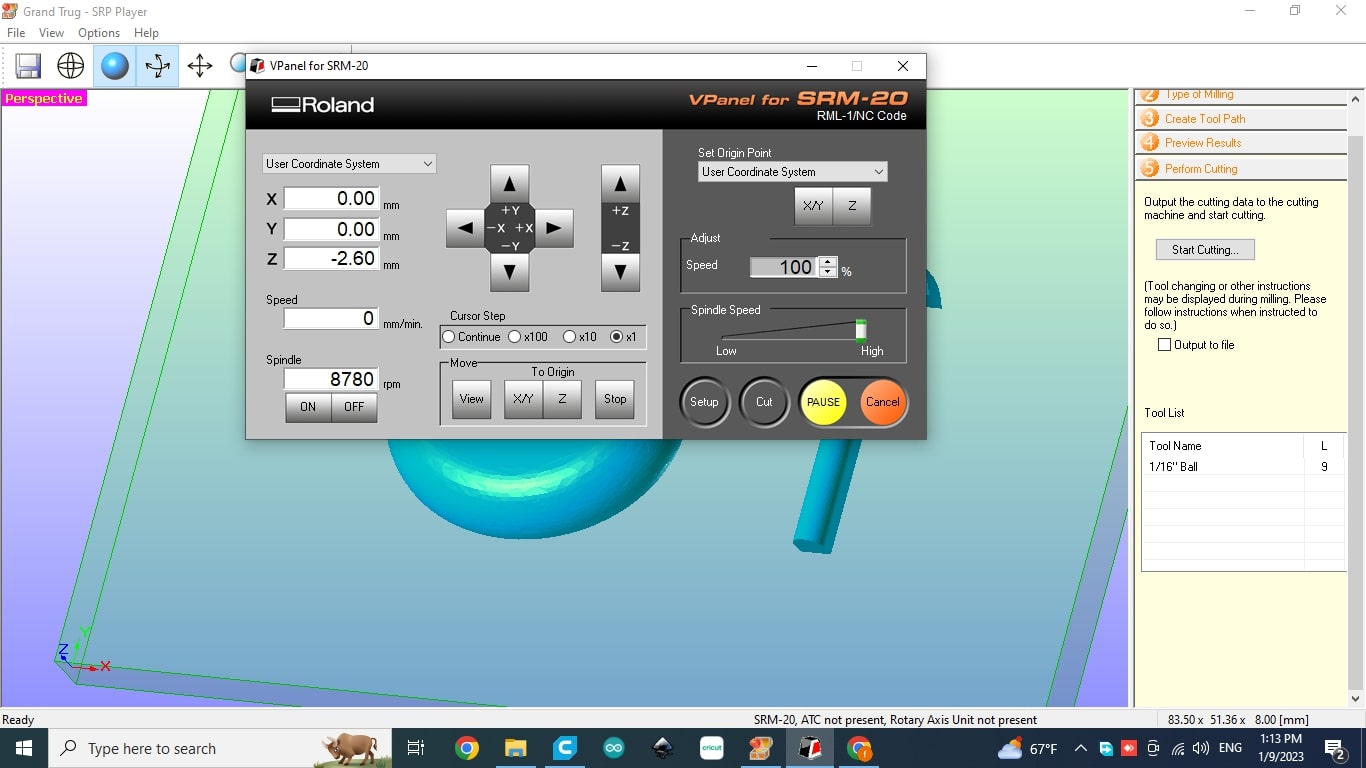
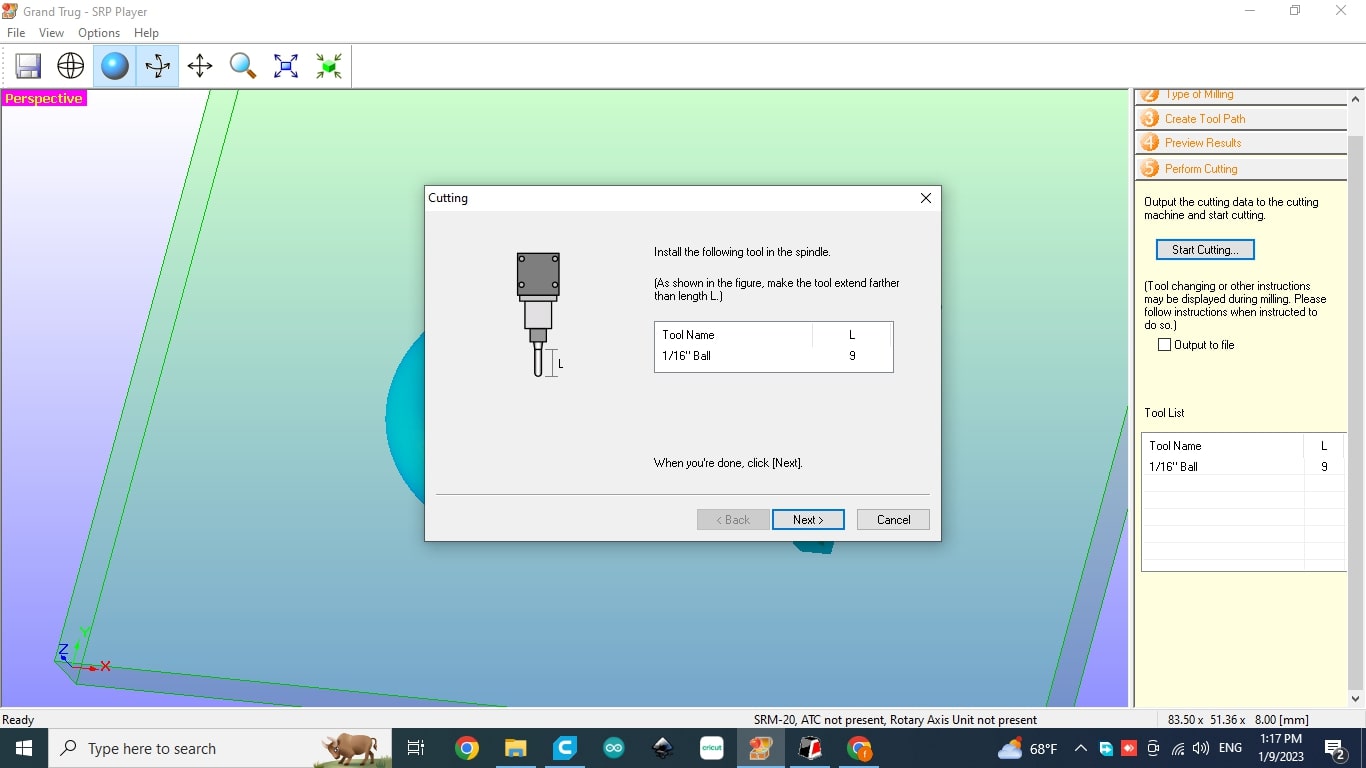
Counter x Mold
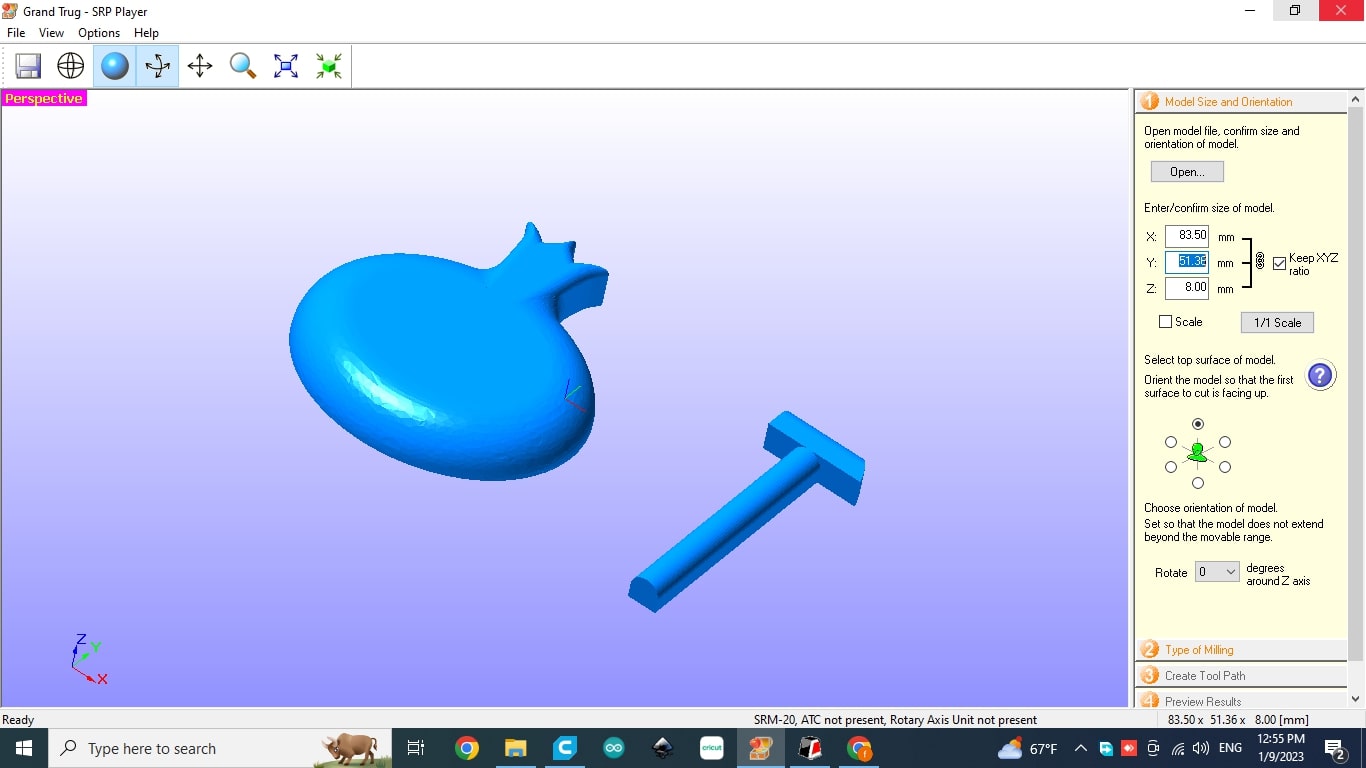
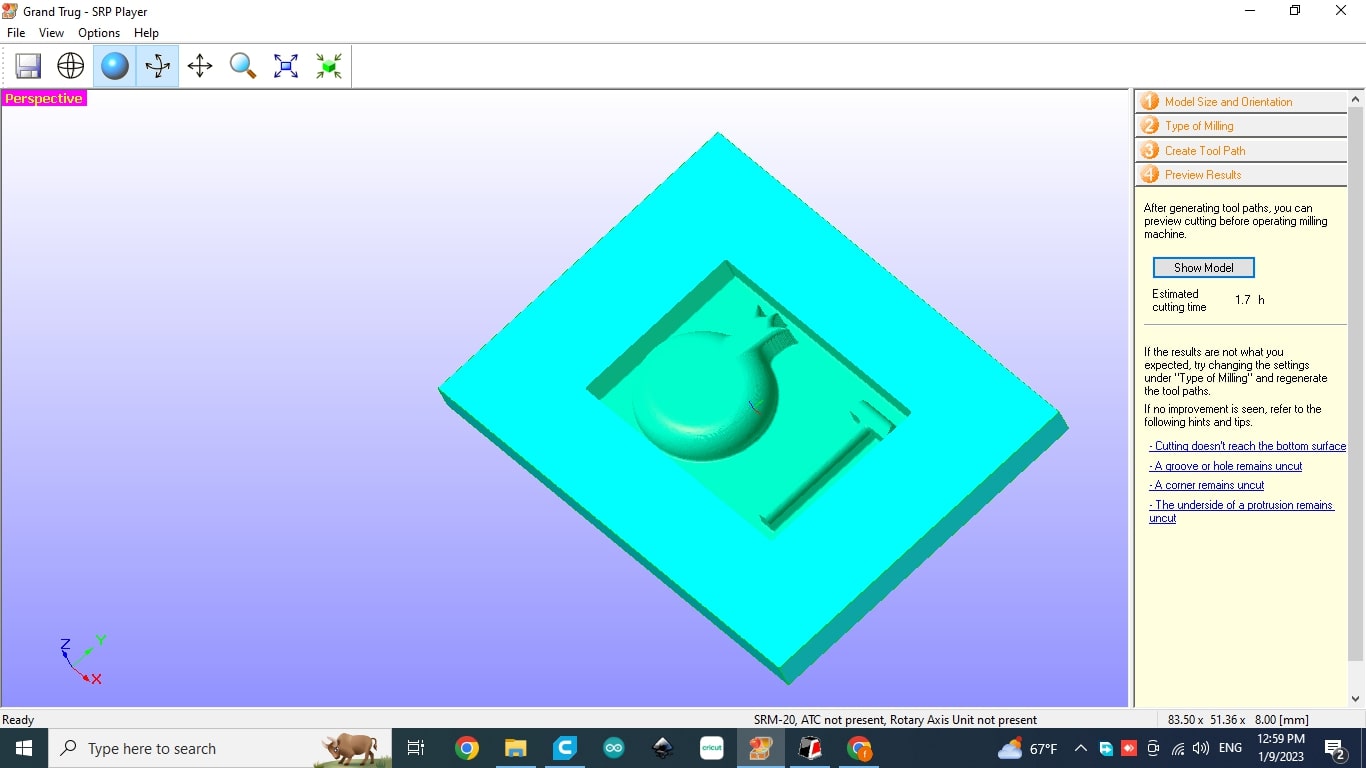
Once the design was read, it was exported as an STL file to the SRP player software which allows one to control the design and toolpath for the cut mold using the MonoFab machine. The steps involved importing the design, the selecting the toolbit, speed, adjusting positioning, and creating borders in order to minimize the amount of work to be done. It is important to note that the machinable wax can be melted again and reused which means that waste is minimal. The steps to let the counter mold be done can be seen below:


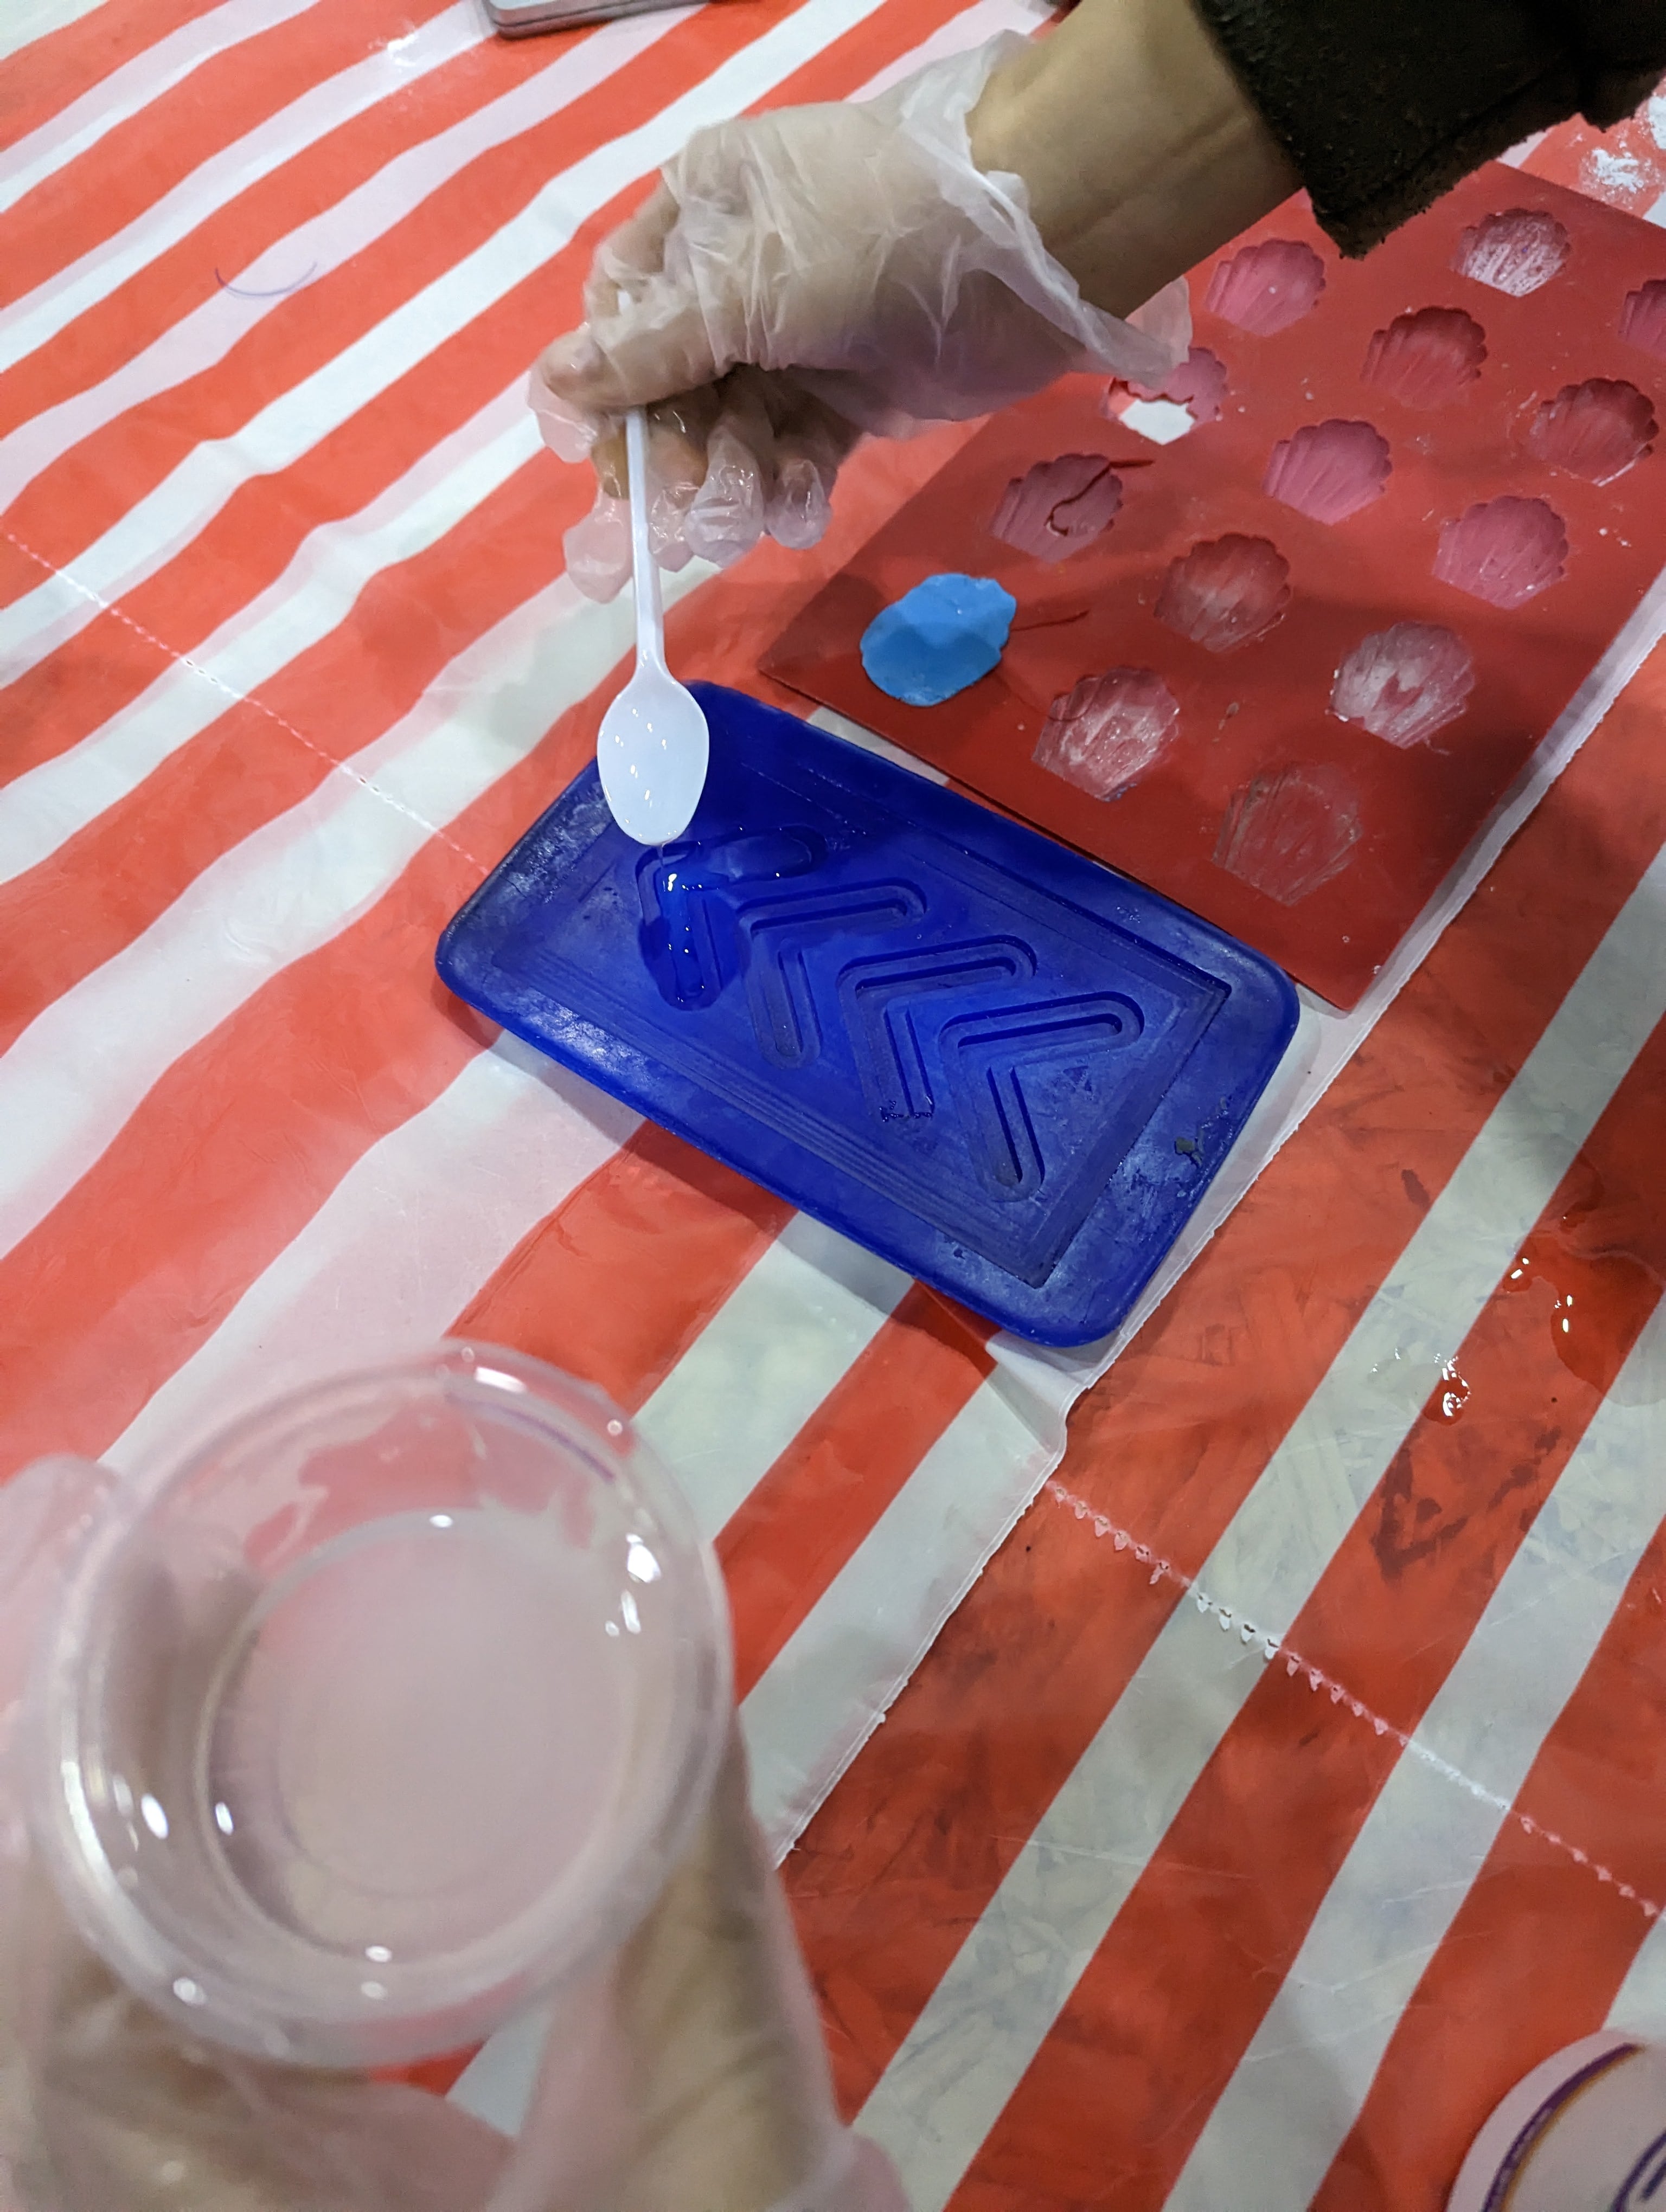
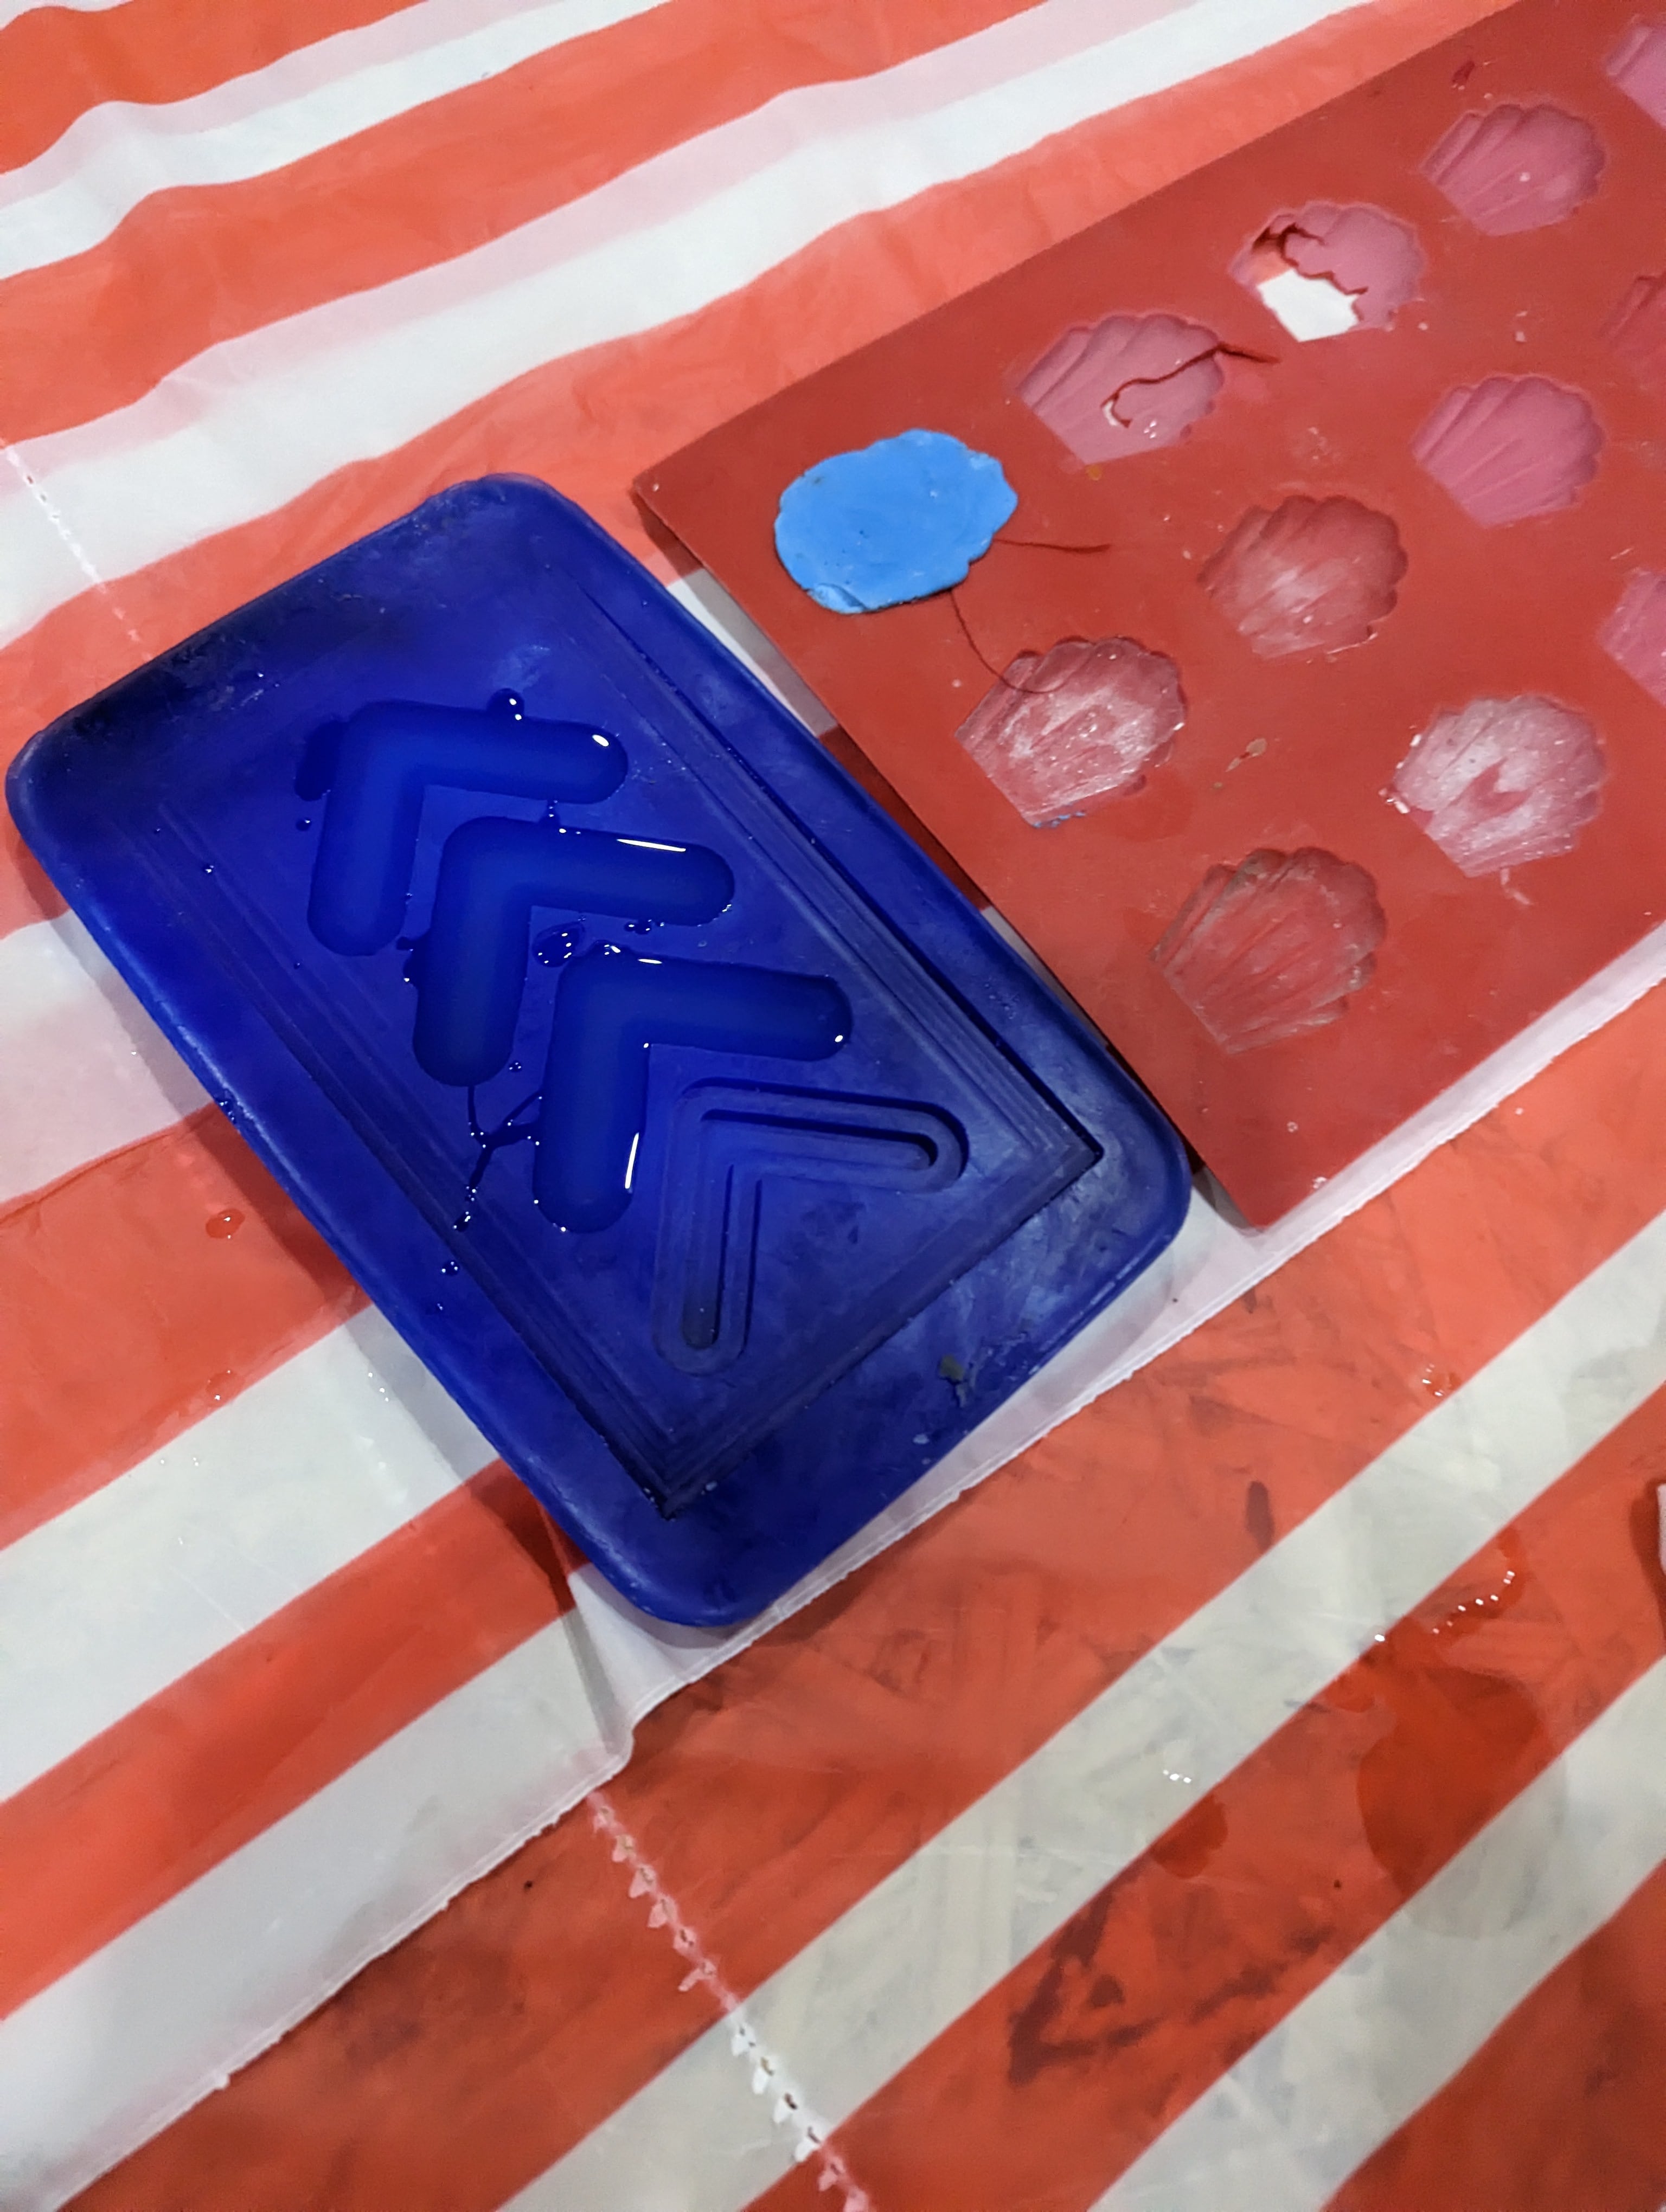
Once the counter mold was completed, we are finally able to use it to make the mold. Note that the mold material needs to be soft as the machinable wax is considered a hard material so that it can be removed after it is set. So I used silicone rubber to make the mold, and then after it set, I used a gypsum mixture which consisted of a 2:5 ratio of water to gypsum, which was then quickly poured into the mold and left to set. This process can be seen below:


Final Product unavailable as Basel has not made it to Fablab yet at the time of writing this
Mold was left to set on Thursday, it is currently Sunday morning (dawn) so technically saturday really because I didnt sleep
Download x Files
You can find the links to download the design files produced below: