8. Moulding and casting
This week I learned Moduling and casing
Research
Molding is the process of manufacturing by shaping liquid or pliable raw material using a rigid frame called a mold or matrix. This itself may have been made using a pattern or model of the final object. … The liquid hardens or sets inside the mold, adopting its shape. A mold or mould is a hollowed-out block that is filled with a liquid or pliable material such as plastic, glass, metal, or ceramic raw material. A mold is the counterpart to a cast.
Molding is a technique through which a material, often plastic, but also metal, rubber, or powder mixtures is shaped on the outline of a die or mold. There are many different techniques for molding materials, just as there are many different applications for each process.
Moulding Boxes. … Special purpose boxes are designed for use in moulding systems where the demand of high pressure moulding and high production rates (from a fully automated system) require a box designed & machined to exacting tolerances.
Casting is a manufacturing process in which a liquid material is usually poured into amold, which contains a hollow cavity of the desired shape, and then allowed to solidify. The solidified part is also known as a casting, which is ejected or broken out of the mold to complete the process.
Both the processes involves pouring of molten metal into a mold/die which will take the shape of cavity mold or die on solidification. The basic difference between moulding and casting is the method by which molten metal is poured. … Casting use a one time mold but molding can use molds on repetition too.
Among the most commonly used mold materials are liquid latex, silicone rummer, urethane rubber, and alginates. Common cast making materials include Plaster-of-Paris and Gypsum cement, concrete, plastics (resins and epoxies), waxes, metals.
Difference between molding and casting
Molding - molding is the preferred process for manufacturing plastic parts. Injection molding is used to create many things such as electronic housings, containers, bottle caps, automotive interiors, combs, and most other plastic products available today. It is ideal for producing high volumes of plastic parts due to the fact that several parts can be produced in each cycle by using multi-cavity injection molds. Some advantages of injection molding are high tolerance precision, repeatability, large material selection, low labor cost, minimal scrap losses, and little need to finish parts after molding. Some disadvantages of this process are expensive upfront tooling investment and process limitations.
Casting - casting involves pouring liquid metal into a mold, which contains a hollow cavity of the desired shape, and then allowing it to cool and solidify. The solidified part is also known as a casting, which is ejected or broken out of the mold to complete the process. Casting is most often used for making complex shapes that would be difficult or uneconomical to make by other methods
Indivisual Assignment
Design
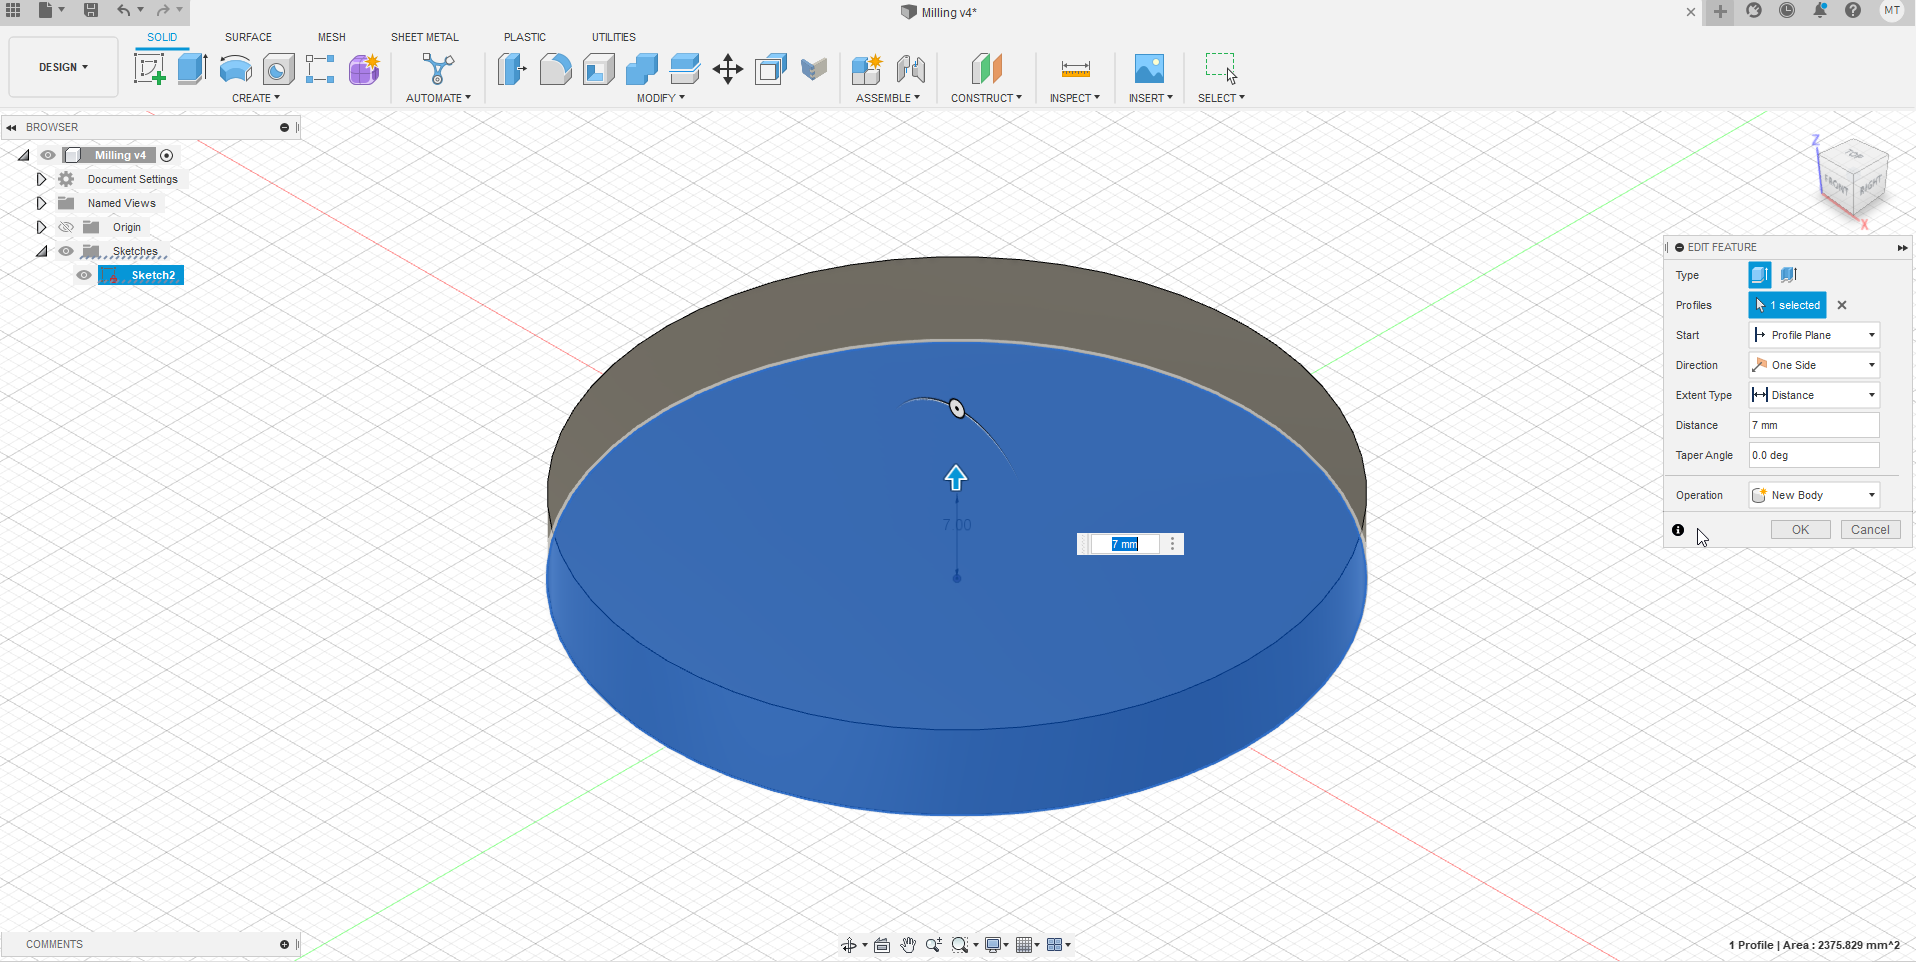
STEP1:First i created circle and extruded it up to 7mm as per instruction the max height we can design is 8mm
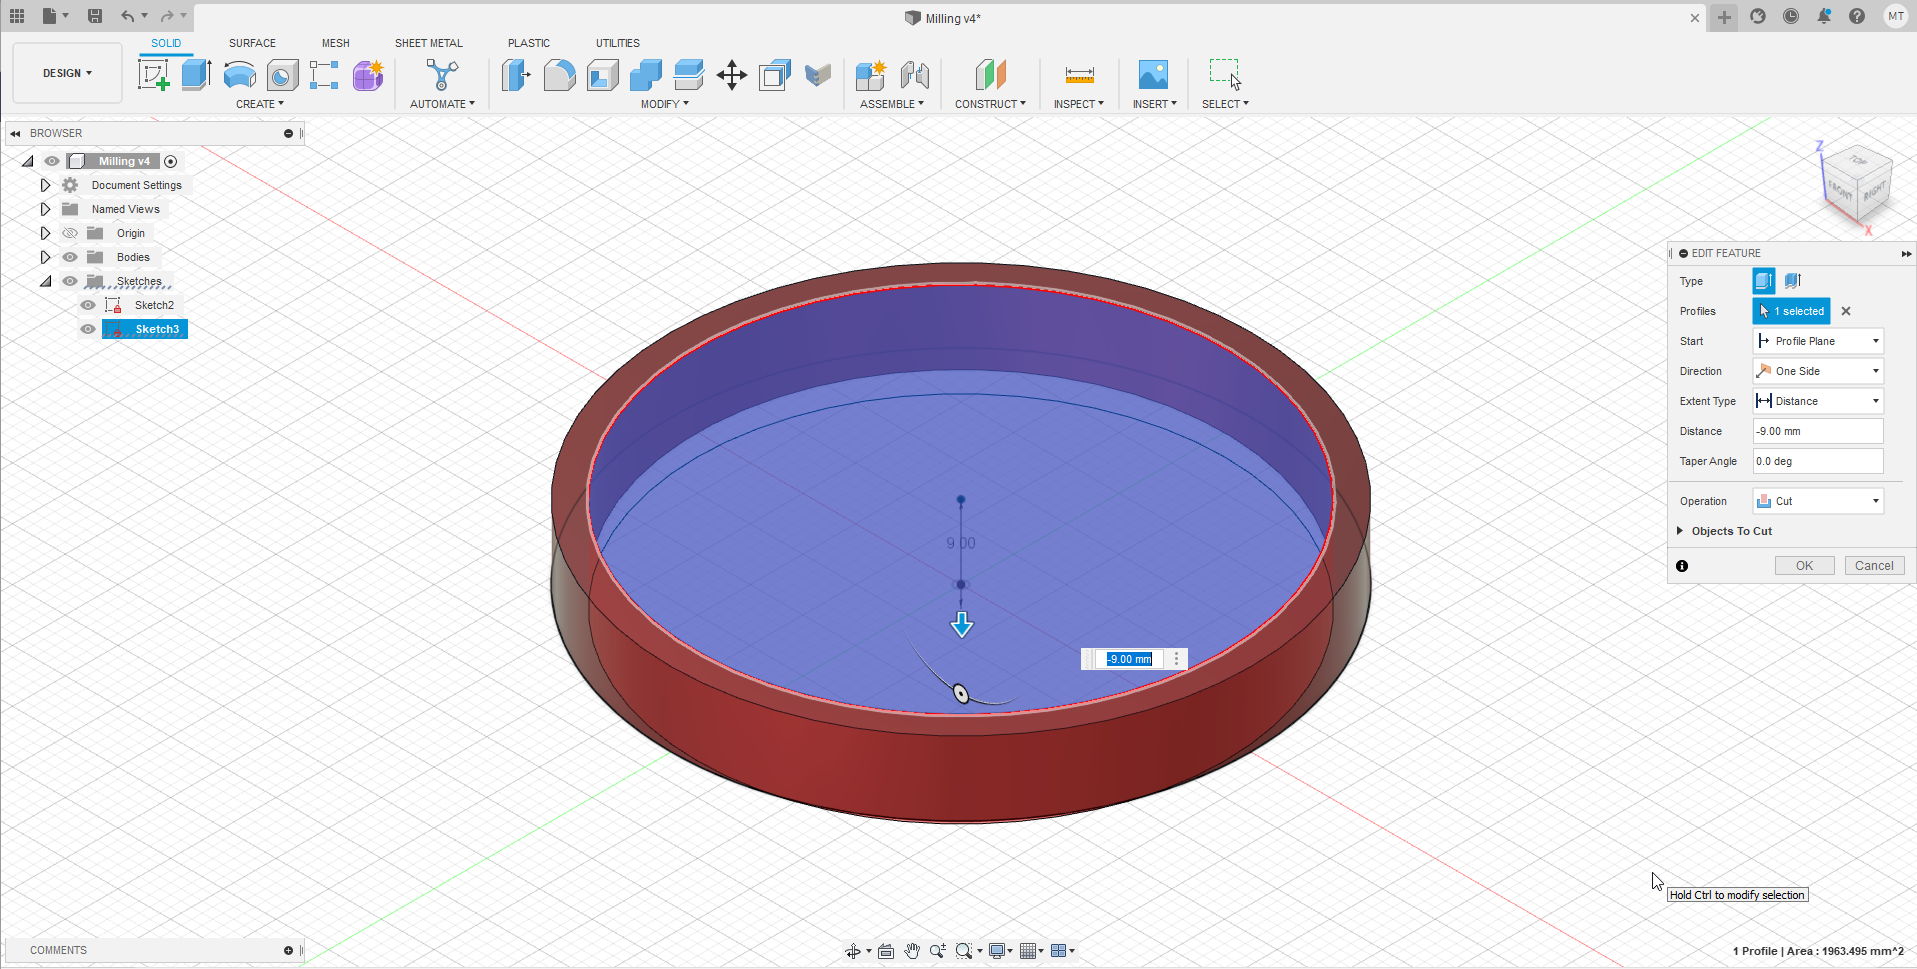
STEP2:I Created a smaller circle on the above one and extruded down to cut a hole
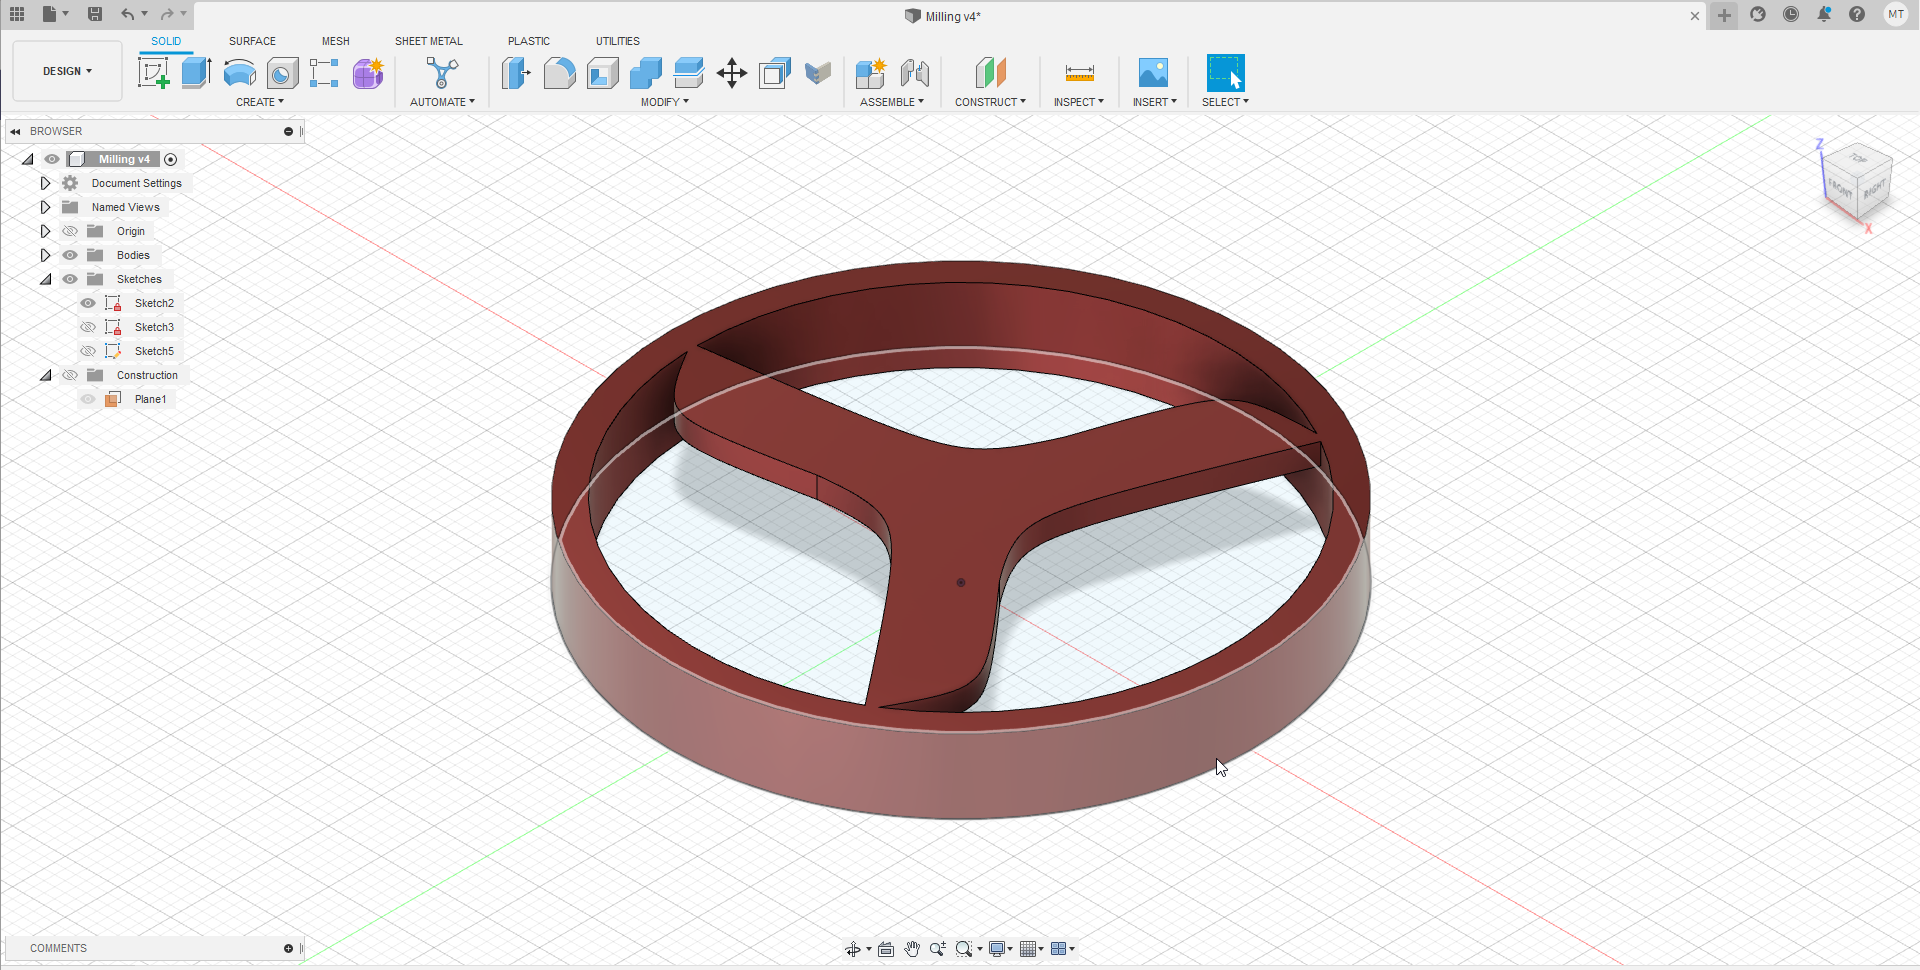
STEP3:I construced a place on the surface of my circle and the draw the shape you can see in the image and extruded it down

STEP4:Finally i draw a circle on the bottom surface of circle and extruded it up to the object i drew in STEP3

Process
STEP1:First we created our mould using the machine we have in fablab by putting the plate inside the machine and the drill bit on
the center of the plate

 STEP2: After the mould was ready first thing we did was submerge the mould with water to make sure how much of liquid needed to fill the mould
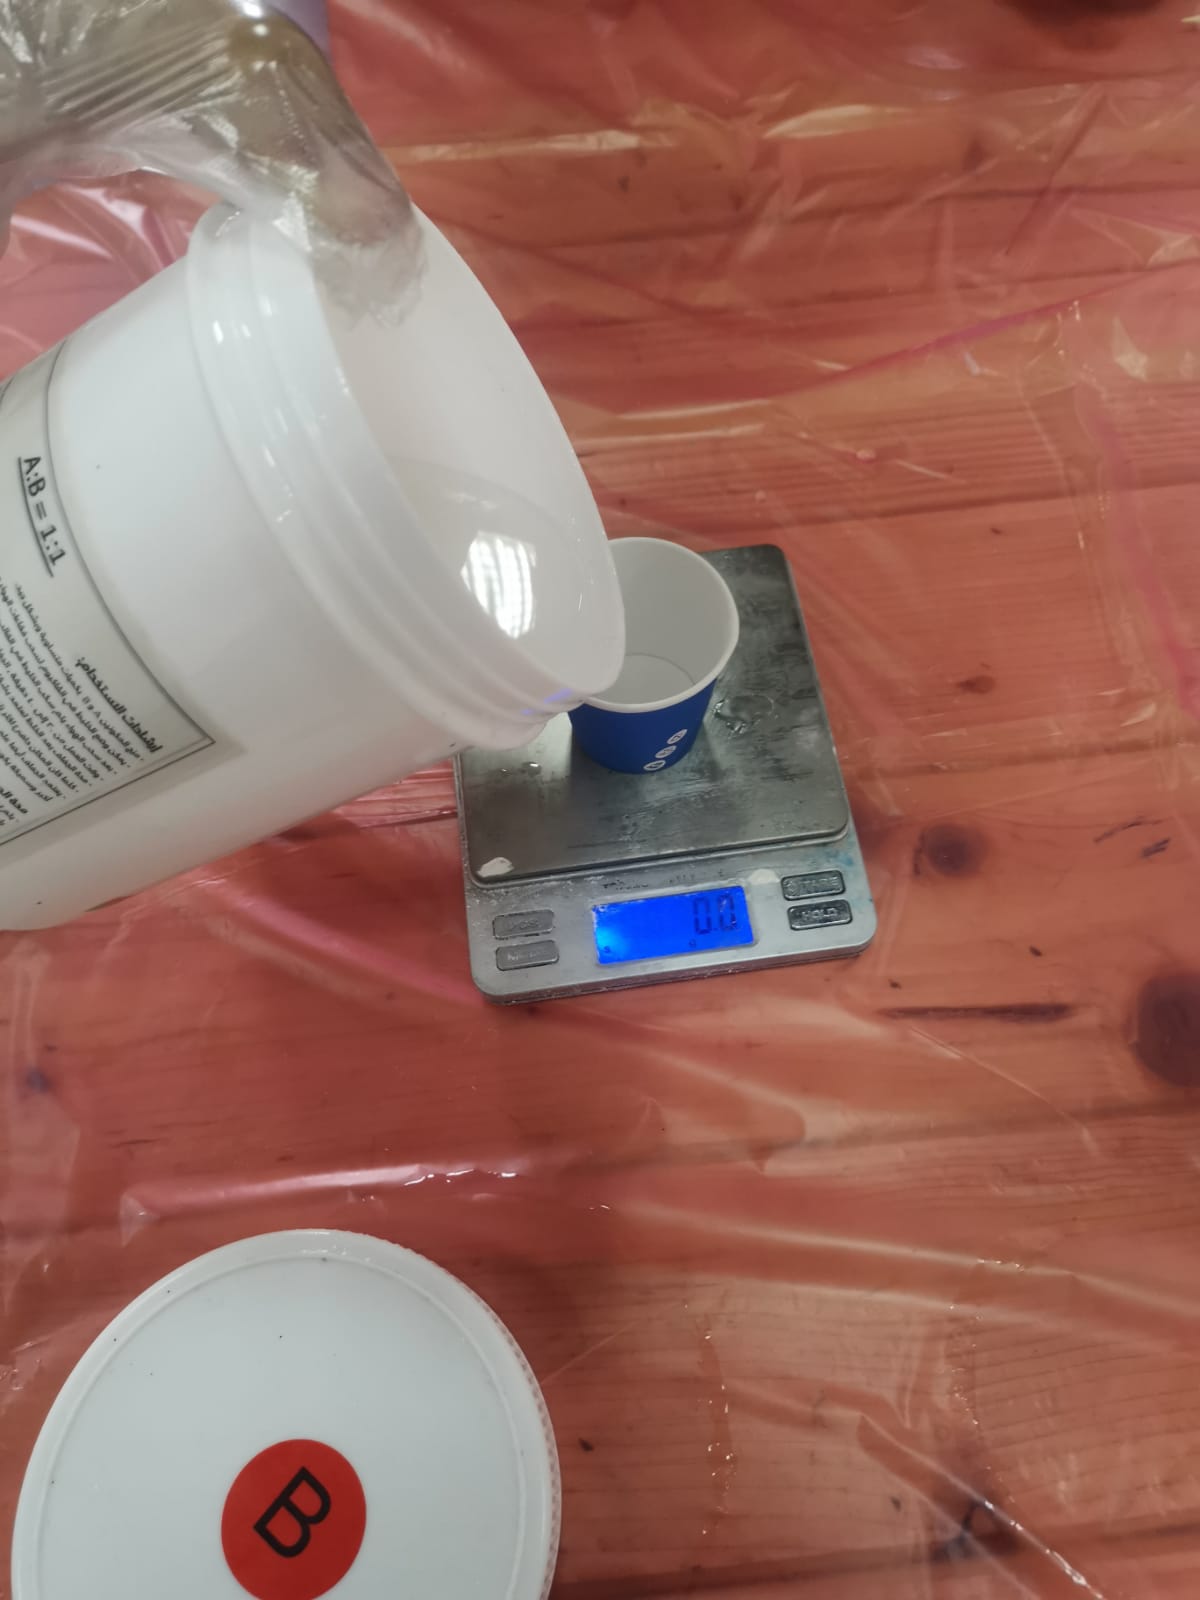
 STEP3:After we get arround 55.4g of water, we decided to fill the mould with 60g of silicon 30 of component A and 30 of B
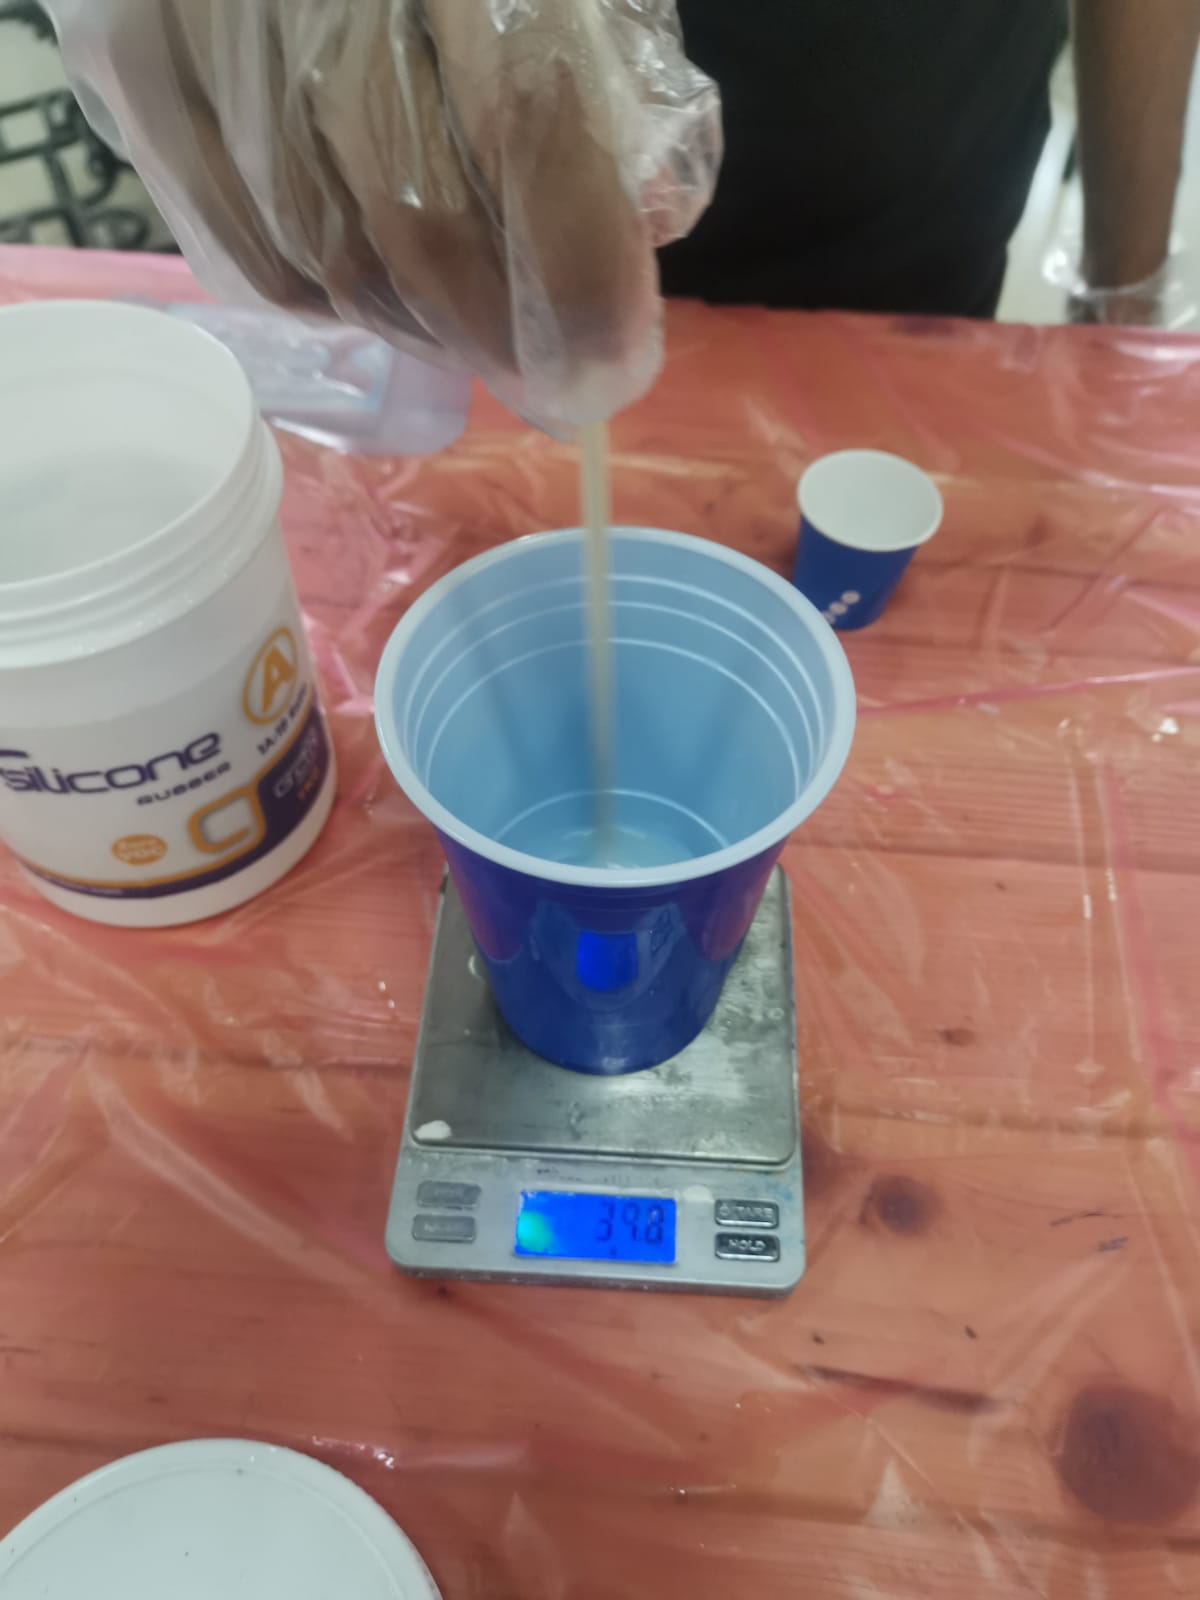
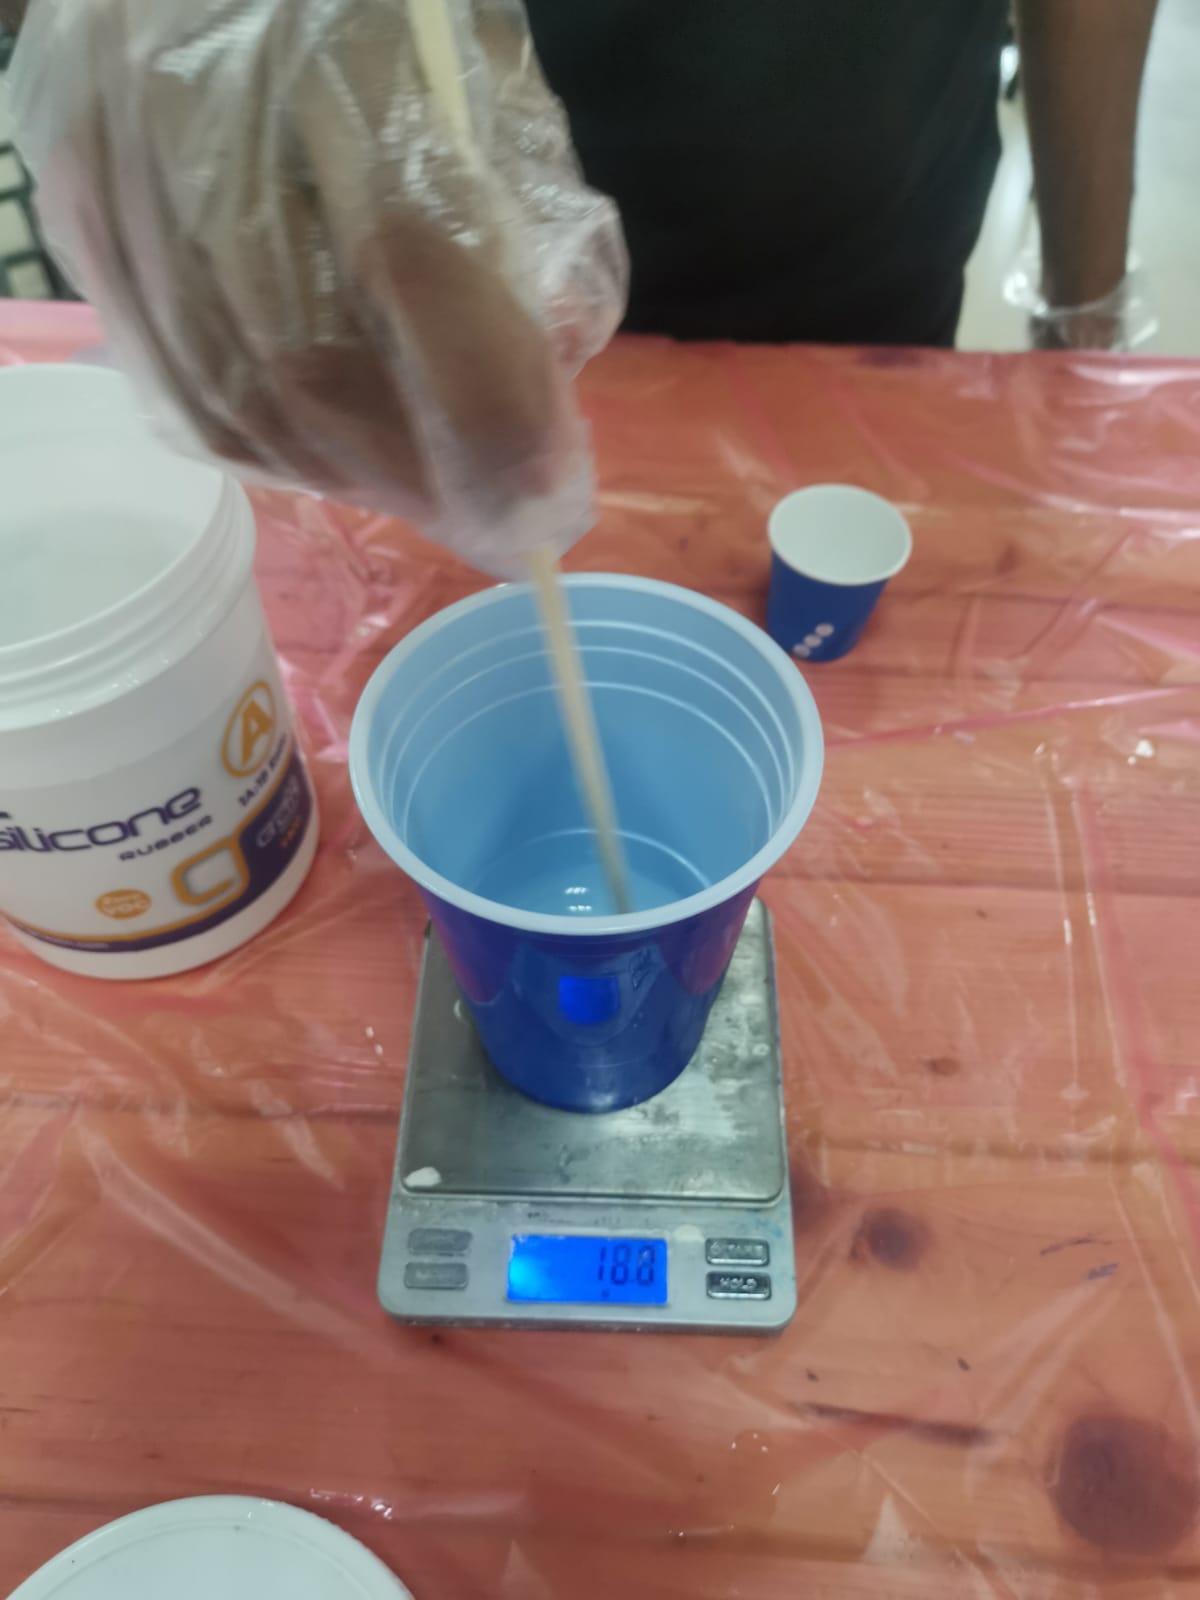
 STEP4:After that we mixed both of them
 STEP5:Finally we poured the mix in the mould


machine settings :
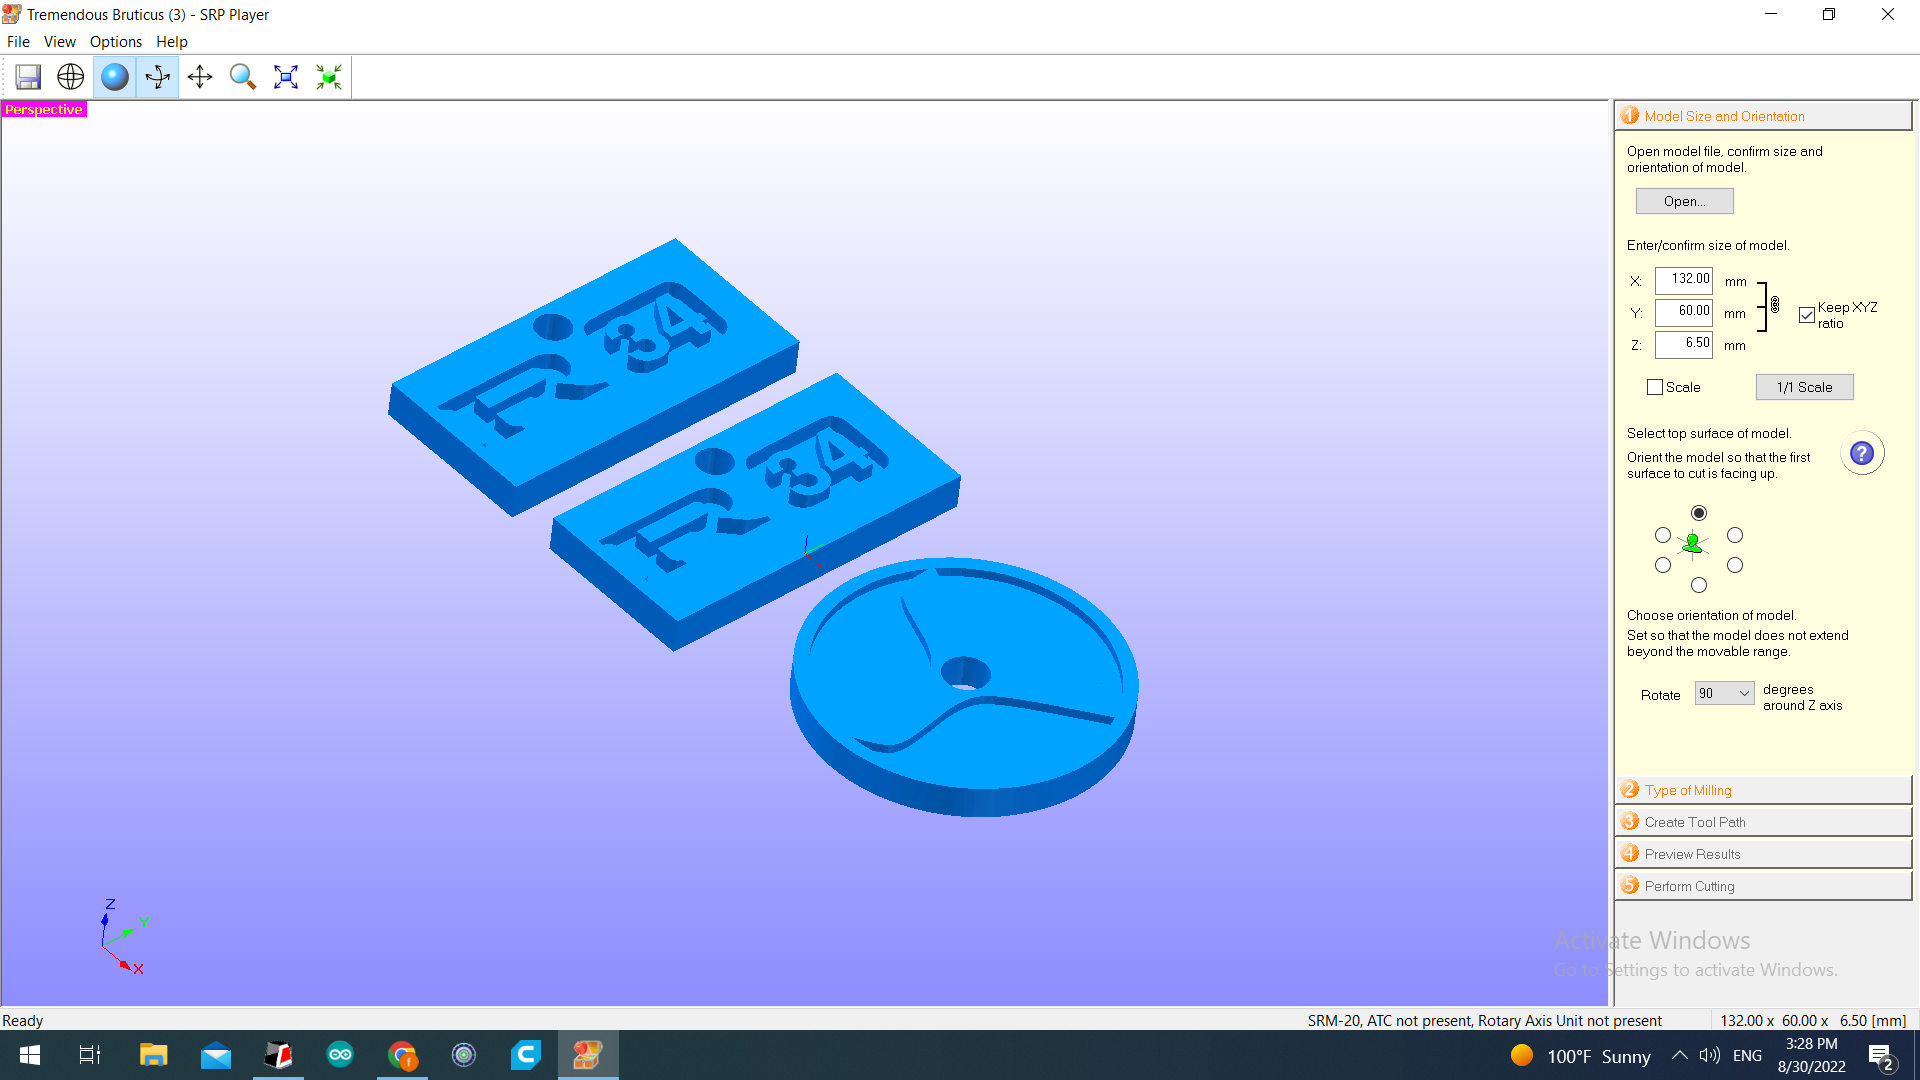
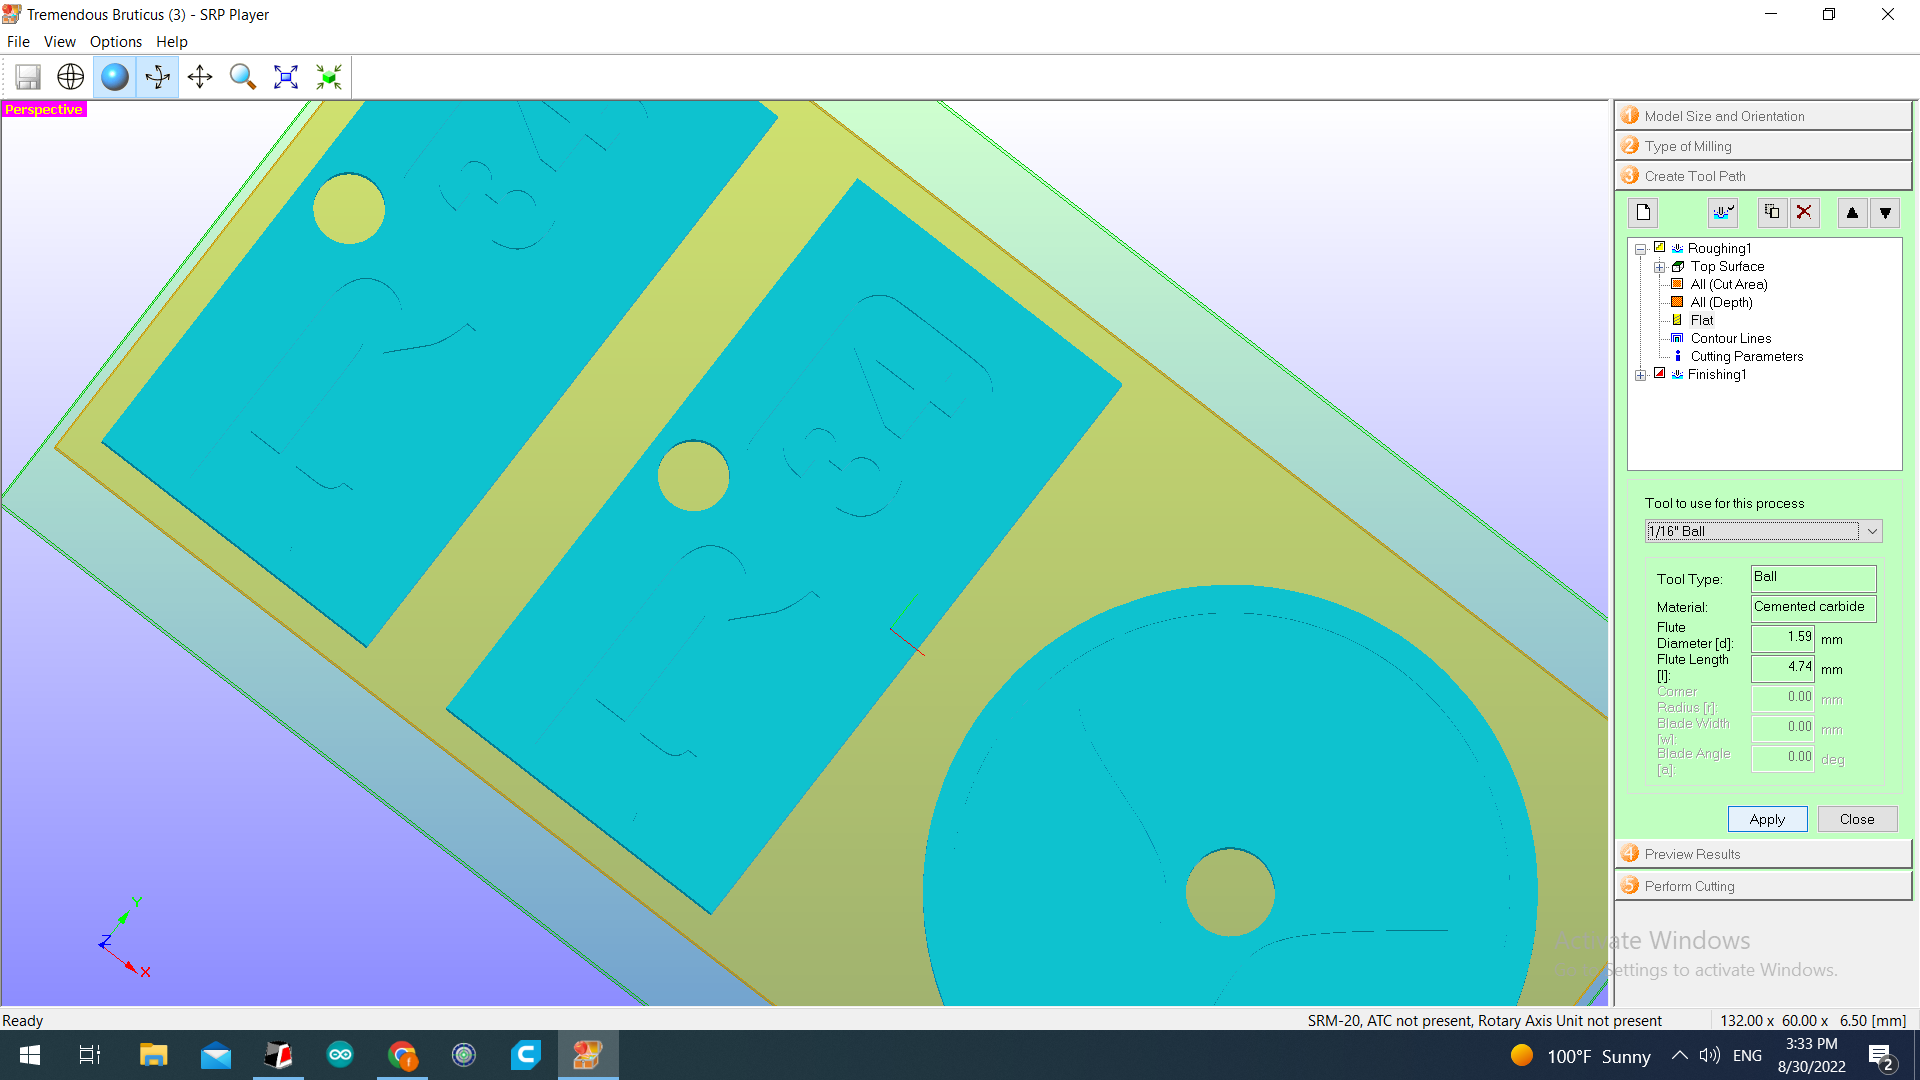
STEP1:First i Opened my file in SPR Player
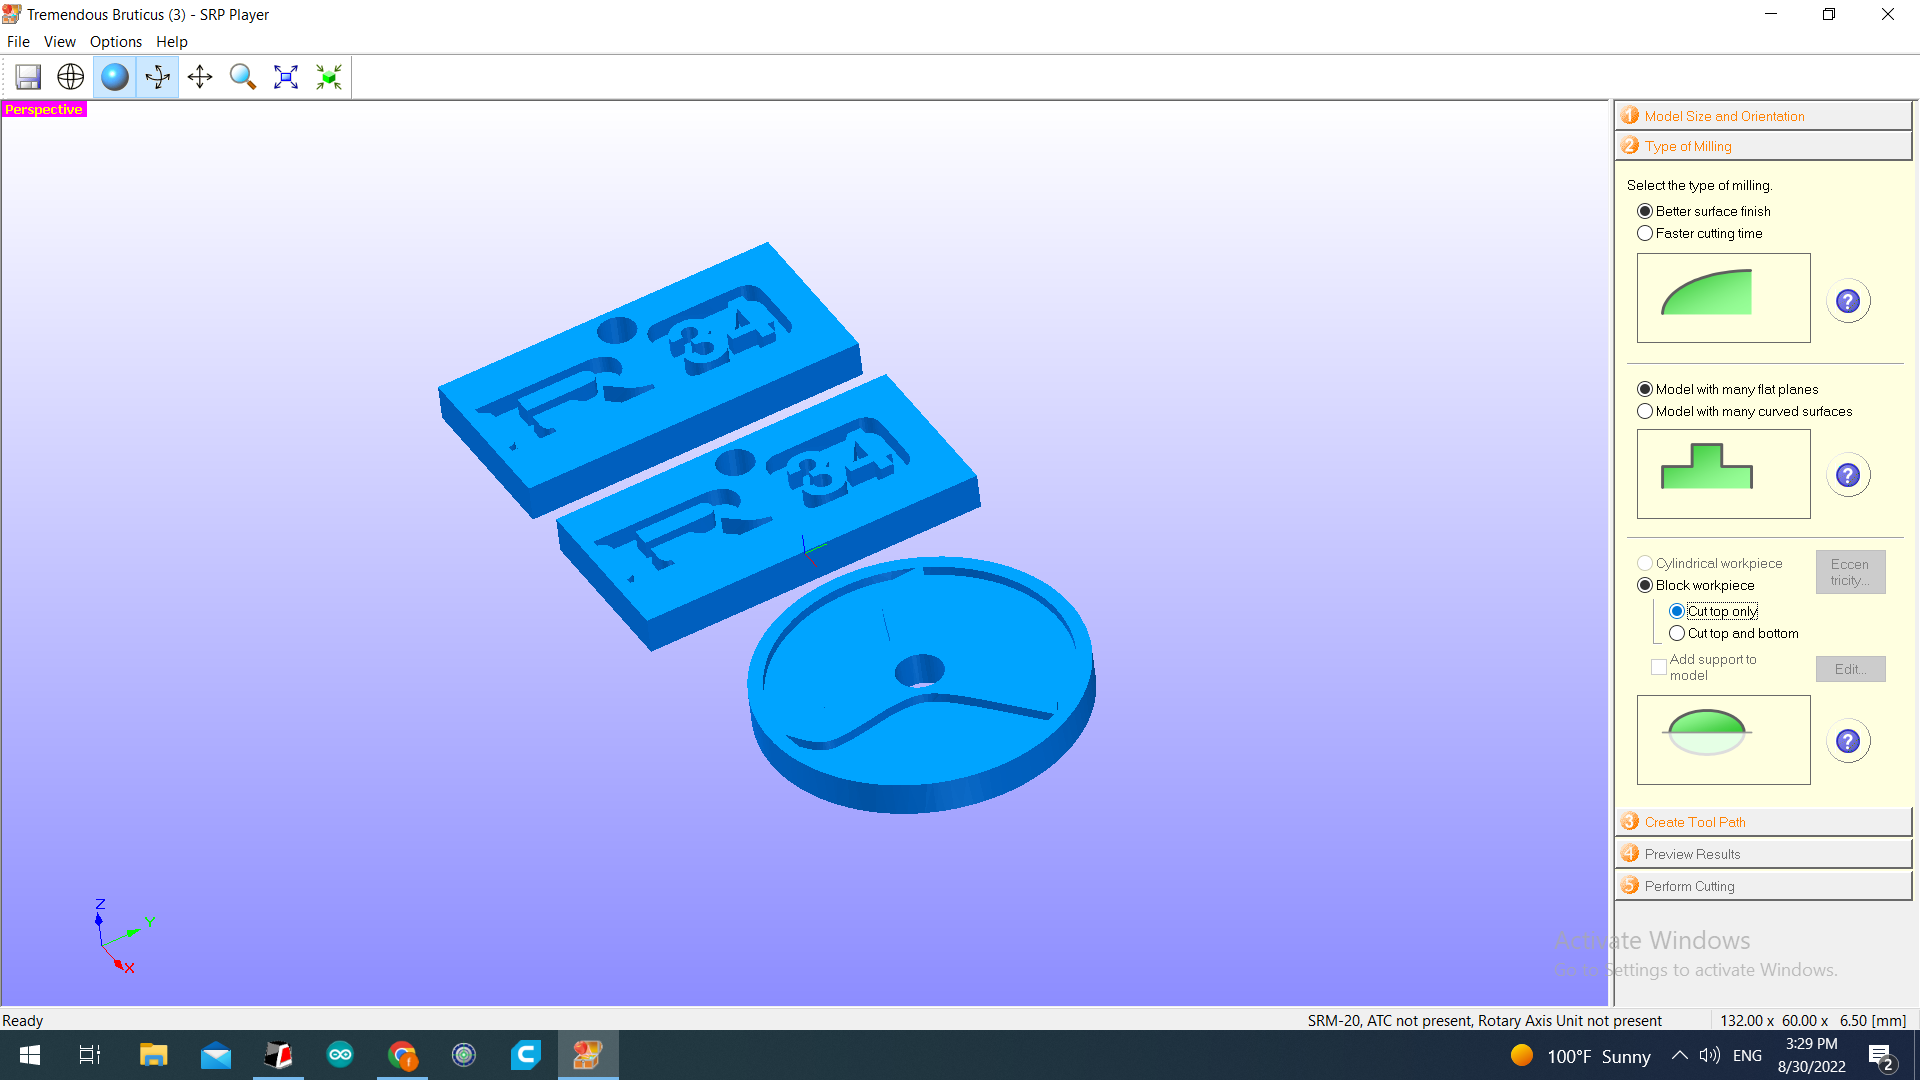
STEP2:Here i selected Type of milling and i choose setting that give me a better surface finish
STEP3:Here i used the tool path for the machining and tool size used
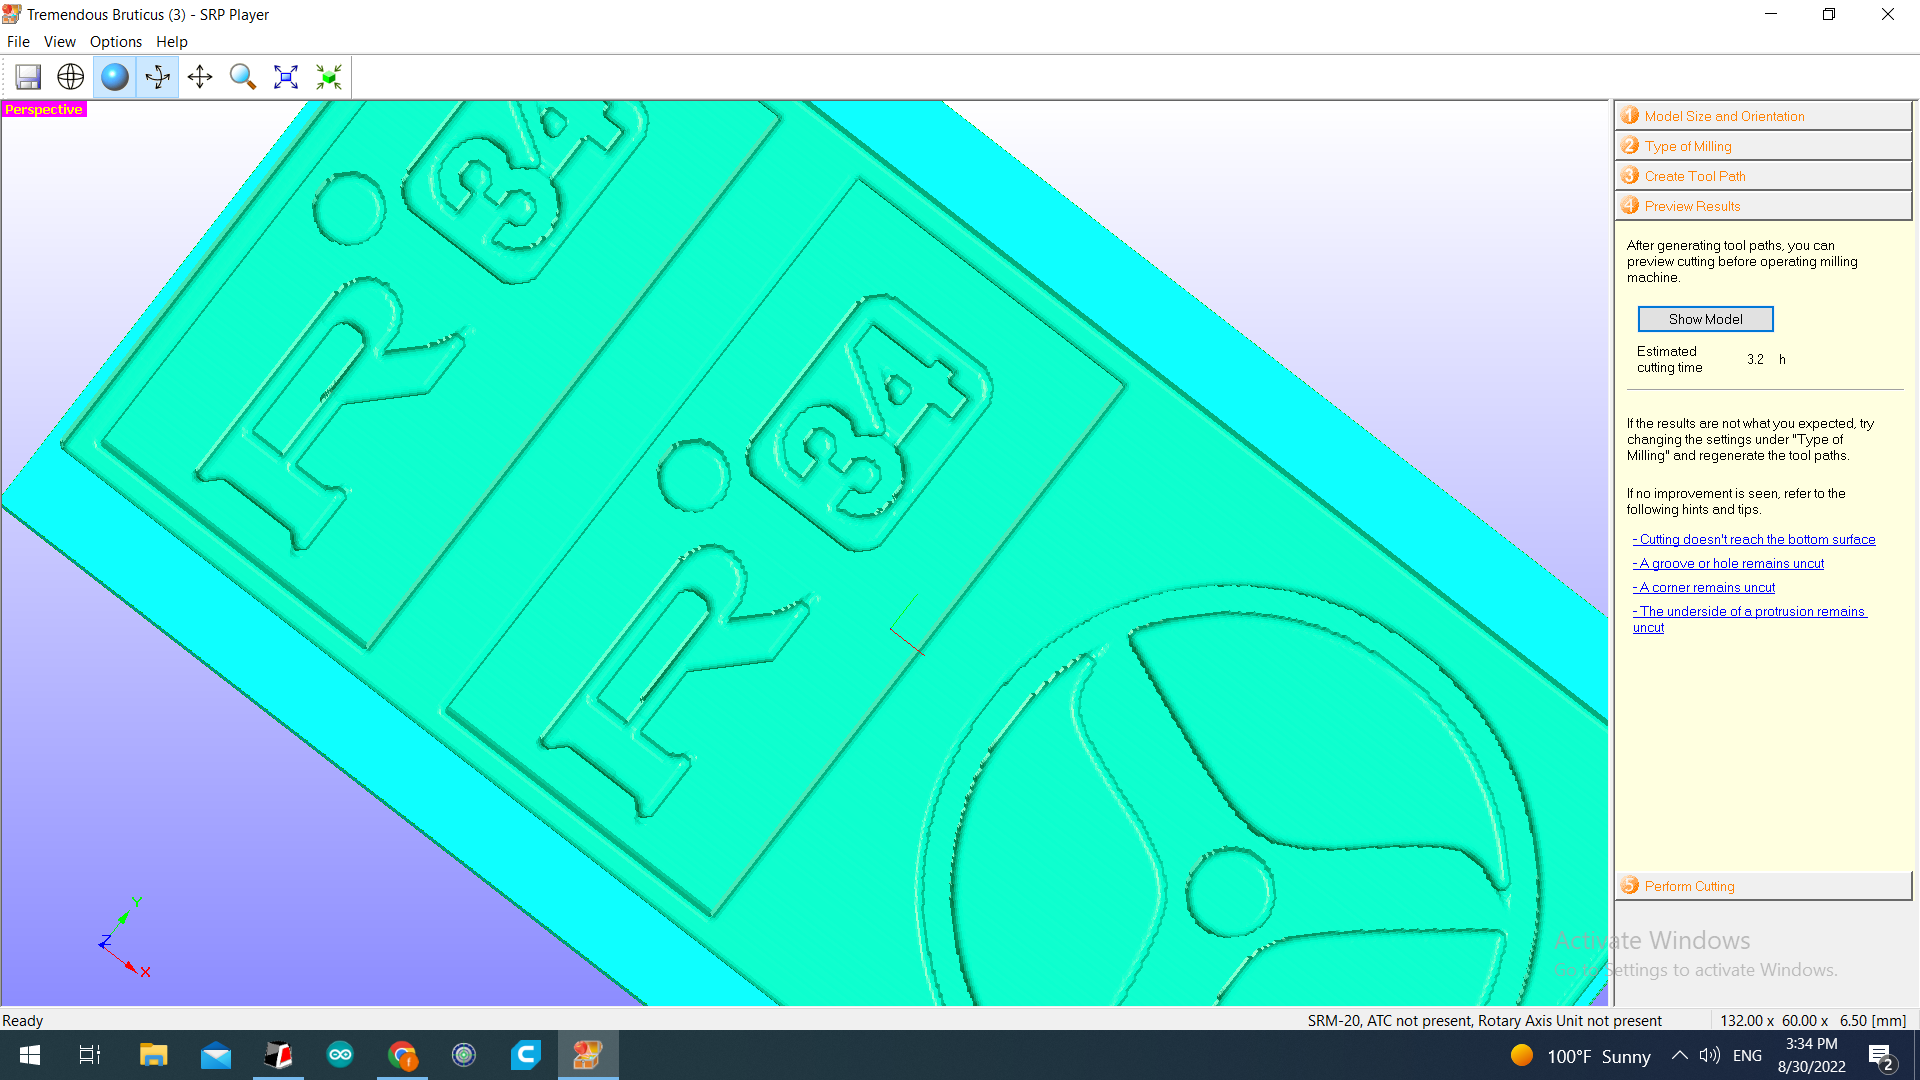
STEP4:Here i did preview of the work and it was good
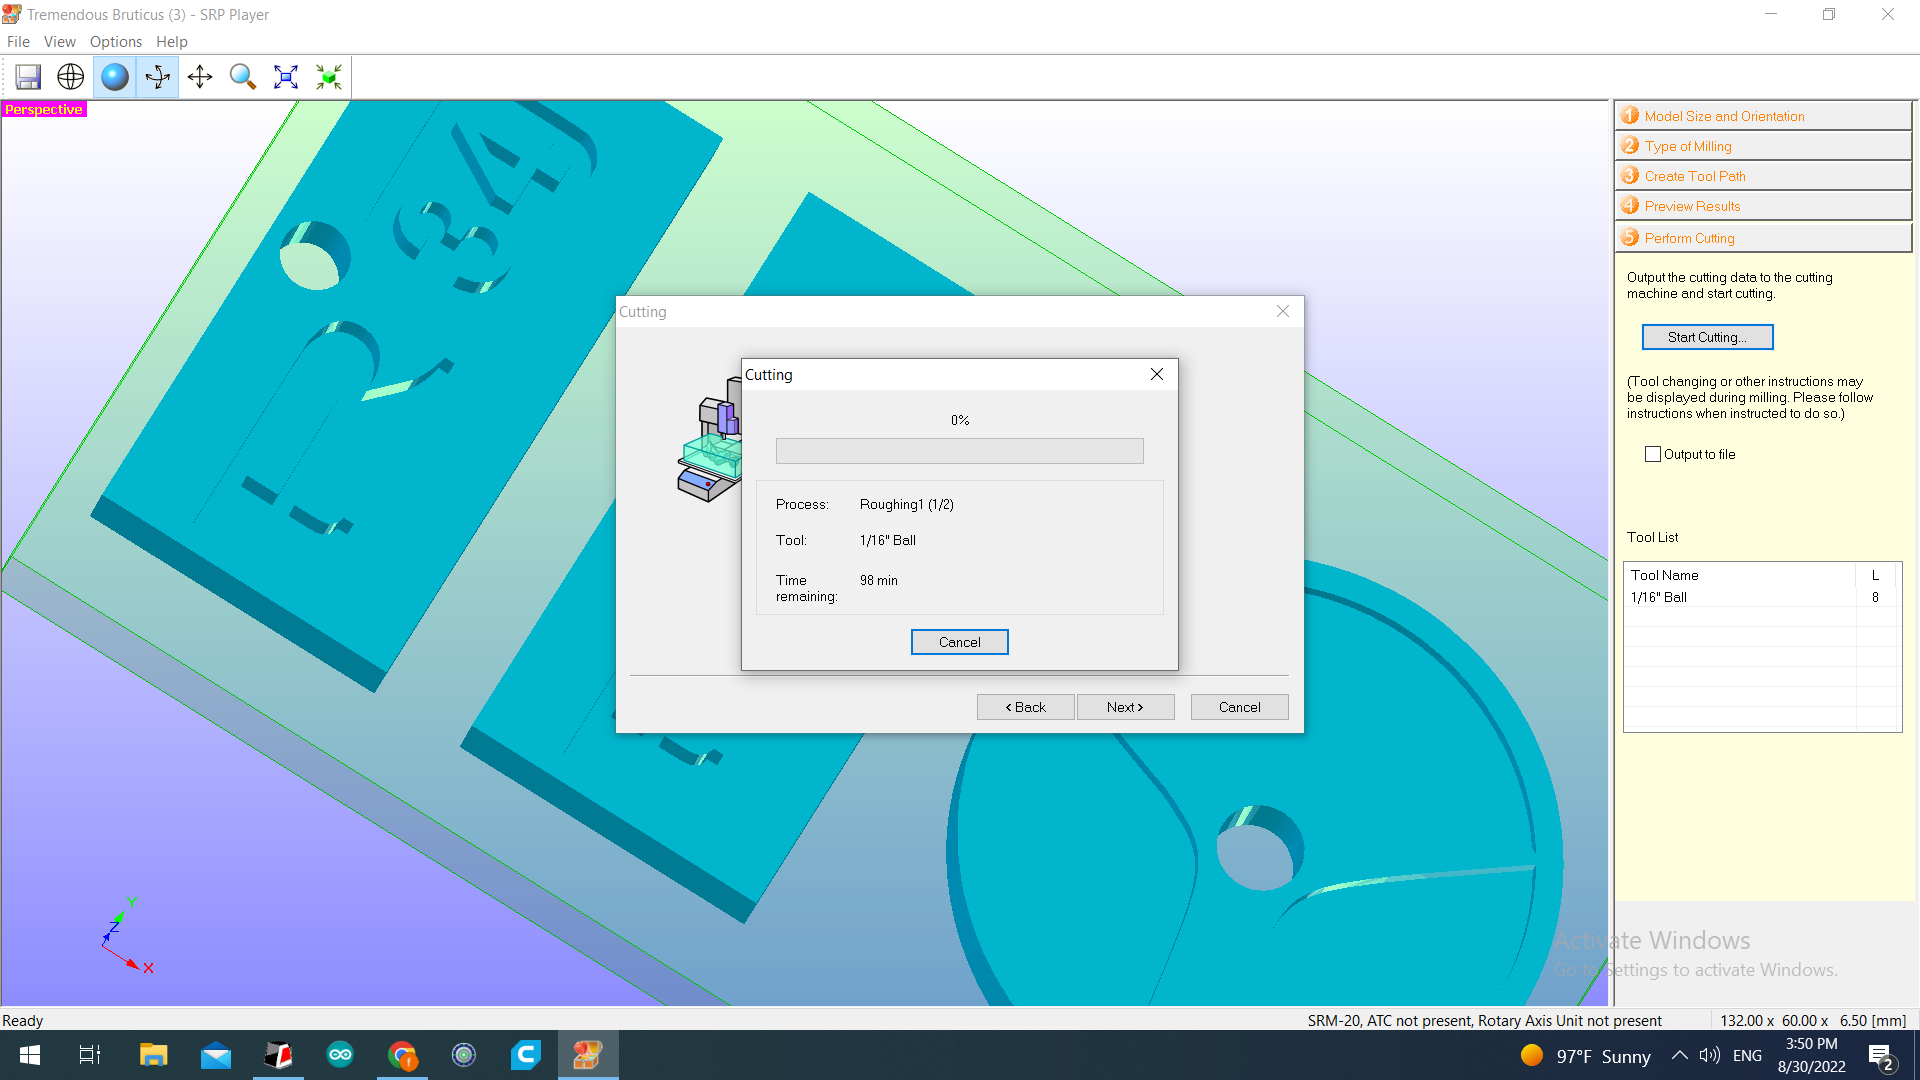
STEP5:Here i started the cutting and you can see the estimated finish time
pouring the hard material
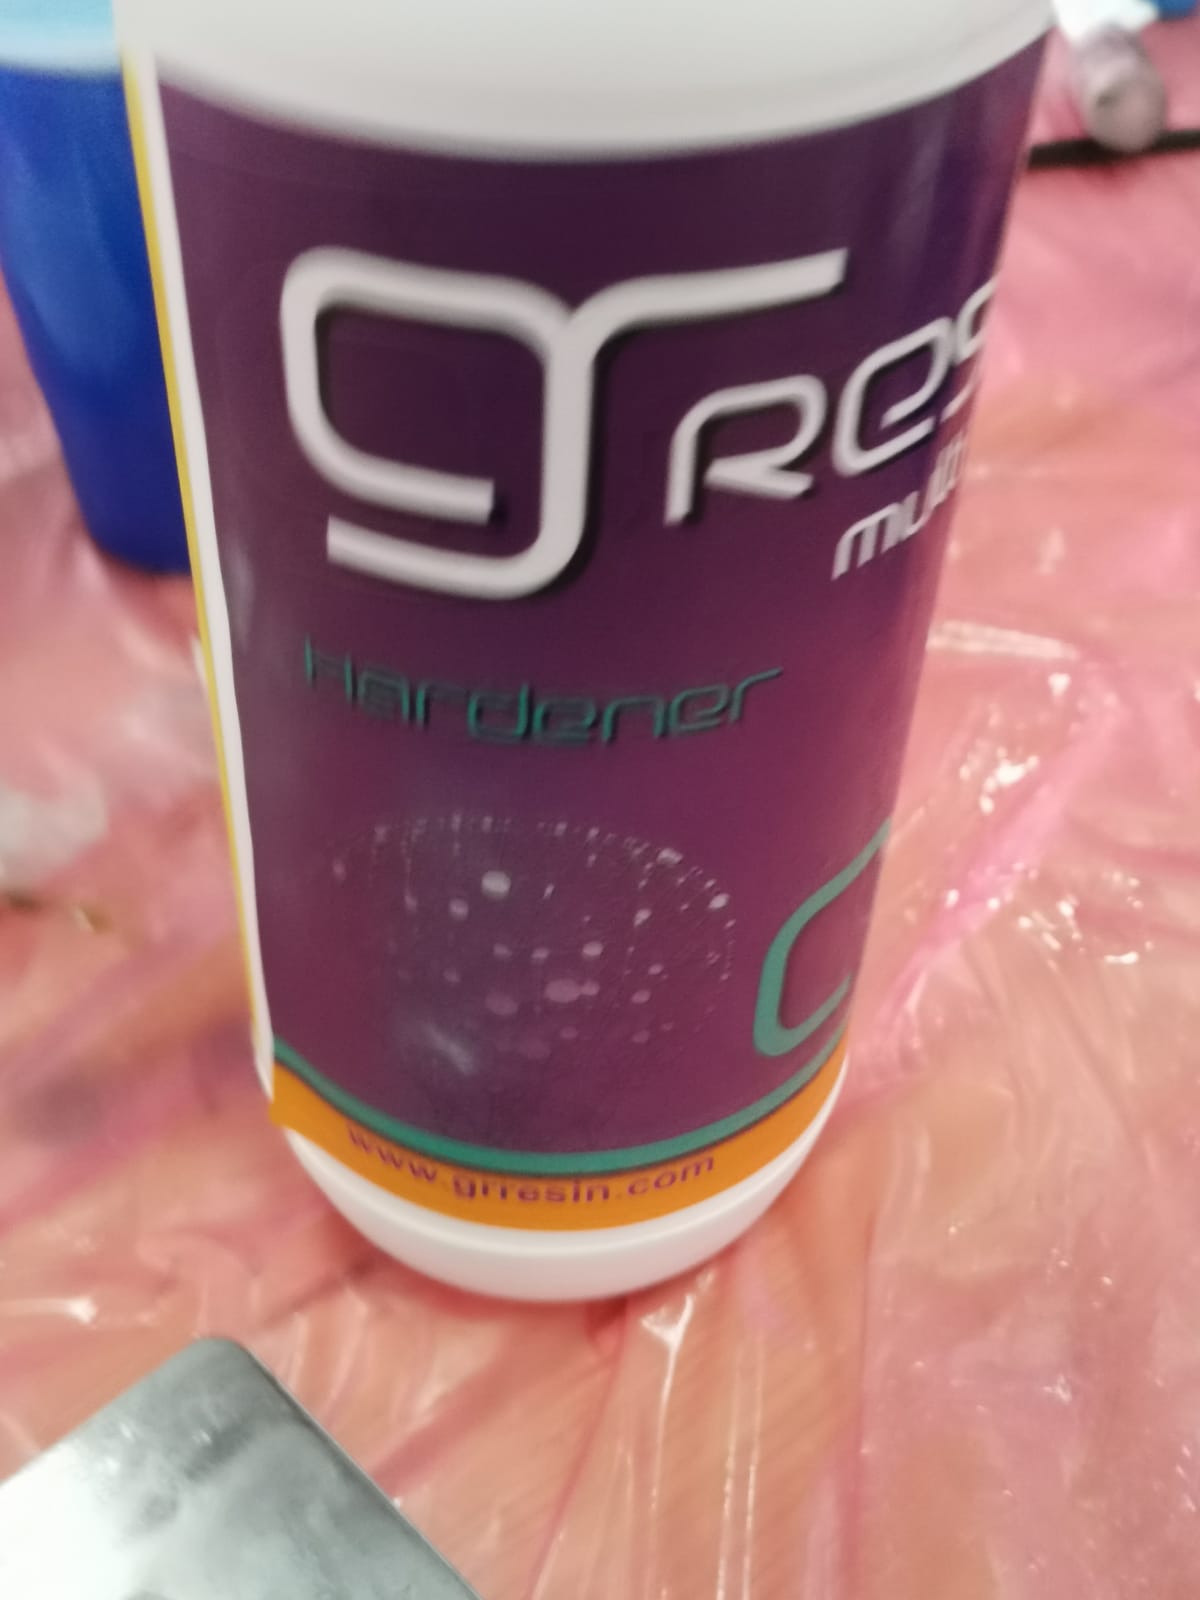
since the silicton i used for the moult is soft , i had to pour a hard material into to get my final shape and i choose resin
STEP1:since the ratio between Resin and harderner must be 10:6, i poured 20g of resin and 12g of resin

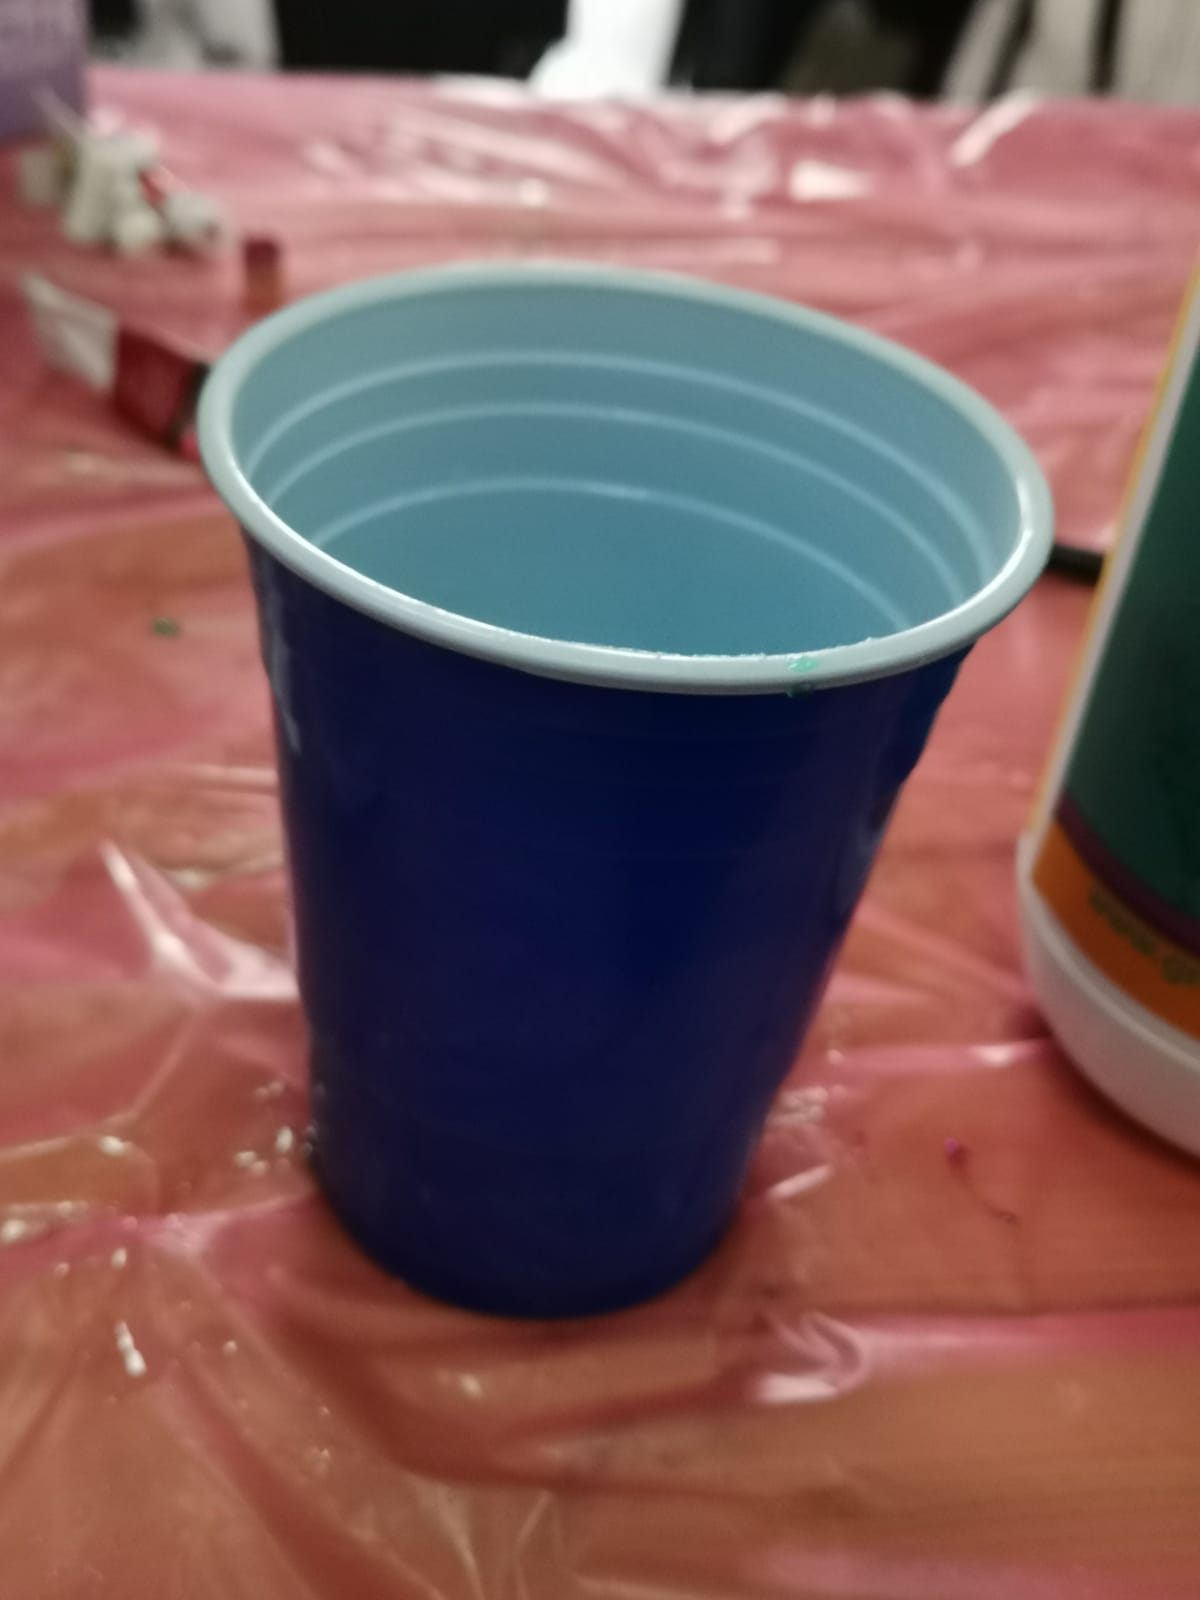
 STEP2:I mixed both of them in larg cup
 STEP3:Finally i poured them into the mould
HERO SHOTS

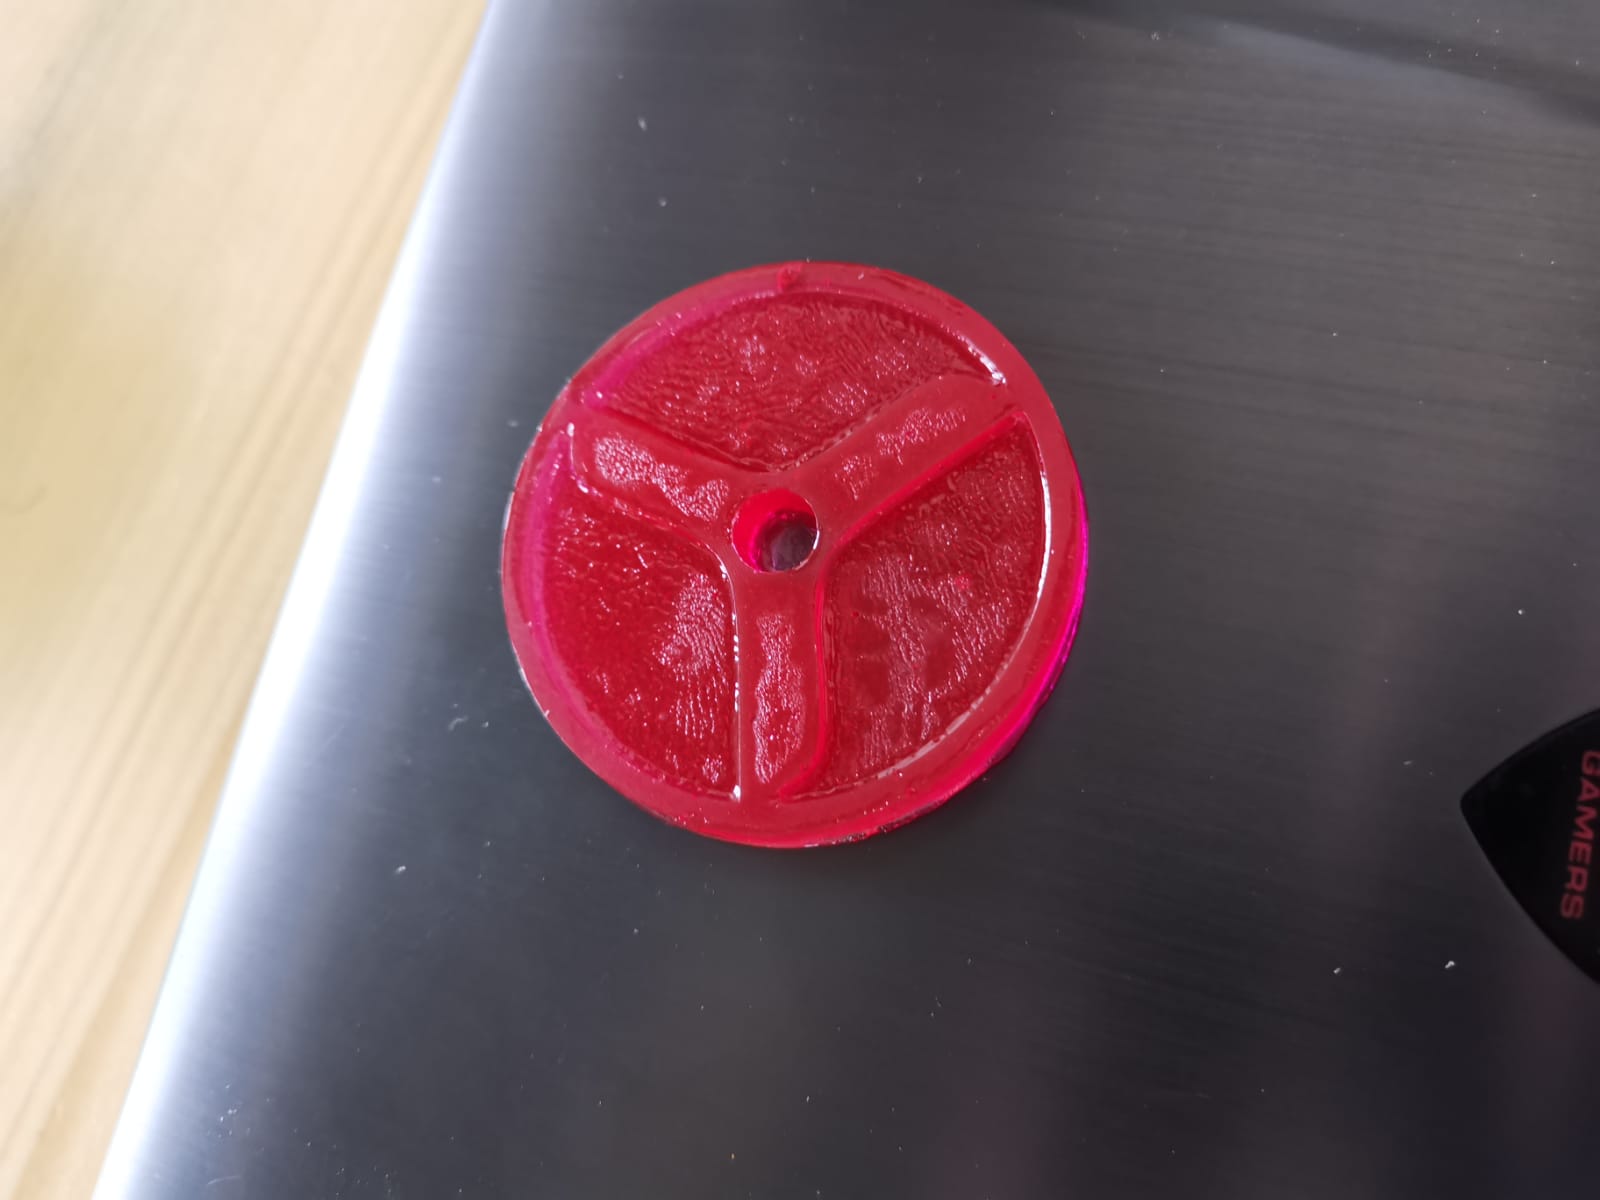

As you may have noticed the surface of final product is not very clear and this is probably becasue of ratio of silicon which is suppose to be 1A:1B is not poured at this same ratio
Group assignment:
Group assignment is on a wep page to access it Click Here