Final Project
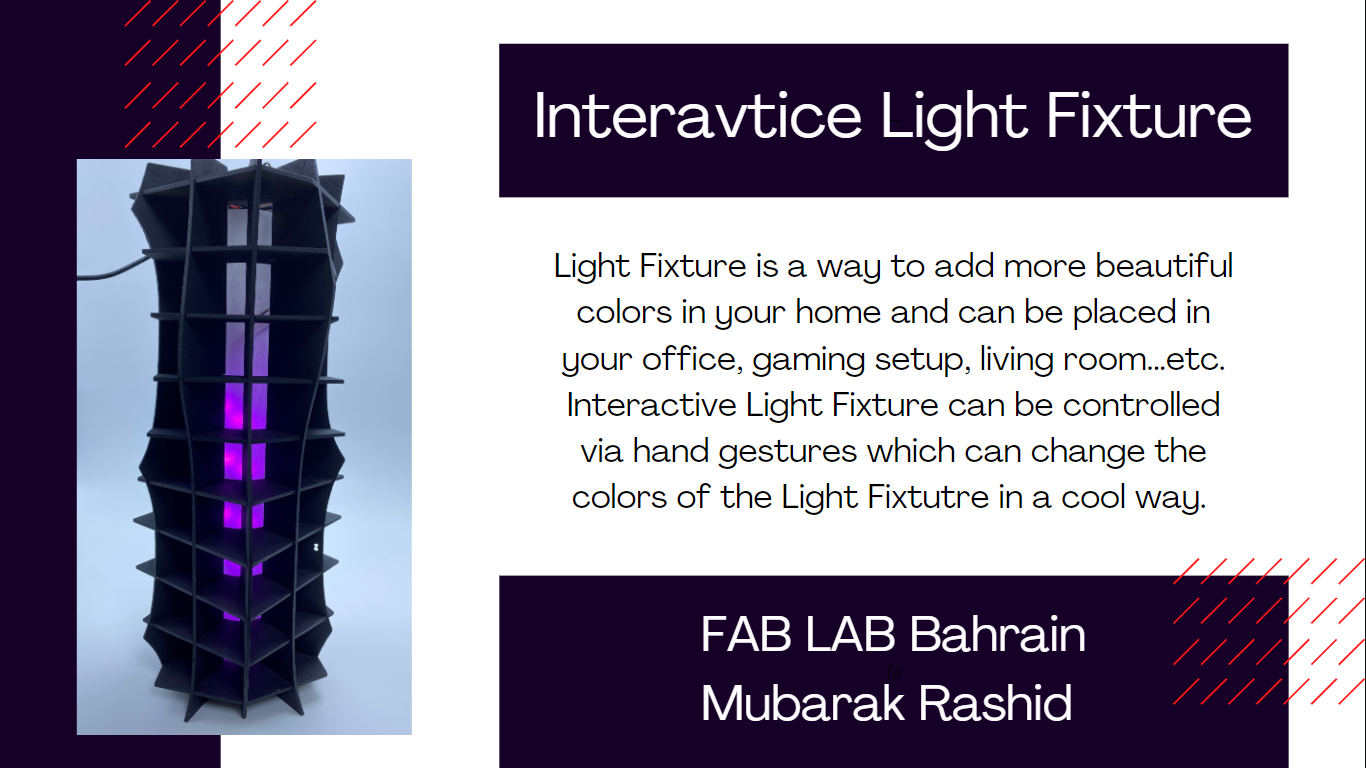
This week I worked on defining my final project idea. for my final project i wanted to do something that can reflect my personality and something that i like. so that is why i worked on Light Fixture because i am a gamer and i play video games almost everyday and every gamer setup must have RBG lights to make his/her setup more cooler. Light Fixture is something that is simple but cool and in my opinion when you walk in any room the first thing that will catch your eye is the RBG light that makes the room more awesome and makes you whish to have something like it so that is way i choose this idea as my project.
Research
For research, i searched for multiple design ideas for light fixture and LED panels to get an inspiration for my project structure, i didn’t have an idea for the design at first but after searching and looking through different light fixtures, i got inspired by a different thing entirely which is the Wyndham Hotel. The swirly and tilted design of the hotel was something beautiful which i admired and appreciated.

Fusion Slicer
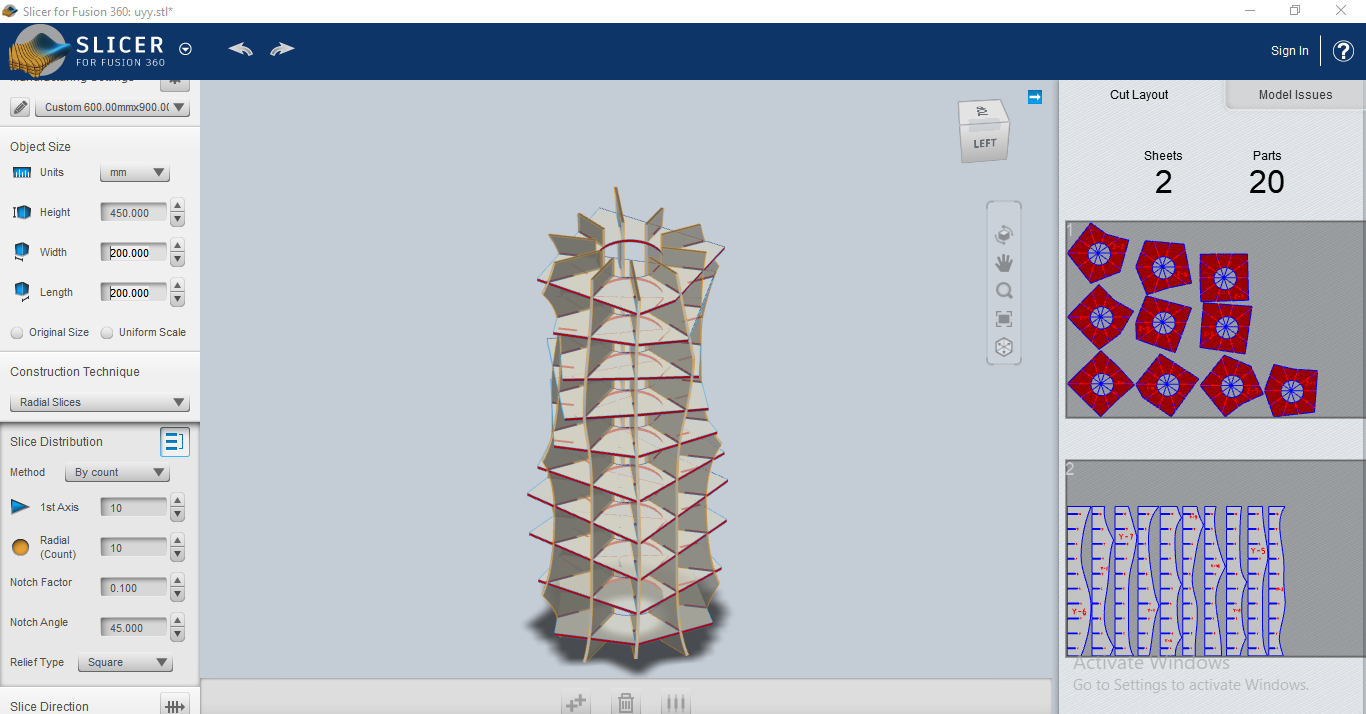
for the design of the structure, it was easy to do because Fusion Slicer pretty much did every thing for me, i just made the shape which like a cylinder and gave it some tilting or swirling and the program did every thing from slicing to assembling instruction.
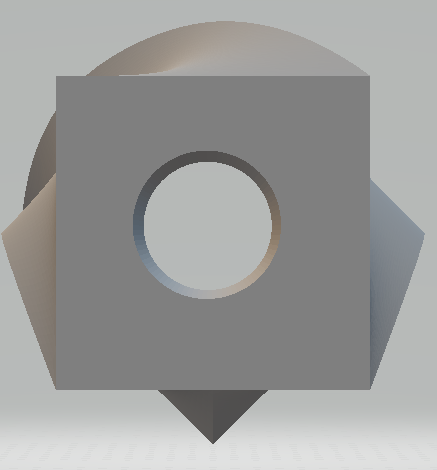
top view
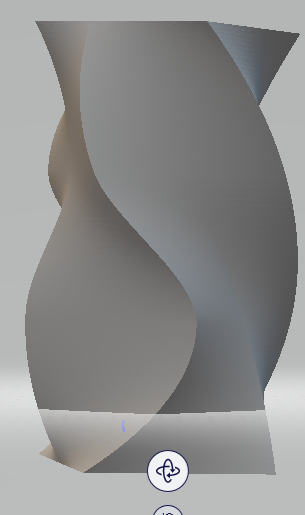
side view
Assembly
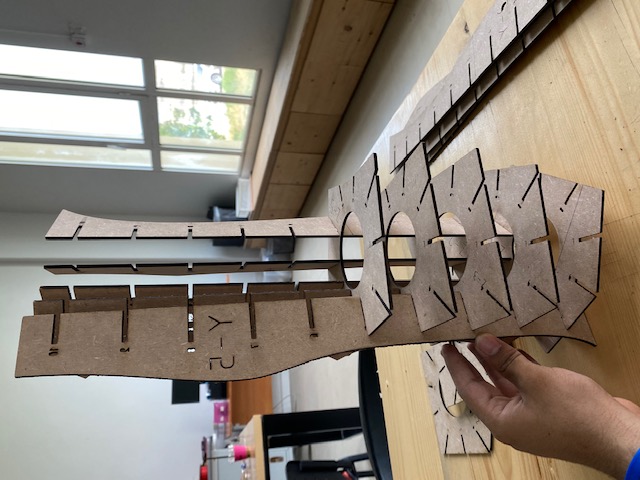
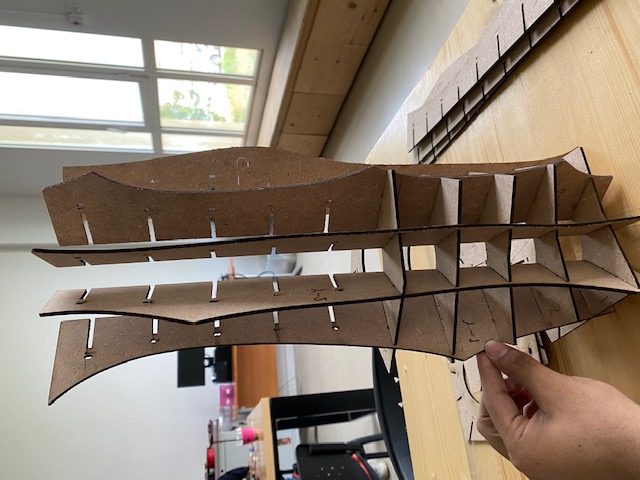
making the structure of the project i used 3mm MDF wood which is comprised wood which will provide a strong and solid structure. there are 20 pieces total, 10 vertical and 10 horizontal pieces. plus, Fusion Slicer marked each piece in the assembling instruction as i mentioned above which was very helpful and super easy to assemble. to cut the pieces, i used laser cutter which was the fasted and best way to handle 3mm MDF wood.
here is a video for vertical pieces.
here is a video for horizontal pieces.
as i said the assembly part was very easy, it was like putting Lego part on top of each other. below you will see the assembling steps from each direction.
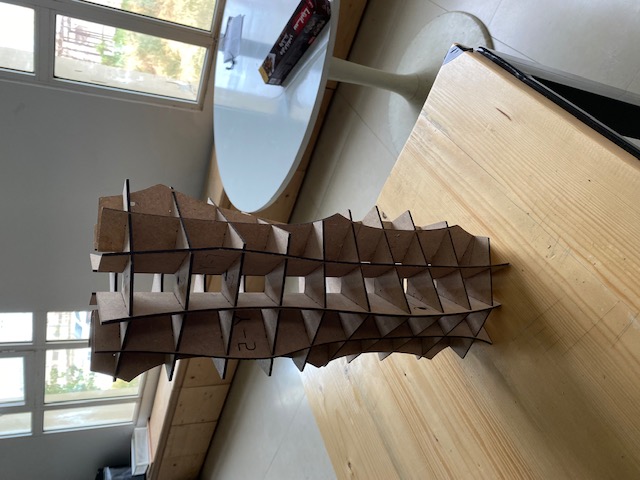
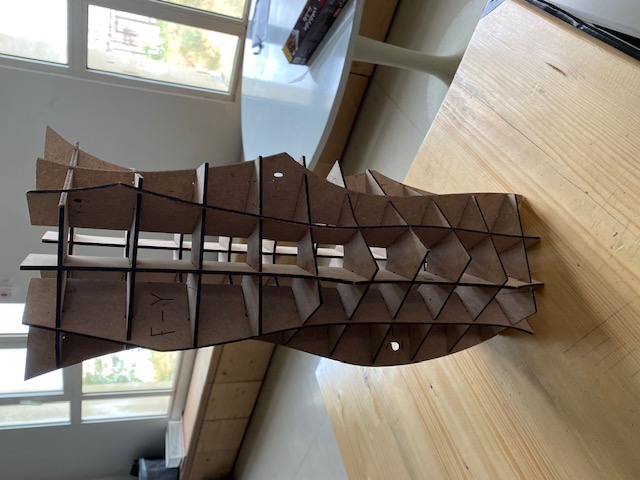
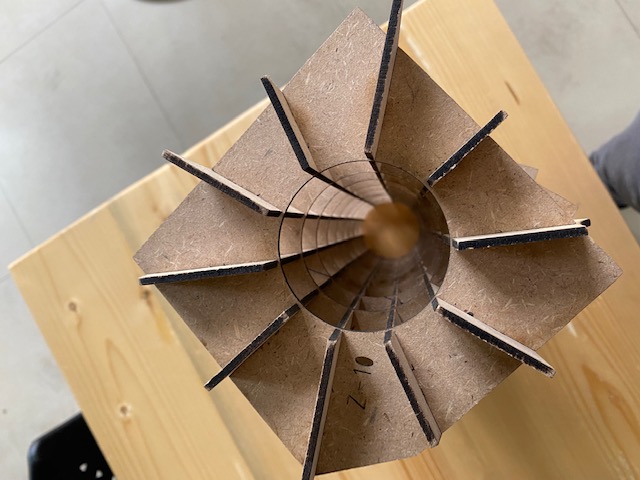
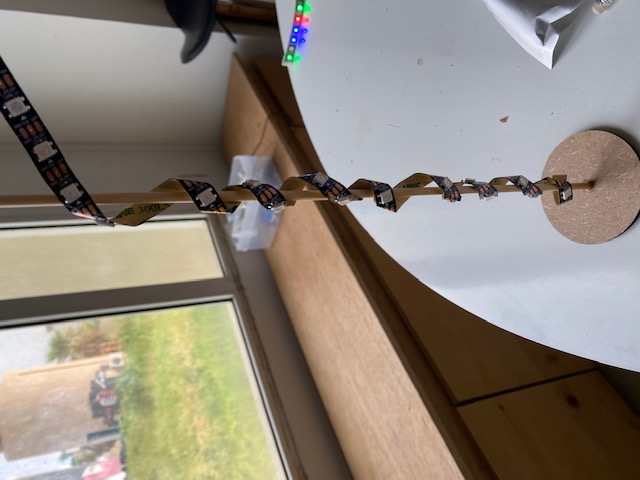
then i putted inside of the structure a pole which the LED light will wrap around it and gives stability to the lights.
finally, this is a turn around video after assembling.
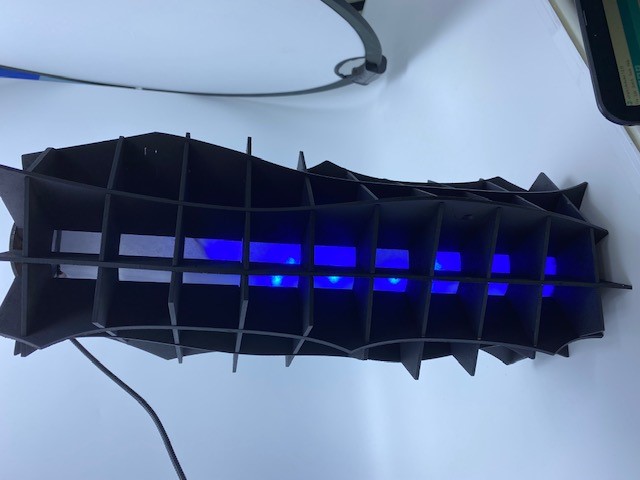
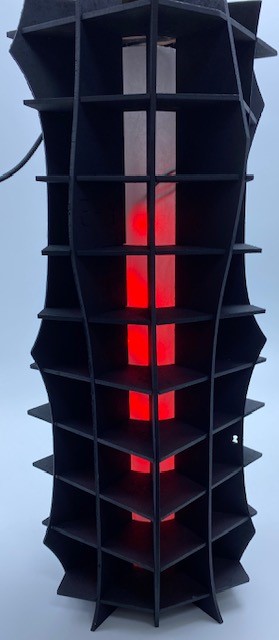
after finishing the assembly, the color of the structure was not good and had some burned areas due to the laser cutter so i decided to painted all MATT Black which will emphasis more on the colors coming form the LED and makes the structure looks cool in the dark.
LED light , microcontroller and coding
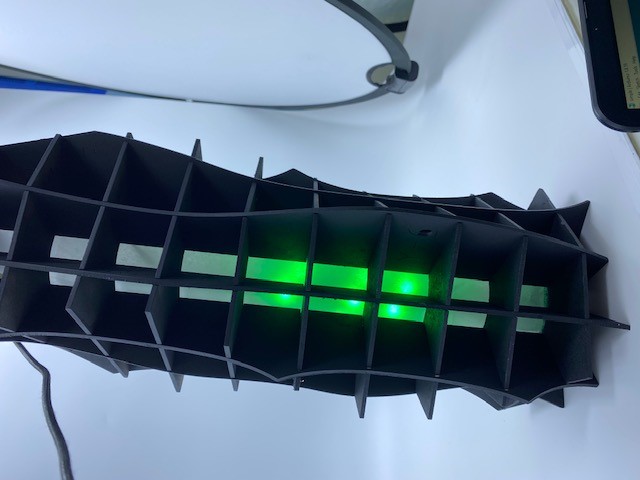
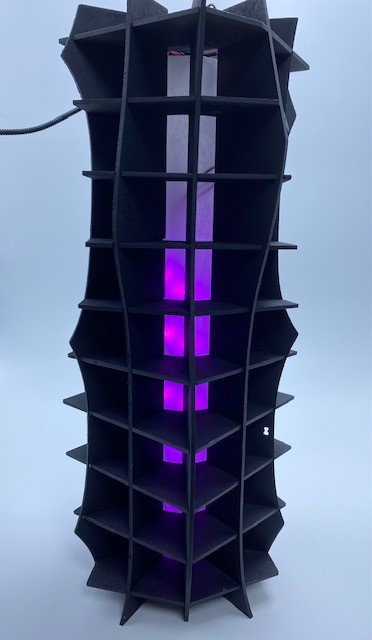
the LED lights was provided by FABLAB so i used different codes to test if the lights is working and i learned that there is different modes for the lights to work so i wanted to decide what to use. the colors i used are the main colors Red, Green, Blue and my favorite color purple. also, the lights will be covered by tracing paper that will hide the lights and wiring plus making the lights pleasant to look at.
testing code
// NeoPixel test program showing use of the WHITE channel for RGBW
// pixels only (won't look correct on regular RGB NeoPixel strips).

#include <Adafruit_NeoPixel.h>
#ifdef __AVR__
 #include <avr/power.h> // Required for 16 MHz Adafruit Trinket
#endif

// Which pin on the Arduino is connected to the NeoPixels?
// On a Trinket or Gemma we suggest changing this to 1:
#define LED_PIN     5

// How many NeoPixels are attached to the Arduino?
#define LED_COUNT  30

// NeoPixel brightness, 0 (min) to 255 (max)
#define BRIGHTNESS 75 // Set BRIGHTNESS to about 1/5 (max = 255)

// Declare our NeoPixel strip object:
Adafruit_NeoPixel strip(LED_COUNT, LED_PIN, NEO_GRBW + NEO_KHZ800);
// Argument 1 = Number of pixels in NeoPixel strip
// Argument 2 = Arduino pin number (most are valid)
// Argument 3 = Pixel type flags, add together as needed:
//   NEO_KHZ800  800 KHz bitstream (most NeoPixel products w/WS2812 LEDs)
//   NEO_KHZ400  400 KHz (classic 'v1' (not v2) FLORA pixels, WS2811 drivers)
//   NEO_GRB     Pixels are wired for GRB bitstream (most NeoPixel products)
//   NEO_RGB     Pixels are wired for RGB bitstream (v1 FLORA pixels, not v2)
//   NEO_RGBW    Pixels are wired for RGBW bitstream (NeoPixel RGBW products)

void setup() {
  // These lines are specifically to support the Adafruit Trinket 5V 16 MHz.
  // Any other board, you can remove this part (but no harm leaving it):
#if defined(__AVR_ATtiny85__) && (F_CPU == 16000000)
  clock_prescale_set(clock_div_1);
#endif
  // END of Trinket-specific code.

  strip.begin();           // INITIALIZE NeoPixel strip object (REQUIRED)
  strip.show();            // Turn OFF all pixels ASAP
  strip.setBrightness(BRIGHTNESS);
}

void loop() {
  // Fill along the length of the strip in various colors...
  //colorWipe(strip.Color(255,   0,   0)     , 75); // Red
  //colorWipe(strip.Color(  0, 255,   0)     , 75); // Green
  //colorWipe(strip.Color(  0,   0, 255)     , 75); // Blue
  //colorWipe(strip.Color(  0,   0,   0, 255), 75); // True white (not RGB white)

  whiteOverRainbow(75, 5);

 // pulseWhite(5);

  //rainbowFade2White(3, 3, 1);
}

// Fill strip pixels one after another with a color. Strip is NOT cleared
// first; anything there will be covered pixel by pixel. Pass in color
// (as a single 'packed' 32-bit value, which you can get by calling
// strip.Color(red, green, blue) as shown in the loop() function above),
// and a delay time (in milliseconds) between pixels.
void colorWipe(uint32_t color, int wait) {
  for(int i=0; i<strip.numPixels(); i++) { // For each pixel in strip...
    strip.setPixelColor(i, color);         //  Set pixel's color (in RAM)
    strip.show();                          //  Update strip to match
    delay(wait);                           //  Pause for a moment
  }
}

void whiteOverRainbow(int whiteSpeed, int whiteLength) {

  if(whiteLength >= strip.numPixels()) whiteLength = strip.numPixels() - 1;

  int      head          = whiteLength - 1;
  int      tail          = 0;
  int      loops         = 3;
  int      loopNum       = 0;
  uint32_t lastTime      = millis();
  uint32_t firstPixelHue = 0;

  for(;;) { // Repeat forever (or until a 'break' or 'return')
    for(int i=0; i<strip.numPixels(); i++) {  // For each pixel in strip...
      if(((i >= tail) && (i <= head)) ||      //  If between head & tail...
         ((tail > head) && ((i >= tail) || (i <= head)))) {
        strip.setPixelColor(i, strip.Color(0, 0, 0, 255)); // Set white
      } else {                                             // else set rainbow
        int pixelHue = firstPixelHue + (i * 65536L / strip.numPixels());
        strip.setPixelColor(i, strip.gamma32(strip.ColorHSV(pixelHue)));
      }
    }

    strip.show(); // Update strip with new contents
    // There's no delay here, it just runs full-tilt until the timer and
    // counter combination below runs out.

    firstPixelHue += 40; // Advance just a little along the color wheel

    if((millis() - lastTime) > whiteSpeed) { // Time to update head/tail?
      if(++head >= strip.numPixels()) {      // Advance head, wrap around
        head = 0;
        if(++loopNum >= loops) return;
      }
      if(++tail >= strip.numPixels()) {      // Advance tail, wrap around
        tail = 0;
      }
      lastTime = millis();                   // Save time of last movement
    }
  }
}

void pulseWhite(uint8_t wait) {
  for(int j=0; j<256; j++) { // Ramp up from 0 to 255
    // Fill entire strip with white at gamma-corrected brightness level 'j':
    strip.fill(strip.Color(0, 0, 0, strip.gamma8(j)));
    strip.show();
    delay(wait);
  }

  for(int j=255; j>=0; j--) { // Ramp down from 255 to 0
    strip.fill(strip.Color(0, 0, 0, strip.gamma8(j)));
    strip.show();
    delay(wait);
  }
}

void rainbowFade2White(int wait, int rainbowLoops, int whiteLoops) {
  int fadeVal=0, fadeMax=100;

  // Hue of first pixel runs 'rainbowLoops' complete loops through the color
  // wheel. Color wheel has a range of 65536 but it's OK if we roll over, so
  // just count from 0 to rainbowLoops*65536, using steps of 256 so we
  // advance around the wheel at a decent clip.
  for(uint32_t firstPixelHue = 0; firstPixelHue < rainbowLoops*65536;
    firstPixelHue += 256) {

    for(int i=0; i<strip.numPixels(); i++) { // For each pixel in strip...

      // Offset pixel hue by an amount to make one full revolution of the
      // color wheel (range of 65536) along the length of the strip
      // (strip.numPixels() steps):
      uint32_t pixelHue = firstPixelHue + (i * 65536L / strip.numPixels());

      // strip.ColorHSV() can take 1 or 3 arguments: a hue (0 to 65535) or
      // optionally add saturation and value (brightness) (each 0 to 255).
      // Here we're using just the three-argument variant, though the
      // second value (saturation) is a constant 255.
      strip.setPixelColor(i, strip.gamma32(strip.ColorHSV(pixelHue, 255,
        255 * fadeVal / fadeMax)));
    }

    strip.show();
    delay(wait);

    if(firstPixelHue < 65536) {                              // First loop,
      if(fadeVal < fadeMax) fadeVal++;                       // fade in
    } else if(firstPixelHue >= ((rainbowLoops-1) * 65536)) { // Last loop,
      if(fadeVal > 0) fadeVal--;                             // fade out
    } else {
      fadeVal = fadeMax; // Interim loop, make sure fade is at max
    }
  }


  for(int k=0; k<whiteLoops; k++) {
    for(int j=0; j<256; j++) { // Ramp up 0 to 255
      // Fill entire strip with white at gamma-corrected brightness level 'j':
      strip.fill(strip.Color(0, 0, 0, strip.gamma8(j)));
      strip.show();
    }
    delay(1000); // Pause 1 second
    for(int j=255; j>=0; j--) { // Ramp down 255 to 0
      strip.fill(strip.Color(0, 0, 0, strip.gamma8(j)));
      strip.show();
    }
  }

  delay(500); // Pause 1/2 second
}
after testing the light, i wanted to add another feature for the light fixture so while researching in week 5 about the microcontroller i learned that there is a gesture sensor so i upgraded the idea to make it an interactive light fixture which will give the ability to change the lights color with different hand gestures. there are 4 gestures in total(up, down, left and right) each specific direction will give you a different color when you swipe your hand on it.
this is the gesture code.
#include "Adafruit_APDS9960.h"
#include <SPI.h>

#include <Wire.h>
#include <PDM.h>
#include <SoftwareSerial.h>

Adafruit_APDS9960 apds;

// the setup function runs once when you press reset or power the board
void setup() {
  Serial.begin(115200);

  if(!apds.begin()){
    Serial.println("failed to initialize device! Please check your wiring.");
  }
  else Serial.println("Device initialized!");

  //gesture mode will be entered once proximity mode senses something close
  apds.enableProximity(true);
  apds.enableGesture(true);
}

// the loop function runs over and over again forever
void loop() {
  //read a gesture from the device
    uint8_t gesture = apds.readGesture();
    if(gesture == APDS9960_DOWN) Serial.println("v");
    if(gesture == APDS9960_UP) Serial.println("^");
    if(gesture == APDS9960_LEFT) Serial.println("<");
    if(gesture == APDS9960_RIGHT) Serial.println(">");
}
the final step was to program the microcontroller gesture sensor and the LED light together. this is the code.
// NeoPixel Ring simple sketch (c) 2013 Shae Erisson
// Released under the GPLv3 license to match the rest of the
// Adafruit NeoPixel library
#include "Adafruit_APDS9960.h"
Adafruit_APDS9960 apds;

#include <Adafruit_NeoPixel.h>
#ifdef __AVR__
 #include <avr/power.h> // Required for 16 MHz Adafruit Trinket
#endif

// Which pin on the Arduino is connected to the NeoPixels?
#define PIN        5 // On Trinket or Gemma, suggest changing this to 1
int y=0;
// How many NeoPixels are attached to the Arduino?
#define NUMPIXELS 30 // Popular NeoPixel ring size

// When setting up the NeoPixel library, we tell it how many pixels,
// and which pin to use to send signals. Note that for older NeoPixel
// strips you might need to change the third parameter -- see the
// strandtest example for more information on possible values.
Adafruit_NeoPixel pixels(NUMPIXELS, PIN, NEO_GRB + NEO_KHZ800);

#define DELAYVAL 100 // Time (in milliseconds) to pause between pixels

void setup() {
  // These lines are specifically to support the Adafruit Trinket 5V 16 MHz.
  // Any other board, you can remove this part (but no harm leaving it):
#if defined(__AVR_ATtiny85__) && (F_CPU == 16000000)
  clock_prescale_set(clock_div_1);
#endif
  // END of Trinket-specific code.

  pixels.begin(); // INITIALIZE NeoPixel strip object (REQUIRED)

  Serial.begin(115200);

  if(!apds.begin()){
    Serial.println("failed to initialize device! Please check your wiring.");
  }
  else Serial.println("Device initialized!");

  //gesture mode will be entered once proximity mode senses something close
  apds.enableProximity(true);
  apds.enableGesture(true);
}

void loop() {
  pixels.clear(); // Set all pixel colors to 'off'

  // The first NeoPixel in a strand is #0, second is 1, all the way up
  // to the count of pixels minus one.
    // For each pixel...

    // pixels.Color() takes RGB values, from 0,0,0 up to 255,255,255
    // Here we're using a moderately bright green color:
    Serial.println("working");


     uint8_t gesture = apds.readGesture();
     Serial.println(gesture);
    if(gesture == APDS9960_UP){
    for(int i=0; i<NUMPIXELS; i++){
    (pixels.setPixelColor(i, pixels.Color(225, 0, 0)));
     pixels.show();
    Serial.println("^");
     delay(DELAYVAL);
    }}


    else if (gesture == APDS9960_DOWN){
    for(int i= NUMPIXELS; i>0; i--){
    (pixels.setPixelColor(i, pixels.Color(125, 0, 125)));
     pixels.show();
    Serial.println("V");
     delay(DELAYVAL);
    }}

    else if(gesture == APDS9960_LEFT){
    for(int i=(NUMPIXELS/2); i>0; i--){
    pixels.setPixelColor(i, pixels.Color(0, 225, 0));
    y = map(i,15,0,16,30);
    pixels.setPixelColor(y, pixels.Color(0, 225, 0));
    Serial.println(y);

     pixels.show();
    Serial.println("<");
     delay(DELAYVAL);
    }}

    else if (gesture == APDS9960_RIGHT){
    for(int i=0; i<(NUMPIXELS/2); i++){
    pixels.setPixelColor(i, pixels.Color(0, 0, 225));
    y = map(i,0,15,30,16);
    pixels.setPixelColor(y, pixels.Color(0, 0, 225));
    Serial.println(y);

     pixels.show();
    Serial.println(">");

     delay(DELAYVAL);
    }}
  }
Hero Video
testing the gesture sensor
final result
final result in the dark.
Hero Shots
Here are pictures with different colors
Materials
| Qty | Description | Price |
|---|---|---|
| 1 | MDF wood | free |
| 1 | LED light | free |
| 1 | tracing paper | free |
| 1 | MATT black spray | 0.55BD |