8. Moulding and Casting
Introduction
This week we learned about moulding and casting different types of materials. So, What are molding and casting? And what is the aim behind these processes?
Moulding and Casting are manufacturing processes in which a liquid material is formed by pouring it into a rigid frame called a mold or matrix.

“The easiest example of what a mold is, that almost everyone has used before, is an ice cube tray. The hollow forms of the mold get filled with water (the casting material) to produce ice cubes. The cubes are released from the mold and voila! Finished cast pieces. (Iced teas rejoice!)”
Group Assignment
For the group assignment, every two partners were asked to choose a different type of molding and casting material and review the safety data sheets and identify some features.
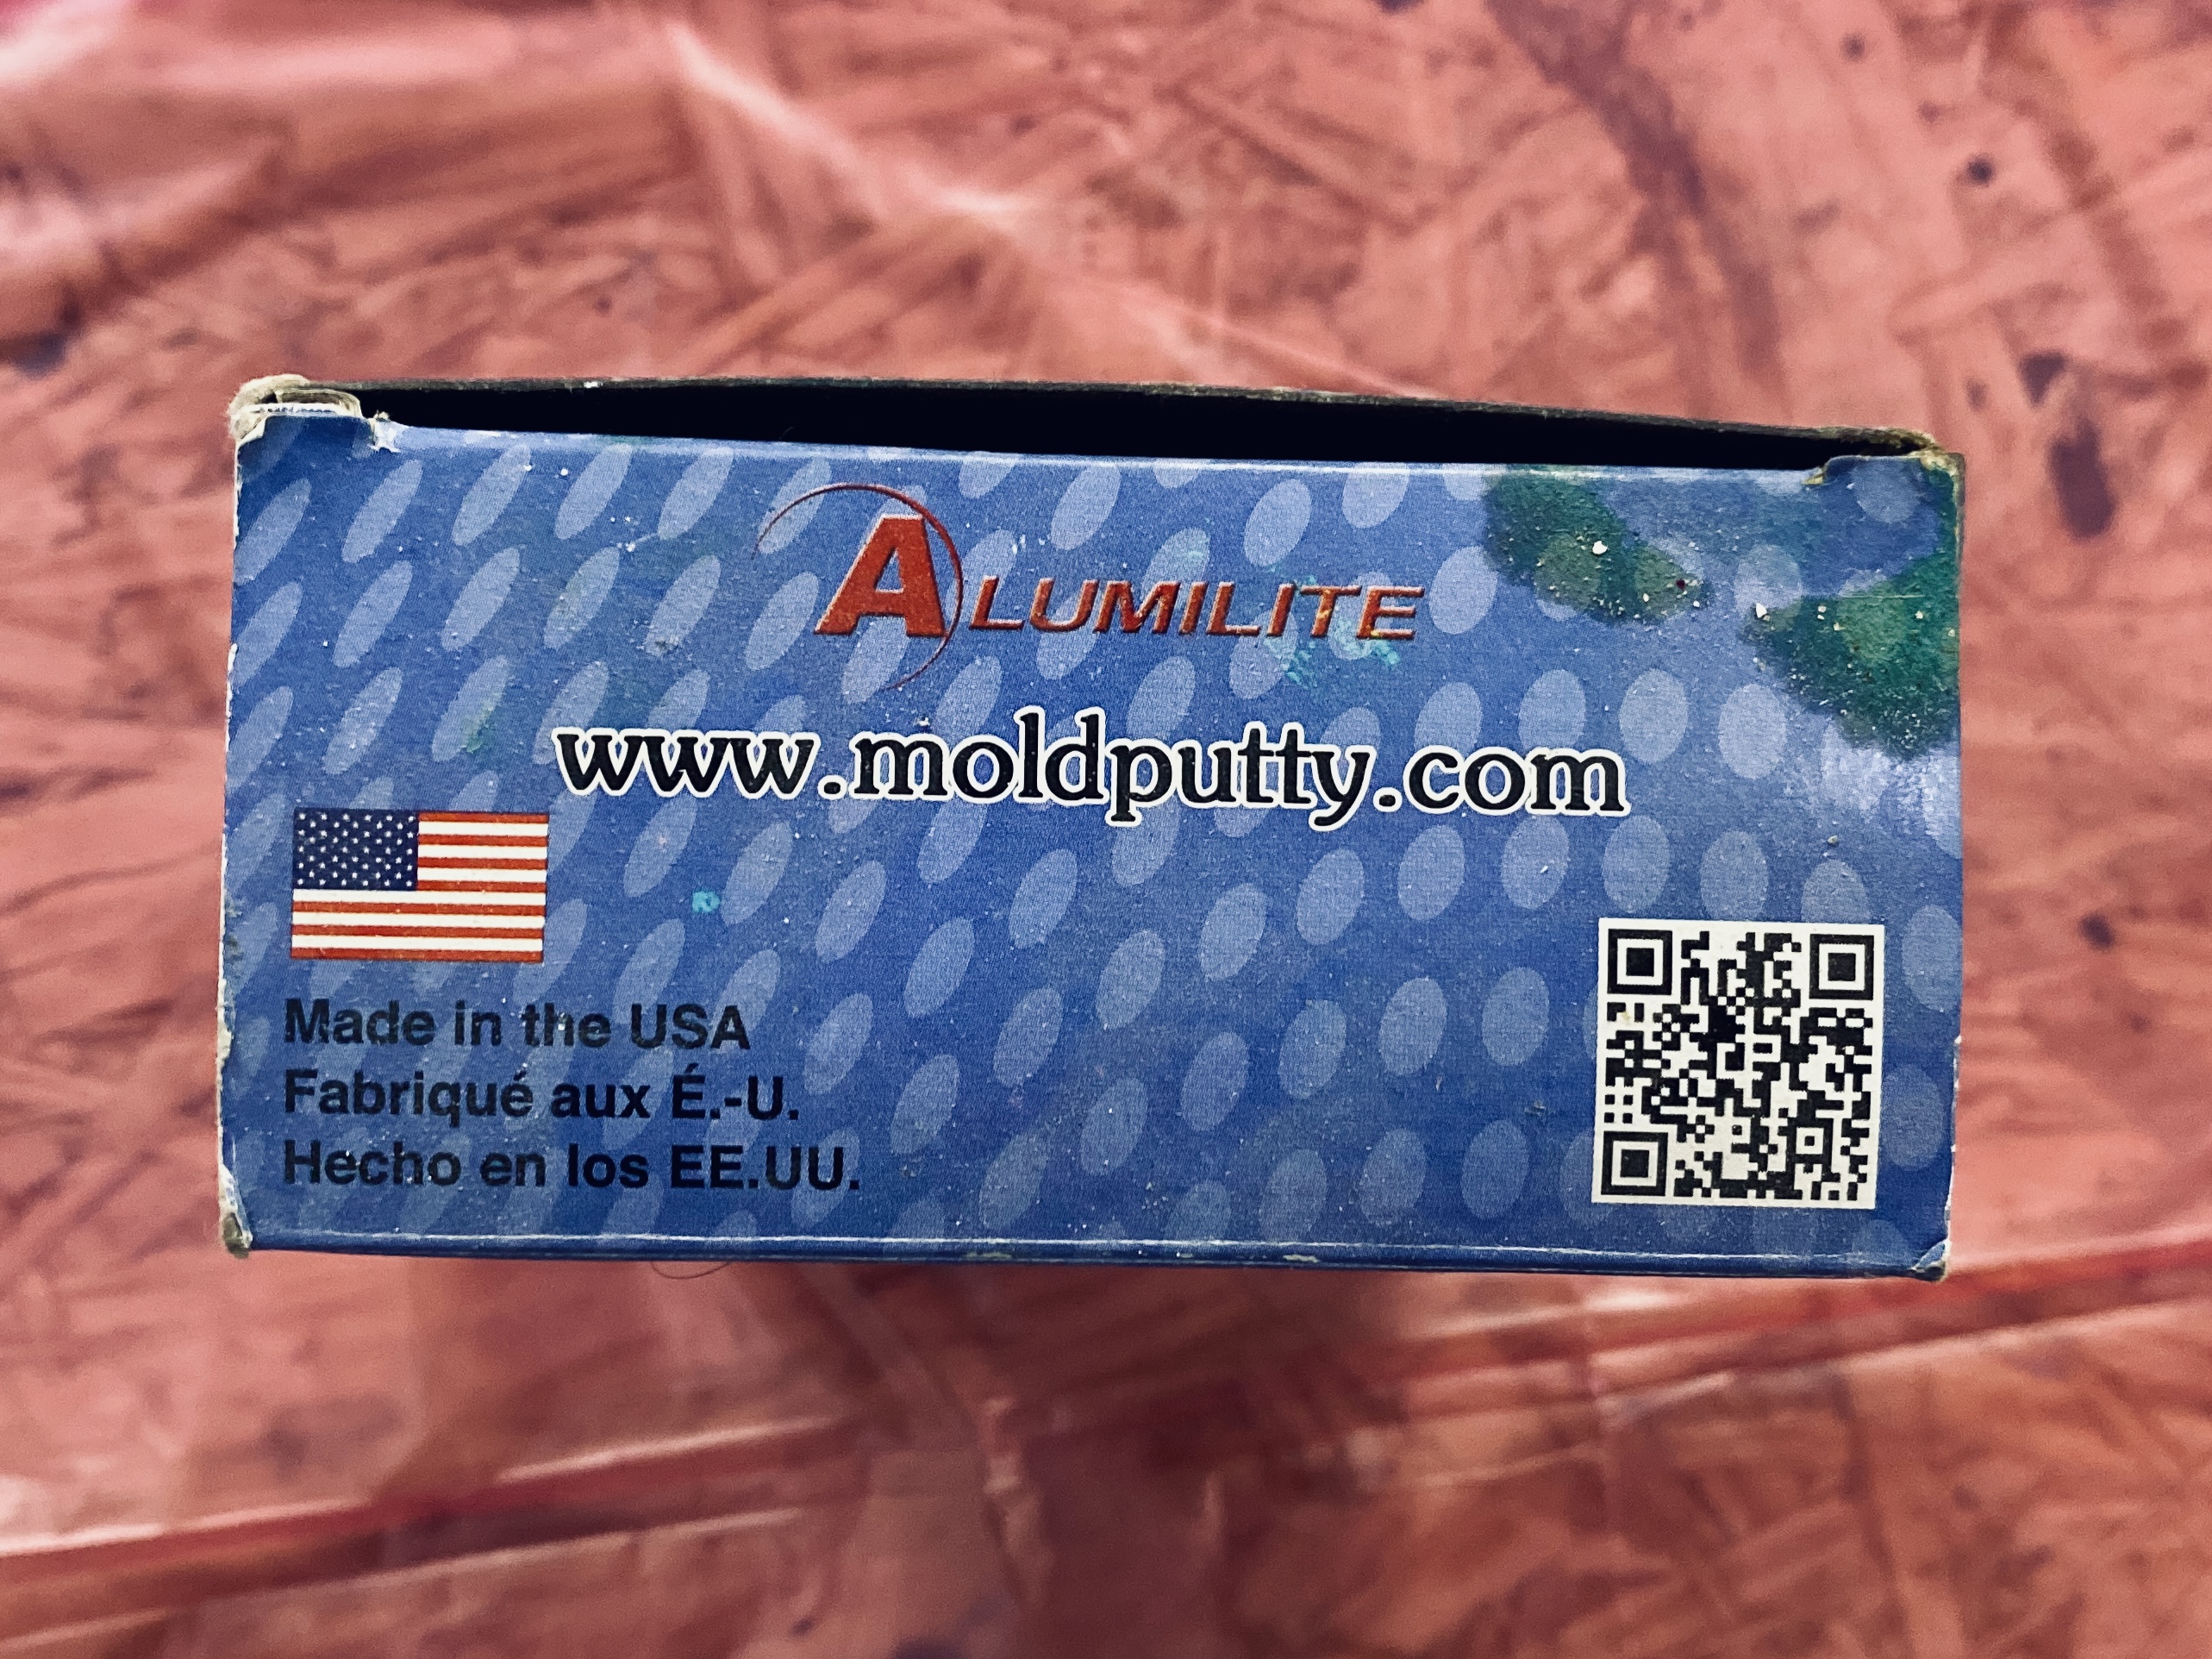
My colleague Sakeena and I chose the resin “Amazing Clear Cast” material as shown below.
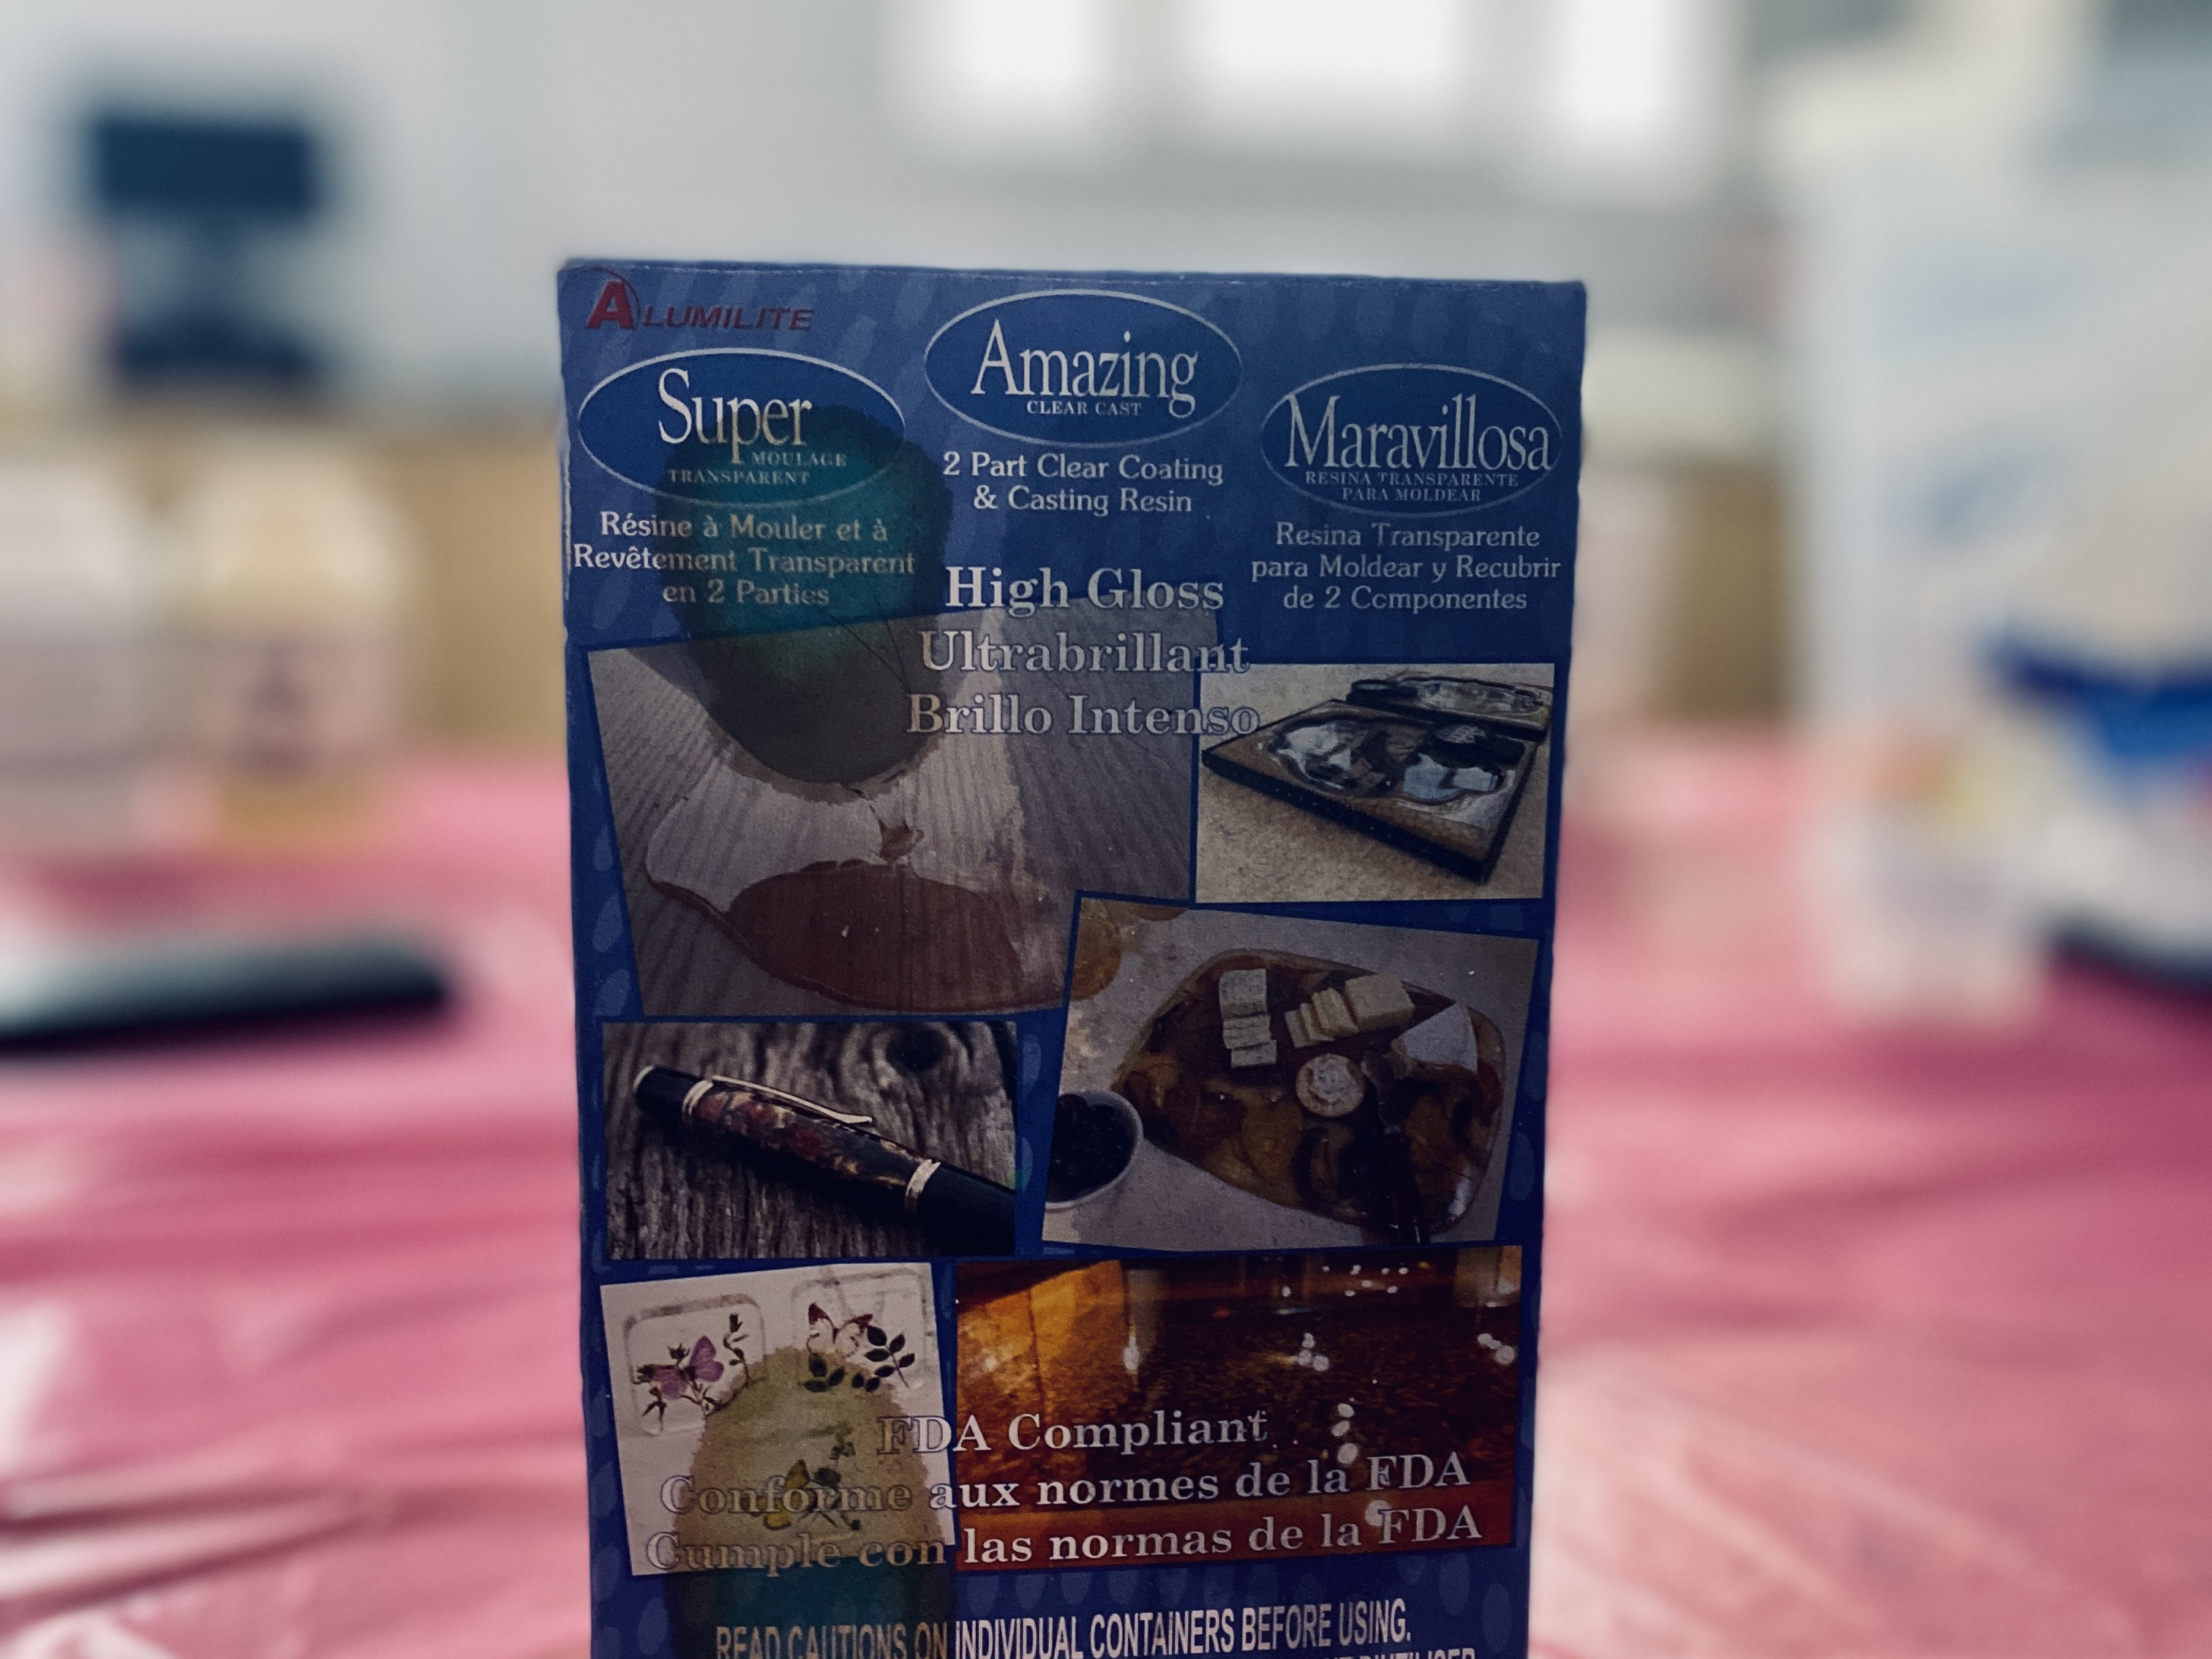
We followed the QR code printed on the box and we easily had access to the origin (Alumilite) website where we found all the required information.
Click here to see the entire group assignment where we made and compared test casts with each of them.
Individual Assignment
Modeling
For the individual assignment, we were asked to model a 2.5D design (no undercuts) and I chose Sketch Up software to do that.
First, I looked for moulding and casting ideas on Pinterest to get inspired.
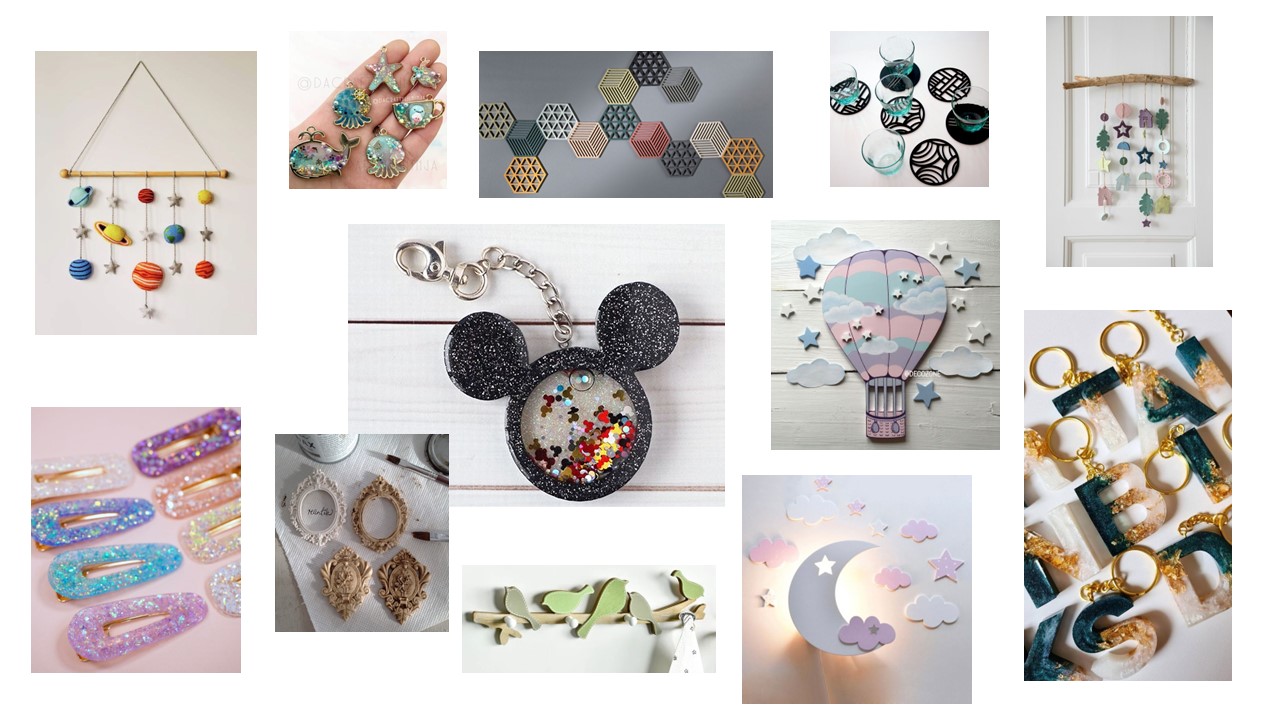
Second, I decided to make a mickey mouse keychain as shown below.

Preview the model in 3D below ^_^
Click here to download the file ^_^
Also, I modeled clouds and stars with different layers as the following.
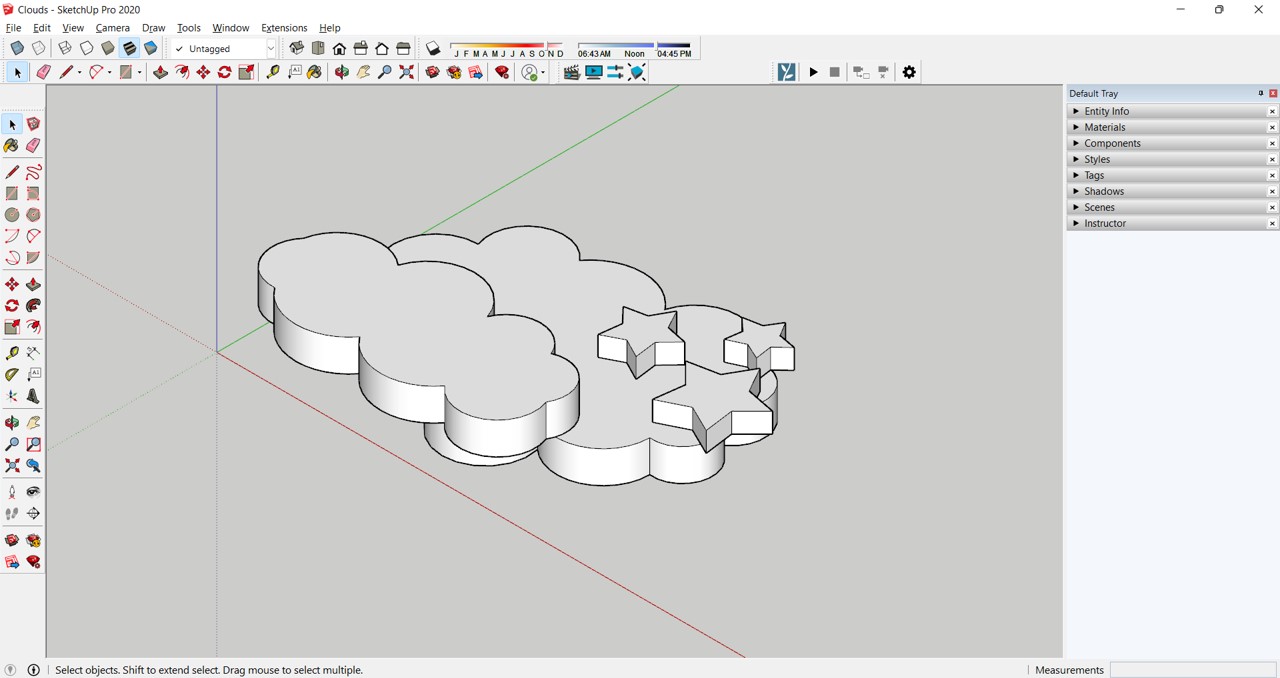
Preview the model in 3D below ^_^
Click here to download the file ^_^
However, I realized that my model will be hanged with magnets and will be displayed in the Fab Lab as a souvenir. As for that, I wanted to design something which has a meaning behind it and really expresses me and my journey in the Academy.
So, here you can see the initial ideation and sketches.
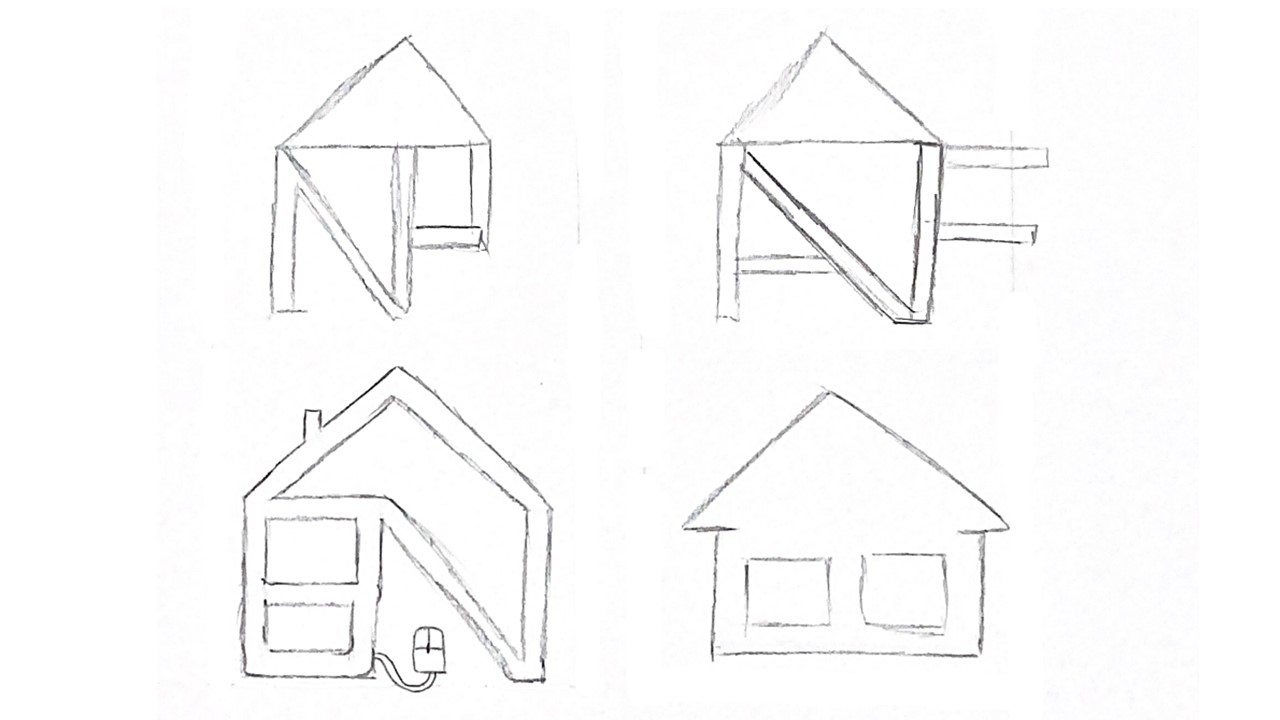
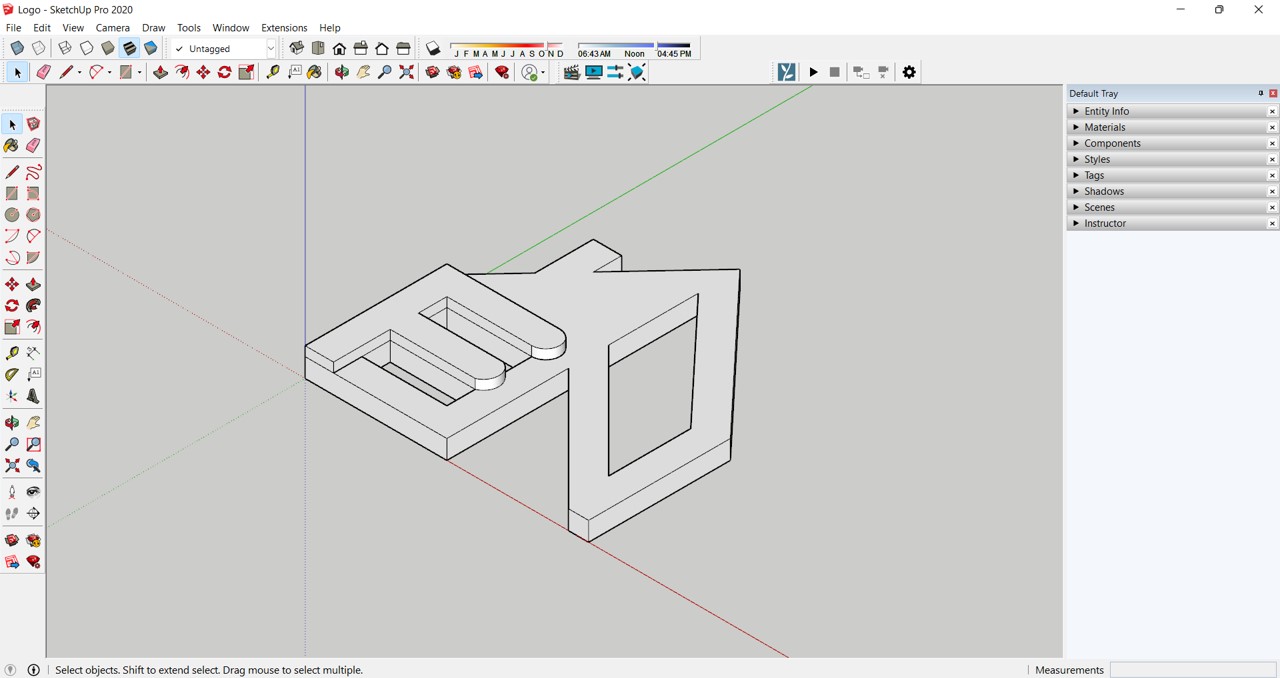
After that, I chose the sketch on the bottom left to model it in SketchUp.
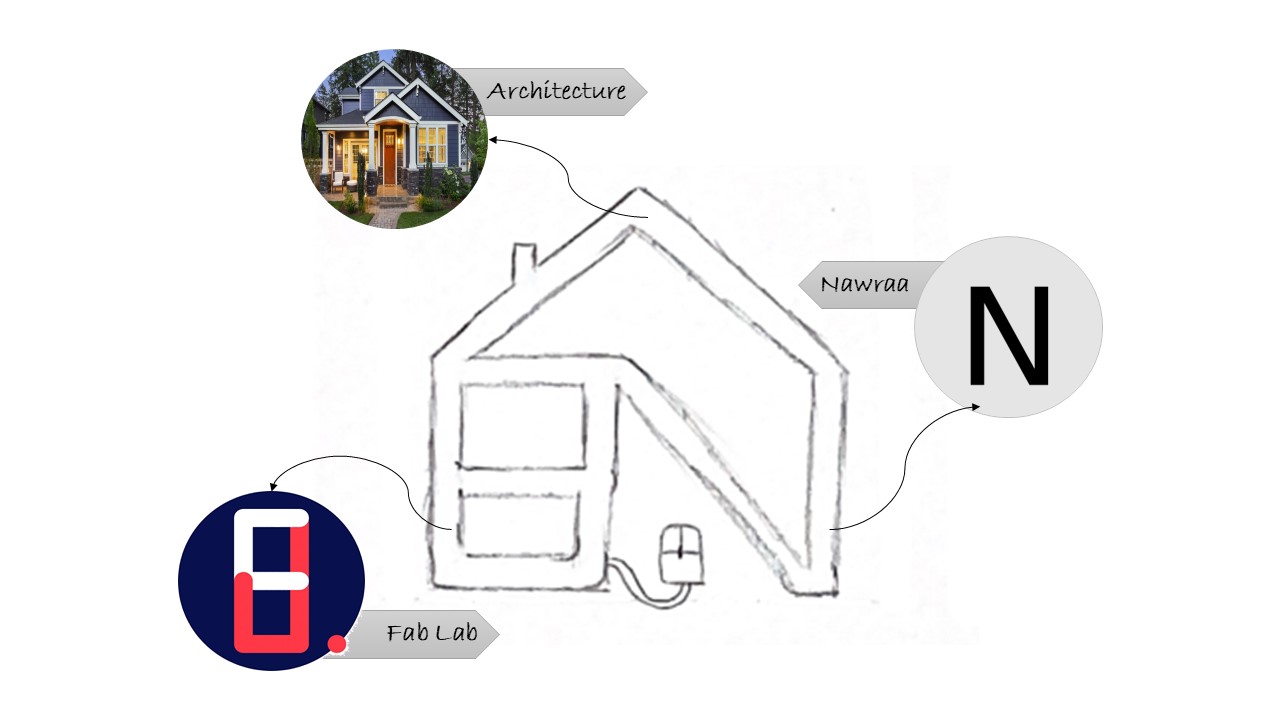
The concept was that Fab Lab Academy and Nawraa are under one shelter, so you can see the Fab Lab logo on the left-hand side, the first letter of my name (N) on the right-hand side, and the shelter is basically a gable roof and simultaneously it indicates that I am an architecture student.
Then I started the modeling process, and since we had specific dimensions (smallest gap: 1.6mm, design height max: 8mm, design width and length max: 60mm) I created a reference square with a grid.

Later on, I used the lines and started to draw the design in 2D.
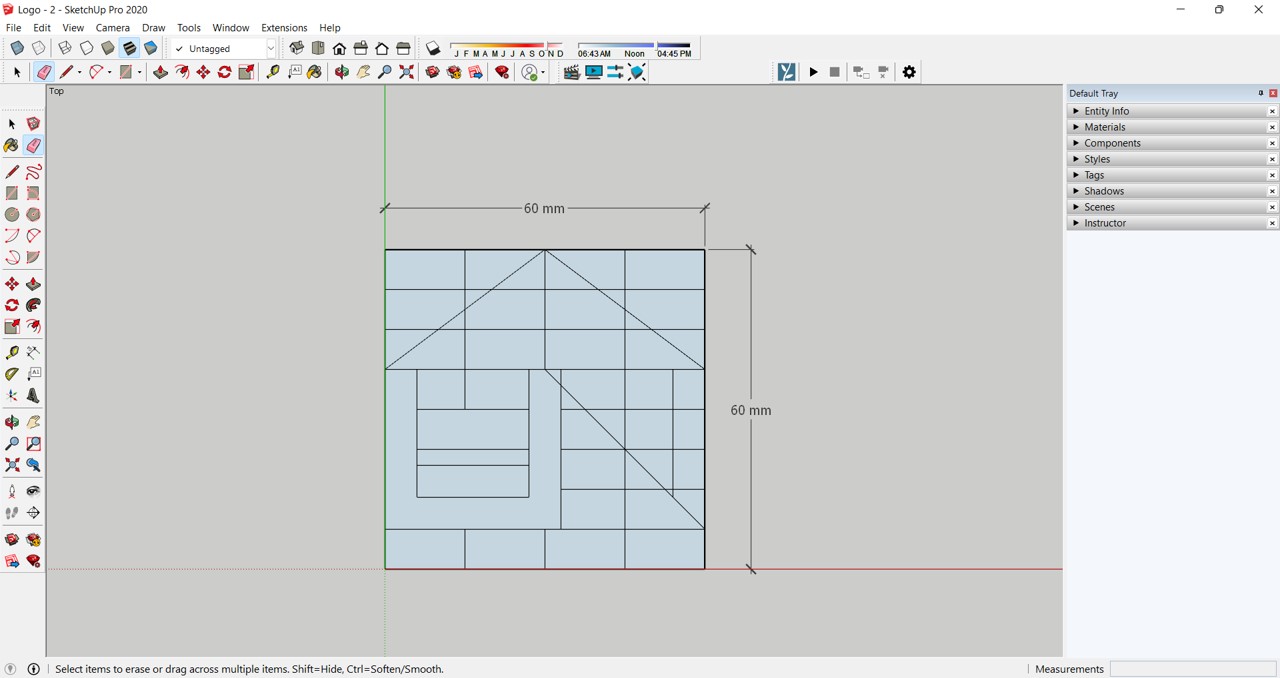
After that, I used the eraser tool to erase the extra lines of the grid and gradually the shape started to appear.
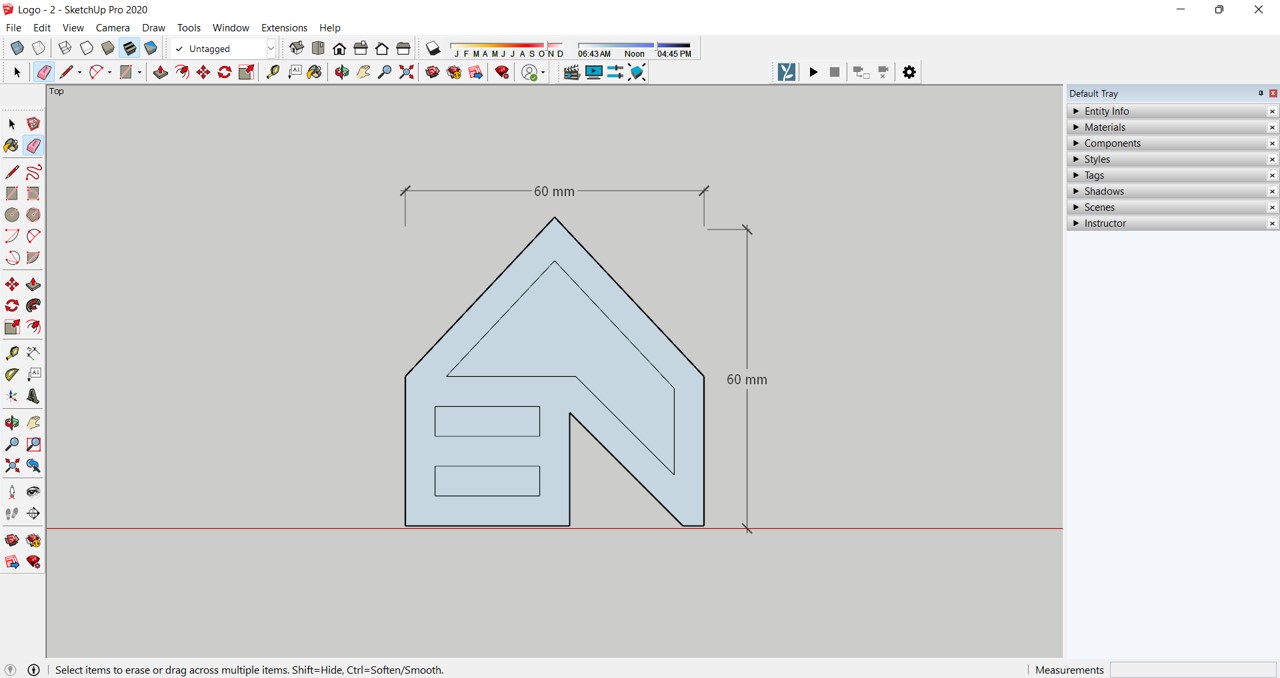
Finally, I used the pull and push tool in order to give it thickness. Also, I decided to emphasize the letter “F” in a different layer for two reasons, to ensure that this model cannot be cut with the laser cutter, and to enhance the concept and make it clearer (F: Fab, L: Lab, N: Nawraa).
Preview the model in 3D below ^_^
Click here to download the file ^_^
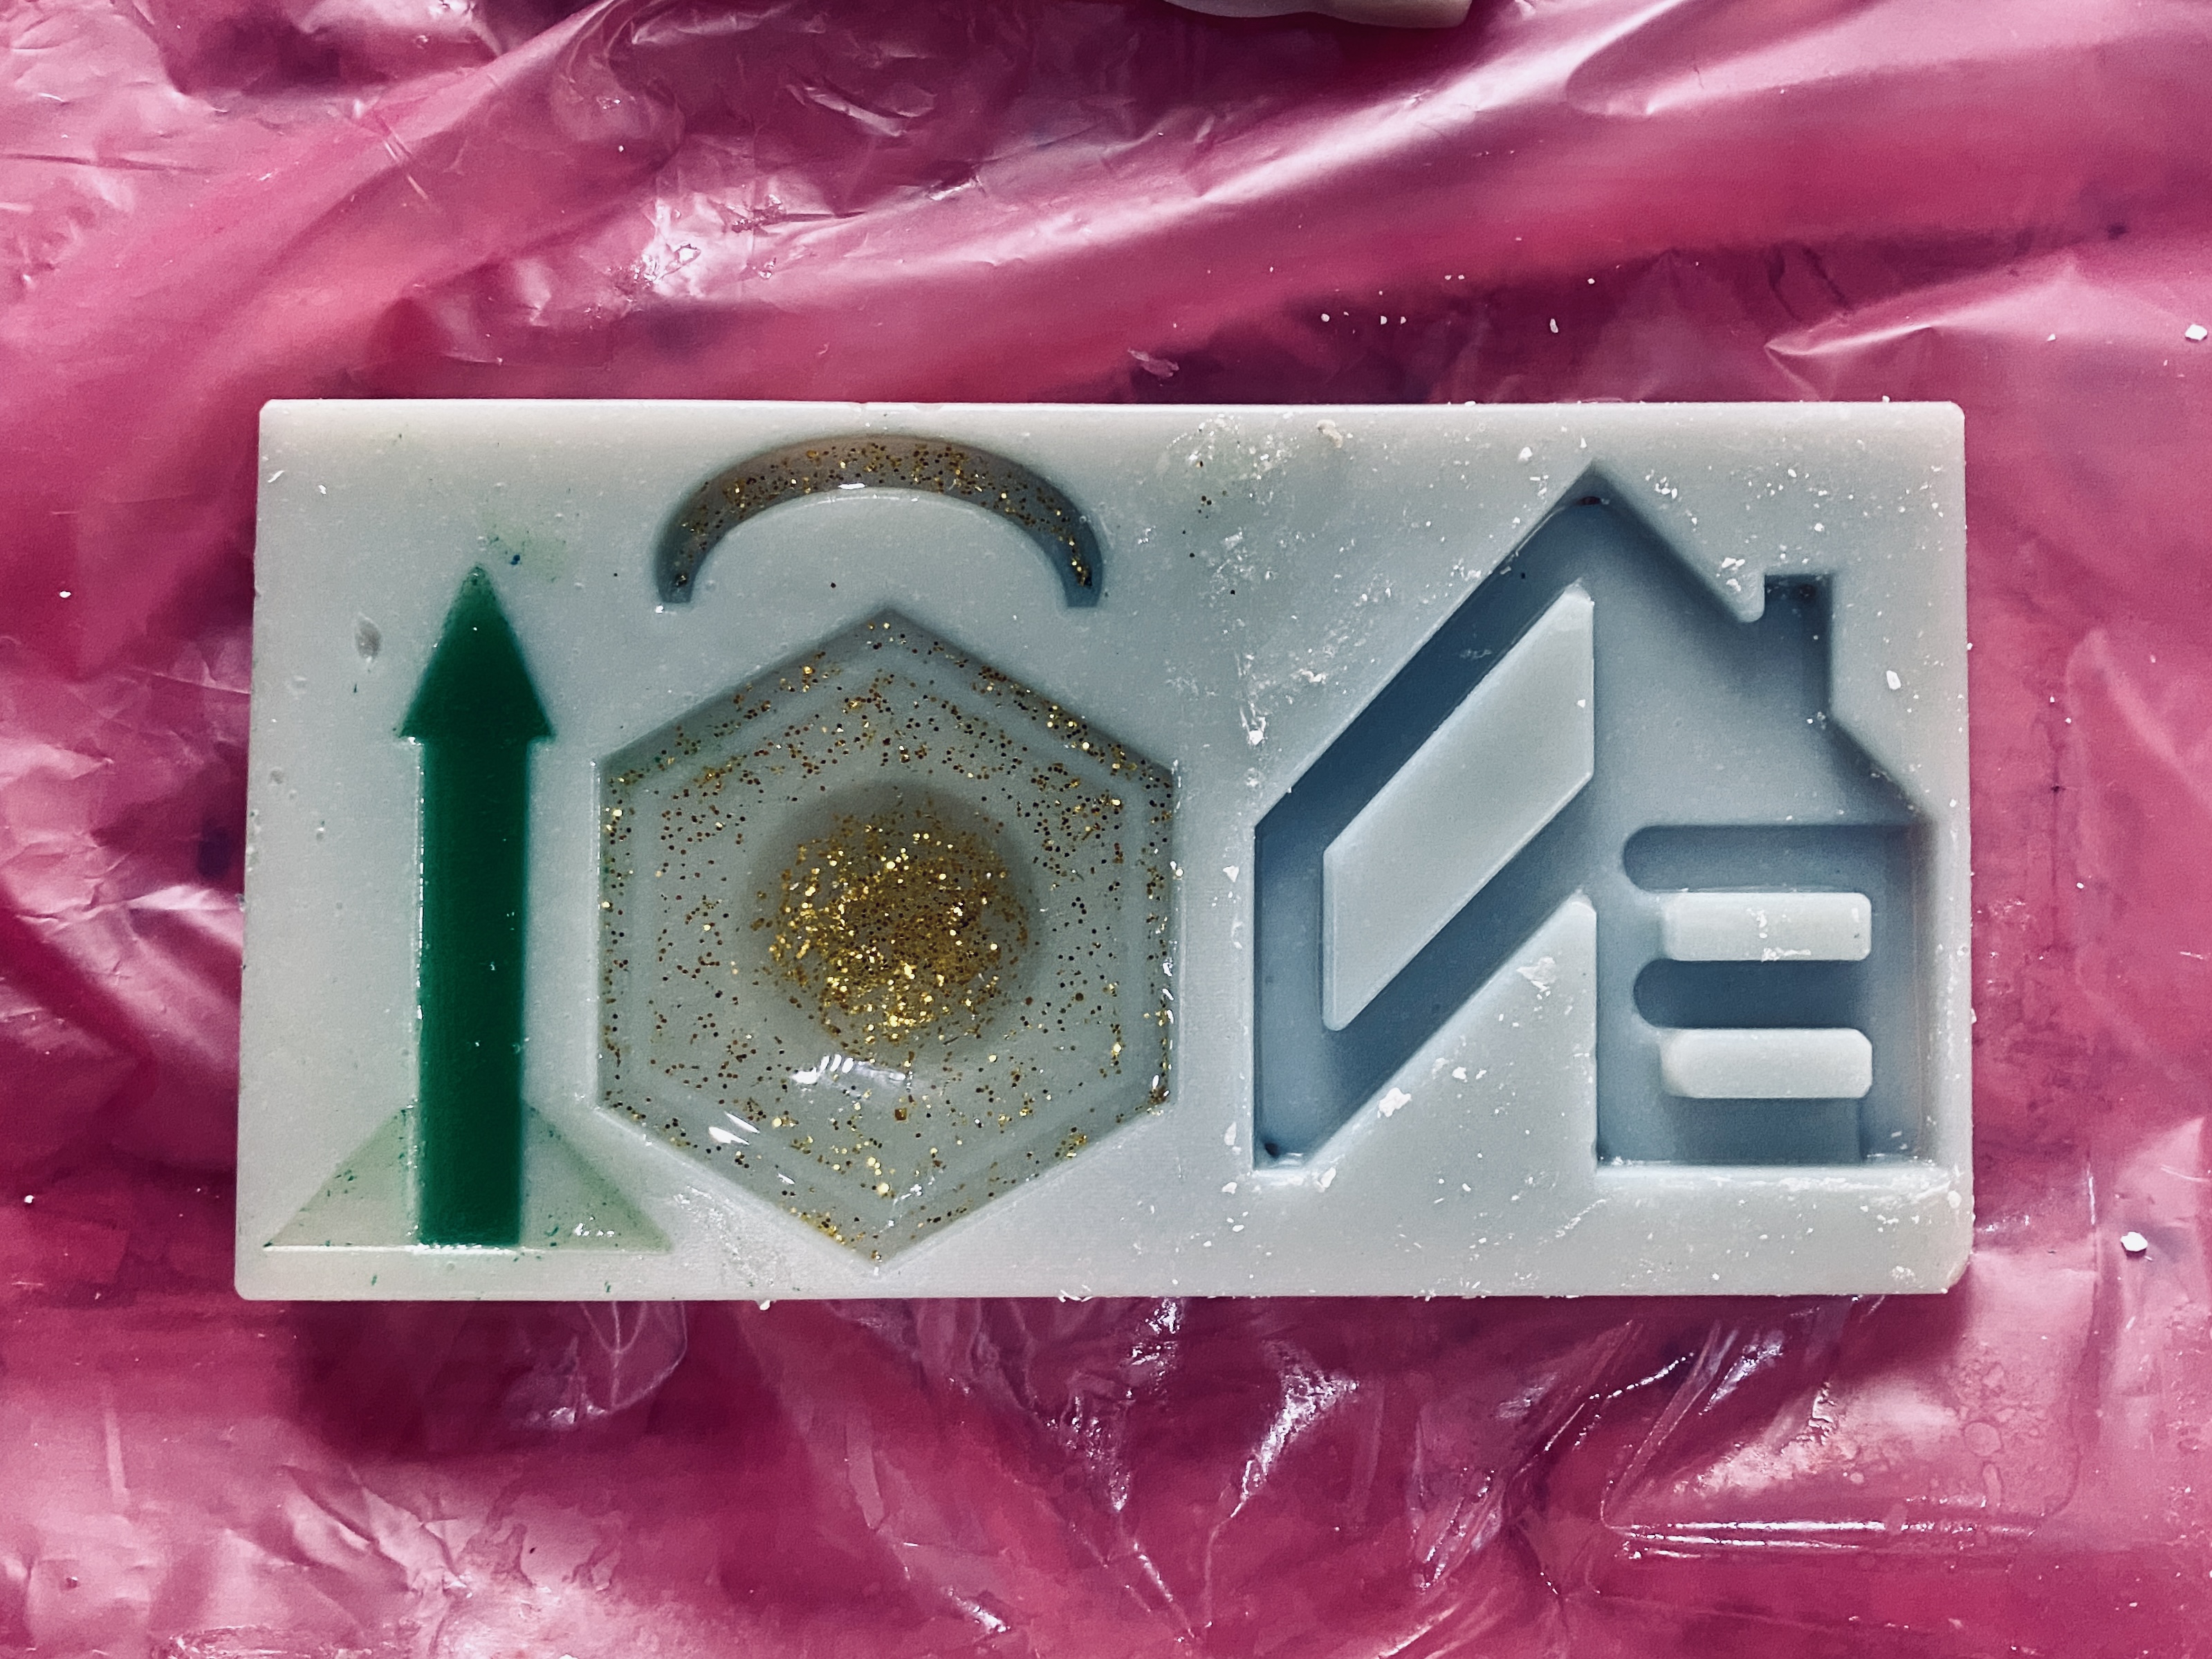
Moulding
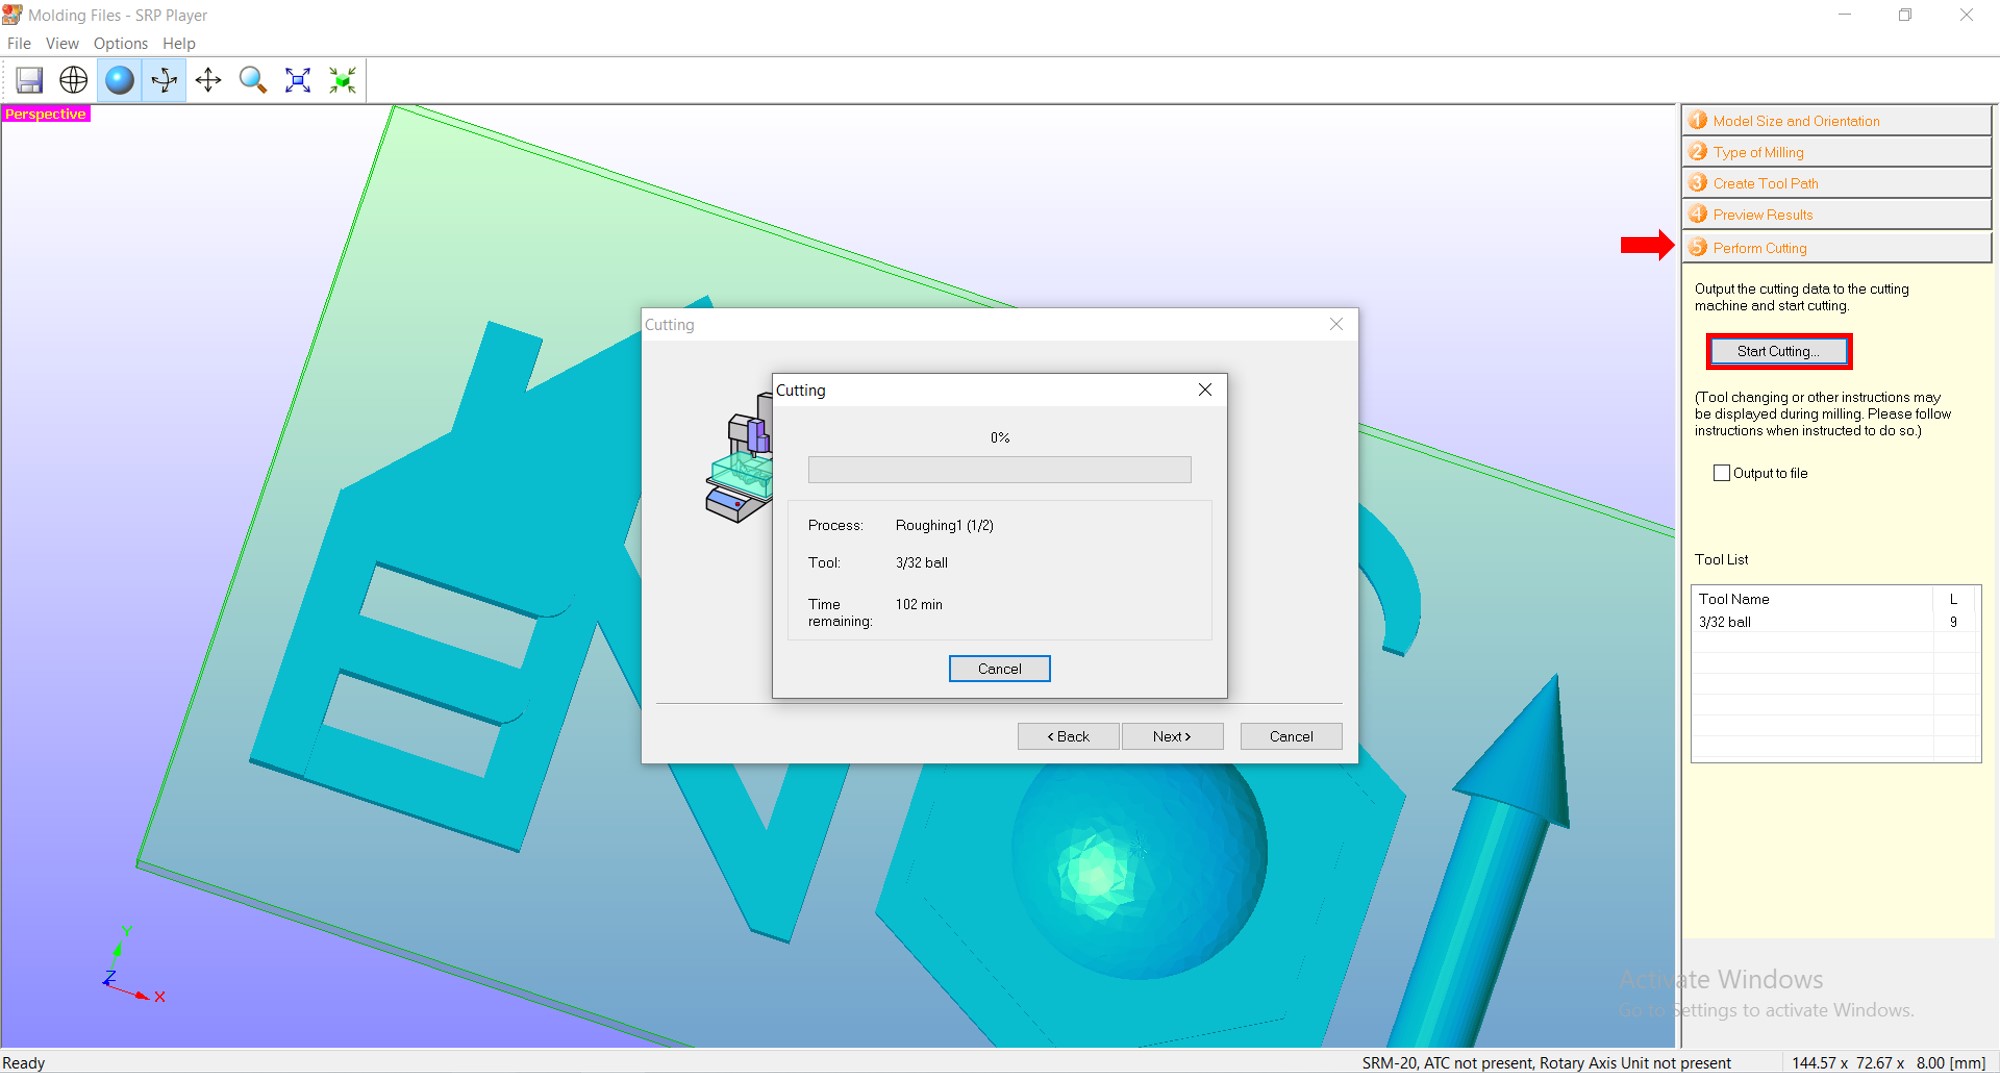
After exporting the SketchUp model to .stl format, we opened it in SRP Player software, modified the settings, and prepared it to be cut on the blue wax block as shown in the upcoming images.
1) Model Size and Orientation

2) Type of Milling

3) Create Tool Path
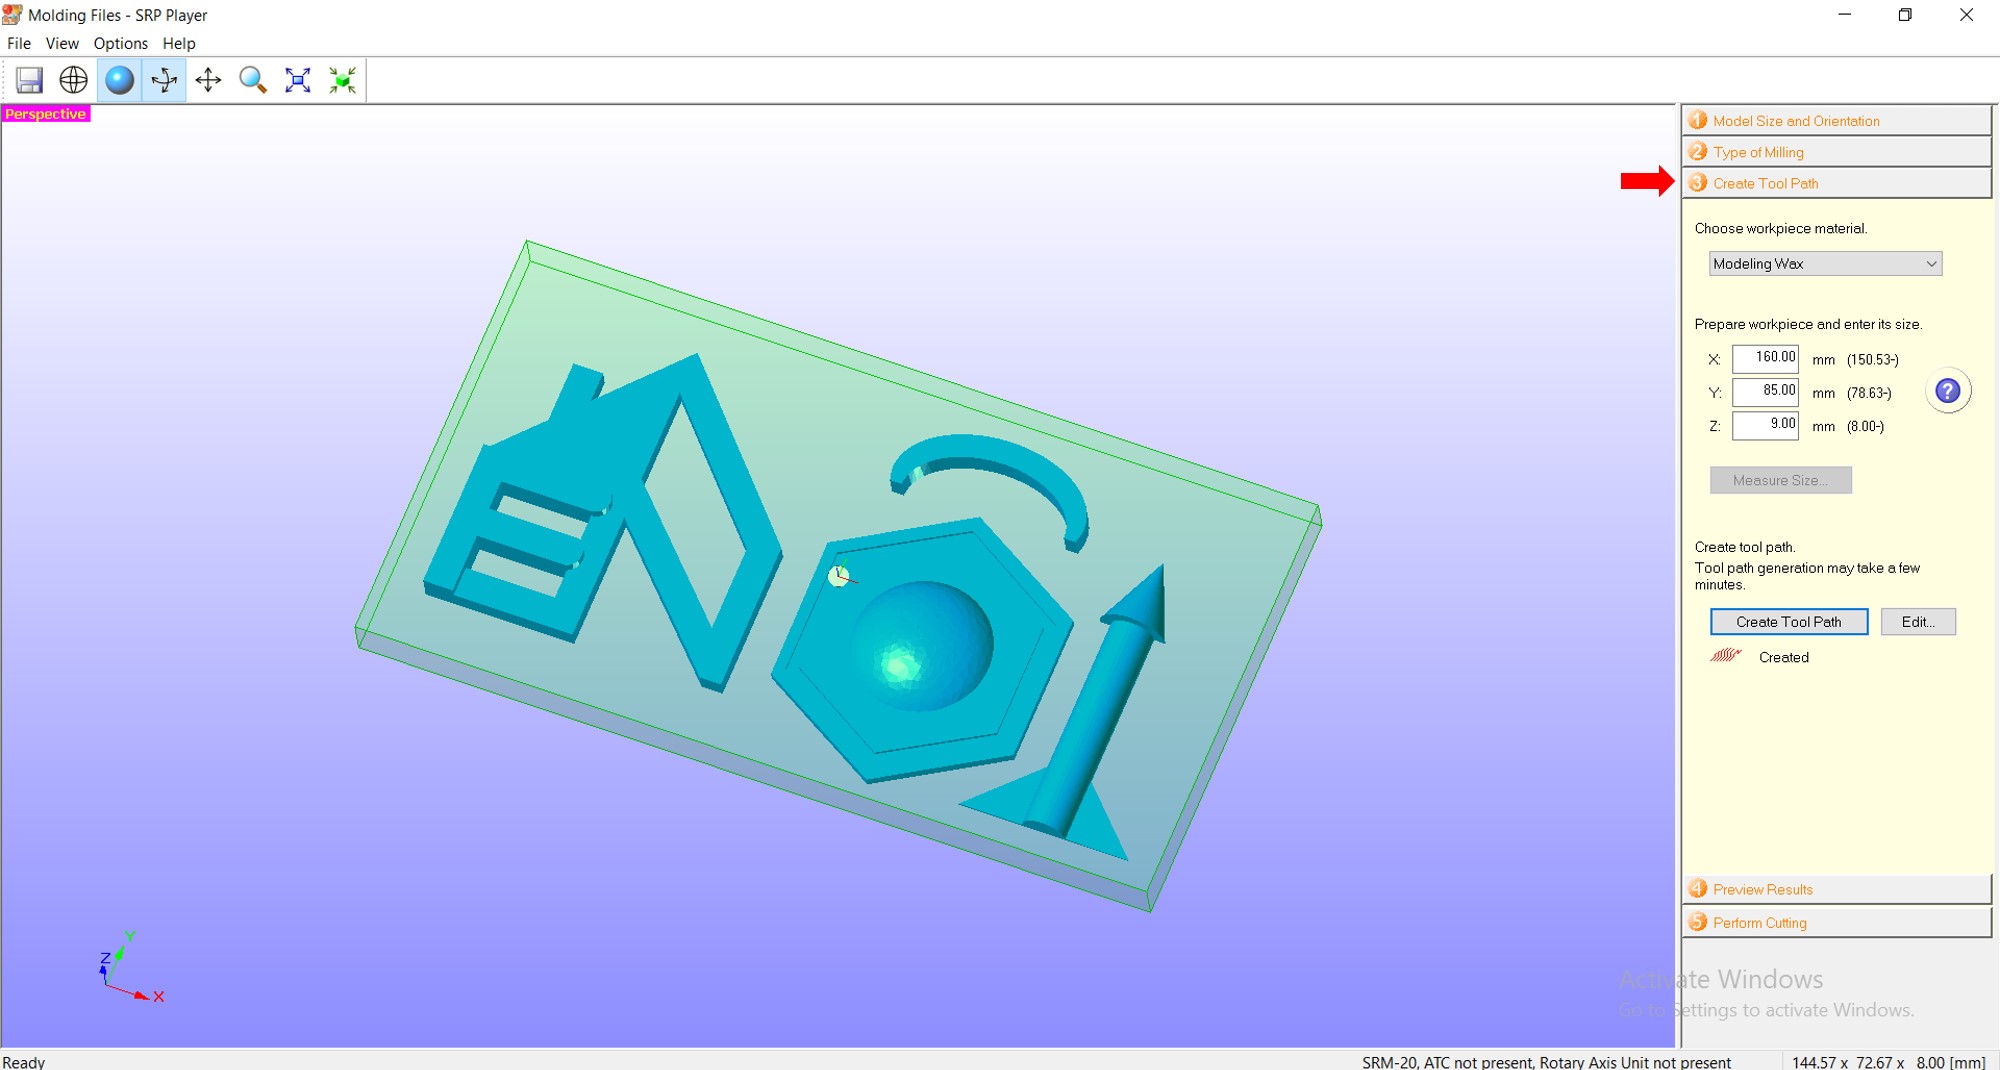
4) Preview Results
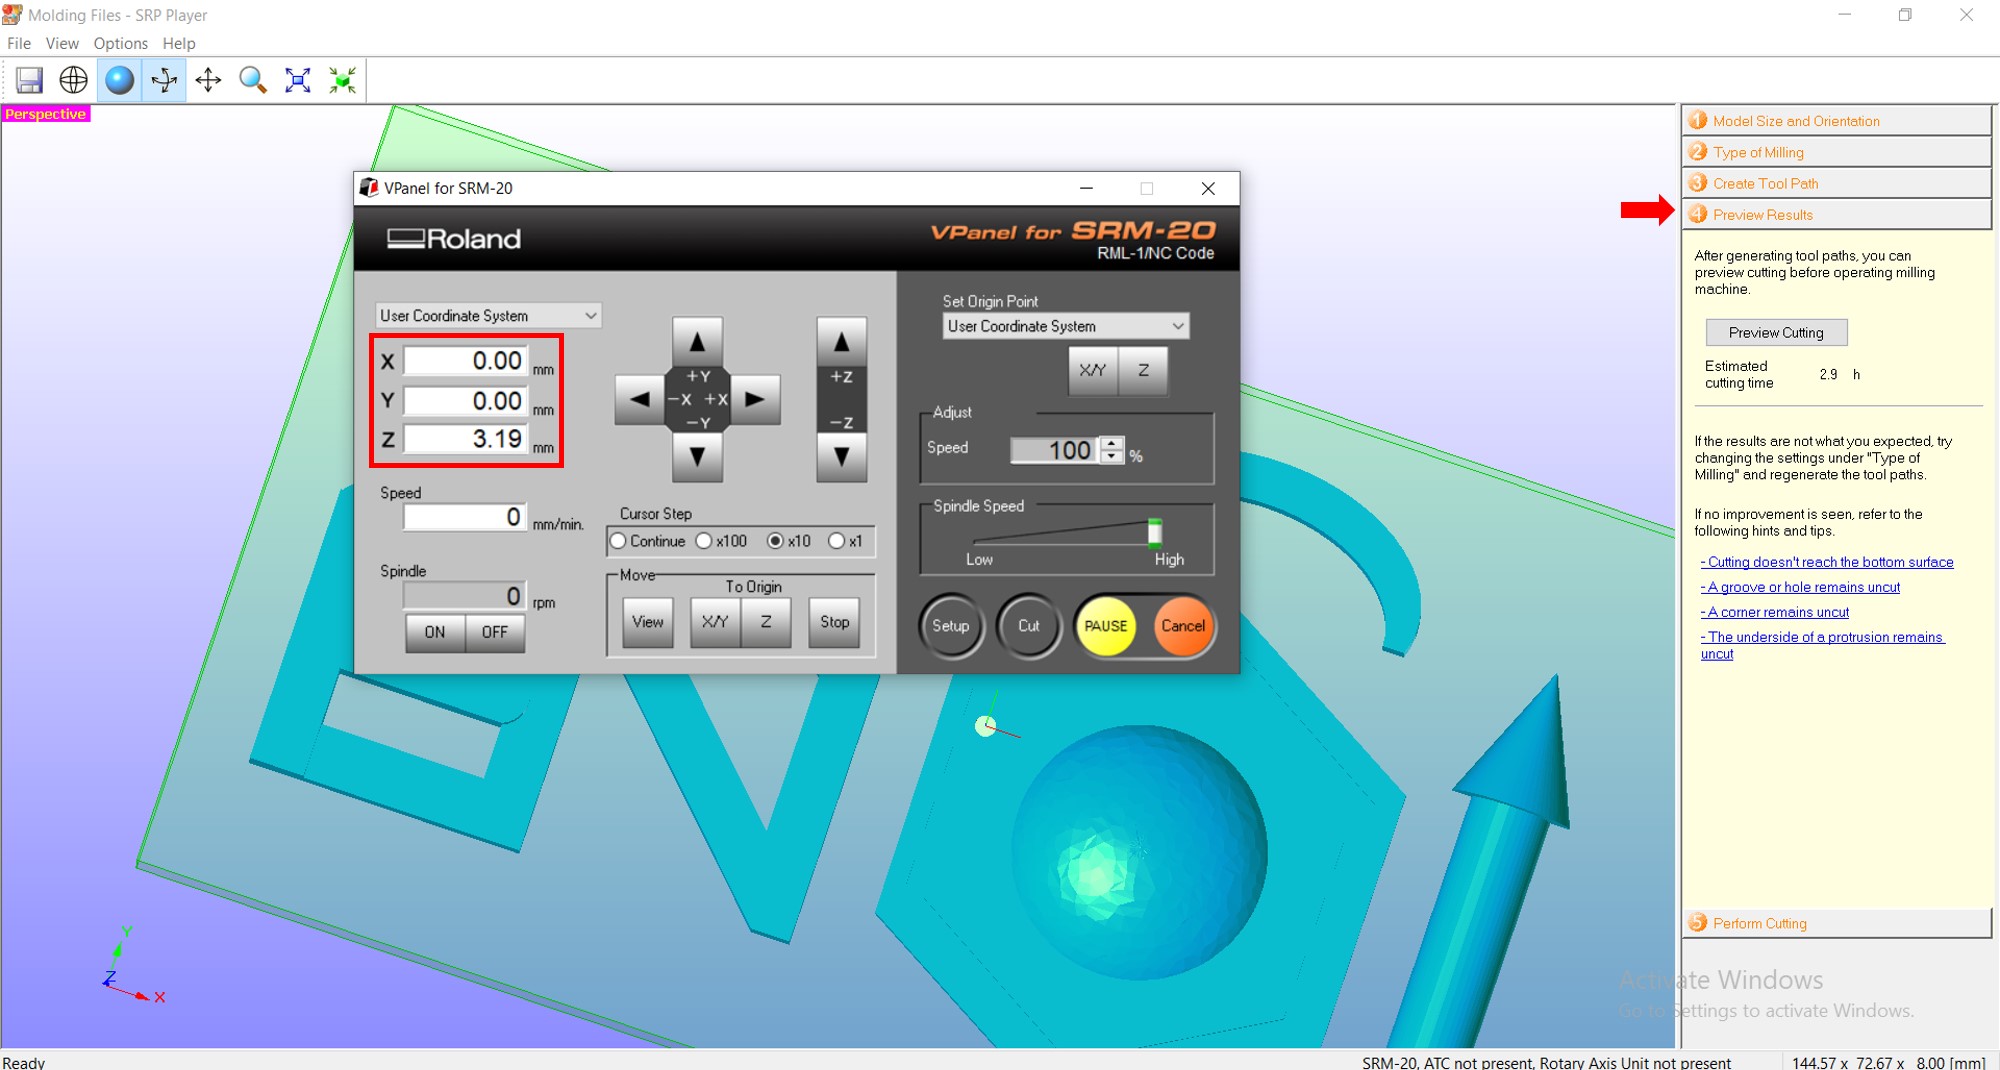
5) Perform Cutting
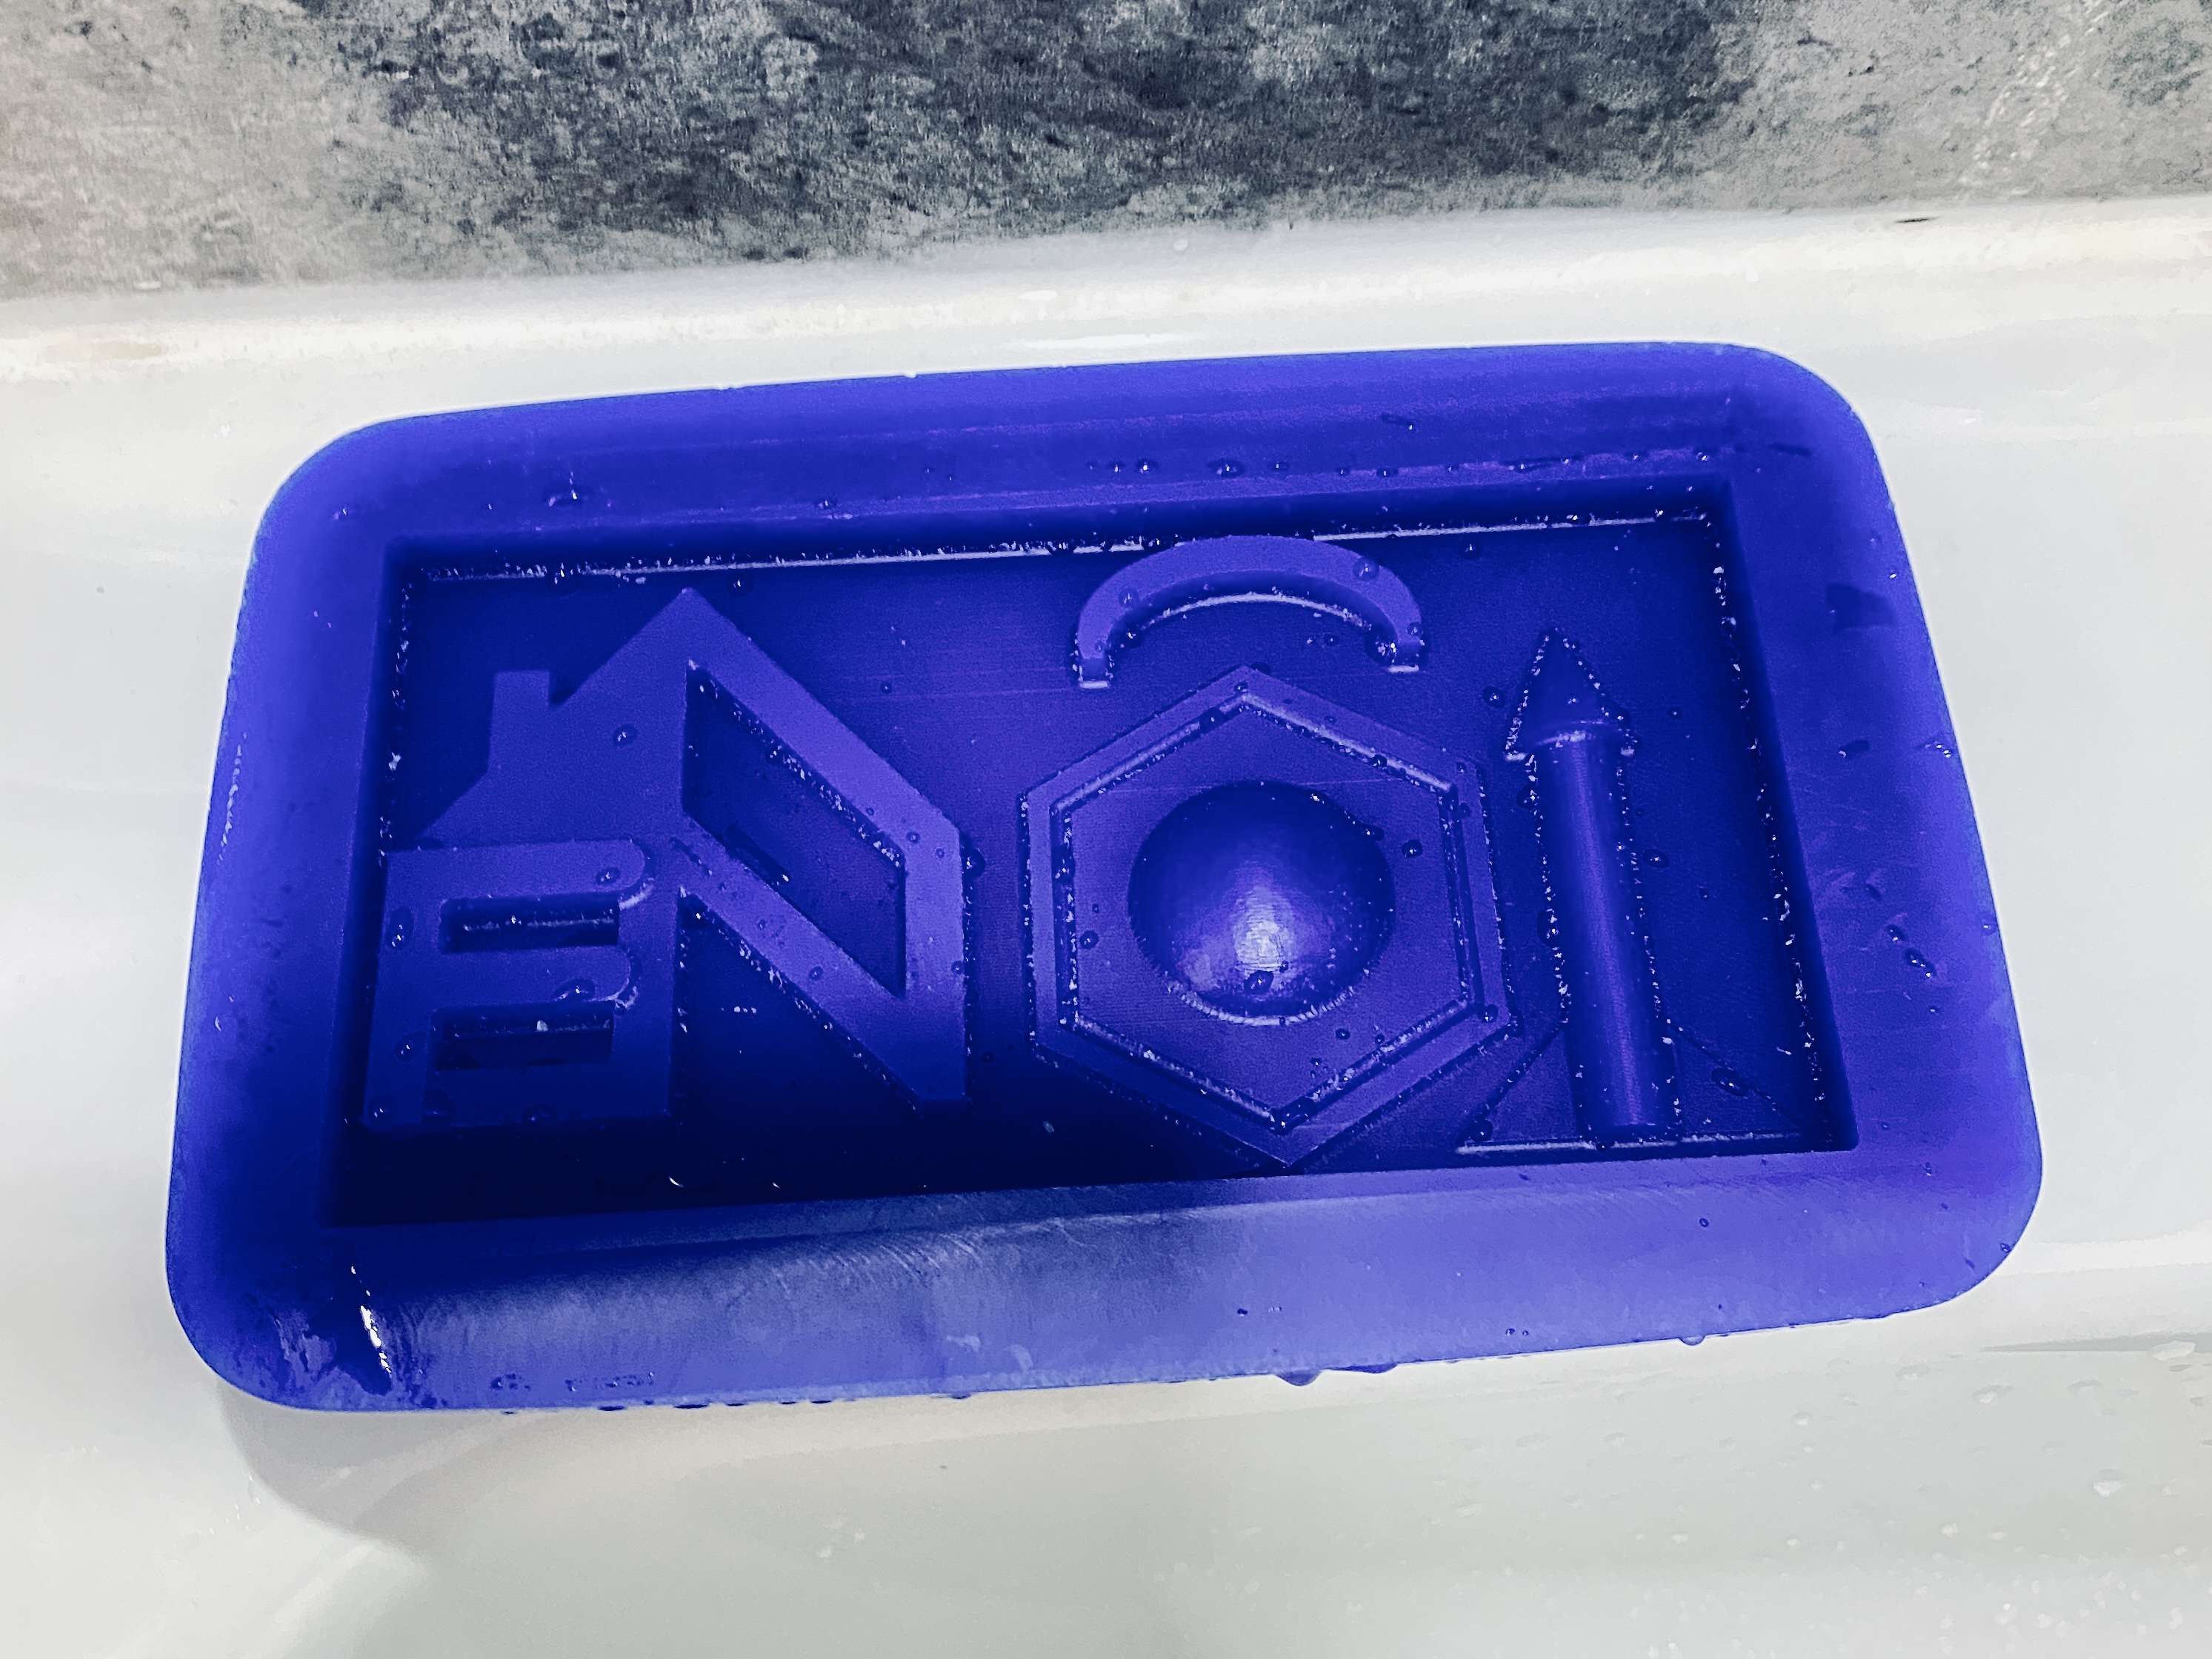
And this is the awesome result!
(This picture was taken while washing the object in order to get rid of the wax impurities)
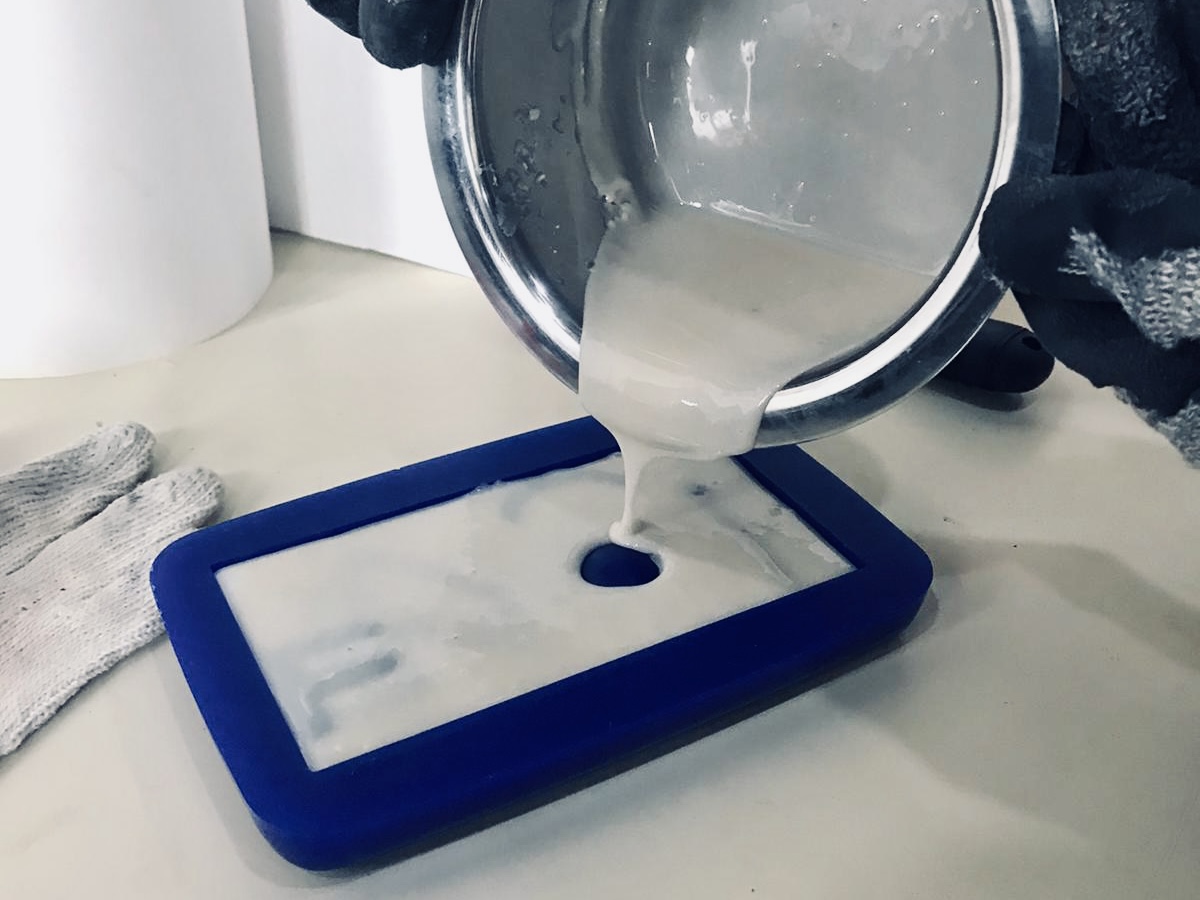
After that, we compared different mold materials and decided which one we will use. And as you can see, we cut the material into small cubes and put it in a pot on the hot plate.

We kept on moving the material using a wooden solid spoon until it became a liquid. Then, we poured it into the wax mold.
Notes:
-
Cutting the material into smaller cubes will make the process faster.
-
Immediately take away the pot from the hot plate once the material becomes liquid, as the boiling will cause the material to be burned and turn brown.
-
Make sure to pour the material quickly and carefully into the wax mold to avoid solidifying. If it happens you have to repeat the heating process again as we had to do.
Casting
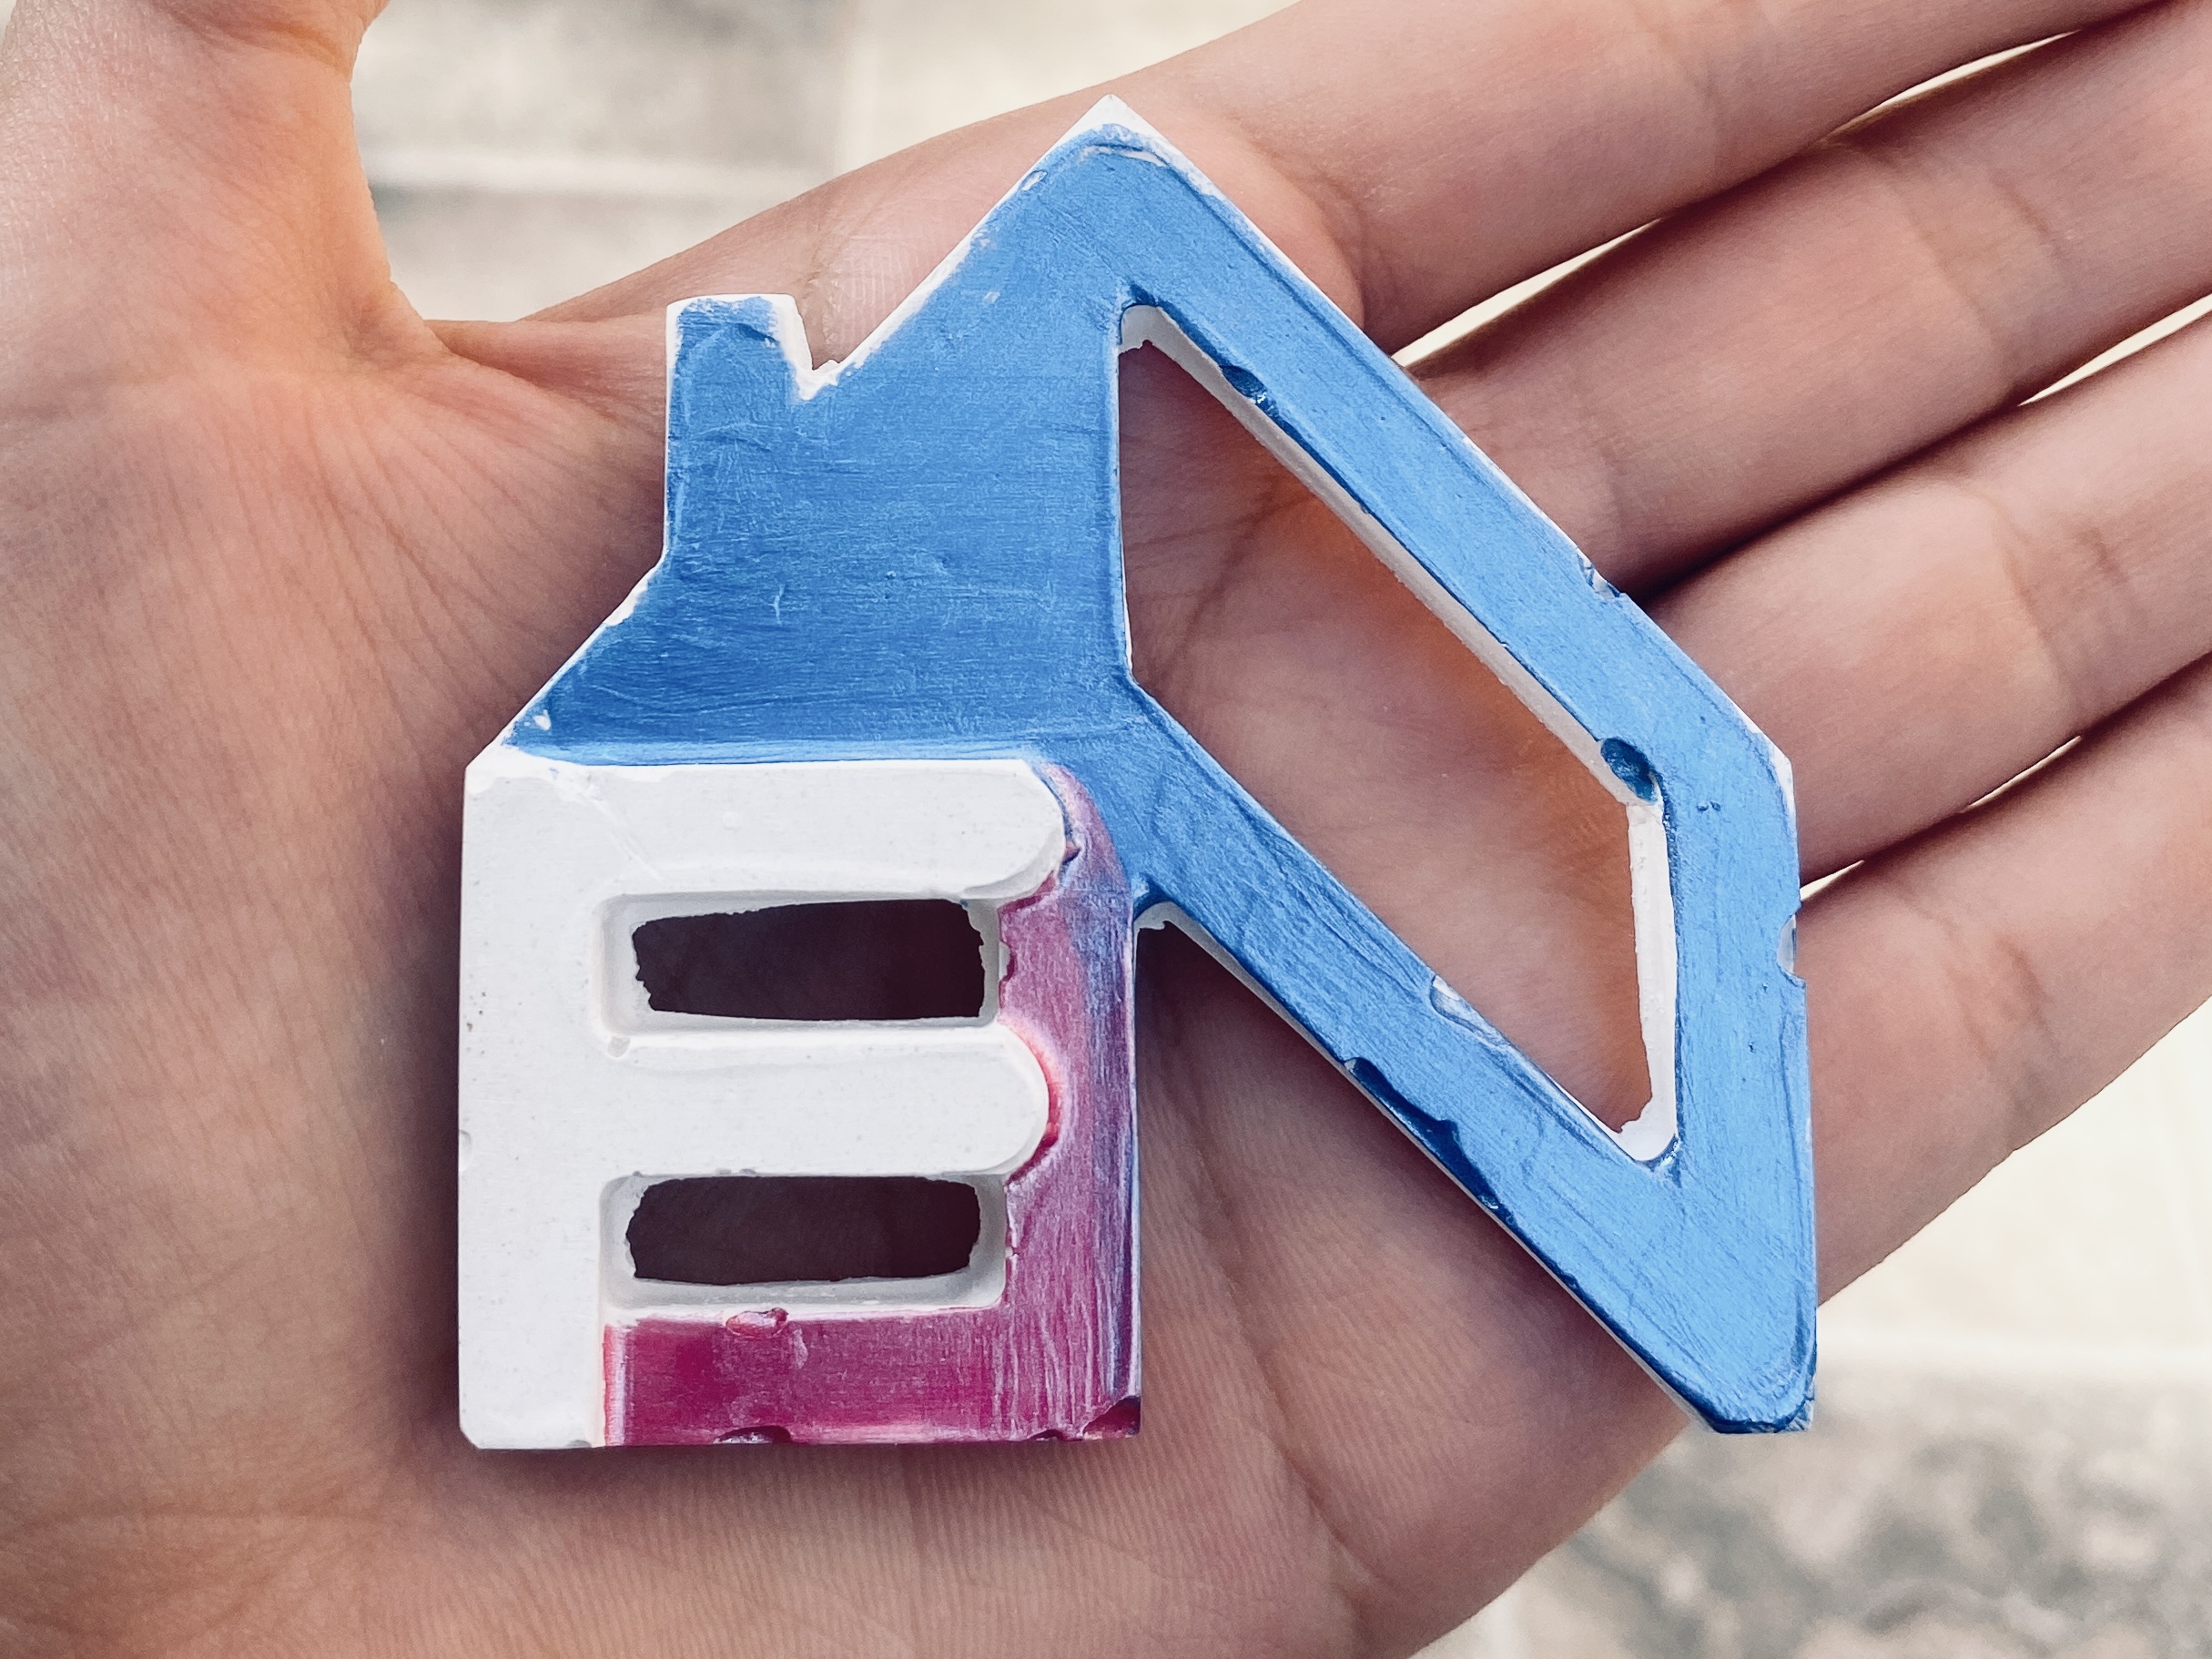
For casting, at first, I wanted to use resin. However, I noticed that all of my colleagues used resin so I decided to make something unique and I went with gypsum which allows me to paint the piece as well.
So, I prepared the gypsum mixture (refer back to the group assignment for more details) and poured it into the mold but unfortunately, it could not be poured efficiently because I kept on mixing the mixture for 5 minutes which cause it to be thick.
This is the outcome, and as you can see it is not clean and the gaps are filled.
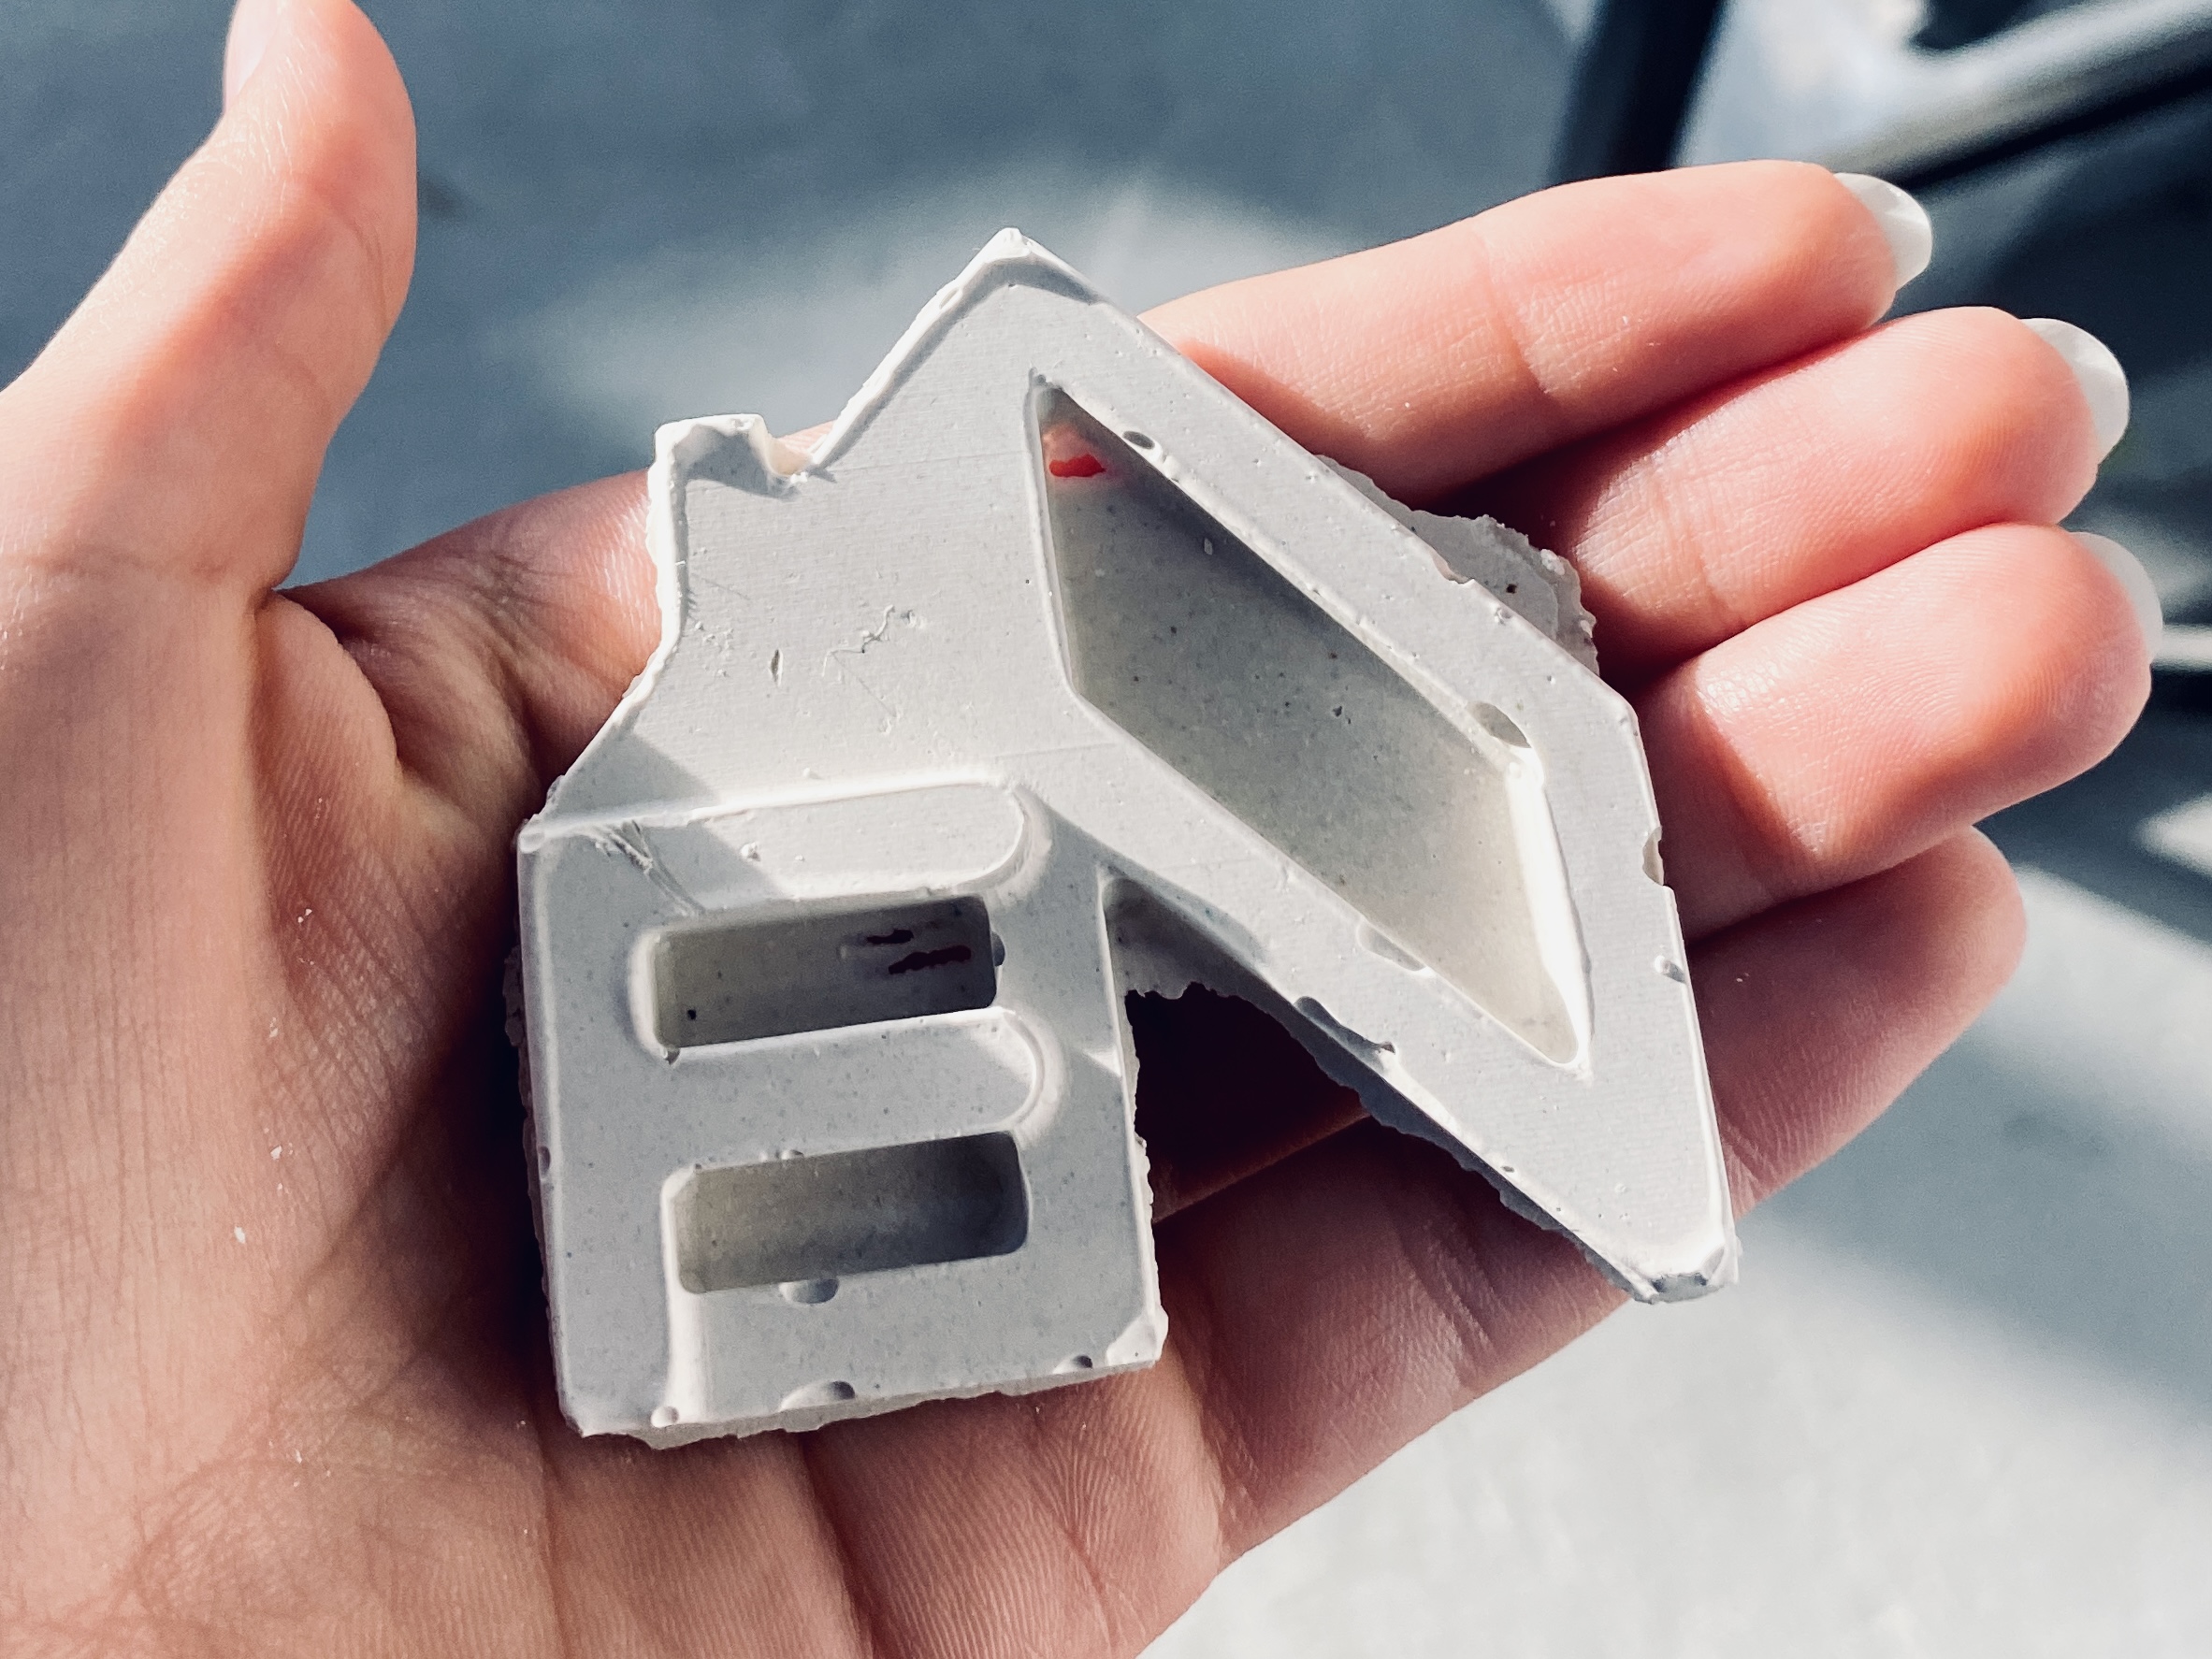
However, I removed the extra material using a cutter and I used it as a study model to experiment with the colors.

Final Result
This is the casting outcome after one day (24 hours).
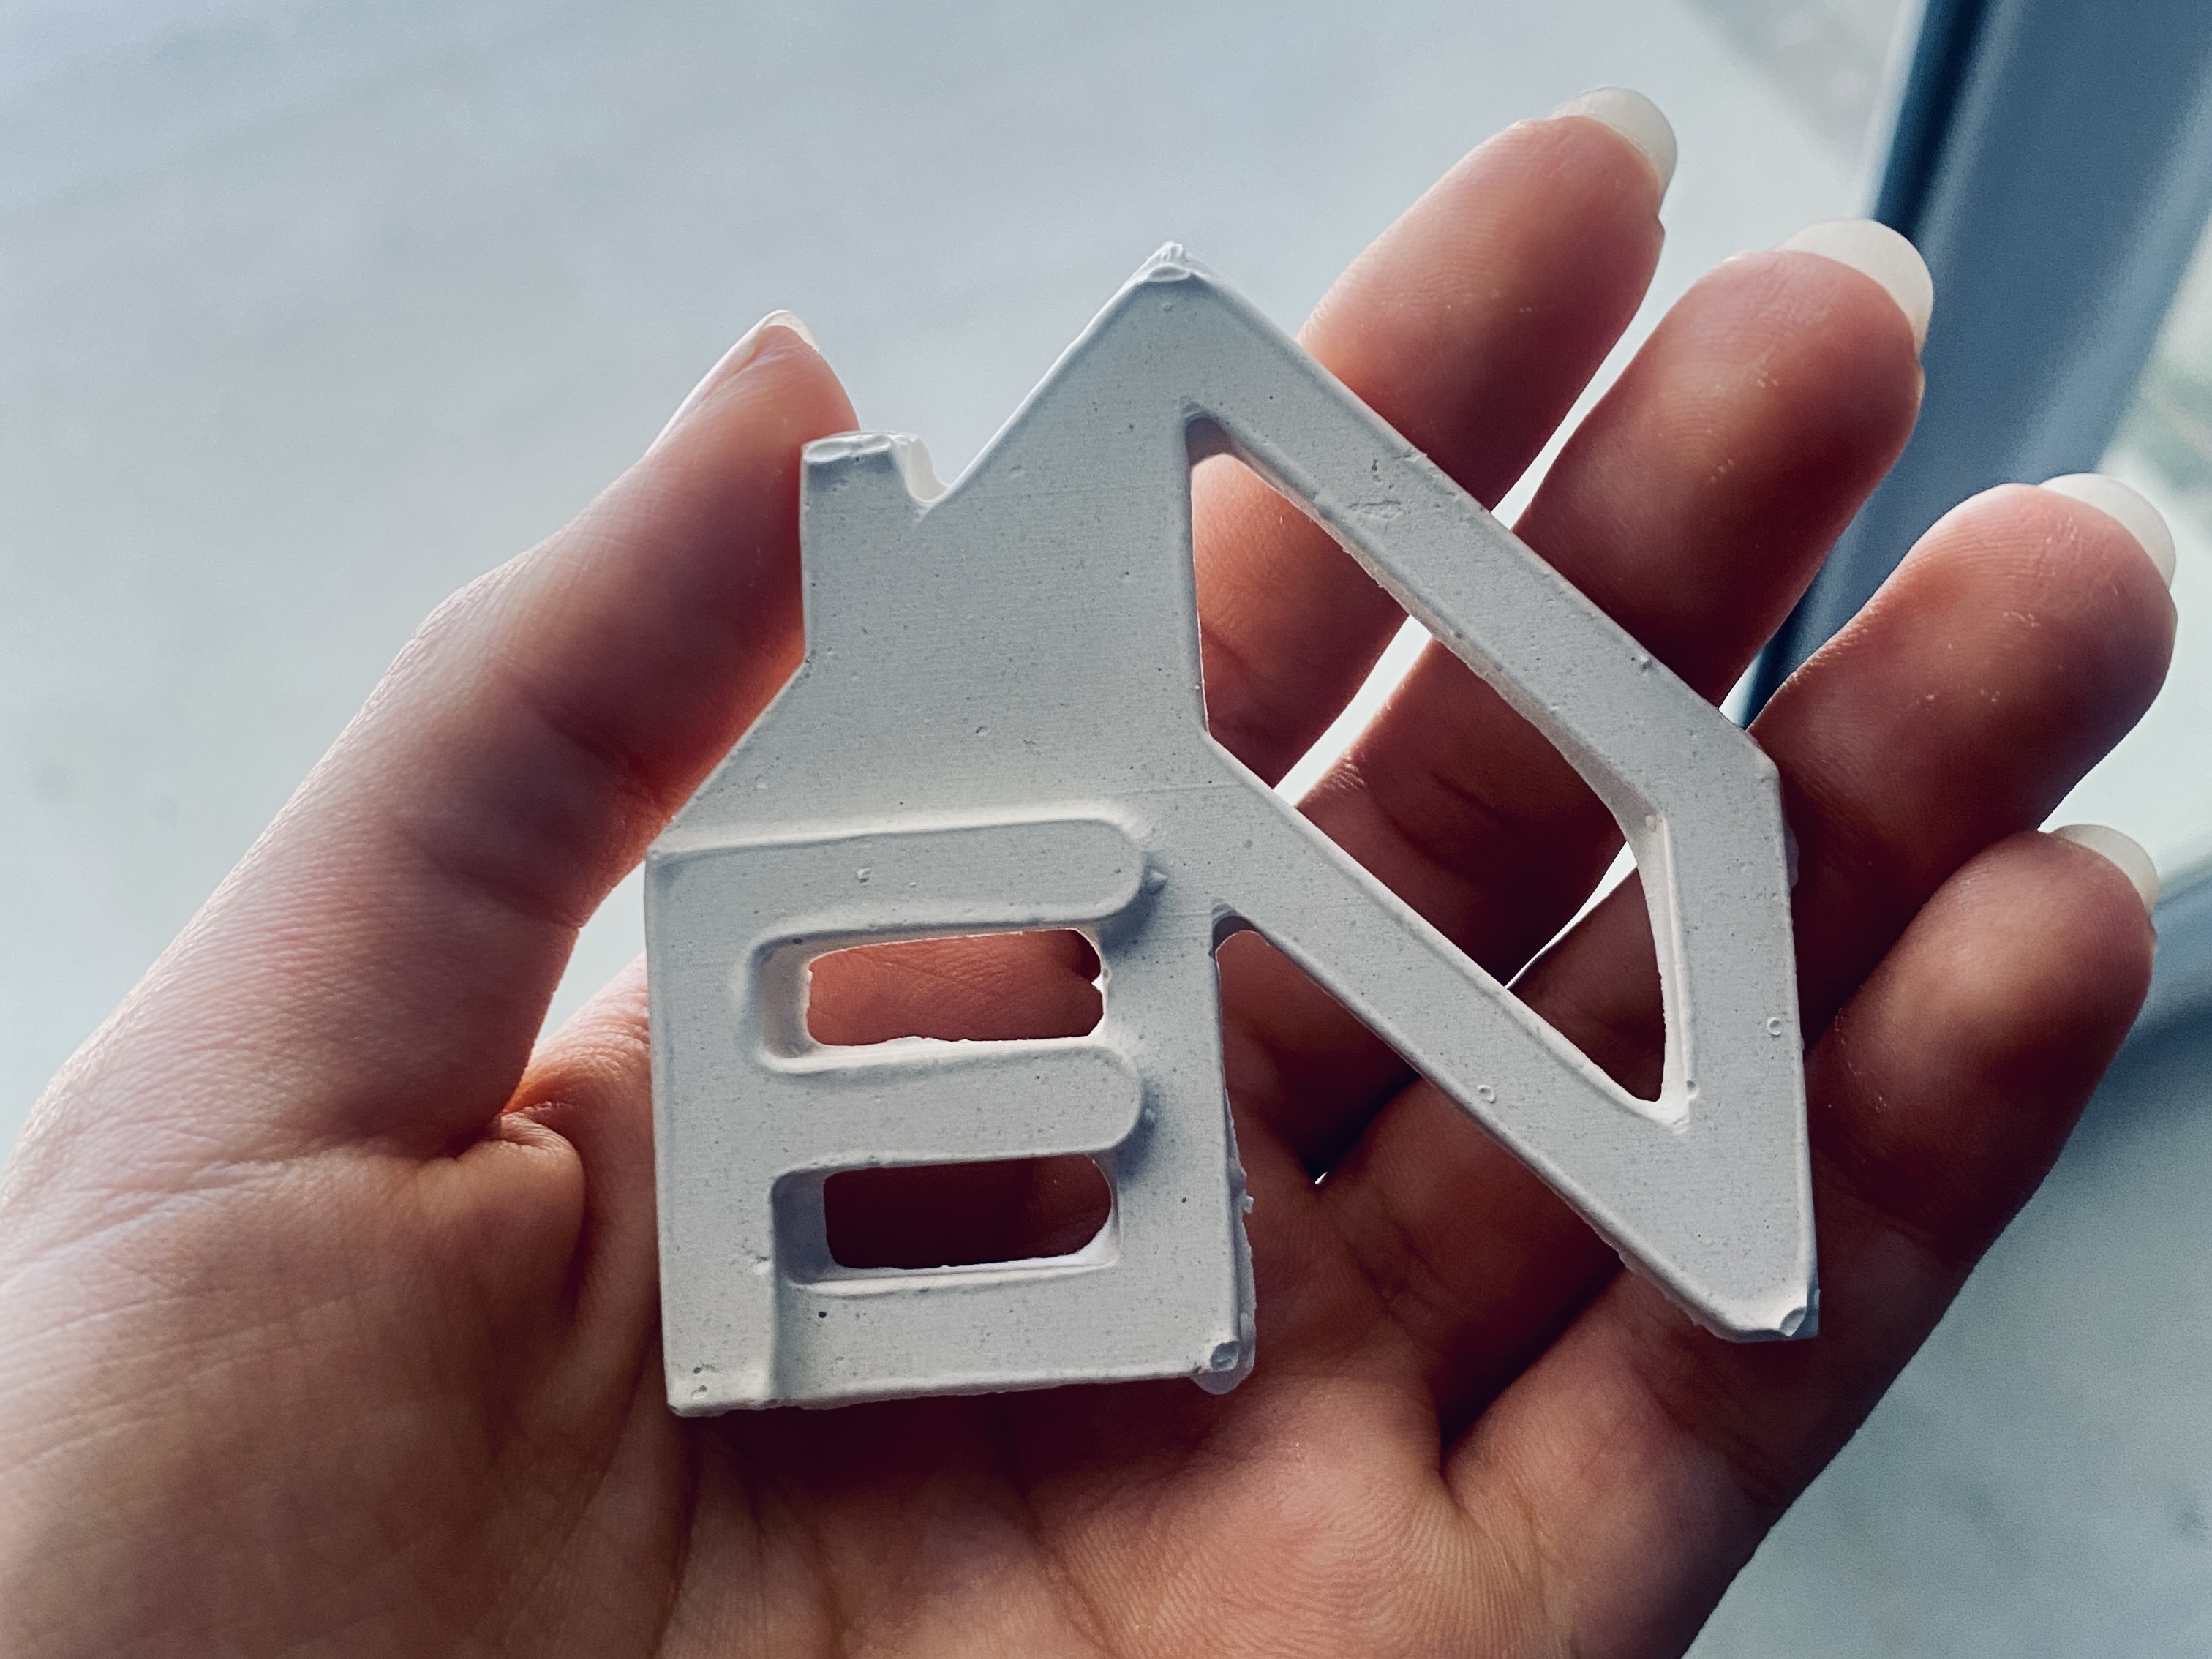
Firstly, I used sanding paper to smooth the surface, and unfortunately during the process, the object was broken. I used glue to stick it.

Secondly, I paint the object off-white.
Thirdly, I stick small magnets on the back side of the object using super glue.
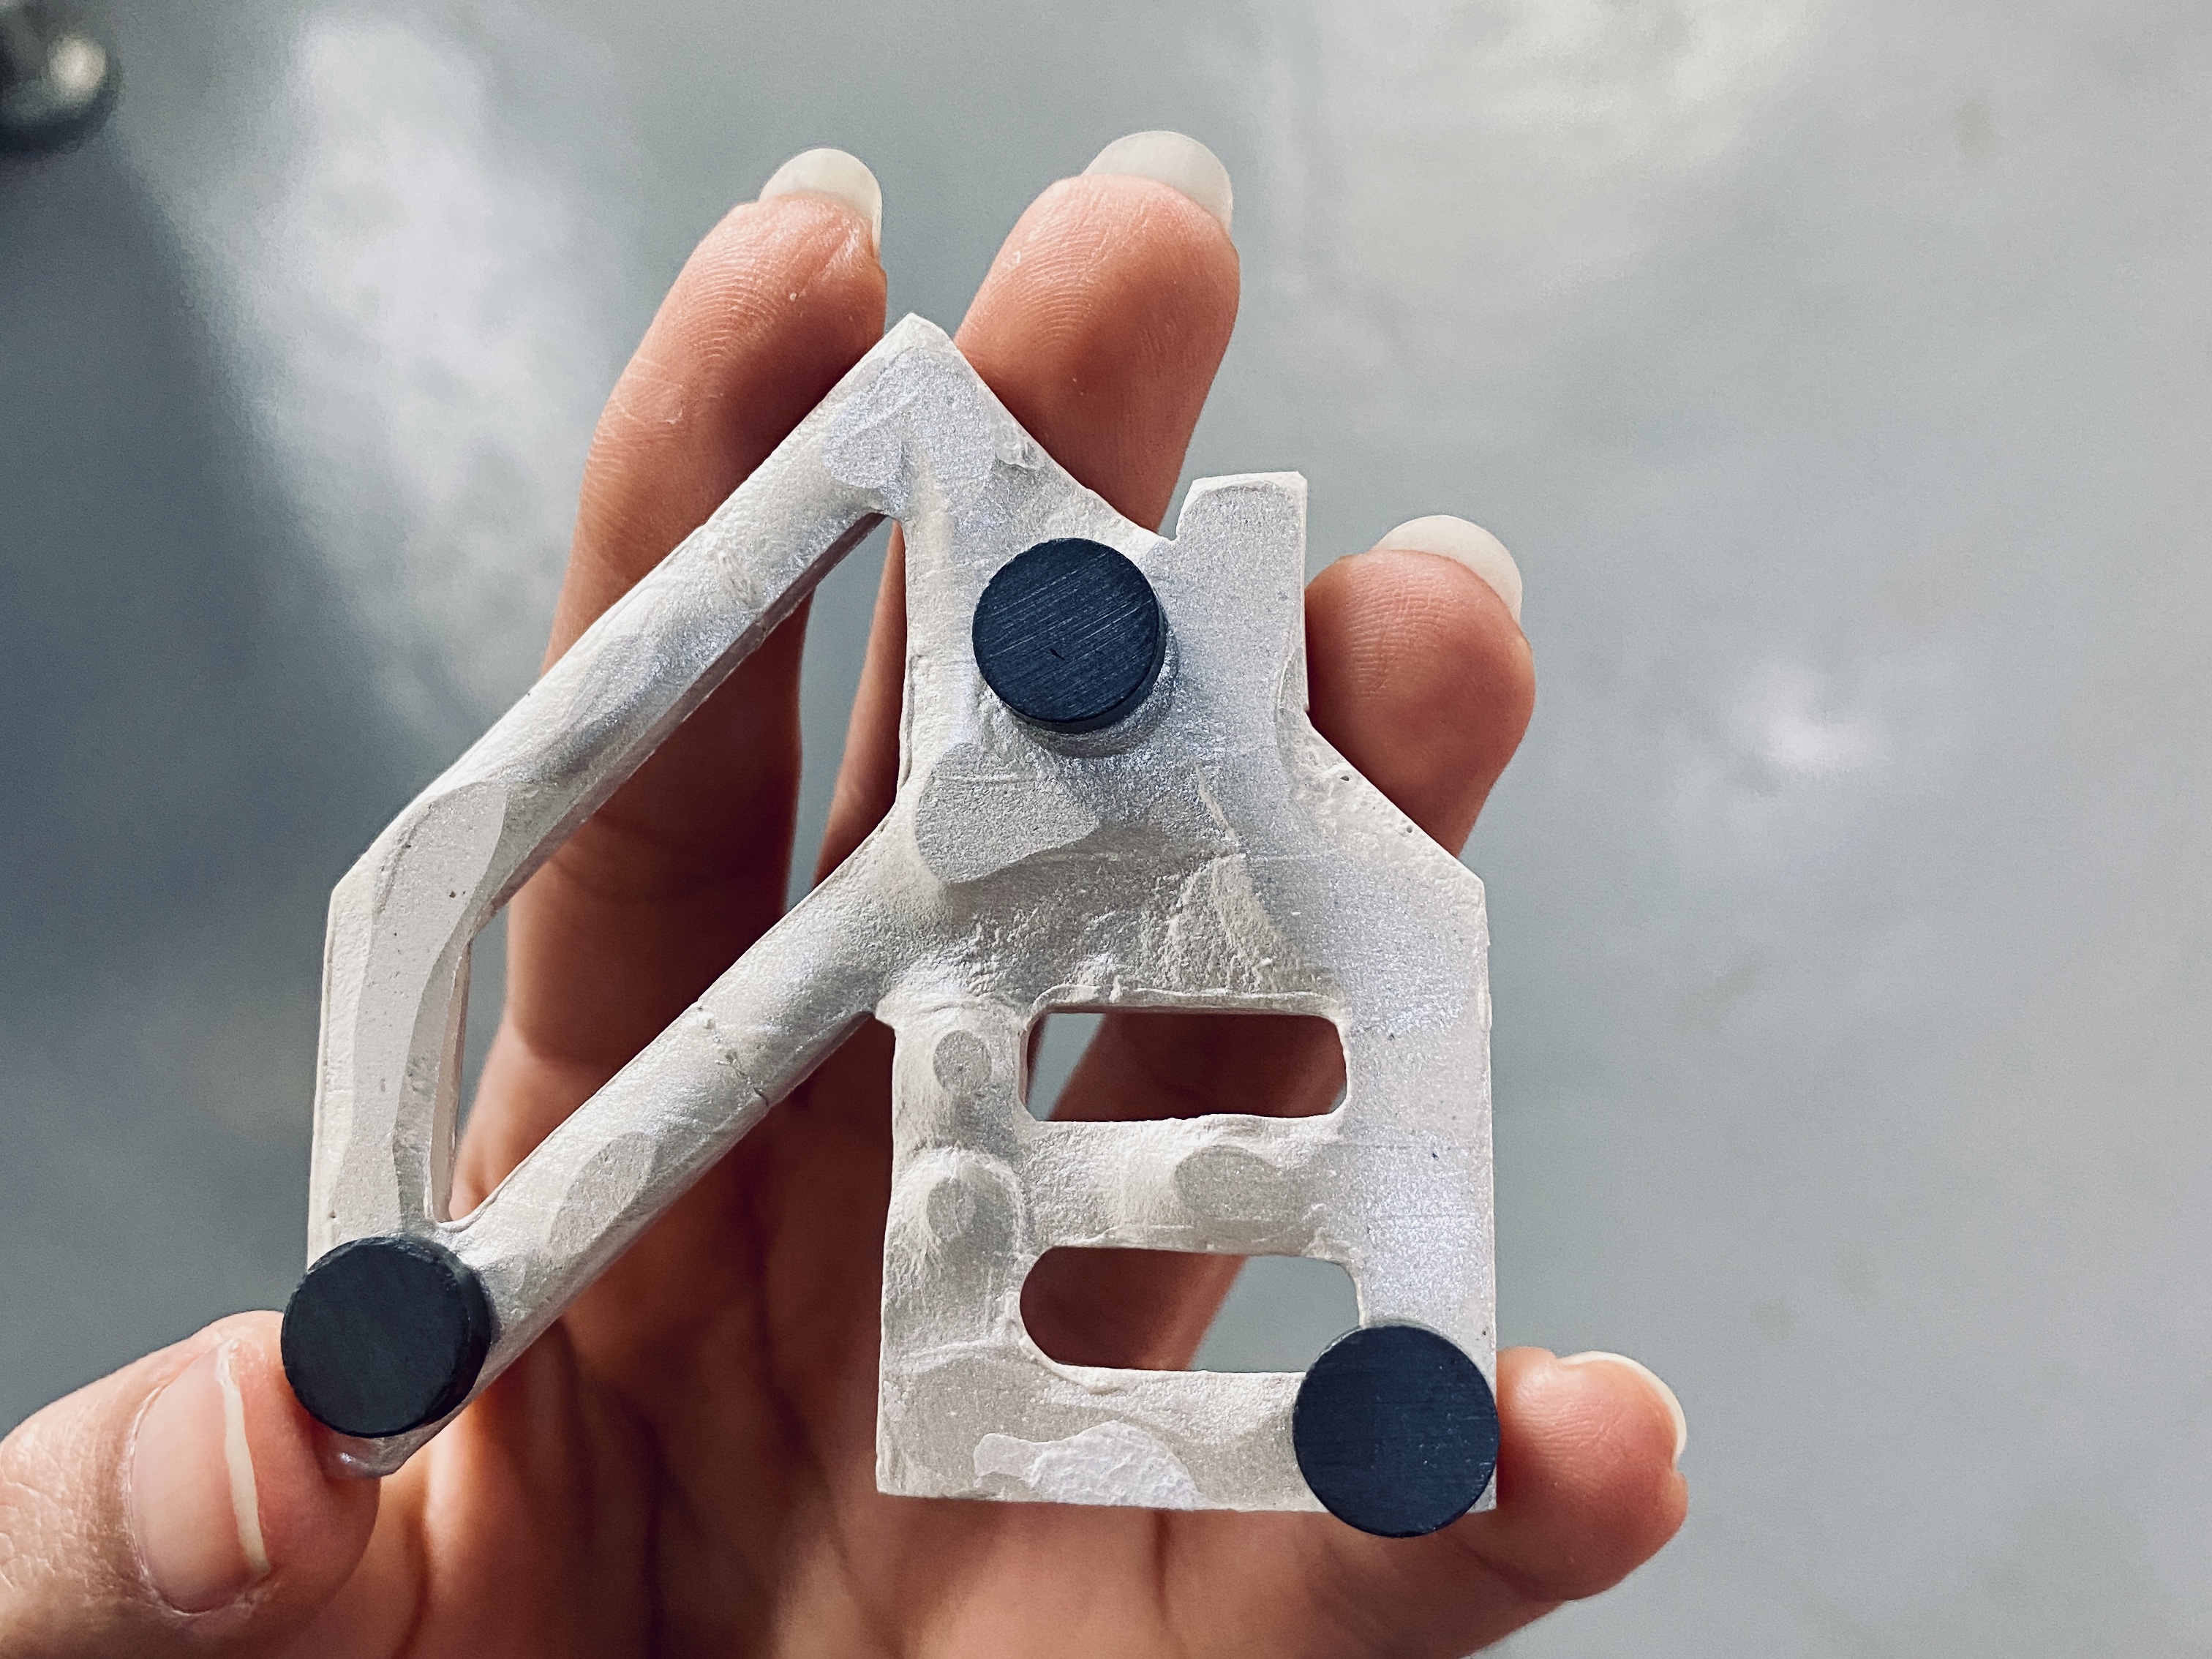
Finally, I hung it on a whiteboard in the Fab Lab Academy!

Personal Opinion
I really enjoyed this week. It was filled with experiments and it reminds me of science labs by some means.
References
DesignMore, P.R.R. (n.d.). Mold Making & Casting Basics. [online] Instructables. Available at: Click Here [Accessed 27 Jun. 2022].