6. Large format CNC (computer controlled Machining)

In this assignment, I have designed a CAD model and used the large format CNC milling machine to cut it using wood material.
What is a CNC machine?
A CNC machine is a machine that is controlled via a computer numerical control, meaning that it gives the machine input data such as CAD designs and tool paths and the machine corresponds to this data and gives feedback to the computer.
Types of CNC machine processes
A CNC machine is an umbrella term for many types of machining processes, some of these processes are:
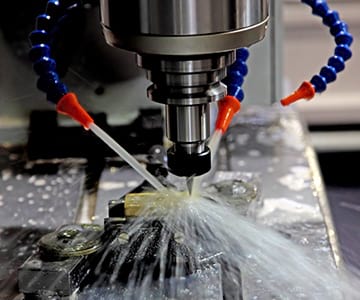
- Milling: Milling process is when a clamped workpiece is milled by a rotating cutting tool, it is used to remove material from the surface of the workpiece, or to drill holes, grooves.
This procces is achieved by using a milling machine
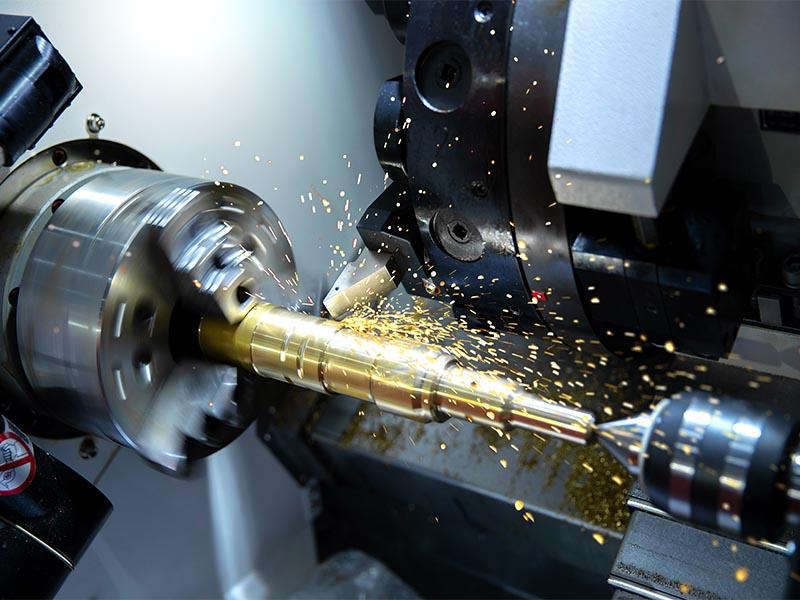
- Turning: Turning process is when a rotating round workpiece is cut to shorten the diameter of the workpiece or to chamfer the edges and to thread the worpiece.
Here you will find the other types of turning operations
This process is achieved by using a lathe machine.
Types of material to cut
A Milling machine can cut materials ranging from wood to aluminium, but in Fab Lab Bahrain we use two types of wood material:
-
MDF: 11 mm in thickness
-
Plywood: 12 mm in thickness
Group Assignment
Check out Ayman’s documentation for our group assignment, it contains all the safety steps, tool path selection steps, feed rate and speed settings.
Individual Assignment
The objective is to design, mill and assemble something big to be donated for a children charity using wood material.
Design
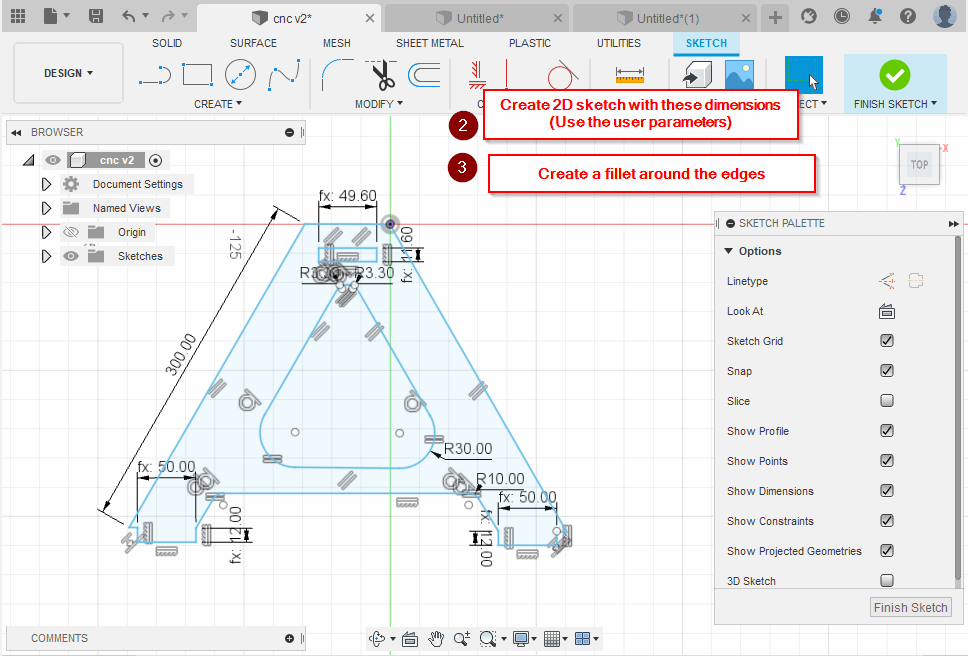
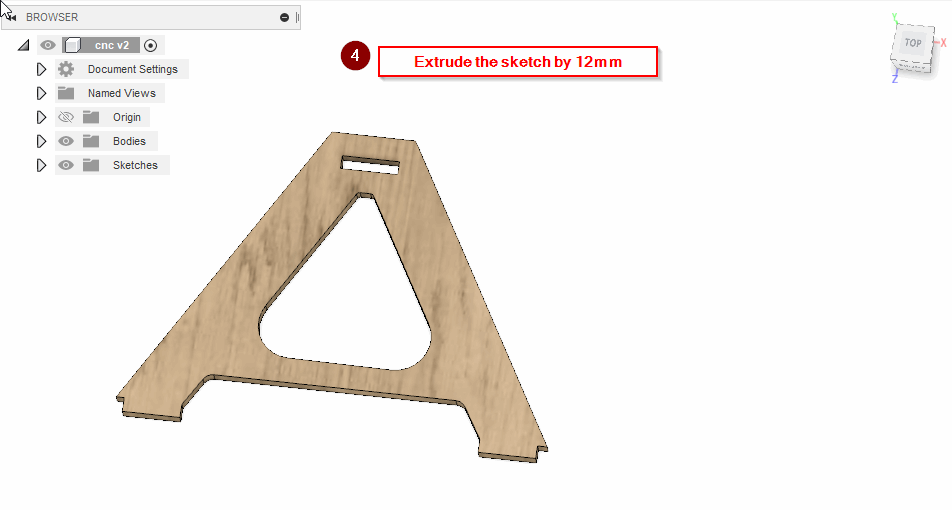
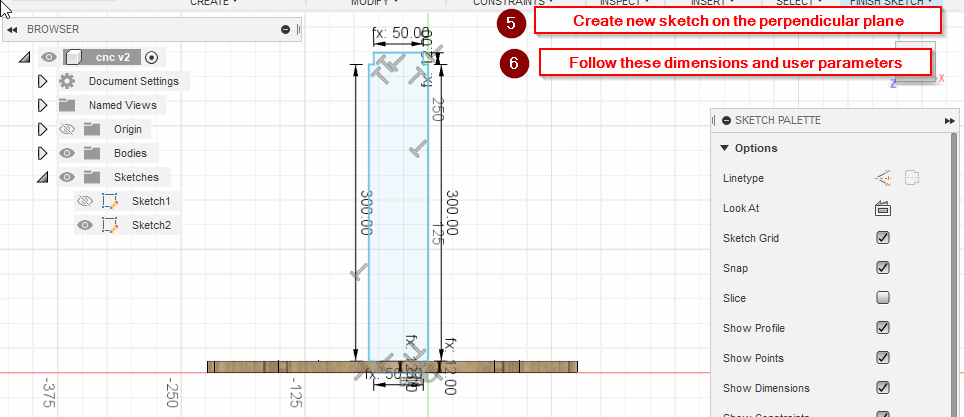
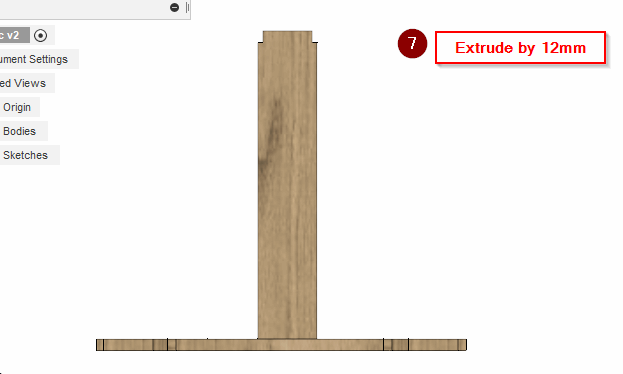
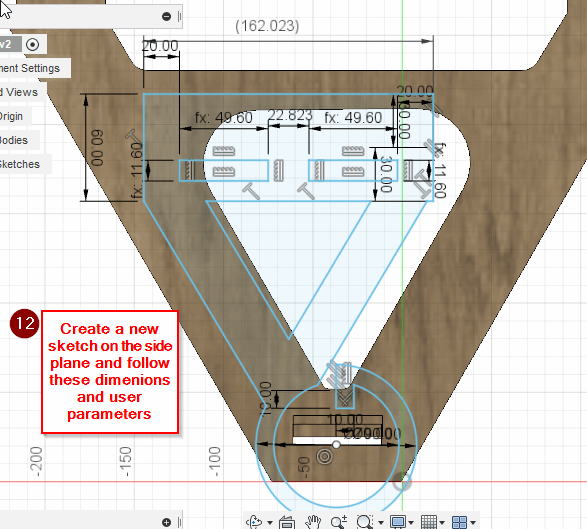
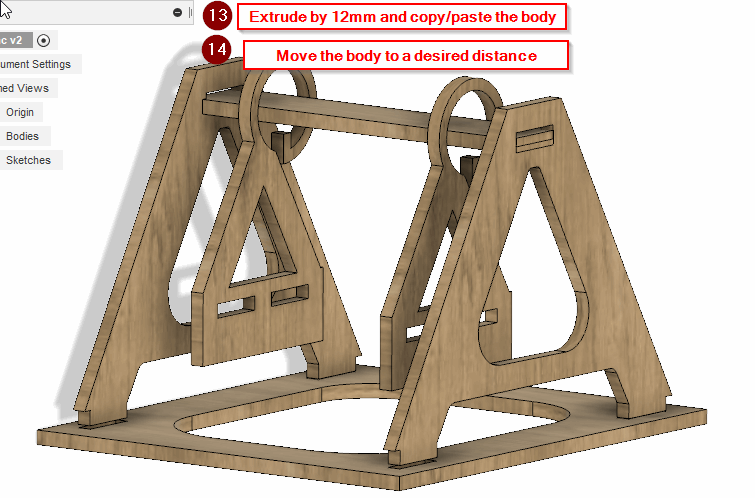
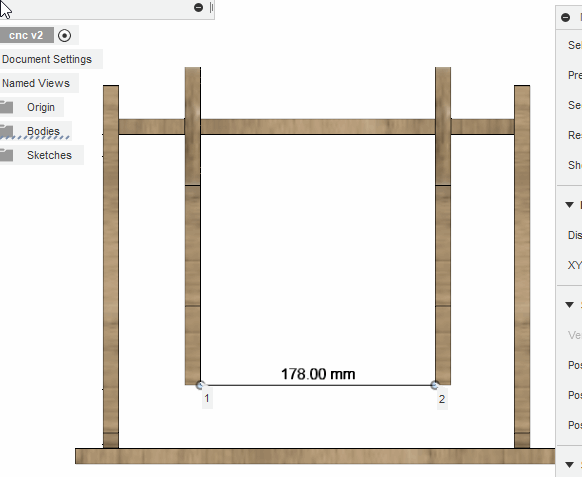
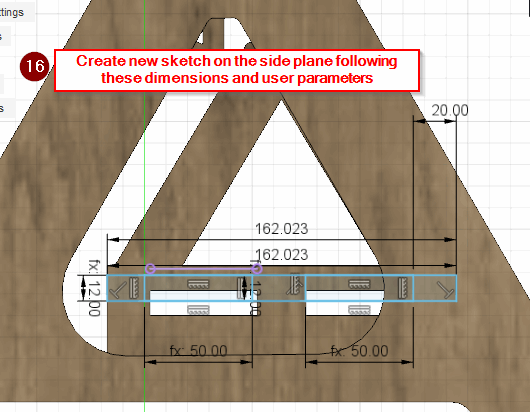
Using Fusion 360, I have designed a children swing inspired by this design and I have added my own tweaks.
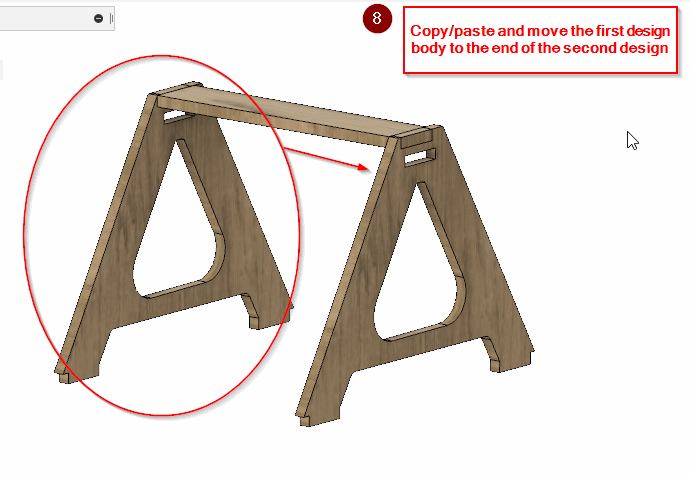
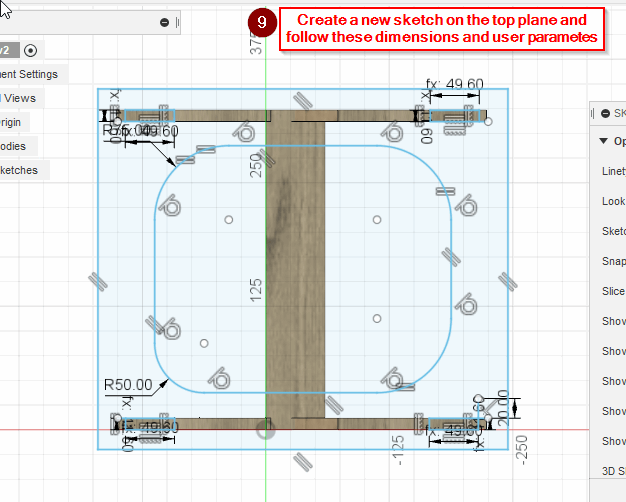
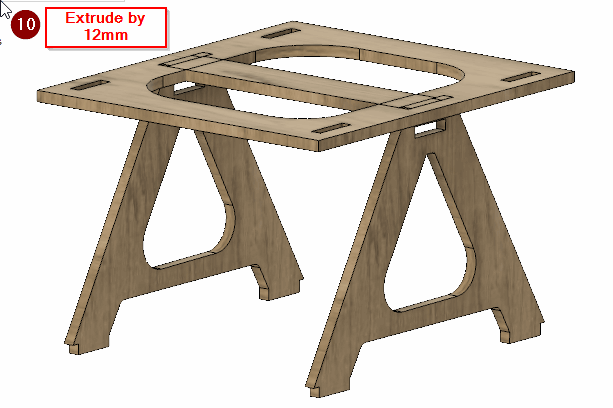
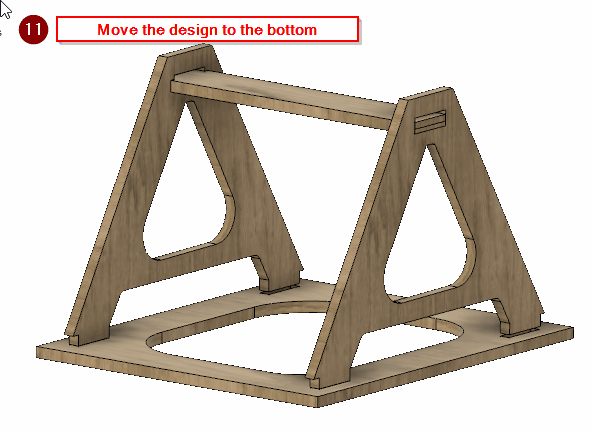
- Steps to design
- Original file
Mill
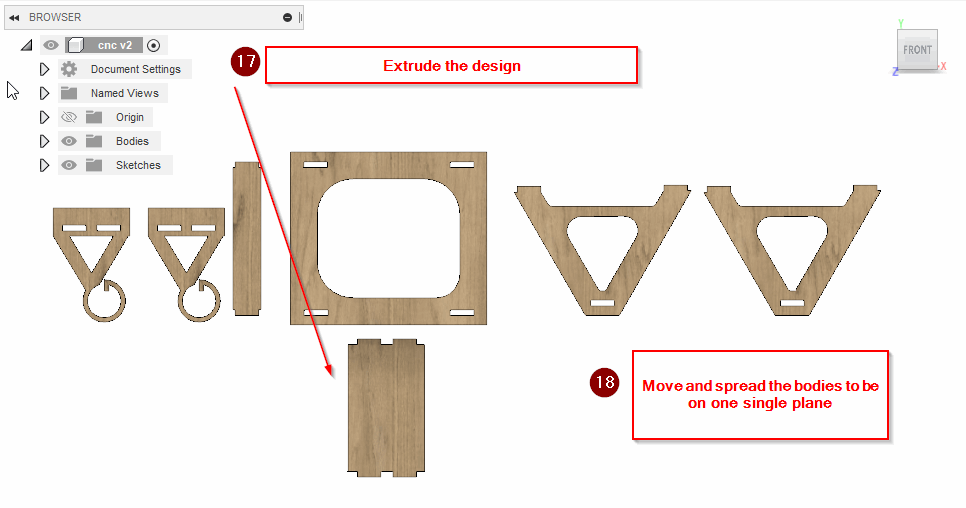
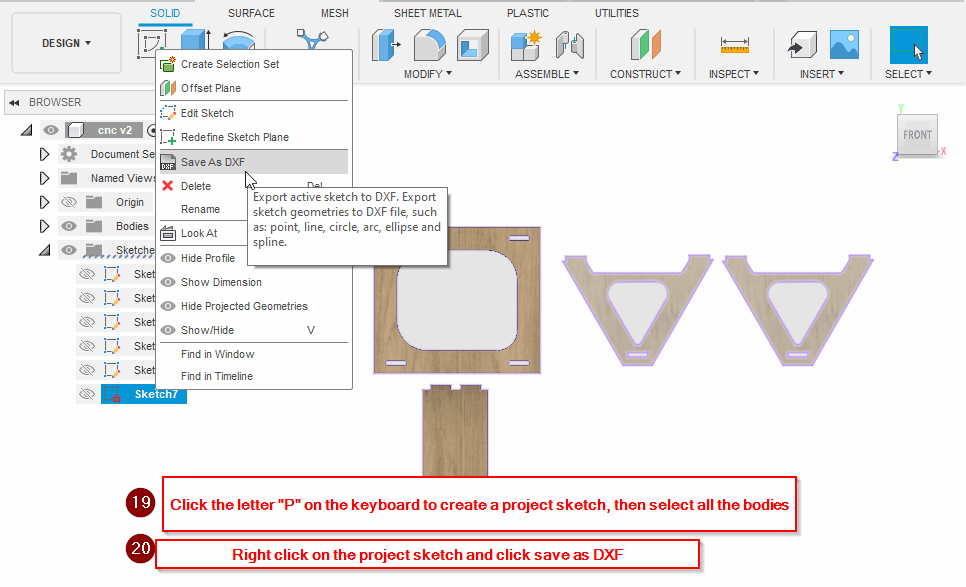
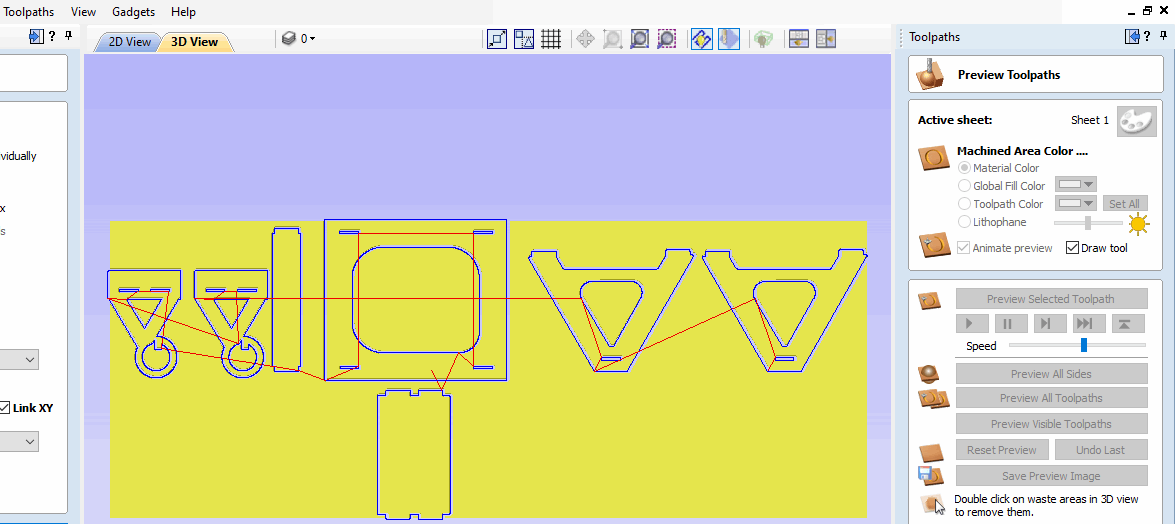
After designing and exporting the design as dxf, I have opened it in Vcarve software to prepare it for milling.
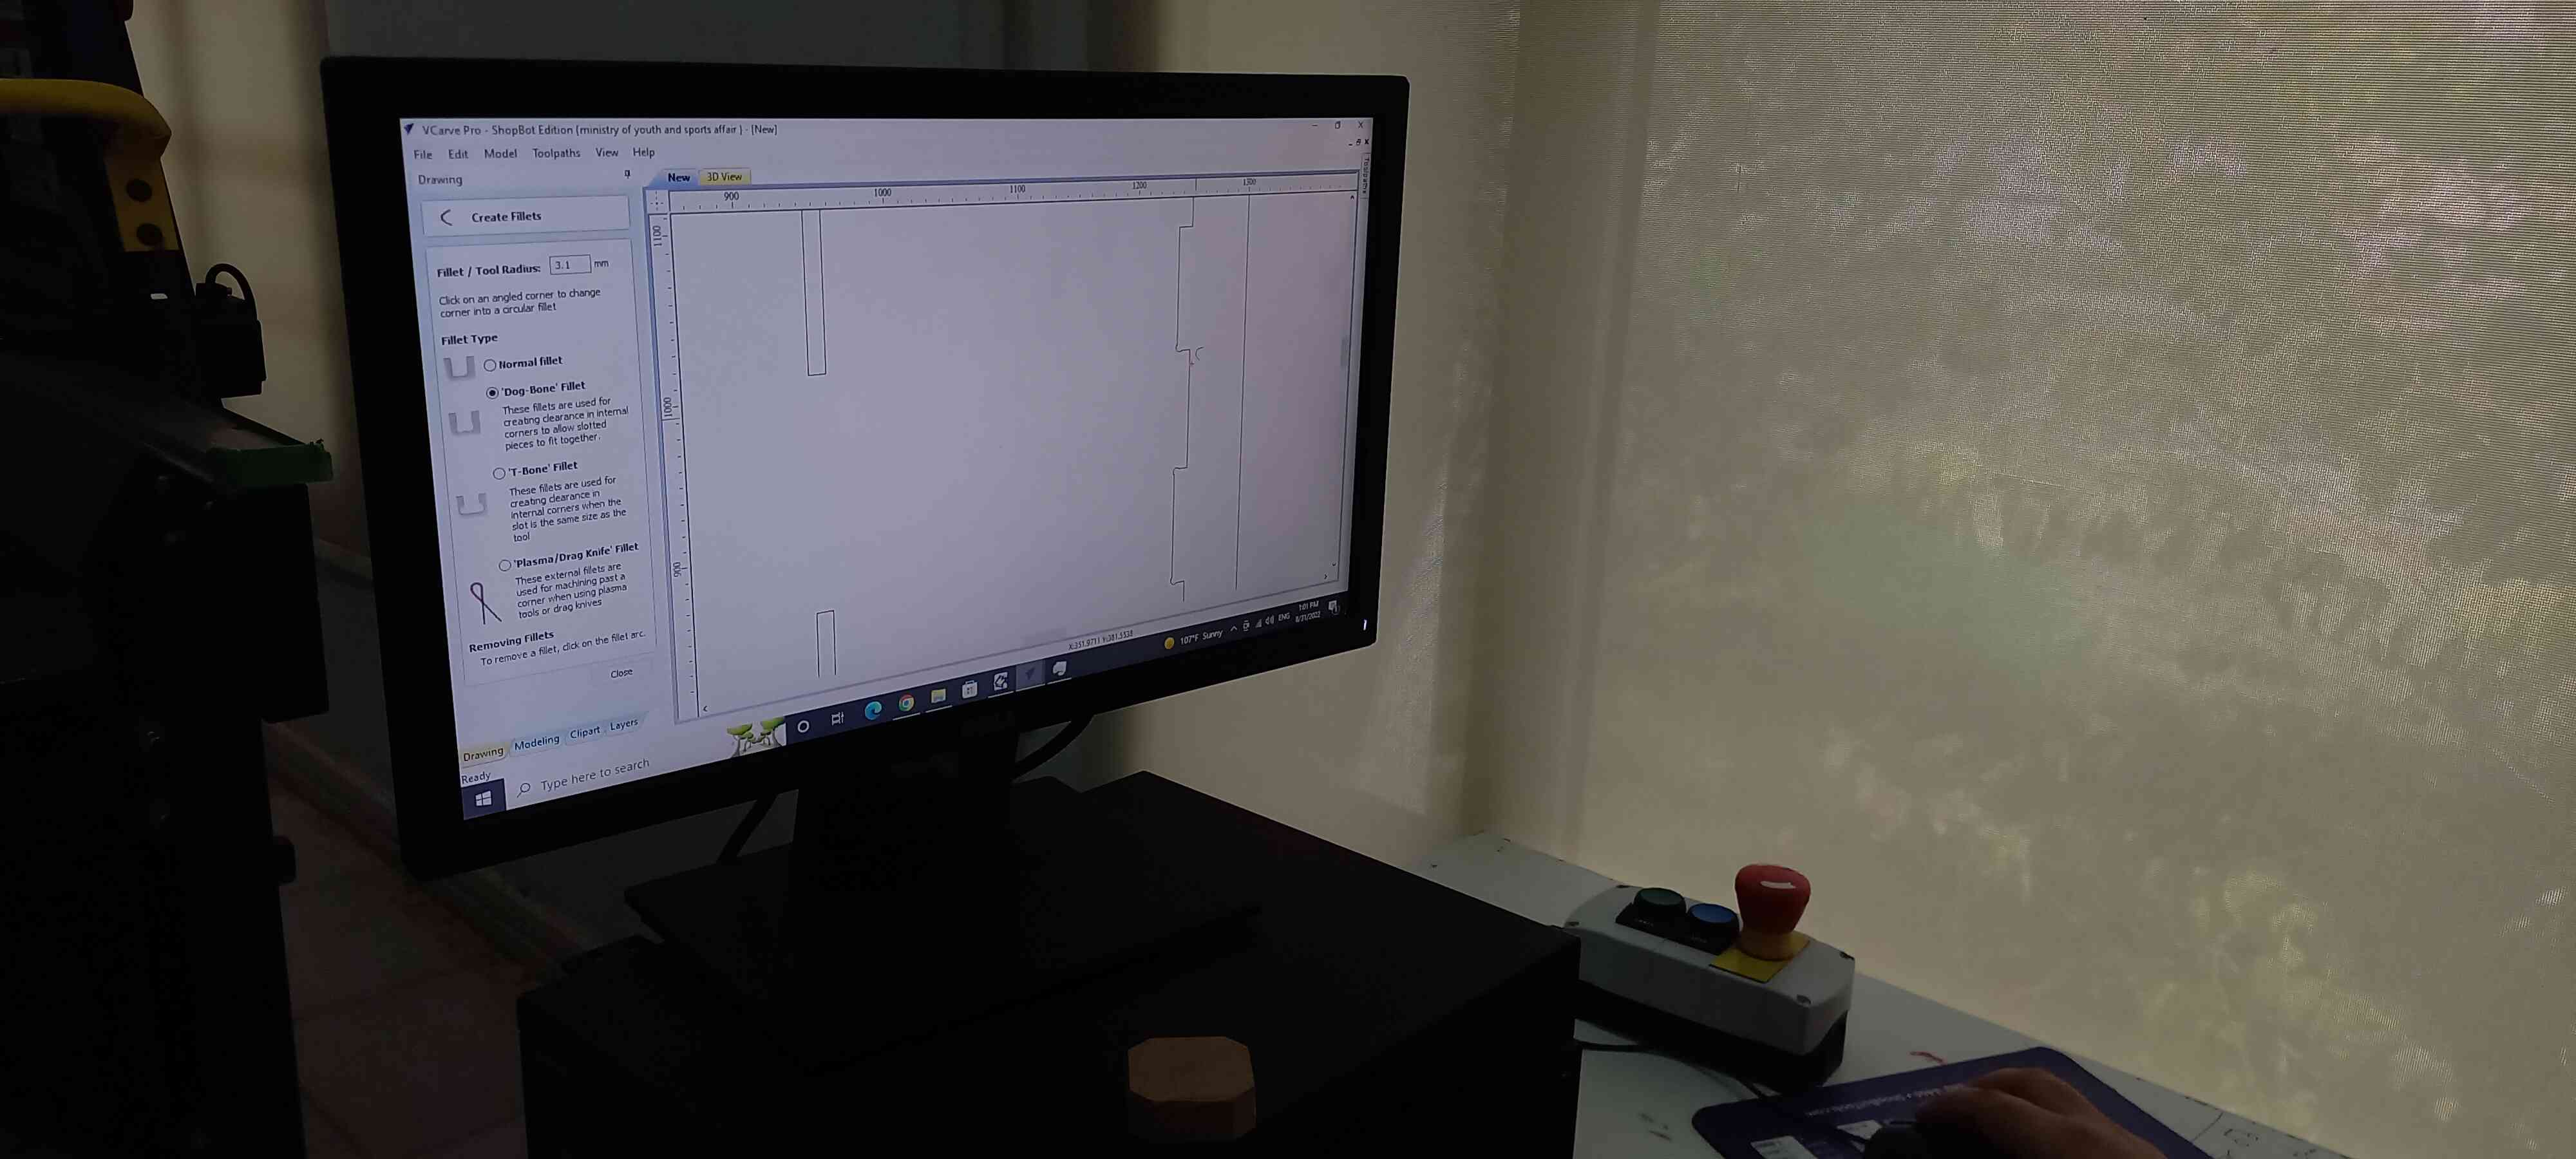
Step 1: Add dog bone to the joints
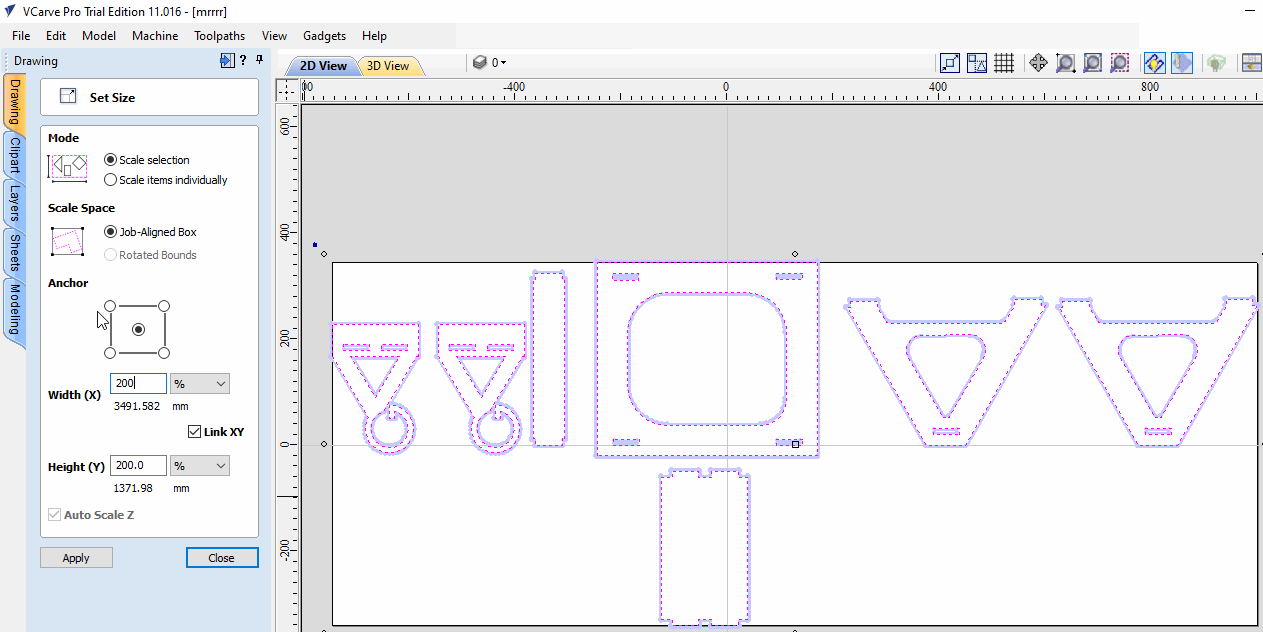
Step 2: I have scaled up the design by 200%
Step 3: Review tool path
Note: For detailed Vcarve, feed rate, speed and tool path selection steps please check out our group assignment.
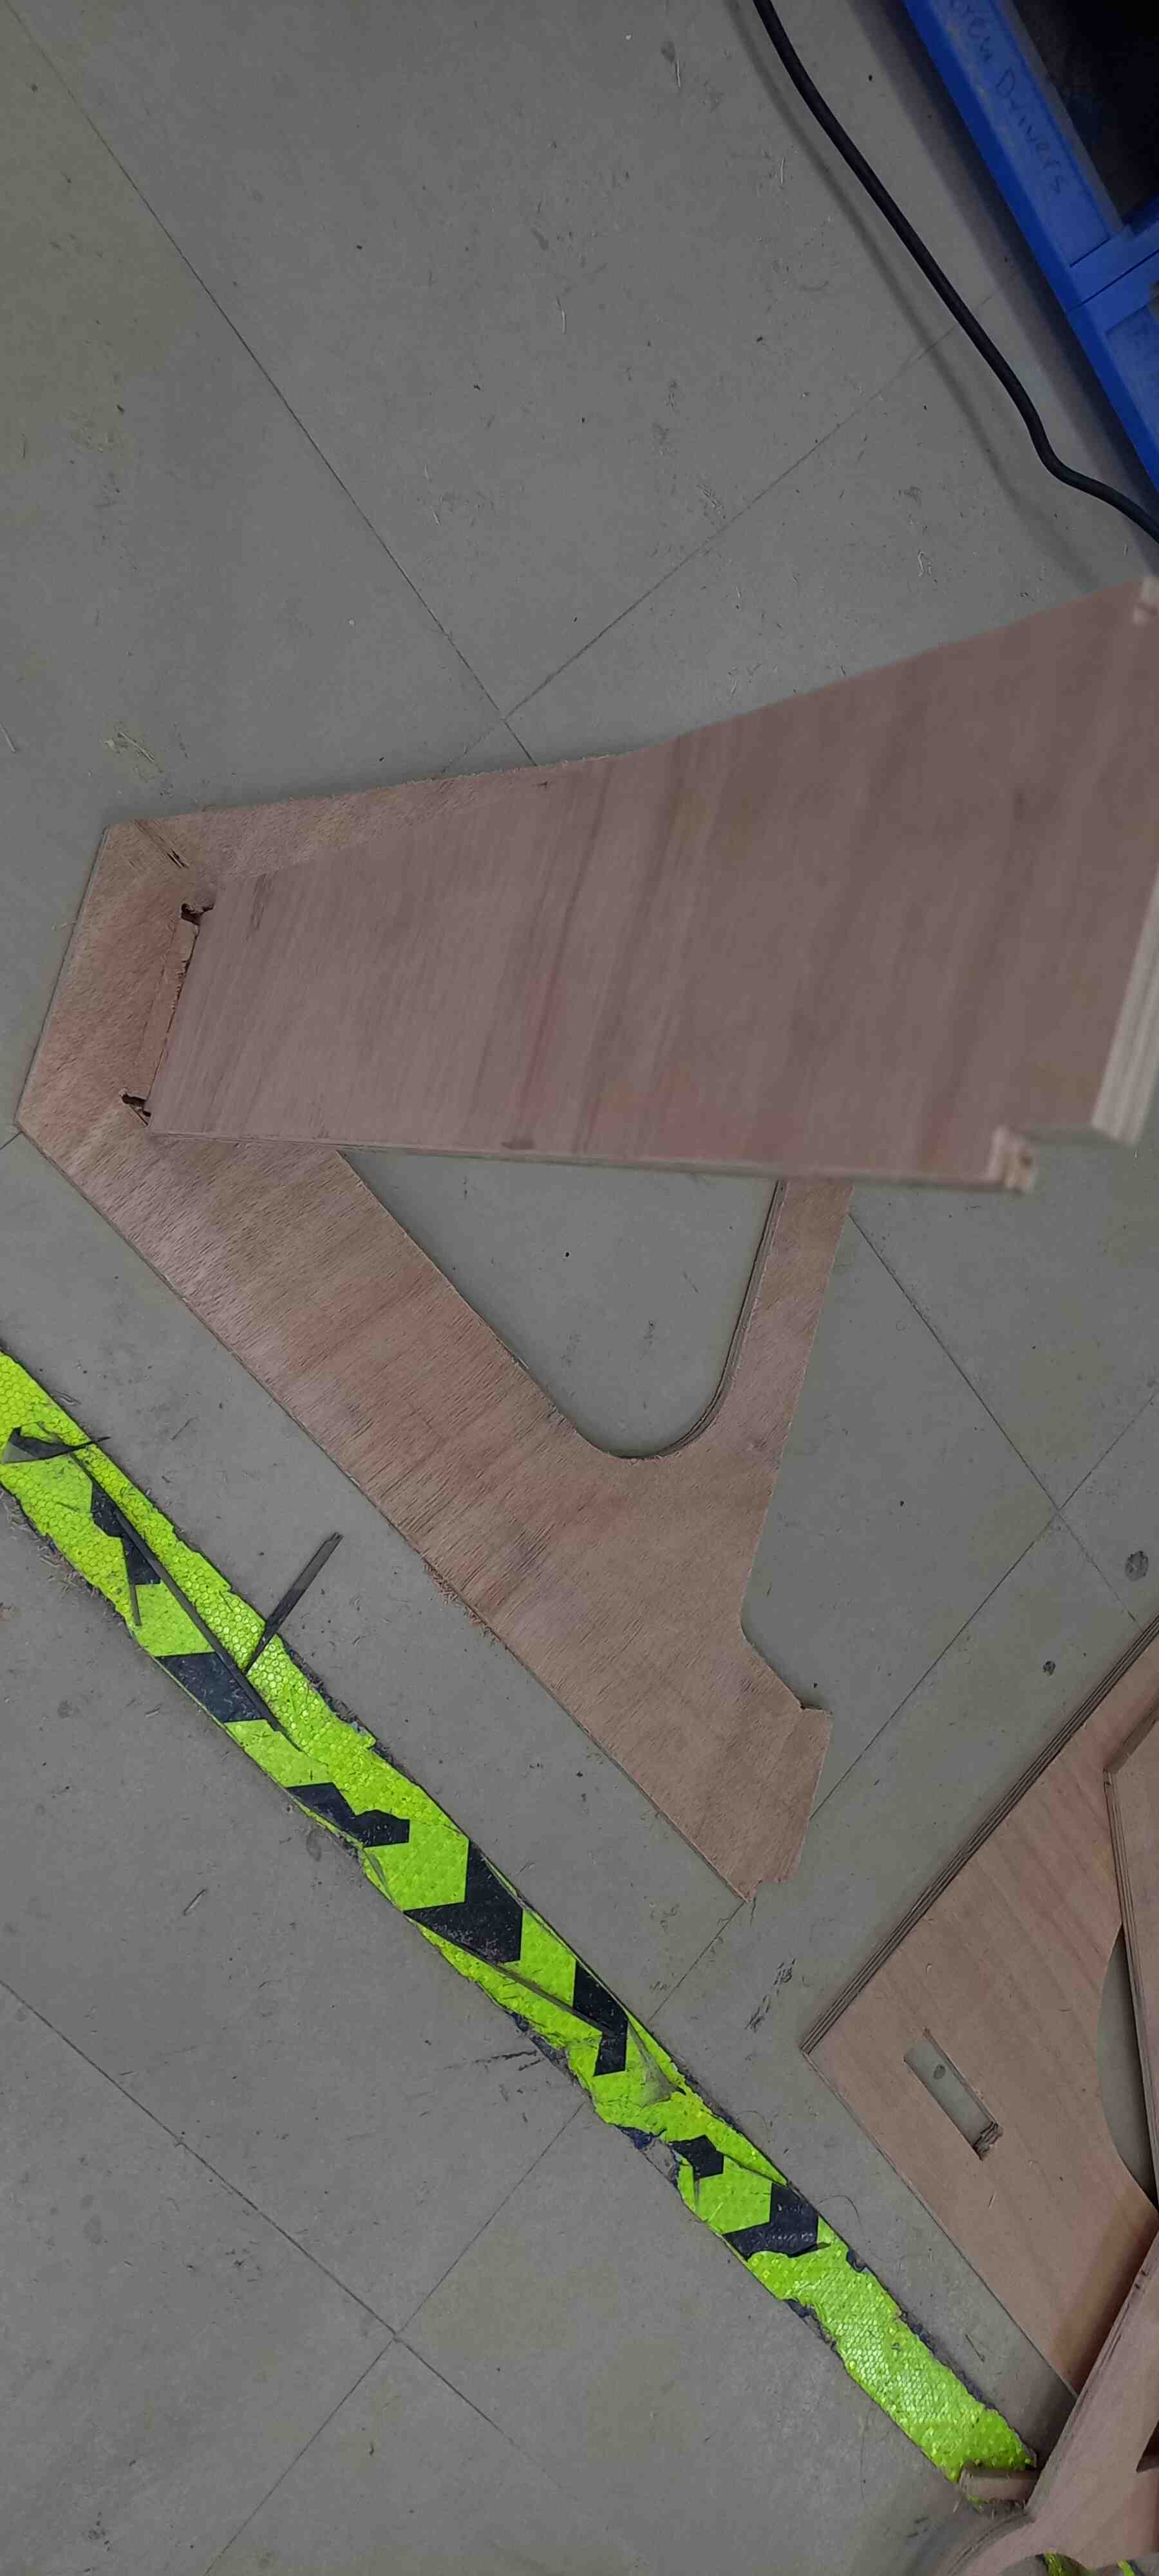
Step 4: Start the cutting process

Assemble
After the CNC milling machine is done cutting, I proceeded with the assembly procces:
- Step 1: Sanding

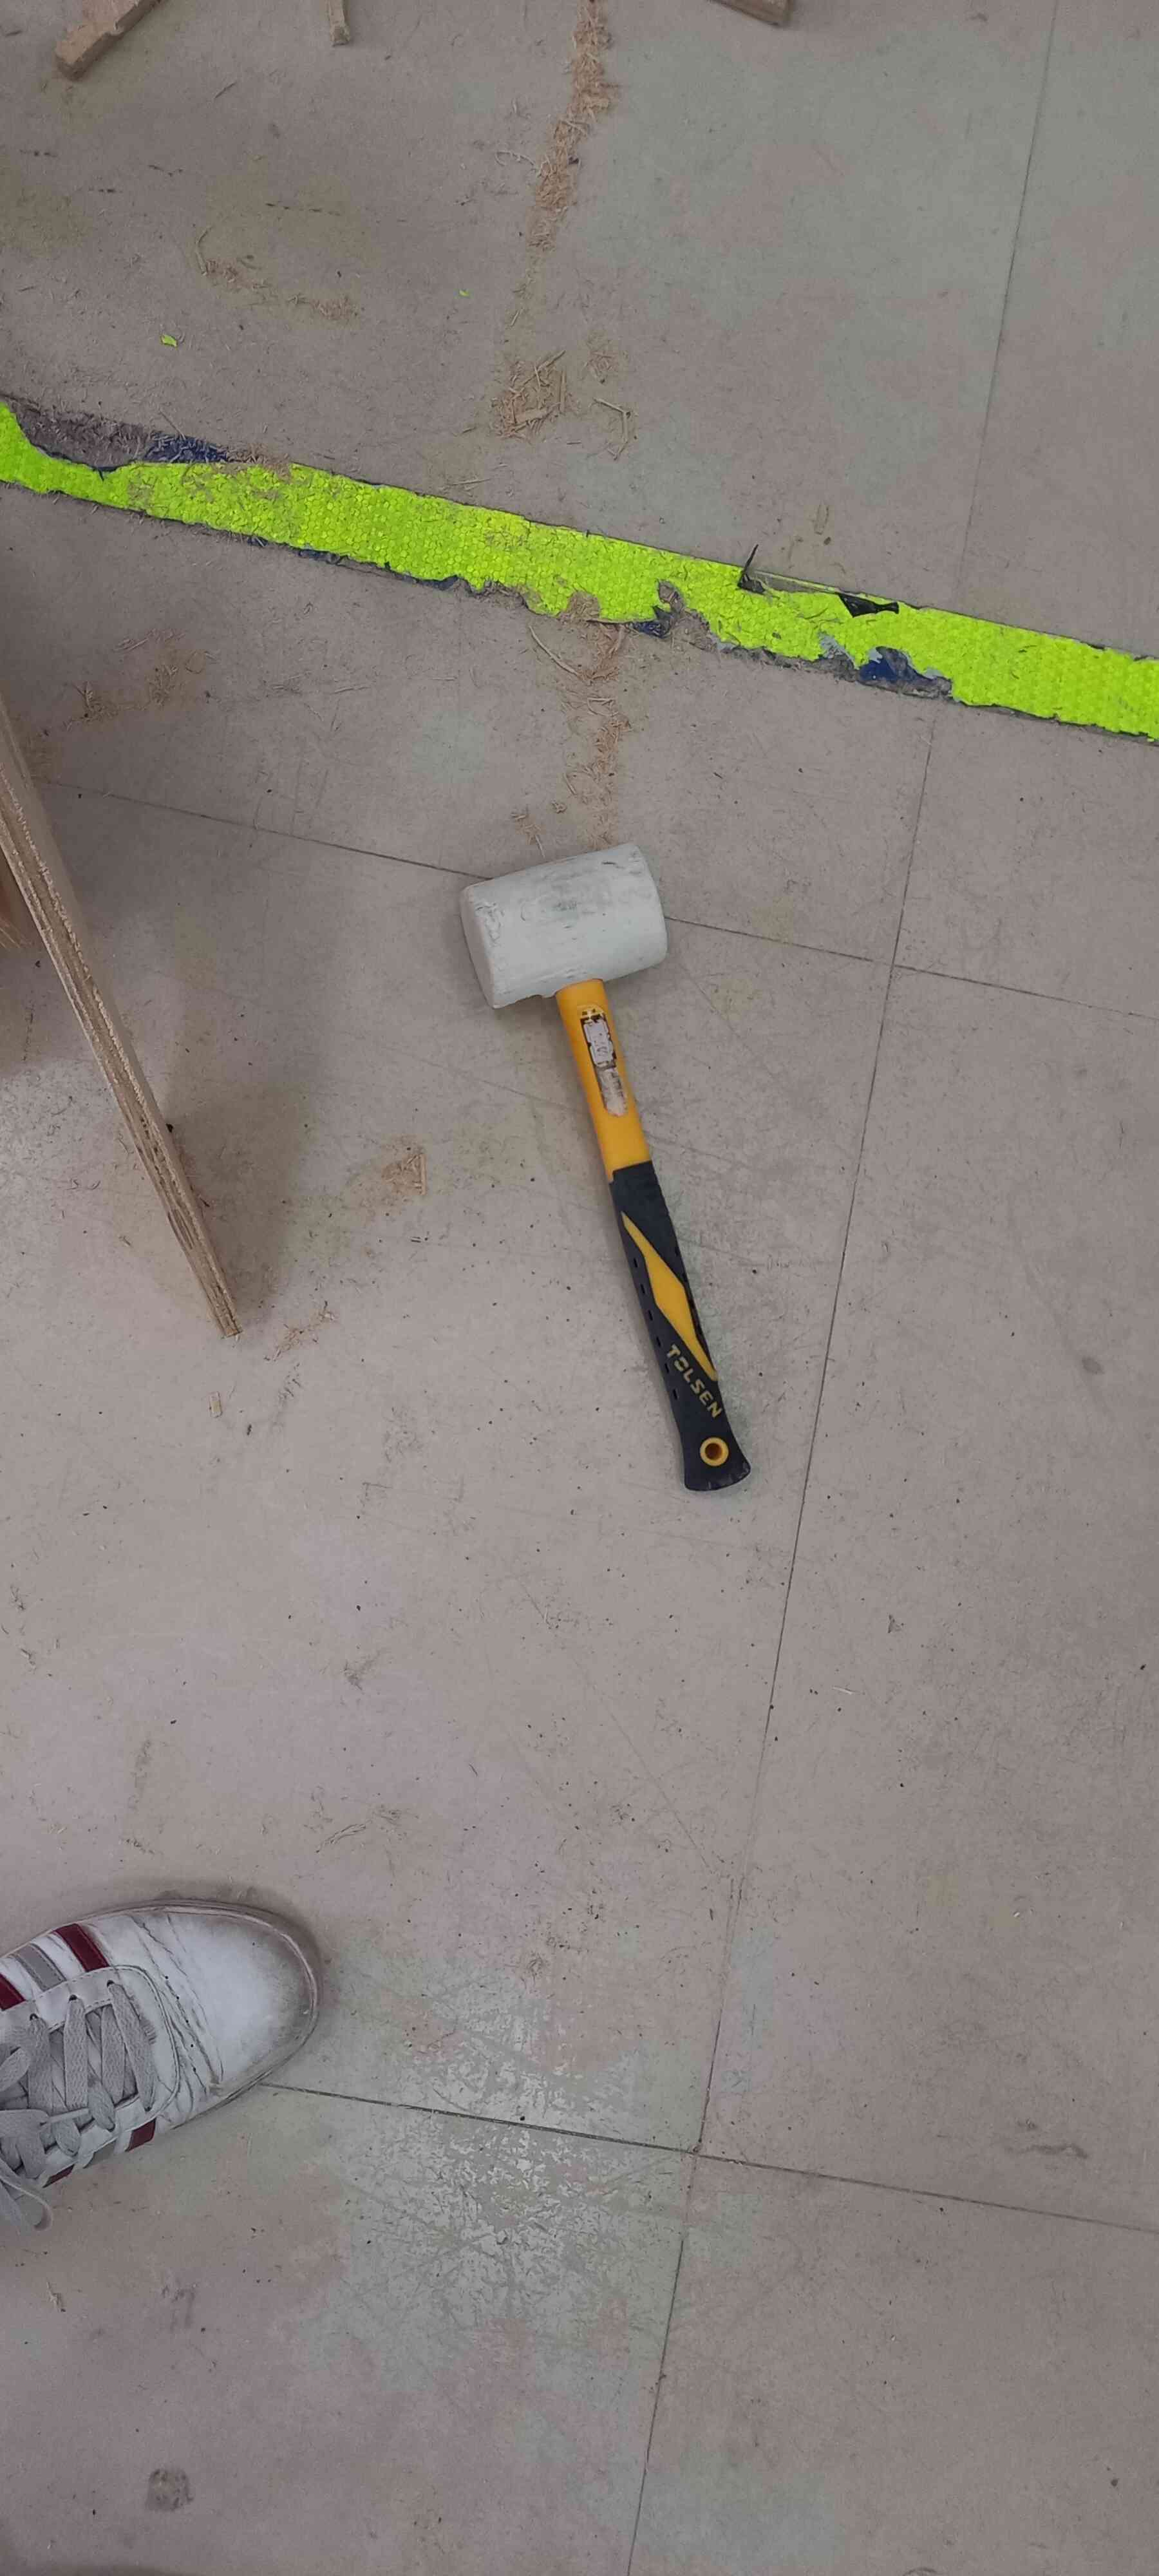
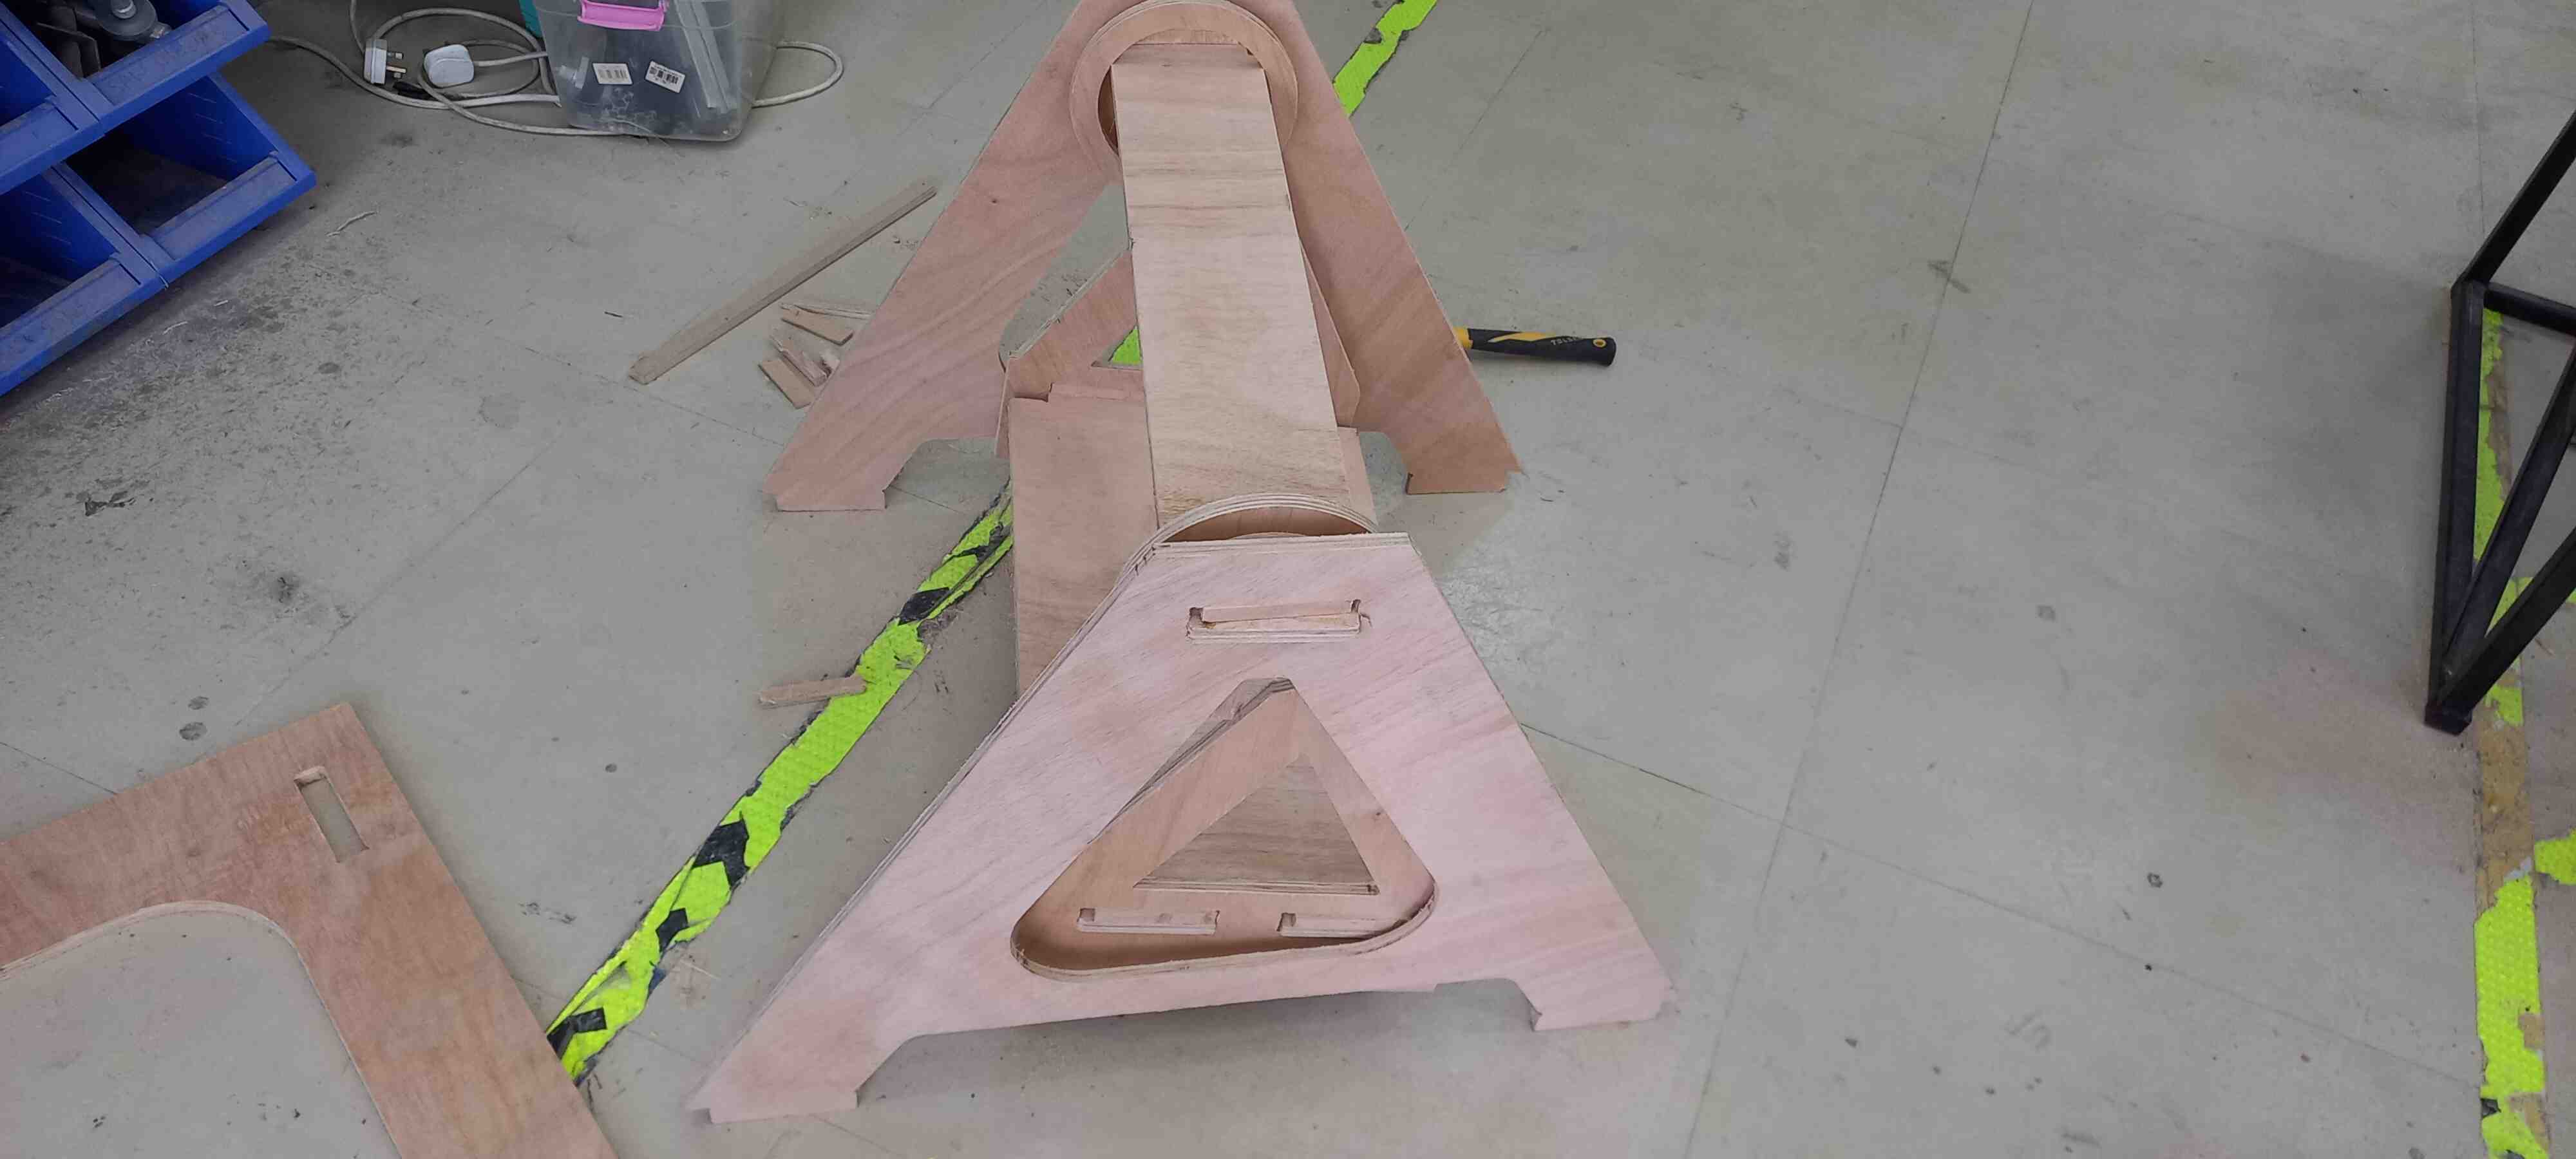
- Step 2: Hamering the joints
To press fit the joints, I have used a rubber hamer to strike the joint in place firmly without breaking the material.
Unfortunatly I have ran into a problem concerning the joint size, it is not 12 mm as I have designed it in Fusion 360, instead, it is 24 mm, meaning that it is doubled in size.
The reason for this is that I have scaled up the design in Vcarve by 200%, which means that even the joints have been scaled up, so for this problem I had two options:
Option 1: Cut the design one more time with the same scale (200%) and fit them together, but this option costs time and material.
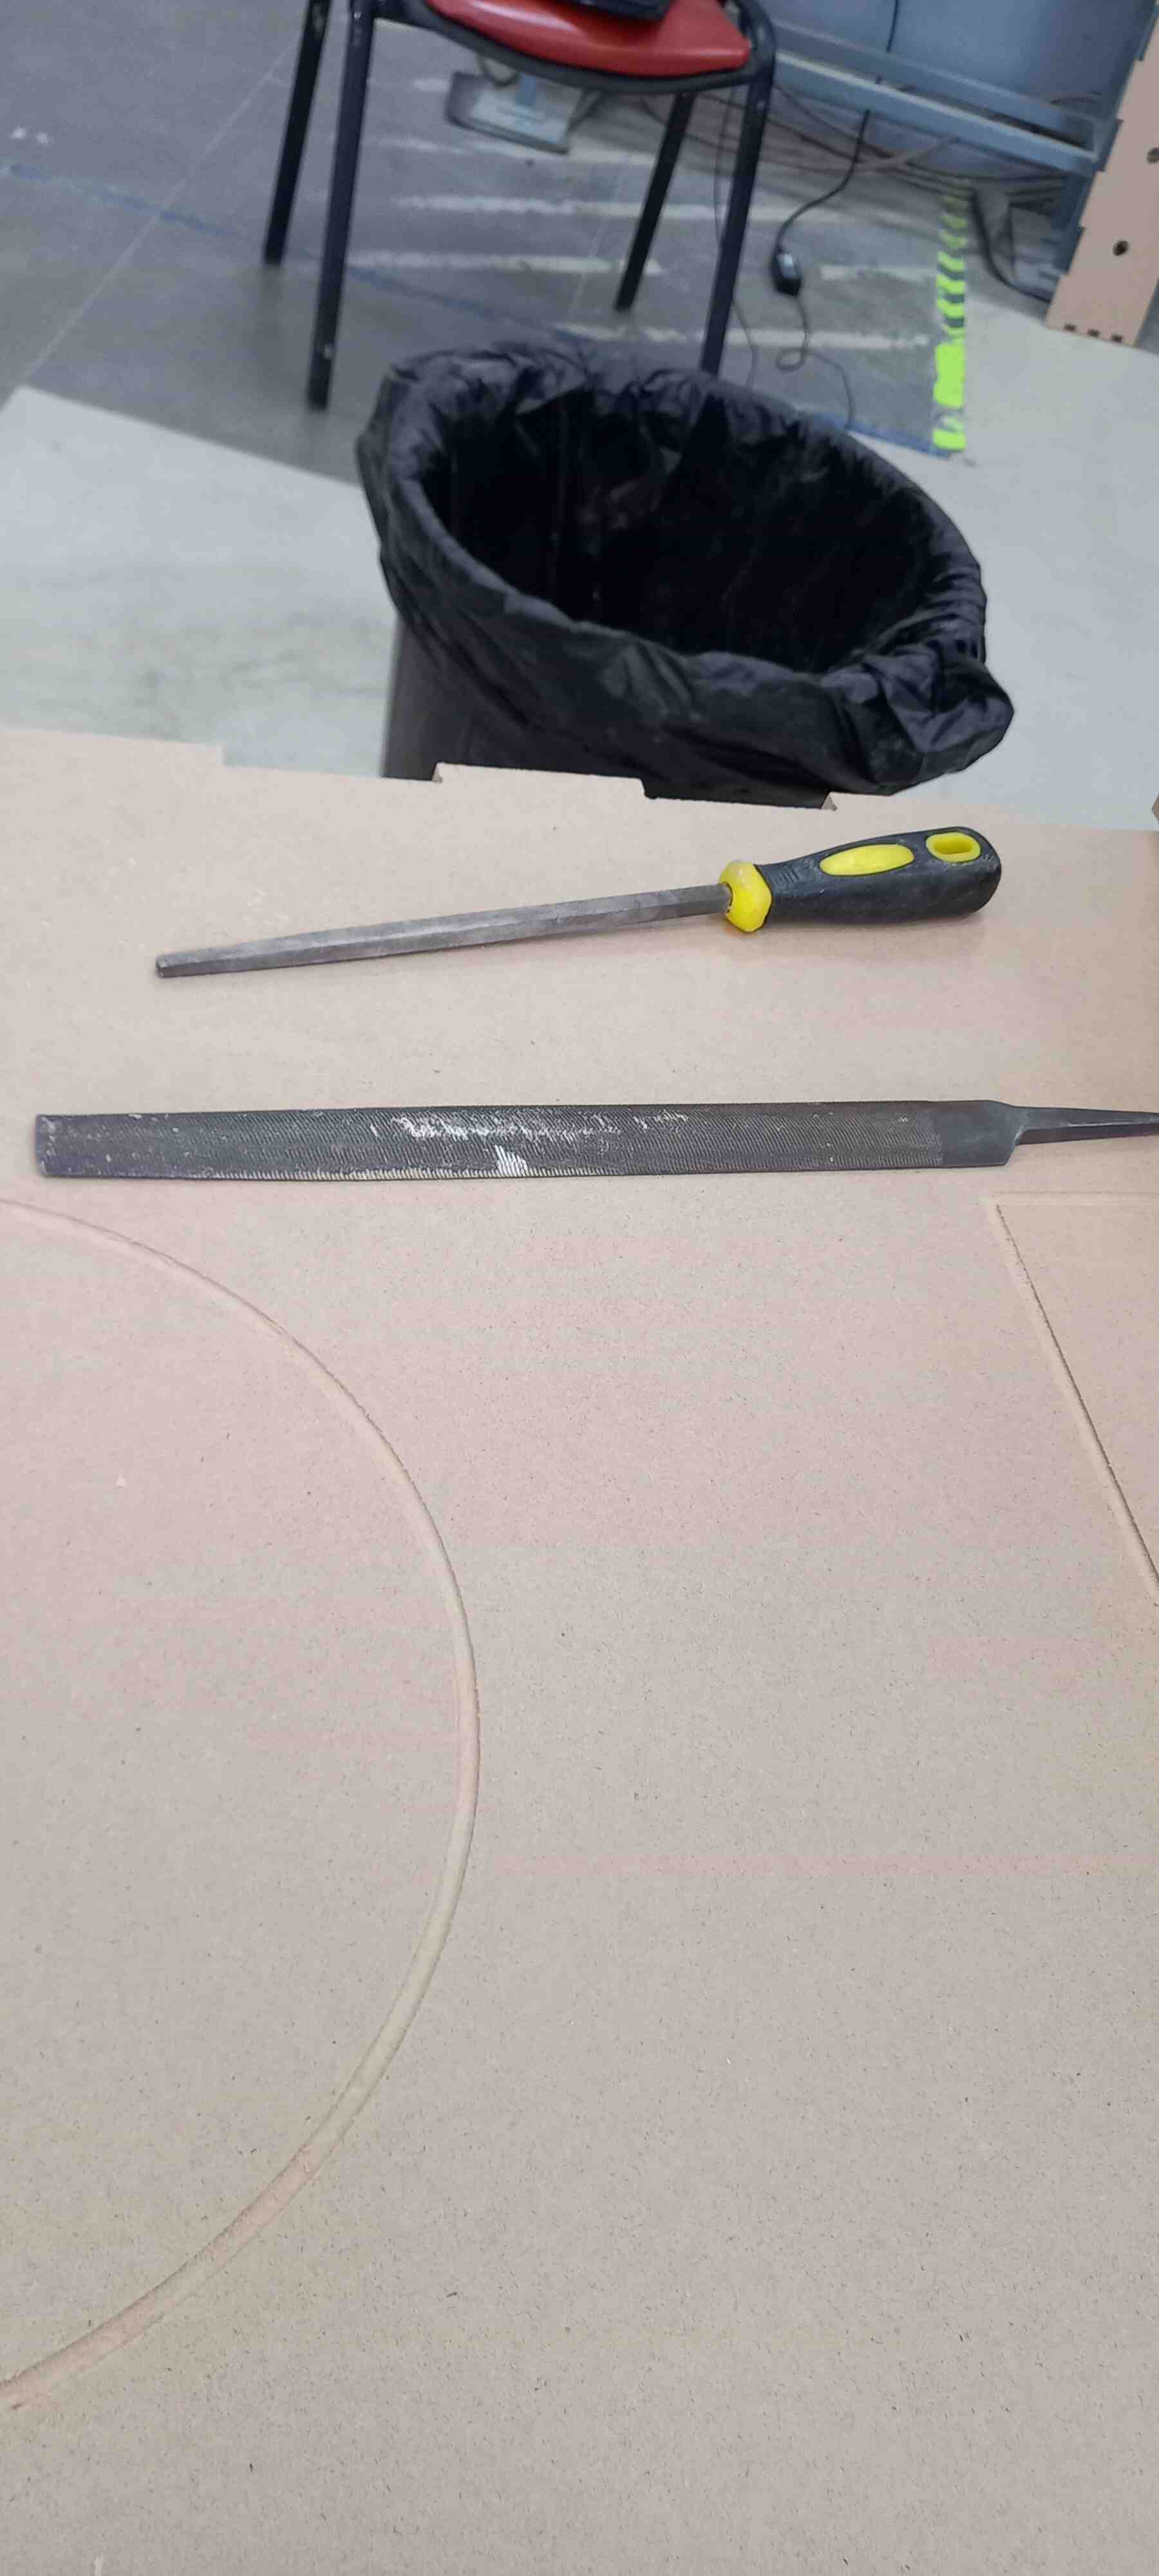
Option 2: Press fit a small piece of 12 mm exceess wood into the joints, these pieces of wood would be considered waste, but I have used them to my advantage.
So I started by collecting the excess wood pieces, and I have used a file to trim off a bit of material from the joints and the wood pieces
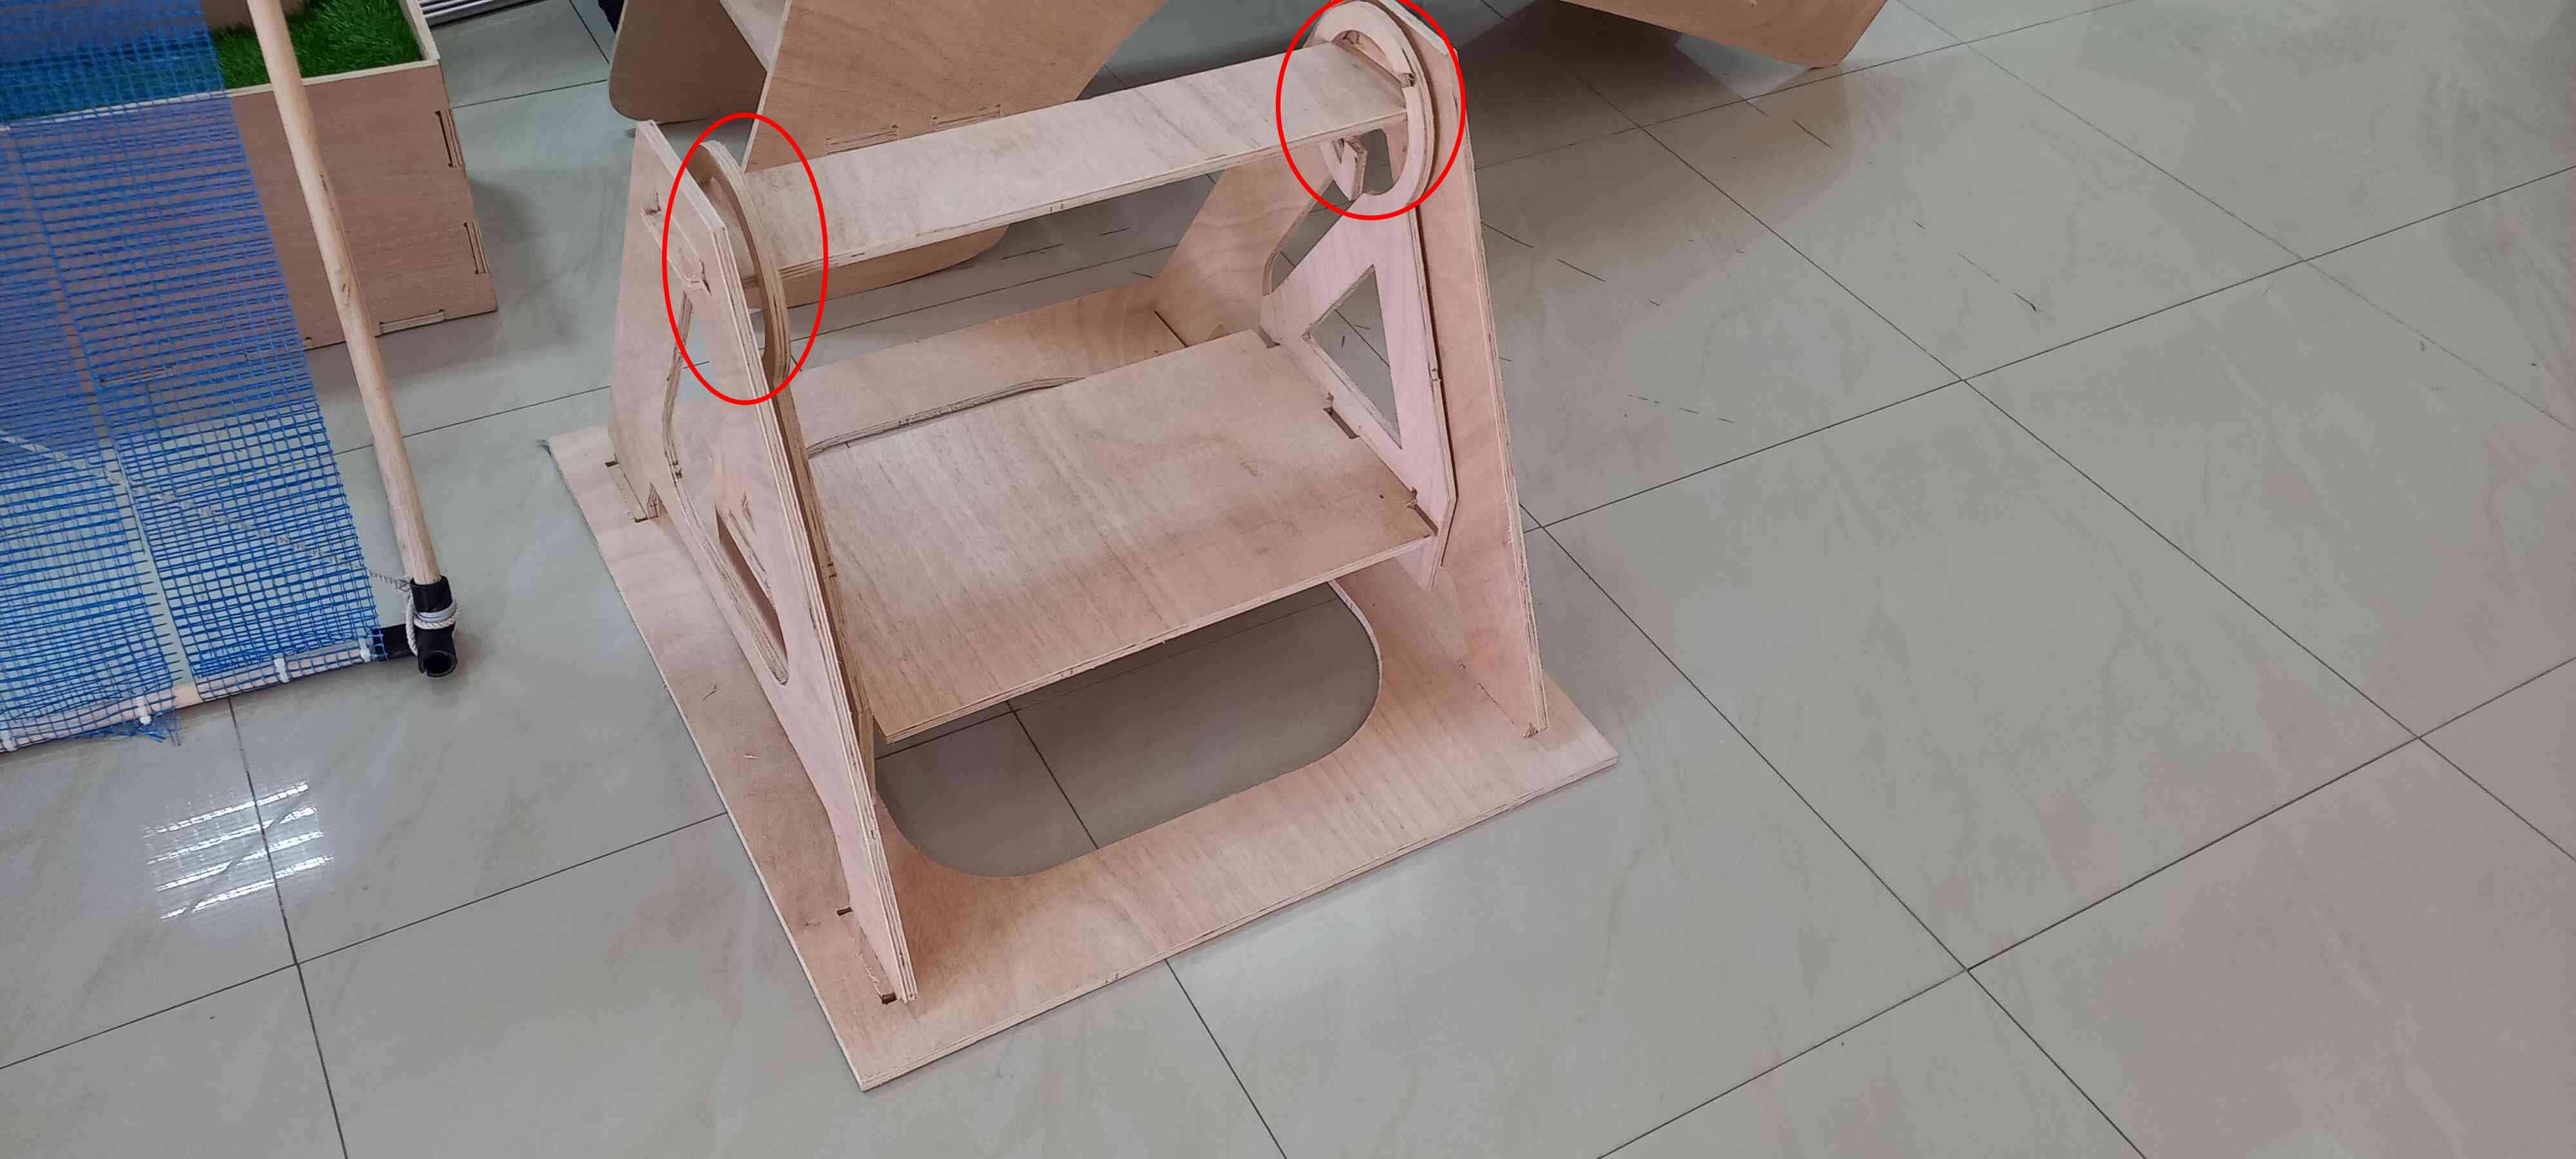
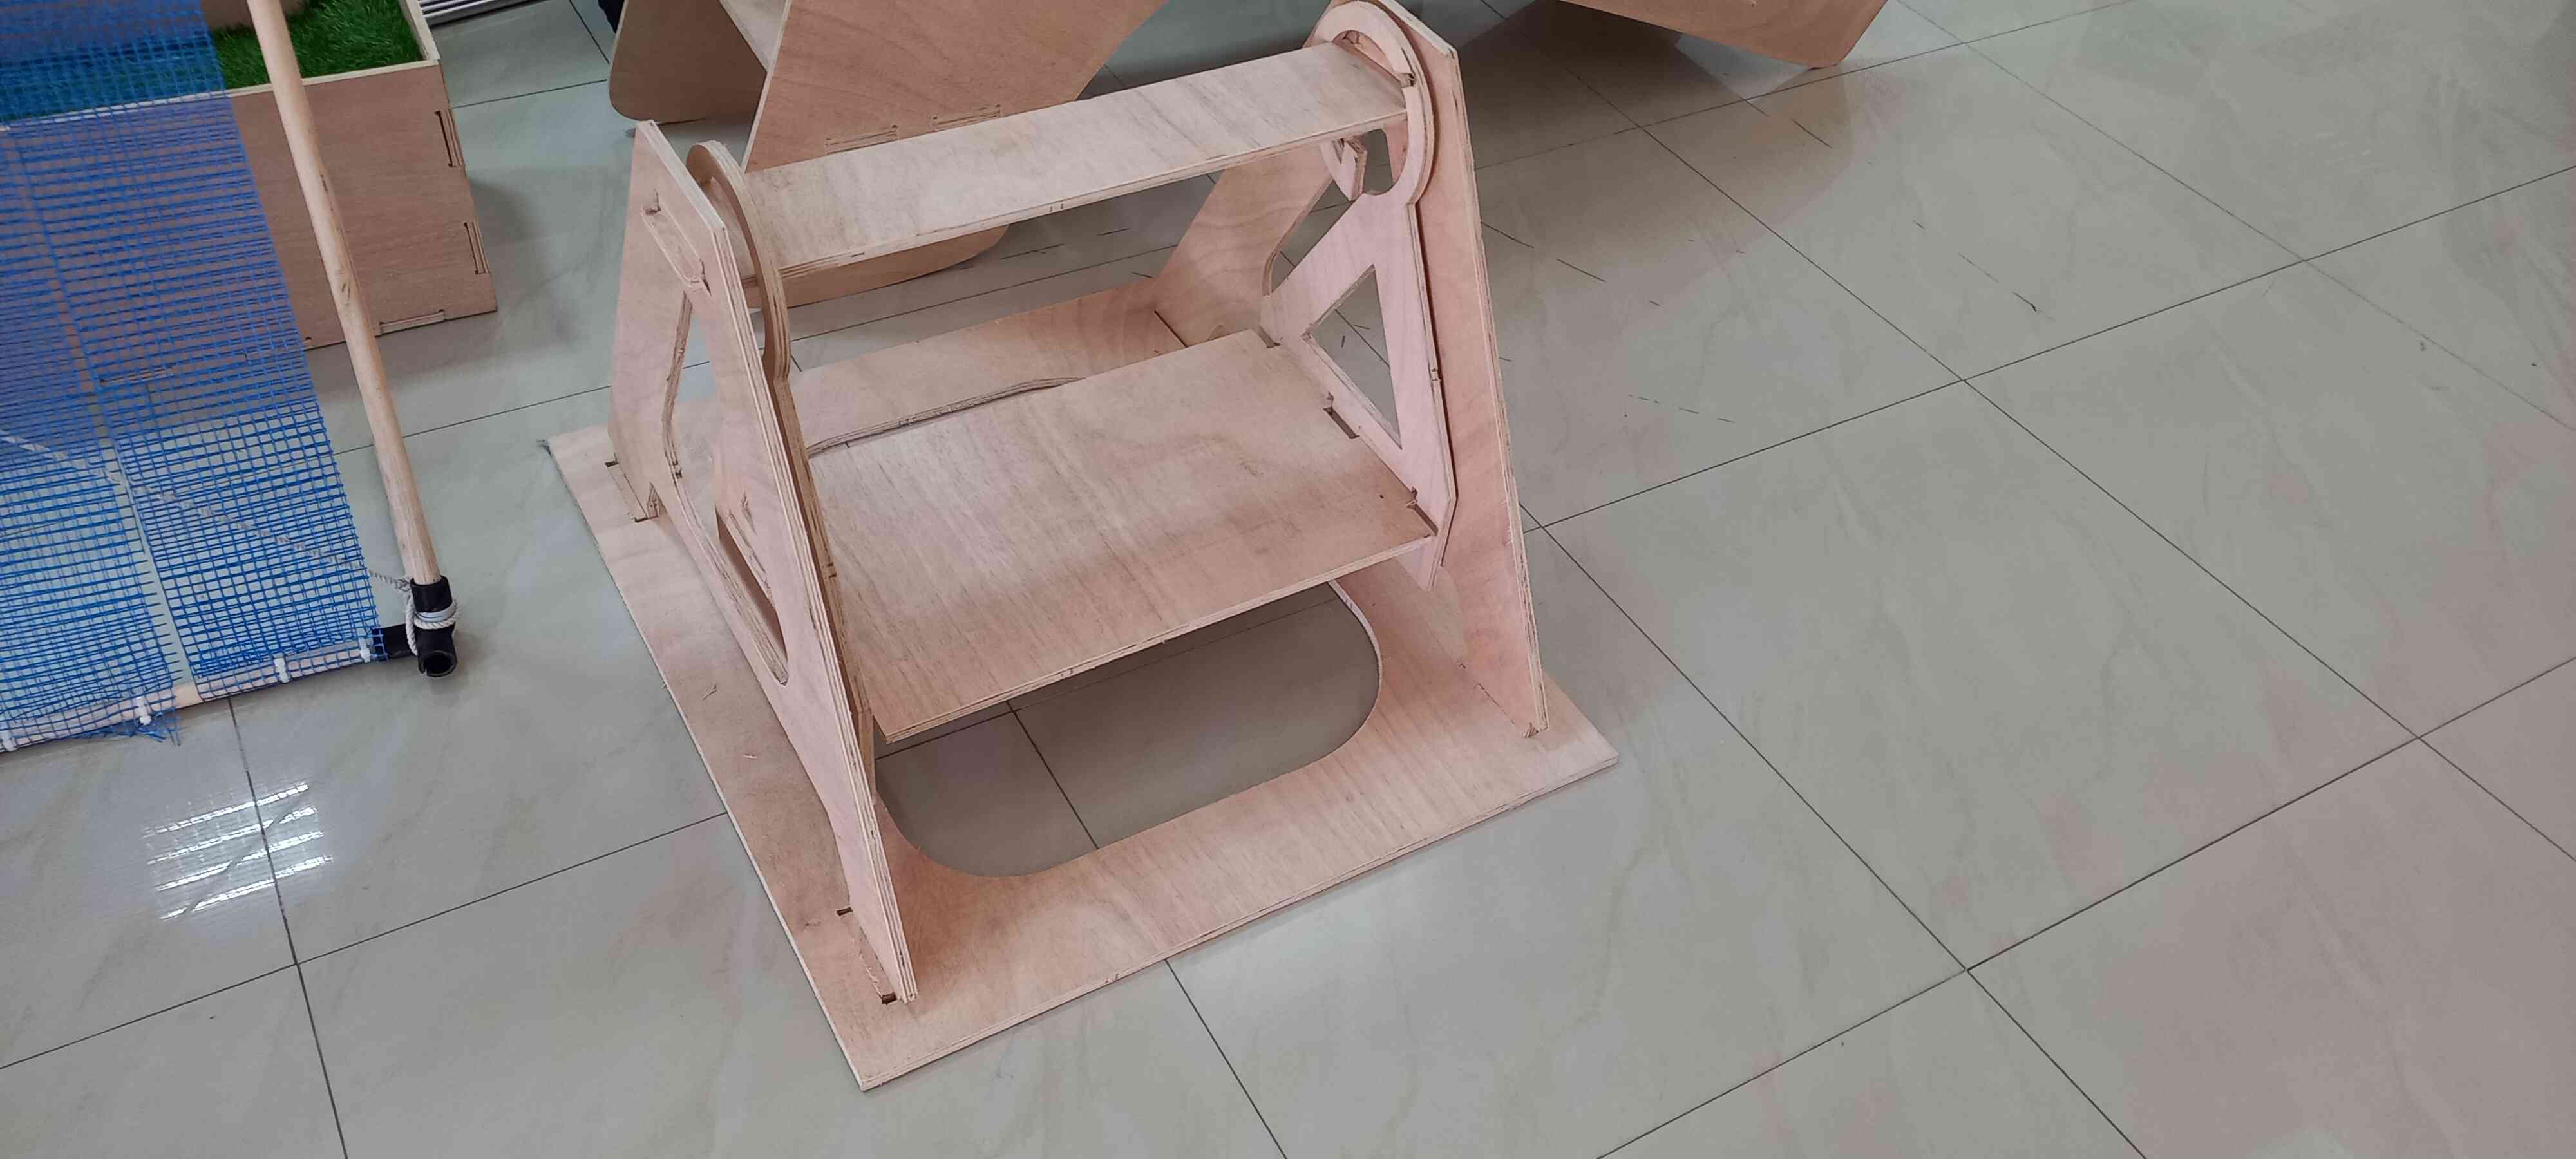
As you can see, the joint is supported and pressed by the excess wood pieces
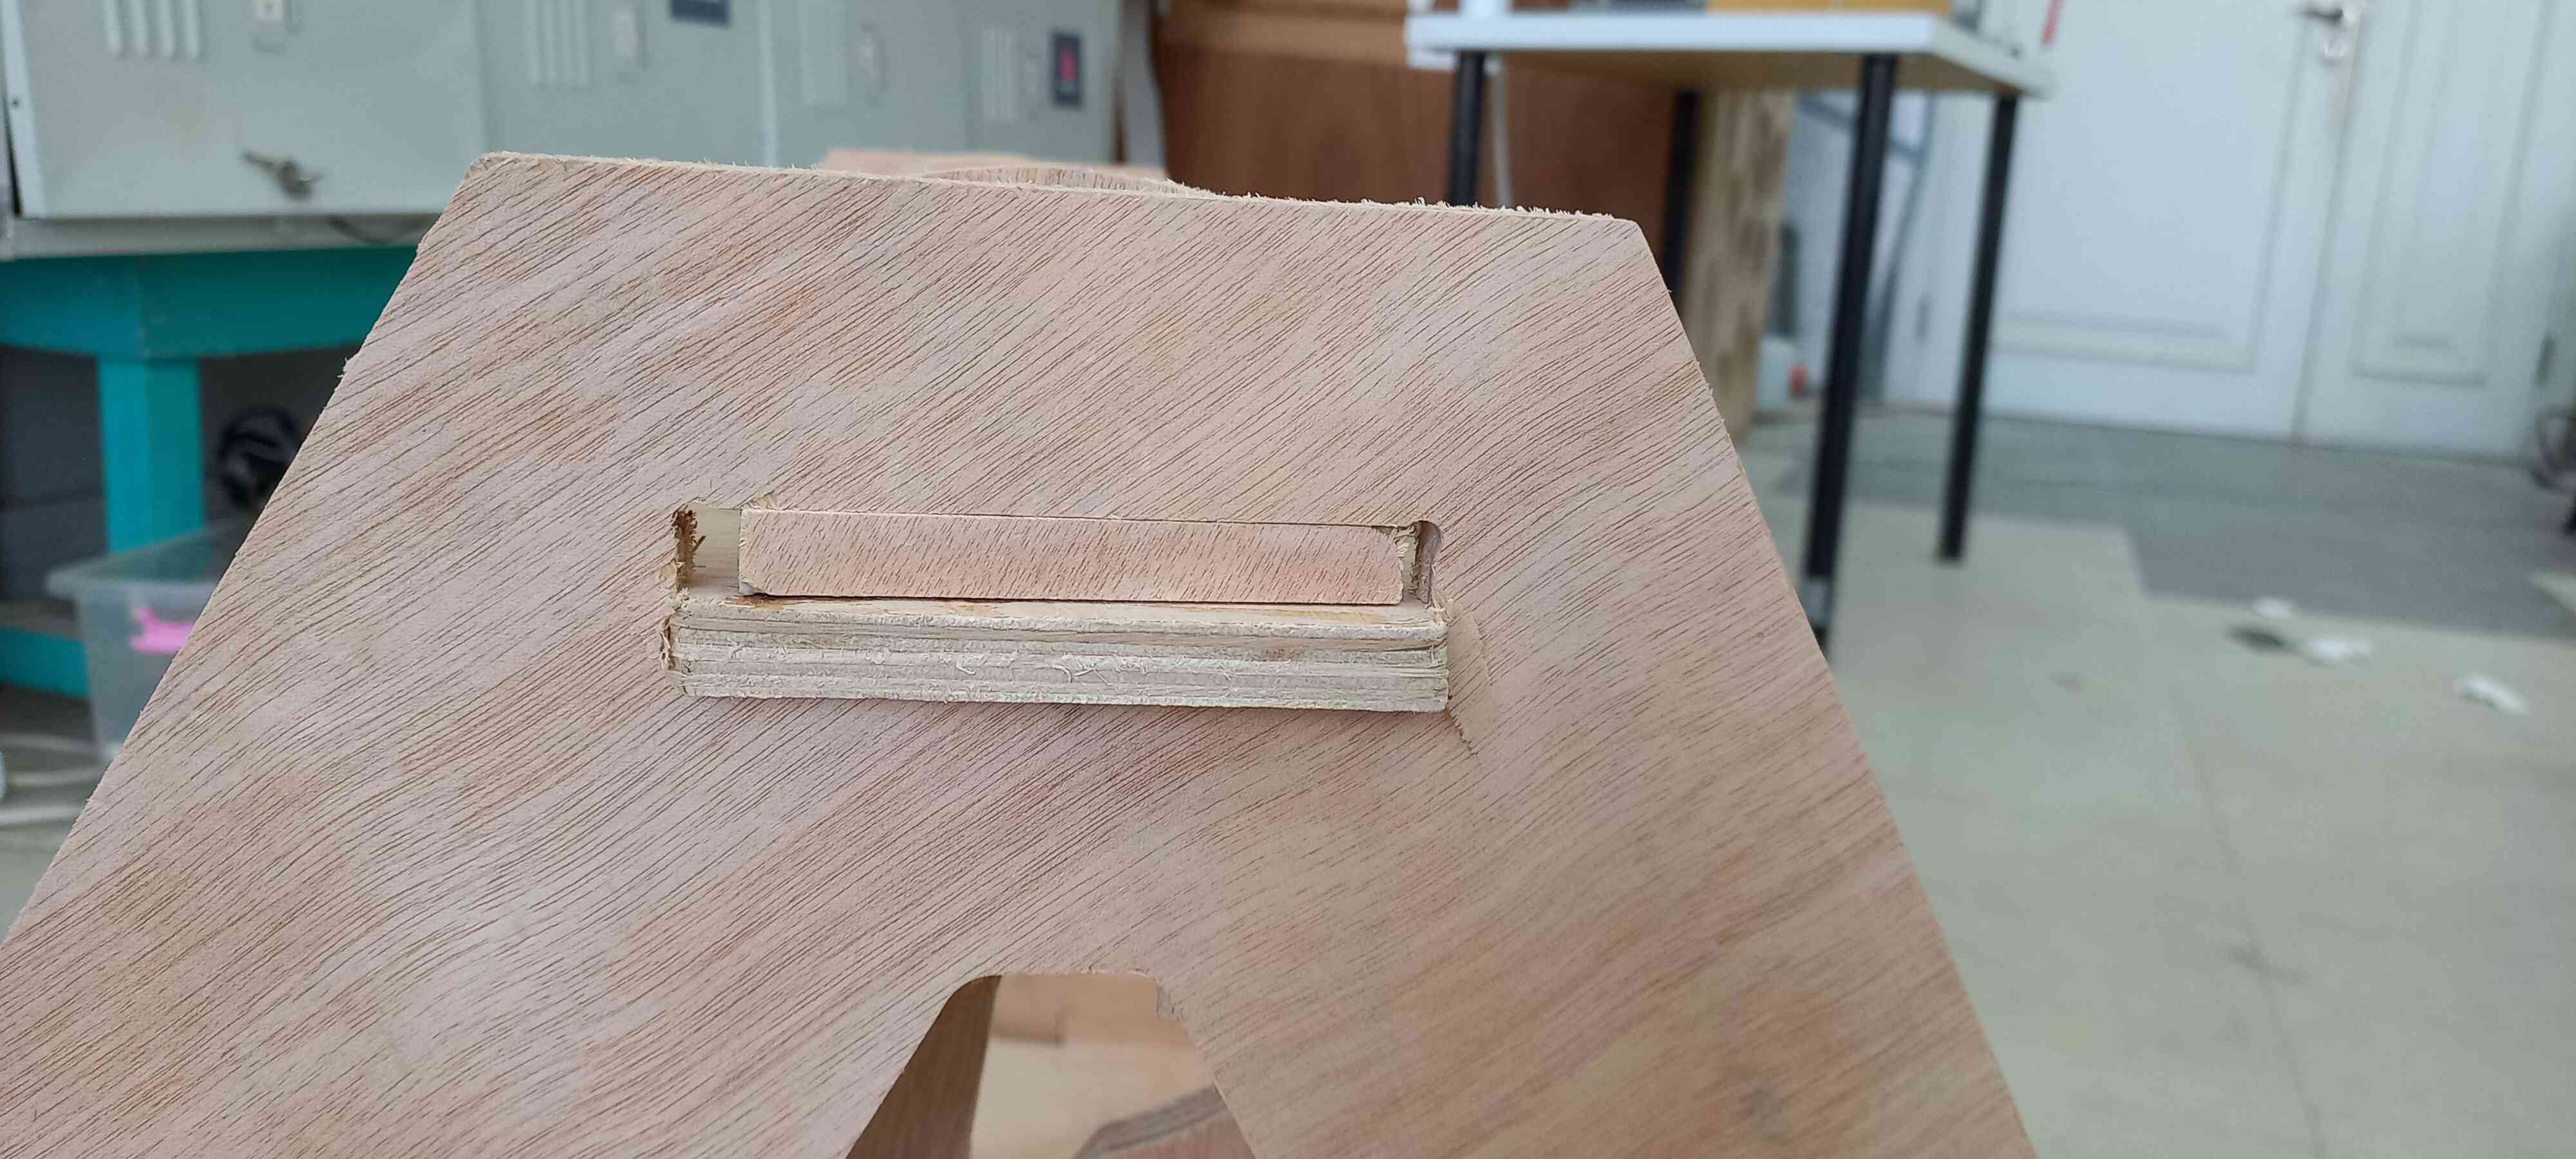
I have assembled all the joints in this manner
- The result
Final Thoughts
-
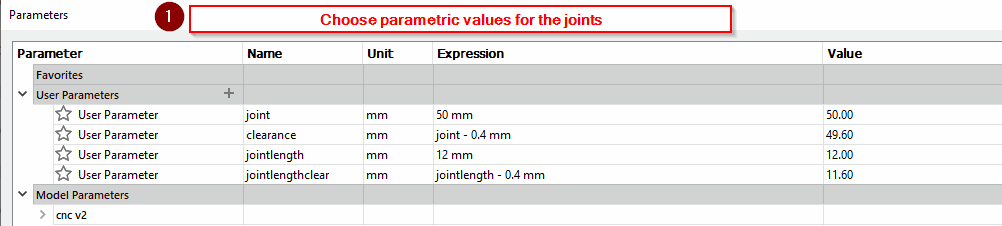
As I have pointed out in the assmbly steps, scalling your design should be done with cautioun to avoid the same problem that I had come accross, the only cautious way to scale your design is to return to the original design file and change the dimensions using the parametric approach.
-
In my design, I should have designed a rod to be mounted on the swing instead of a flat piece so that it can swing freely with less friction.
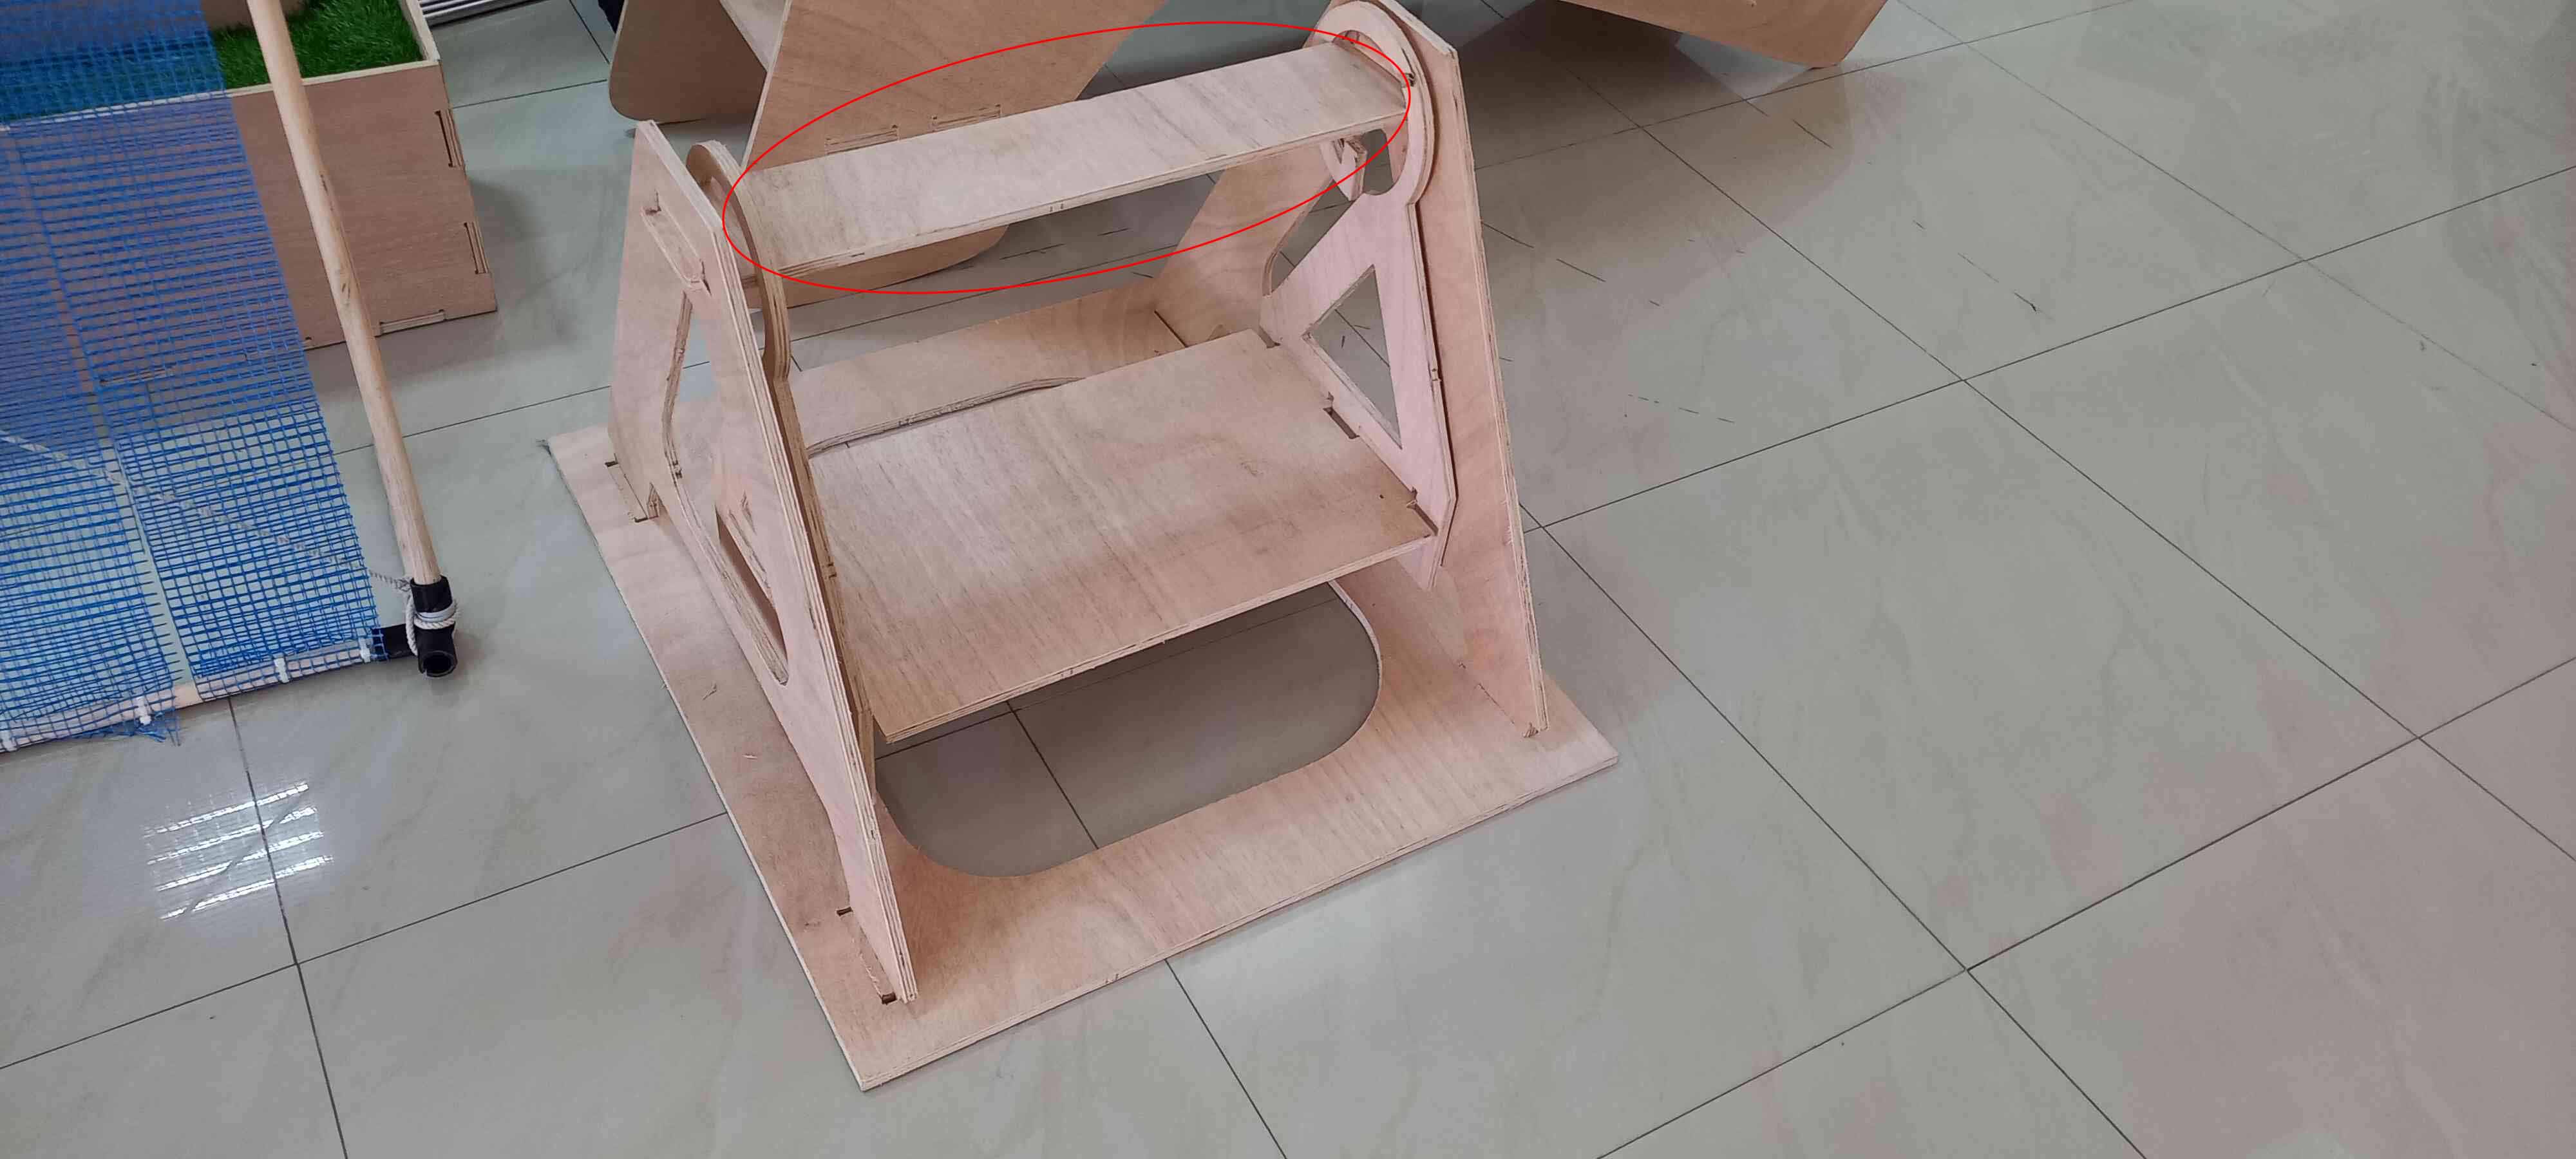
- The round design of the swing should be thicker to avoid breaking the structure when a certain amount of force/weight is applied on the swing seat.