4. Embedded programming
We started week five by taking an introduction about microcontrollers and what they are. After that, each group has been given a different kind of microcontroller such that we can identify the information related to it which was the group assignment.
Group assignment
-
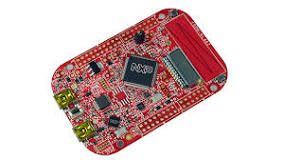
For our board, we got a microcontroller called FRDM-KL46Z which is built on the ARM architecture and designed and manufactured by a company called NXP.
-
We have 64 I/O pins which have different functionality, some of them could be used in serial communication such as URAT and SPI, and others could be used in input analog signals from sensors for example, and also pins for the voltage and ground.
-
In this microcontroller, we have a Capacitive touch slider and accelerometer and it also has an LCD display
-
we can program it using C/C++ and also there is a software to program it and deal with it called OpenSDA
all of this information about this microcontroller we got from the data sheet click here to access it
click here to find the all group documentation for the assignment.
Individual assignment
For the individual assignment, we started by creating a simple blinking program.
The board I used for the individual assignment is called Adafruit Feather nRF52840 Sense. In order to connect the board to the computer and program it using the Arduino IDE, there are some steps. I follow this page to do them.
To do that, we first downloaded the Arduino IDE from their website
Then we added the bored to the IDE using this tutorial
And then after we finished the setup phase of the board we started writing the program which can be found down below
#include <Arduino.h>
#include <Adafruit_TinyUSB.h> // for Serial


int randHigh, randLow;

void setup() {
  // initialize digital pin LED_BUILTIN as an output.
  pinMode(LED_BUILTIN, OUTPUT);
}

// the loop function runs over and over again forever
void loop() {
  randHigh=random(1000);
  randLow=random(1000);
  digitalWrite(LED_BUILTIN, HIGH);
    delay(randHigh);
    digitalWrite(LED_BUILTIN, LOW);
    delay(randLow);
}
So what will this code do is to generate random number for the delay time of the blinking
After writing the code I compile it and upload it to the board after connecting it to a laptop using a USB cable.
Unforthintly, it did not work and it gives me an error. So I google it and I found a solution that indicates I should select the “port” from the tools menu
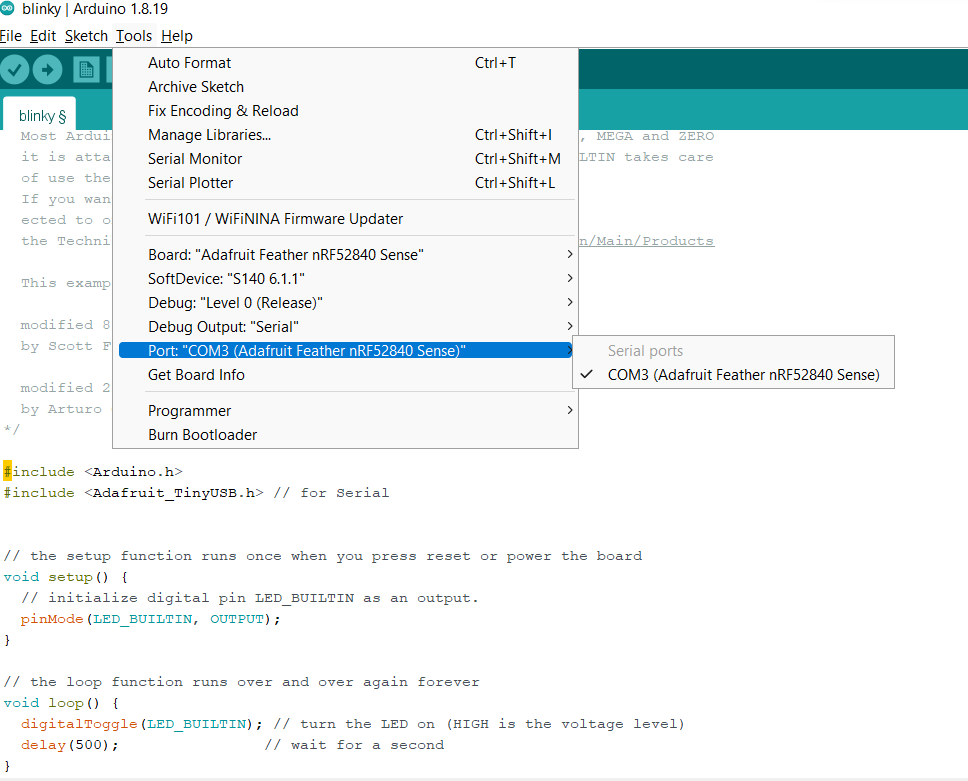
Then it works totally fine!
This video is for normal blinking with half second delay
This video shows the blinking with random delay
Thinkercad
Thinkercad is known that is used to design simple 3D designs and it is meant for children and beginners to use it. we found in this lecture that it also could be used as a circuits simulator with a simple drag and drop structure! click here to access the website
Then, we got introduced to morse-code and we were asked to write a code that represents a word in morse-code which dot will be represented by low voltage and dash by high voltage.
For my example, I chose “SOS” which means help and then I write a C++ code that represents this word based on this dot = 0.5 sec dash = 1 sec the gap between dot and dash = 0.5 sec (off) the gap between letters = 2 sec off ‘SOS’ in morse code is represented by … — …
Since ThinkerCAD is for beginners, there were ready blocks that we can use instead of writing the hall code line by line.
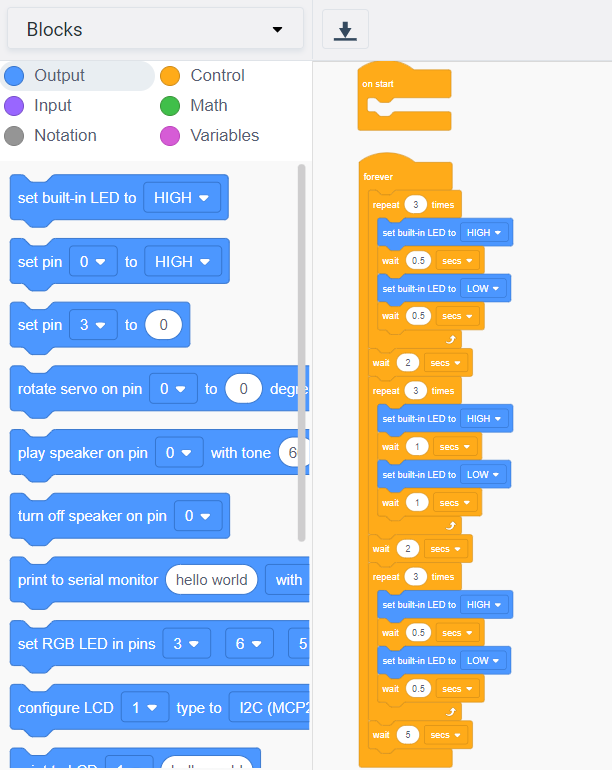
After setting up the code in TinkerCAD I downloaded it into Arduino to upload it into my microcontroller and here is the downloaded code below:
// C++ code
//
int counter;

int counter2;

int counter3;

void setup()
{
  pinMode(LED_BUILTIN, OUTPUT);
}

void loop()
{
  for (counter = 0; counter < 3; ++counter) {
    digitalWrite(LED_BUILTIN, HIGH);
    delay(500); // Wait for 500 millisecond(s)
    digitalWrite(LED_BUILTIN, LOW);
    delay(500); // Wait for 500 millisecond(s)
  }
  delay(2000); // Wait for 2000 millisecond(s)
  for (counter2 = 0; counter2 < 3; ++counter2) {
    digitalWrite(LED_BUILTIN, HIGH);
    delay(1000); // Wait for 1000 millisecond(s)
    digitalWrite(LED_BUILTIN, LOW);
    delay(1000); // Wait for 1000 millisecond(s)
  }
  delay(2000); // Wait for 2000 millisecond(s)
  for (counter3 = 0; counter3 < 3; ++counter3) {
    digitalWrite(LED_BUILTIN, HIGH);
    delay(500); // Wait for 500 millisecond(s)
    digitalWrite(LED_BUILTIN, LOW);
    delay(500); // Wait for 500 millisecond(s)
  }
  delay(5000); // Wait for 5000 millisecond(s)
}