6. Moulding and casting
Casting is a process in which a fluid material is poured into a mold, and it solidifies inside the mold, taking the shape of its cavity.
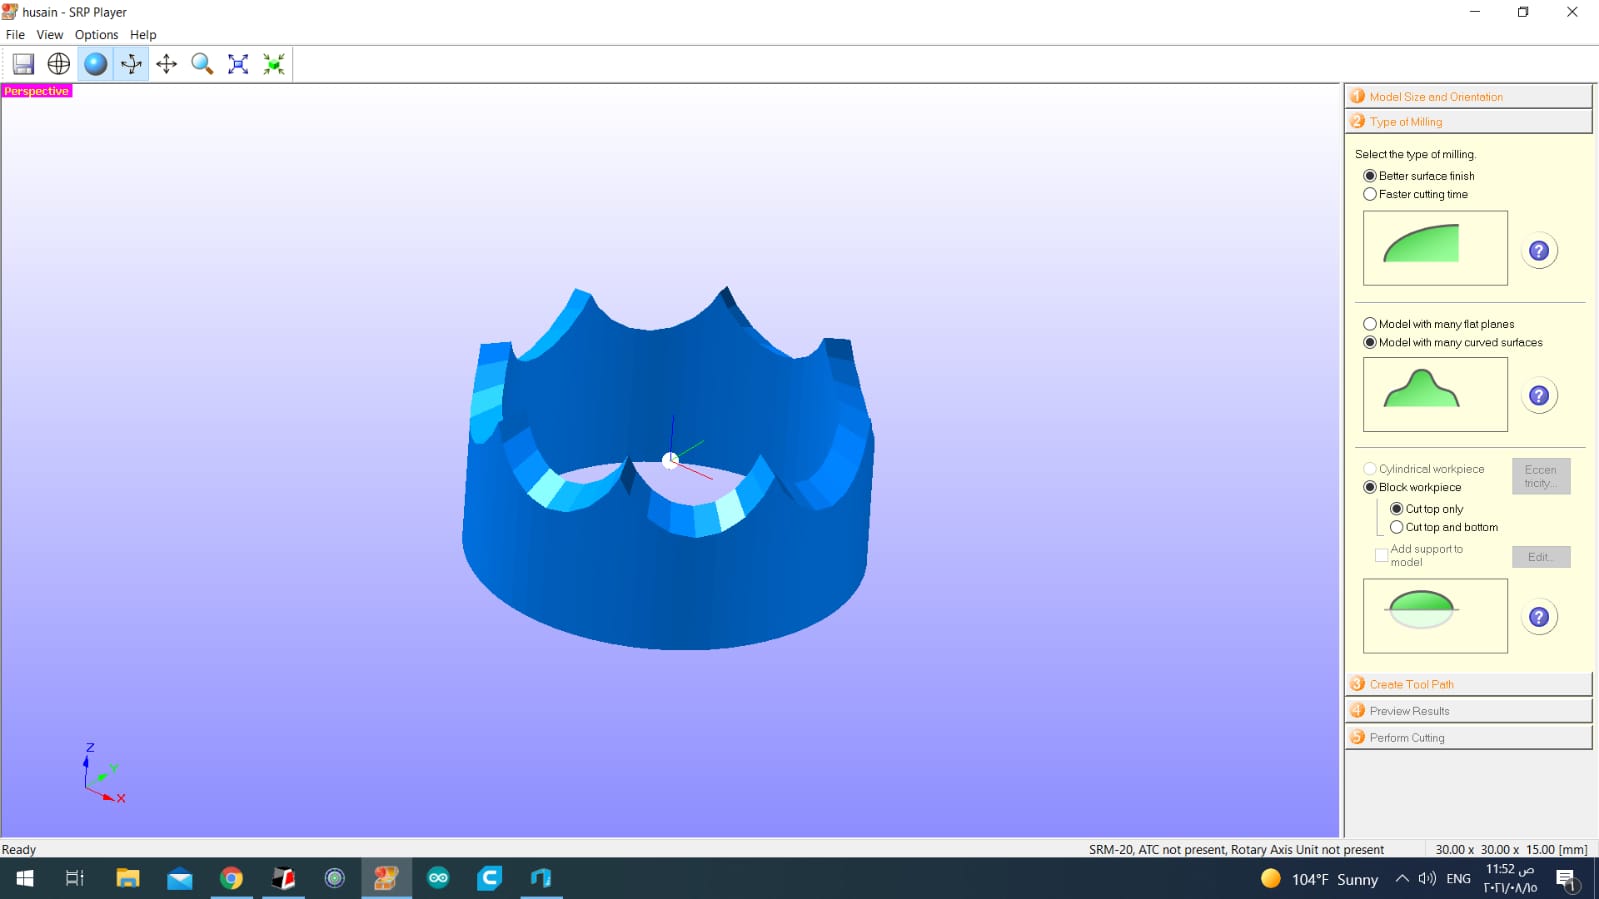
We started the process by creating the shape we wanted to cast. I made a simple crown using TinkerCad. I chose the shape of the crown because it is simple enough to make, and the small amount of details make it a reasonable design to cast.
We start by milling our design on a wax bar using a small scale milling machine, which is quite similar to the CNC machine we used earlier during Fab Academy. We upload our design to the machine’s software, select the necessary cutting parameters, including the tool’s size needed, and then give the command to the machine to start milling the wax bar.
Other important settings to pay attention to in the software are the type of milling, fast or accurate, and the types of the surfaces our designs have, flat or curved surfaces. In my case, I had several curved surfaces.
We also use the software to create the tool path and simulate the shape of the object, and select the material to be used. In this case, we used molding wax. Calibrating the device’s cutting tool is also an important step here. We do that manually. A small mark was notched on the top of the surface of the molding wax for that purpose. The molding wax used here was a rectangular shape with enough area to fit in two designs, so I used half of it only, and basically fooled the machine into thinking that the center of the molding wax bar is in the center of its right half. This is done to preserve time and material. The cutting tool is moved in all 3 axis manually to be just right above the notched mark on the molding wax bar. This is our zero point.
The software will preview the shape of your design, and how it is going to look after its being done, and give you the option to start milling. Keep in mind that the process is done to basically create a mold, which is used to create another mold, and that second mold is to be used to cast the final object.
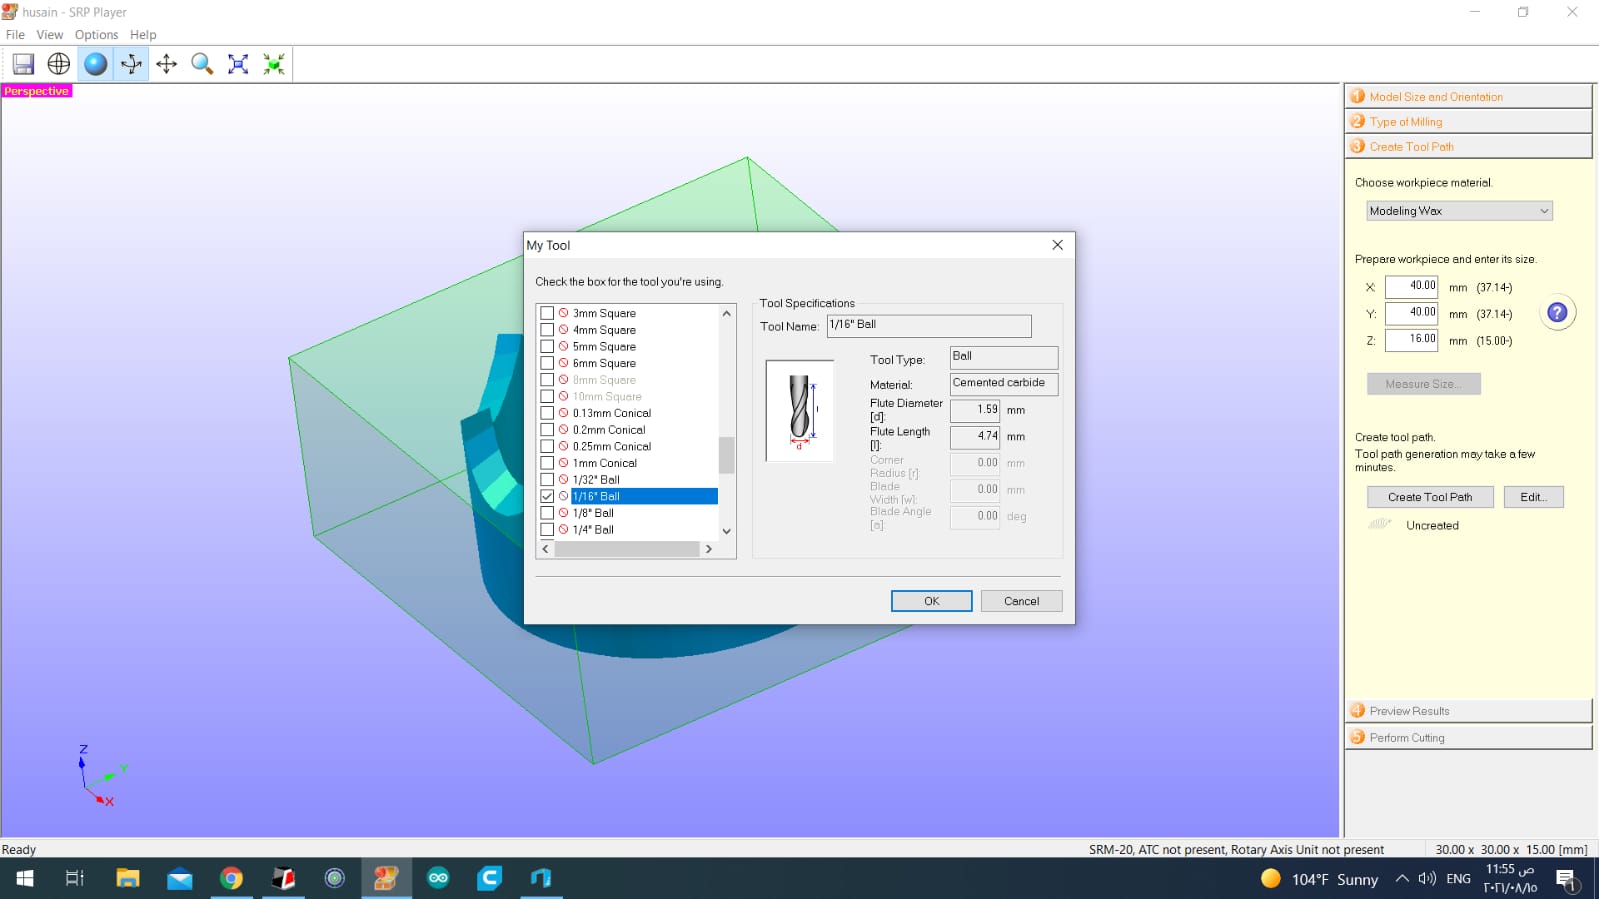
Adjusting the tool
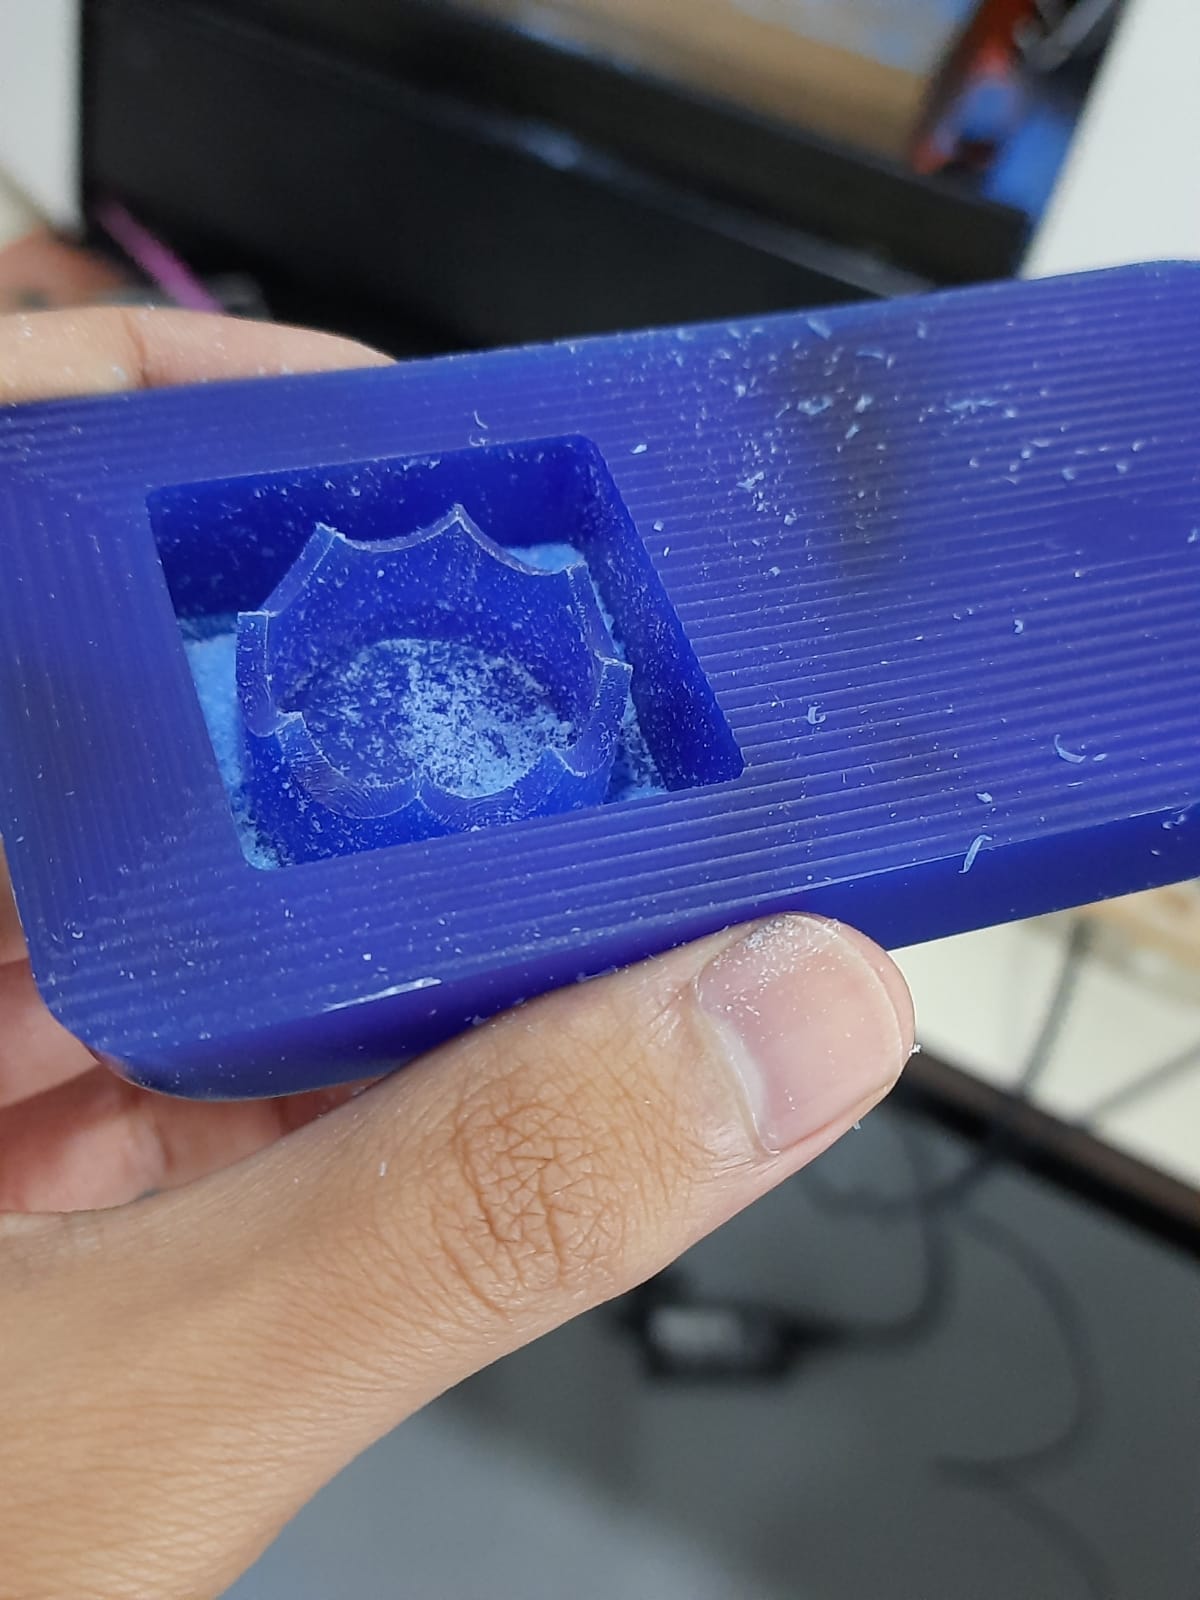
The design will be embedded in the molding wax, and will not be detachable.
The software operates in two steps, roughing and finishing. Roughing is when the software cuts the general shape of the design, without paying attention to the details. Finishing is when the software slows down the cutting speed to cut the details of the design in a more precise manner. Sometimes the software will require changing the cutting tool drill bits between steps, as some details can be small enough to require a smaller drill bit.
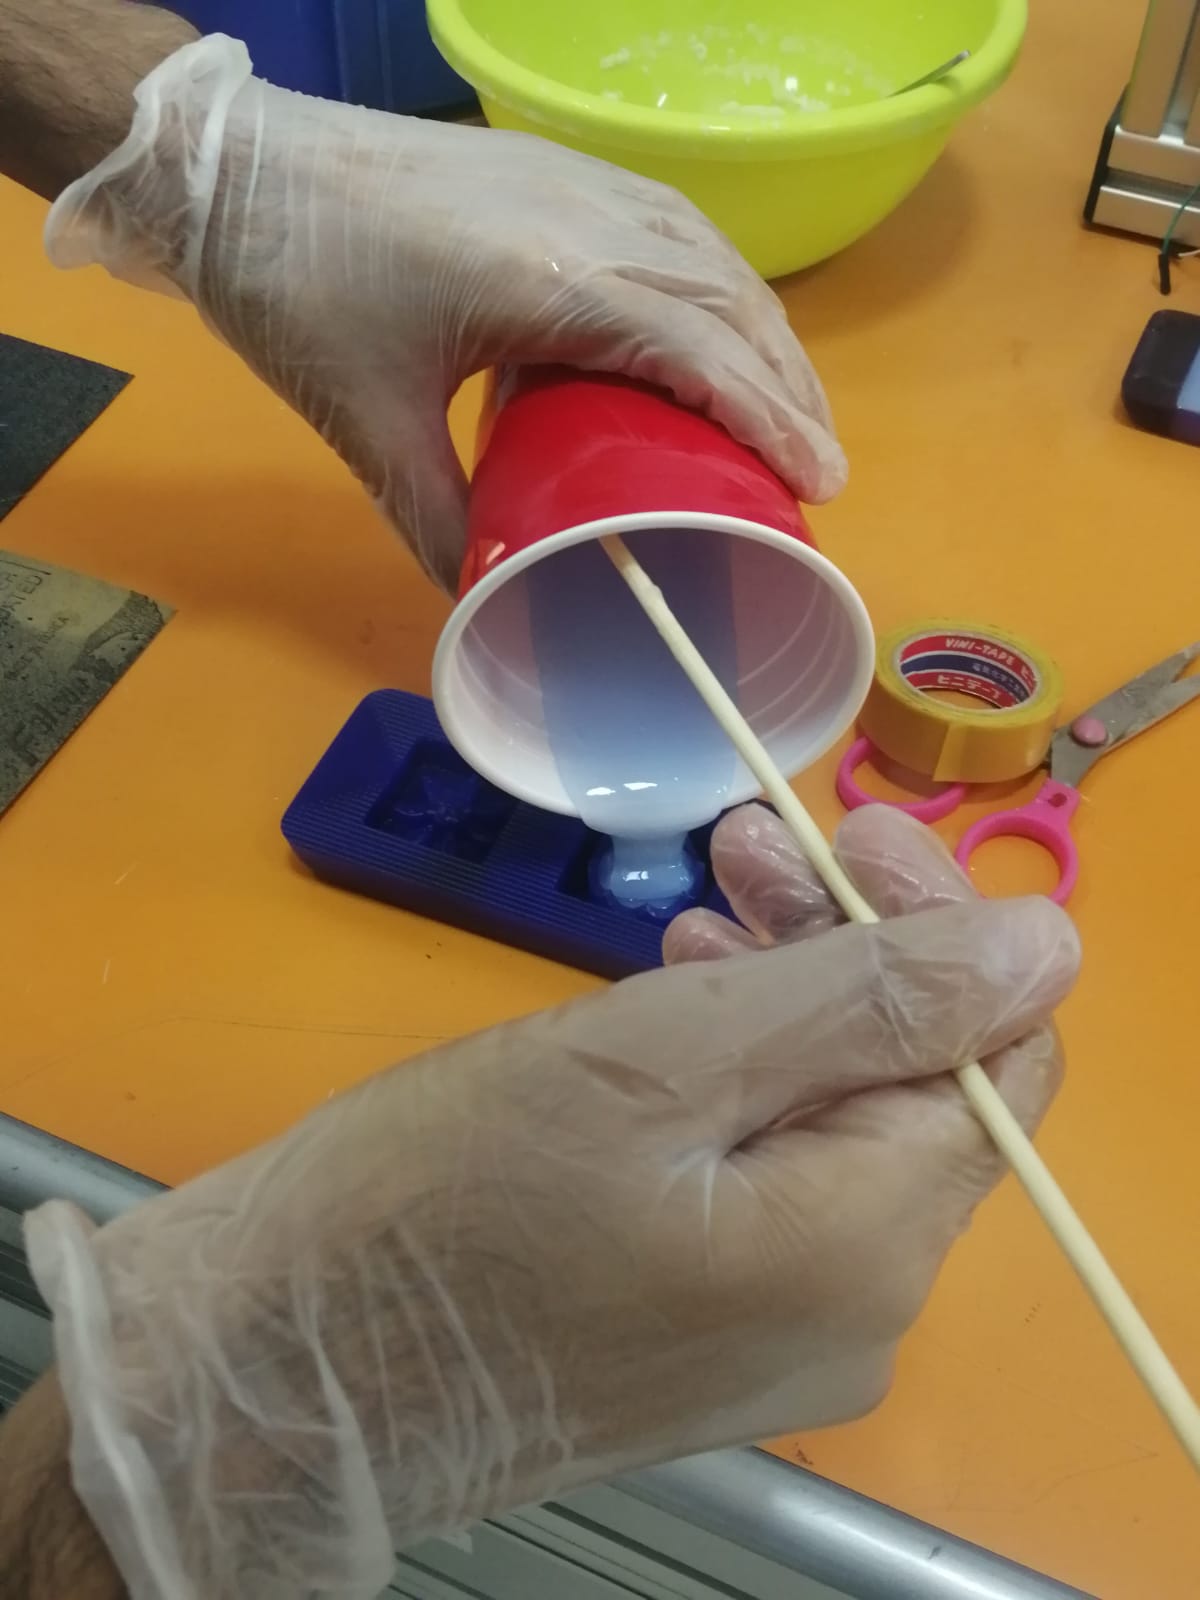
Considering the simplicity of my design, it didn’t take a long time to be cut. After the milling machine turns off, I opened it to remove the molding wax, and carefully extracted the left over chips resulting from the cutting as they can still be remelted and reshaped to be used for future projects. The next step is to create the mold to be used to cast our designs. We were instructed to use a form of silicone liquid. To create the mold, we first have to mix two materials with a 1:1 ratio. Basically the two materials are liquid in their original form, but mixing them with a 1:1 ratio makes it so that they start solidifying after a while, which in turns becomes a material that is suitable for casting. This is known as curing. We then pour the material into the molding wax cavity, and wait for it to cure. The liquid silicone material is known to cure relatively fast.
Mixing the materials
While the material was curing, we were informed about the different molding and casting materials. Some of them tend to be hard and some of them tend to be soft. Generally, softer materials are casted in harder materials while the harder ones are casted in softer material. This is done to facilitate removal, as removing a soft material from a soft mold can damage both the design and the mold, and the same holds true for harder materials.
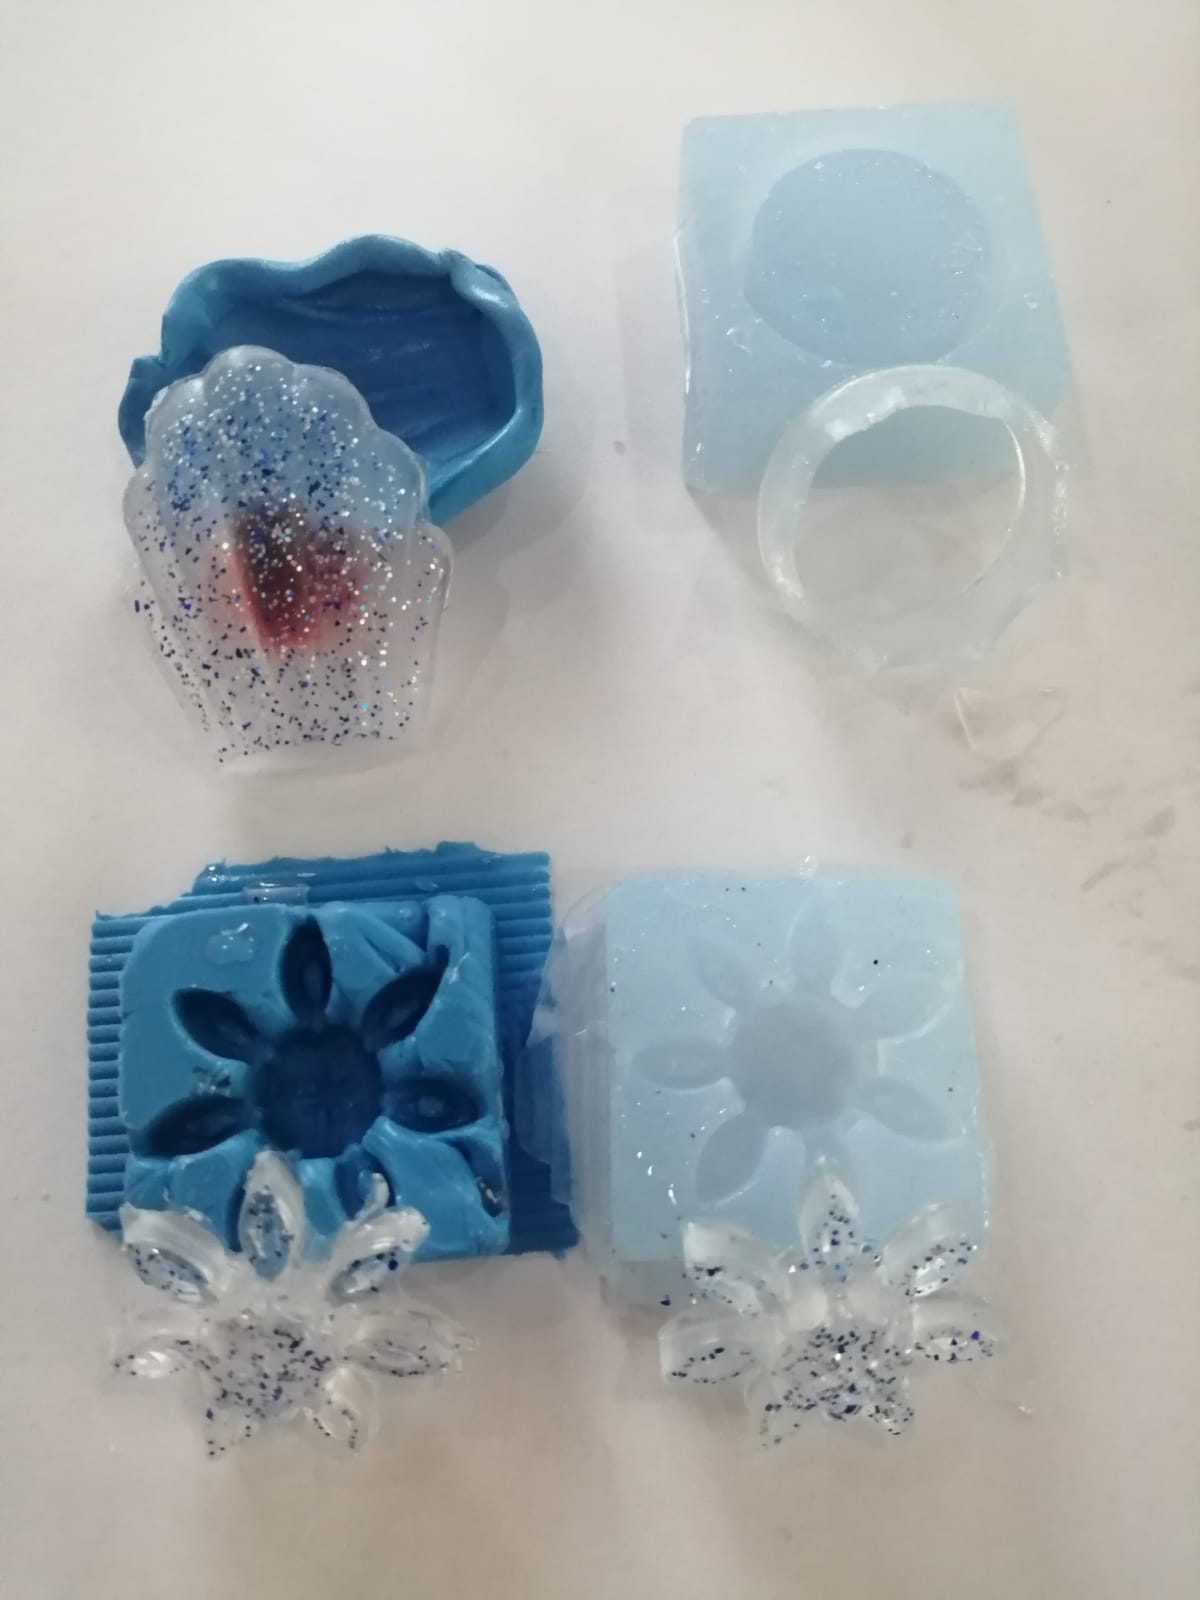
We left our molds to cure overnight, but unfortunately it seemed that we had a problem with mixing and so our molds were softer than they should have been. Although we did not discard the molds, we made other sets of molds using plastic silicone, which is basically a material that is similar to clay and other forms of shaping compounds in the sense that it is solid and can be shaped into other objects. As with liquid silicone, we had to mix material A and B in a 1:1 ratio, so it would cure and solidify. The difference between this material and the former is that this one is harder and it cures at a much faster rate. After thoroughly mixing it, we carefully filled the molding wax cavity with it and left it to cure.
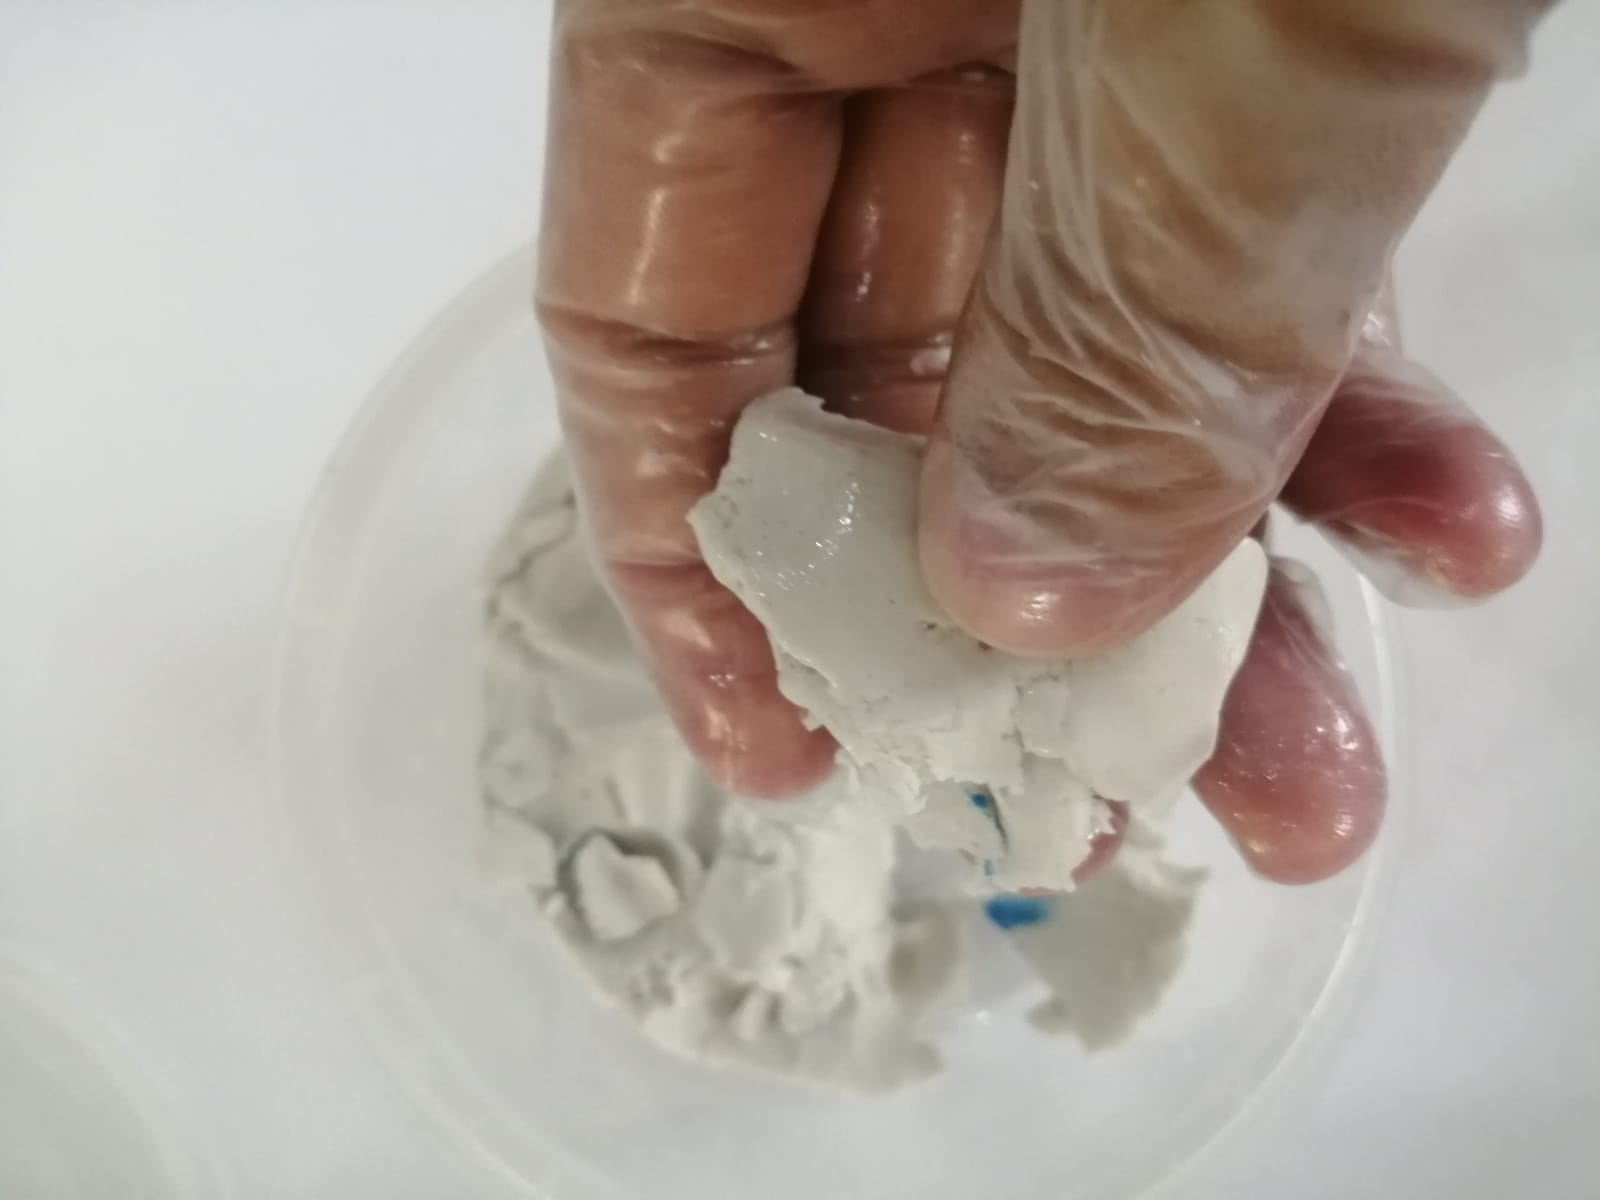
General shape of the clay material. This is one part of the mixture, however the final shape and properties do not change much.
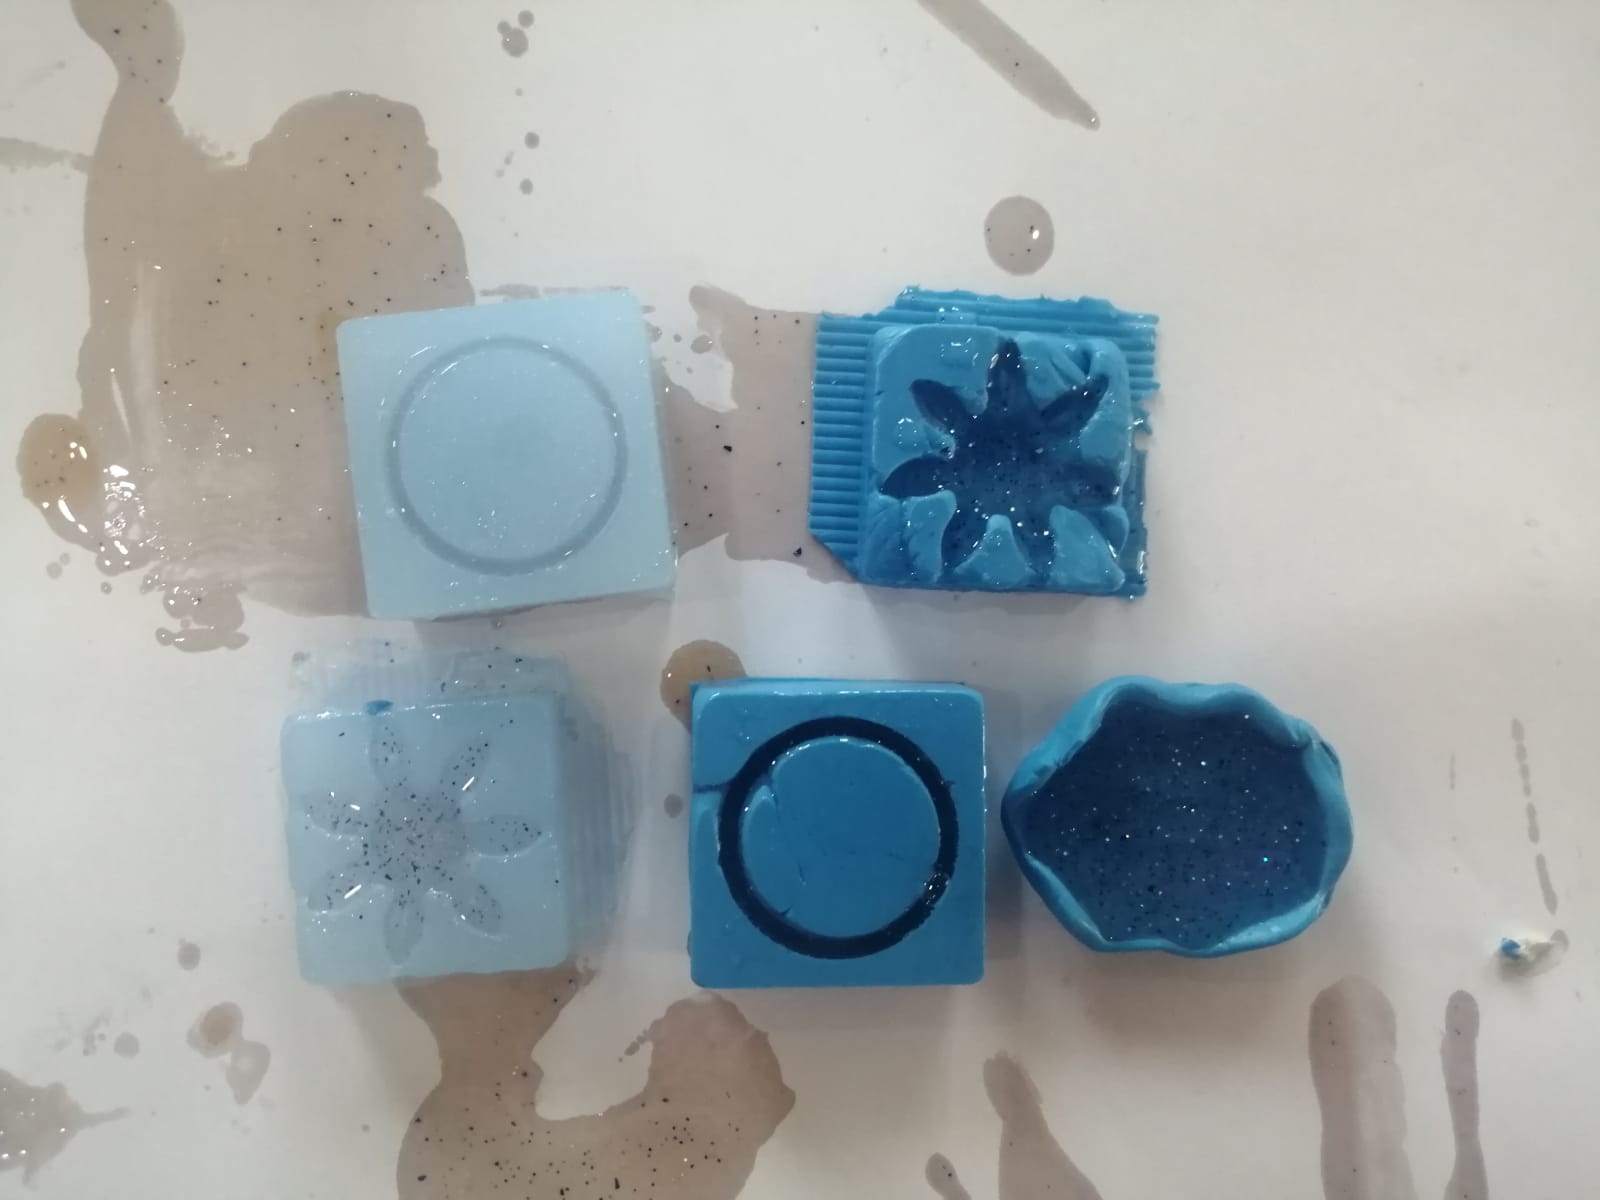
Due to it’s different state, creating a mold out of it was more difficult as it wasn’t fluid enough to fill in the gaps by itself, and so my mold had a lot of cavities and areas that weren’t molded properly, and this was reflected in the shape that came out of it later.
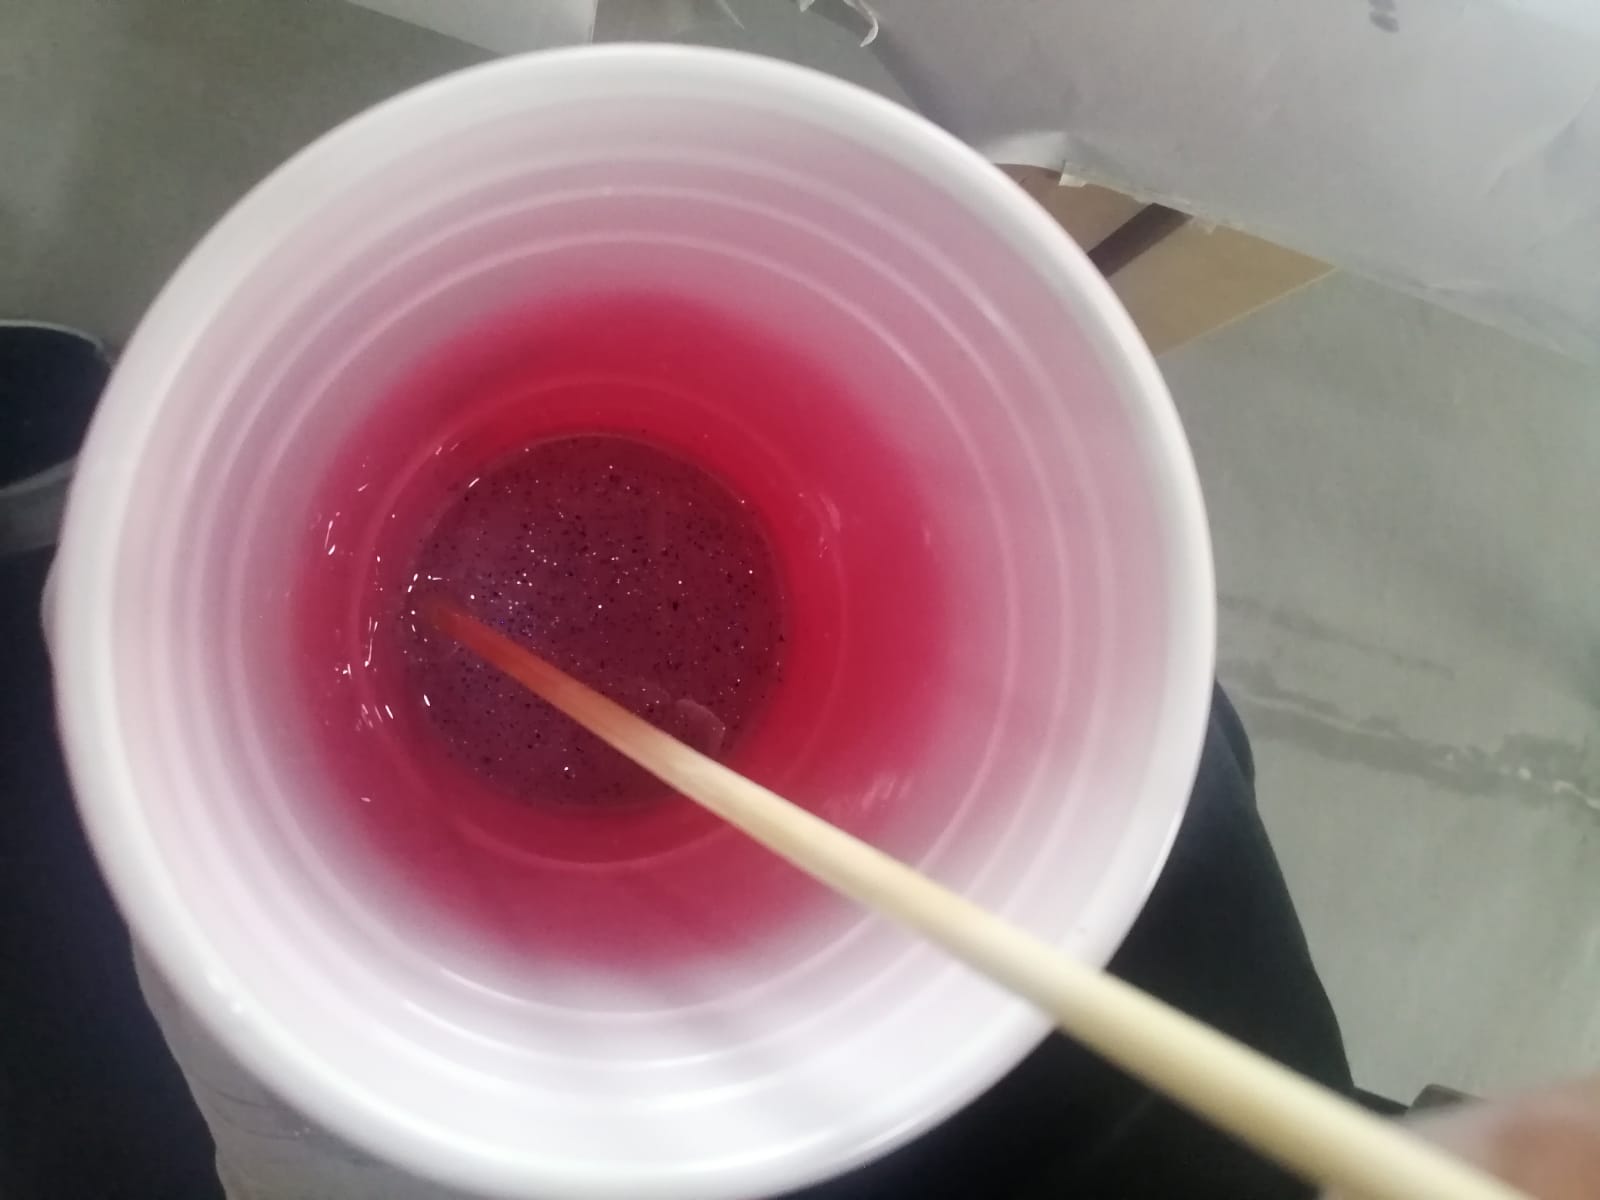
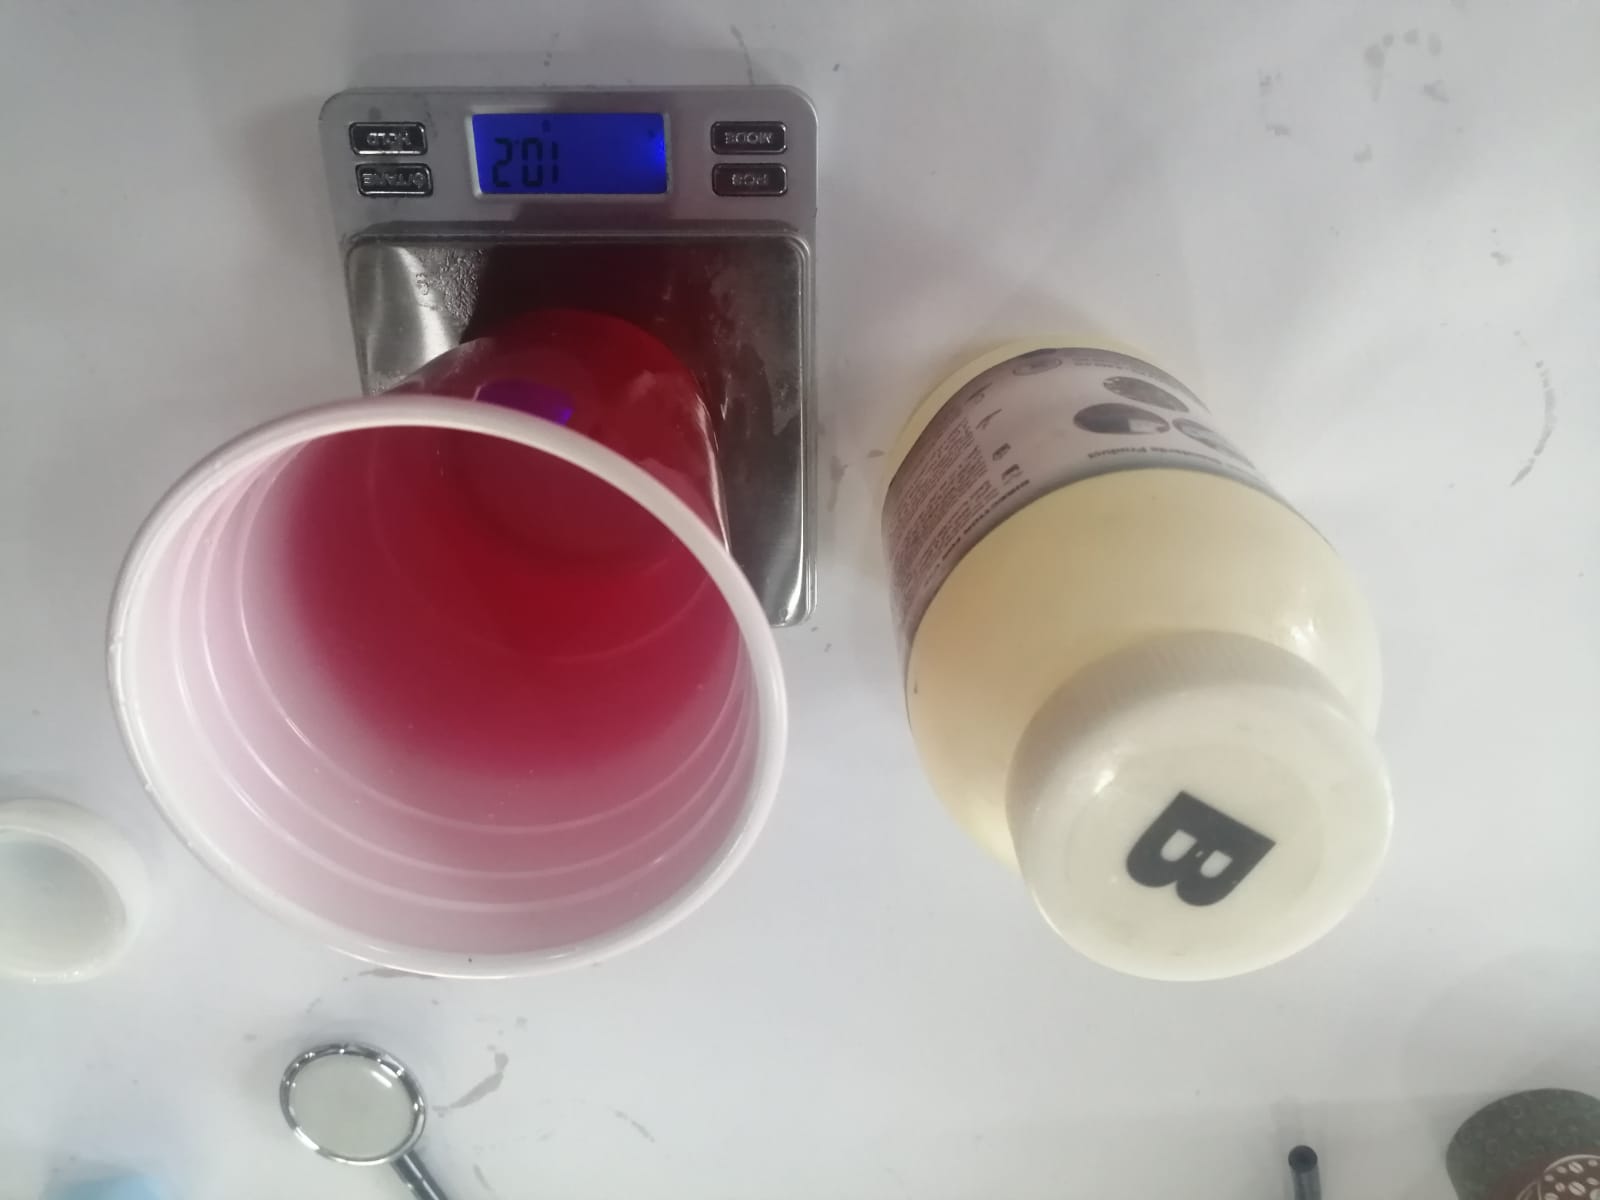
For the final step, we use the molds produced in the previous step to cast our designs. We had a range of materials to choose for casting, including gypsum for example. We chose epoxy resin as the material for casting as it was an incredibly good surface finish and it was easy to use, and not to mention the finished product is a delight to look at. Also, due to its nearly transparent color, coloring it is quite easy. Unlike previous materials, epoxy resin is mixed in a 3:1 ratio, with the 1 ratio being the hardener material. As with liquid silicone, epoxy resin is a viscous liquid which means it is quite easy to cast, however it has 48 hours curing time.
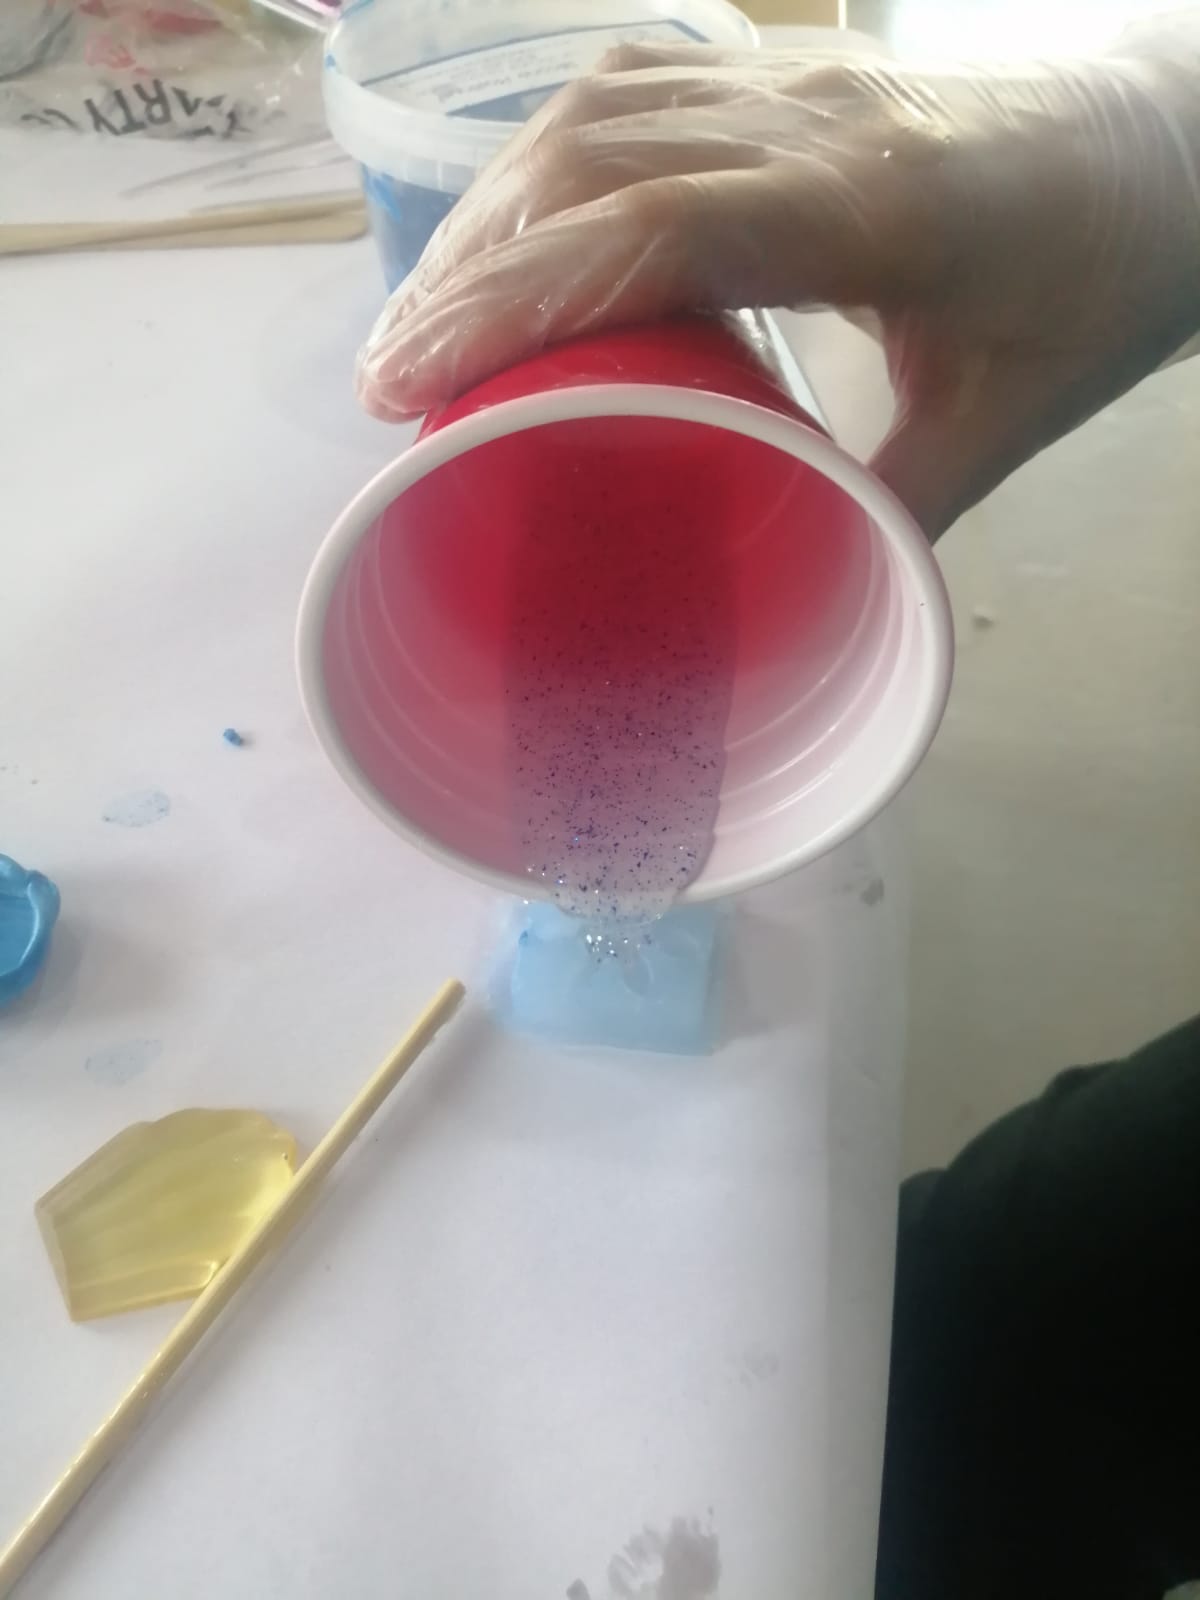
Here we have two examples of different materials being casted
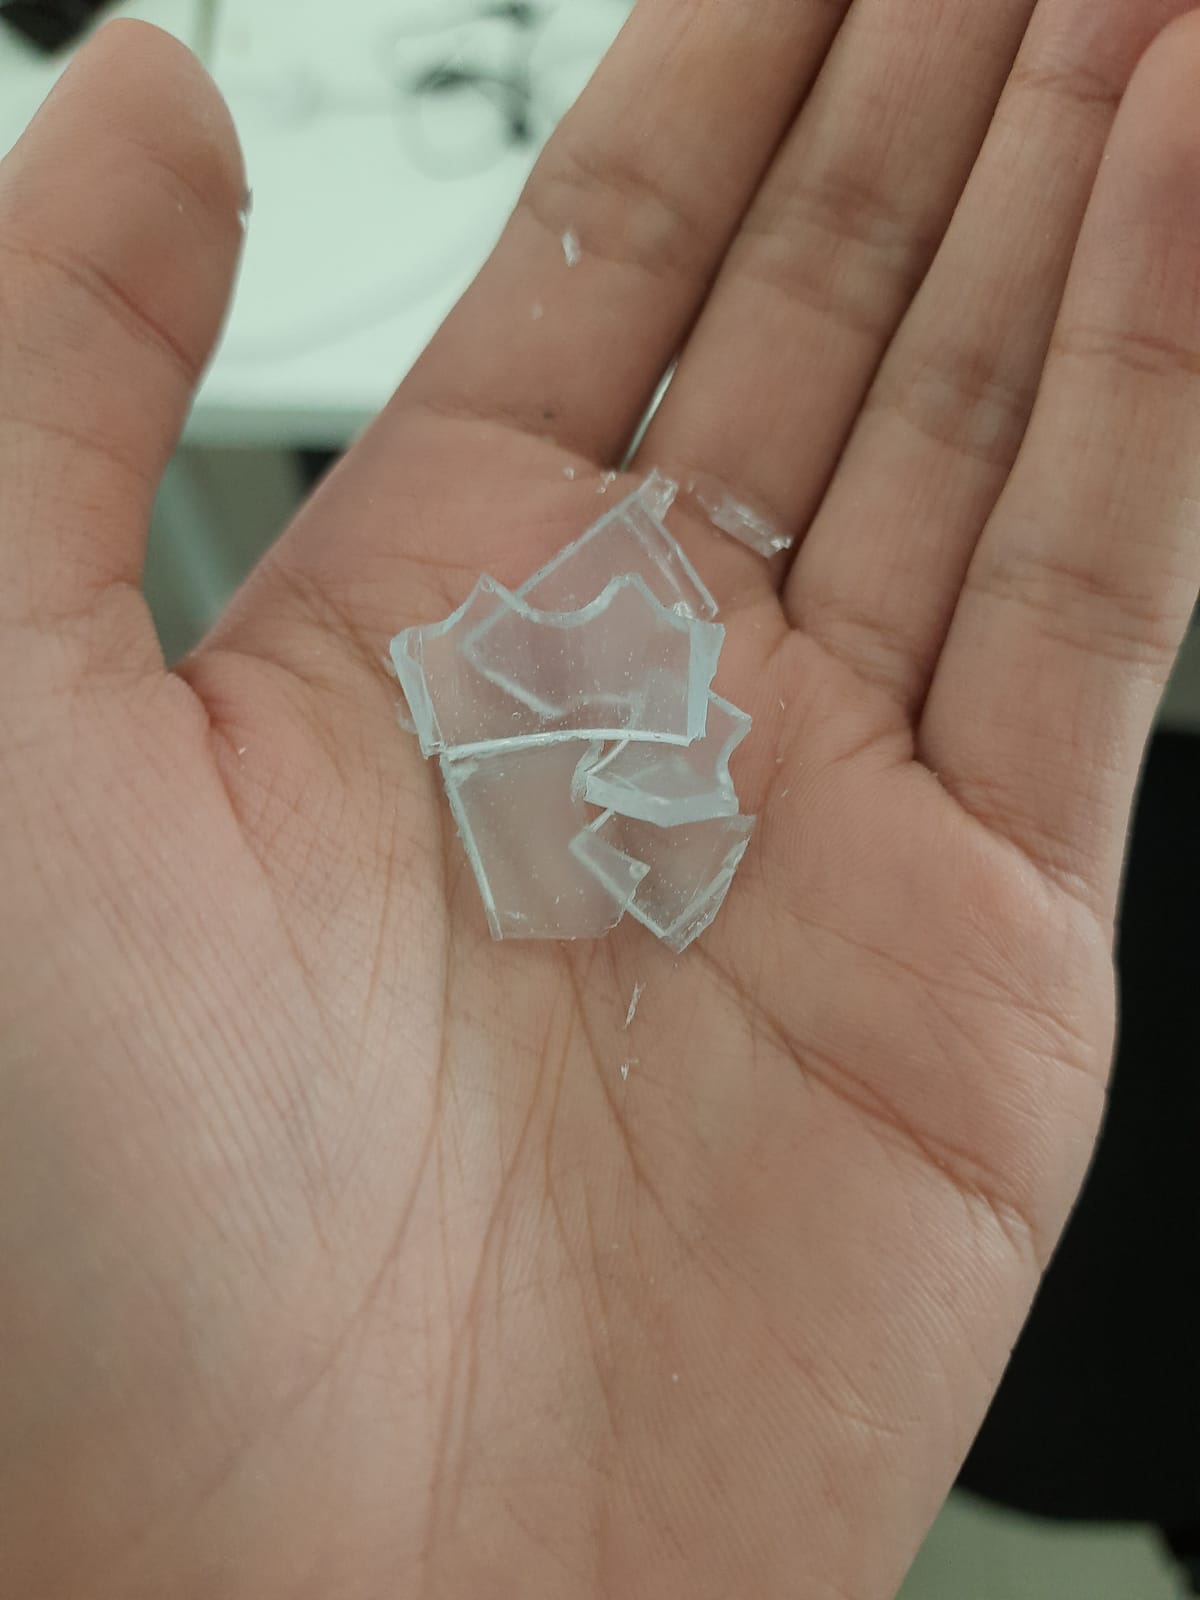
Since I had two molds, I decided to remove the silicone liquid mold one first, after nearly 30 hours. The product was quite nice, however it was rather soft initially. Over time it became more rigid, and later even broke because I was trying to test it’s rigidity. I assume this is because we removed it earlier than 48 hours and the curing process wasn’t smooth. The second mold, the silicone plastic, was a rather hard material and therefore needed to be cut to be able to remove the product. The product this time was far more rigid, although the quality was mediocre at best owing to the fact that the silicone plastic mold didn’t shape properly. There was another silicone mold that I have made based on a seashell, which came out smooth despite being removed 18 hours before it finished curing. I assume because the material amount contributed a lot to its rigidity as opposed to my thin crown design.