7. Embedded programming
This week I learned about microcontrollers and about programming them. A microcontroller is basically a small computer incorporating one or more CPUs along with memory and programmable input/output peripherals.
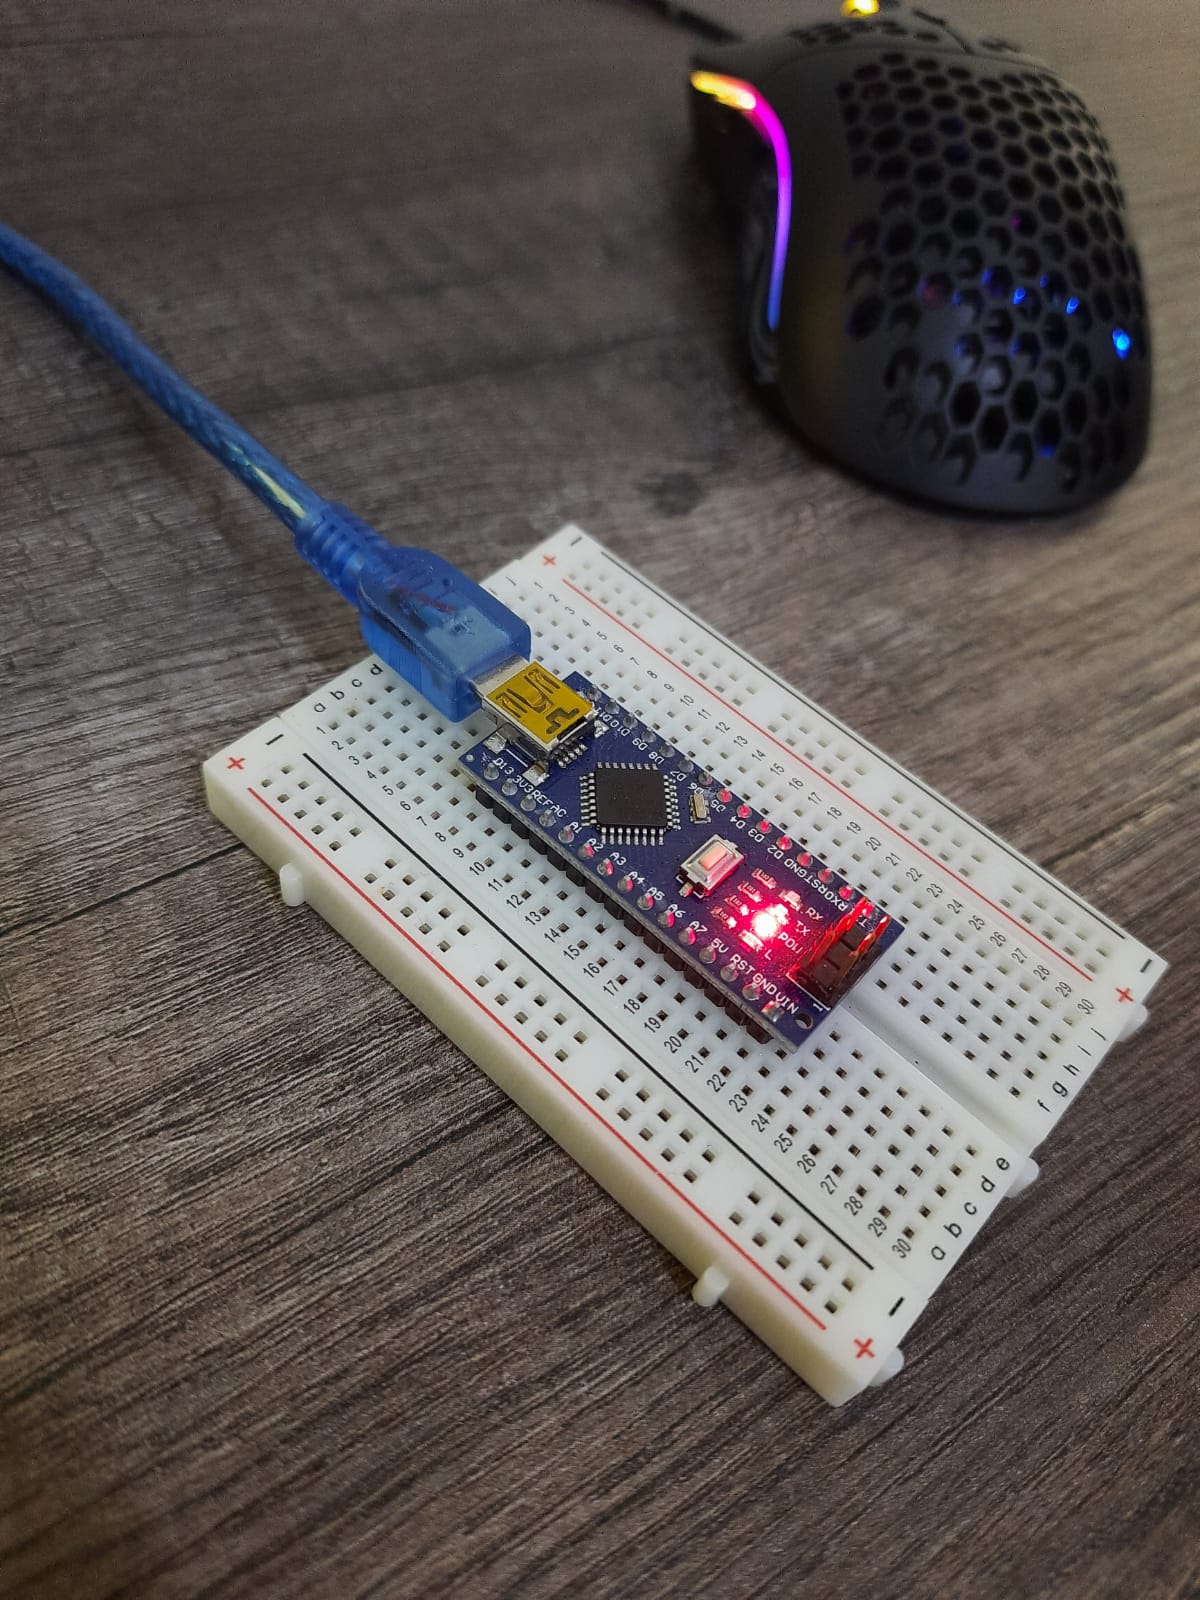
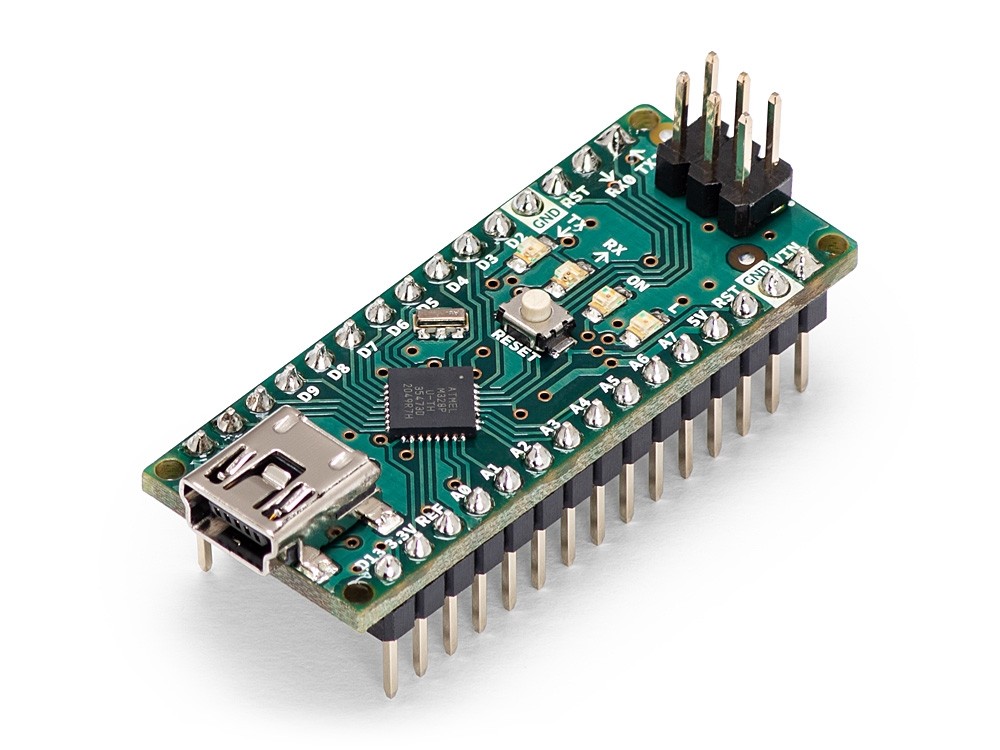
The microprocessor I learned to use is called Arduino Nano. The Arduino Nano is a small, complete, and breadboard-friendly board based on the ATmega328 (Arduino Nano 3.x). It works with a Mini-B USB Cable.
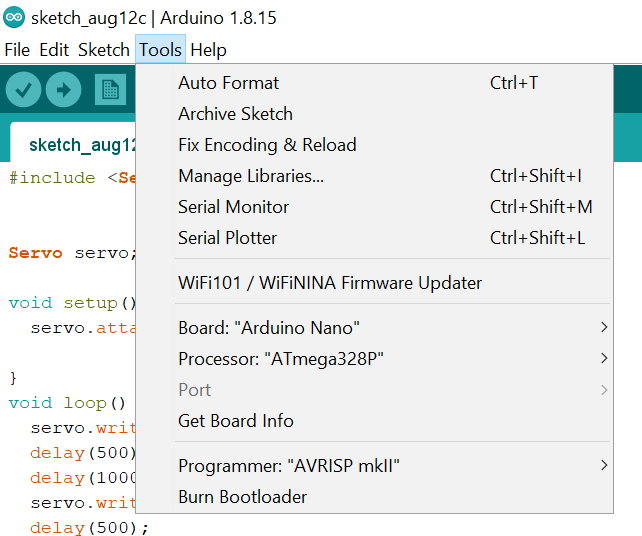
To properly use the Arduino Nano microcontroller we will first download the driver and the software. After installing both, we must now make the software identify the board we’re using. This can be achieved by clicking Tools on the upper left corner, and clicking board and selecting Arduino Nano. Next we must select the processor, which is also located in the Tools menu.
In the interface we see void setup and void loop. Setup is a process that happens once, in this case it’s the LED lighting on the Nano board. We will select through coding the right pin which is where the LED light is located, and then we will select output, in order to output light.
Next step is configuring the loop, which is basically a process that occurs continuously. In this instance we want a blinking effect. We add the command digitalwrite with the LED name + HIGH; the HIGH translates to the light being ON and LOW to OFF mode, the delay is basically the time they will spend ON or OFF in millisecond.
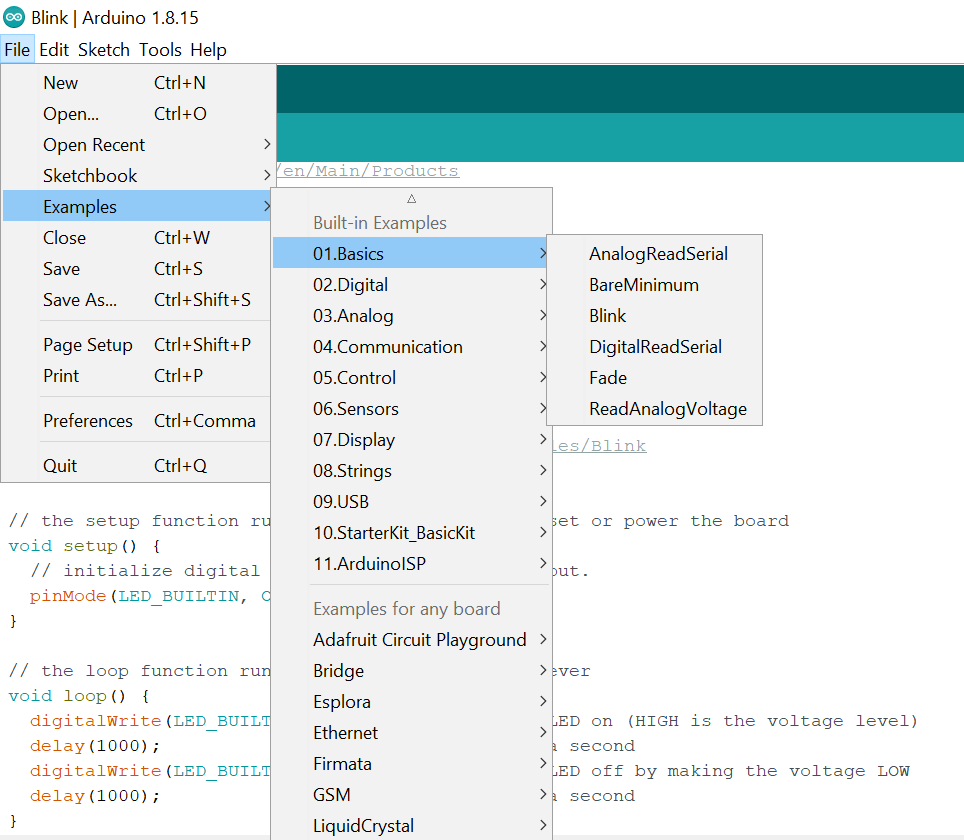
Many examples of Arduino codes can be found here.
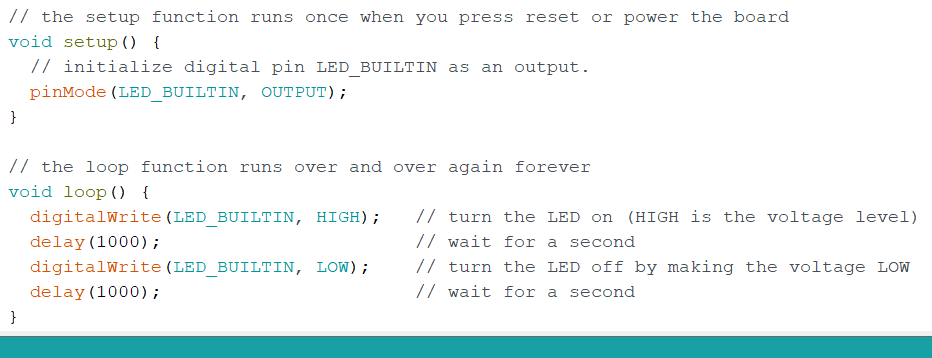
A sample code provided by the Arduino software for the blinking function.
After this is done, we will click on the arrow key on the upper left next to the correct sign, to upload the code to the Arduino Nano board. We can also save this file for future references.
The Medium Challenge
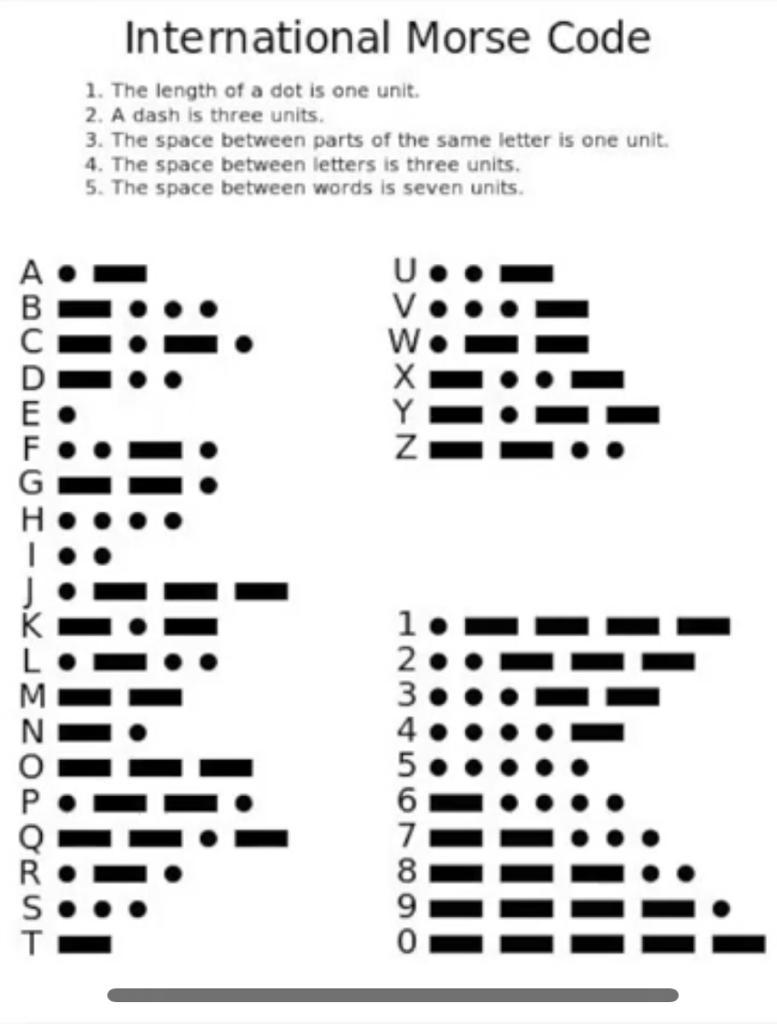
Our instructor gave us a list of challenges to achieve to demonstrate our understanding of coding. The challenge I chose is to use the LED light to spell a word using morse code. The word I chose is SOS, which is short for Save our Ship. It’s a form of signal that is used to call for help, and oftentimes it’s in morse.
And now for the final code
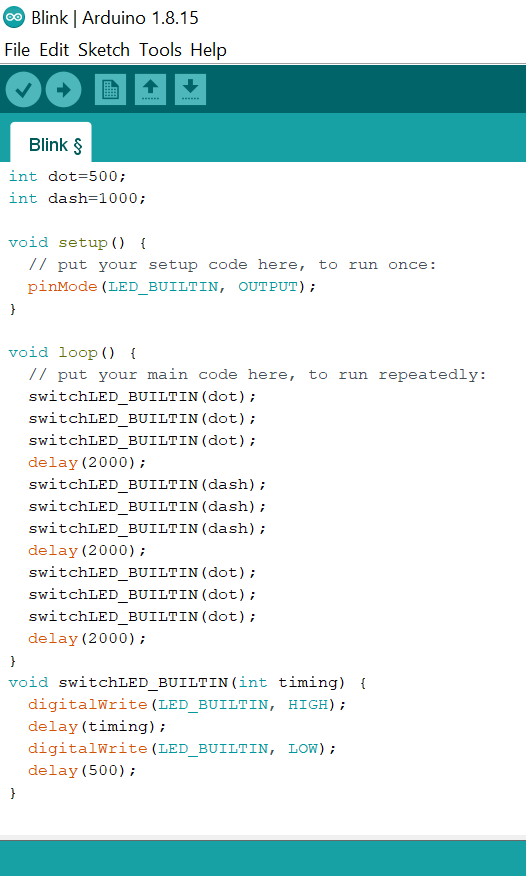
We begin by identifying the dots and dashes with a certain timing to recognize them. We then code the intended LED switch pin to turn on and off depending on the timing, which is under void switchLED_BUILTIN(int timing). Finally we turn the Morse signal into a code, which is different from one letter to another. This information is pulled from the international Morse code sheet. We add a 2 seconds delay between each letter to be able to recognize the letters.