7. Input & Output device
In this week I learned how can I use the output and the input of the Arduino and how can I connect the some input devices and transfer the information to the output through the code that I wrote , Also I learnt about some sensors that the Arduino has and how can we use them .
Planning :
My aim was to make an application that it will send the temperature to my phone by using an application made from MIT app inventor
Learning :
BLE
I wanted to use the Bluetooth in my project so I had to learn the meaning of BLE the our Arduino contains, And I found that the BLE is totally different than the Bluetooth that we normally use.
There are Three main differences :
1 - Low power consumption offering a very high autonomy of BLE devices
2 - Long emission range of up to several hundred meters
3 - Competitive acquisition cost
And there are a lot of differences you can check this website
The usage of BLE
1 - Blood pressure monitoring
2 - Fitbit devices
3 - Industrial monitoring sensors
4 - Geography-based, targeted promotions
5 - Public transportation apps
6 - Other various IoT applications
Arduino sensors
Arduino Nano 33 BLE Sense has a lot of sensors :
1 - Color sensor
2 - Brightness sensor
3 - Proximitry sensor
4 - gesture sensor
5 - Digital microphone
6 - Motion sensor
7 - Vibration sensor
8 - Orientation sensor
9 - Temperature sensor
10 - Humidity sensor
11 - pressure sensor
The Applecation
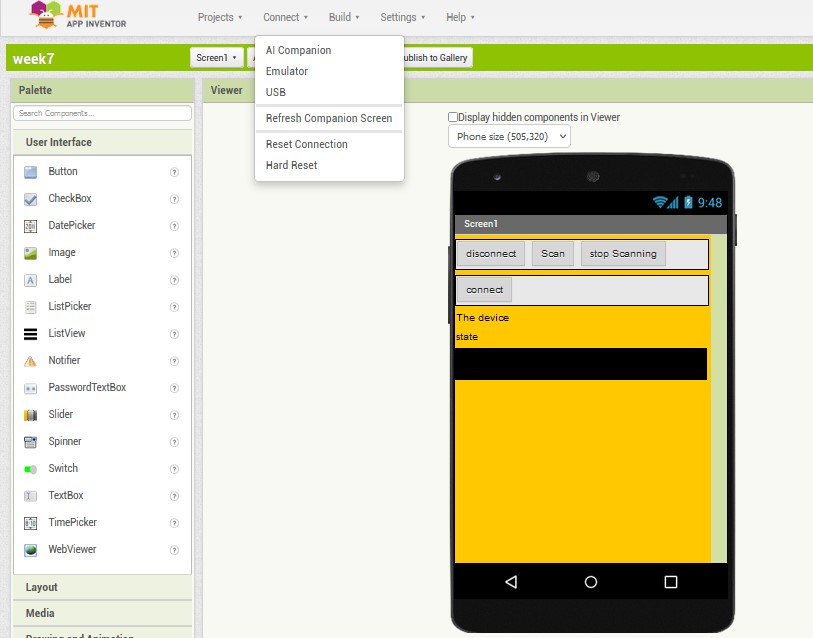
To make the applecation that we will use to reseve the temperature , I had to follow specific steps :
The design
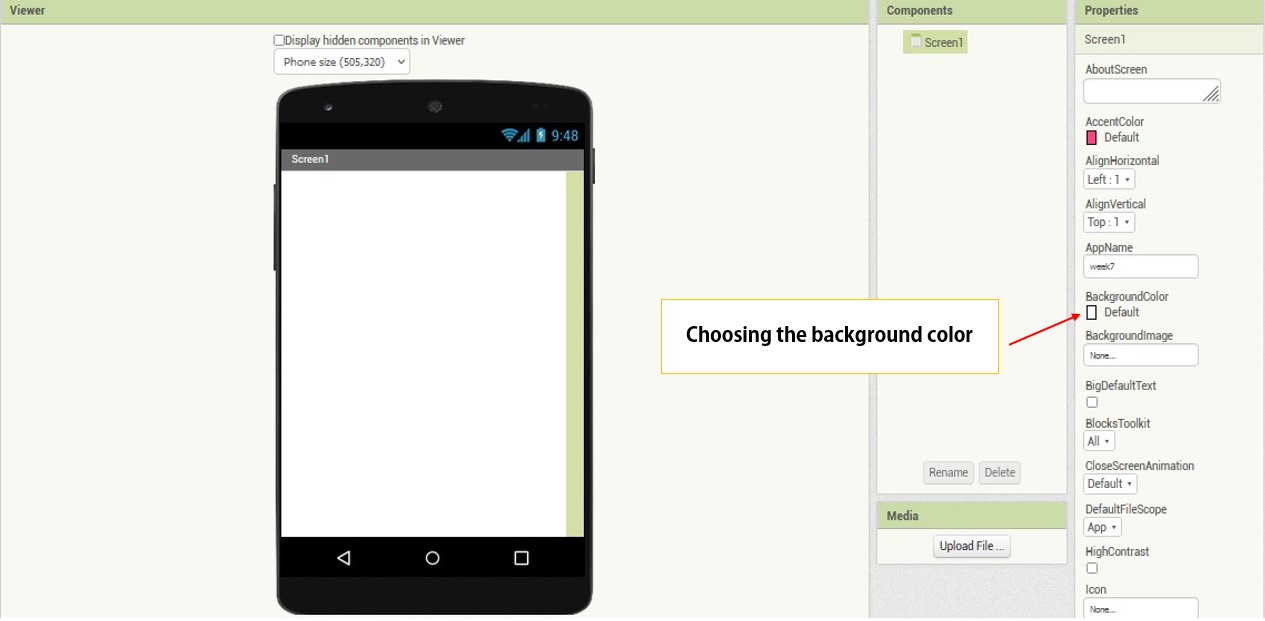
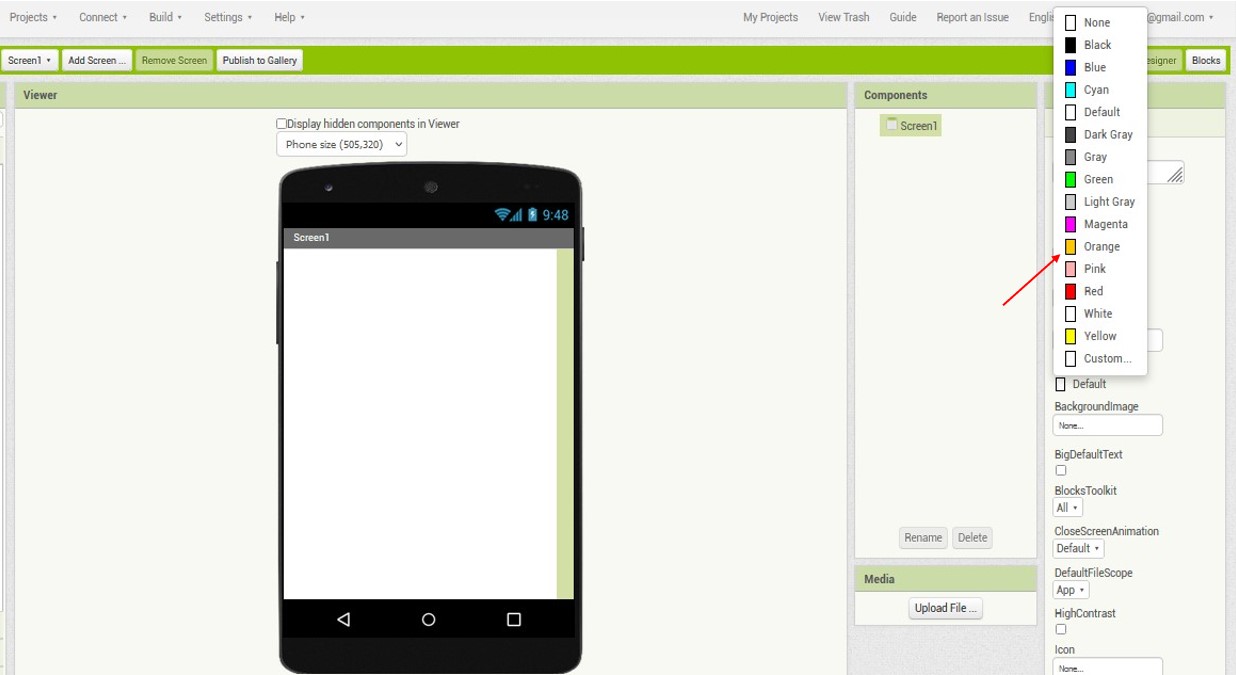
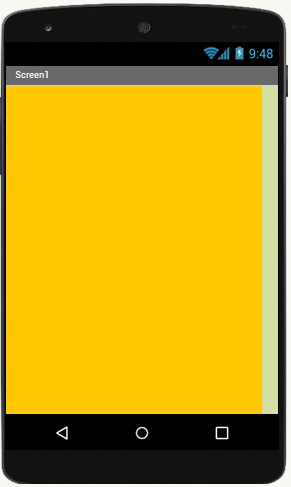
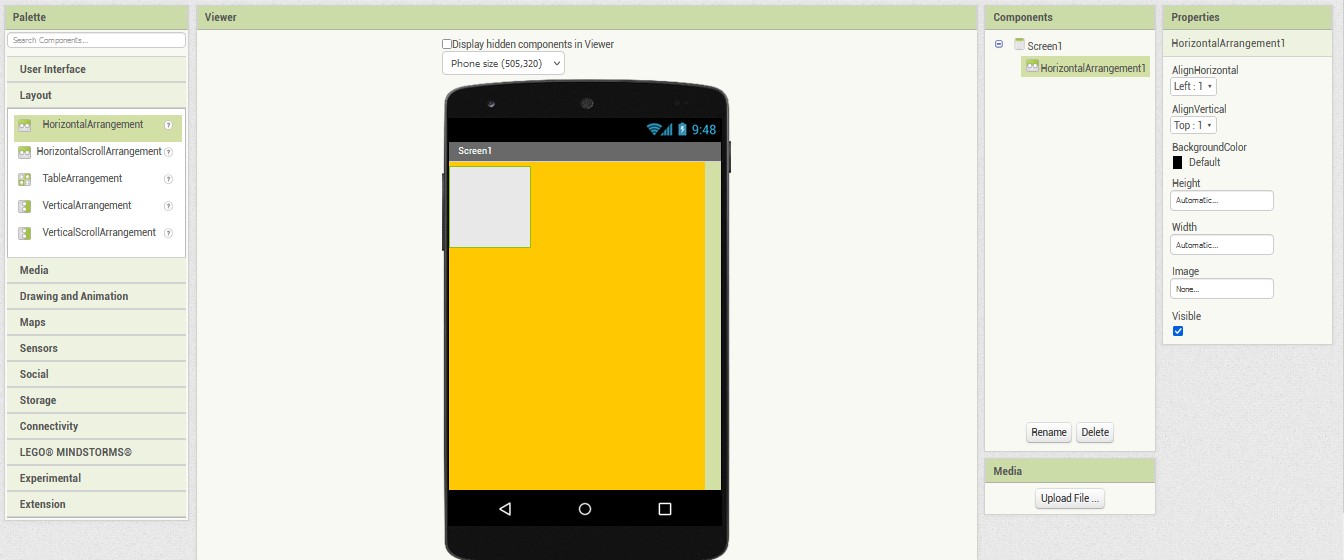
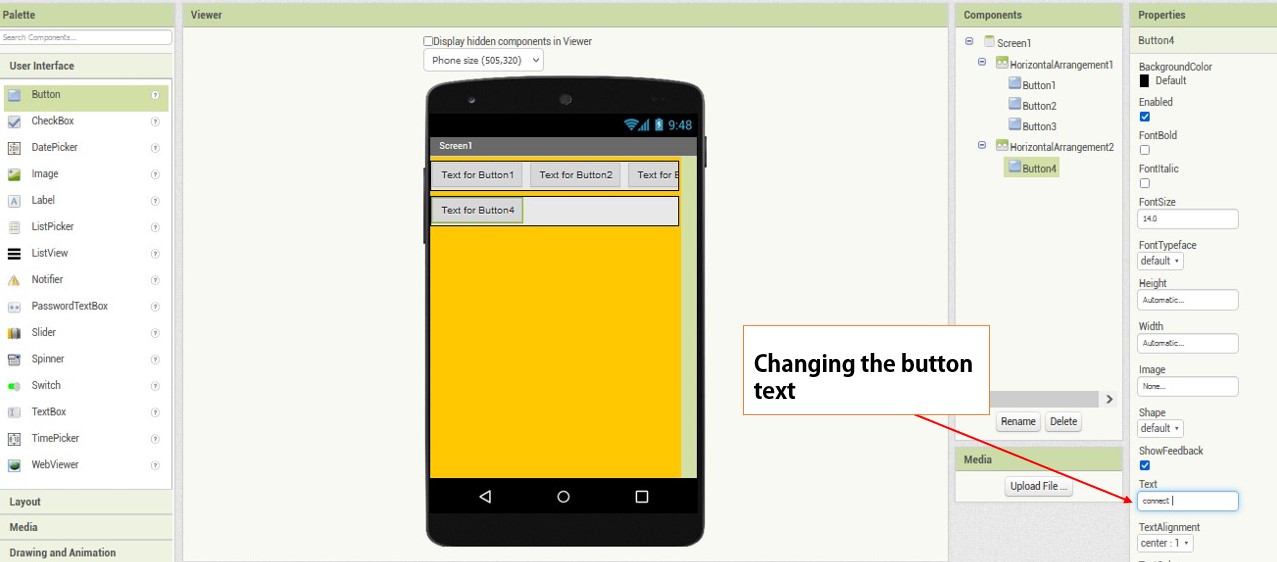
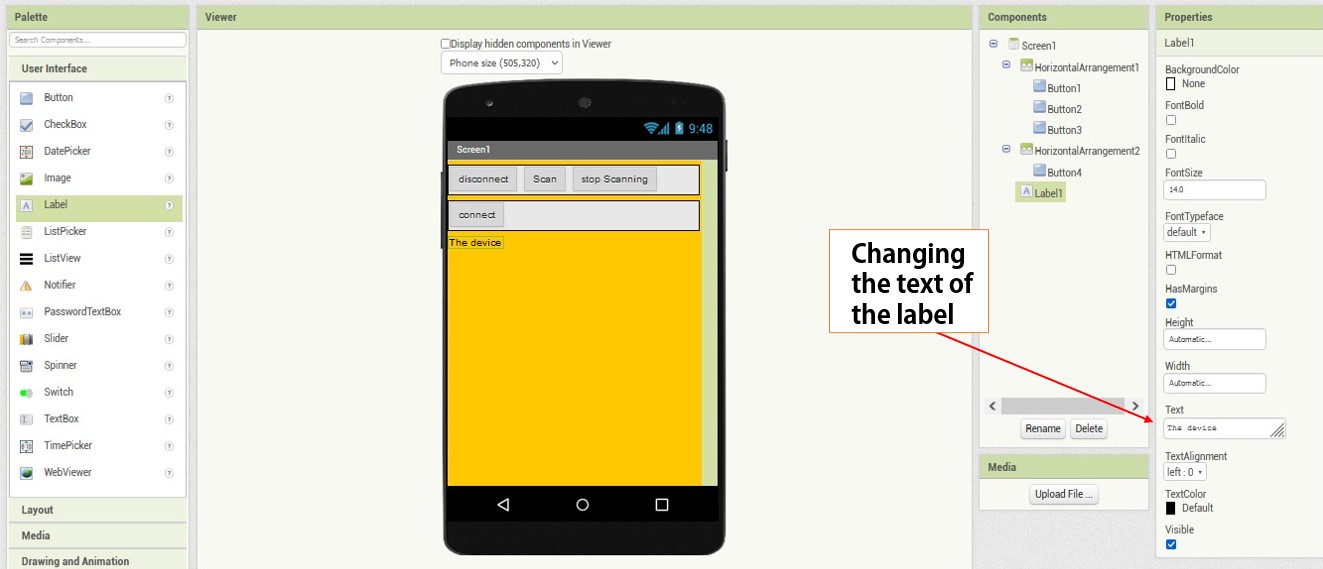
Step one ( The background colore ) :
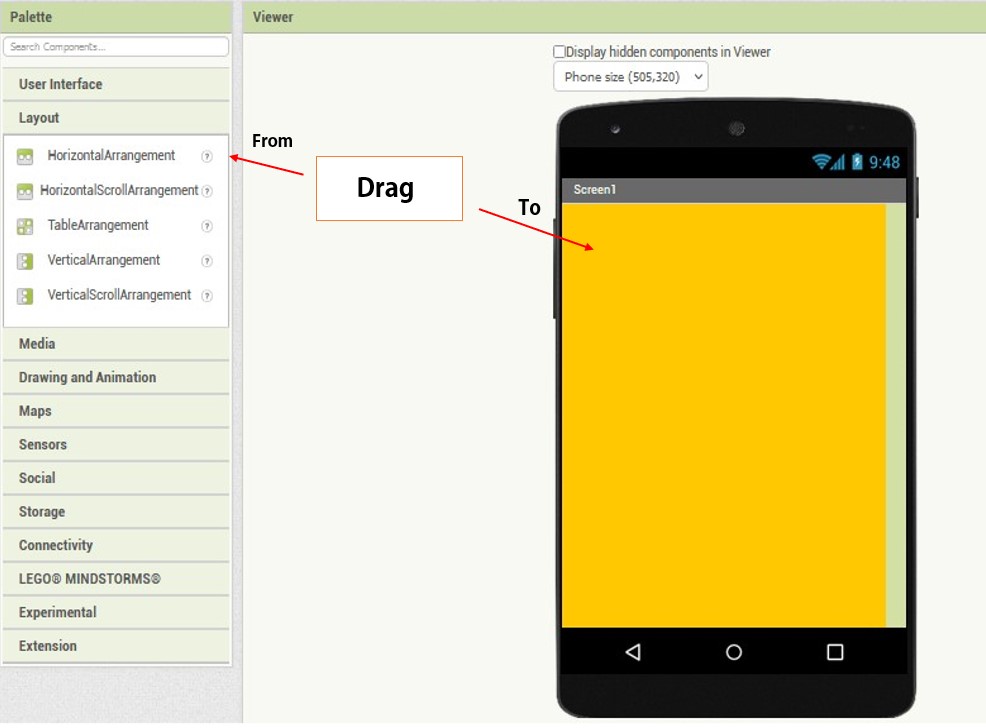
Step two ( Labels and Buttons )
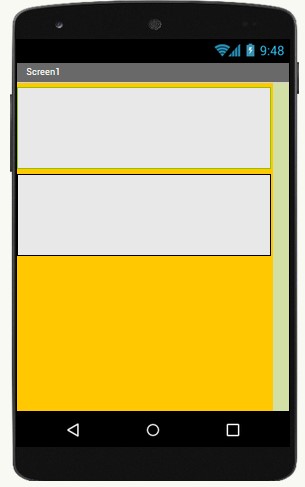
Before we put any buttons we have to put the arrangements
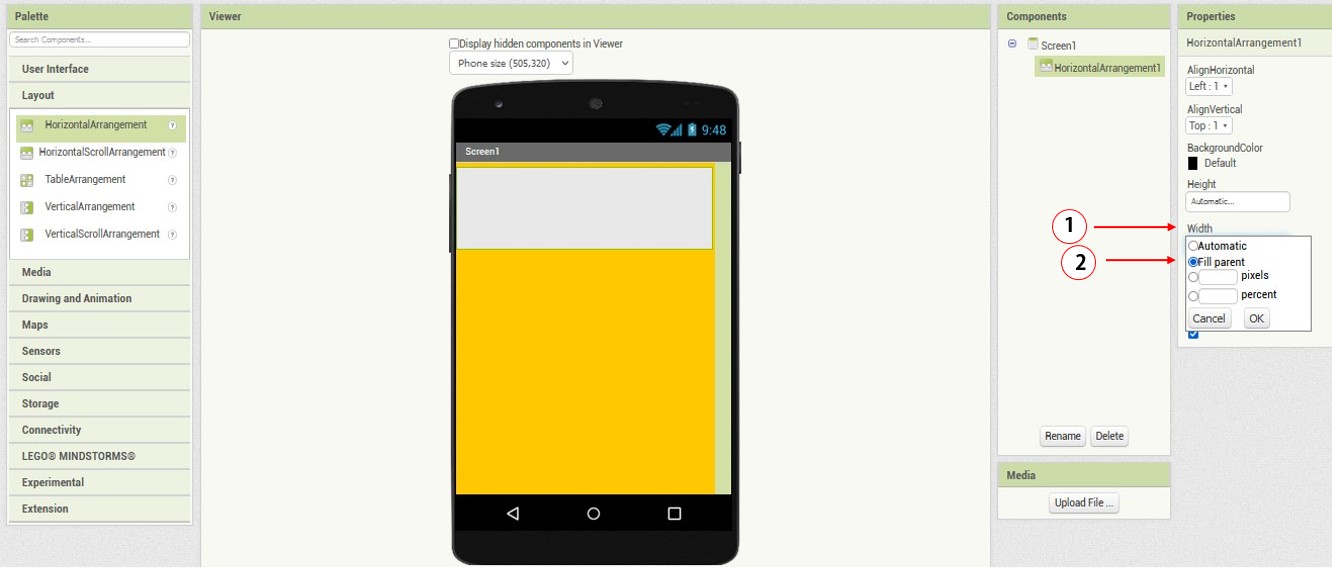
repeat this step one time more
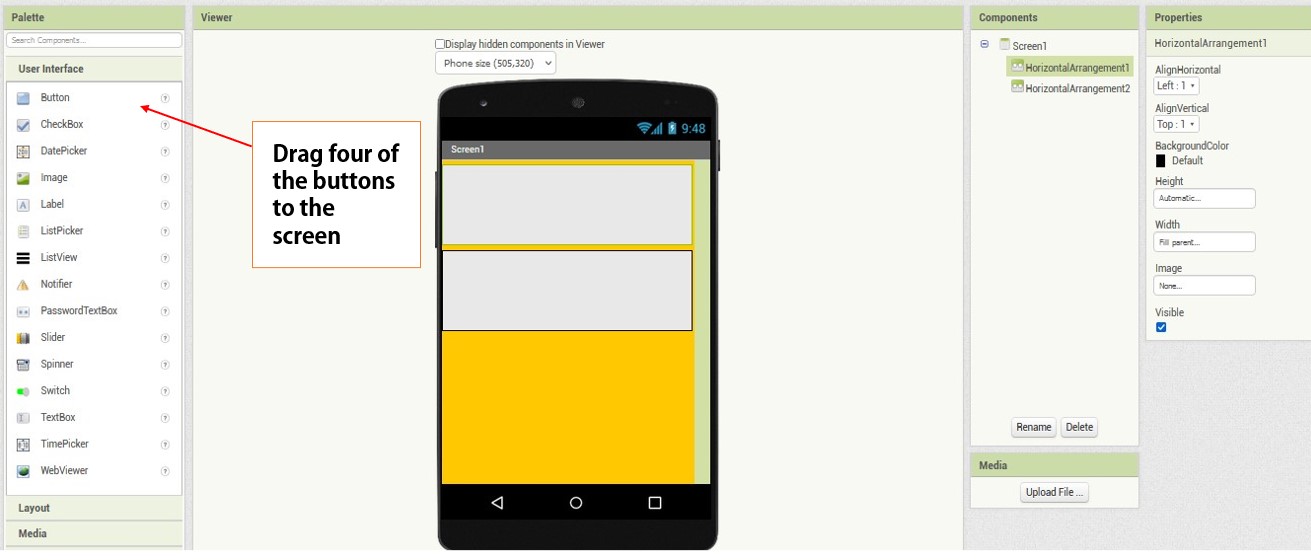
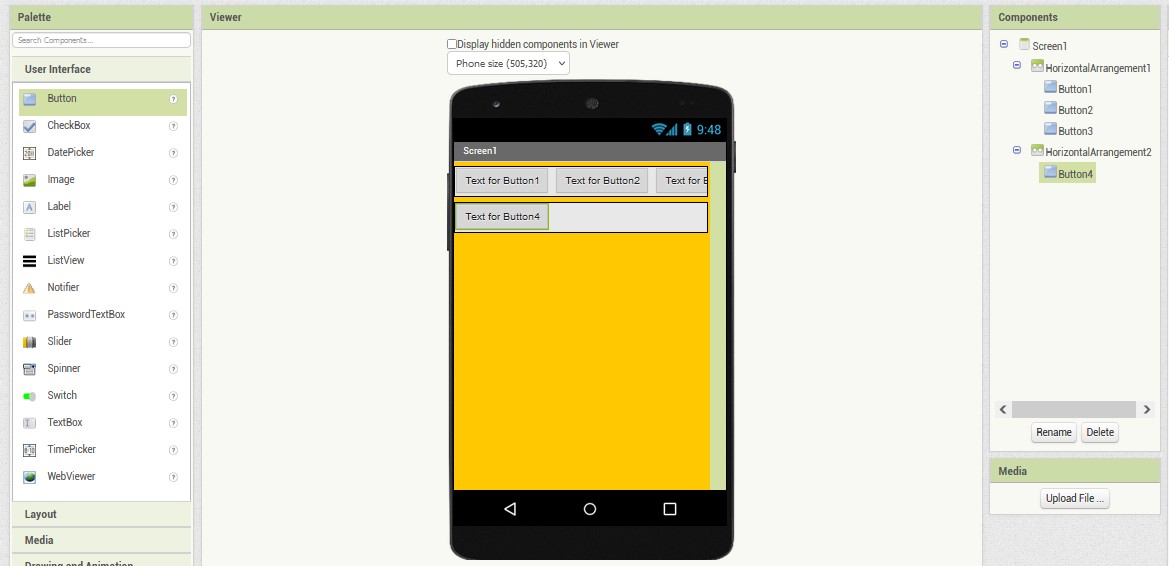
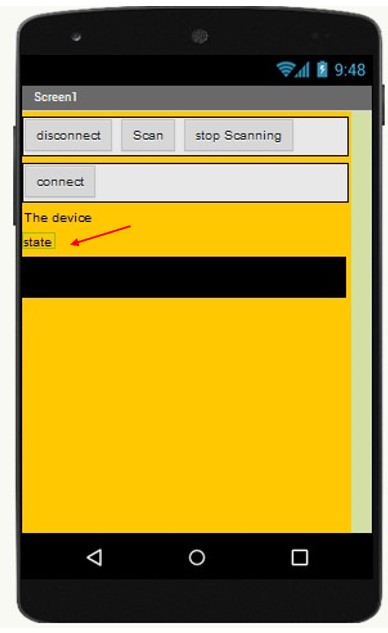
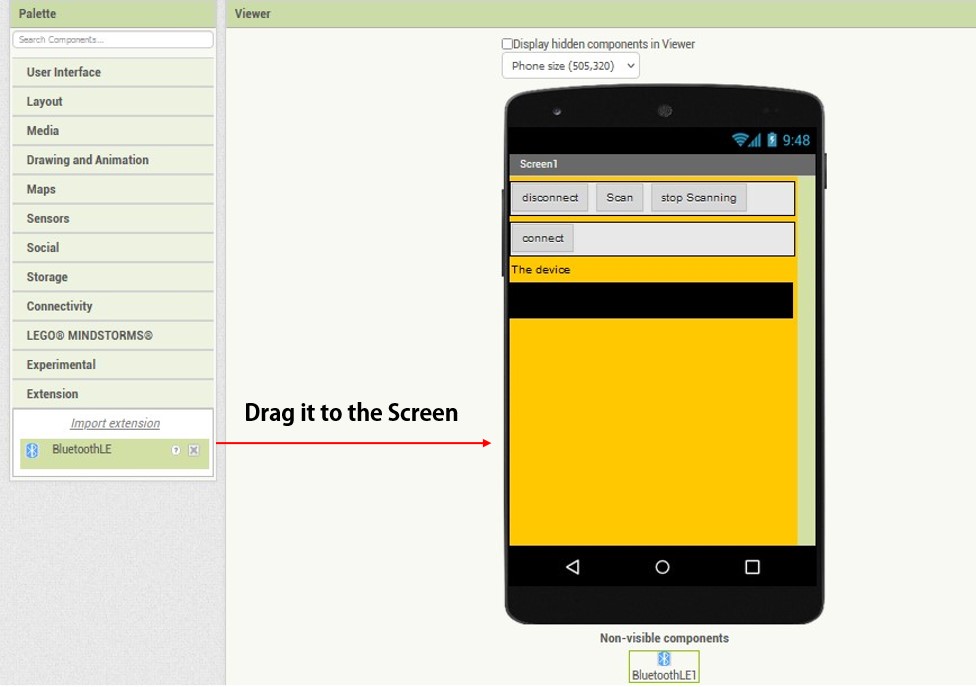
After putting the buttons we have to include a label to determine the device name , label to tell us the state of the connection and a lest view to see the devices

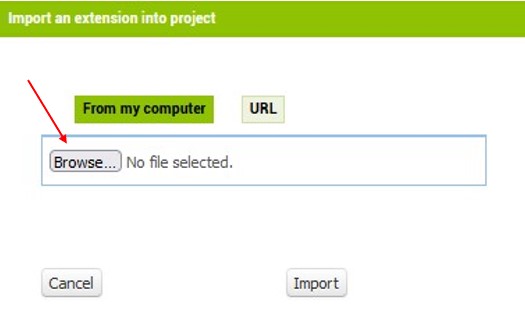
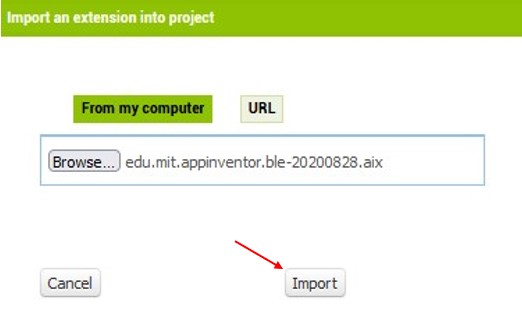
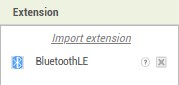
BLE Extension
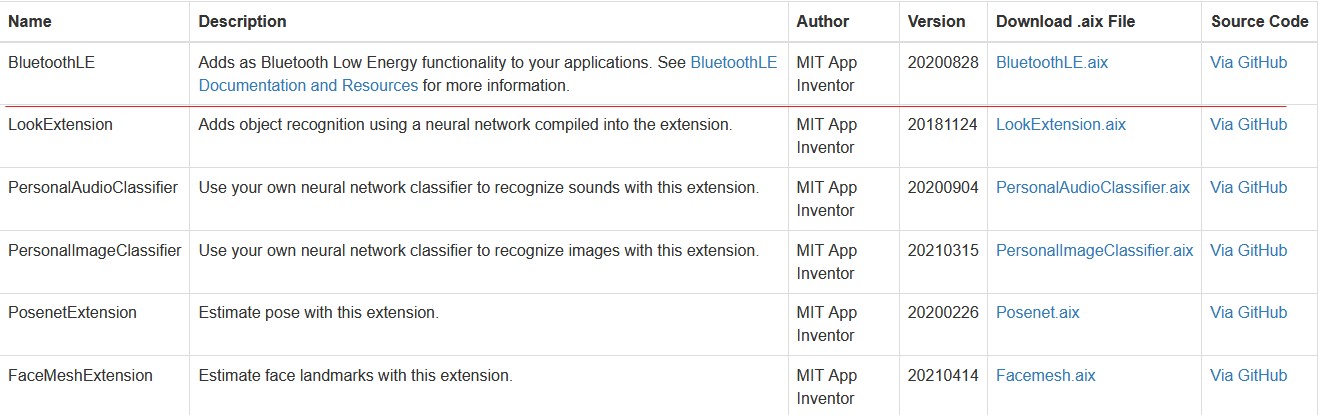
For connecting the Arduino with the phone , we can not use the normal bluetooth , we have to use the BLE , and the MIT app inventor doesnot have BLE blocks , so we have to include an Extension of it .
I found the BLE extention in the website of MIT App Inventor Extensions
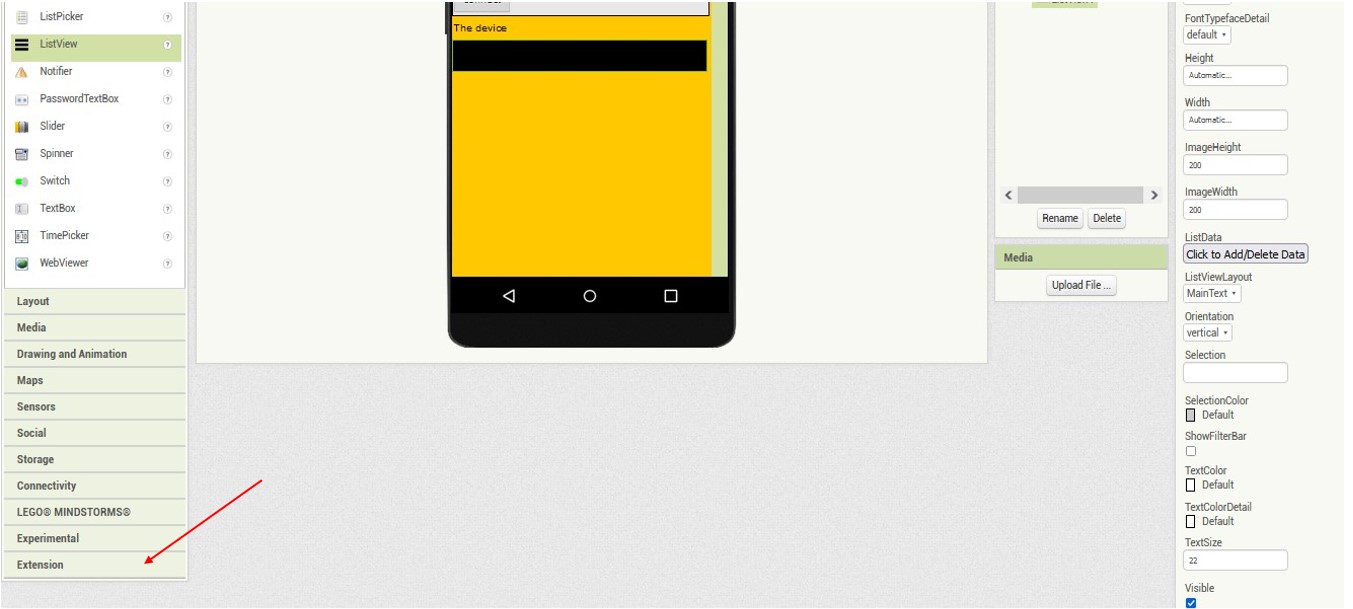
After we install the extension we have to import it

The blocks
For creating the applecation we have to use these blocks :
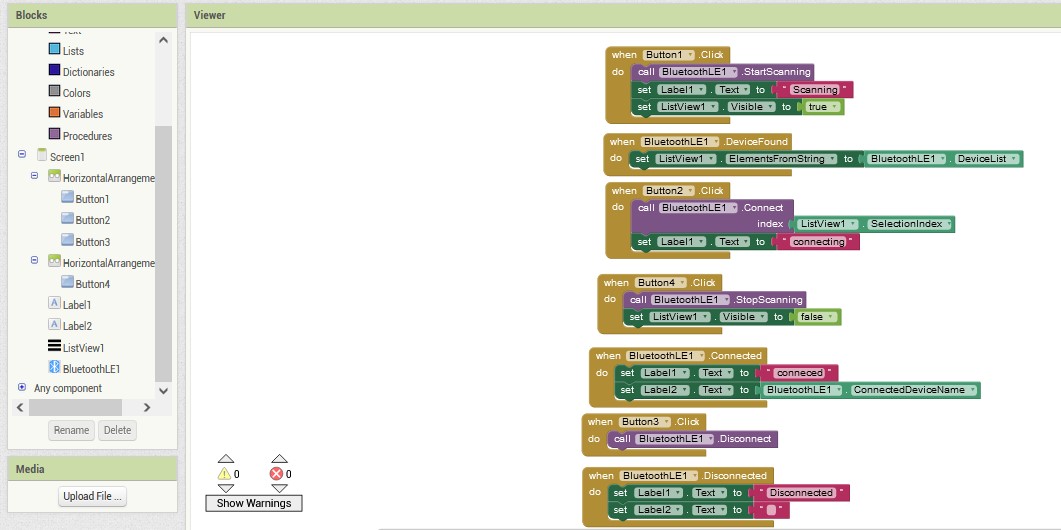
The Explanation of the blocks
 When you click to button 1 the BLE will star scanning and the first label will be Scanning and the listview will be appeared
 The BLE will show the name of the devices in the listview
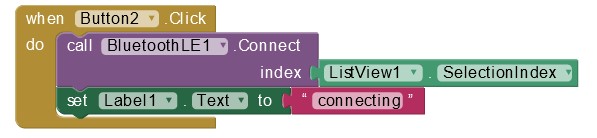 when you click to the Button 2 , The BLE will connect with the selected device , and the label 1 will be connecting
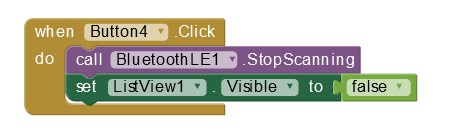 when you click the Button 4 , The BLE will stop scanning , The listview will disappear
 when the BLE connects with the phone , the label 1 will be connected , and label 2 will be as same as the name of the selected device
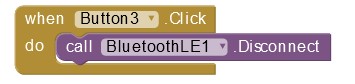 when you click the Button 3 the BLE will be disconnected
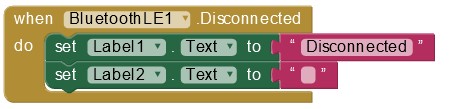 when the BLE disconnected , label 1 becomes disconnected , and label 2 will disappear
The Program (The Arduino Code)
To the programe I used the temperature sensor code and I put it with the BLE code .
The temperature sensor code
For the temperature sensor code we have to install a library called
The example that we will use it
The BLE code
I put the temperature sensor code in the BLE code , I got :
`
  #include <ArduinoBLE.h>
   #include <Arduino_HTS221.h>
   BLEService customService("180C");

 // Syntax: BLE<DATATYPE>Characteristic <NAME>(<UUID>, <PROPERTIES>, <DATA  LENGTH>)
BLEStringCharacteristic ble_temperature("2A57", BLERead | BLENotify, 13);

      void readValues();
 {
// Initalizing all the sensors
    HTS.begin();

Serial.begin(9600);
while (!Serial);
if (!BLE.begin())
{
    Serial.println("BLE failed to Initiate");
    delay(500);
    while (1);
}

// Setting BLE Name
BLE.setLocalName("Arduino Environment Sensor");

// Setting BLE Service Advertisment
BLE.setAdvertisedService(customService);

// Adding characteristics to BLE Service Advertisment
    customService.addCharacteristic(ble_temperature);


// Adding the service to the BLE stack
BLE.addService(customService);

// Start advertising
BLE.advertise();
Serial.println("Bluetooth device is now active, waiting for connections...");
}

 {
// Variable to check if cetral device is connected
BLEDevice central = BLE.central();
if (central)
{
    Serial.print("Connected to central: ");
    Serial.println(central.address());
    while (central.connected())
    {
        delay(200);

        // Read values from sensors
        readValues();

        // Writing sensor values to the characteristic
        ble_temperature.writeValue(t);


        // Displaying the sensor values on the Serial Monitor
        Serial.println("Reading Sensors");
        Serial.println(t);
        Serial.println("\n");
        delay(1000);
    }
}
Serial.print("Disconnected from central: ");
Serial.println(central.address());
}

  void readValues()
  {
// Reading raw sensor values from three sensors
float temperature = HTS.readTemperature();


// Saving sensor values into a user presentable way with units
t = String(temperature) + " C";
}
`
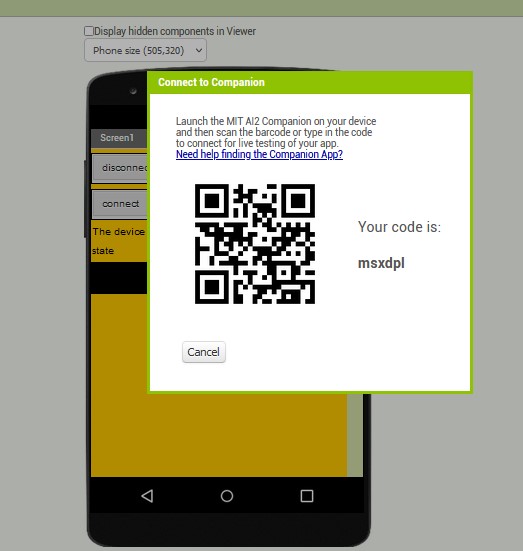
Using the application
For quick test for the applecation , you can use an applecation called
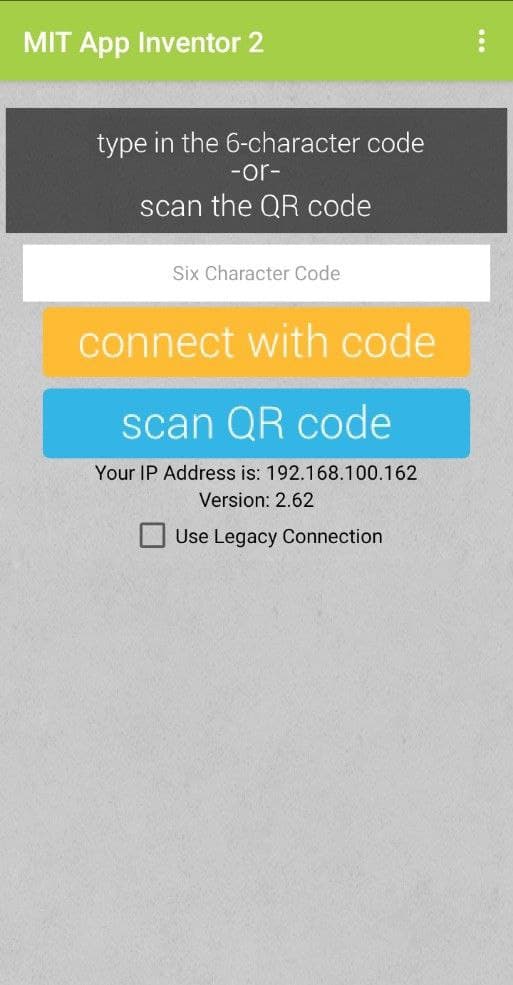
Follow these steps in the website
Testing the applecation
The bluetooth worked so well , but i had a problem that the applecation could not connect with the BLE of the arduino .
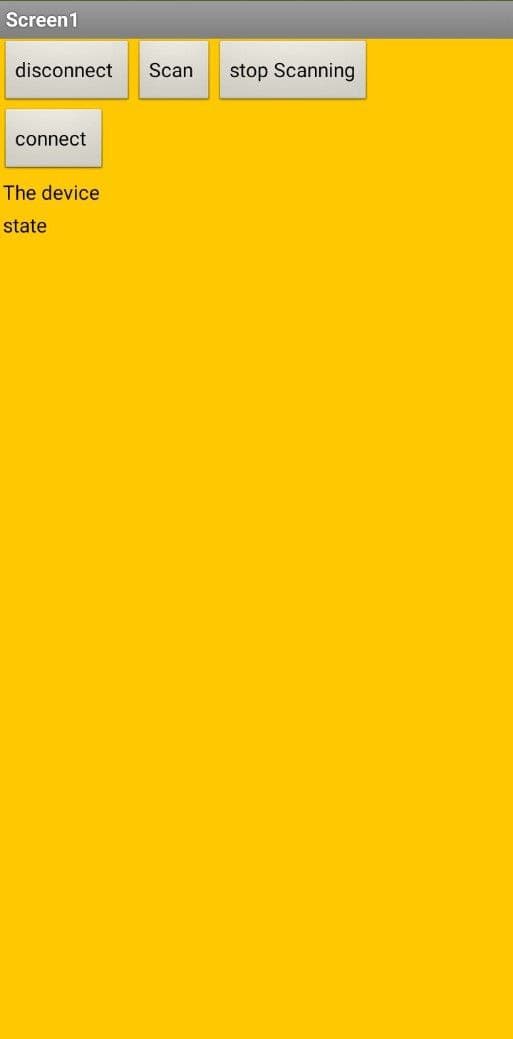
The application
solving the problem
to solve the problem I had to install an applecation called nRF connect
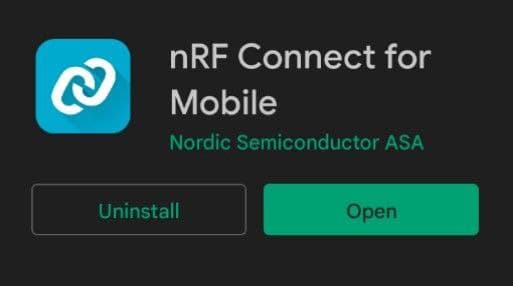
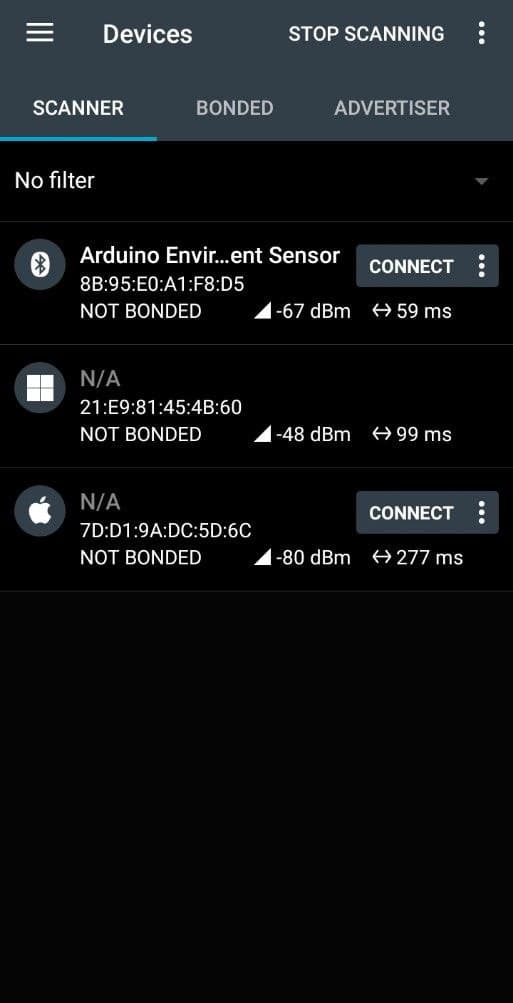
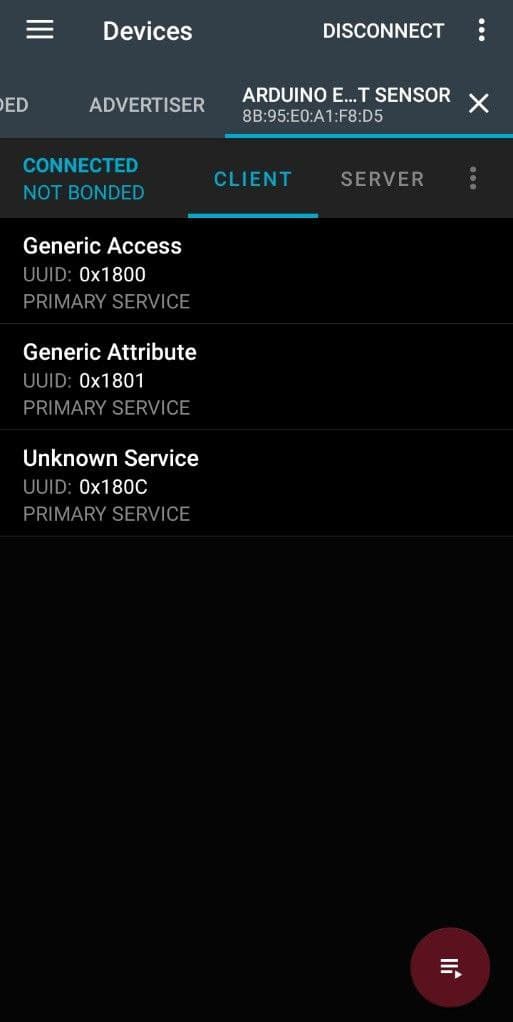
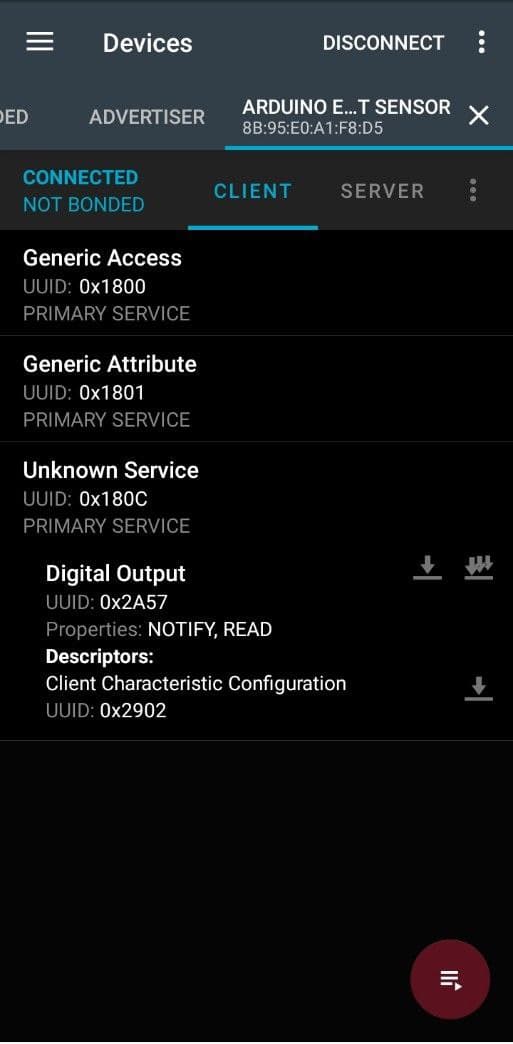
And the applecation code connect with the arduino easly and i could see the Temperature in my phone