3. Computer controlled cutting
This week we worked in the lab for the first time, we learned how to use the cricut and the laser cutter.
In the first lesson for this week, we worked as a group and this is what we’ve done:
cricut machine
In the beginning the tutor introduced to us the machine and how we can use it, these are the steps that we followed:
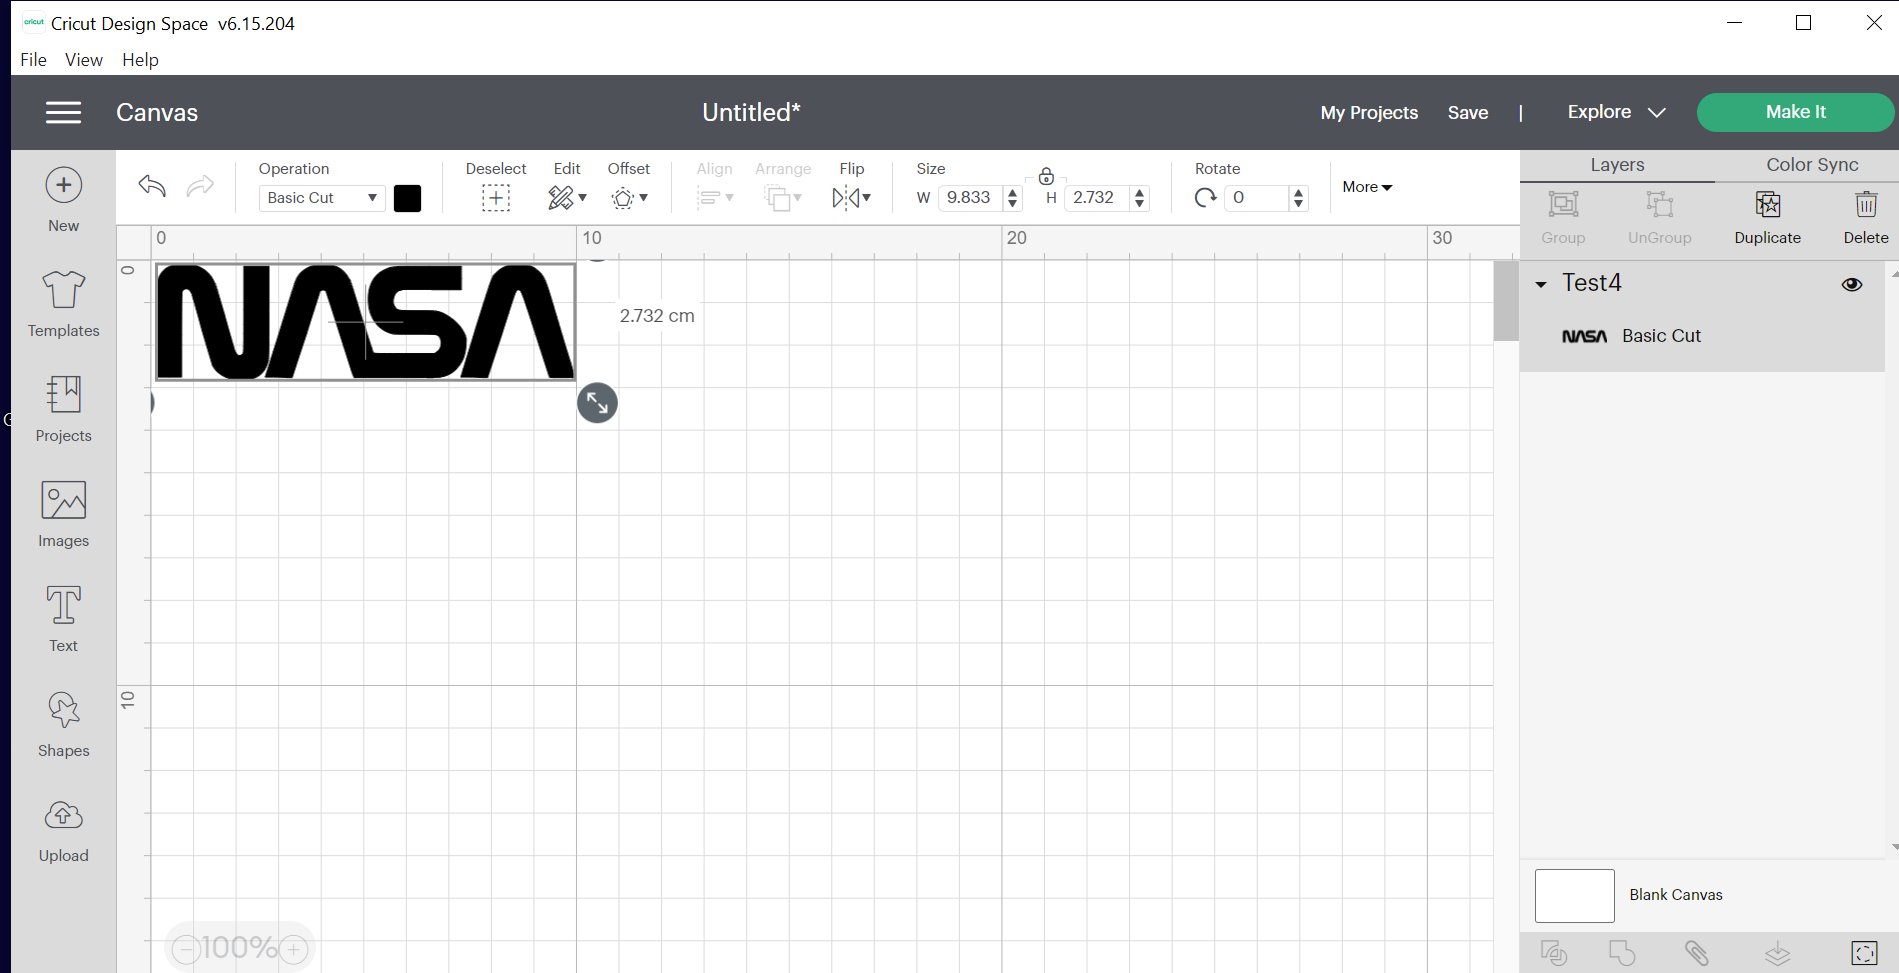
a. we downloaded cricut app.
b. I uploaded the photo that i wanted to cut and set the size.
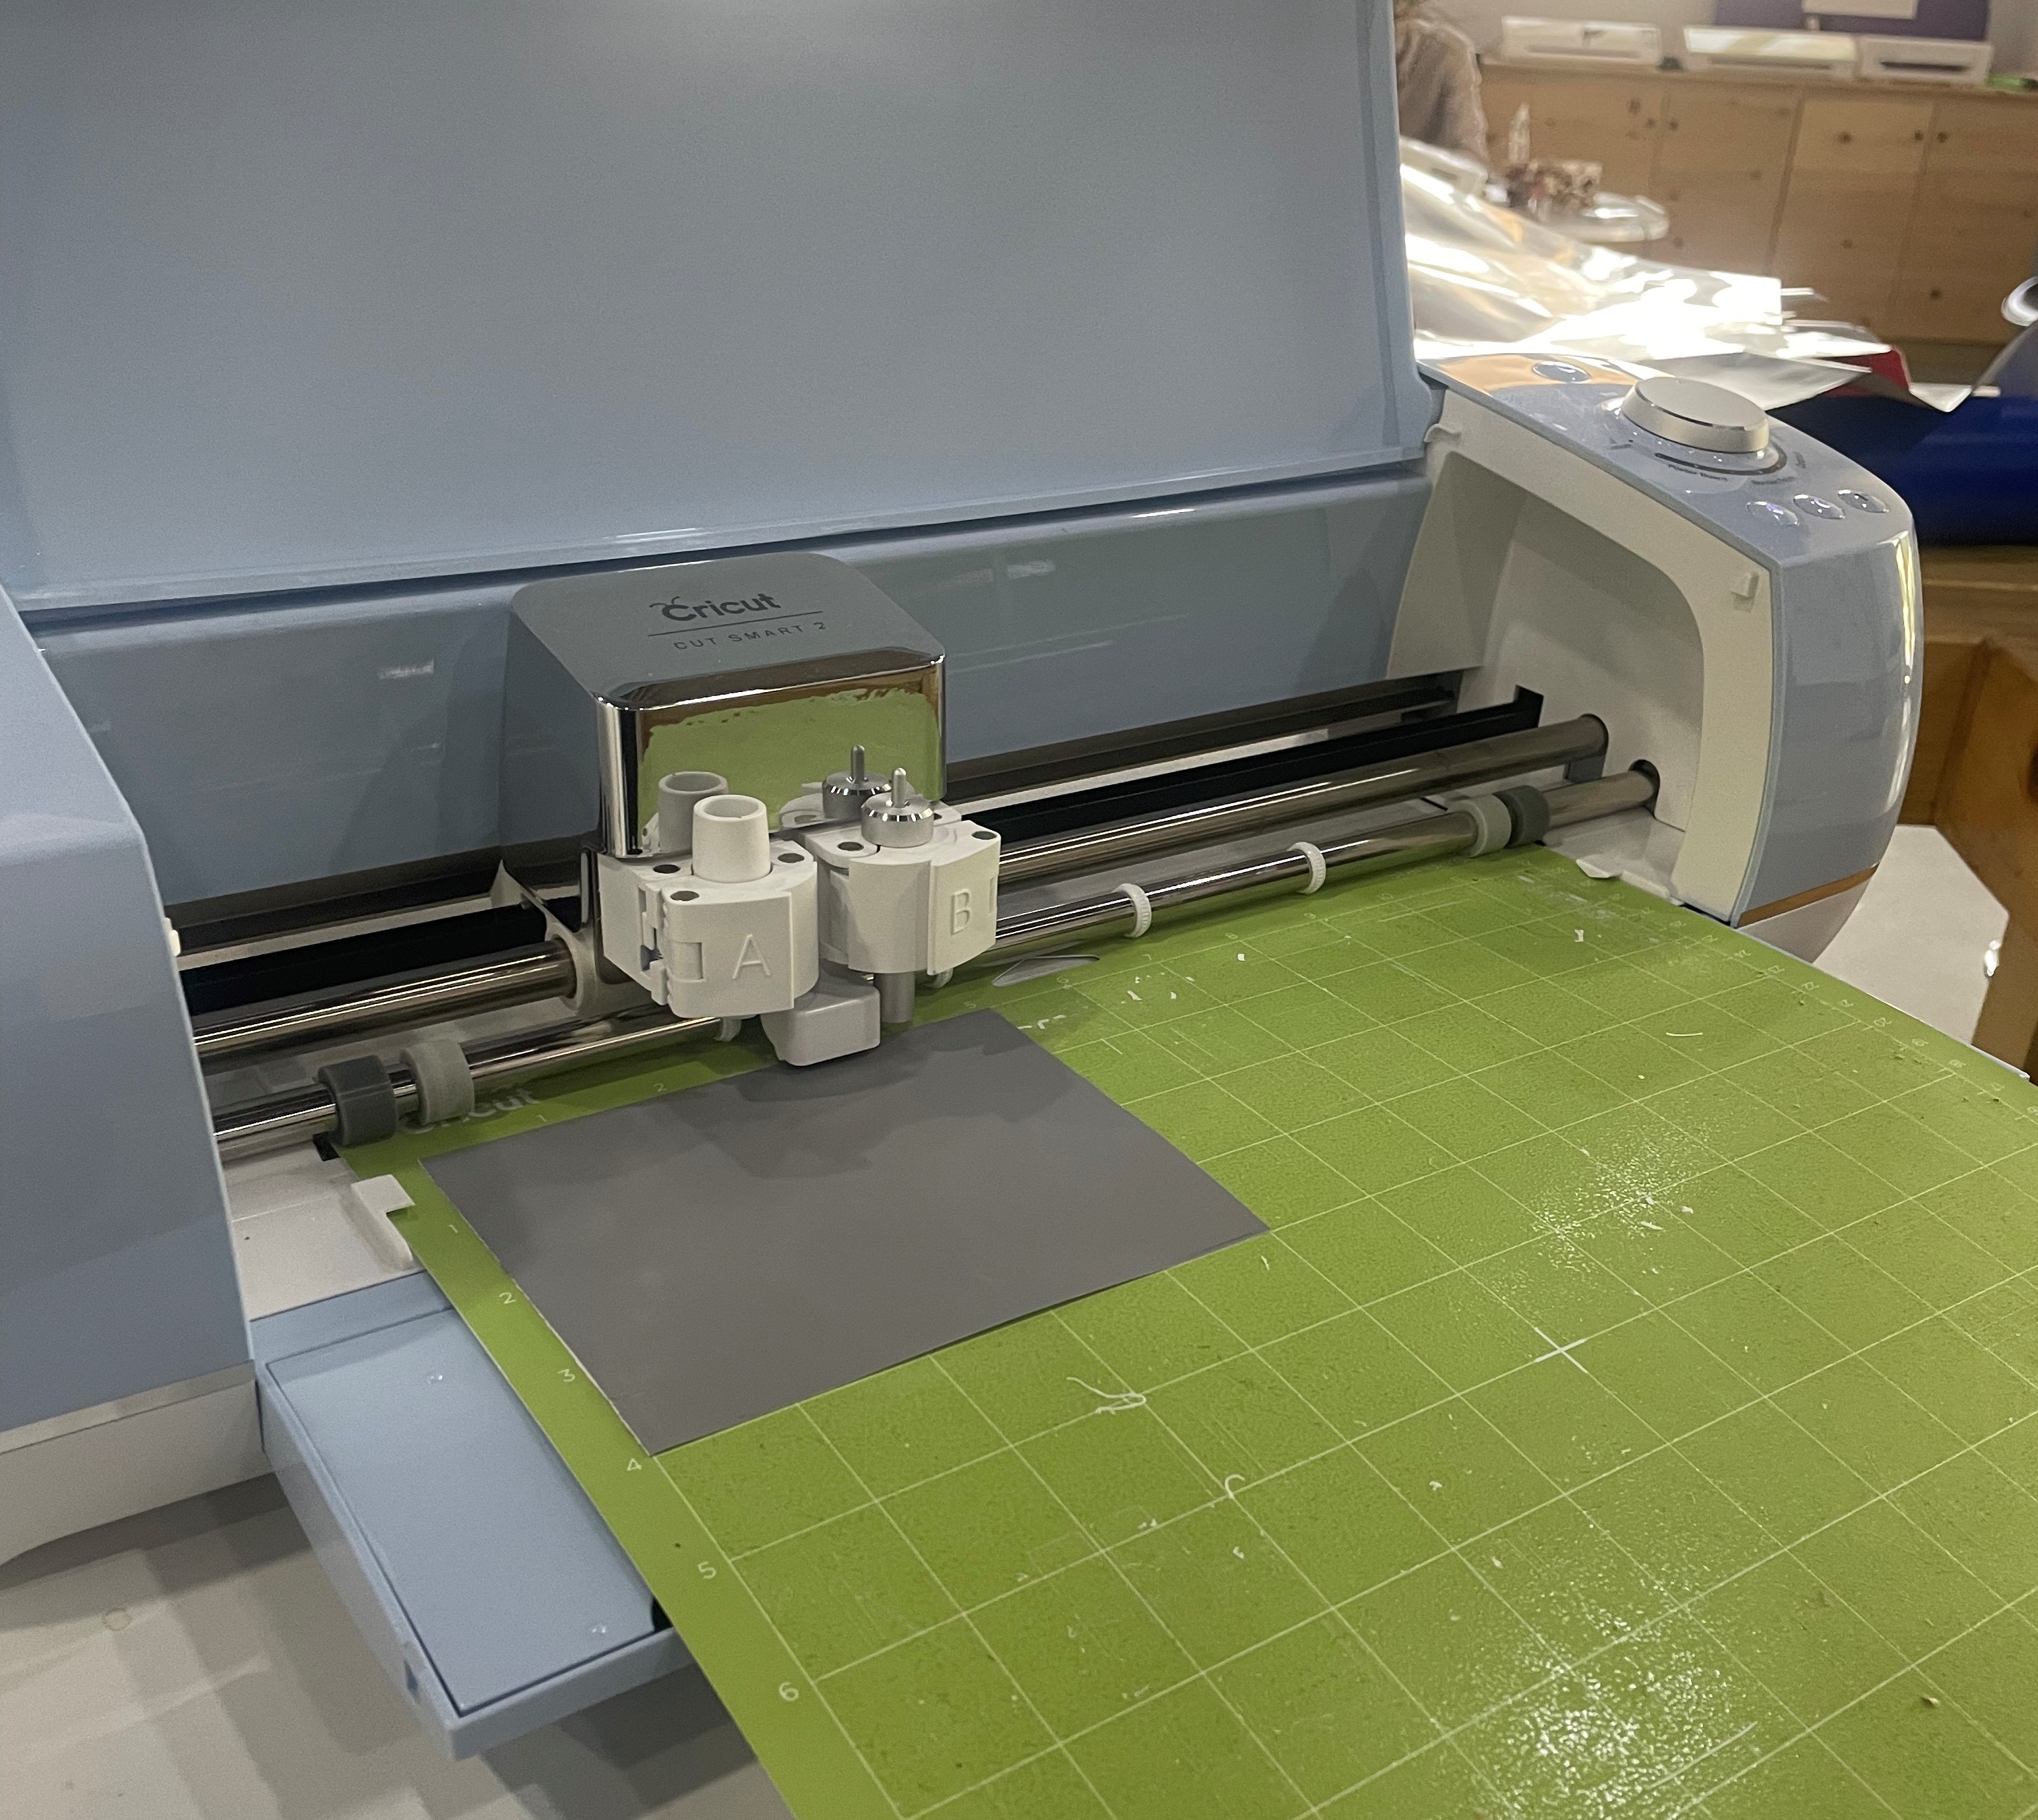
c. after that, I went to the machine and connected it to the computer.
I put the paper and I sticked it to the boared, then I locked it in the machine.
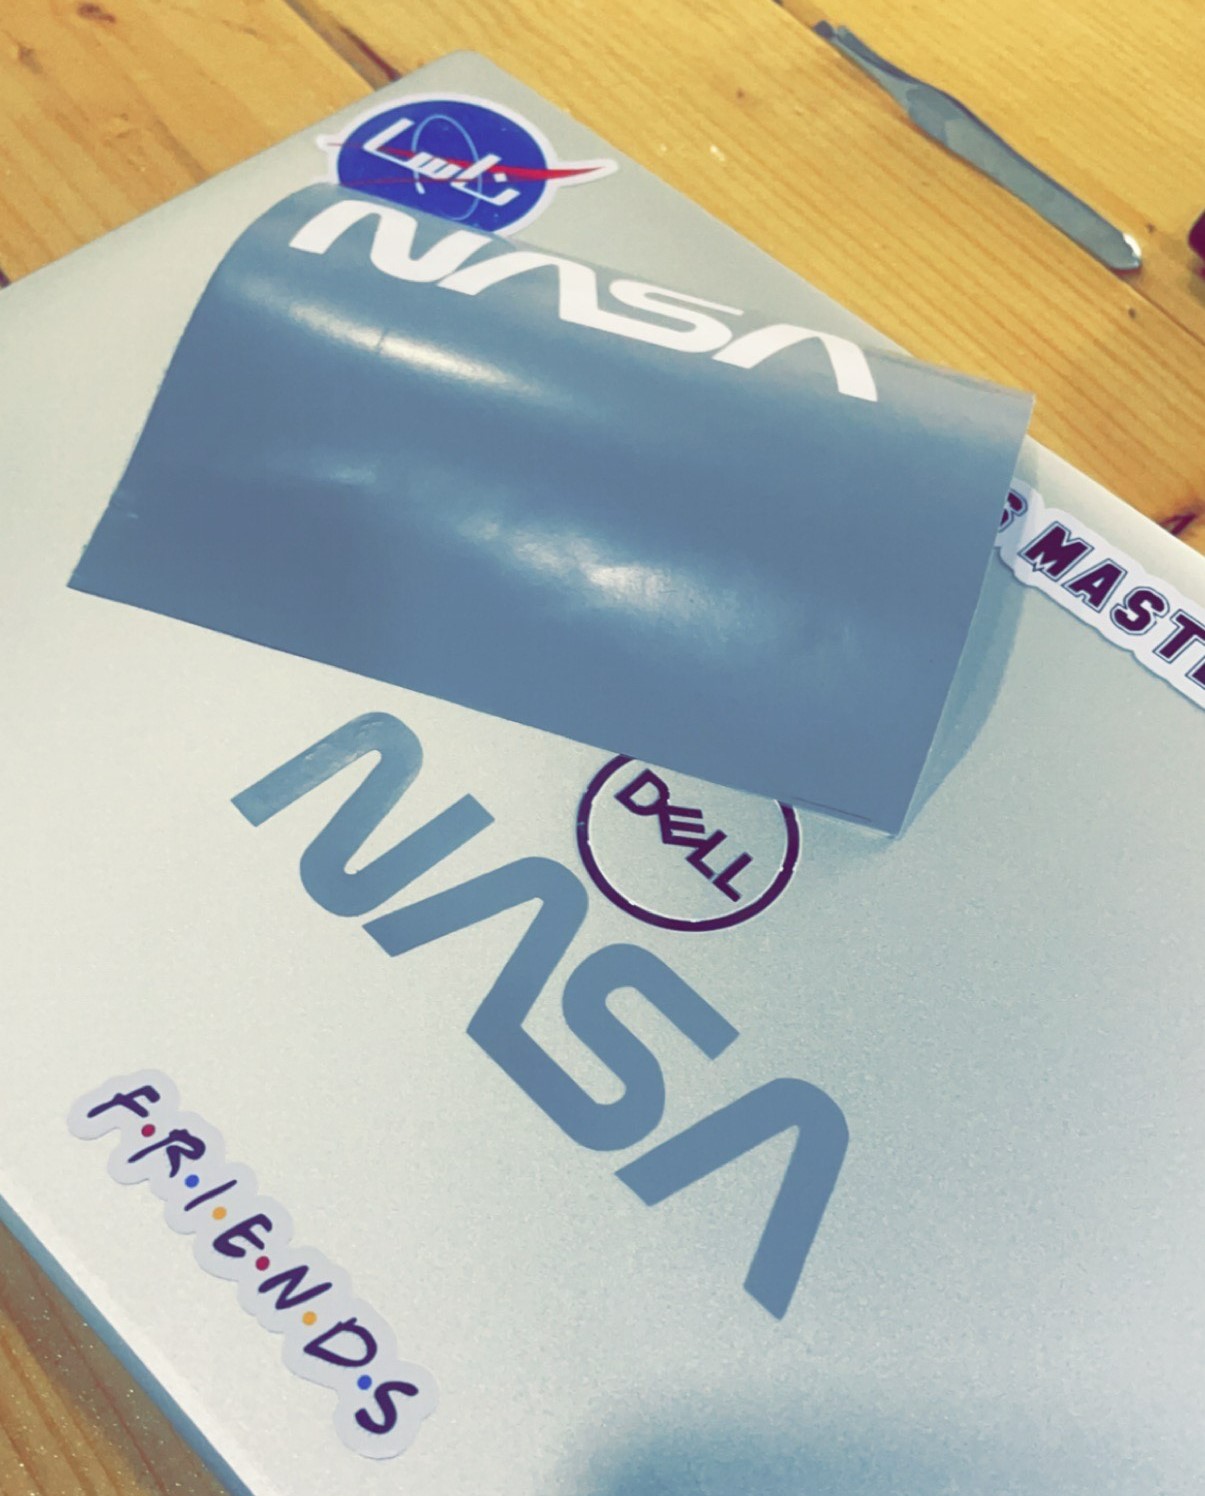
d. This is the final prosuct.
Laser cutter
First we listened to a brief lecture about the machine and how to use it, then we divided into two groups. Two of us worked for the designing and the other two went to set the machine.
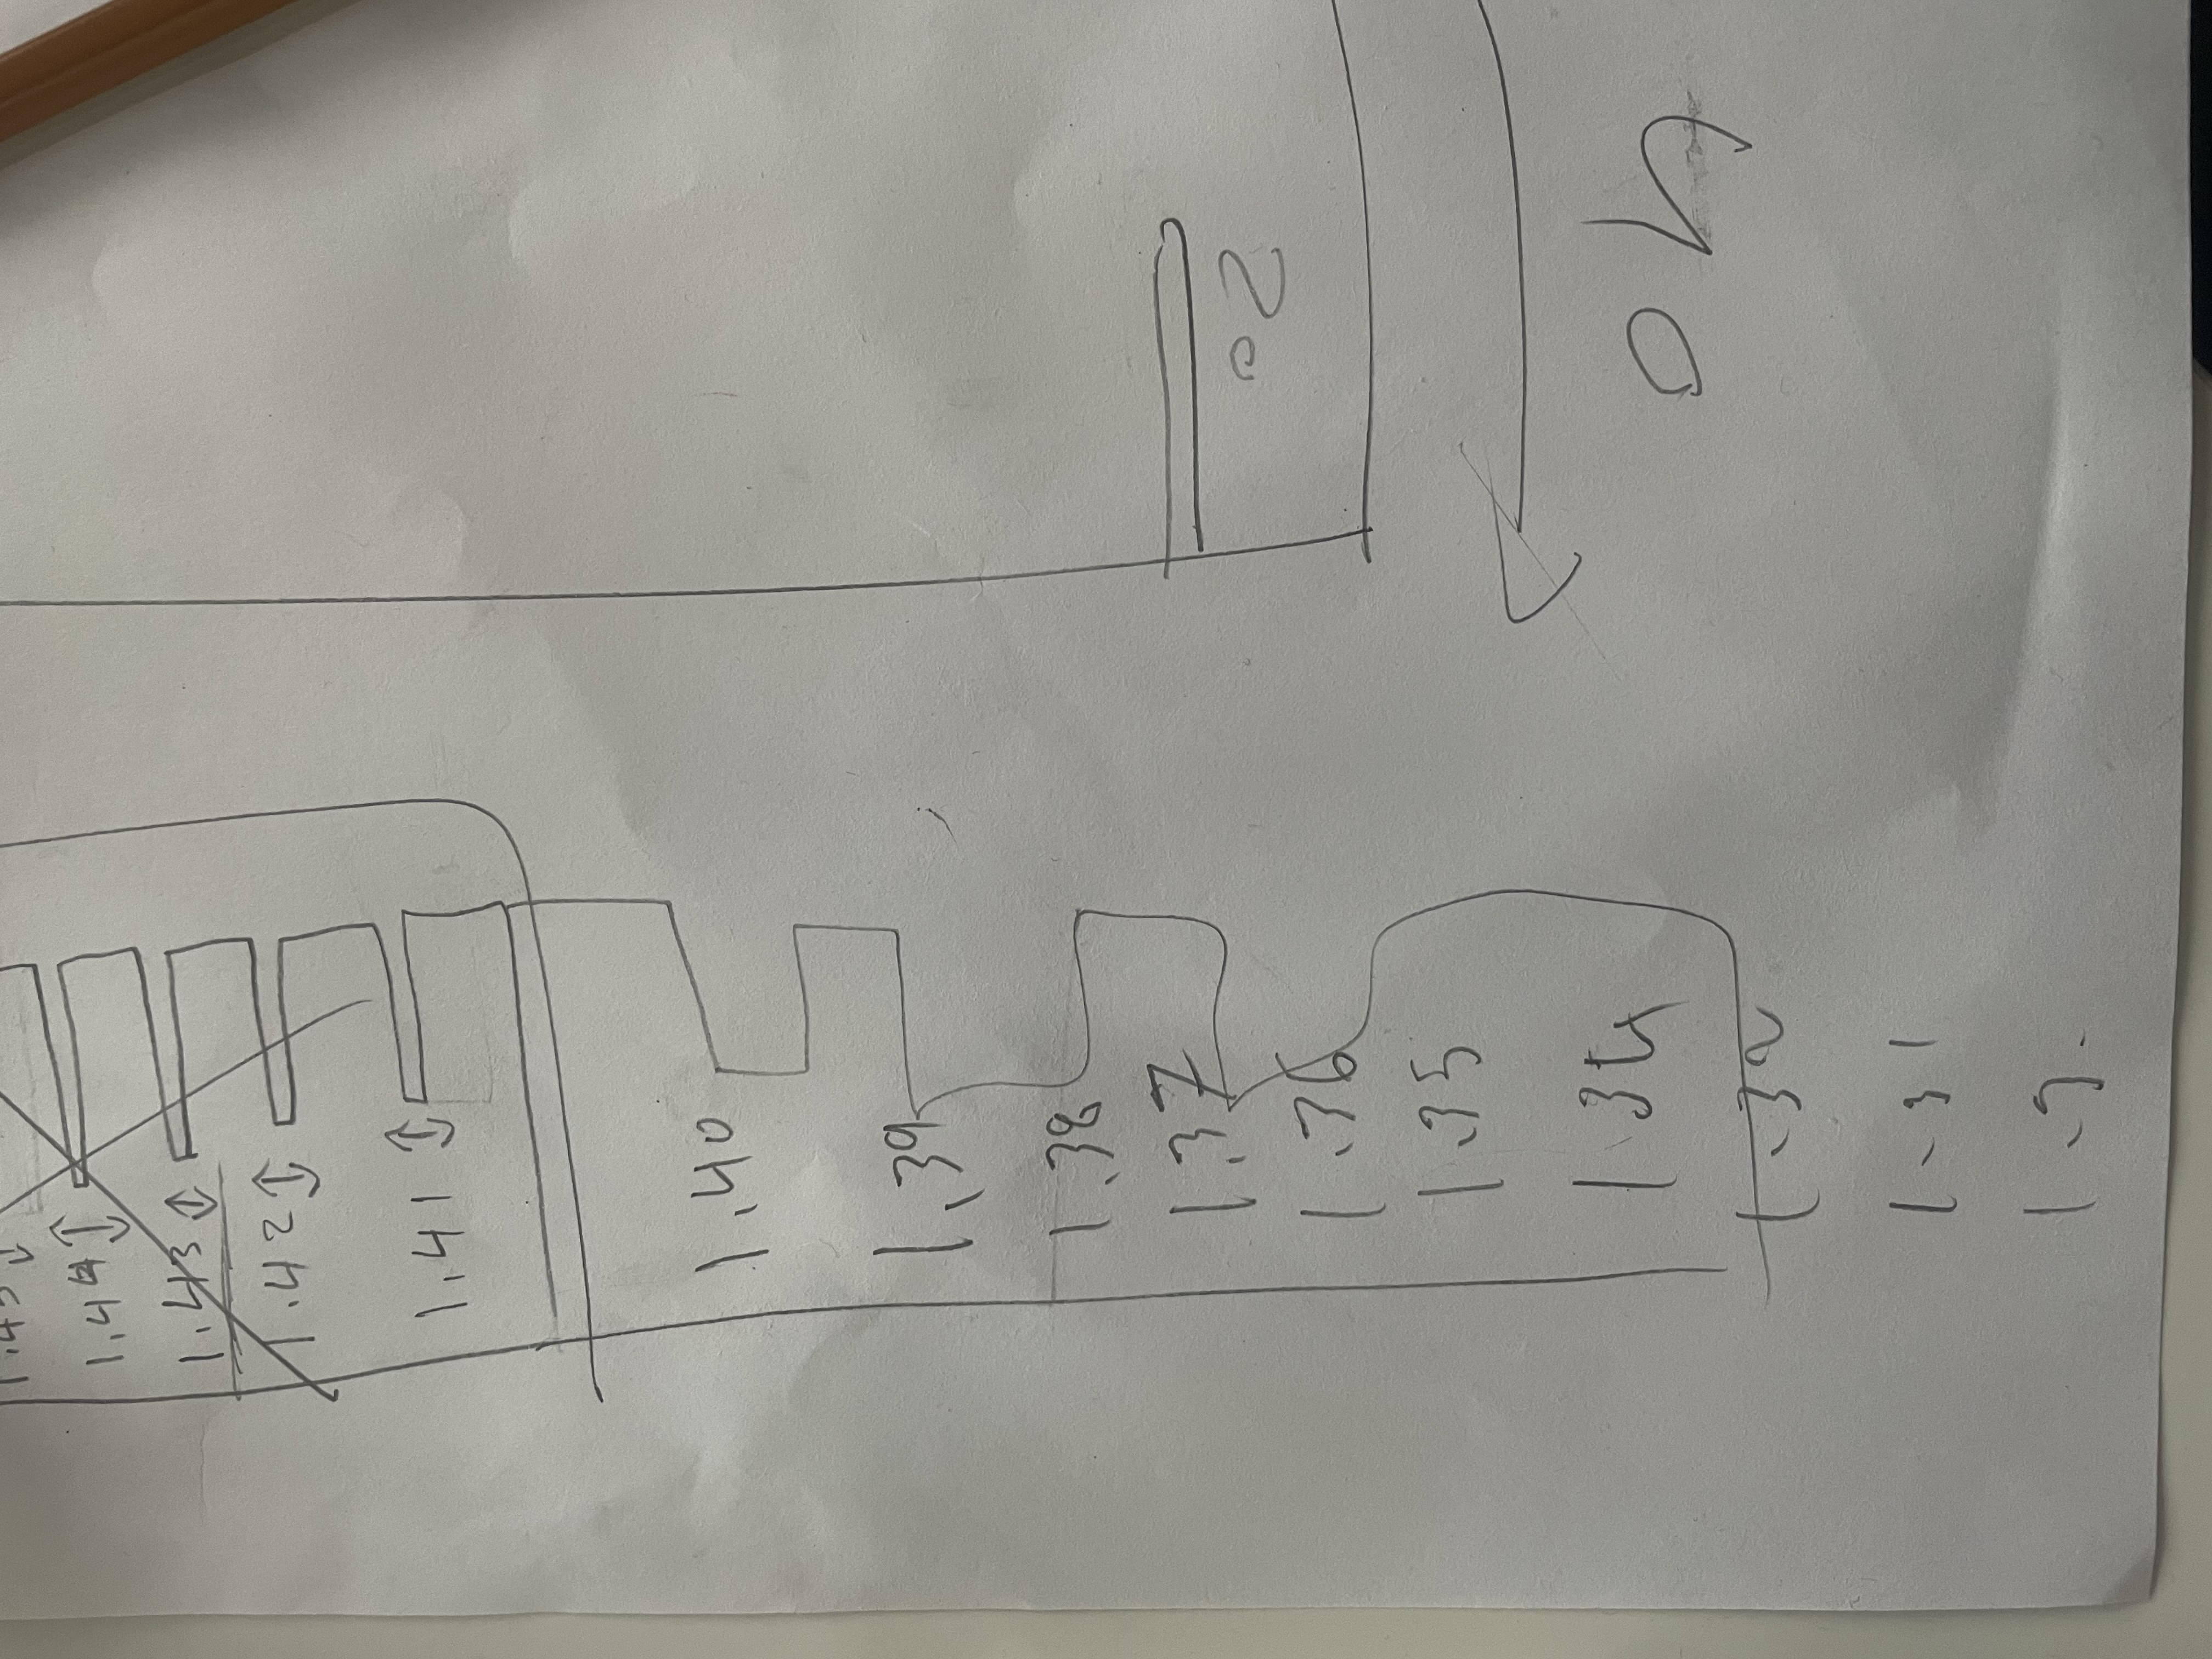
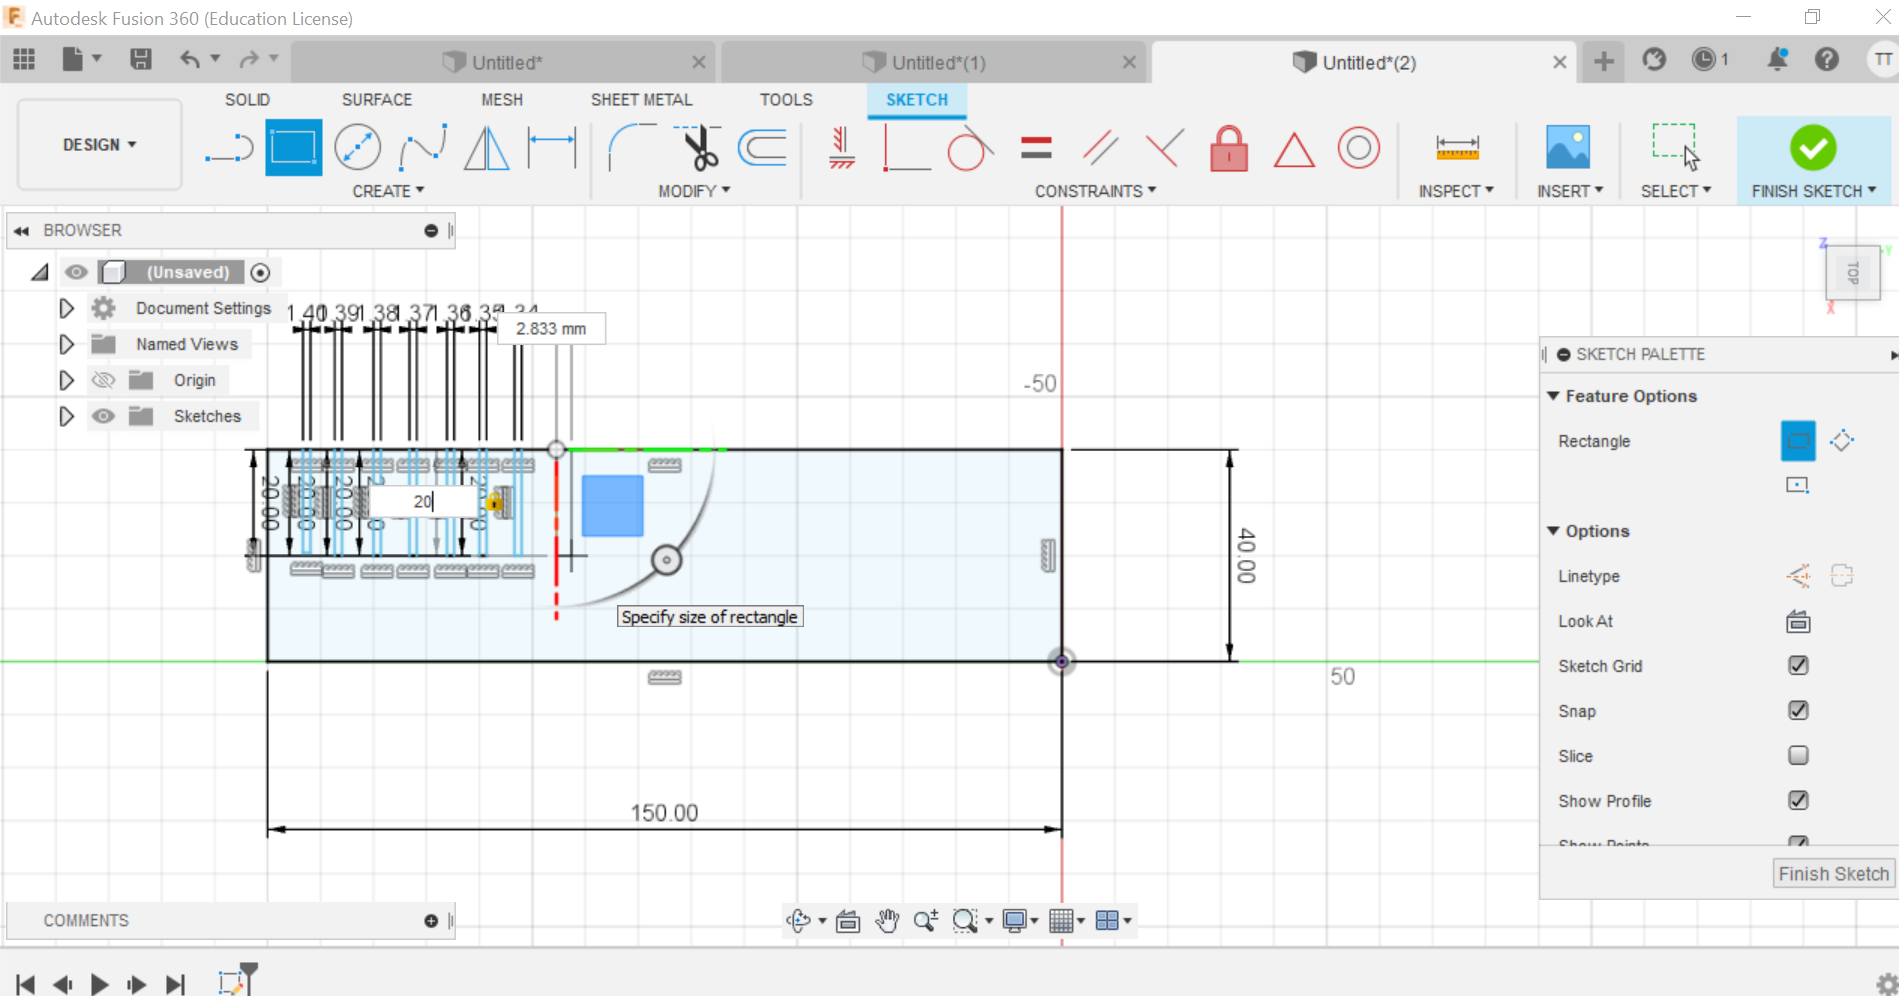
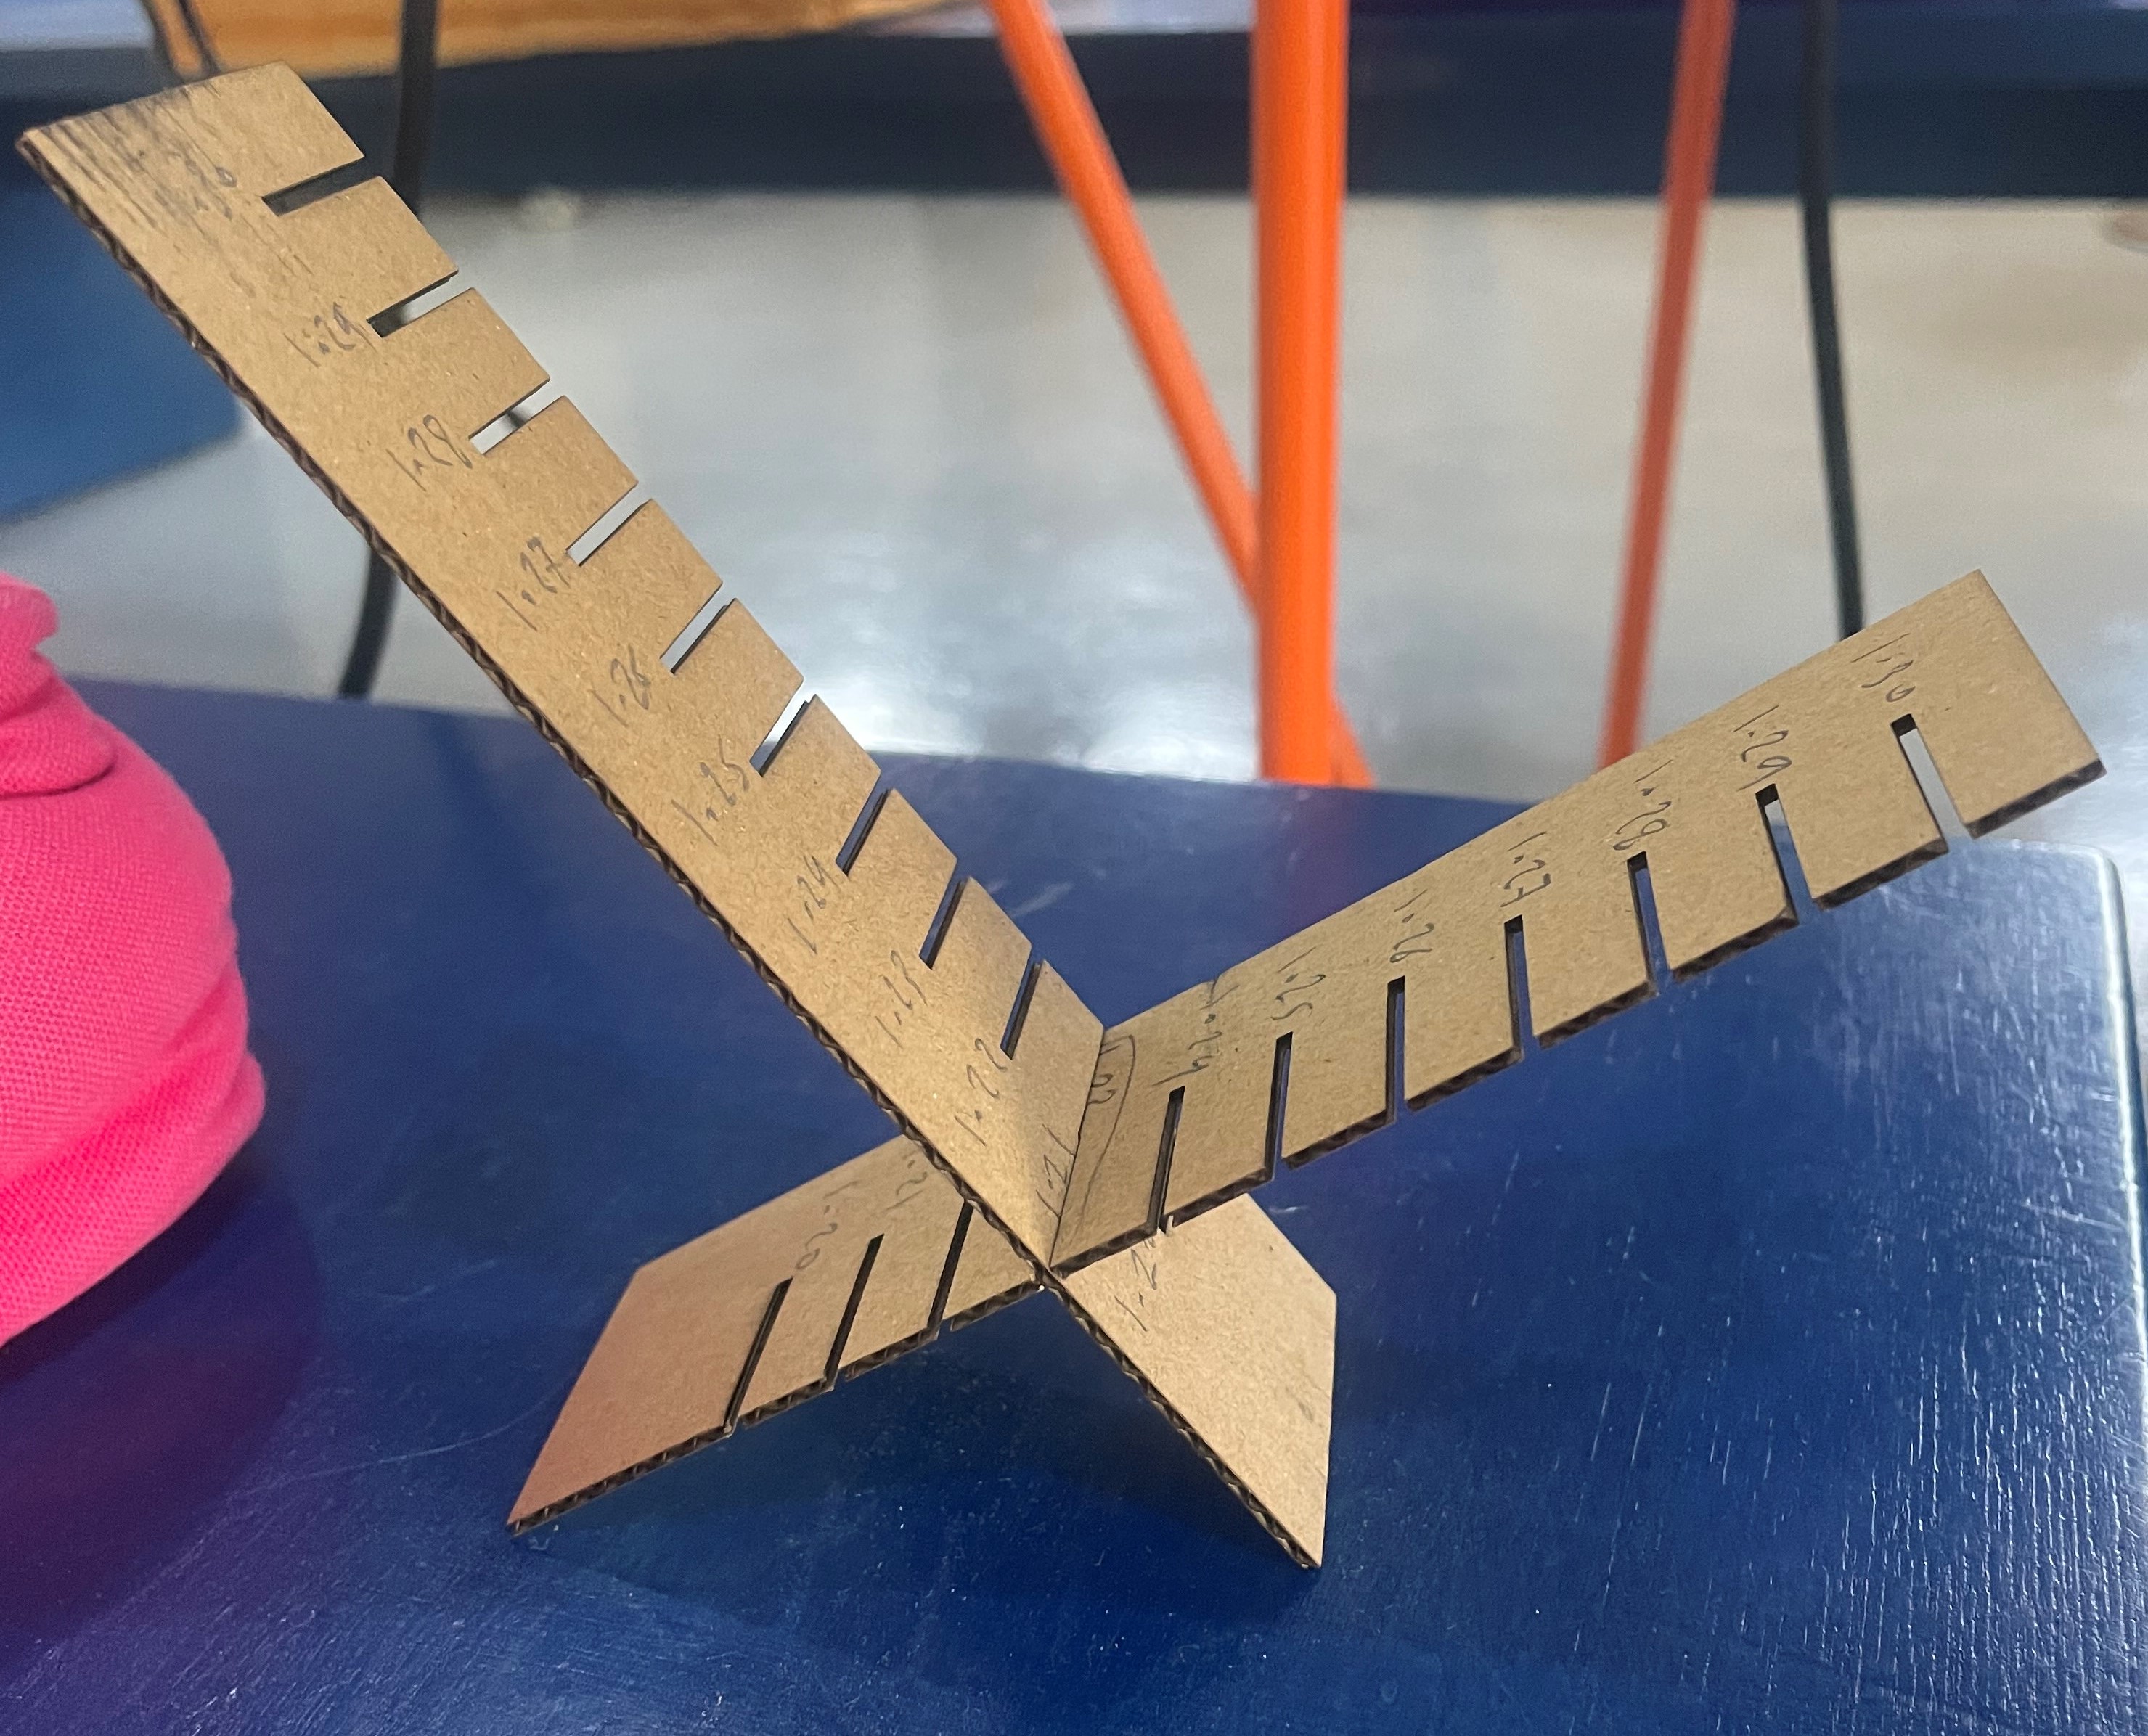
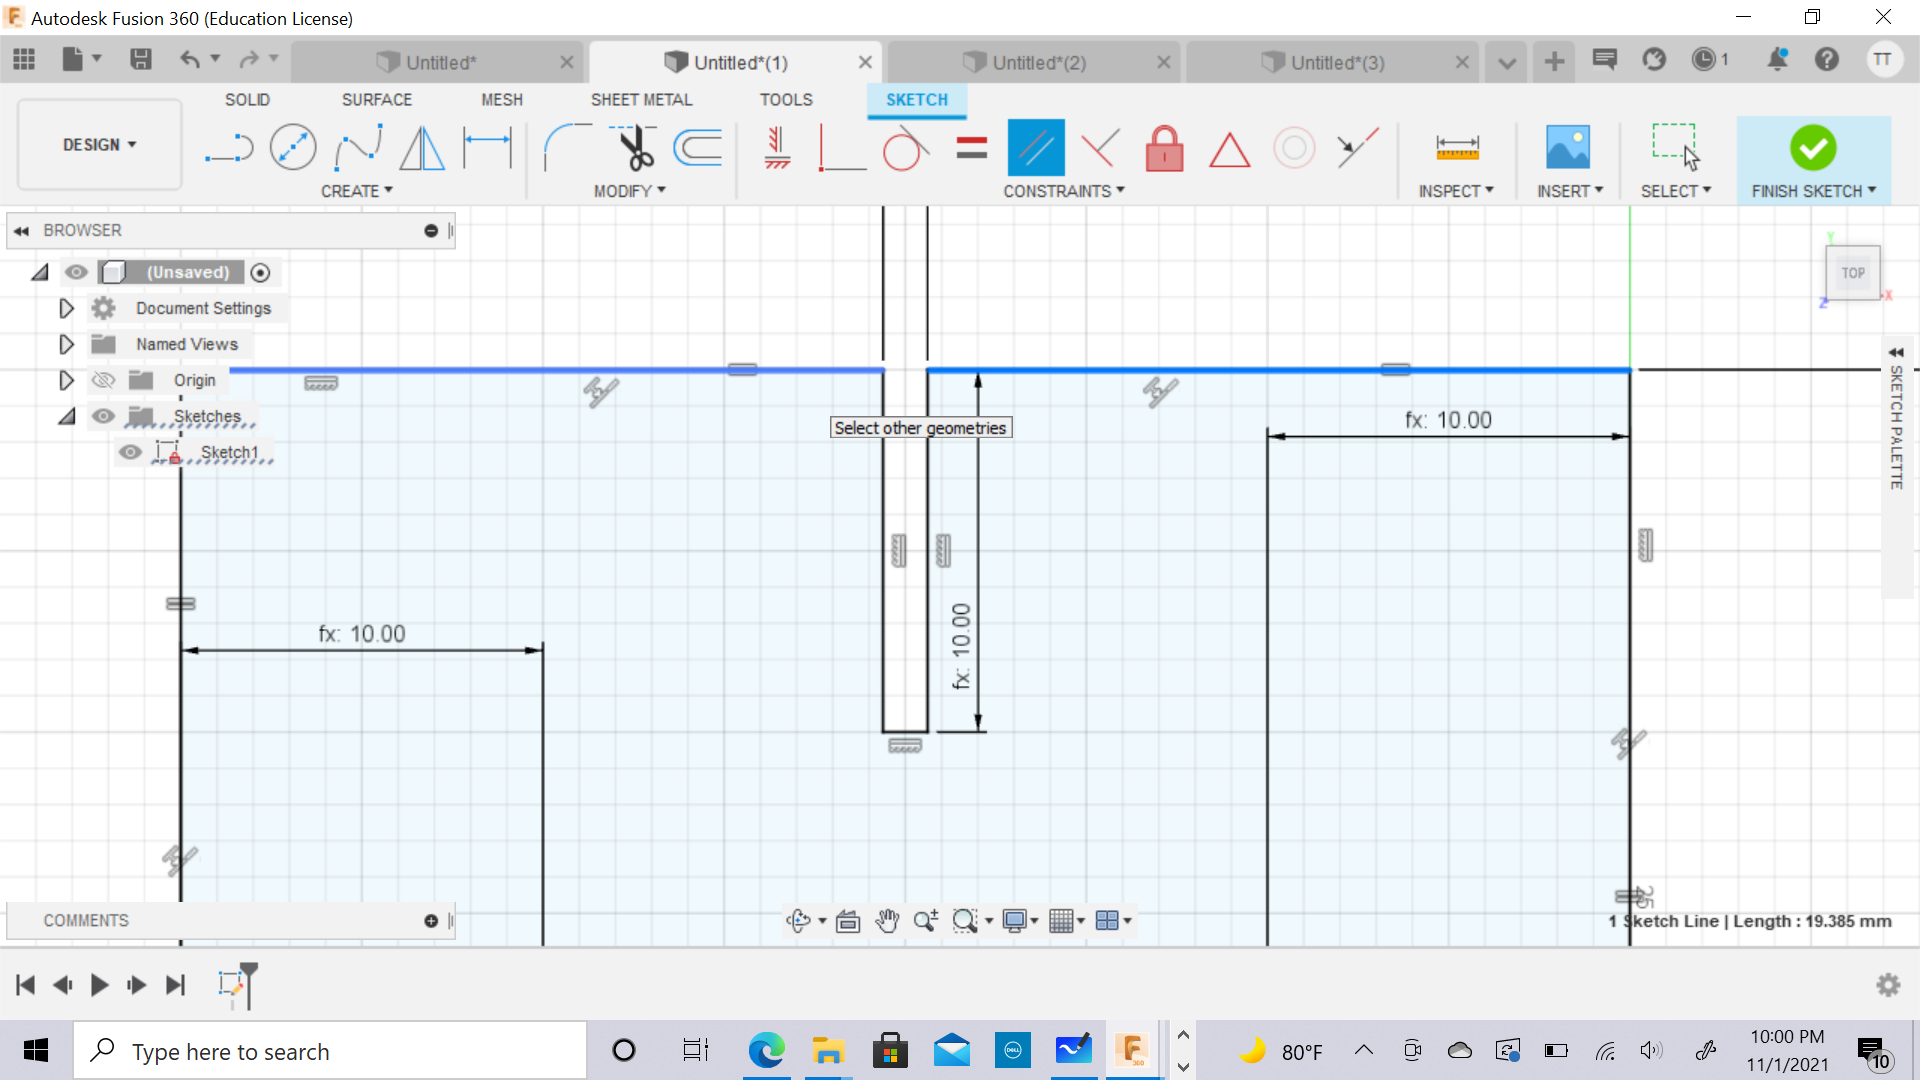
I worked to design a shape that looks like a comb to see what is the best fitting.
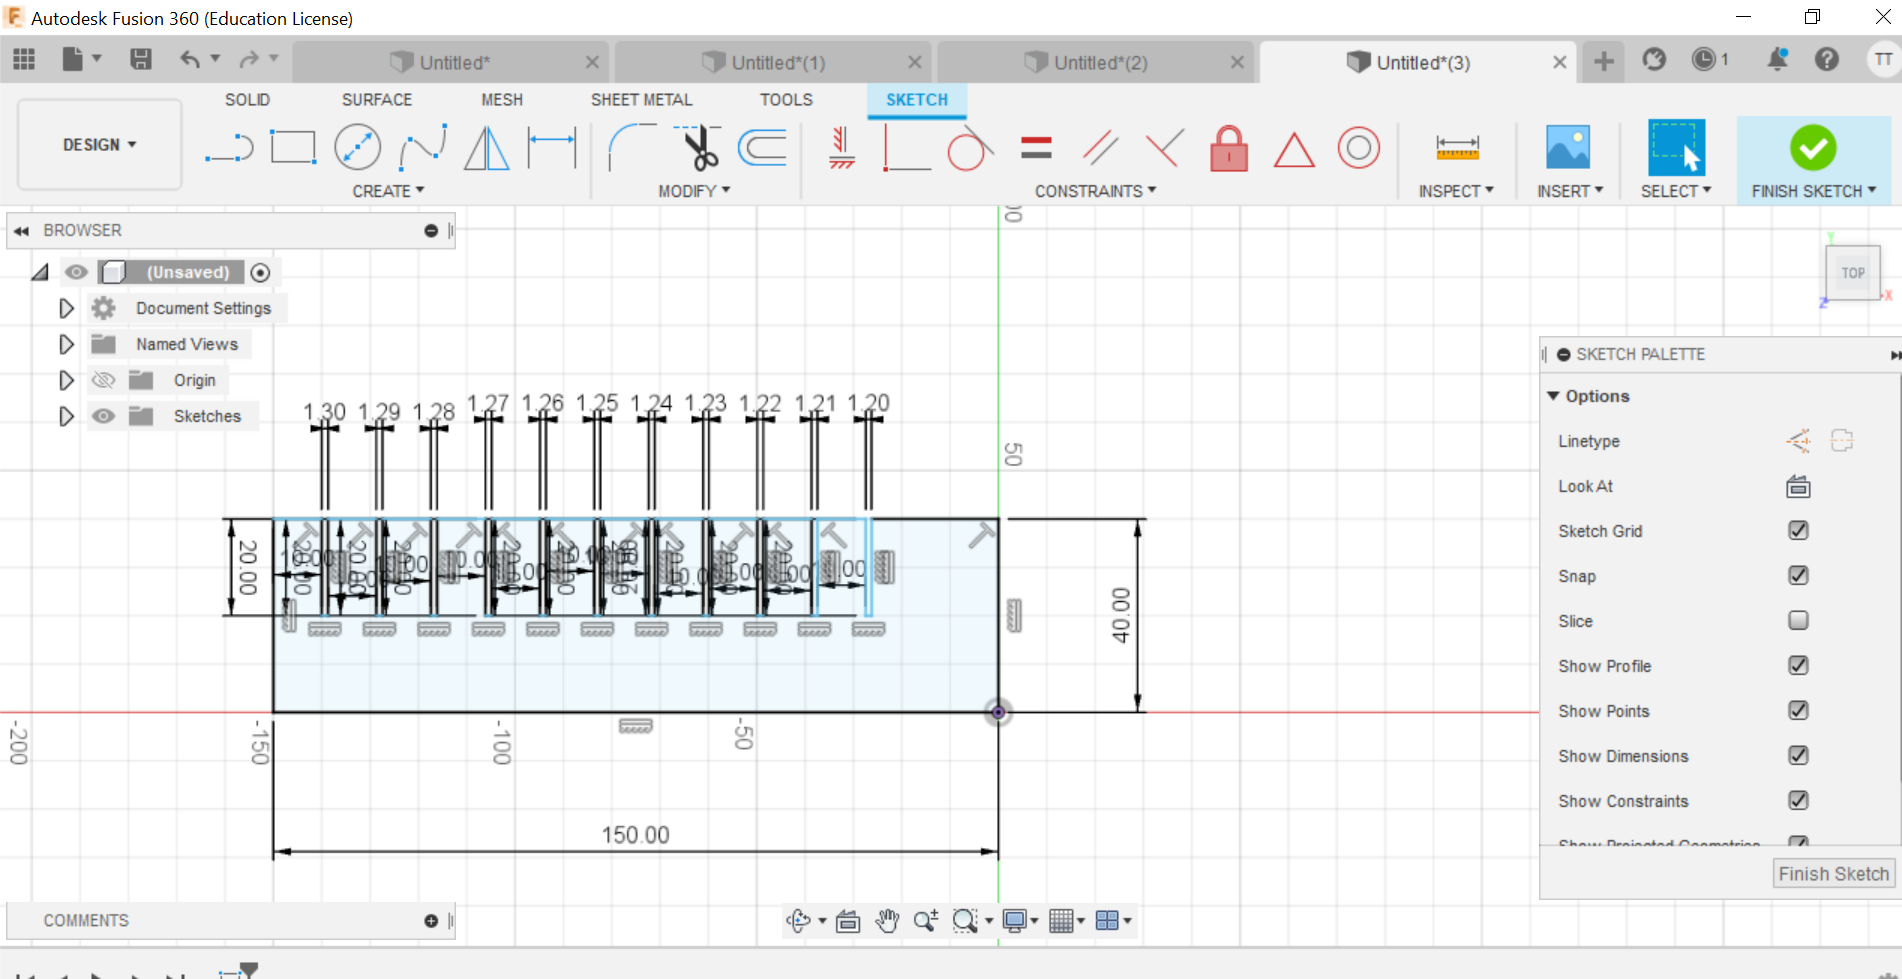
a. I created a rectangle and then I inserted a different sizes of a rectangle width.
The range of the width was from 1.4-1.3
This is the skitch :
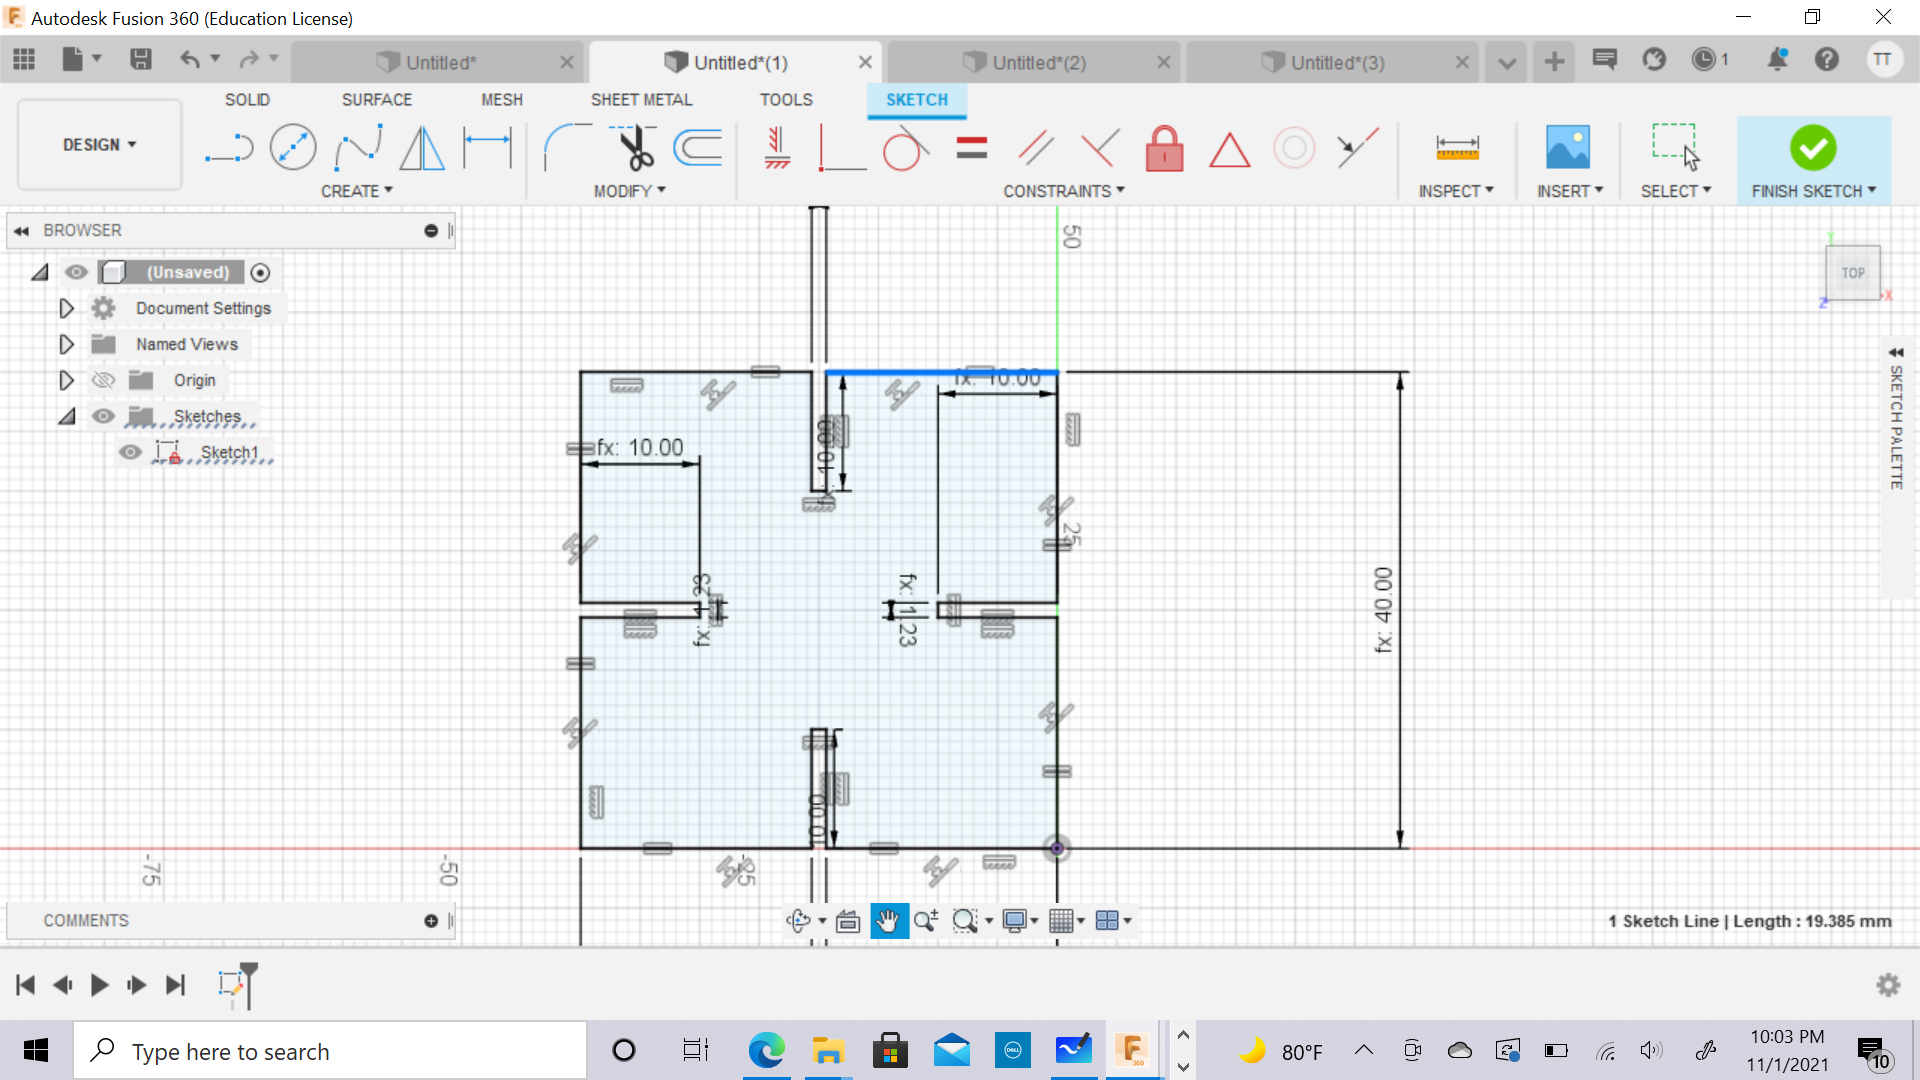
This is the design that I’ve made in fusion 360 :

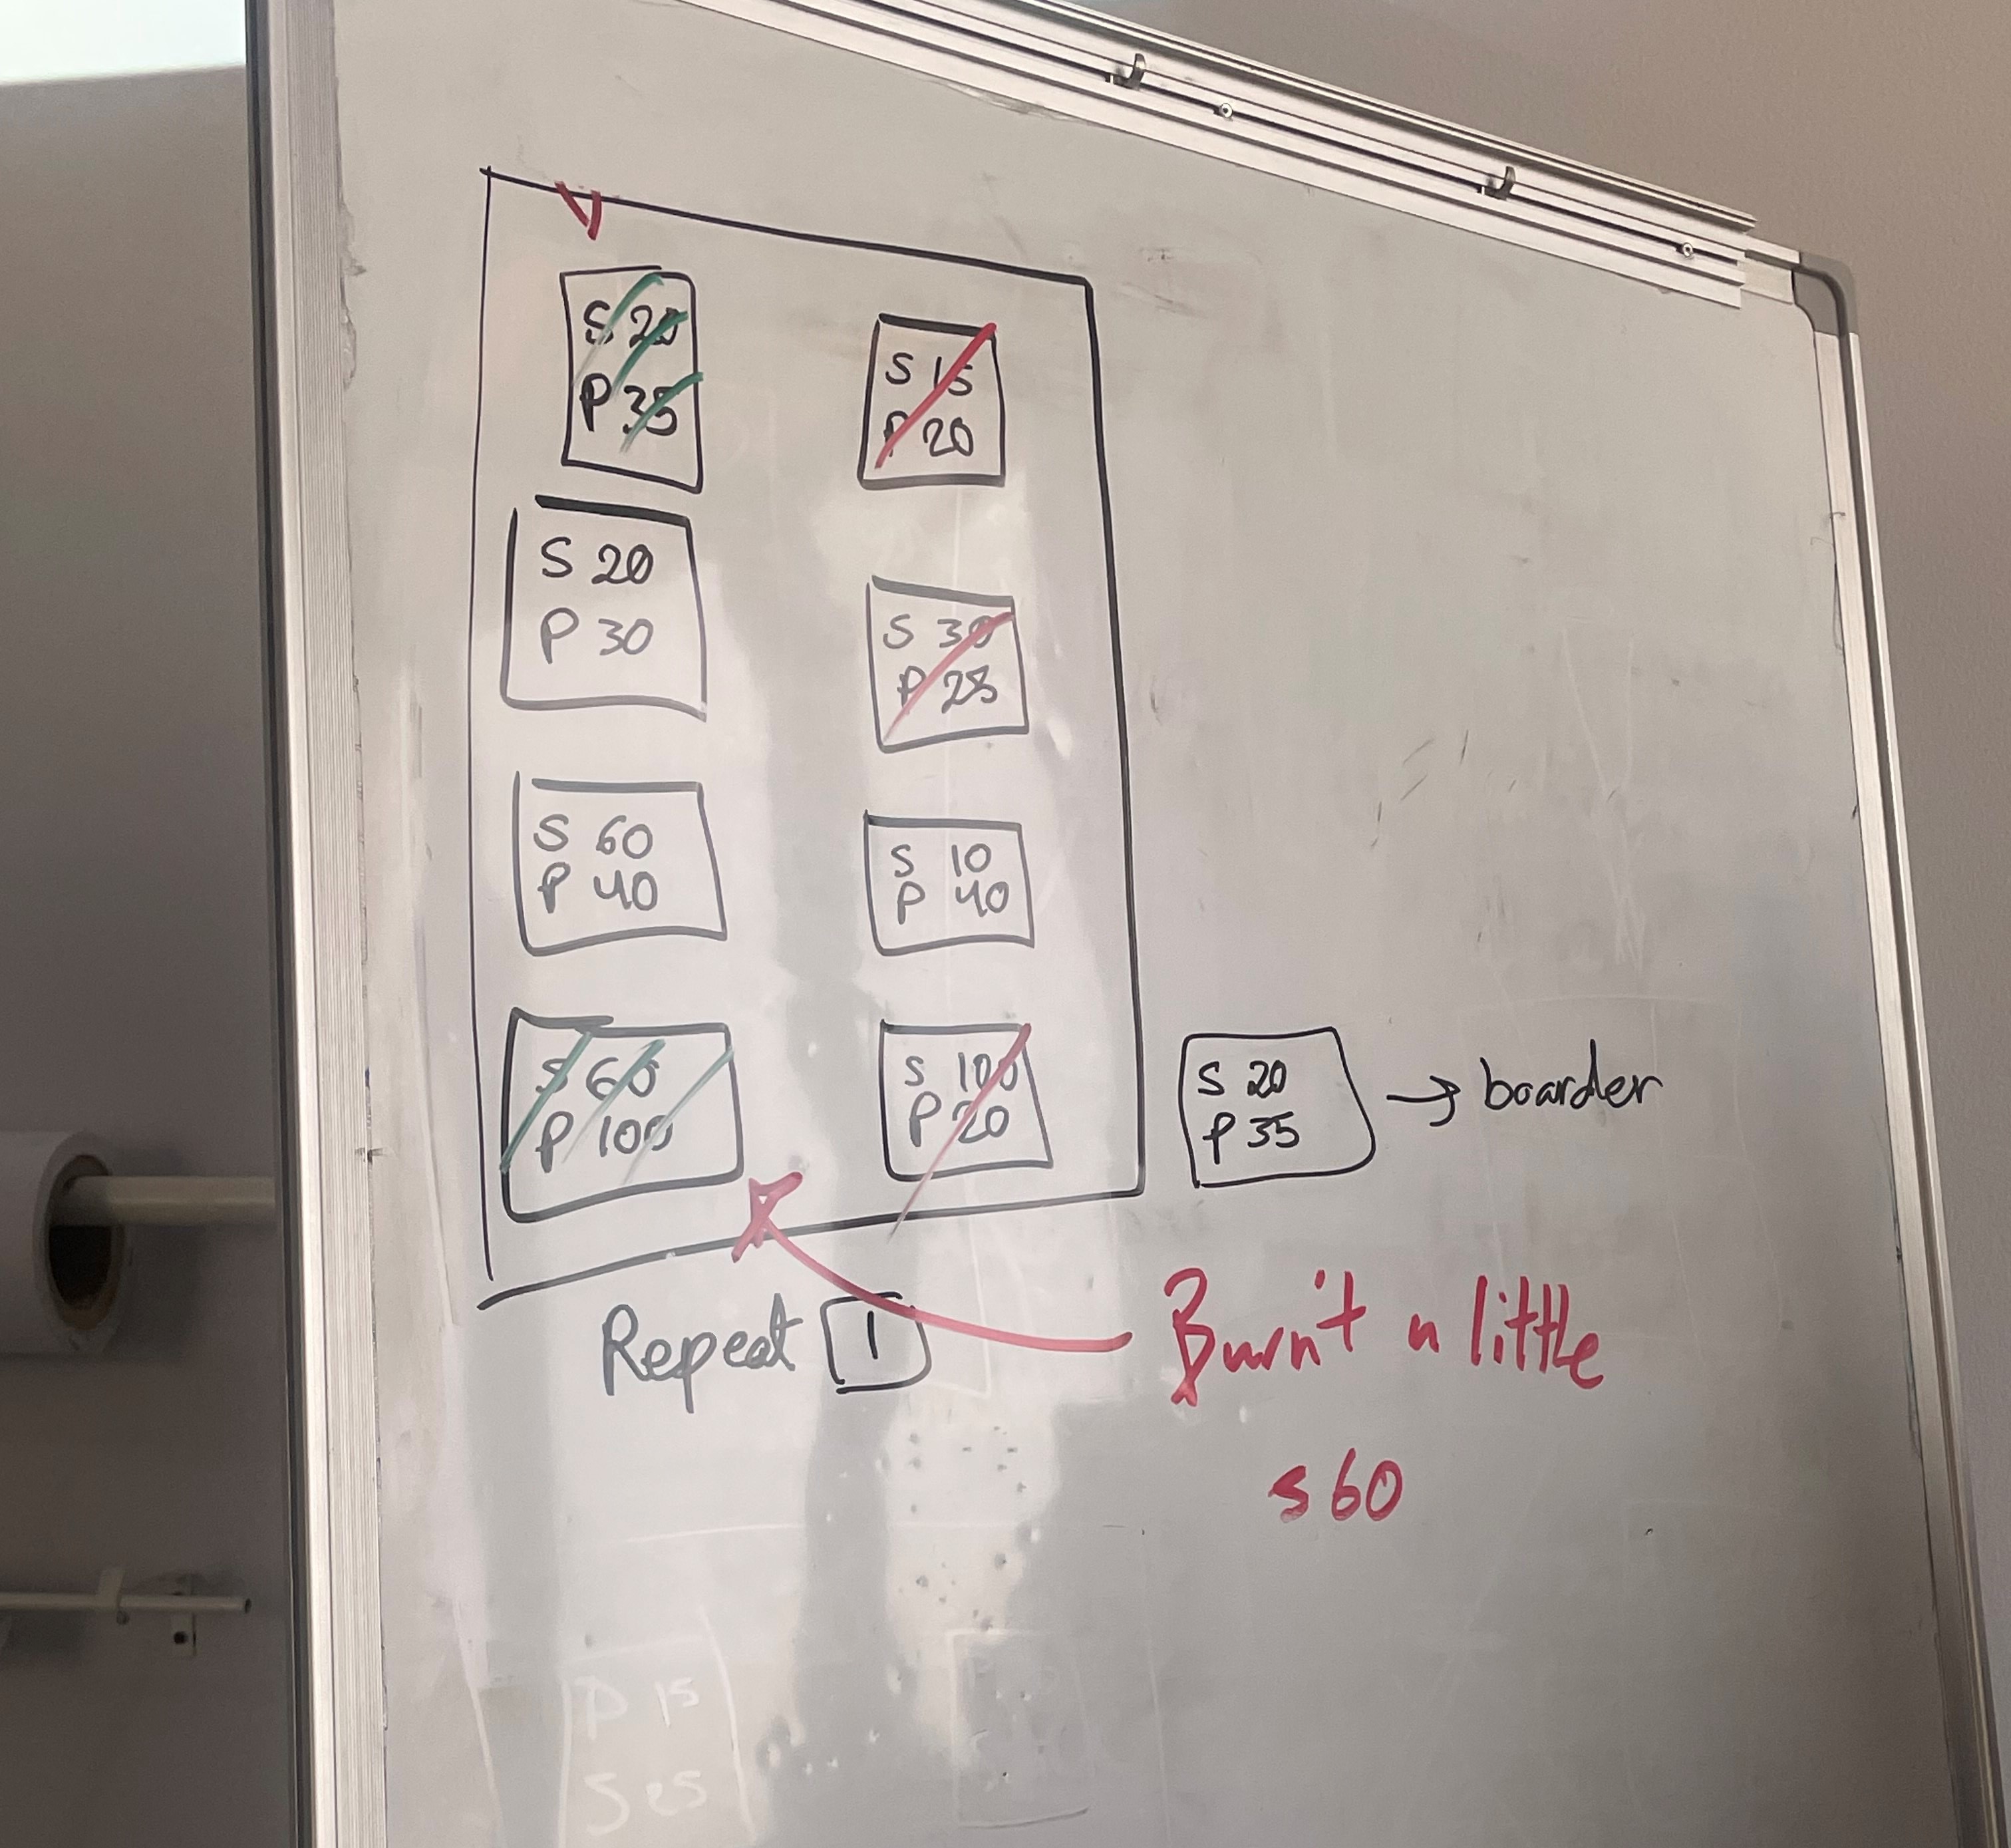
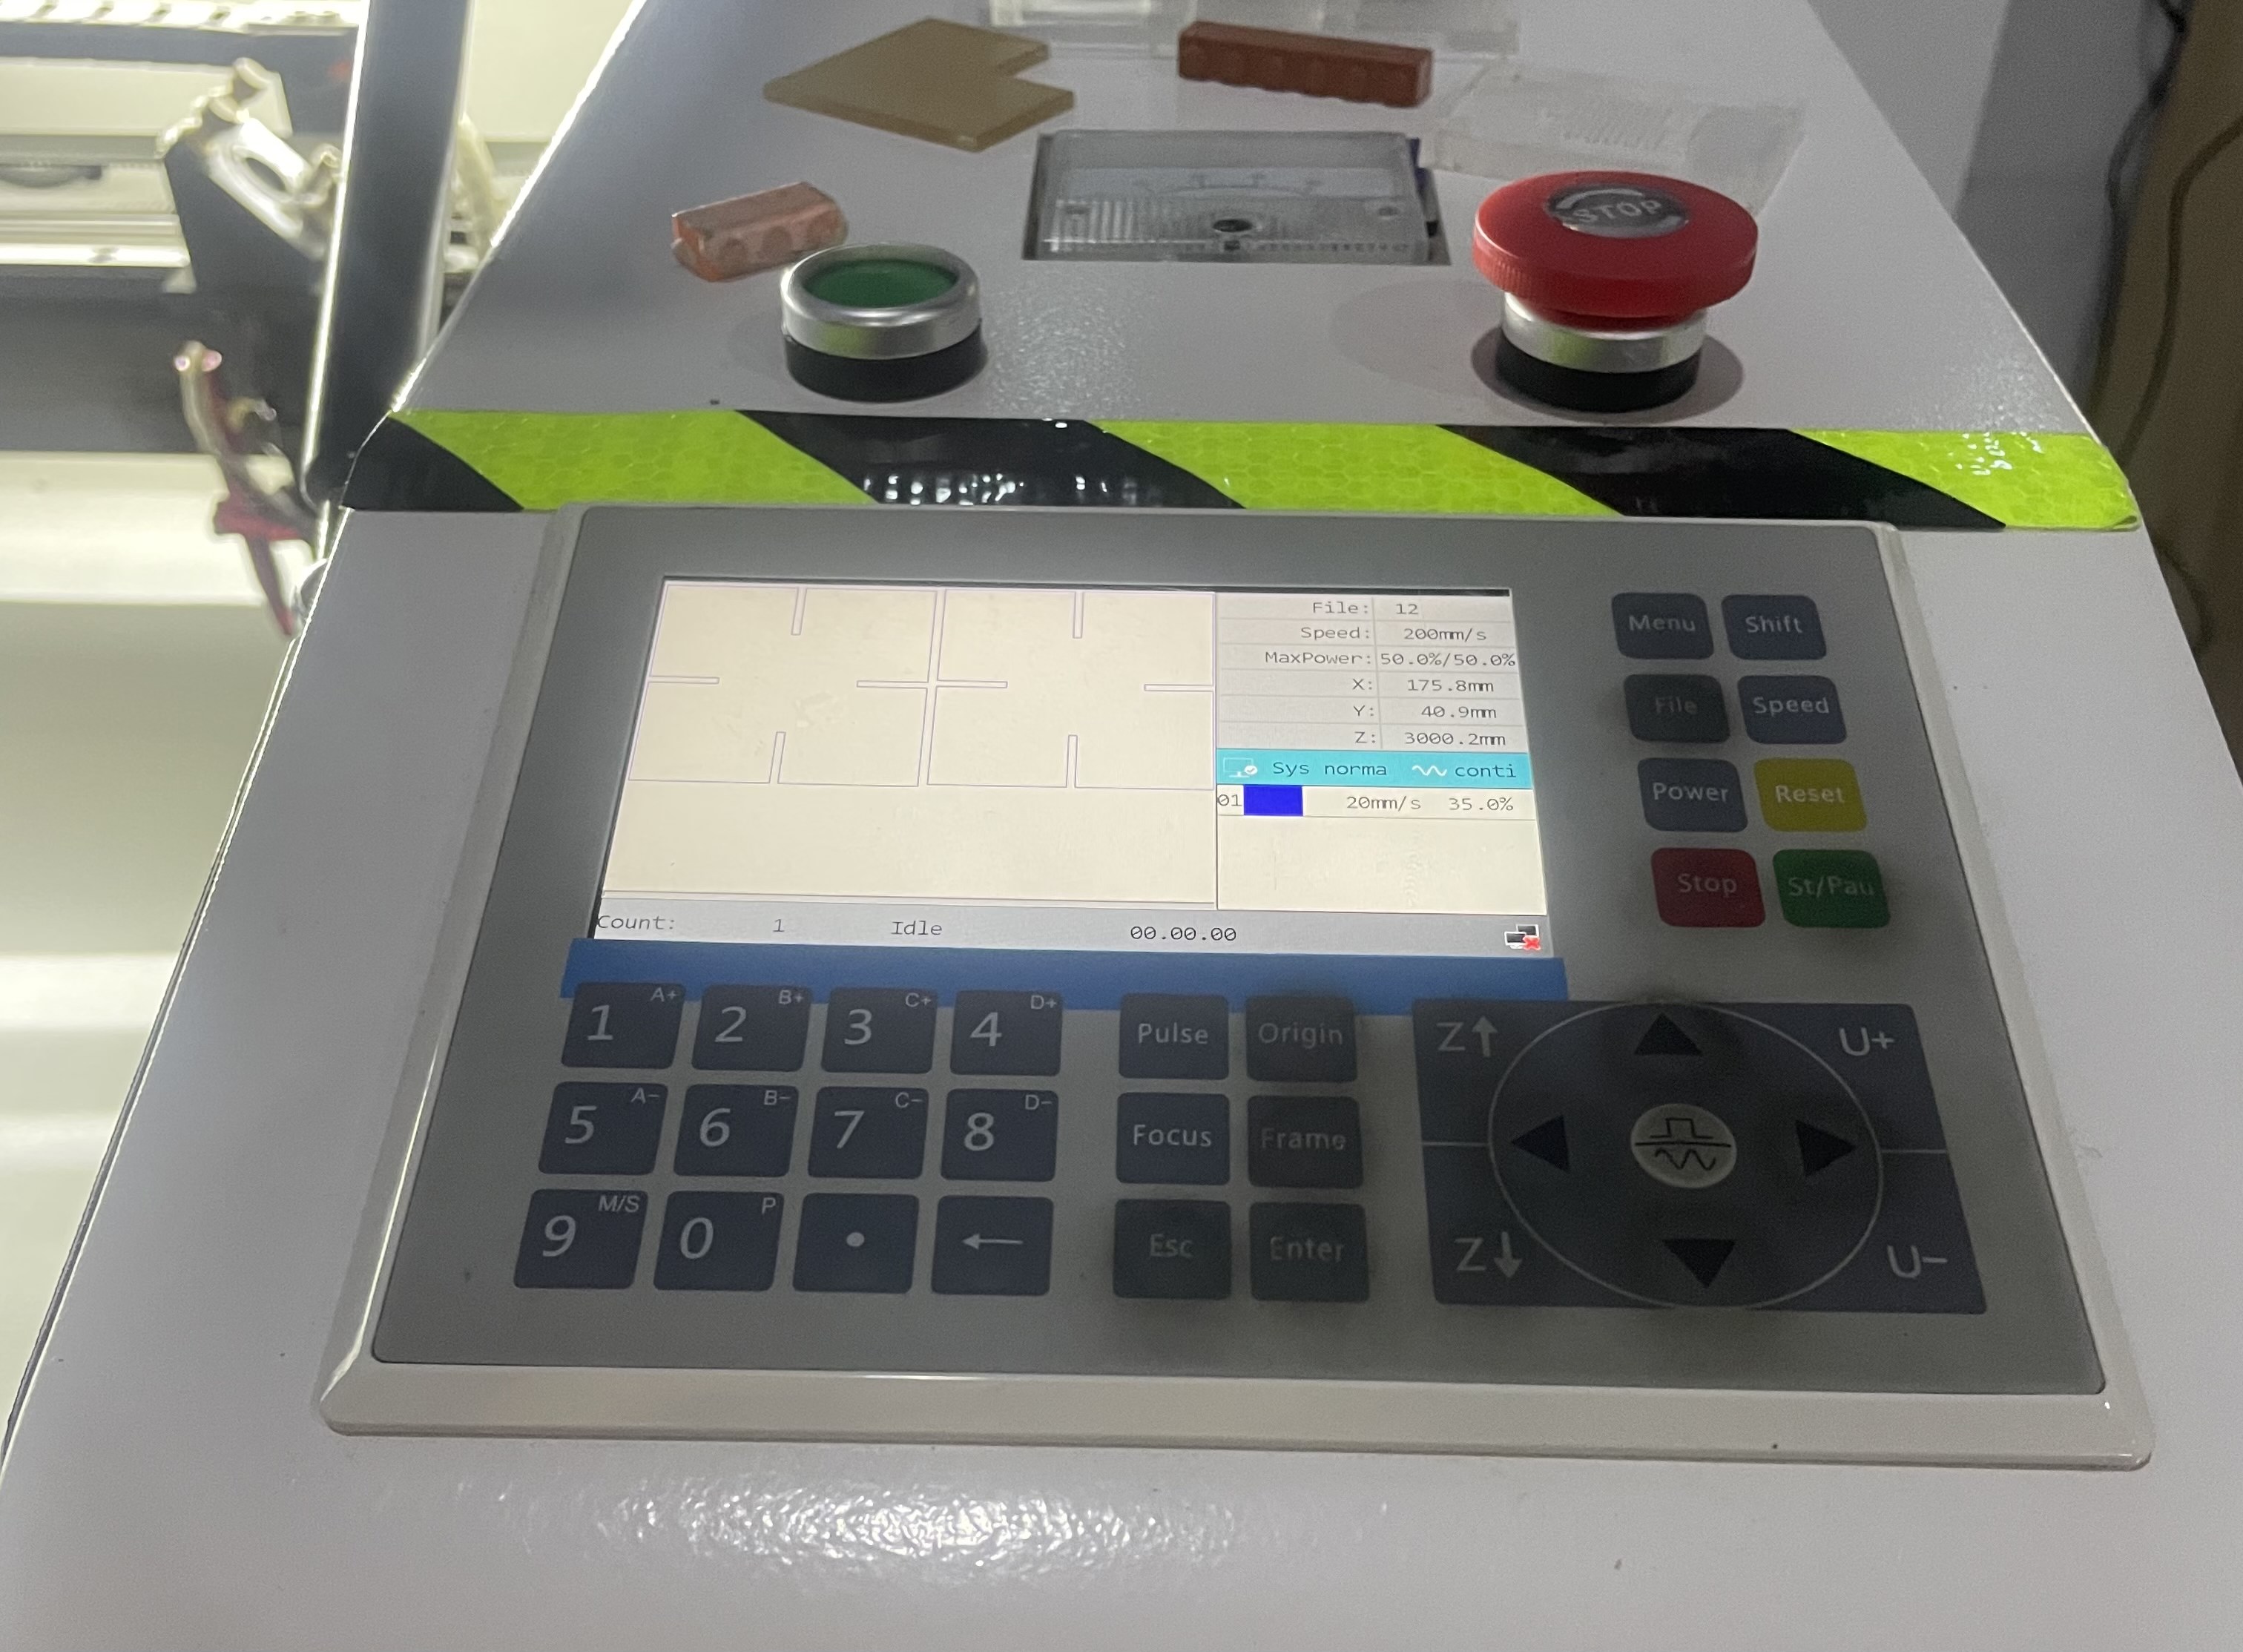
b. The other members of the group worked to test the best power and speed for the laser cutter.
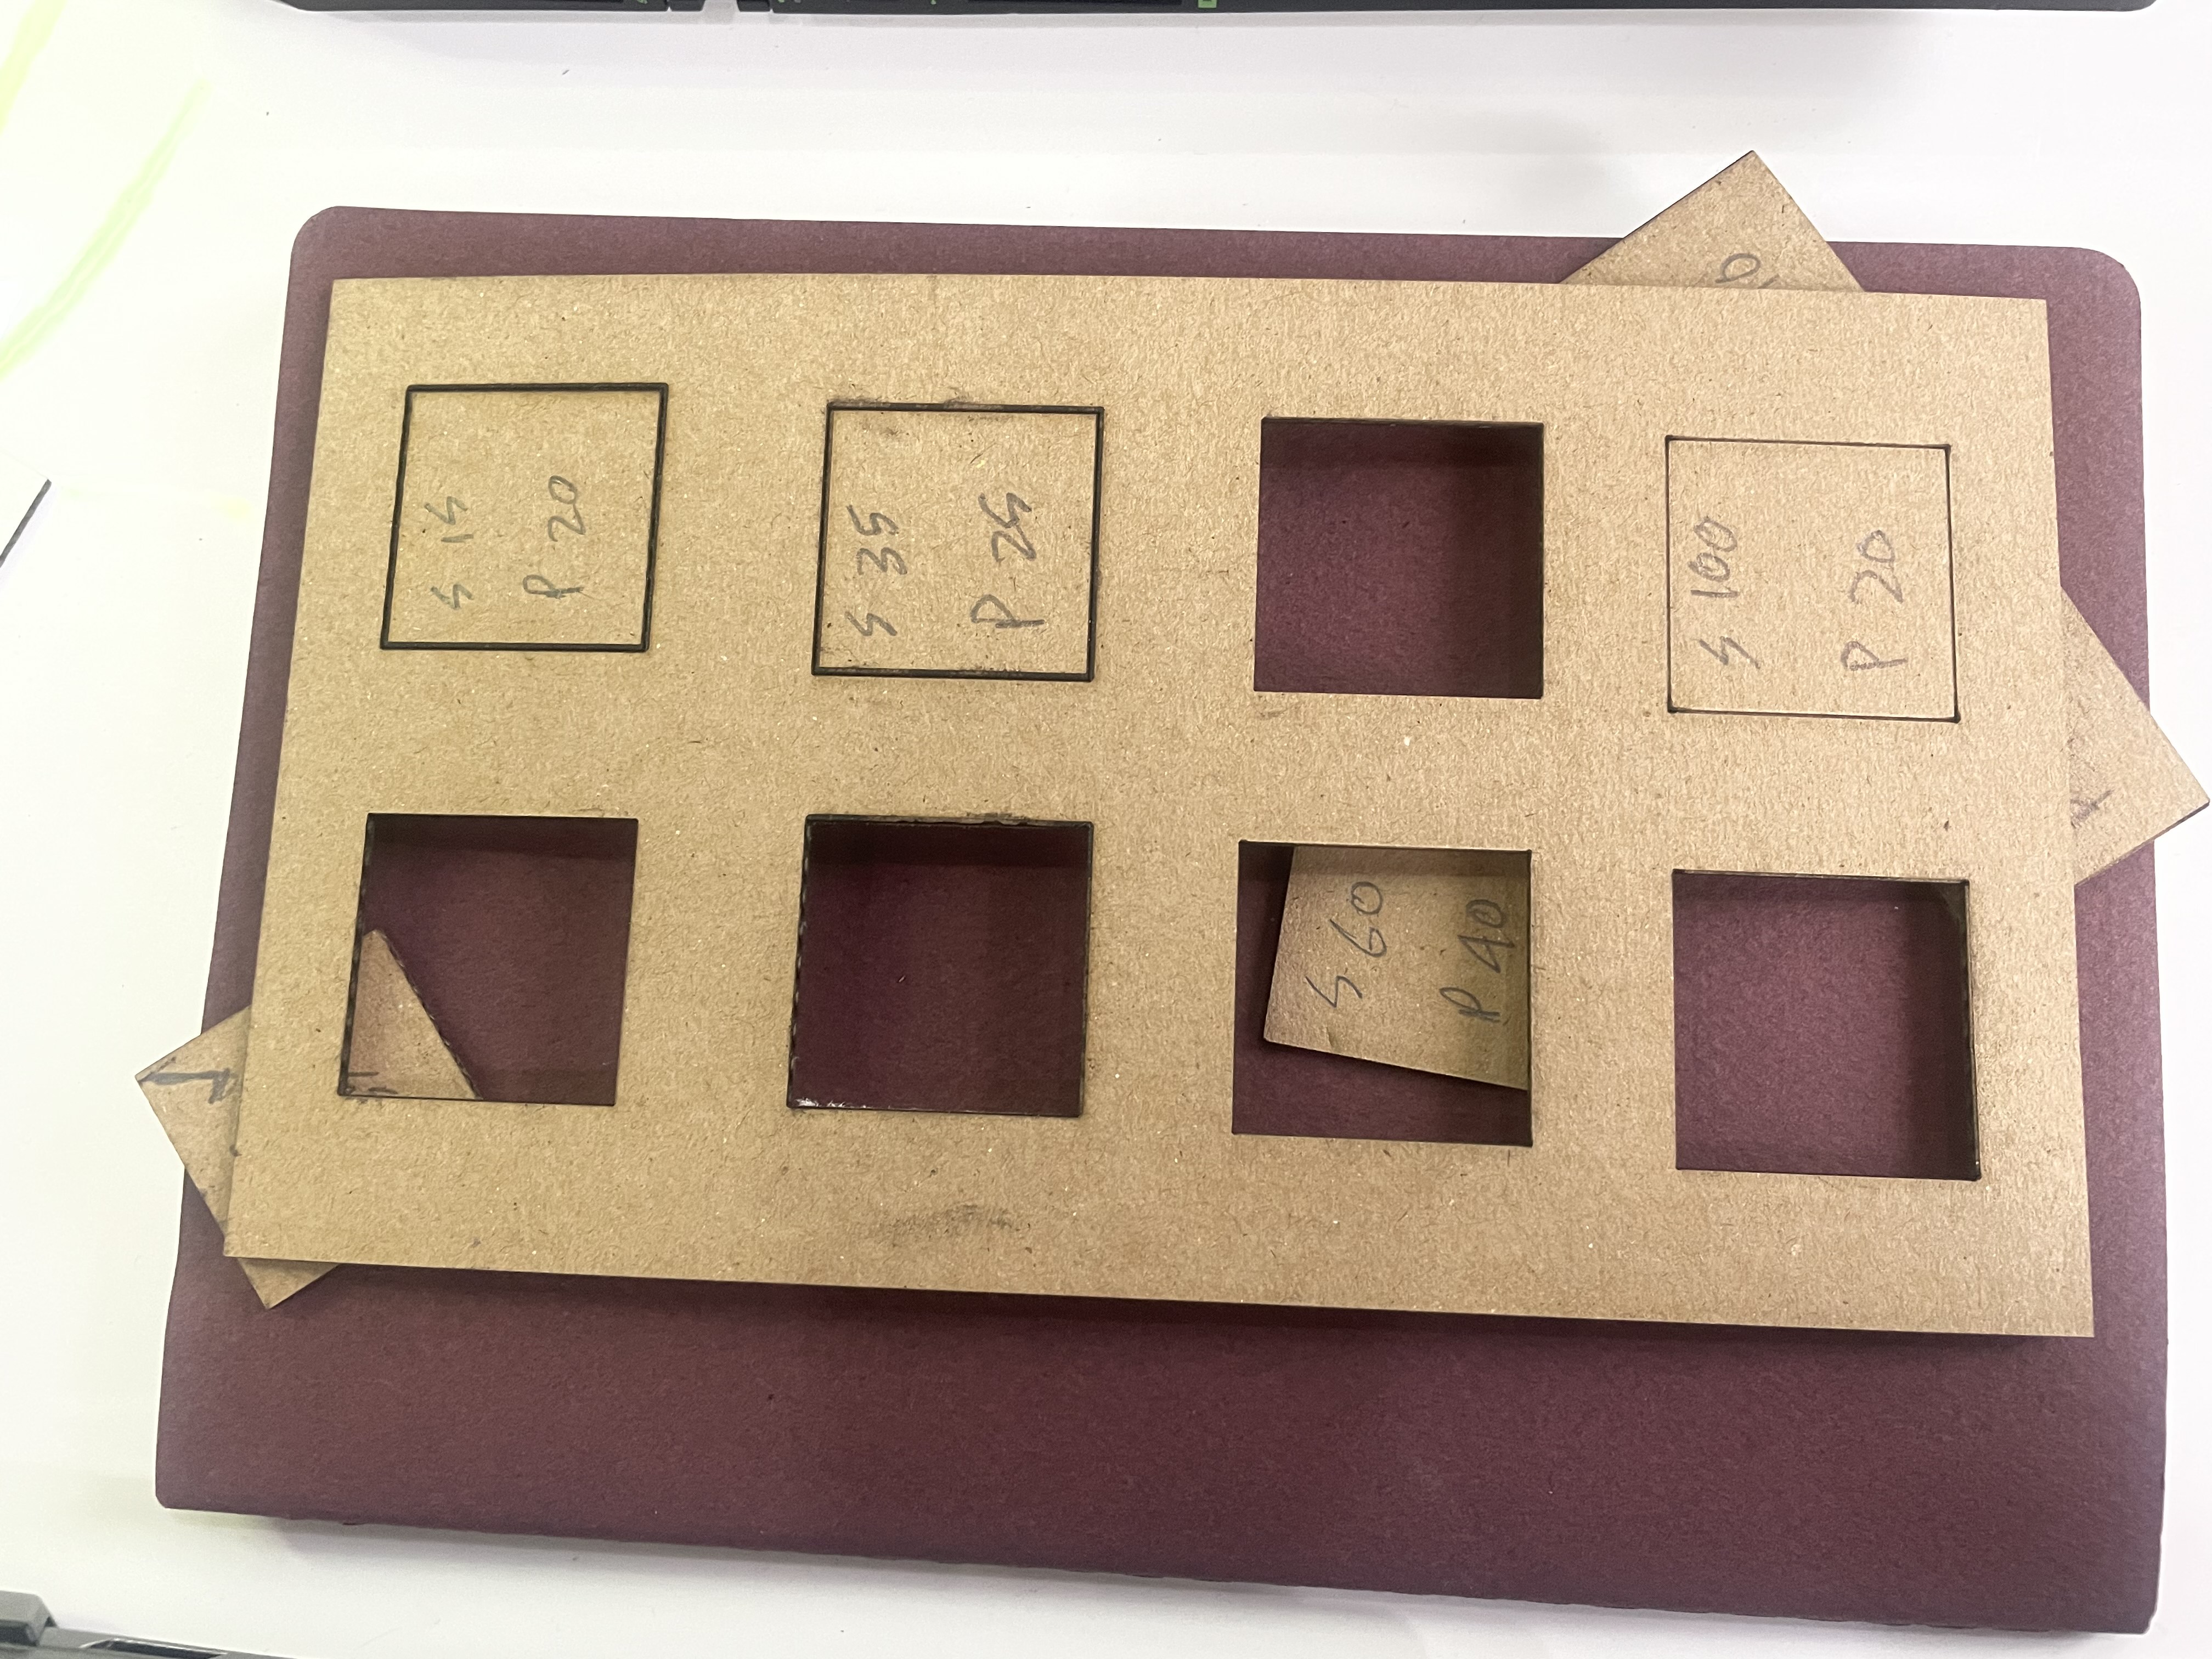
This was the most suitable one :
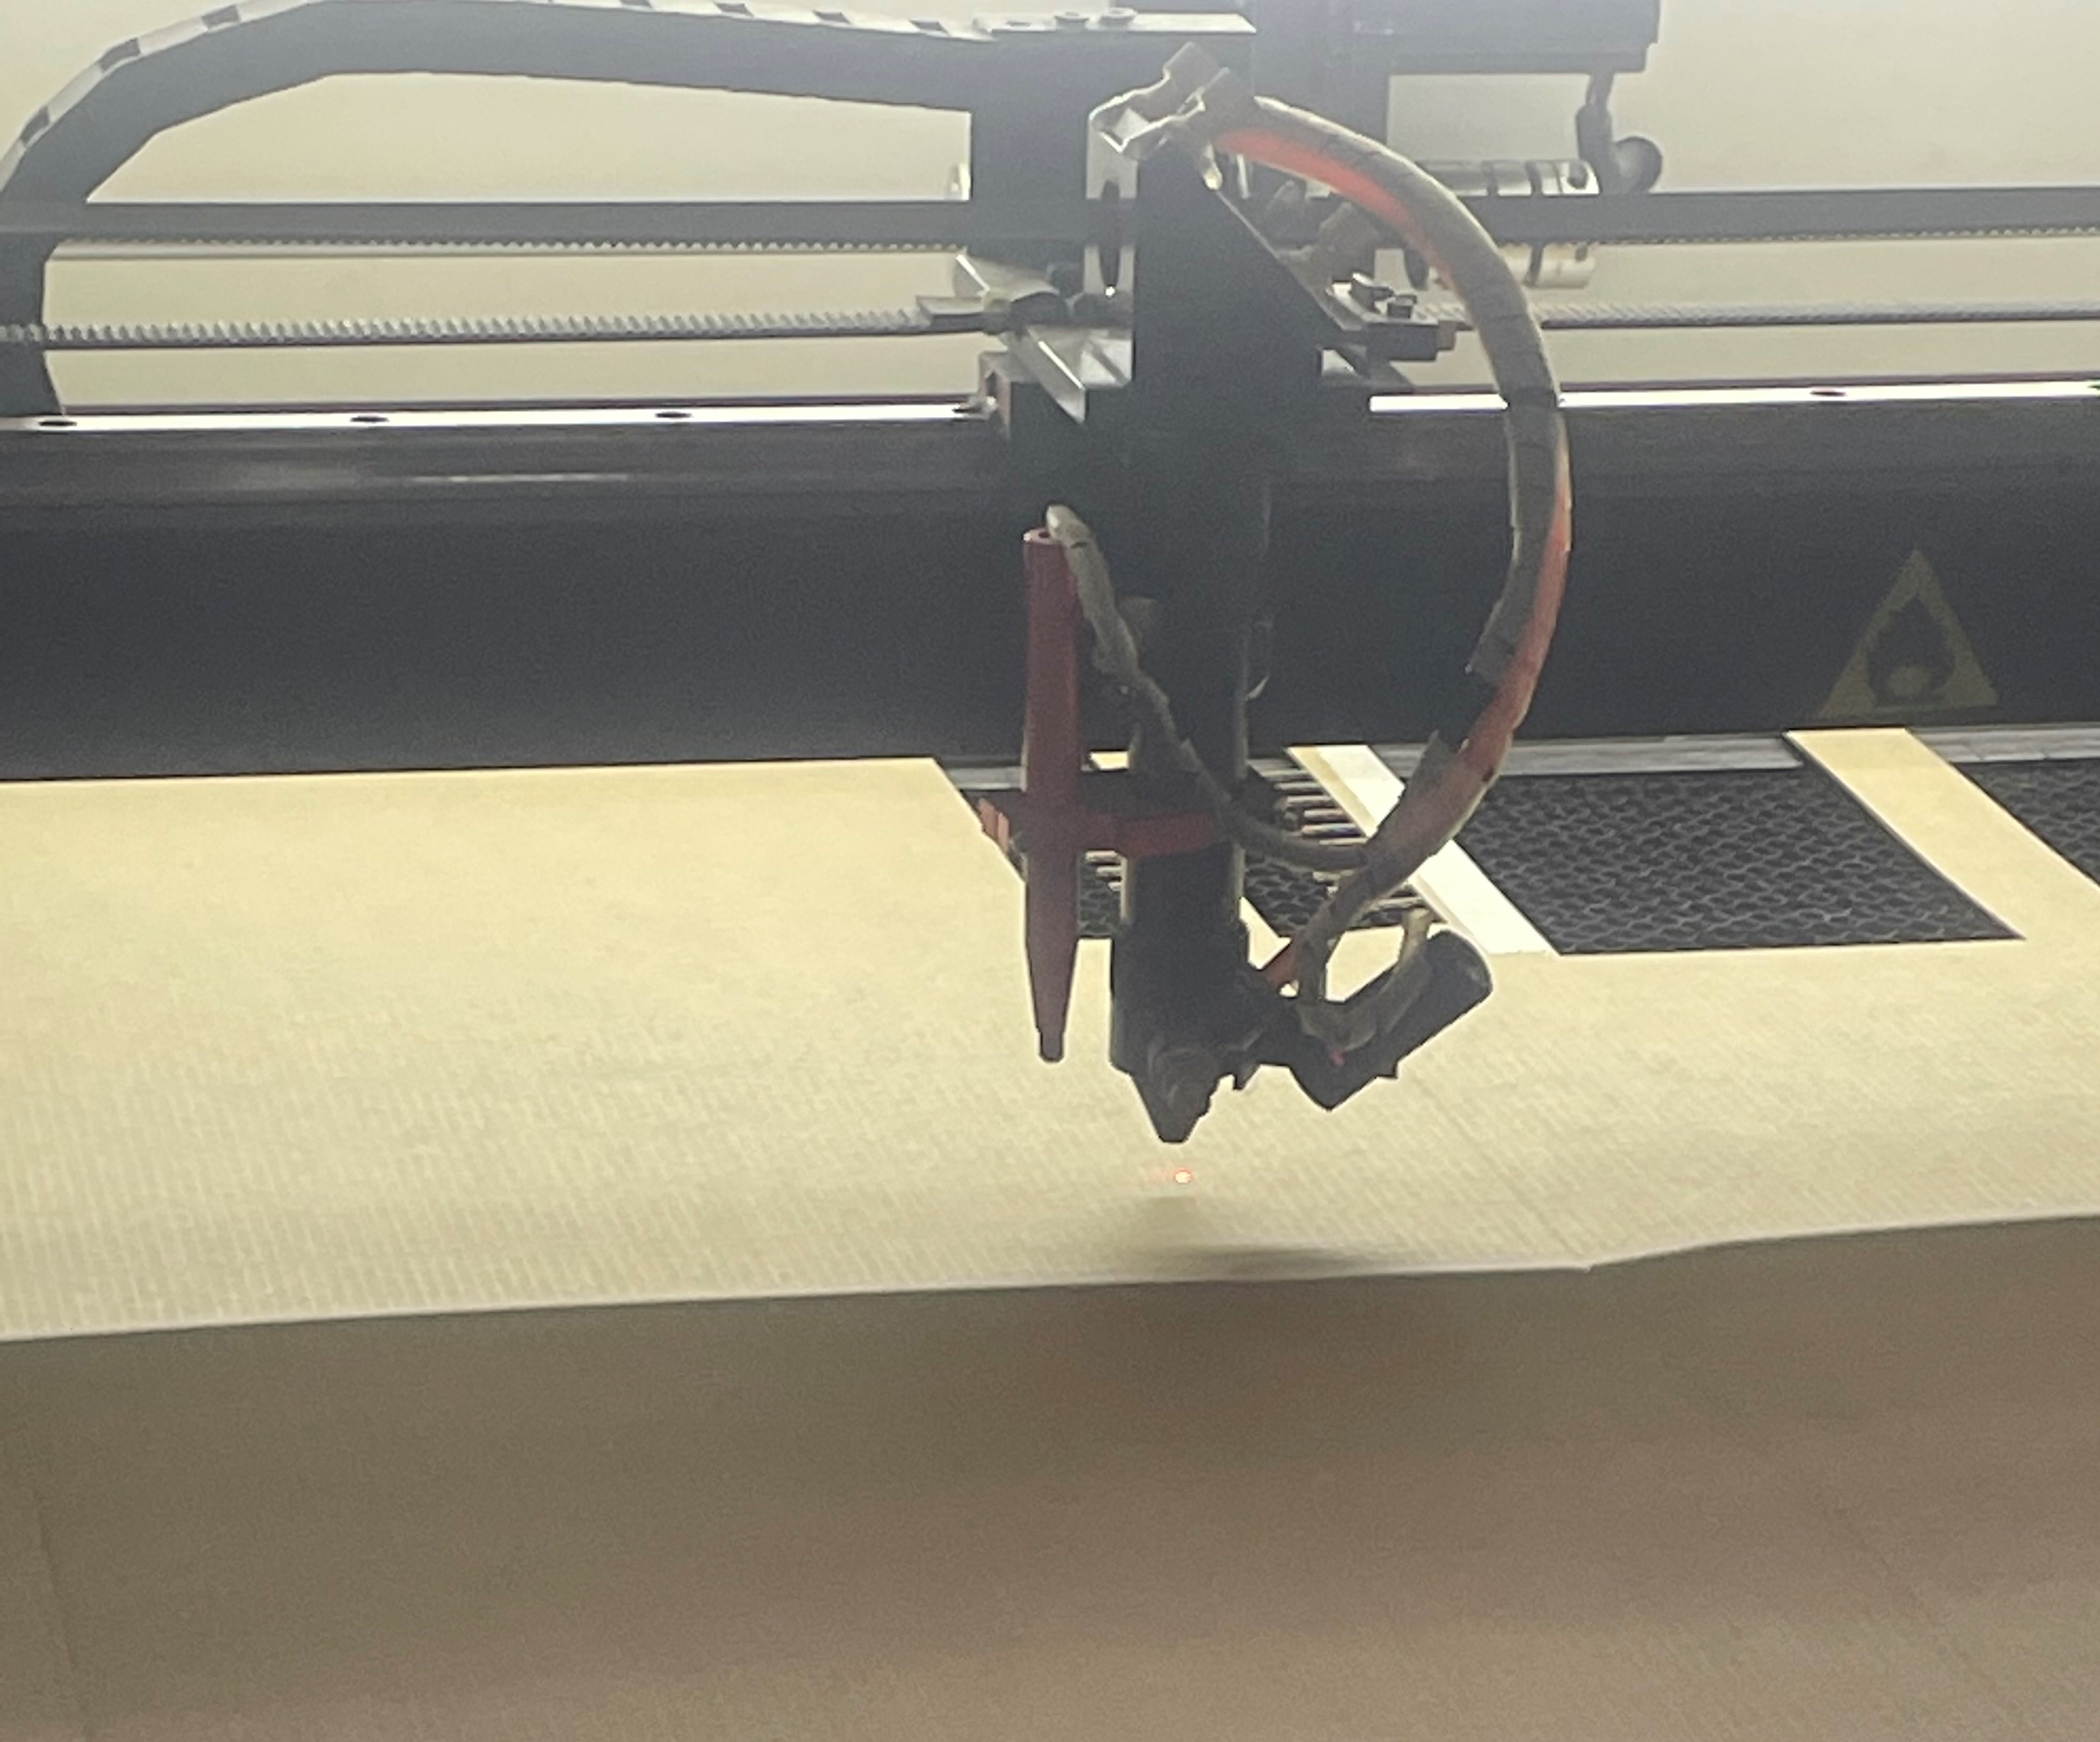
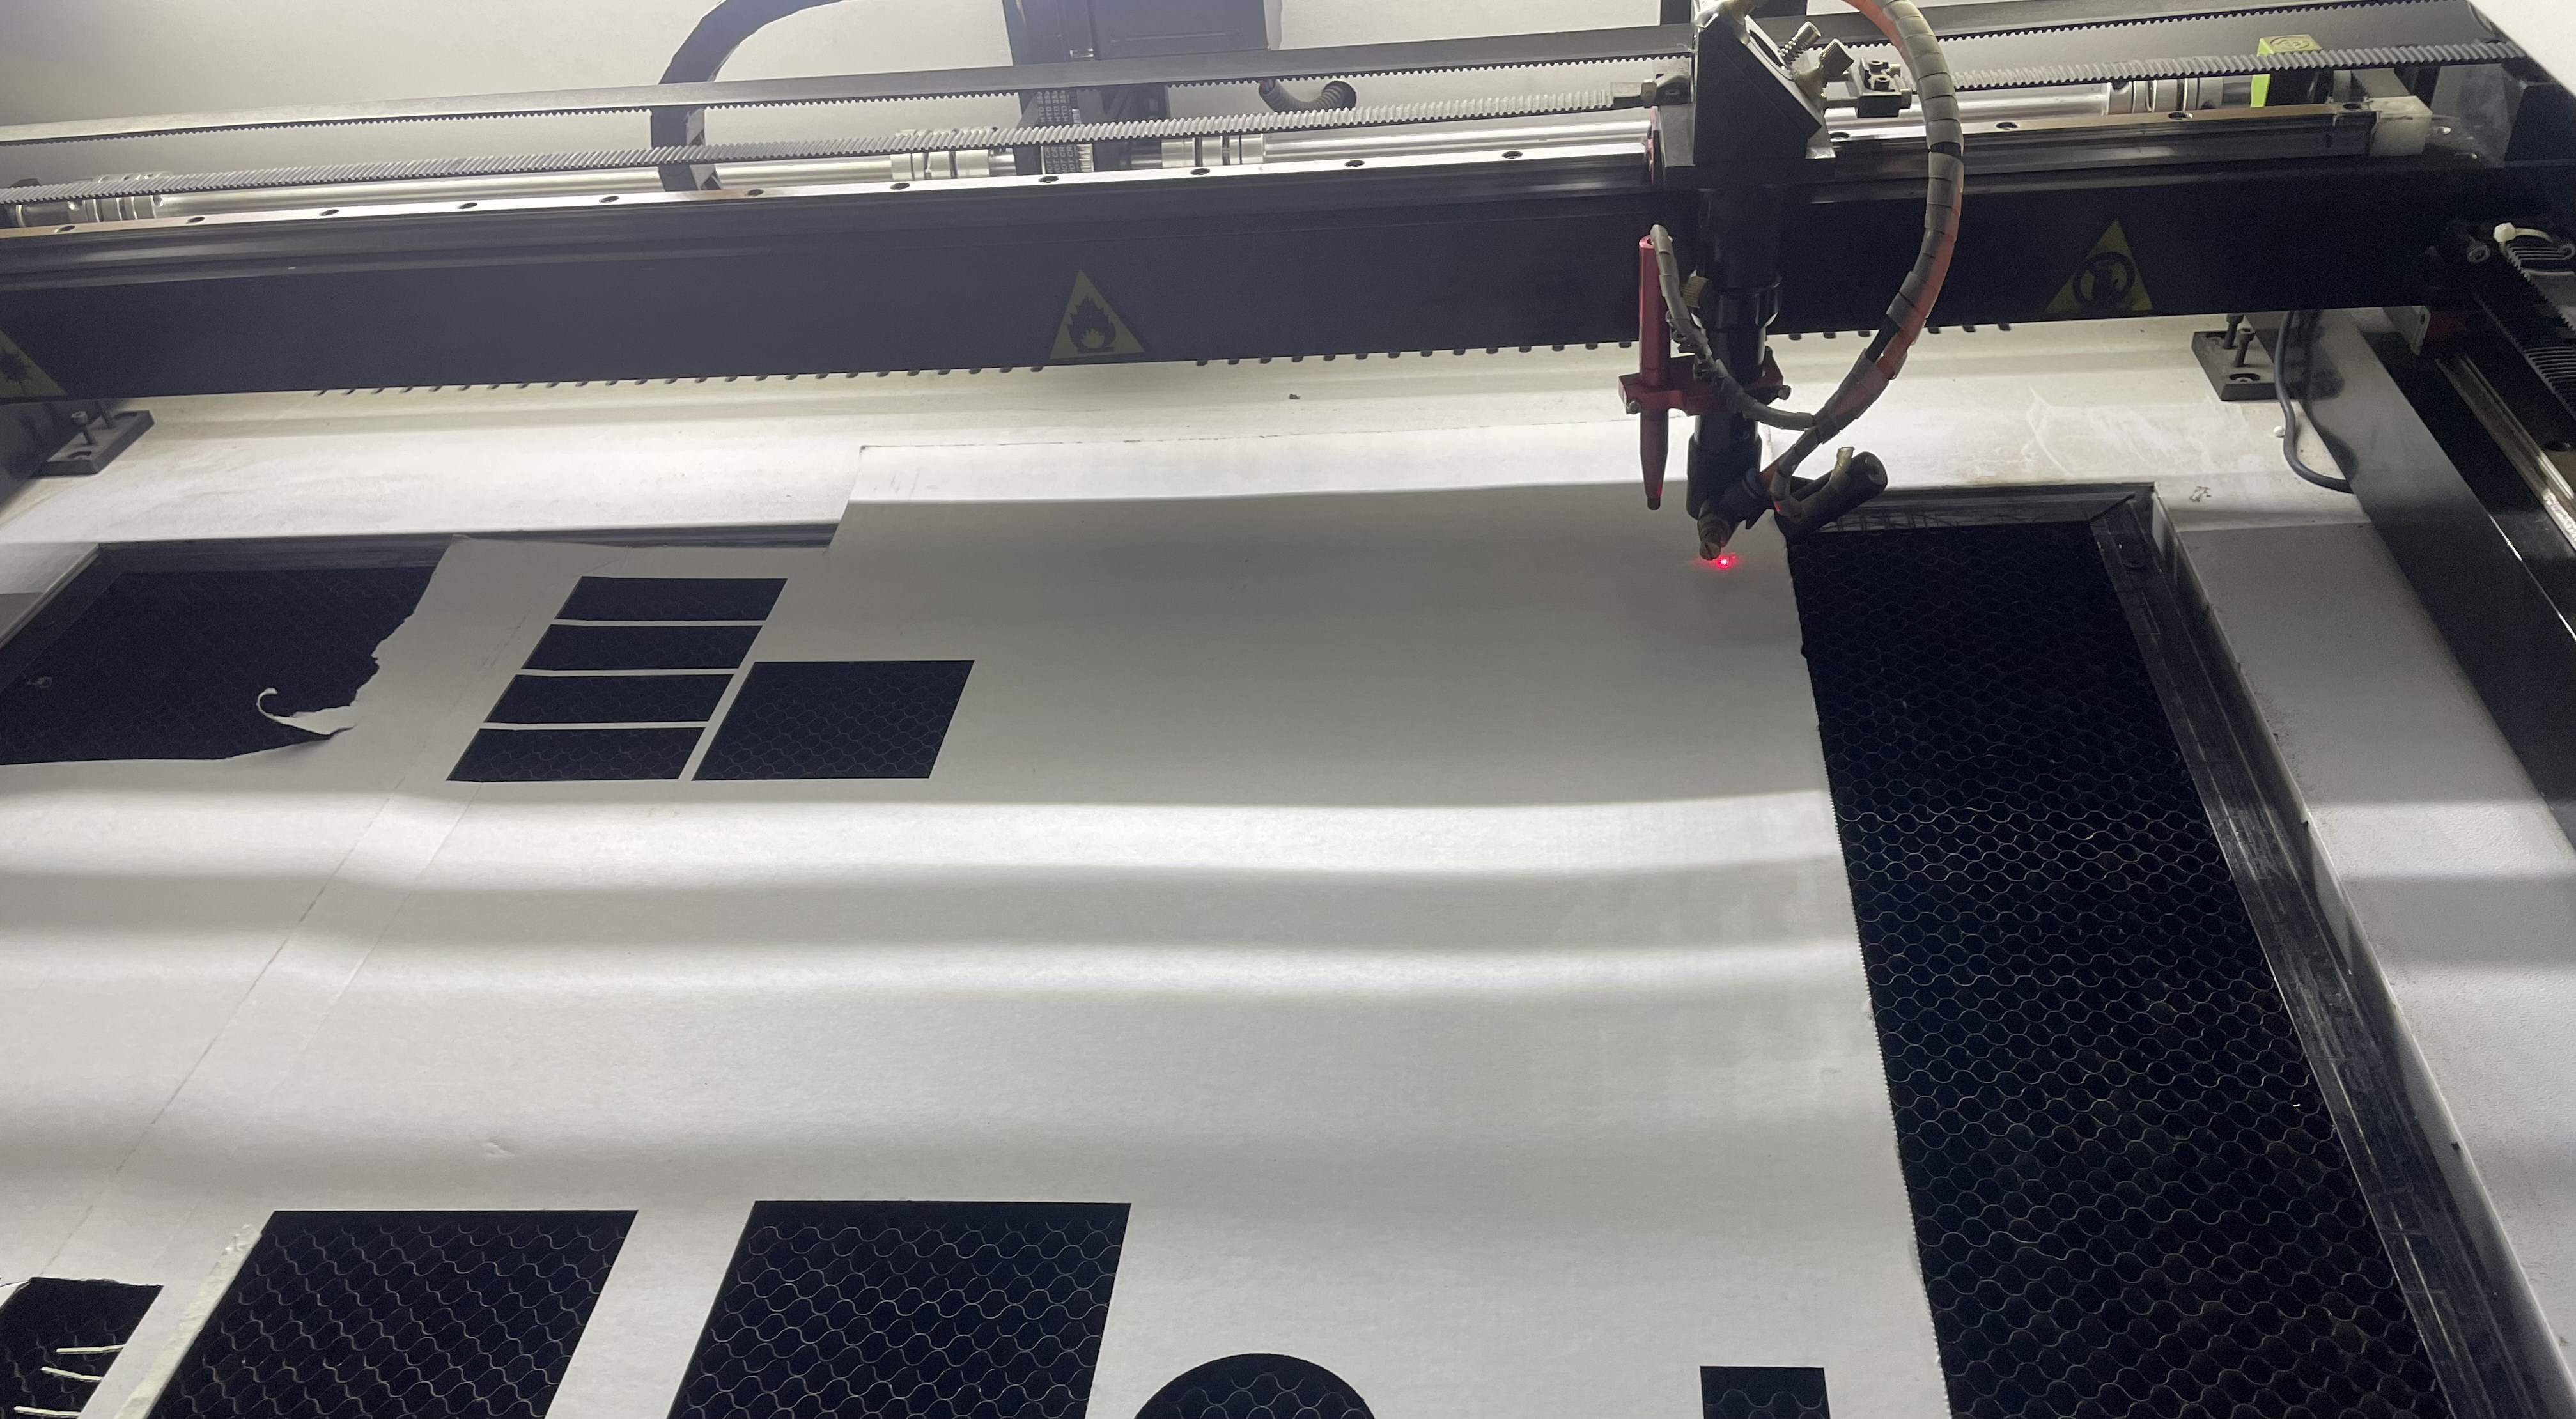
c. we started the procedure of the cutting.
we must adjust the laser to be at the focal point.

d. This is what we’ve got.
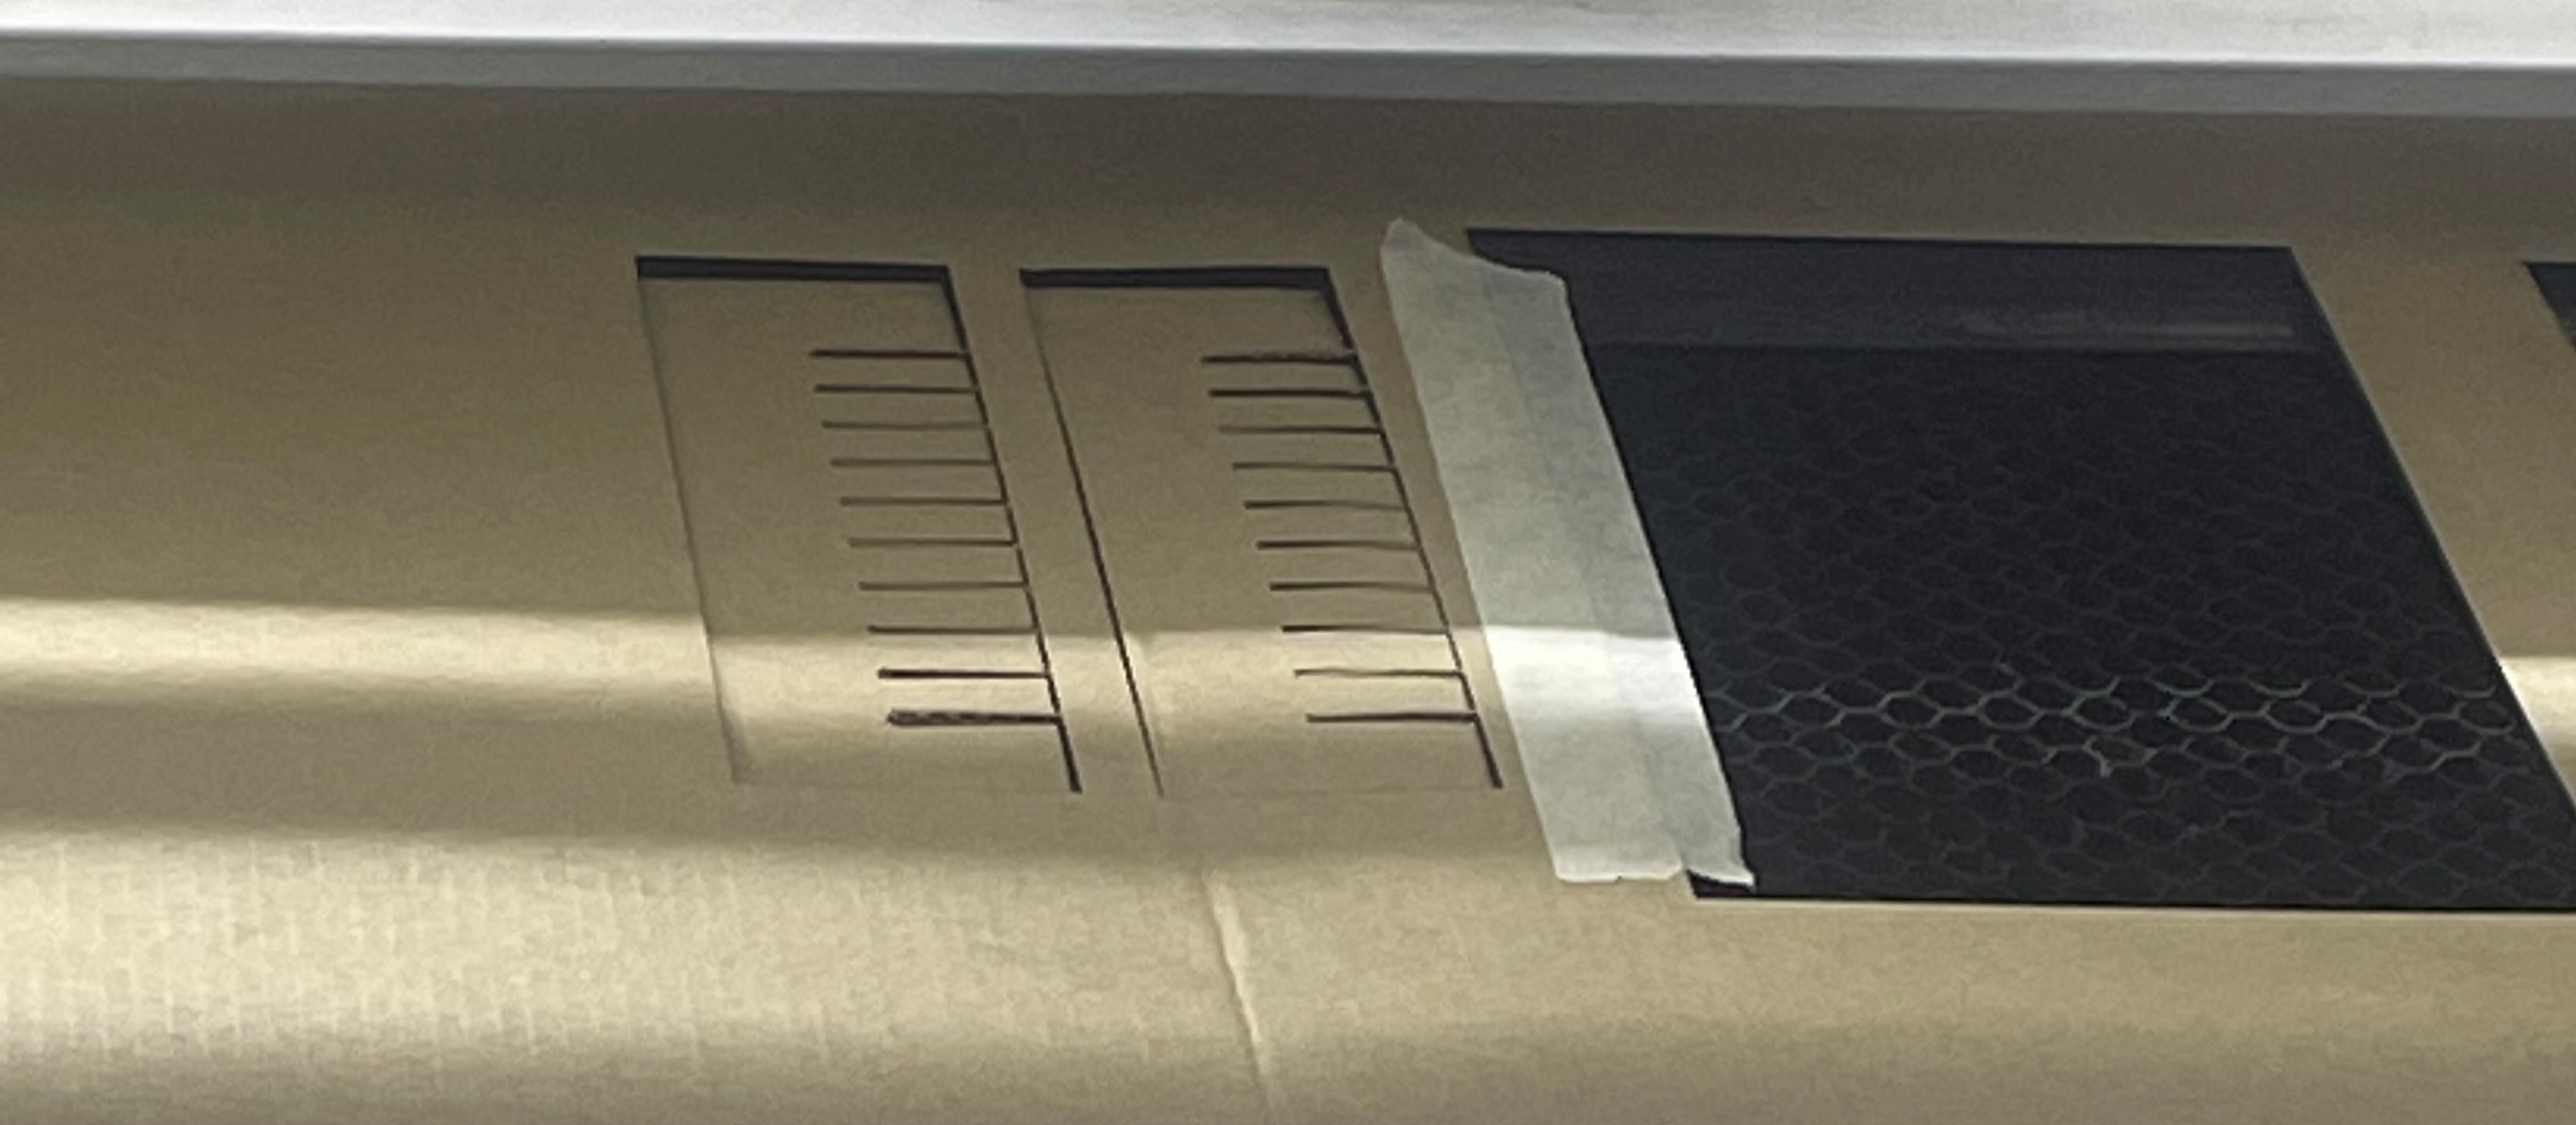
e. We found that the width must to be smaller because it was loose.
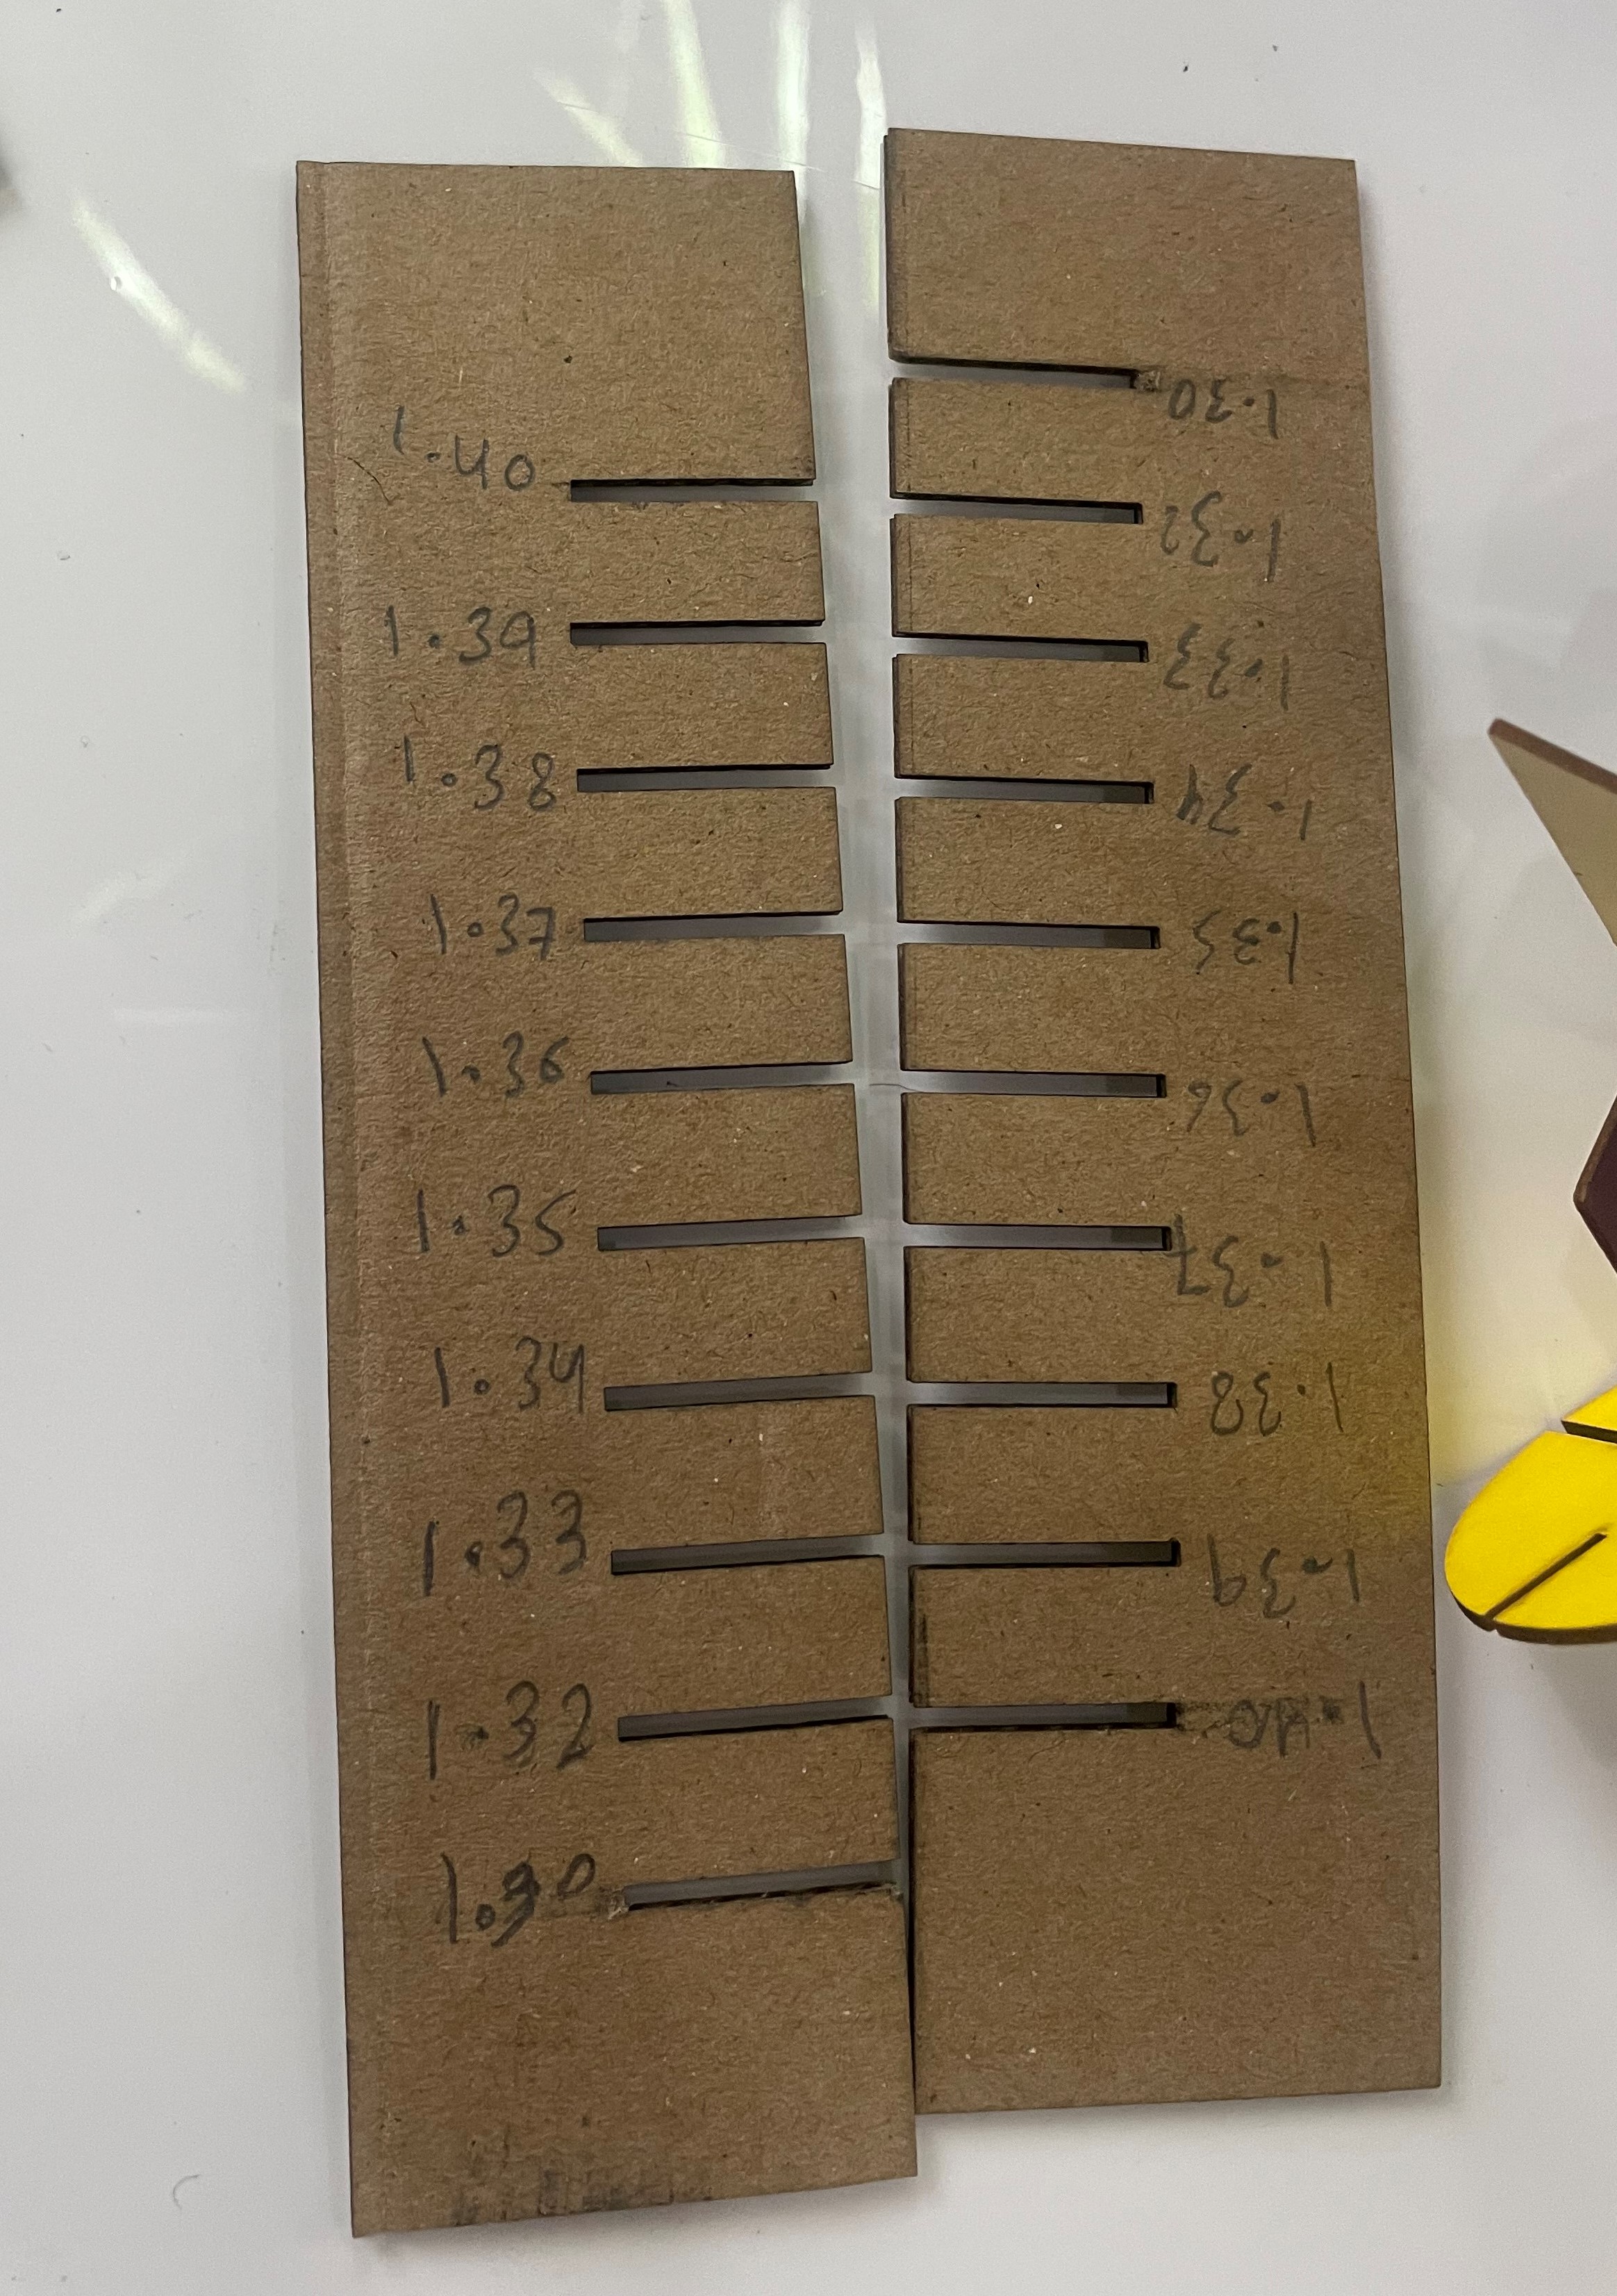
f. I designed another comb with smaller width to see what is the best fit.
The range was from 1.3-1.2
g. we repeated the procedure.
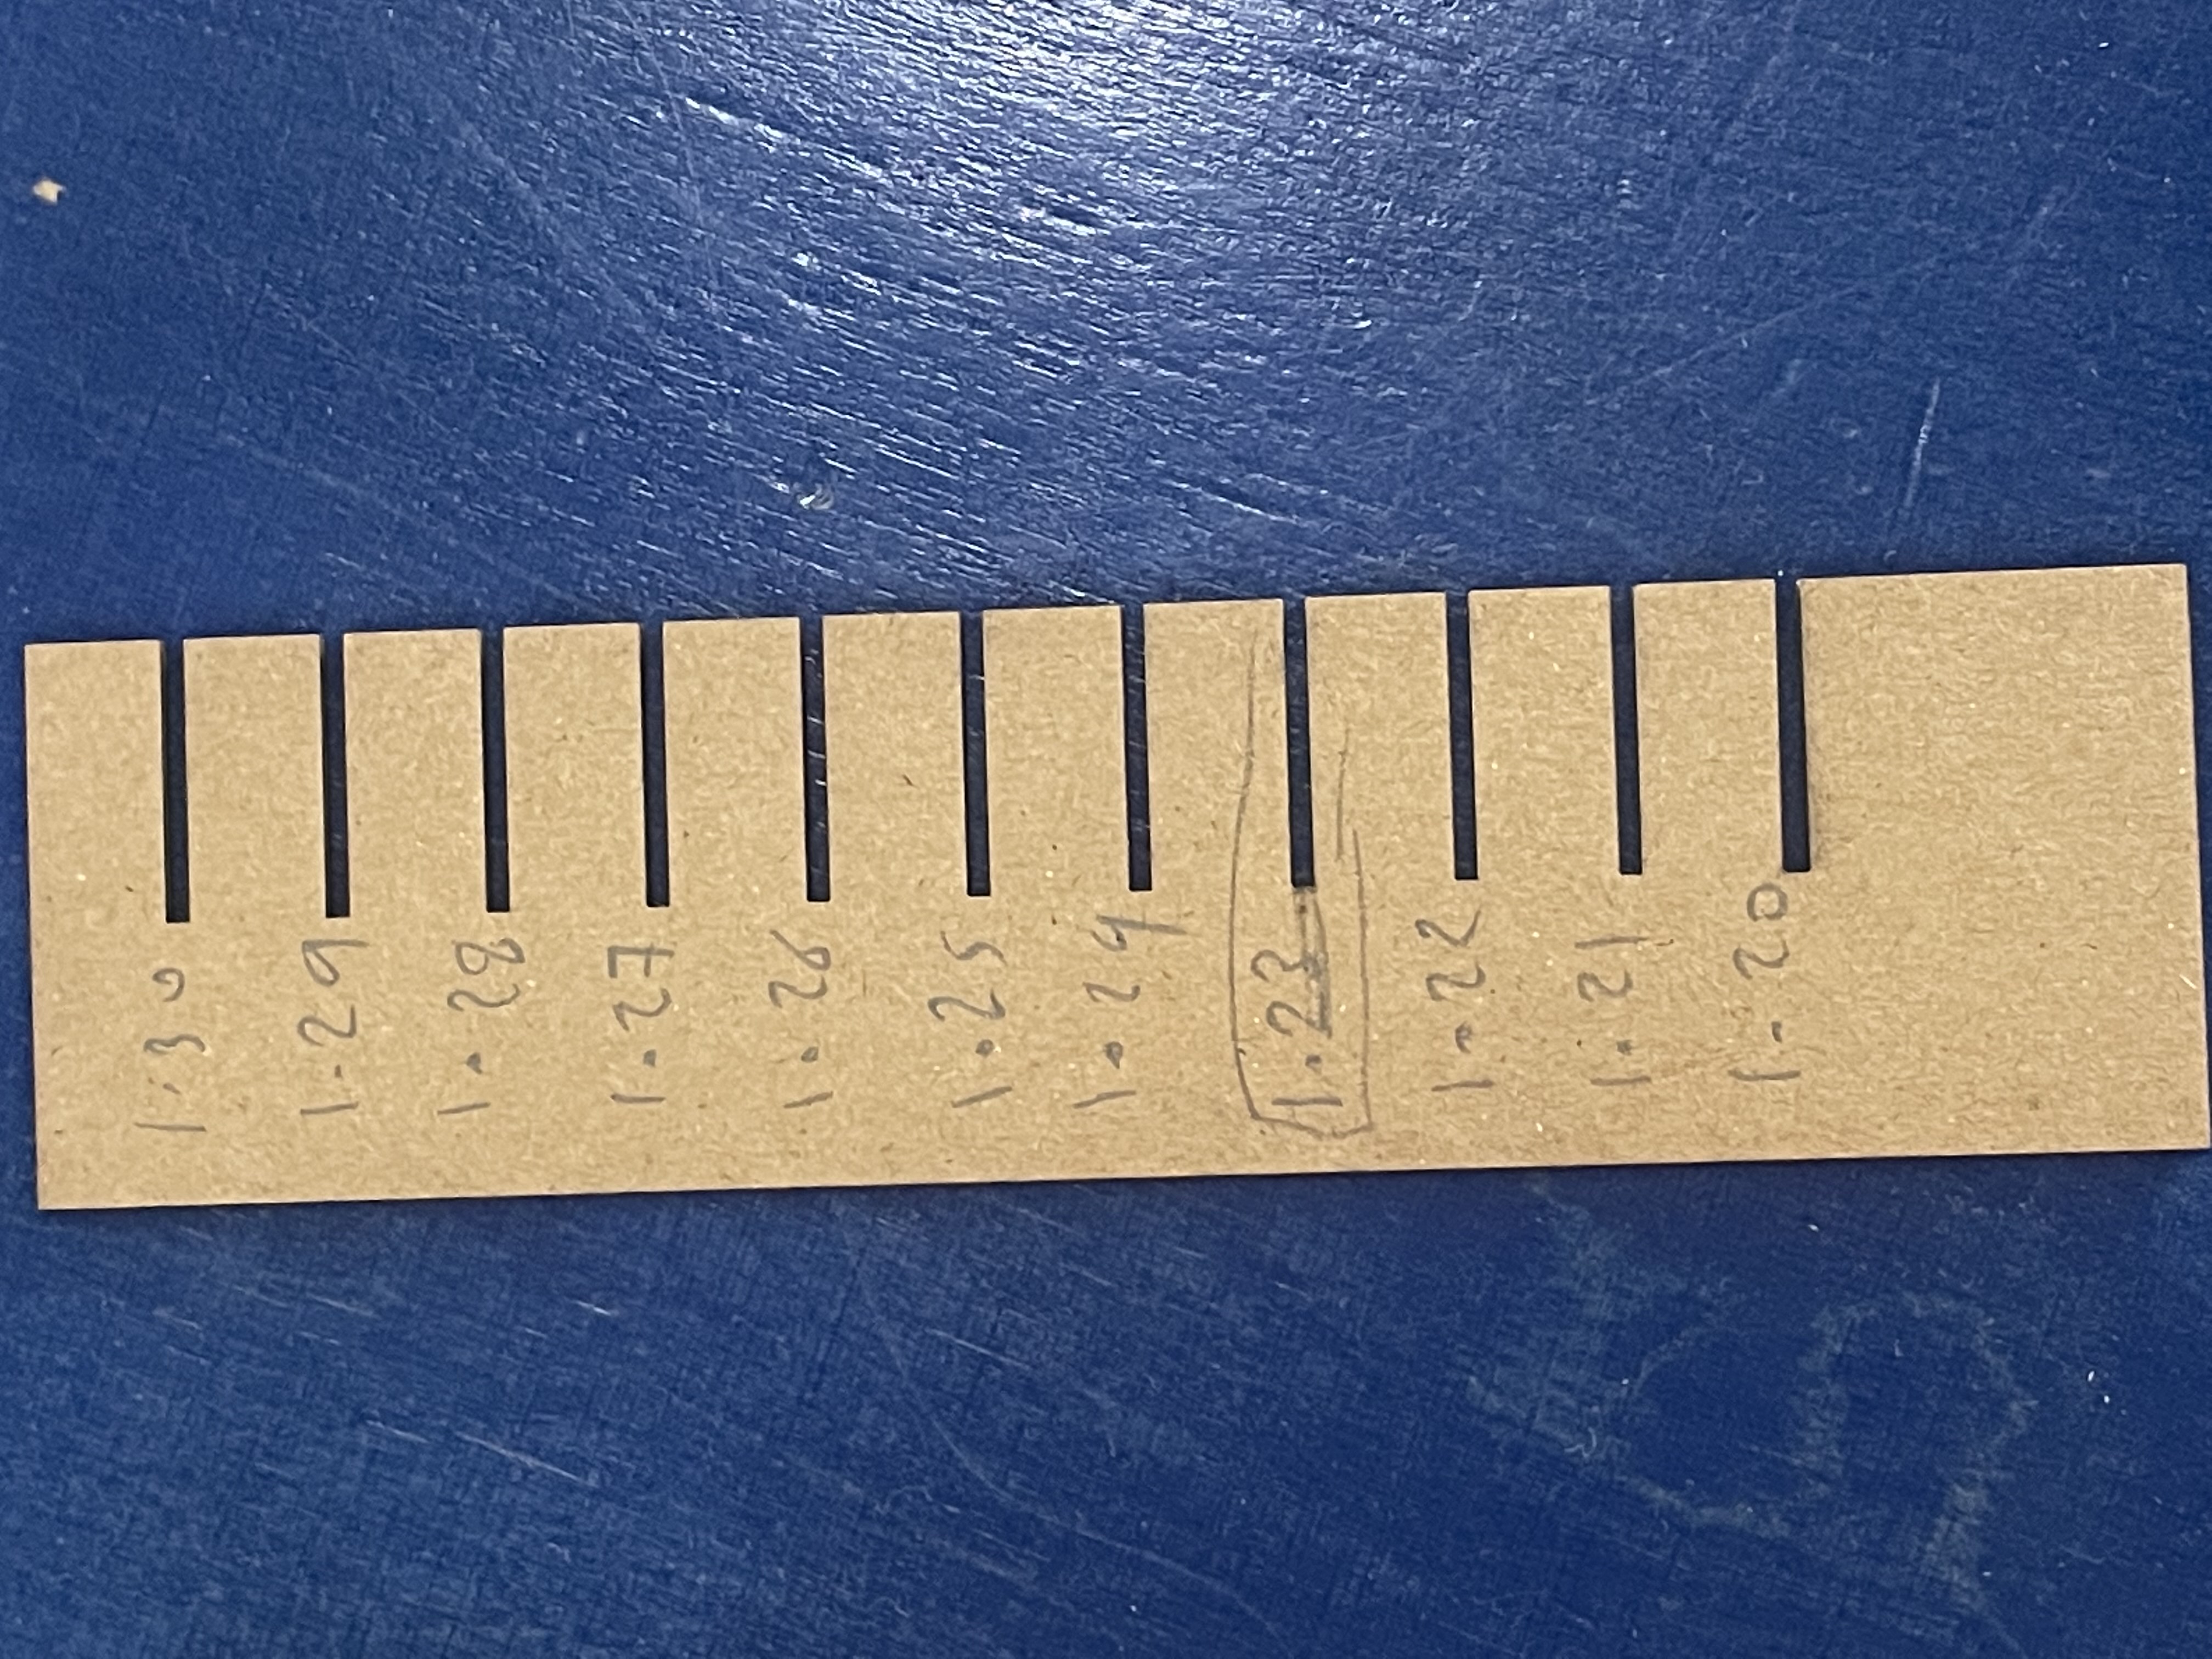
h. Finally we found the best size and it was 1.23mm.
Making press fit by laser cutting
While I’m working on this task I learned how to use the parametric in my design and how it will help me, also I learned how to use the circular pattern.
I started with creating a square, then I add certain parameters:
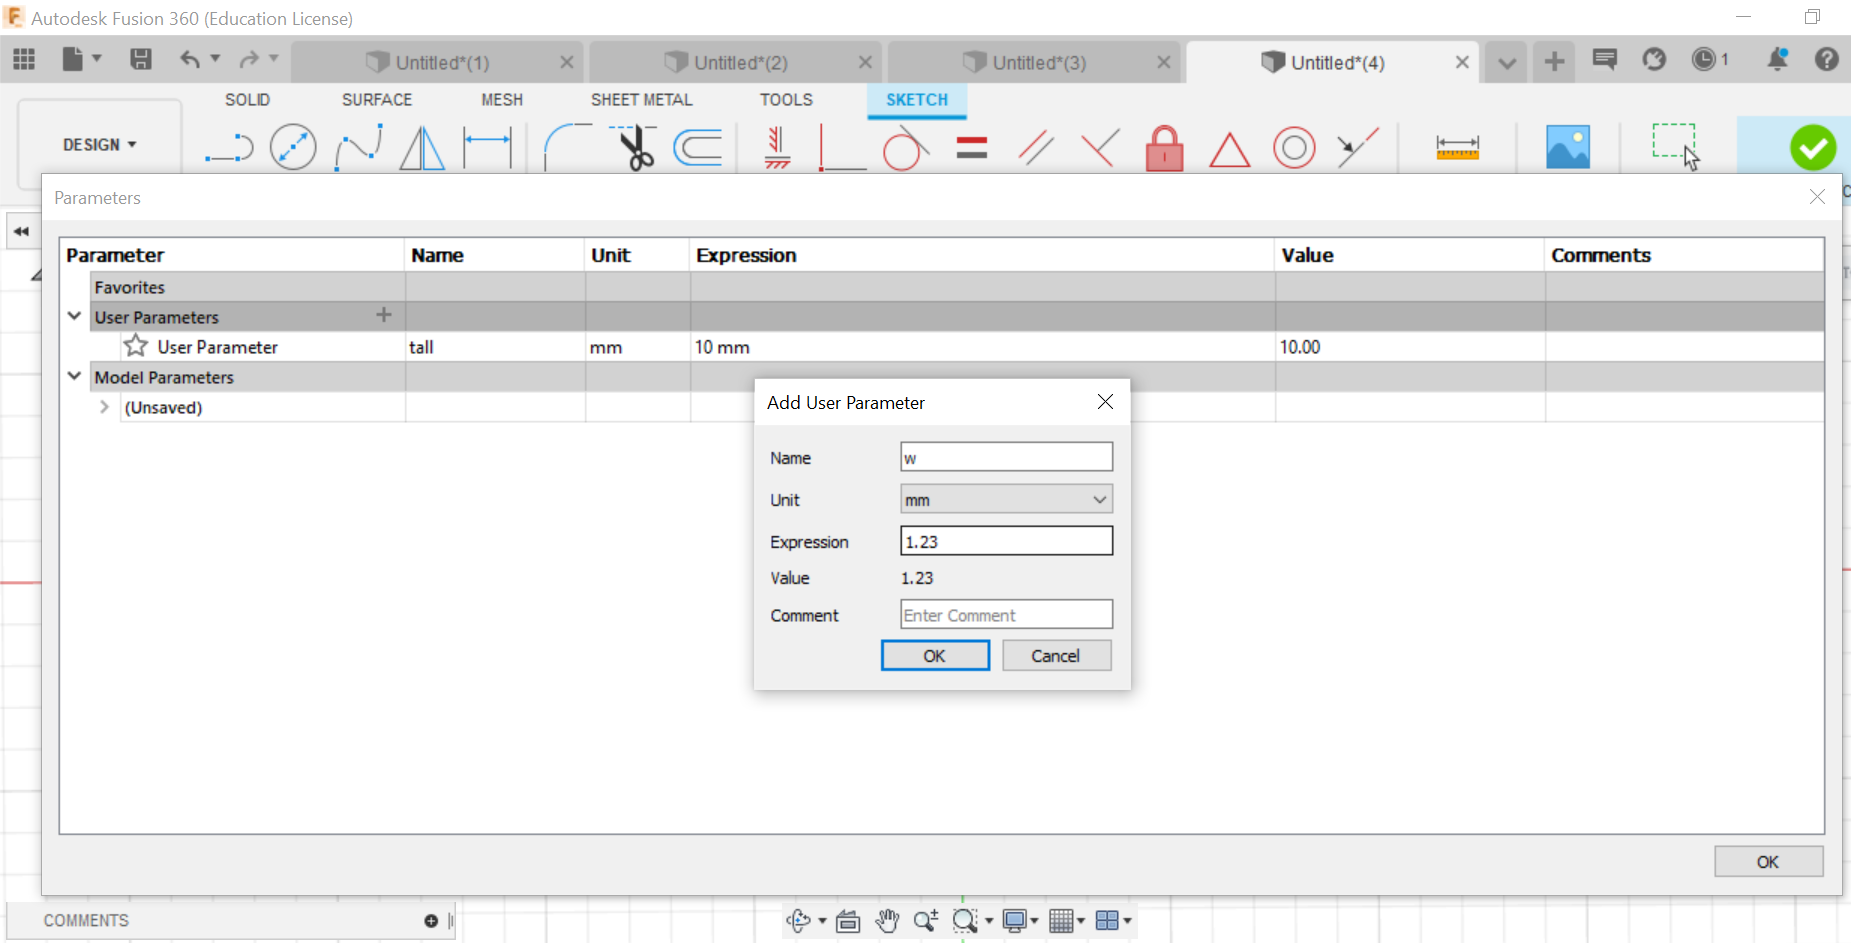
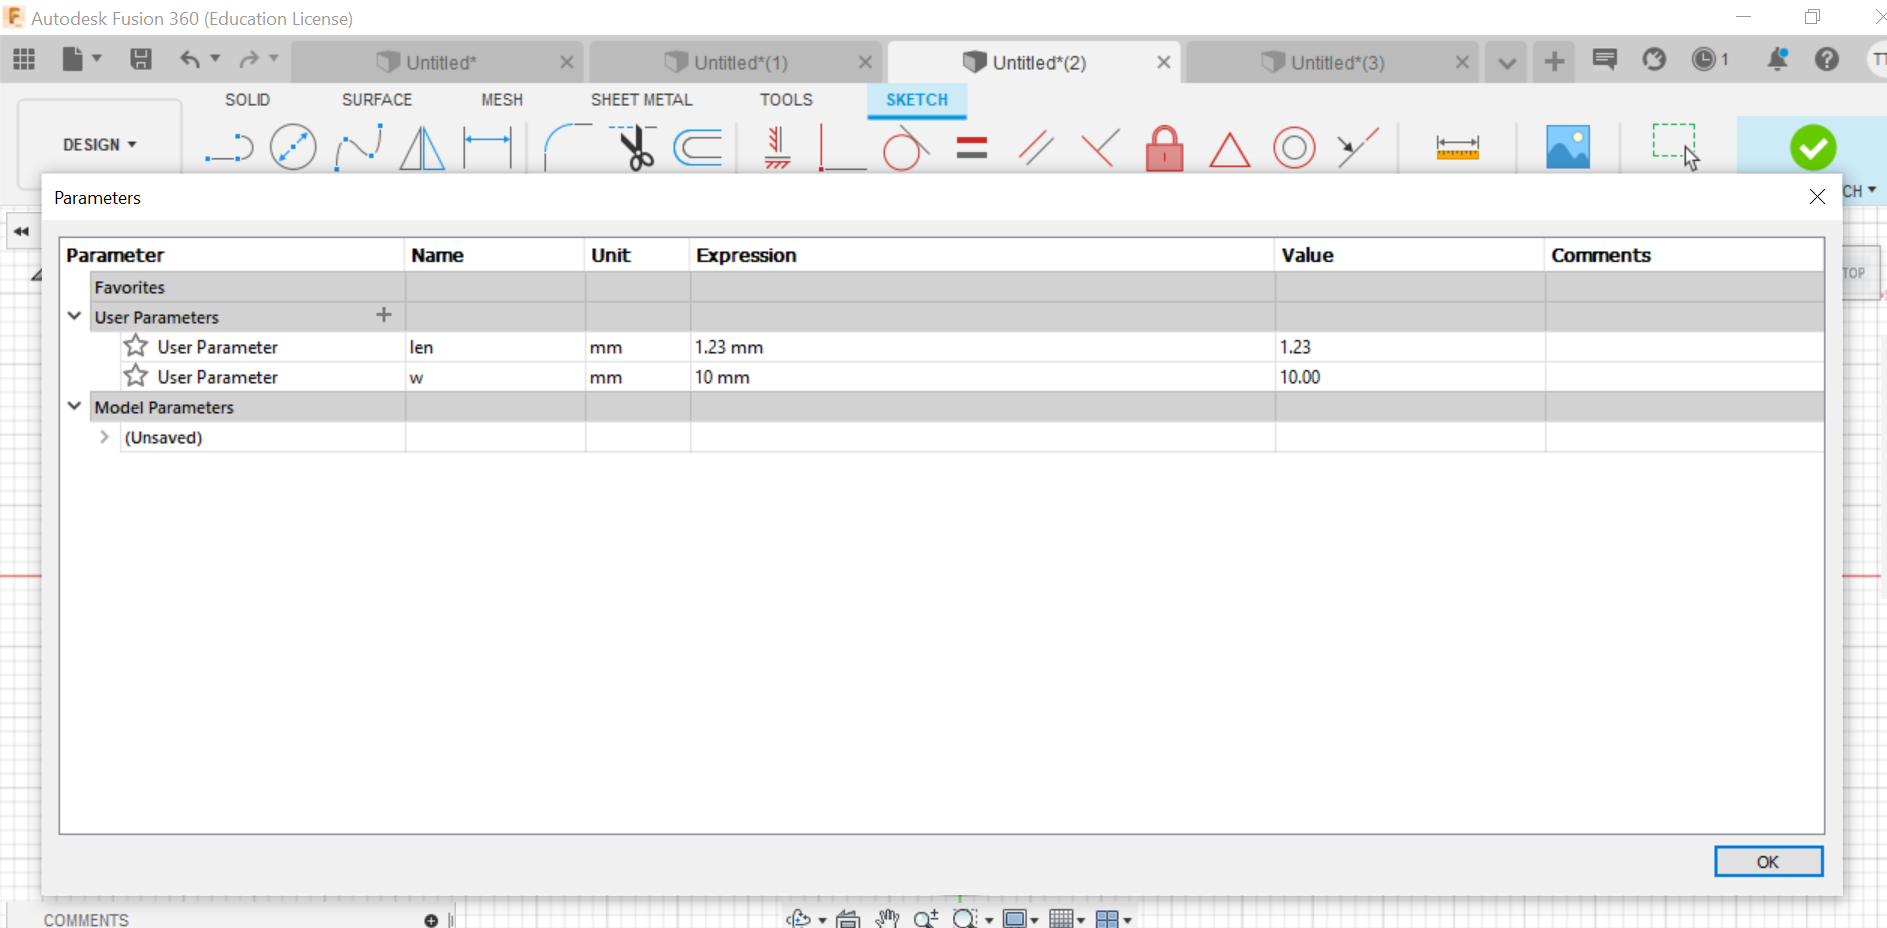
I choose 1.23mm for the width because we found that this is the best fitting.
Then I added a rectangle in one side and I set to to the parameter that i made before.
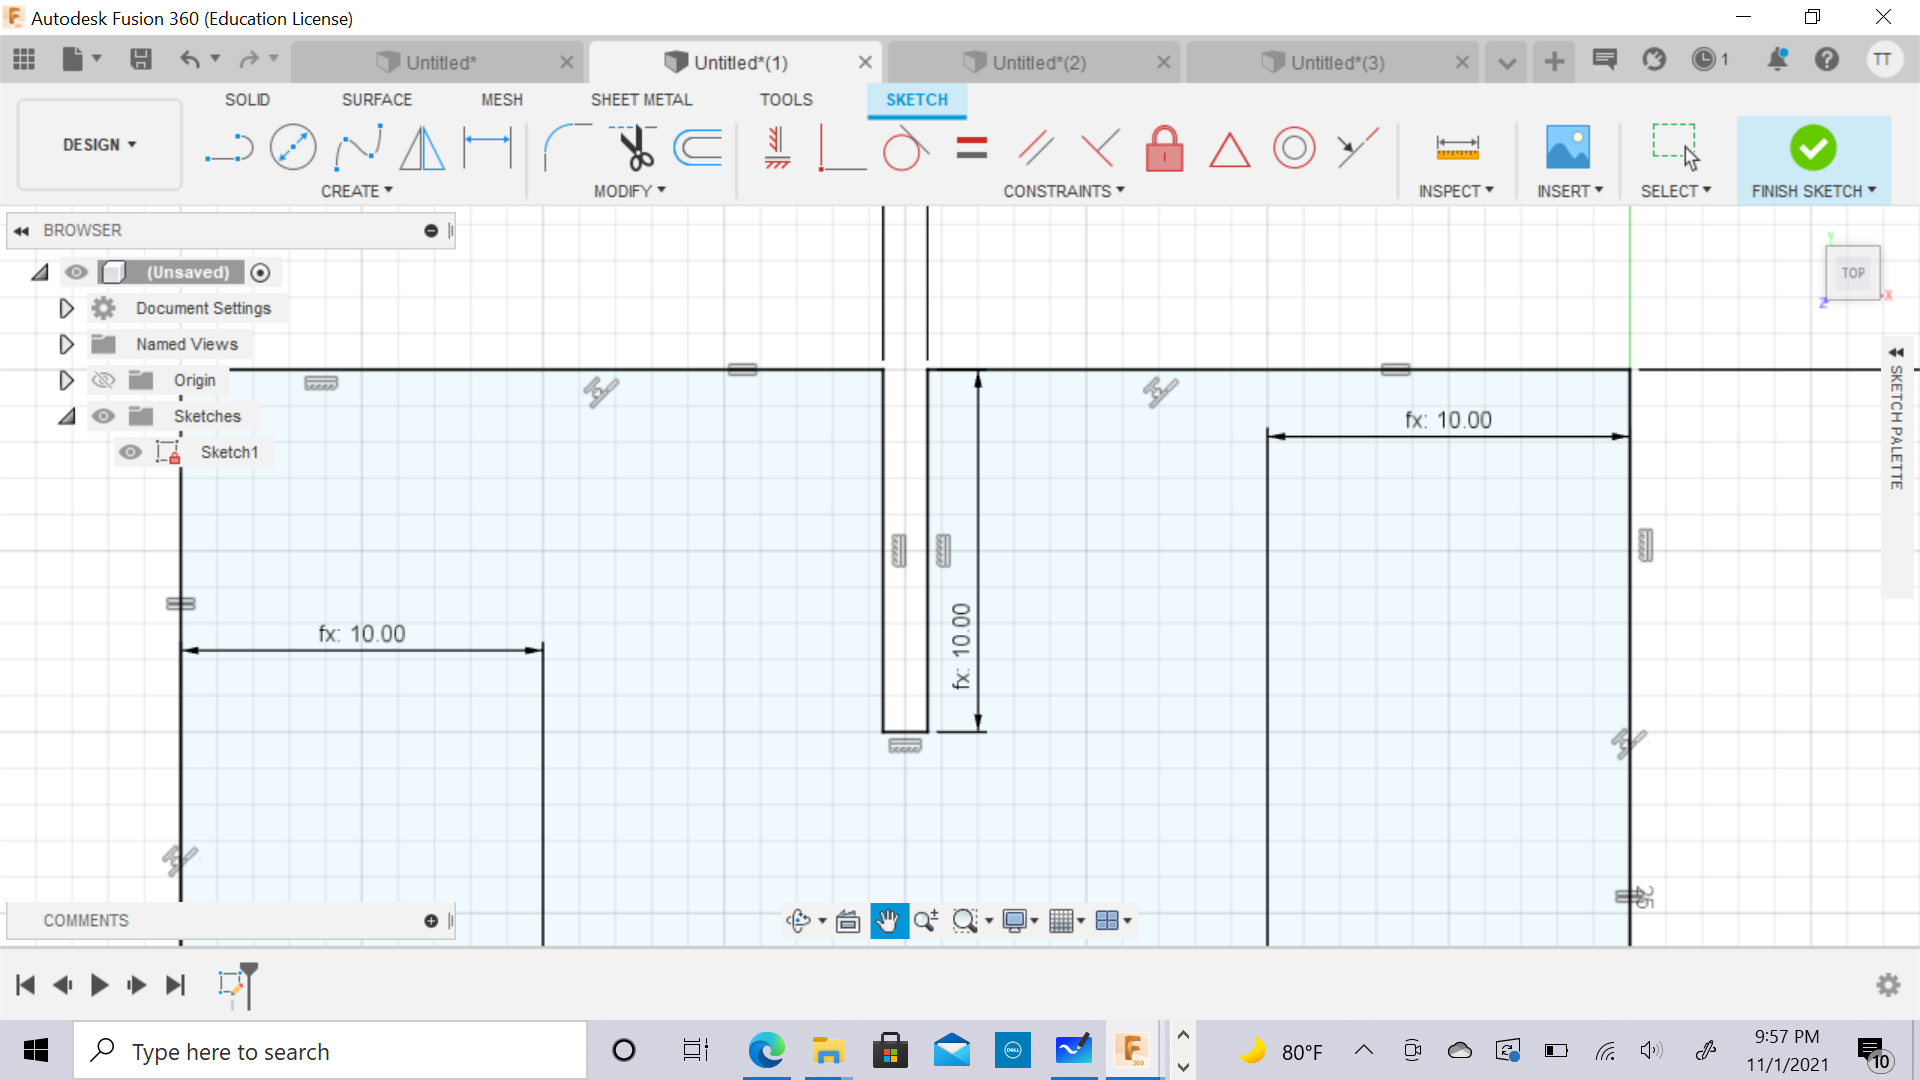
I set the rectangle in the middle by the using the equal constraints.
I used the Rectangular pattern to duplicate the rectangule shape that I made.
Then I save it as a DXF and I download it in the computer that connected to the laser cutting, then I set the power and the speed for the laser.
I uploaded it in the laser cutting machine
I set the laser to the focal point and after that I started the machine.
This was the result:
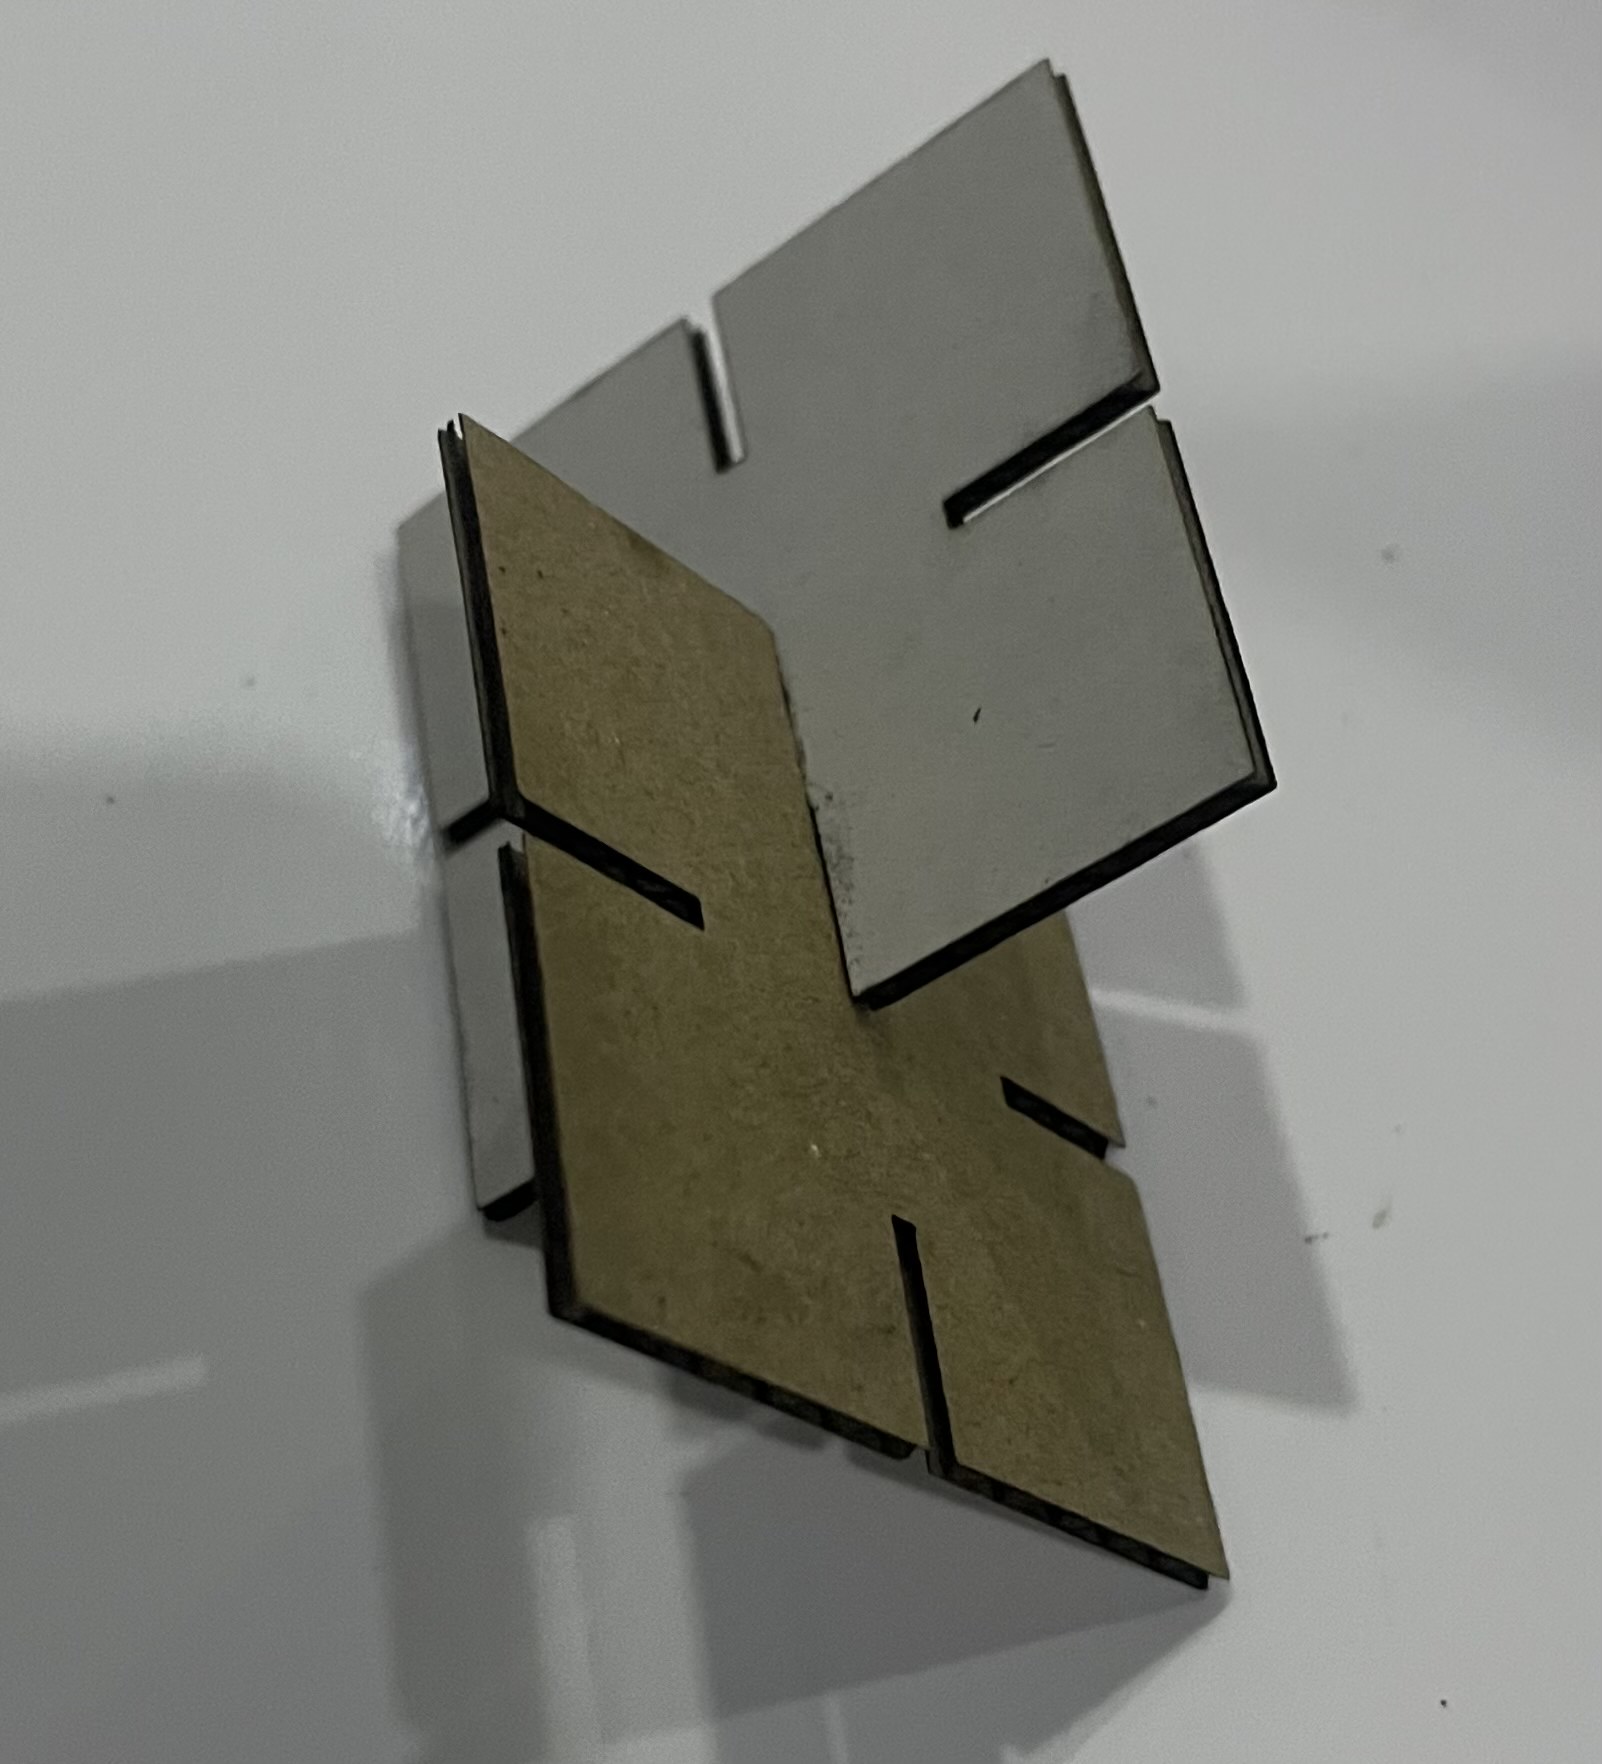
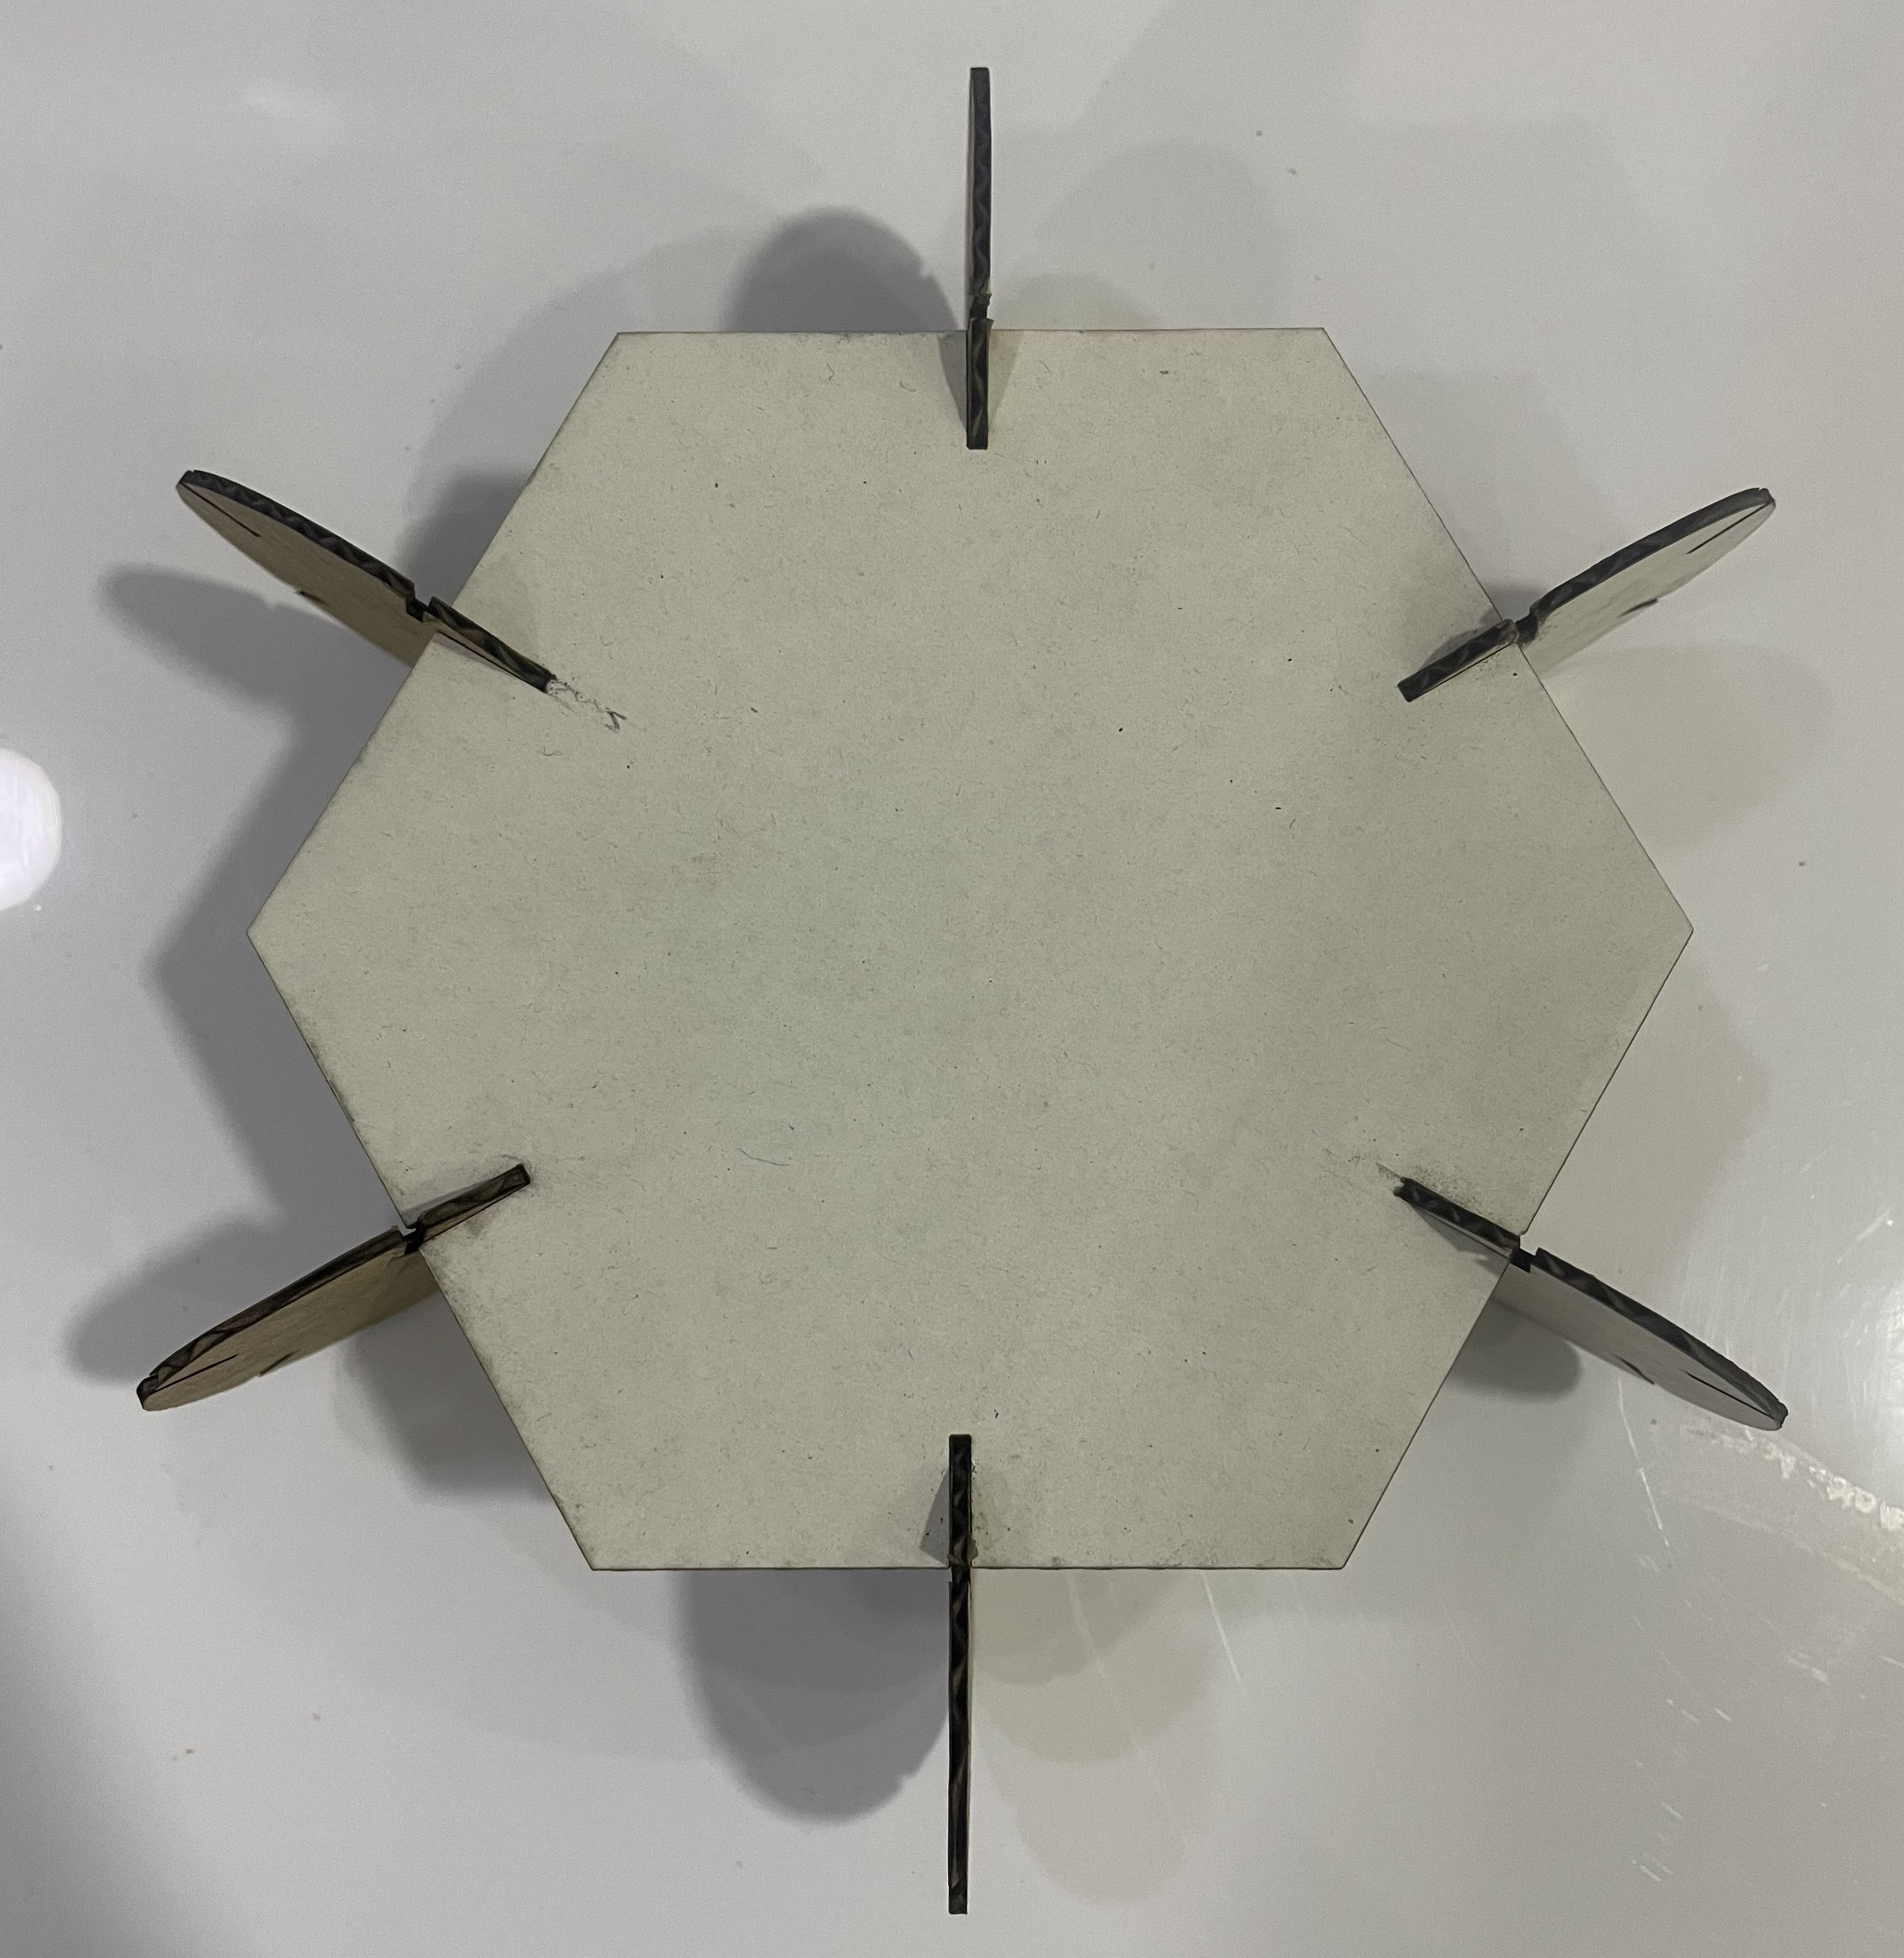
Then I created another shape, I made a circula and a polygon:
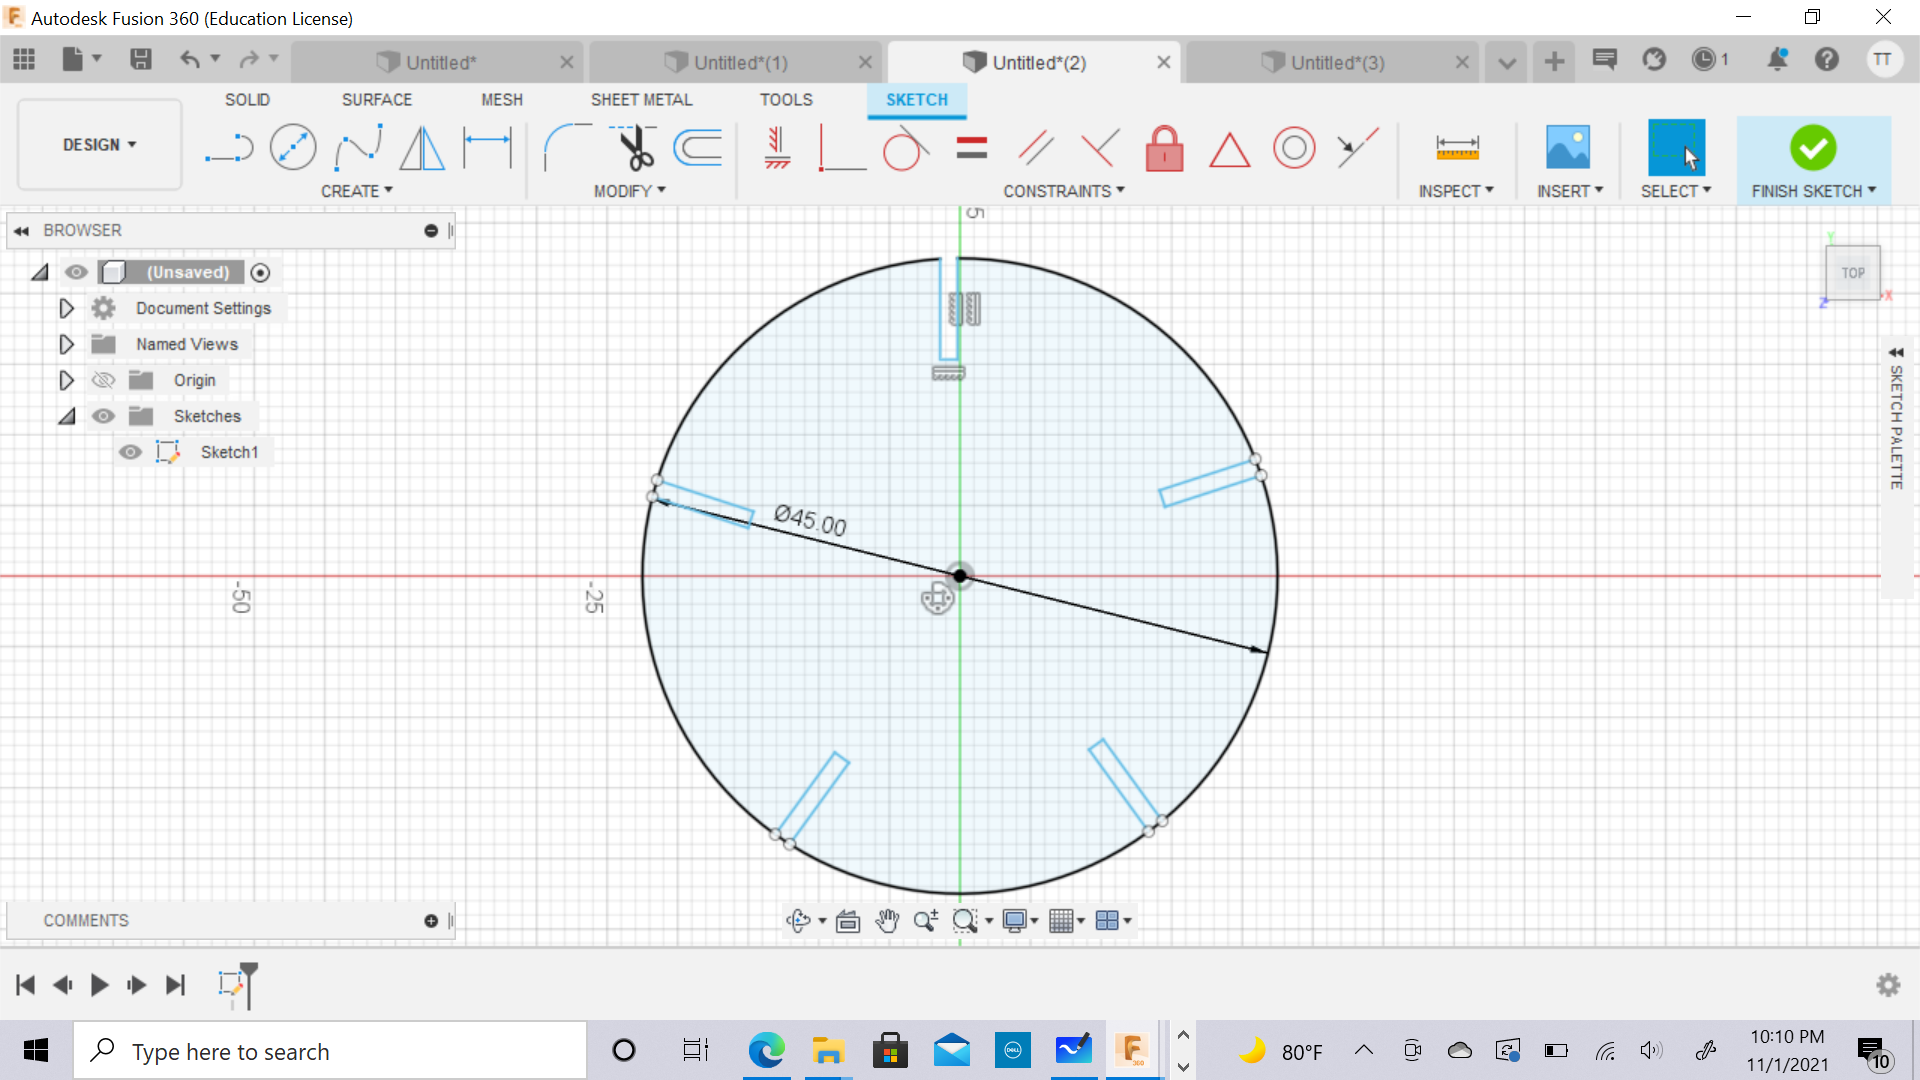
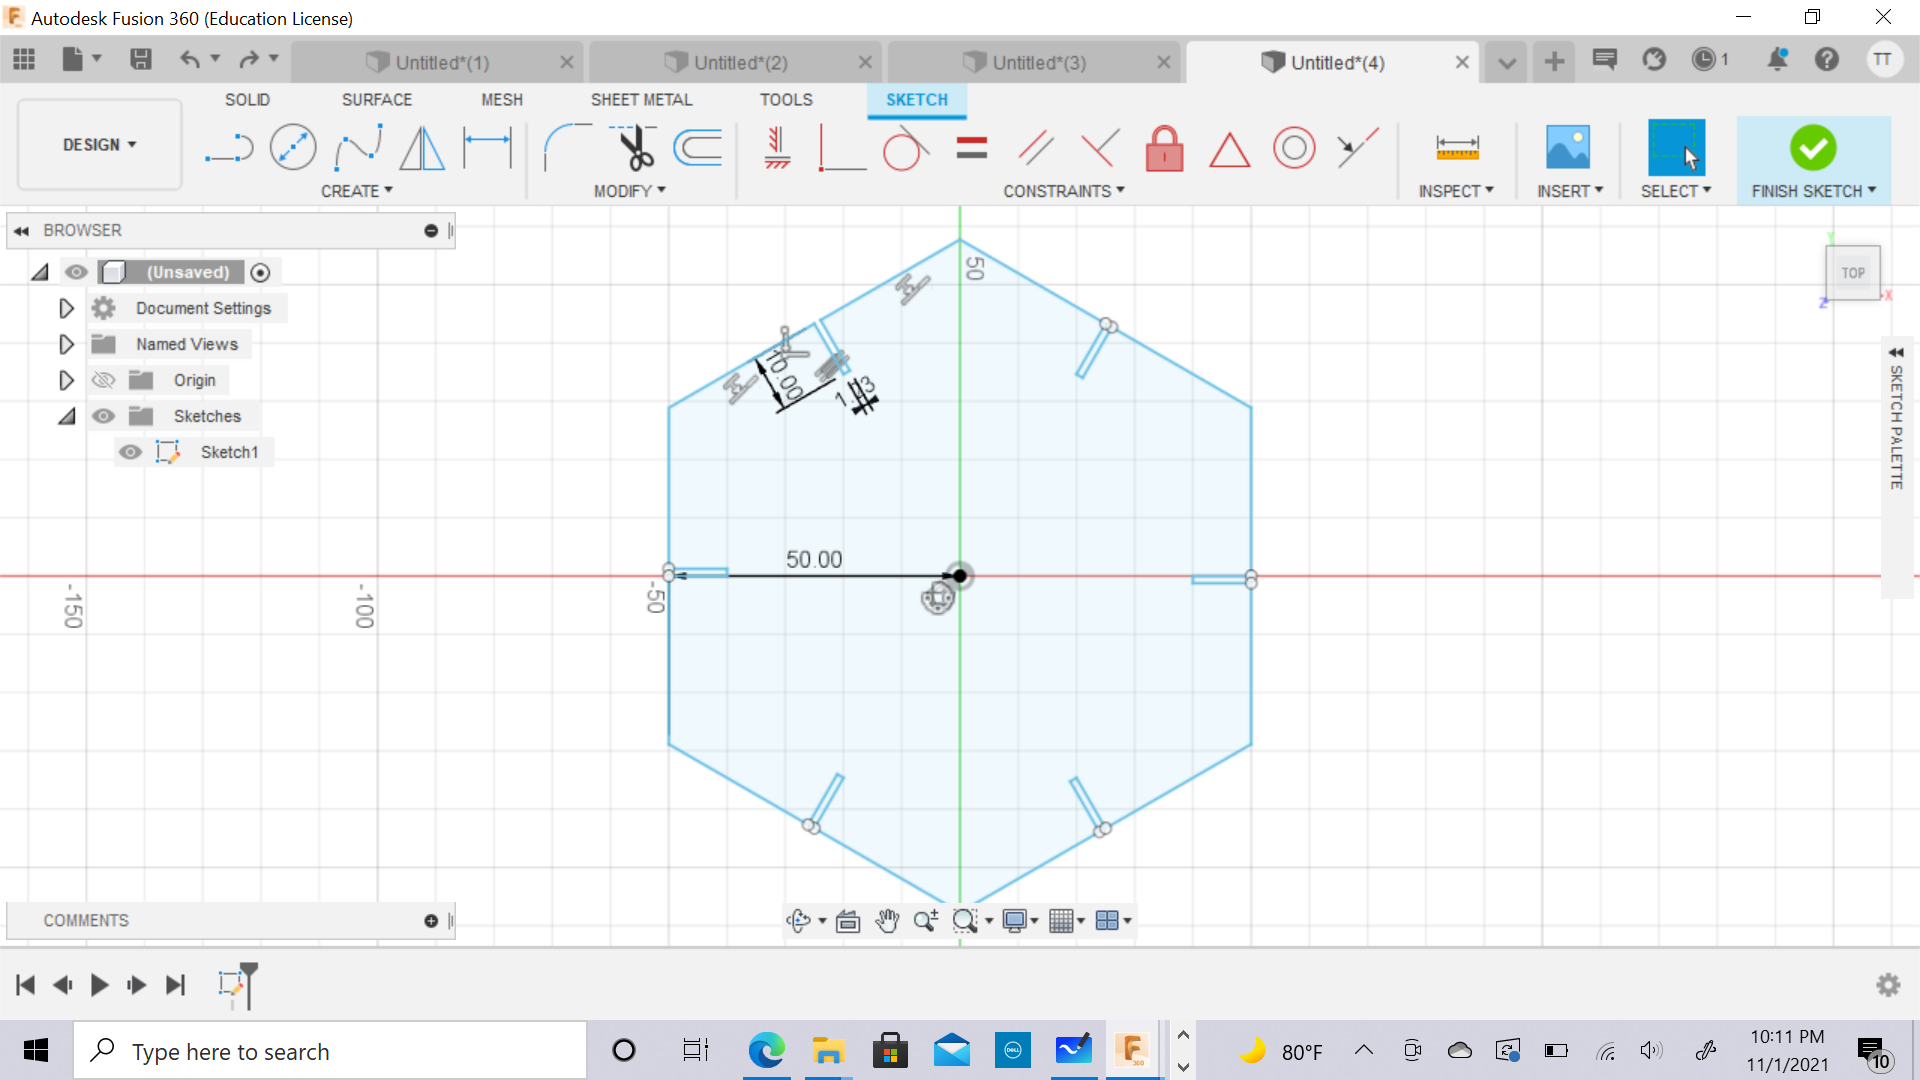
I used the same procedure to create these shapes.
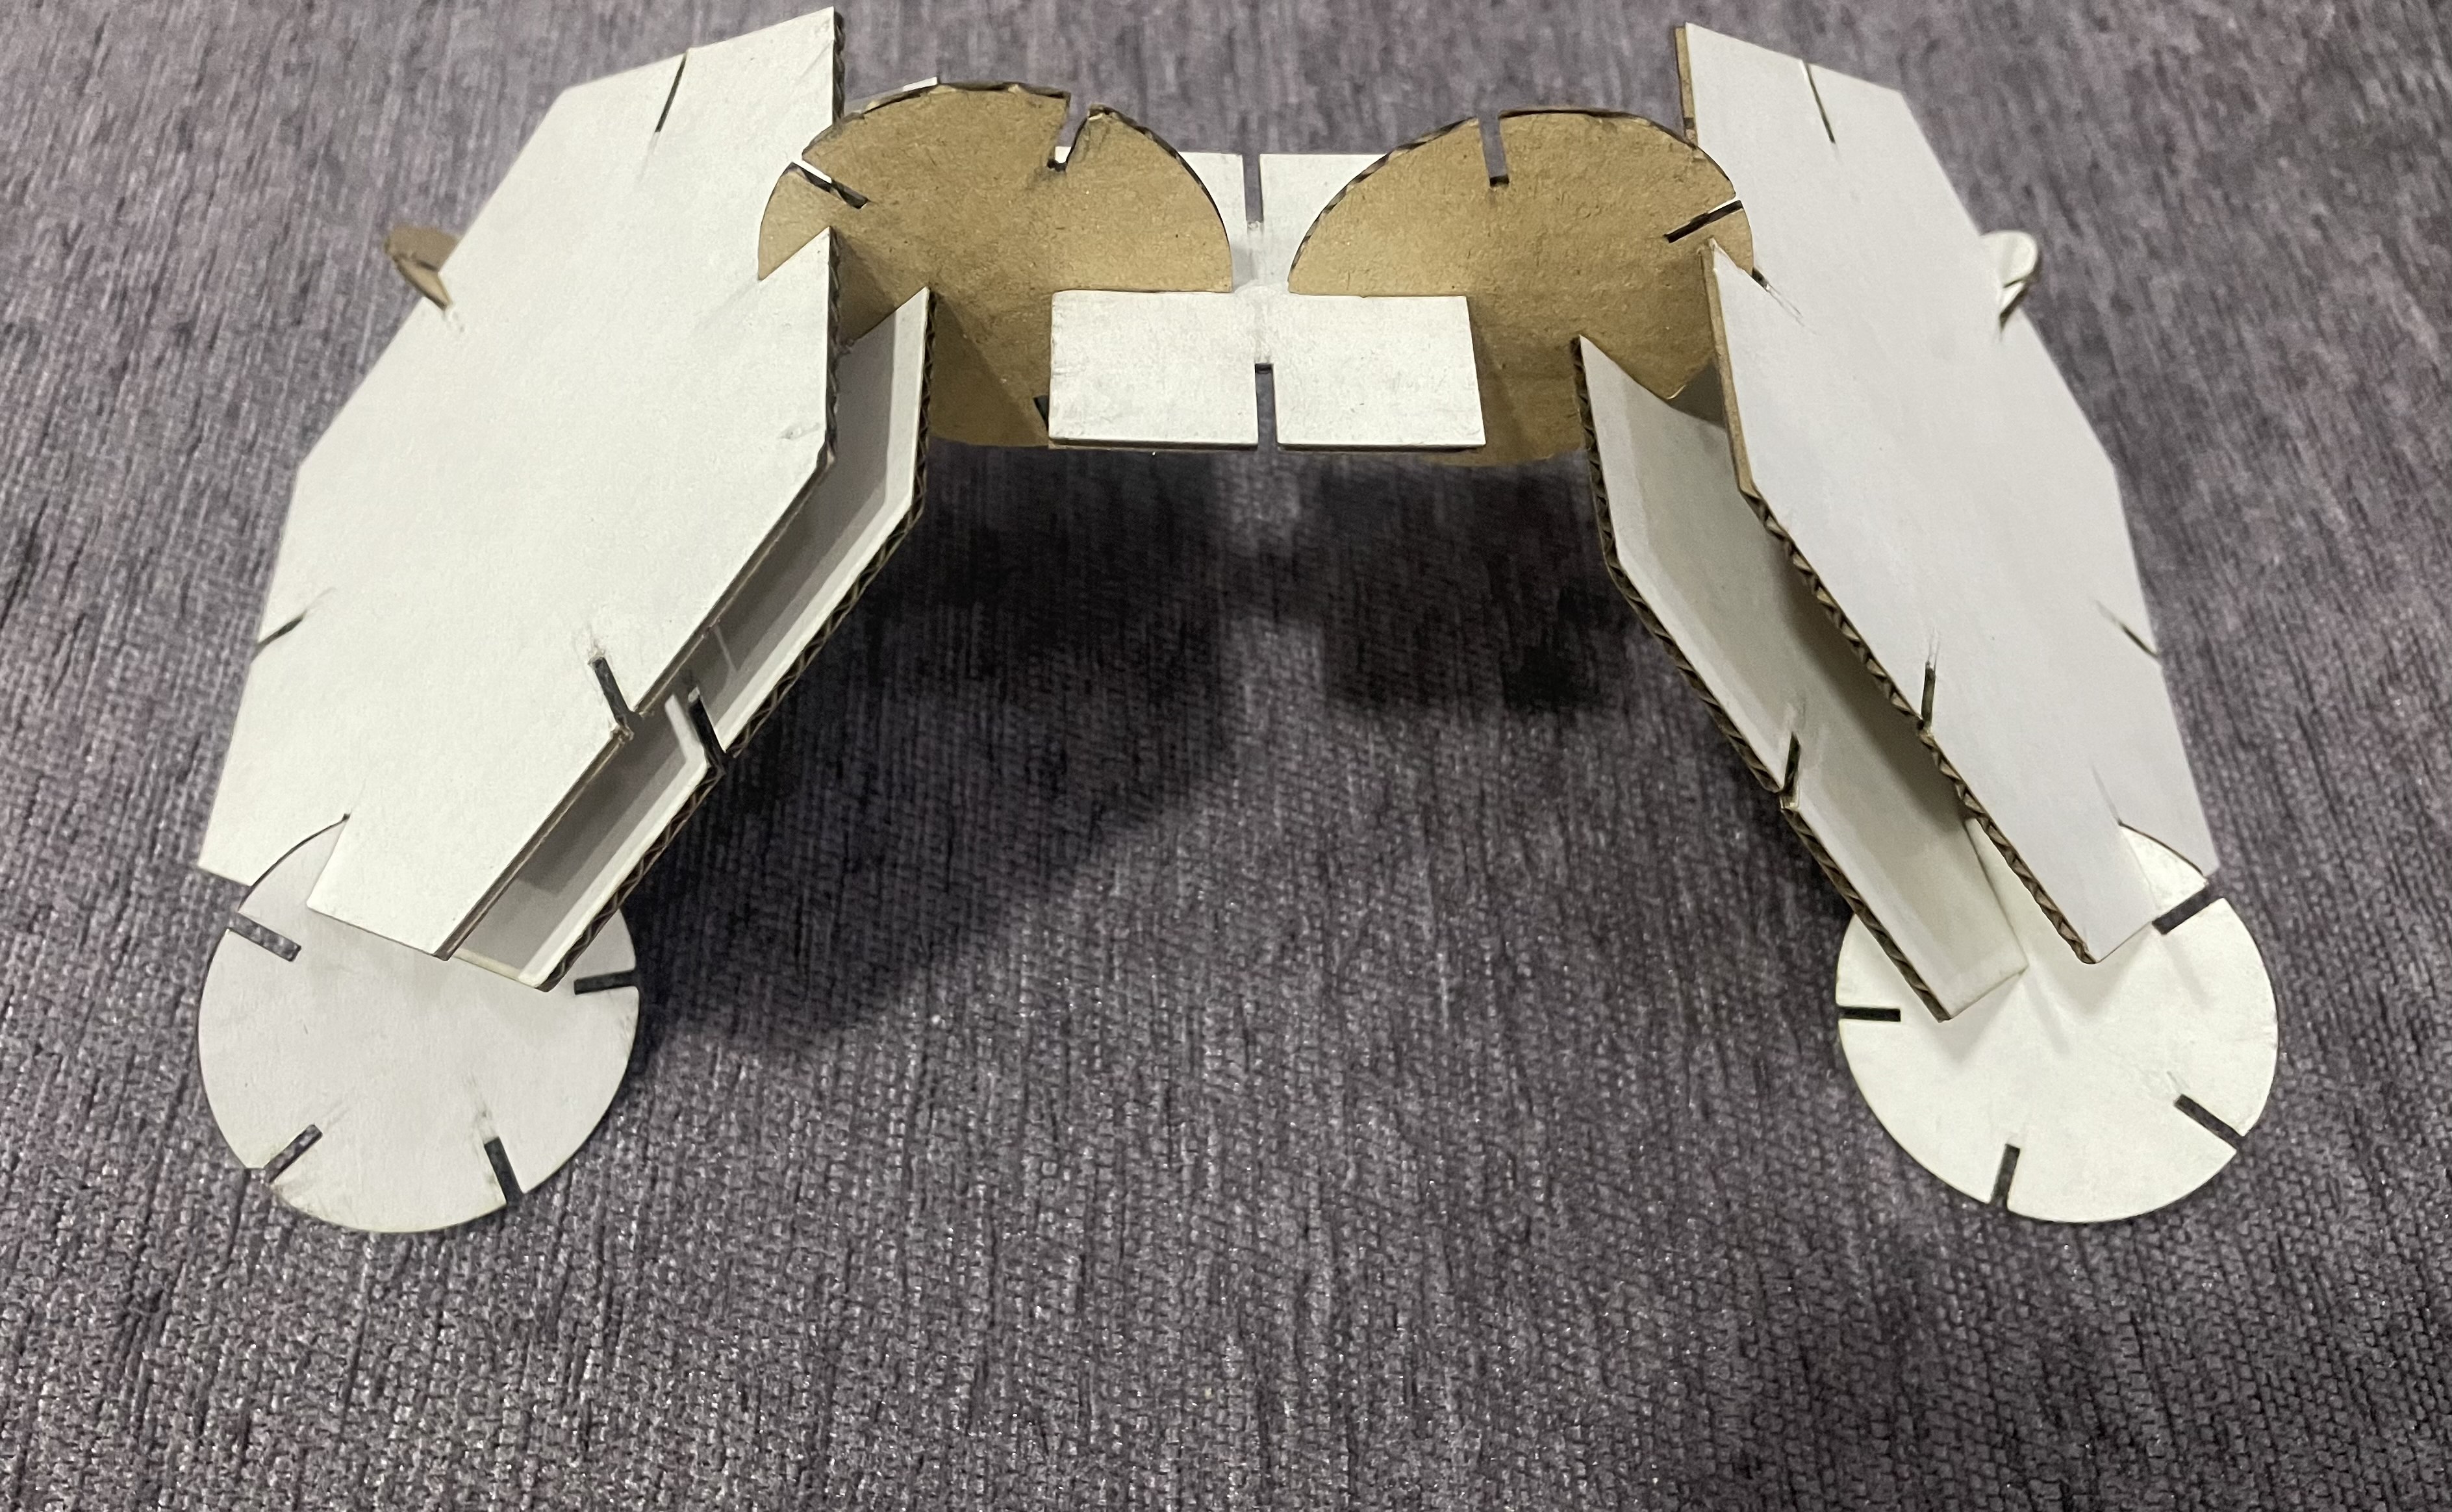
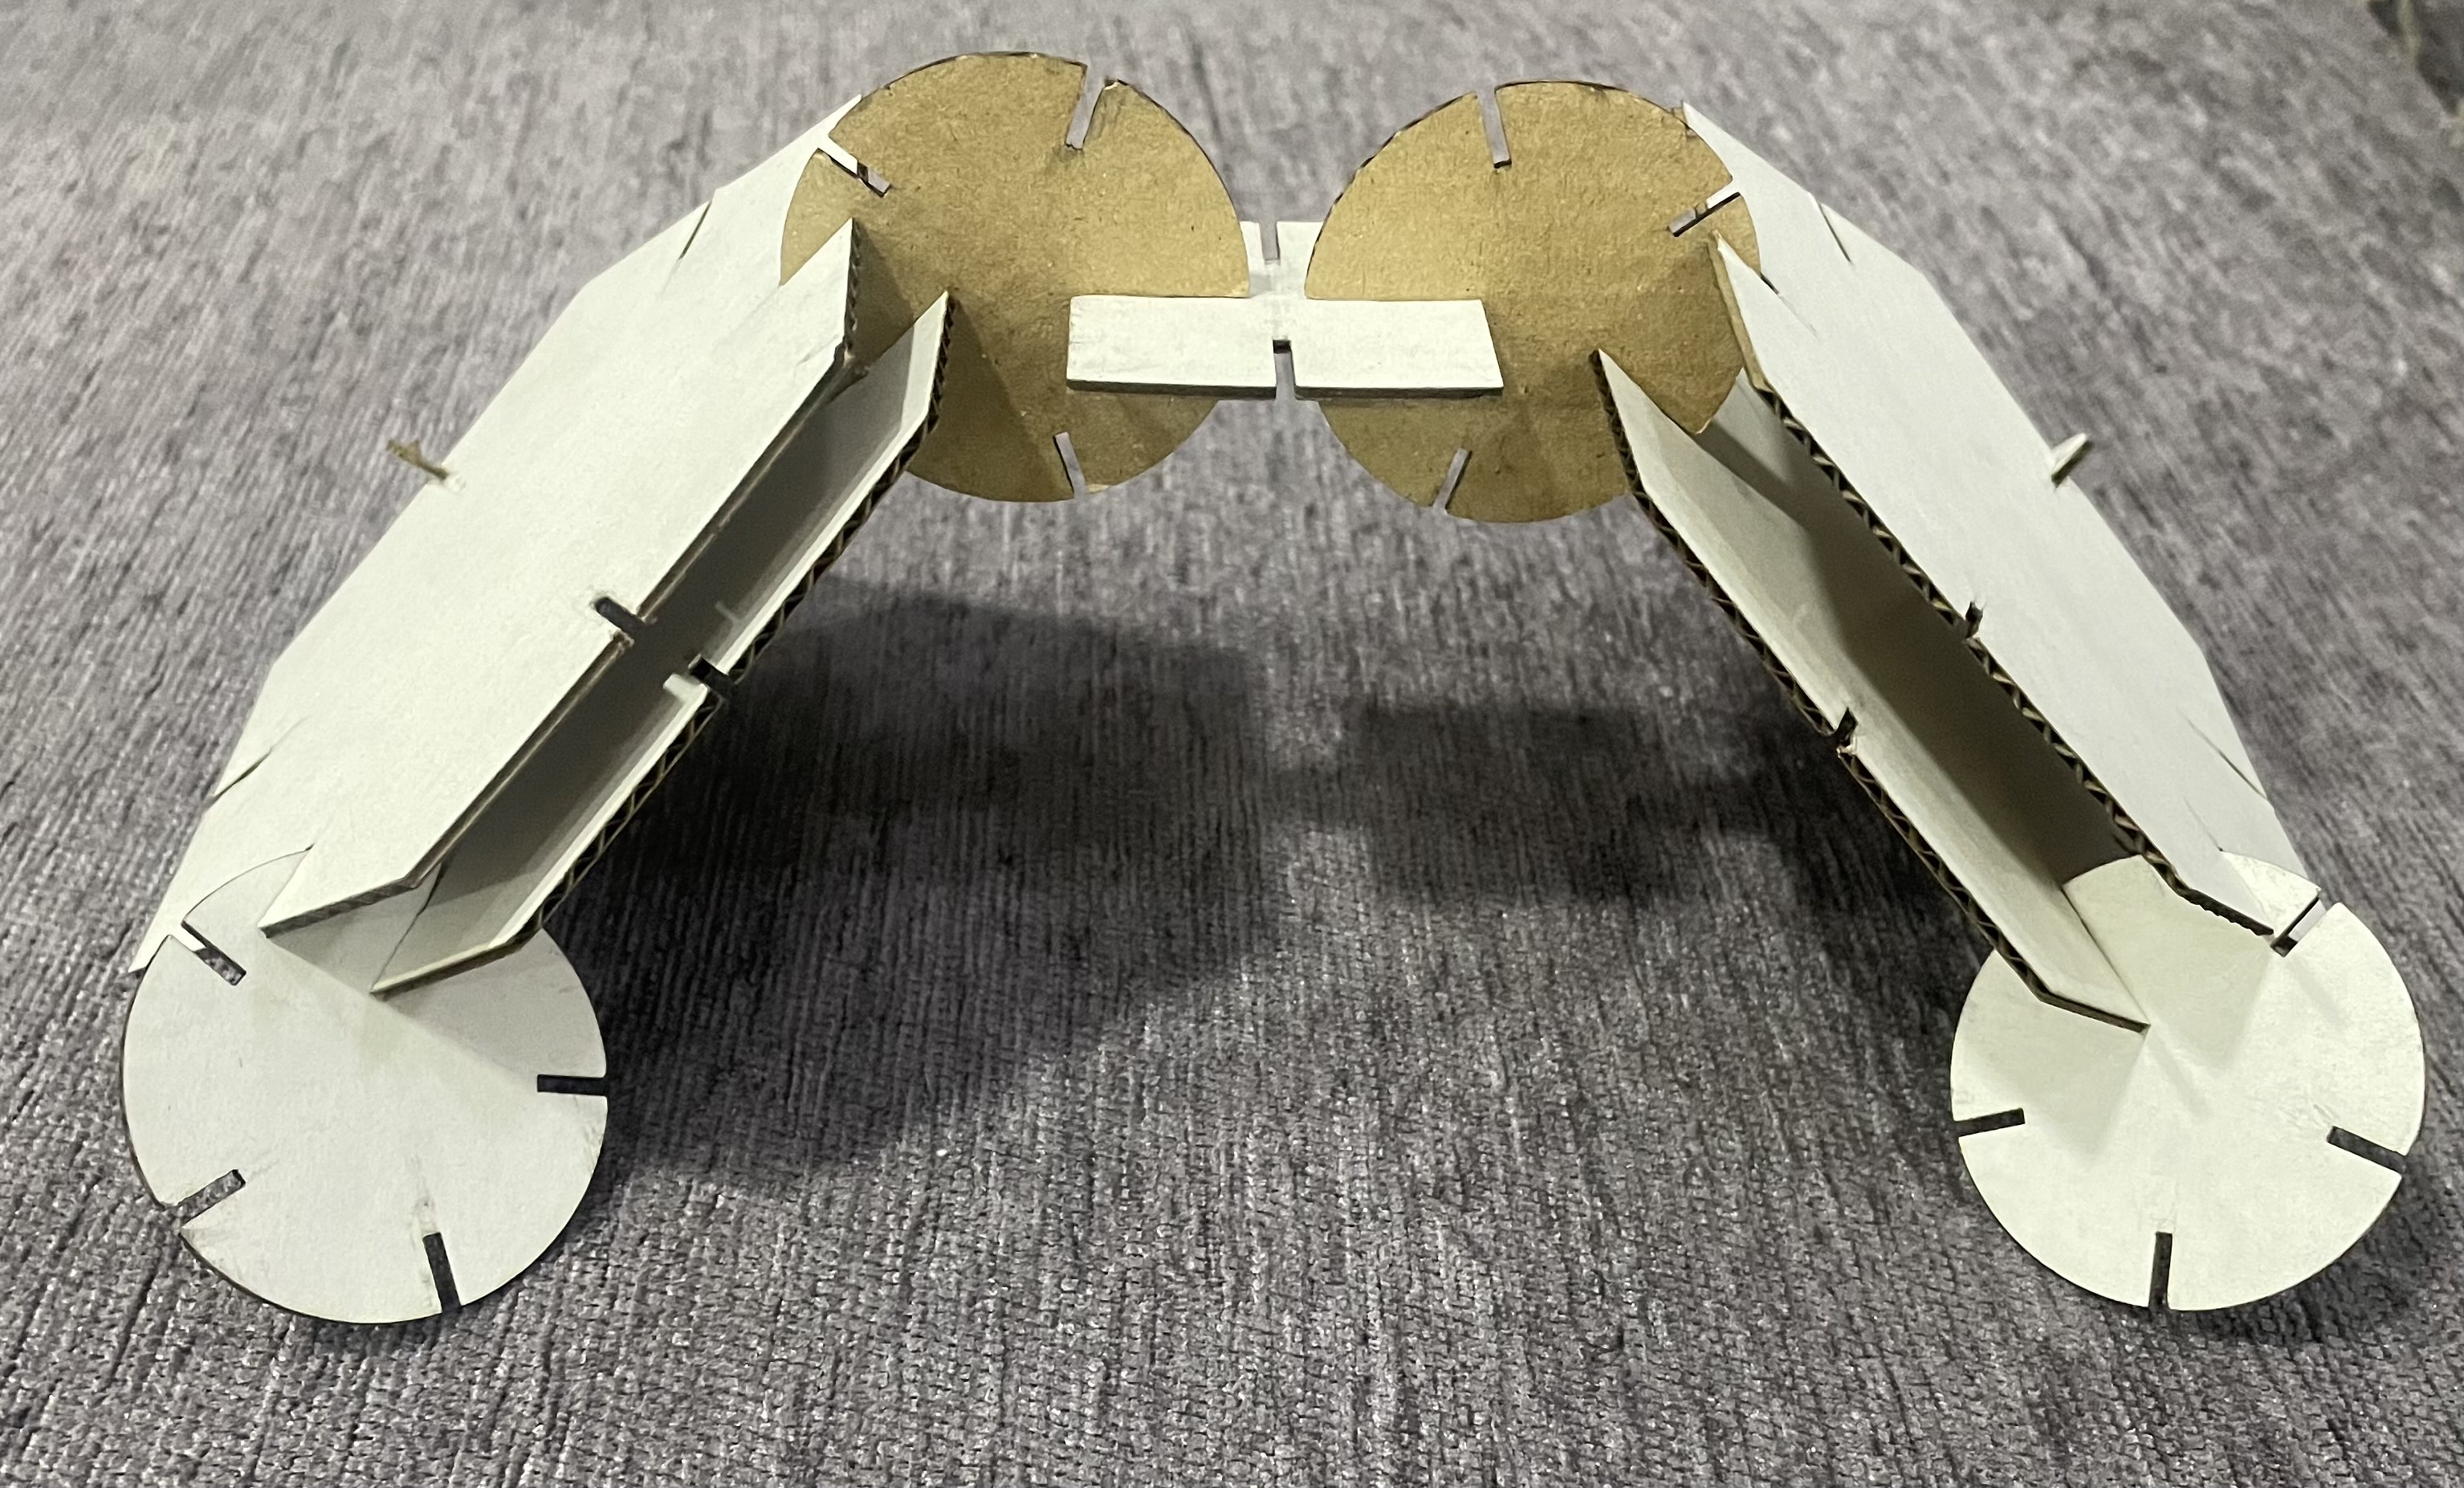
At the beginning, I didn’t have a clear idea about the desgin that i want to make, so I cut many copies of the shapes that i’ve made, then I decided to have fun and try to come up with different structures from the shapes that i have.