7. Input & Output device
this week I learned more about how to program and input an d output devices
Research
An output transducer (output device) is an actuator, whereas an input transducer is a sensor.
An input transducer, also known as a sensor, reacts to a change in the environment and transforms it into a readable electrical signal. In the case of our microphone, the microphone converts actual sound waves into an electrical signal that is sent through cables to the amplifier. Actuators, or output transducers, function in the opposite way from input transducers. They transform electrical signals into an alternative form of energy. A motor, for instance, transforms electricity into motion, while a lamp transforms electricity into light.
Input devices
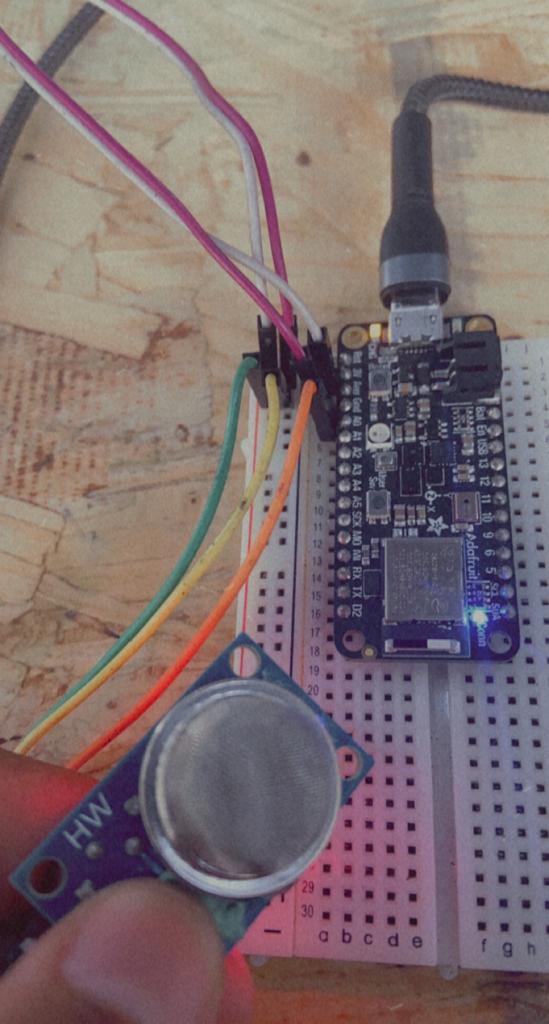
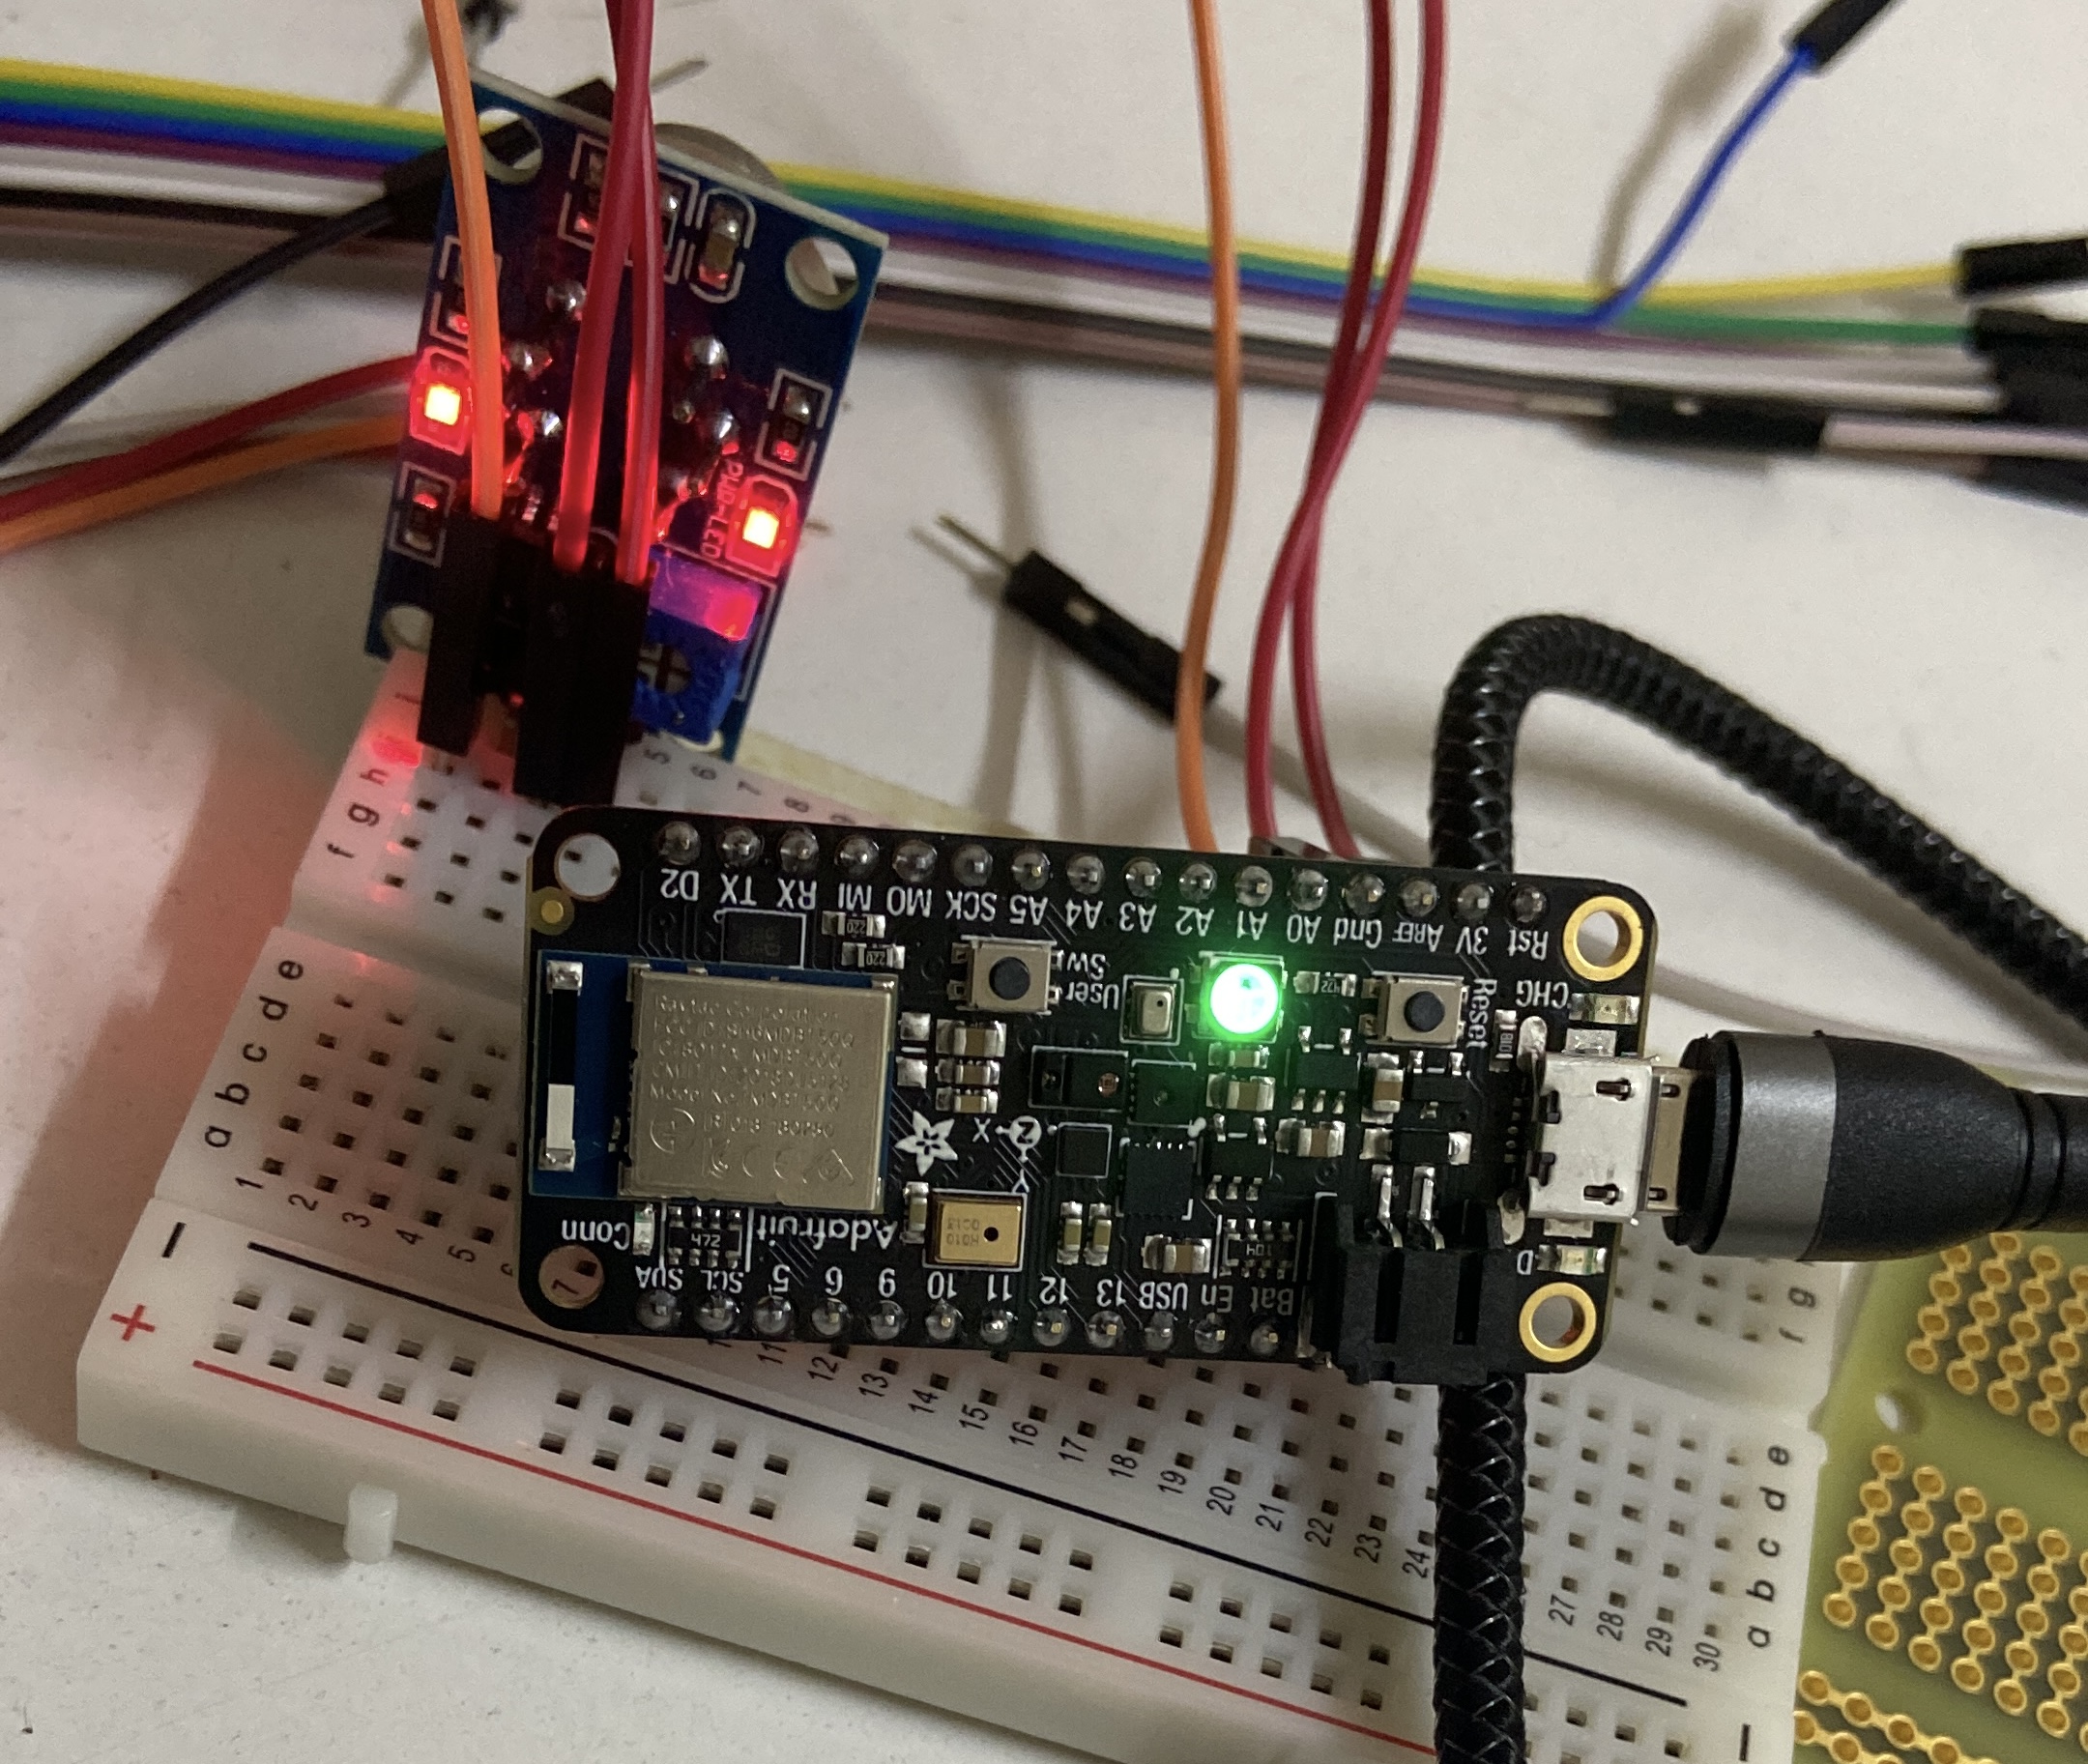
in this week I tried the gas sensor , that I will utilize in my future project.
the gas sensor I used is MQ-135.
MQ135 gas sensor has high sensitivity to ammonia gas, sulfide, benzene series steam, also can monitor smoke and other toxic gases well. Hence I used it to have a general idea regrading the quality of the indoor air.
Code
the code for this sensor is very simple since it contain a one digital analog , but I learned that to work around adafruit feathear we have to include SPI library , once I added it the code been uploaded susccfuly
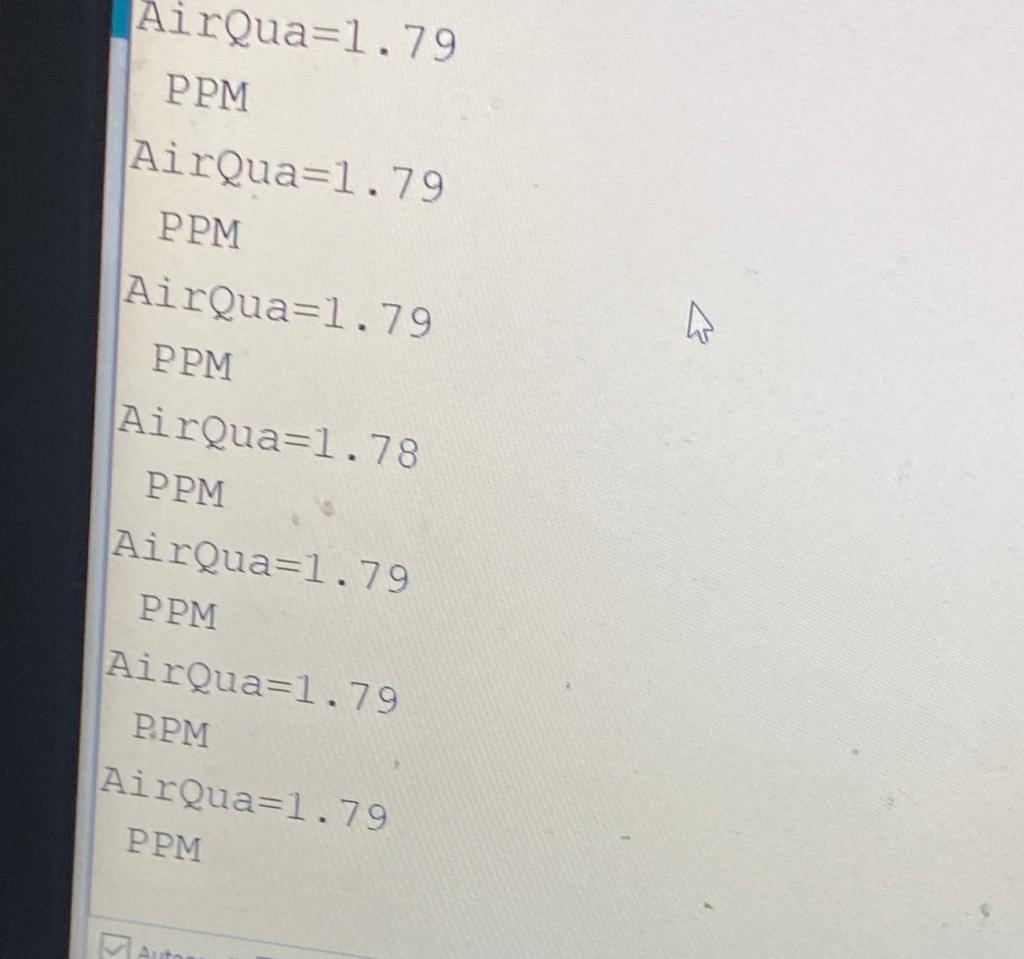
the srial monitor result
#include <SPI.h>


int sensorValue;

#include <Adafruit_SSD1306.h>

void setup() {
   Serial.begin(9600);
}

void loop() {
   // read the input on analog pin 0:
   int sensorValue = analogRead(A0);
   // convert to voltage:
   float volts = sensorValue * 5;
   volts = volts / 1023;
   // print out the voltage:
   Serial.print("AirQua=");
   Serial.println(volts);
   Serial.println(" PPM");
   delay(1000); // delay in between reads for stability
}
output devices
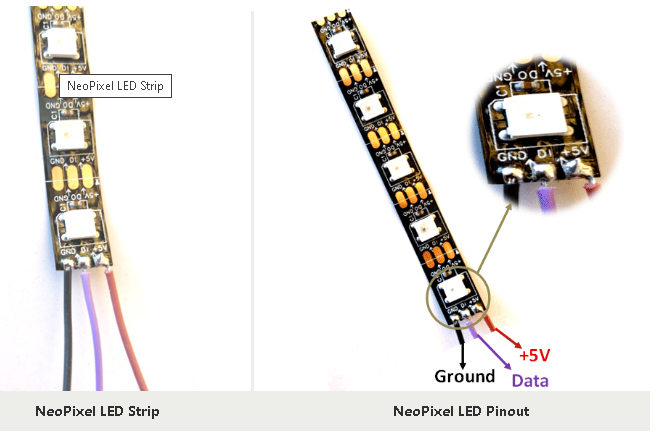
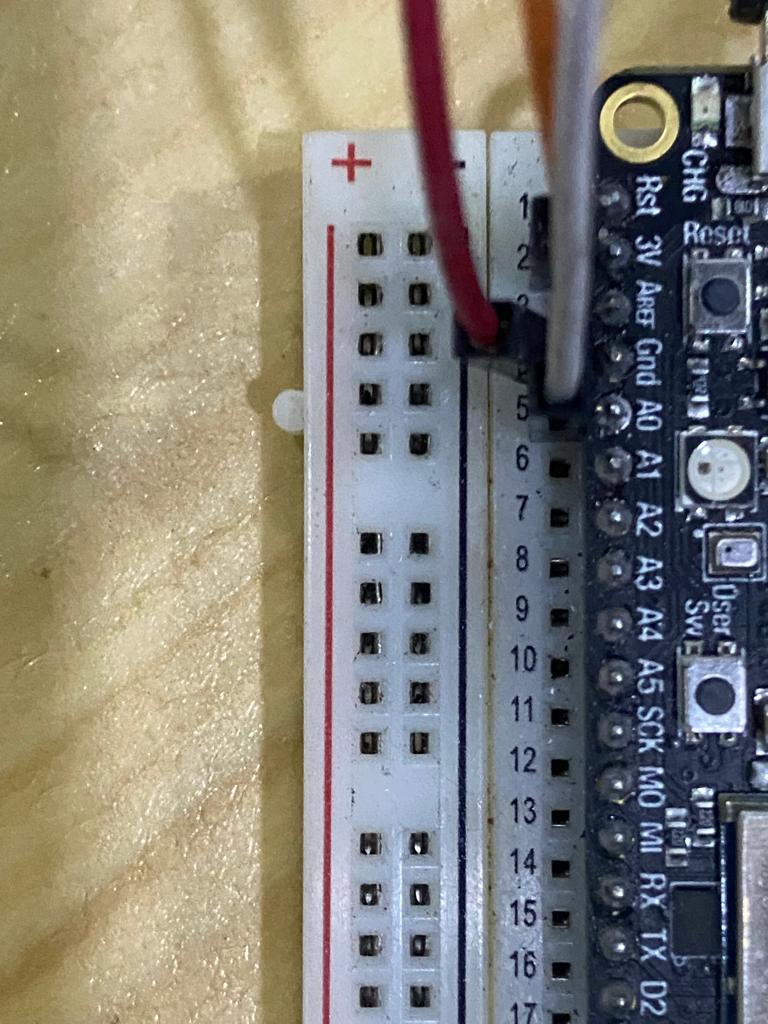
since I was planing on using pixel lights , I tried them on this week in my adafruit I took the pixel lights and linked three wires to them the 5v goes into the the 3V in my Adafruit the gnd goes into the gnd in my adafruit and finaly the digital analog goes into A0 in my adafruit# and the final result looked like
Code
the code I used this time is a built in example from neopixel arduino library just make sure that the digital analog in the code is defoned proparly and that the number of pixels specified in the code mathces the one you have
// NeoPixel Ring simple sketch (c) 2013 Shae Erisson
// Released under the GPLv3 license to match the rest of the
// Adafruit NeoPixel library

#include <Adafruit_NeoPixel.h>
#ifdef _AVR_
 #include <avr/power.h> // Required for 16 MHz Adafruit Trinket
#endif

// Which pin on the Arduino is connected to the NeoPixels?
#define PIN        6 // On Trinket or Gemma, suggest changing this to 1

// How many NeoPixels are attached to the Arduino?
#define NUMPIXELS 30 // Popular NeoPixel ring size

// When setting up the NeoPixel library, we tell it how many pixels,
// and which pin to use to send signals. Note that for older NeoPixel
// strips you might need to change the third parameter -- see the
// strandtest example for more information on possible values.
Adafruit_NeoPixel pixels(NUMPIXELS, PIN, NEO_GRB + NEO_KHZ800);

#define DELAYVAL 500 // Time (in milliseconds) to pause between pixels

void setup() {
  // These lines are specifically to support the Adafruit Trinket 5V 16 MHz.
  // Any other board, you can remove this part (but no harm leaving it):
#if defined(_AVR_ATtiny85_) && (F_CPU == 16000000)
  clock_prescale_set(clock_div_1);
#endif
  // END of Trinket-specific code.

  pixels.begin(); // INITIALIZE NeoPixel strip object (REQUIRED)
}

void loop() {
  pixels.clear(); // Set all pixel colors to 'off'

  // The first NeoPixel in a strand is #0, second is 1, all the way up
  // to the count of pixels minus one.
  for(int i=0; i<NUMPIXELS; i++) { // For each pixel...

    // pixels.Color() takes RGB values, from 0,0,0 up to 255,255,255
    // Here we're using a moderately bright green color:
    pixels.setPixelColor(i, pixels.Color(0, 150, 0));

    pixels.show();   // Send the updated pixel colors to the hardware.

    delay(DELAYVAL); // Pause before next pass through loop
  }
}