5. 3D printing and scanning
This week I worked on 3D printing and scanning.
3D printing
Group Assignment
In this group assignment we print two diffrent designs by using MakerBot Z18 3D printer, we have connected the Makerbot software to a 3D printer, and here are the steps of the work and the process of making it.
Download the software
First we downloaded the software that can send the deisgn from laptop to the 3D printer in a format that it can understand.
It’s a free software you can downloaded from this link Makerbot

Choosing a design and adding to the software
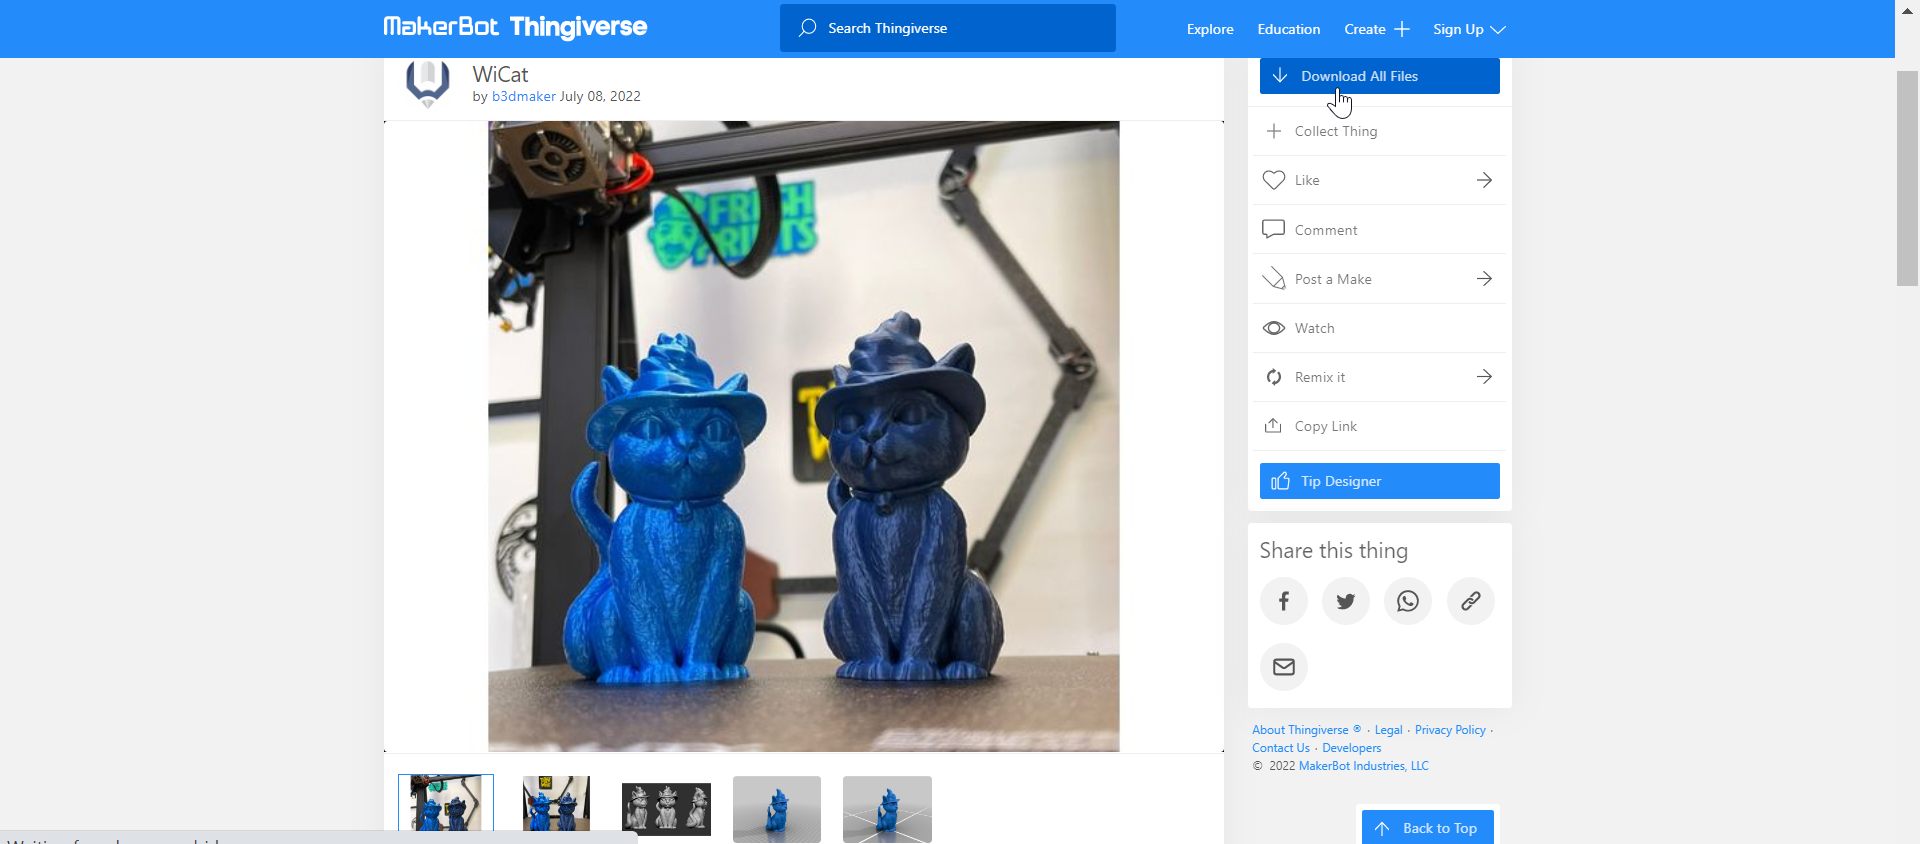
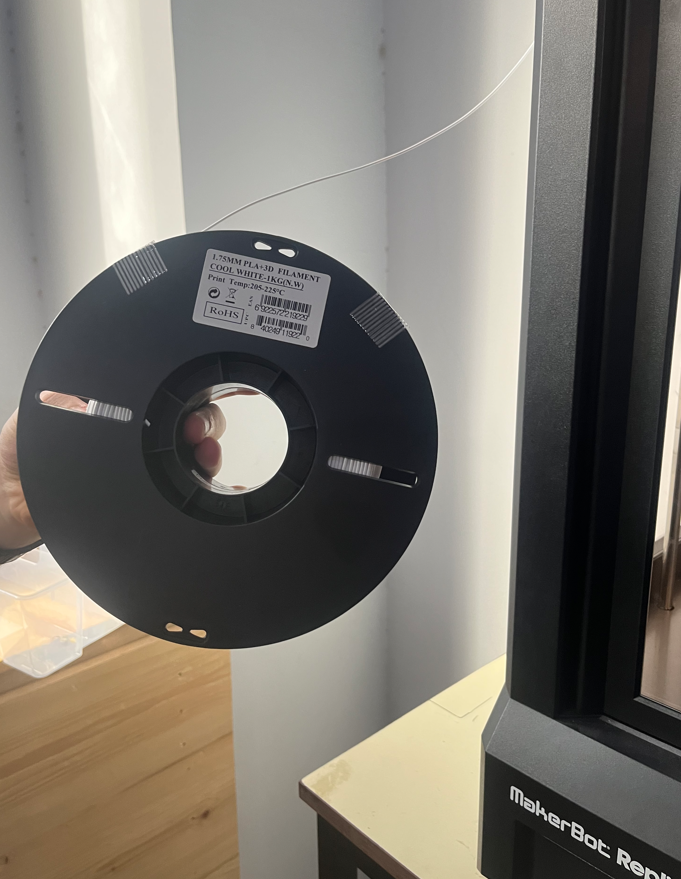
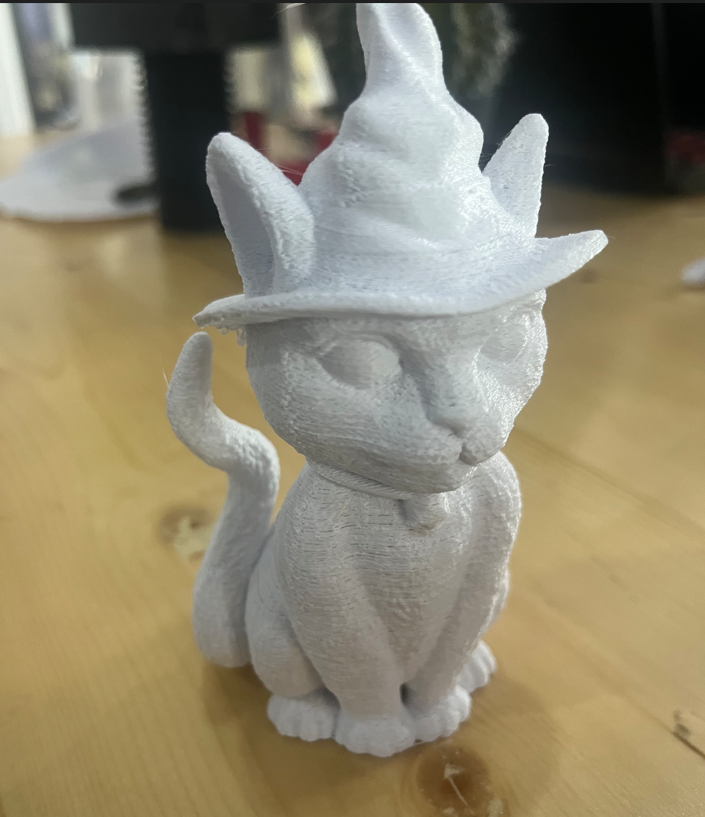
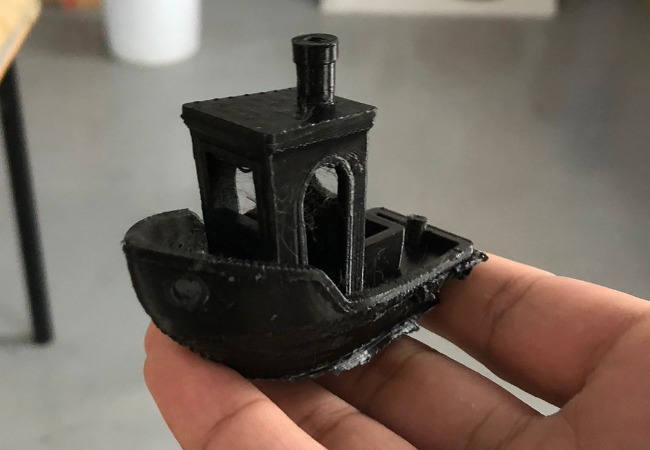
This is our first design that we have downloaded it from Wicat
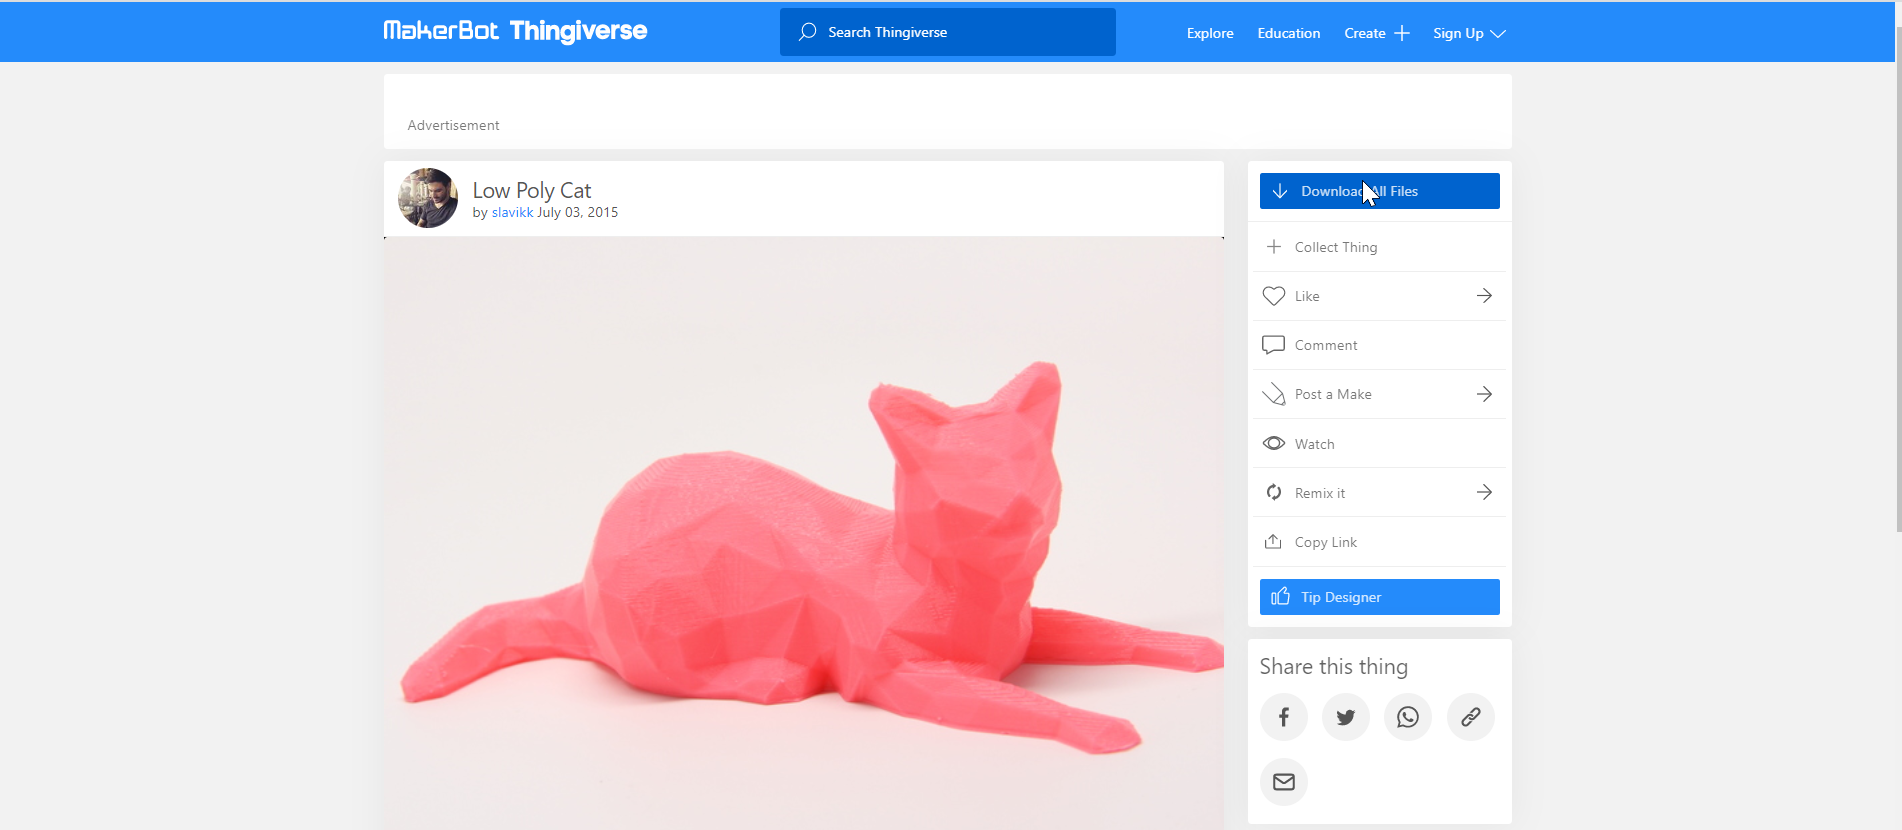
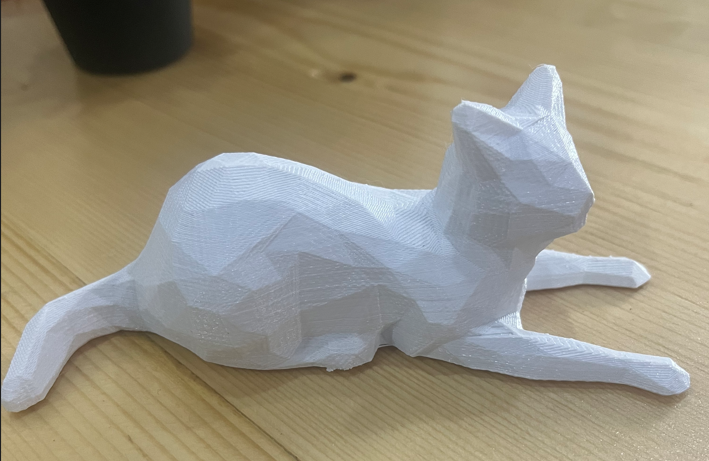
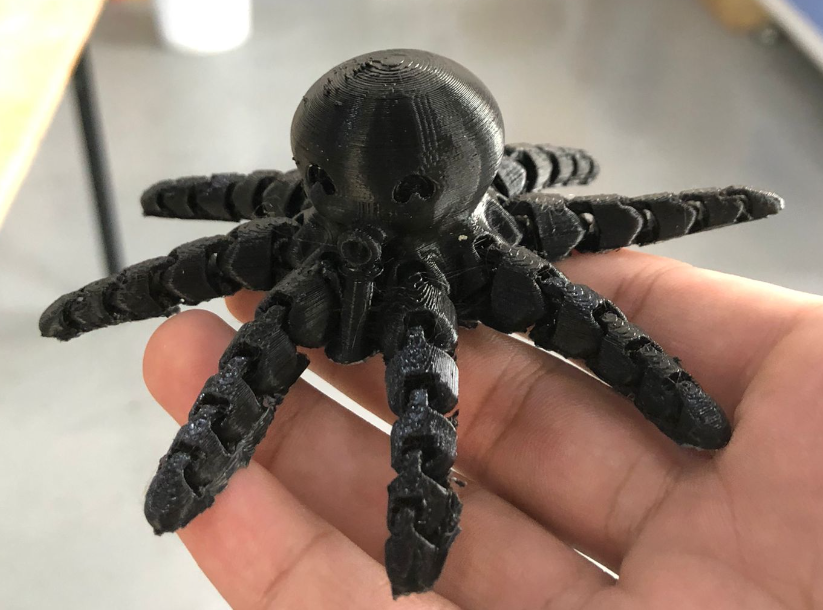
And the second design we chose is Cat
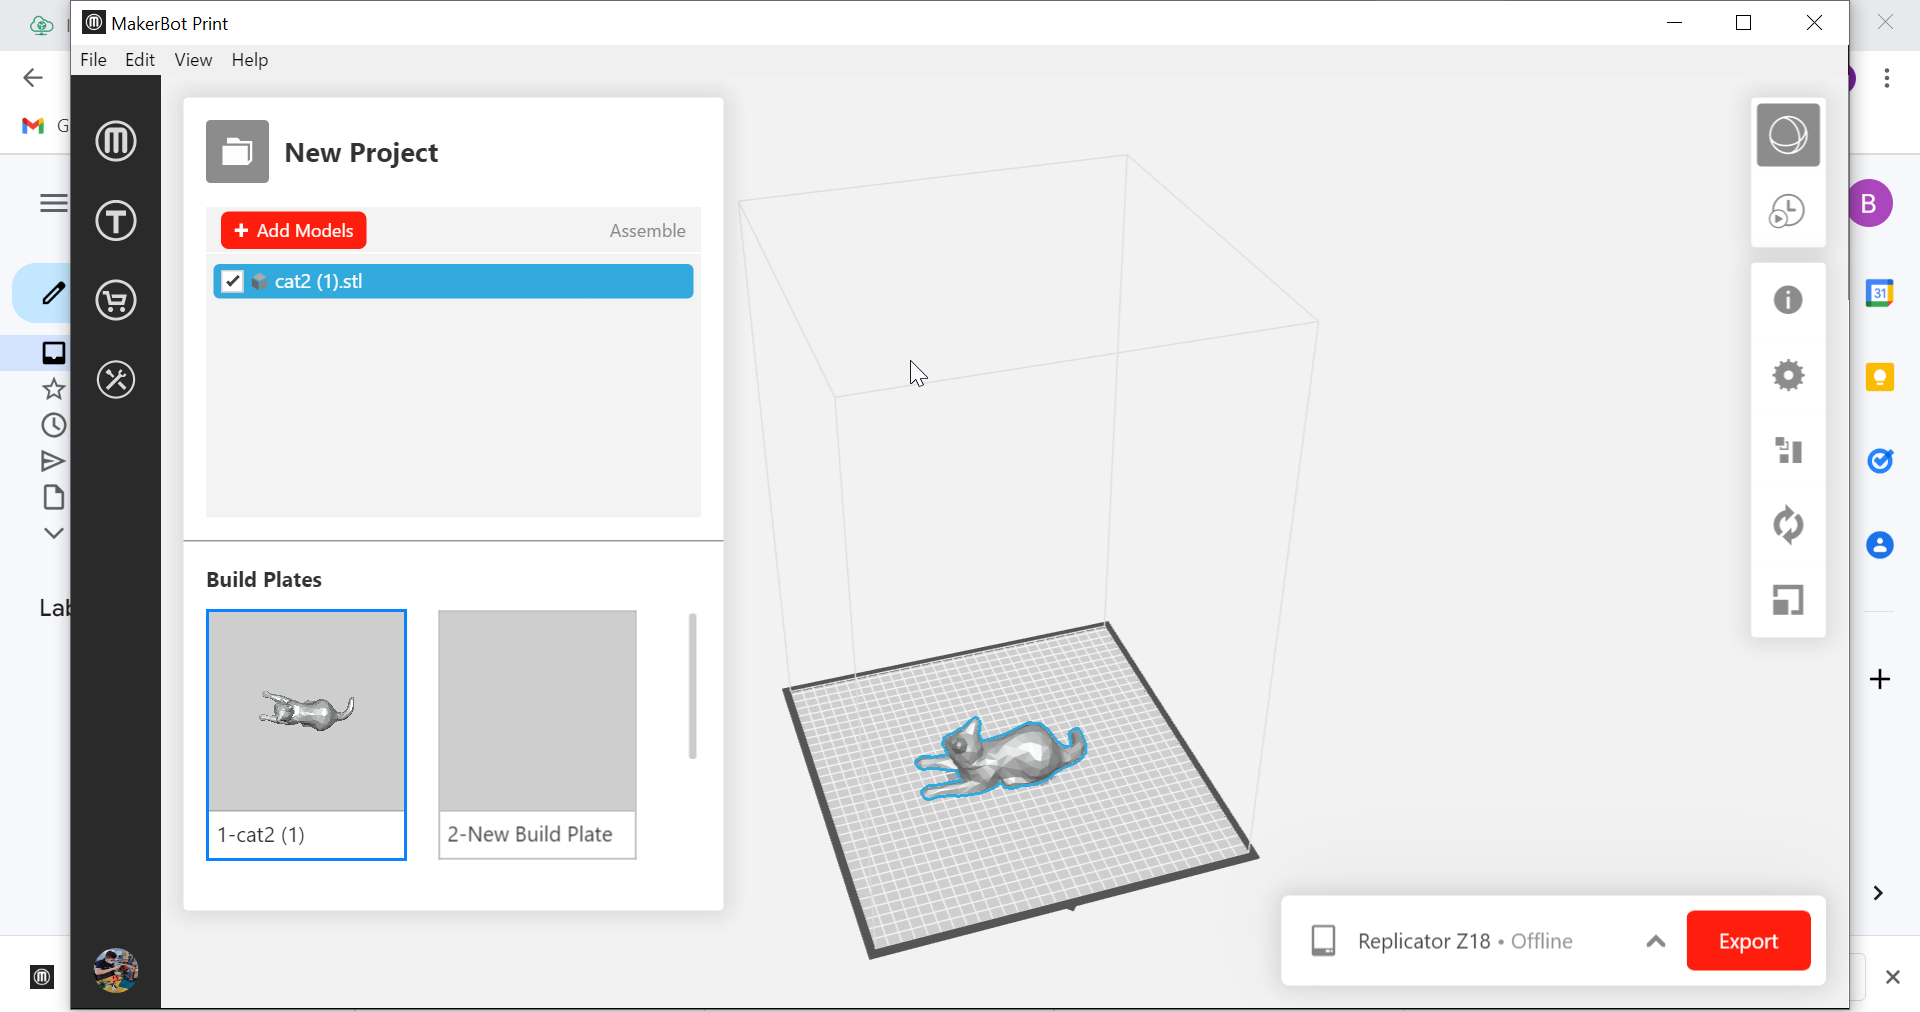
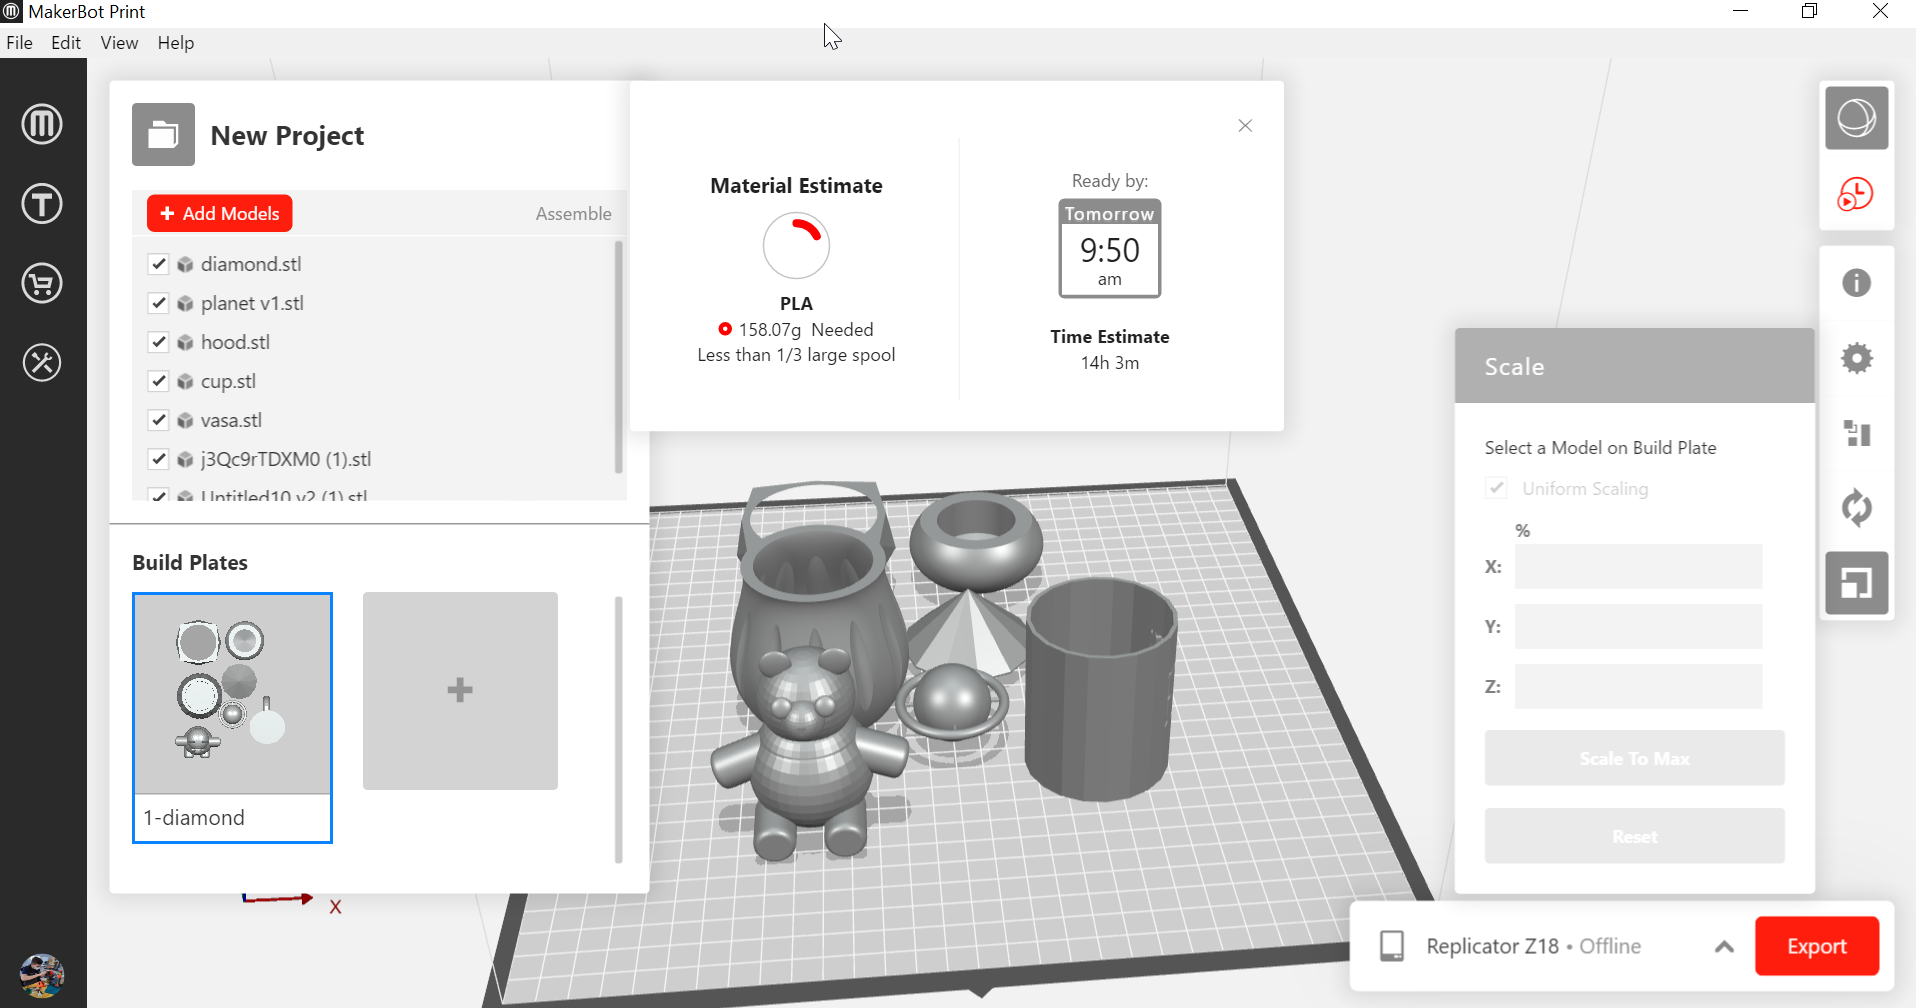
Open the software and adding our designs on new project

Click on Add models and choosing our designs from files
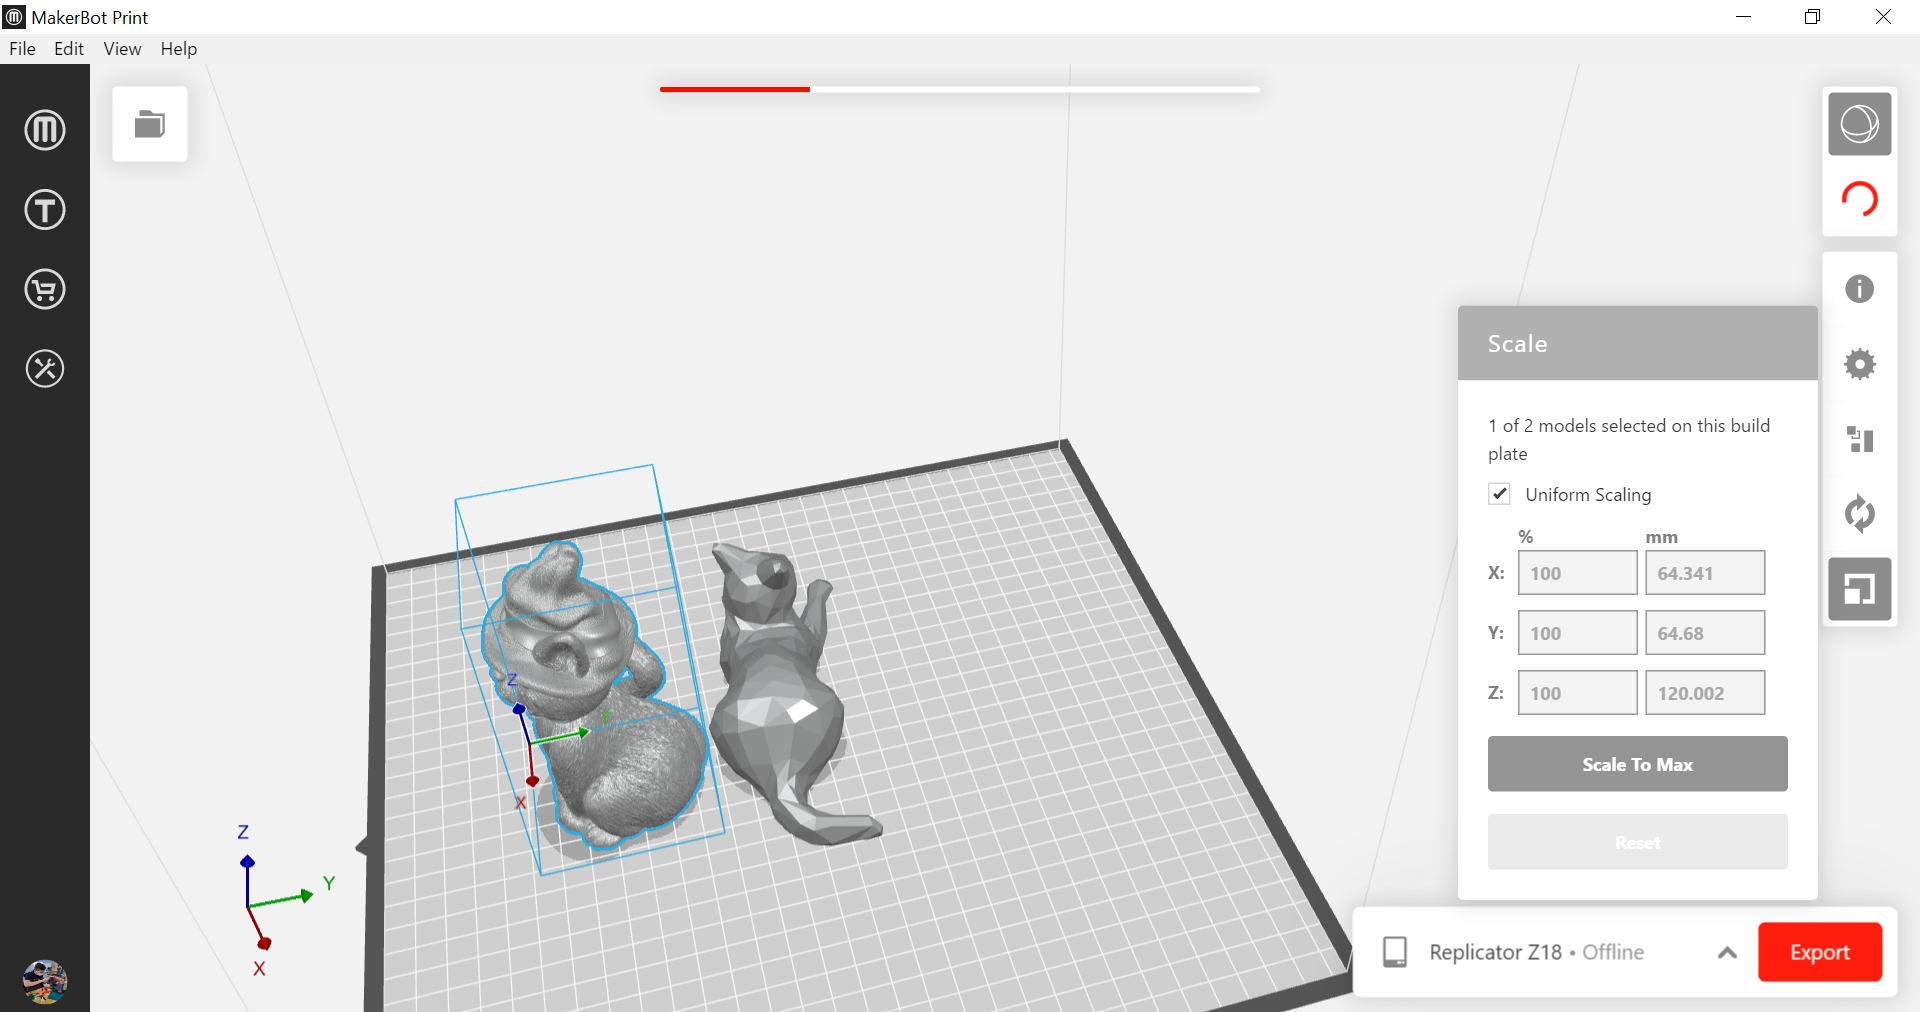
 After adding our designs we changed the scale to 70mm for x and y
 At the end we export it and it show us the print preview that show us the time of how long does it take to print

3D Printer
3D printing or additive manufacturing is the construction of a three-dimensional object from a CAD model or a digital 3D model. It can be done in a variety of processes in which material is deposited, joined or solidified under computer control, with material being added together (such as plastics, liquids or powder grains being fused), typically layer by layer.
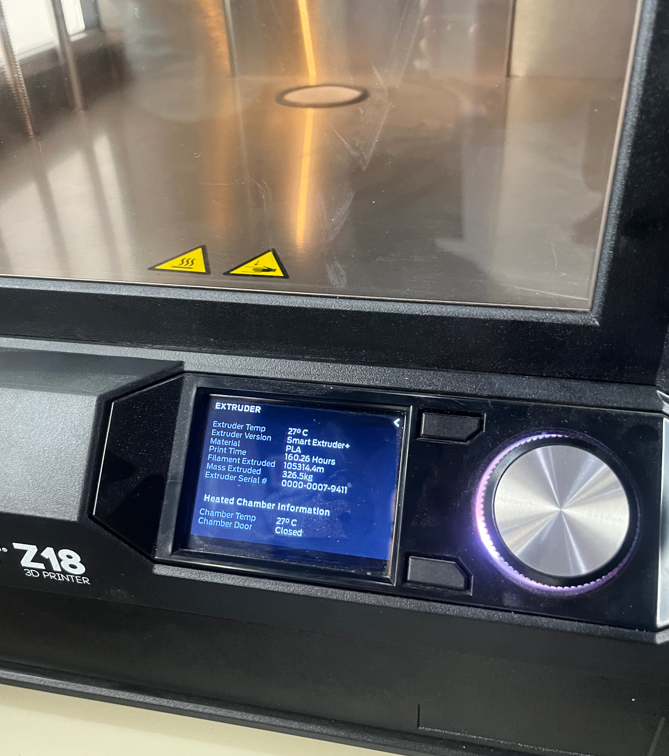
The 3D printer that we are going to use is Makerbot z18

One of the MakerBot Z18’s strengths, aside from it’s generous build size (base and height), is it produces a great finish to the 3D printed parts, making it an ideal 3D printer for prototyping, particularly for aesthetic purposes
The diagram of MakerBot Z18 3D printer

 PLA Material is Safe for the office or classroom, this material is non-toxic and easy-to-print with minimal warping or curling. It’s also optimized to give you the best results and highest quality for the MakerBot Replicator Z18 Printer.
we have controlled the tempreture of the chamber
To connect via USB cable : Locate the included USB cable. And To view the files stored on your MakerBot Replicator Z18 at any time, go to Print > Internal Storage.
 we chose our module from file and selected print

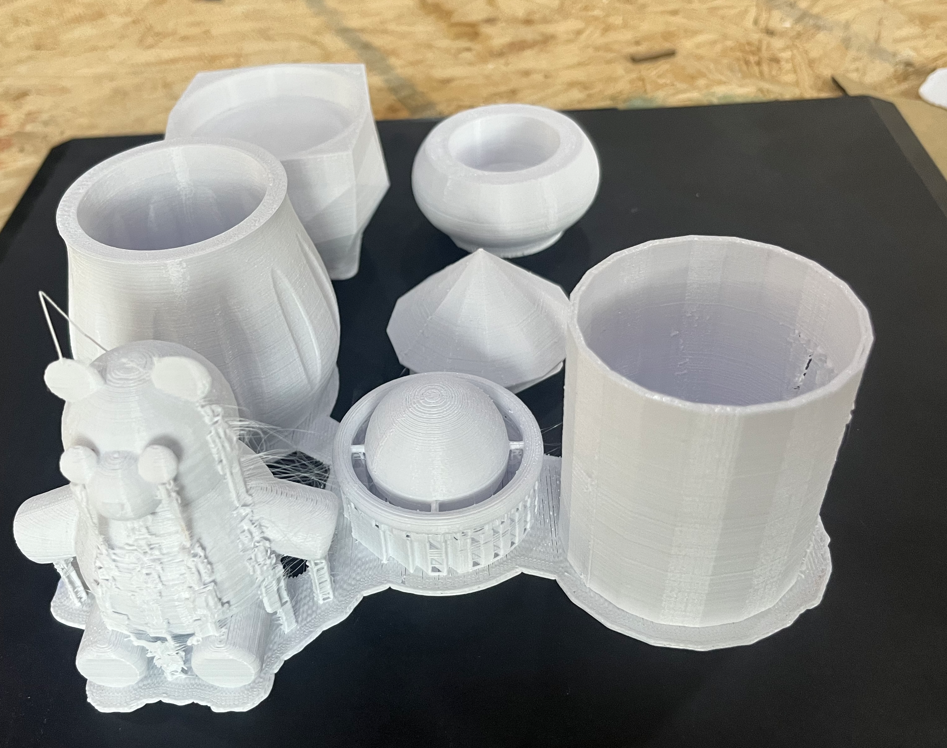
The Result
the result came out after 9 hours of work


Rafts :
A raft is a flat base that is printed before the object. A raft can help your object stick securely to the build plate.
A raft consists of several layers forming a flat surface for your object to rest on. Objects printed with rafts sit on this base of disposable material instead of directly on the build surface. Rafts can provide a better build surface, and are especially useful if your build plate is uneven, has imperfections, or if you are unable to adjust the level of your build plate. The base layer of the raft is thicker than a regular layer and prints more slowly, so it adheres better to the build plate. Rafts are often used in conjunction with supports

after separating the designs from the rafts
MakerBot vs Prusa
We used makerbot printer where The other group used prusa printer and there is the result of Prusa printer.
Why MakerBot Z18 better than Prusa? MakerBot Z18 has a heated build platform ,Prints in full color ,Supports Wi-Fi ,Uses fused deposition modeling (FDM), Supports Wi-Fi , Has plug and play feature. For more Comparison between MakerBot and Prusa
Indivdual design
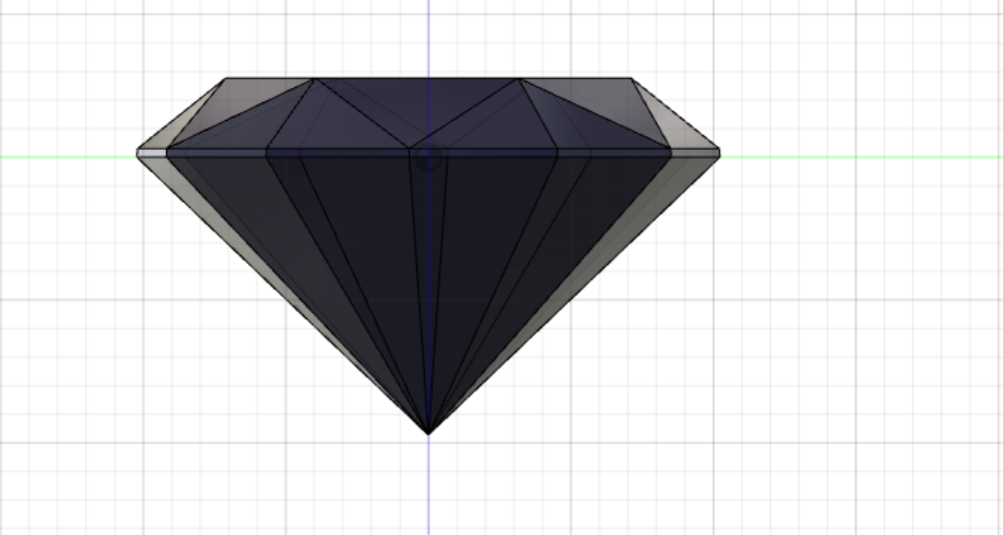
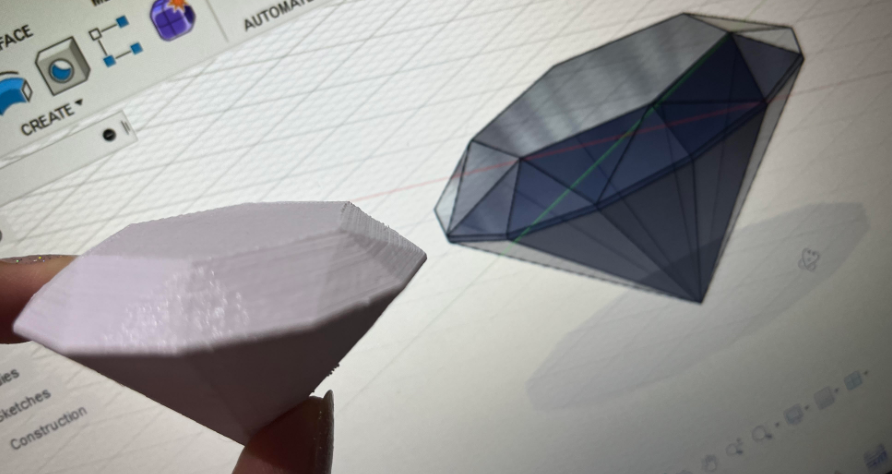
I used Fusion 360 to design my diamond that I designed on week 2
Then I have uploaded it to the Makerbot software
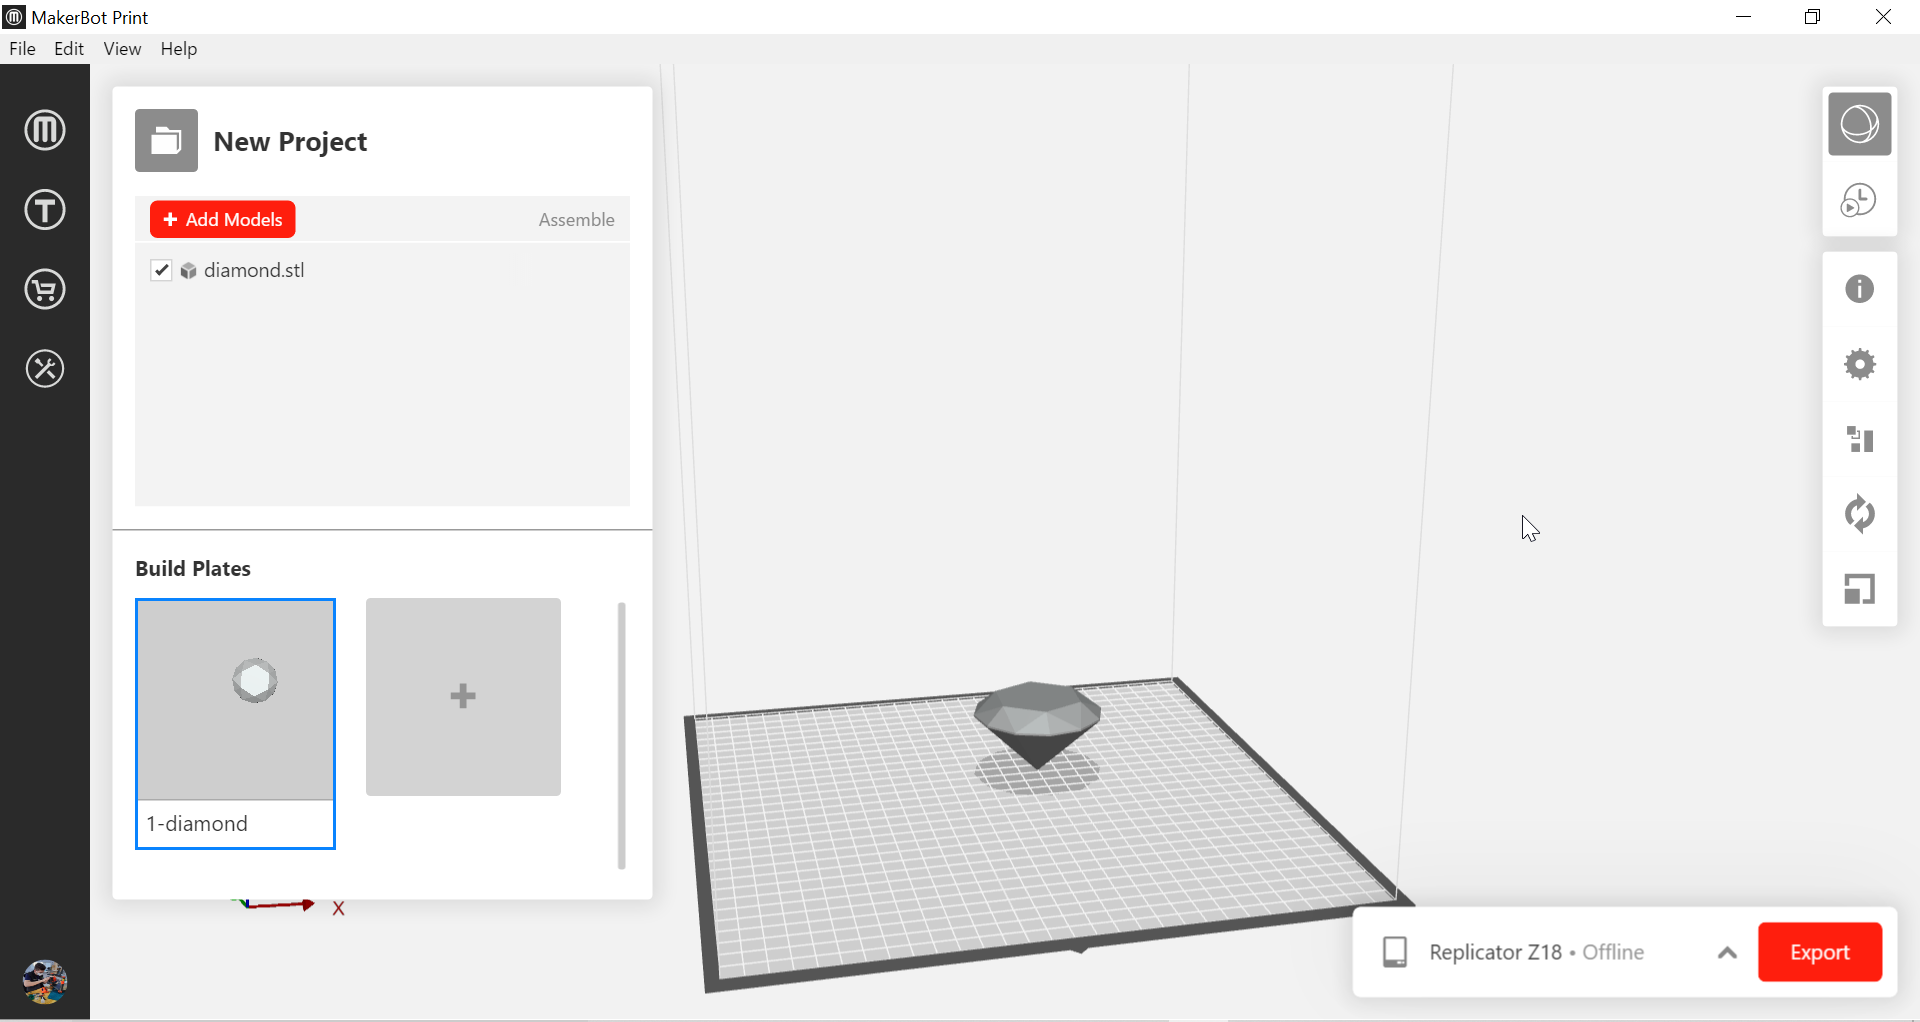
After we added all our designs and export it
The result came out after 14 hours of work


My files
3D Scanning
Qlone
Qlone is a 3D scanning mobile app , it’s available for IOS only
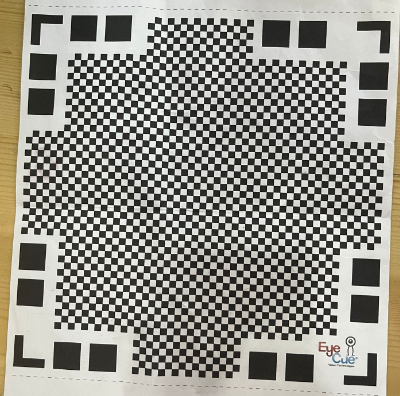
In order for Qlone to be used, users need to print a black and white mat (similar to QR code). They then need to place the object they wish to 3D scan on top of the printed map. Users can print several maps depending on the object’s size.
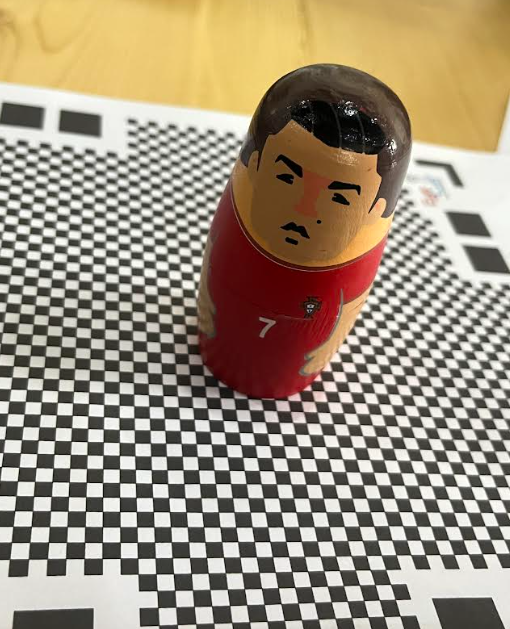
Prepare an object for scanning
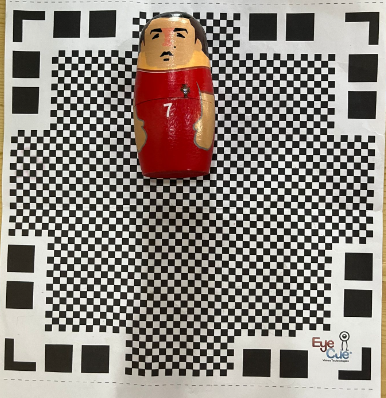
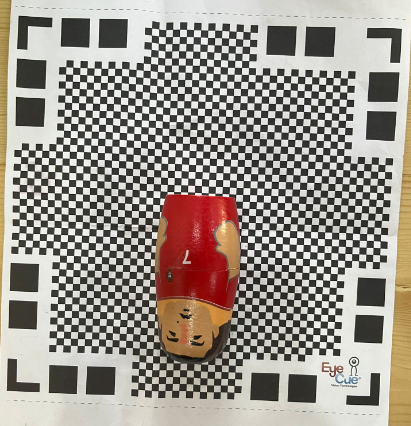
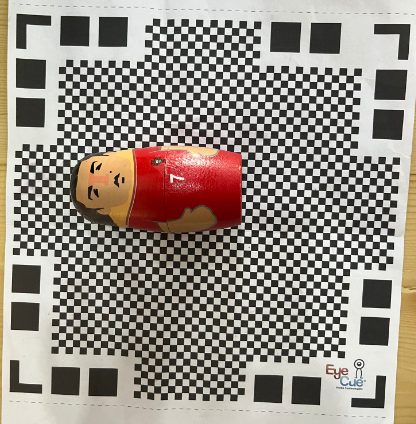
First I checked the light of place for having a good scanning.
Then I set the size of the object depending on the black and white mat size , The object should not be bigger than the mat.

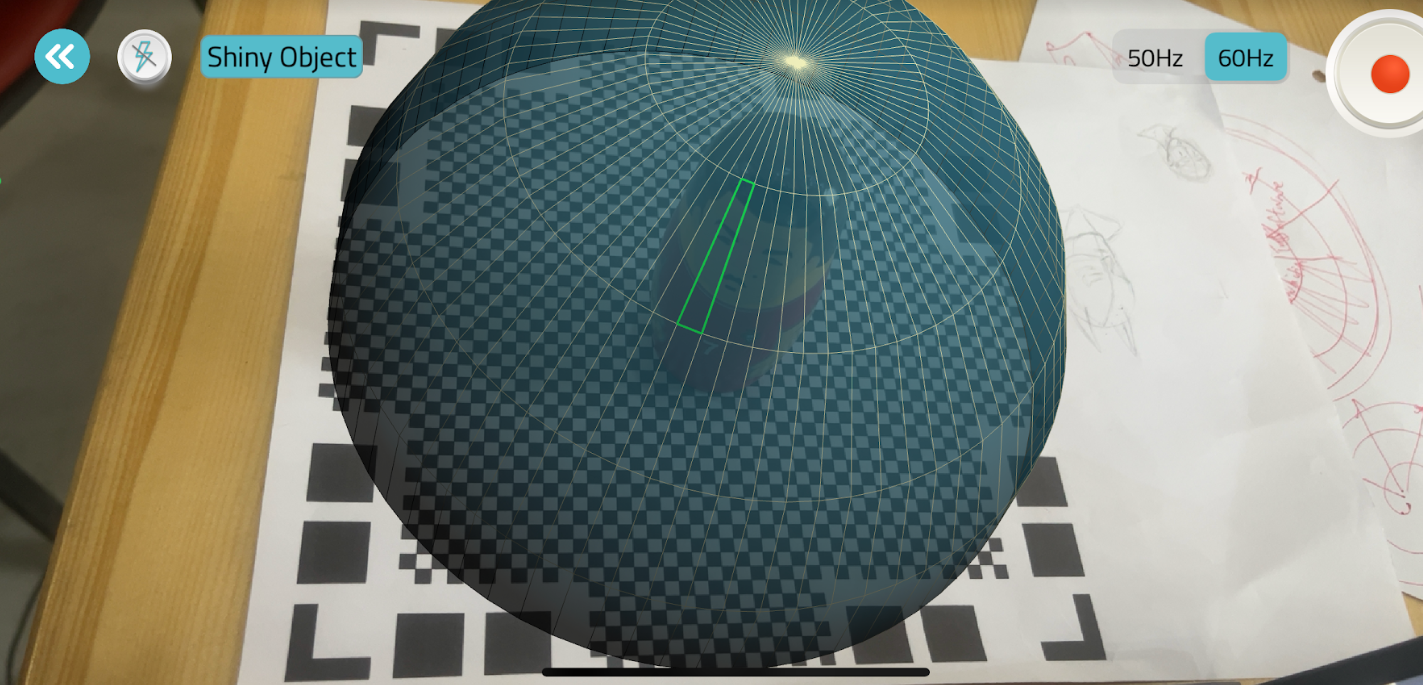
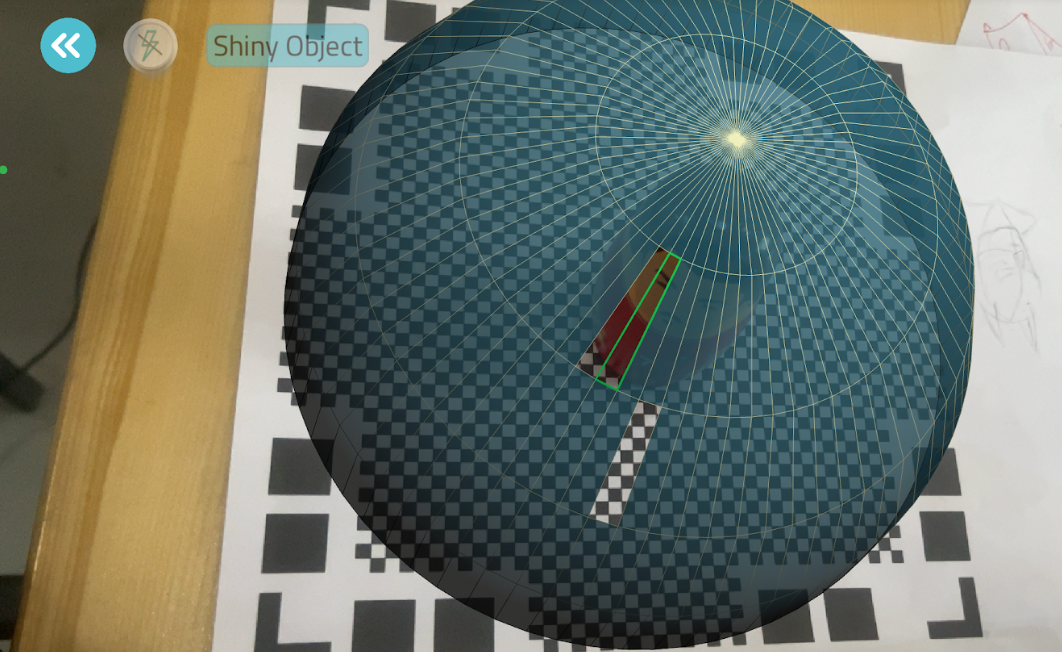
Scanning
I start scanning .

When I got close to the object a dome appeared around the object. Then I roatated around the object until the dome was empty
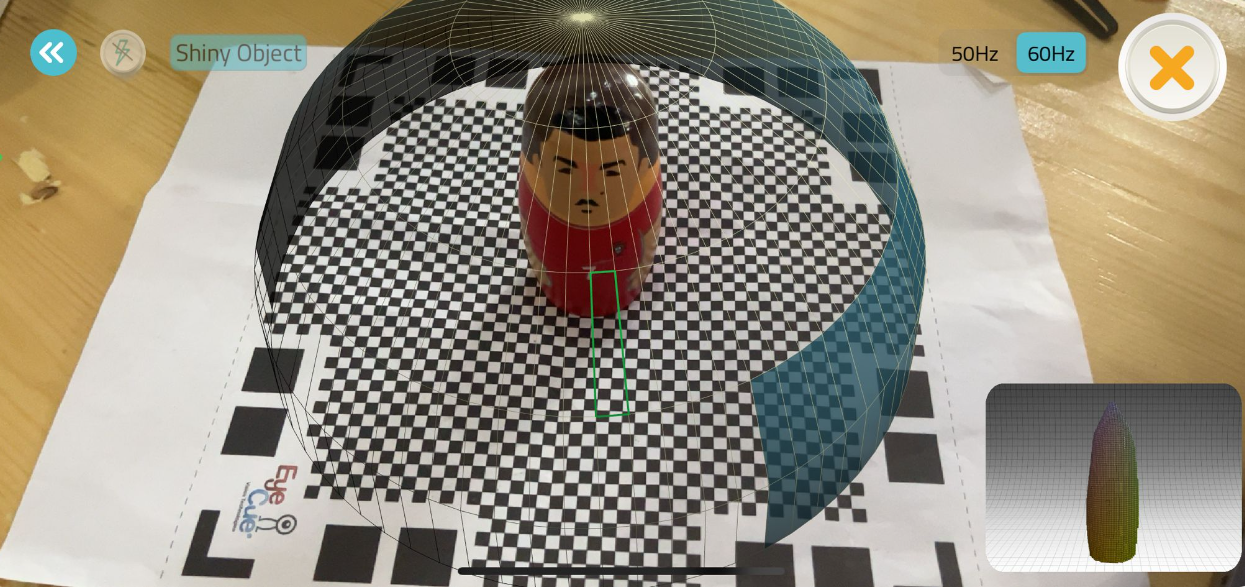
The result
According to the result of scanning mentioned above is 3D printable, because is with little details and don’t have anything around it.
Trnio Plus
Trnio plus is a 3D scanning mobile app . With Trnio Plus you can produce high quality 3D scans right from your phone! Our app implements both ARKit and LiDAR technology that combines with our simple scanning method to produce premium scans with ease. Transfer images from your phone, camera, drone, or simply scan in app. it’s available for IOS only.

Prepare an object for scanning
We need good lighting for scanning so first I checked the light of the place .In Trnio plus no matter the size of the object opposite to the Qlone scanner.

I start scanning by roatating around the object until the points covered all the object.

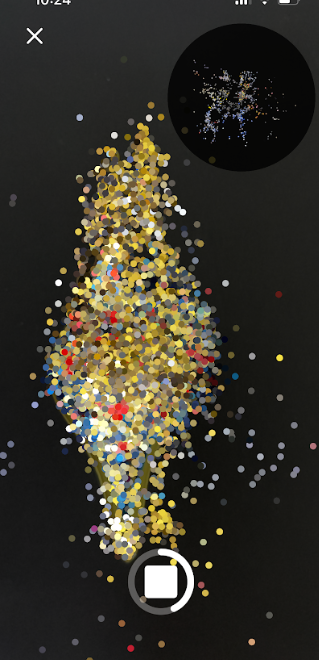
The result came out after a 8 to 9 minutes
For the second result of scanning mentioned above is not 3D printable, because this model had alot of details.