7. Input & Output device
This week we can say it follows week 5 (Embedded programming). We will start using Input(sensor) and OUTPUT(motors) devices.
Input Devices
First day, we start using an input Devices, these devices measures any property from reality and it convert it to electricity current.
we all took a microcontroller and a random sensor from a box, then we tasked to know how to use the sensor.
First I have to know what is the sensor that I have, after that I can search for other thing to know how to use it.
I took Ultrasonic Sensor HC-SR04
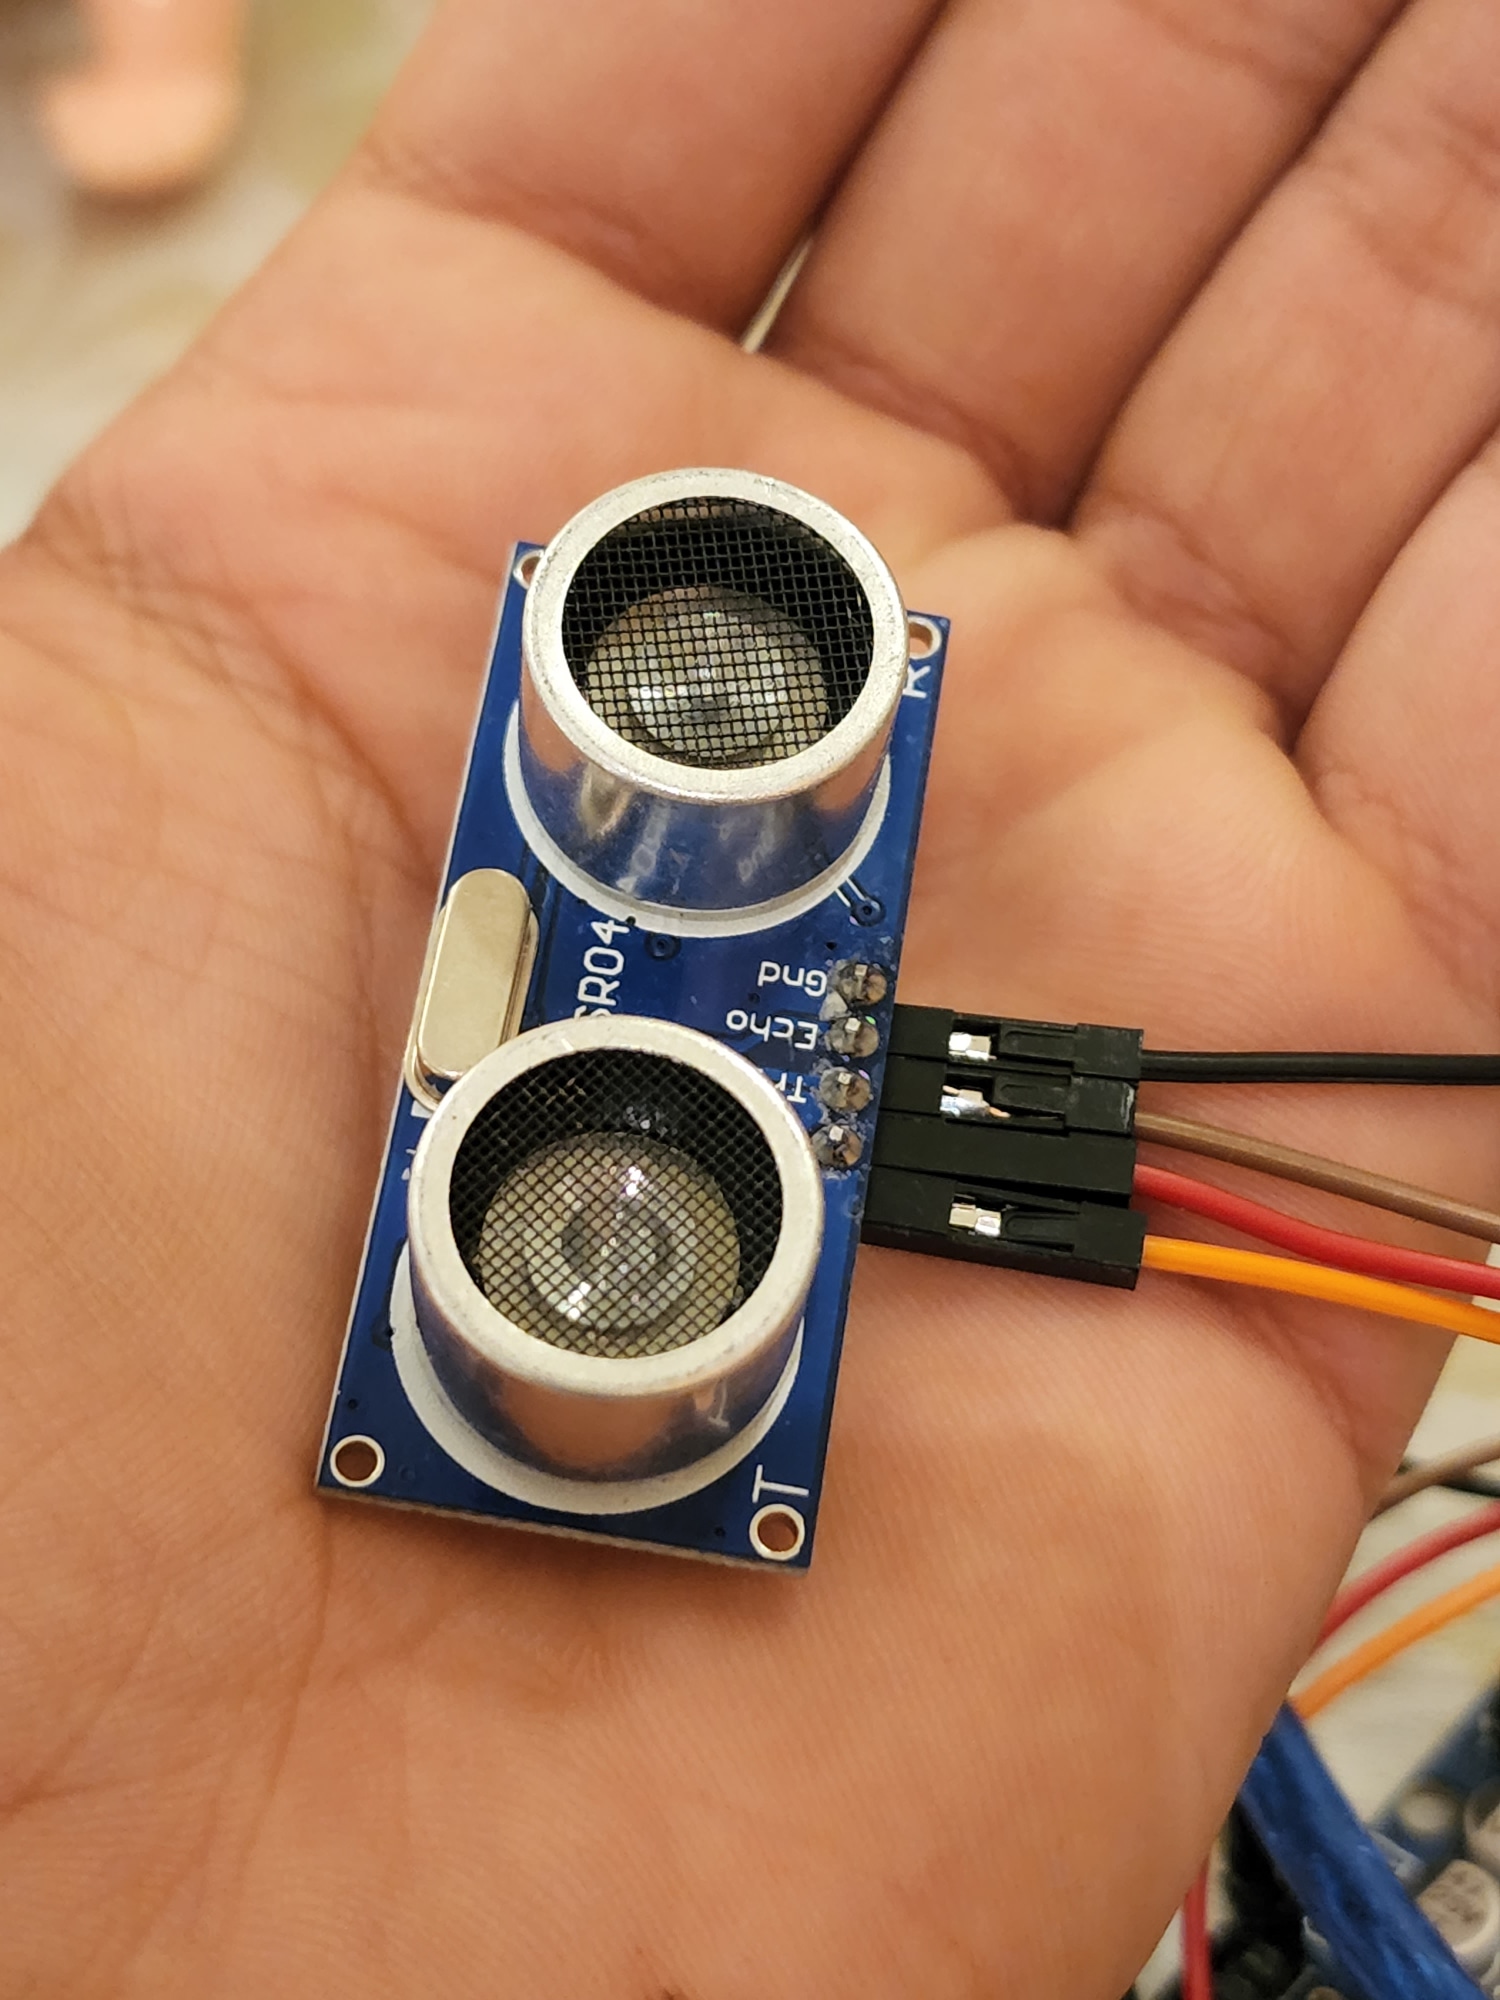 This sensor that can measure distance. It emits an ultrasound at 40 000 Hz (40kHz) which travels through the air and if there is an object or obstacle on its path It will bounce back to the module. Considering the travel time and the speed of the sound you can calculate the distance.
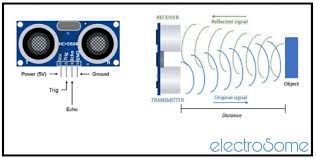
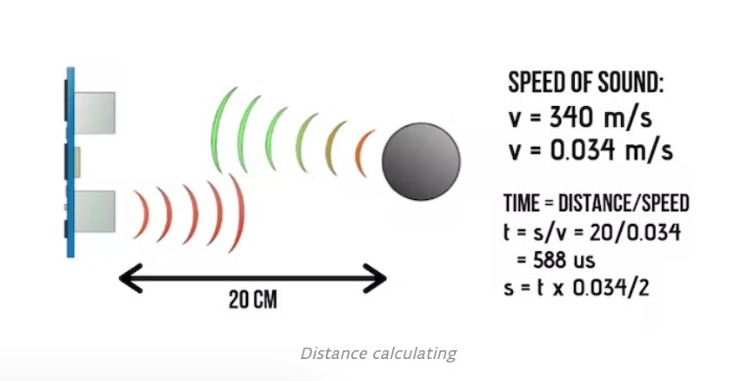
And this how it calculates the distance
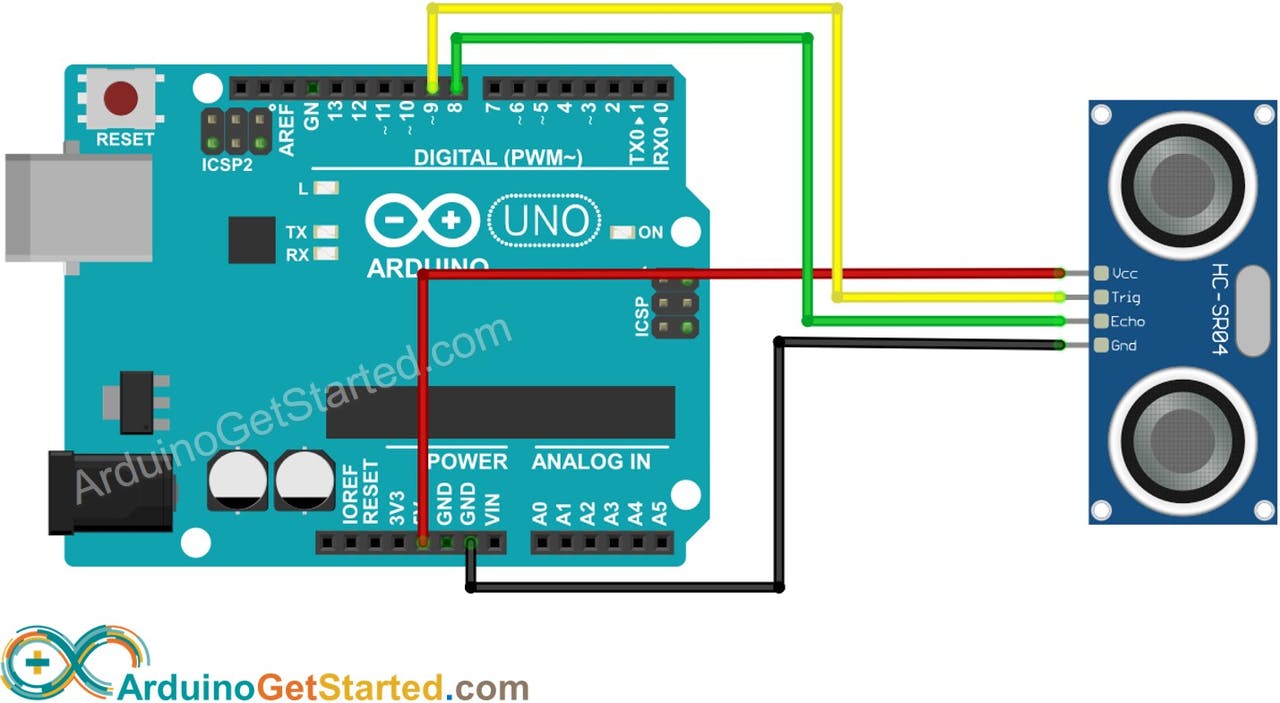
 This is the connection with the microcontroller
Code Example
#define echoPin 2 //  pin D2 as Echo of HC-SR04
#define trigPin 3 //pin D3 as Trig of HC-SR04

long duration;
int distance;

void setup()
{
  pinMode(trigPin, OUTPUT); //  trigPin as OUTPUT
  pinMode(echoPin, INPUT); //  echoPin asINPUT

  Serial.begin(9600);
  Serial.println("Ultrasonic Sensor");
  Serial.println("Arduino UNO");
}
void loop()
 {

  digitalWrite(trigPin, LOW);
  delayMicroseconds(2); // Sets the trigPin(ACTIVE) for 2 microseconds

  digitalWrite(trigPin, HIGH);
  delayMicroseconds(10);
  digitalWrite(trigPin, LOW);

  duration = pulseIn(echoPin, HIGH);

  distance = duration * 0.034 / 2; // Speed of sound wave divided by 2 (go and back)

  Serial.print("Distance: ");
  Serial.print(distance);
  Serial.println(" cm");
}
Video example
More work
This is another sensor I took.
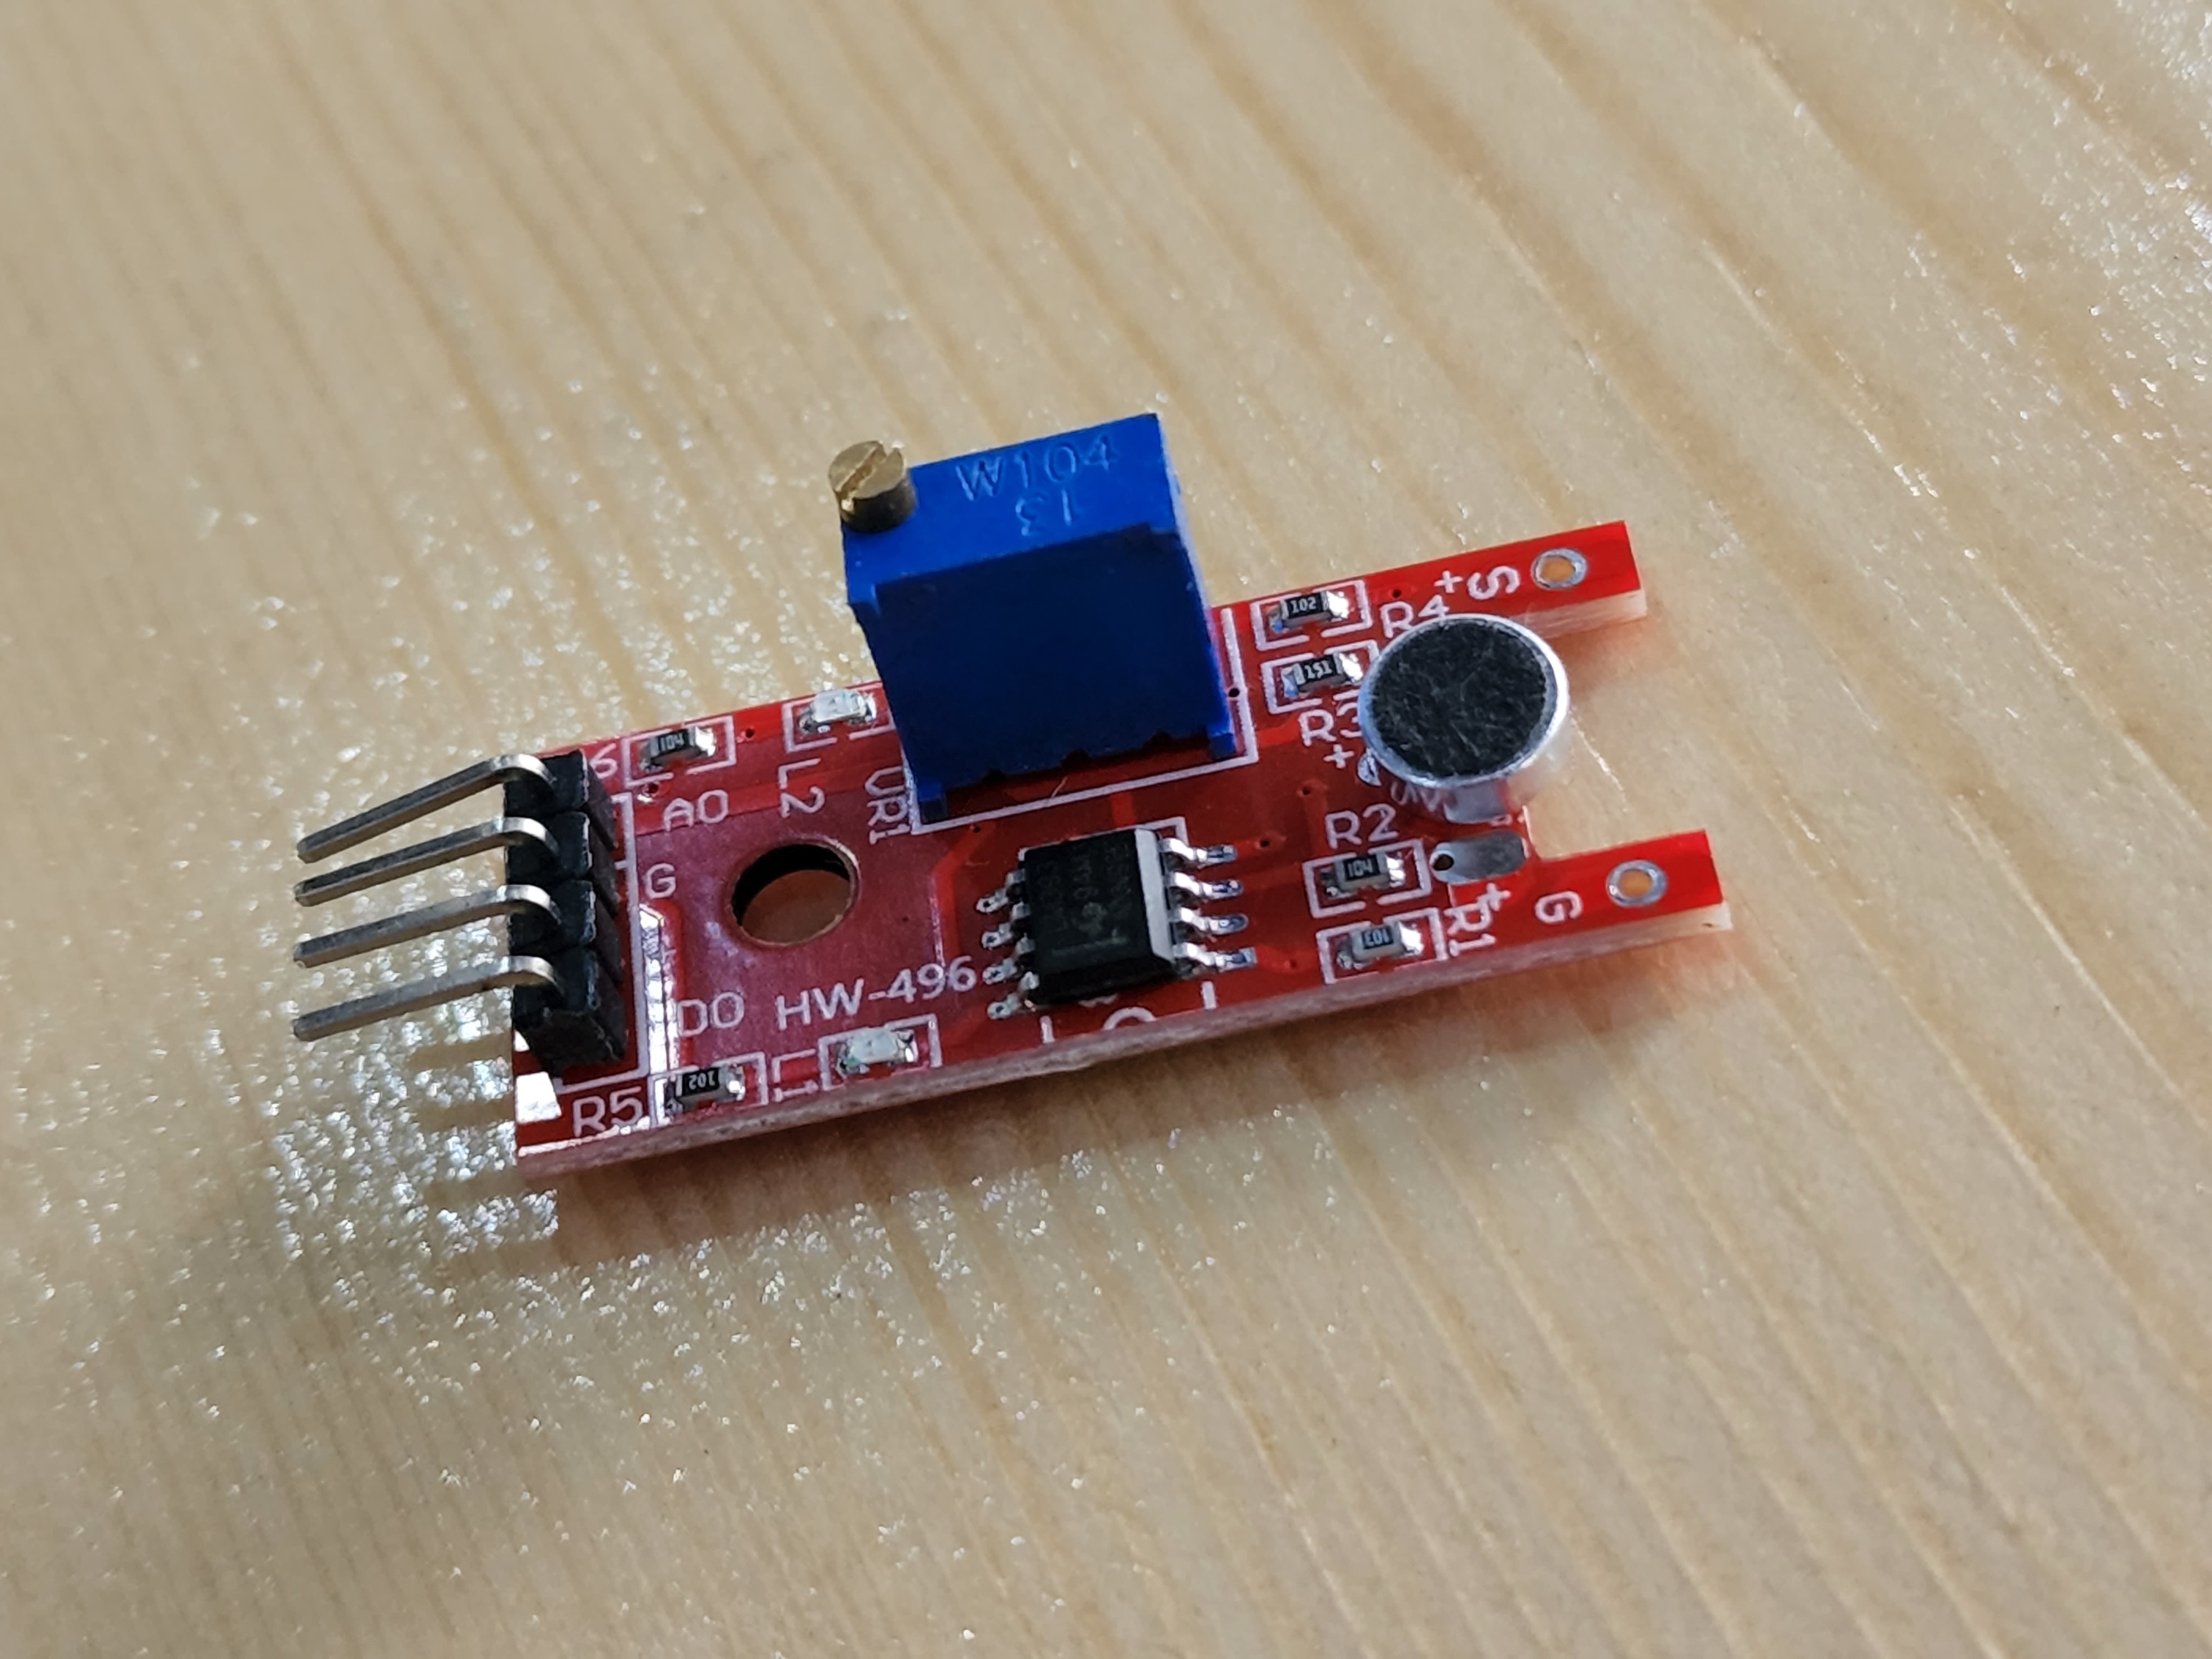
I search about it and tried to discover what is the sensor and how can I use it.
I google it and saw how to connect the sensor with the Arduino, and i saw these three types.
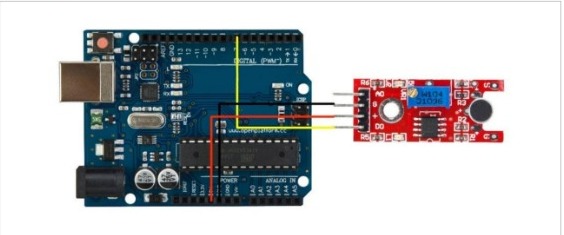
which i used.
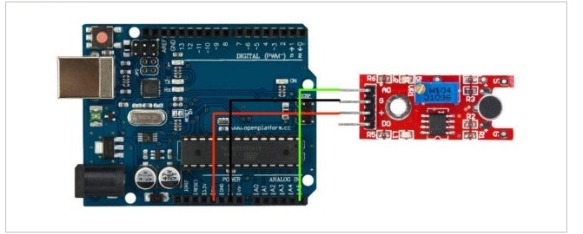
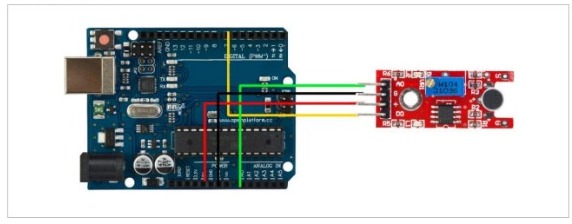
With This sensor we took all the day trying to let it turn on, me and the instructor maitham tried to find out why it’s not working, finally the end of the class we turn it on they were two problems, first was in the code and the second was in the sensor it self , we were need to fix a screw more less that what it were. this sensor burnt my mind.
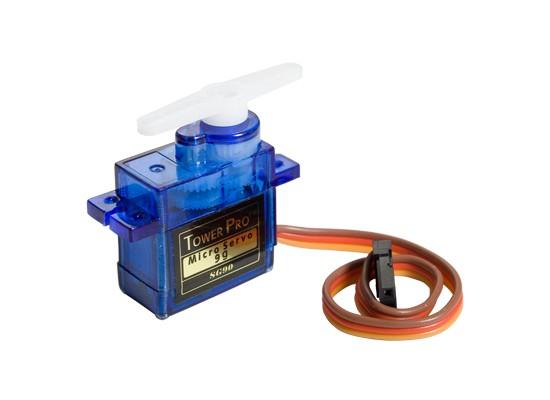
Output Devices
Second day, we start using an output Devices, these devices convert electricity current that comes from microcontroller to deferent type of physical outputs like lights, sounds and heat.
First I took a servo motor as an output device.
 Then I search about it and how to connect it with Arduino, and this is the result.
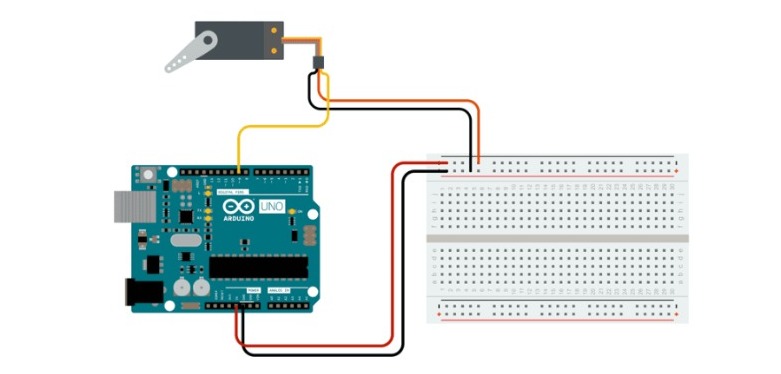
And i already now how to use the motor so i didn’t face a problem with it.
Code Example
#include <Servo.h>

Servo myservo;


int pos = 0;

void setup() {
  myservo.attach(9);
}

void loop() {
  for (pos = 0; pos <= 180; pos += 1) {

    myservo.write(pos);
    delay(15);
  }
  for (pos = 180; pos >= 0; pos -= 1) {
    myservo.write(pos);
    delay(15);
  }
}
Video example
This all for this week, see you at the next one <3