FAB ACADEMY PROJECT : DC 12V Pump
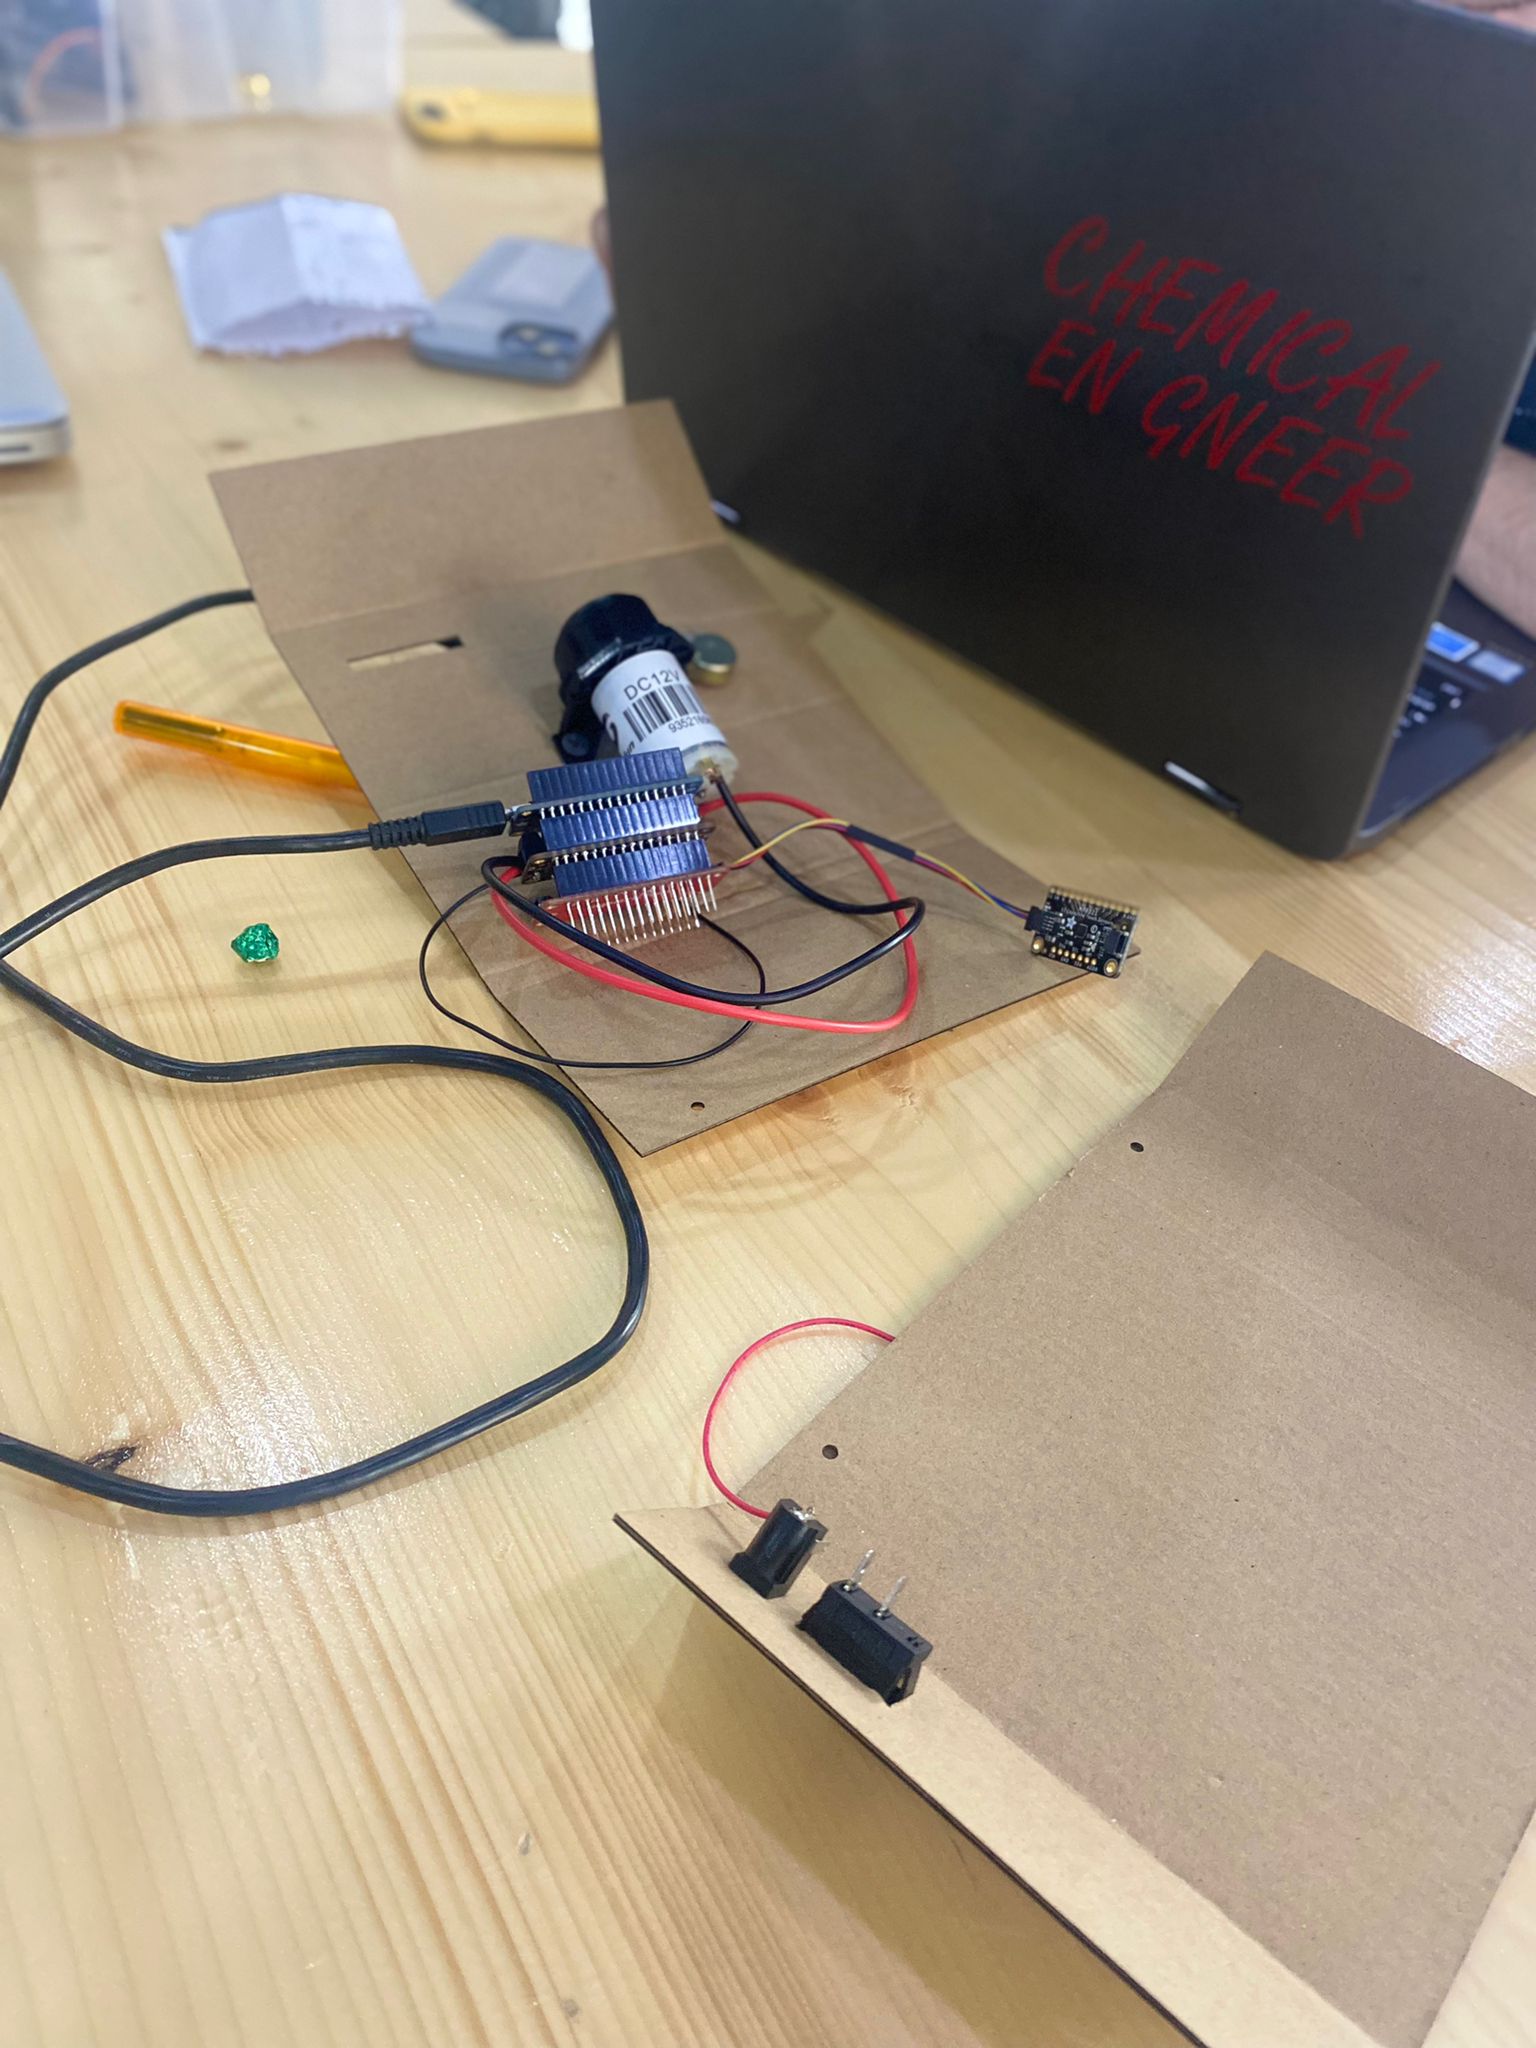
There are three distinct parts to the project. First, the electronics, which includes the connections and programming. Second, create the DC pump’s housing and its internal components. finally, put the pieces together.A DC 12V Mini Submersible Noiseless Water Pump is a low cost, small size Submersible Pump Motor which can be operated from a 12V power supply he project can be separated into three parts.
Together with my coworker Sadiq, I worked on developing the pump’s casing as well as the touching sensors. Additionally, we documented our collaborative work. For the remaining parts visit our Final project website
Designing the case of the pump
We designed two pieces for the case, one of them was for the front and the depth. While, the other one was to cover the back and the sides. The whole design was created as 2D and by using Fusion 360 software.
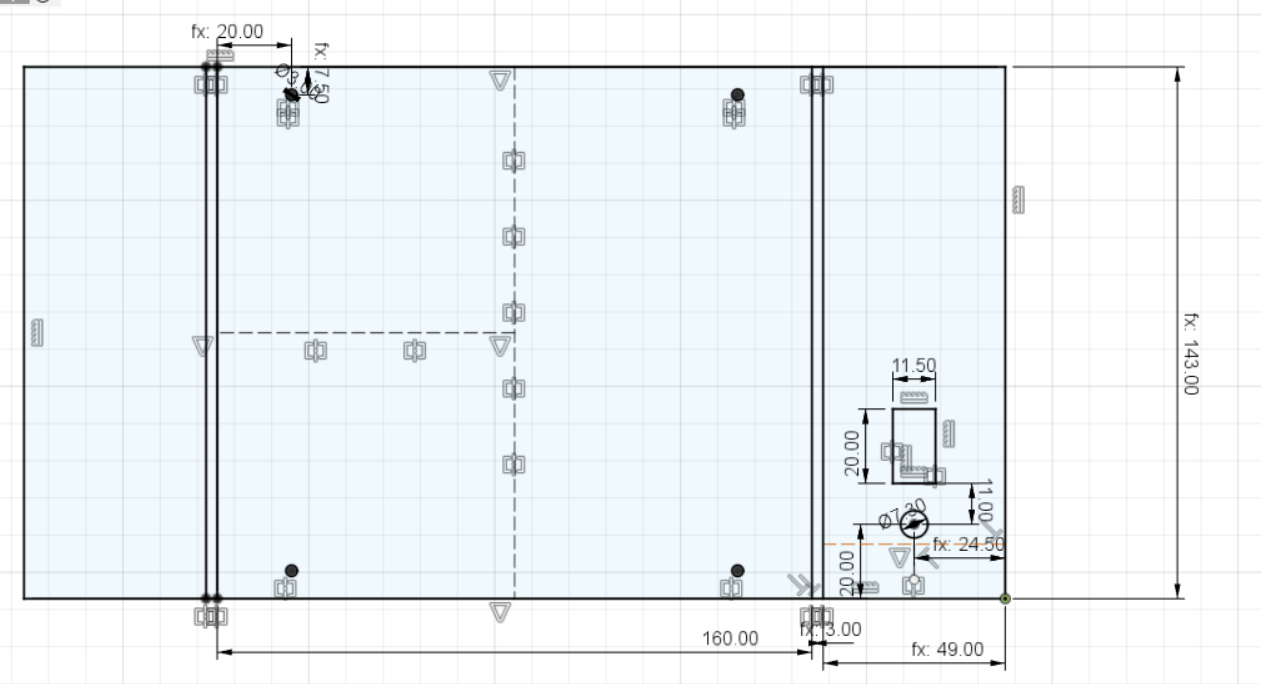
- First, we started by drawing a rectangle for the front piece with a length of 271 mm, width of 160 mm and 52 mm as a depth.
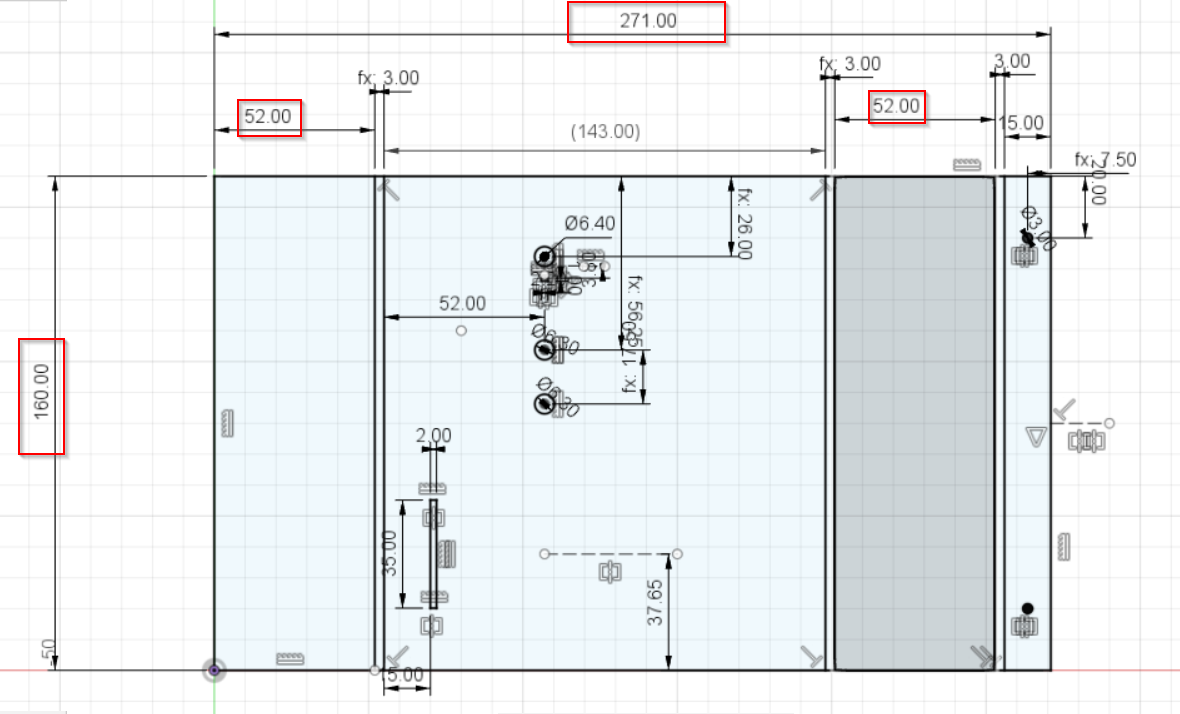
- Then we added lines with 3 mm to specify the place that will get fold while using the heat bending machine.
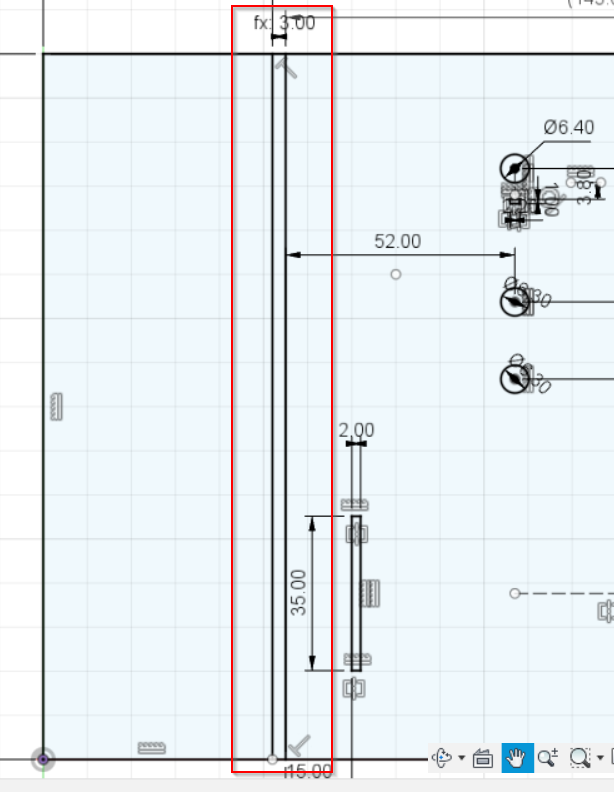
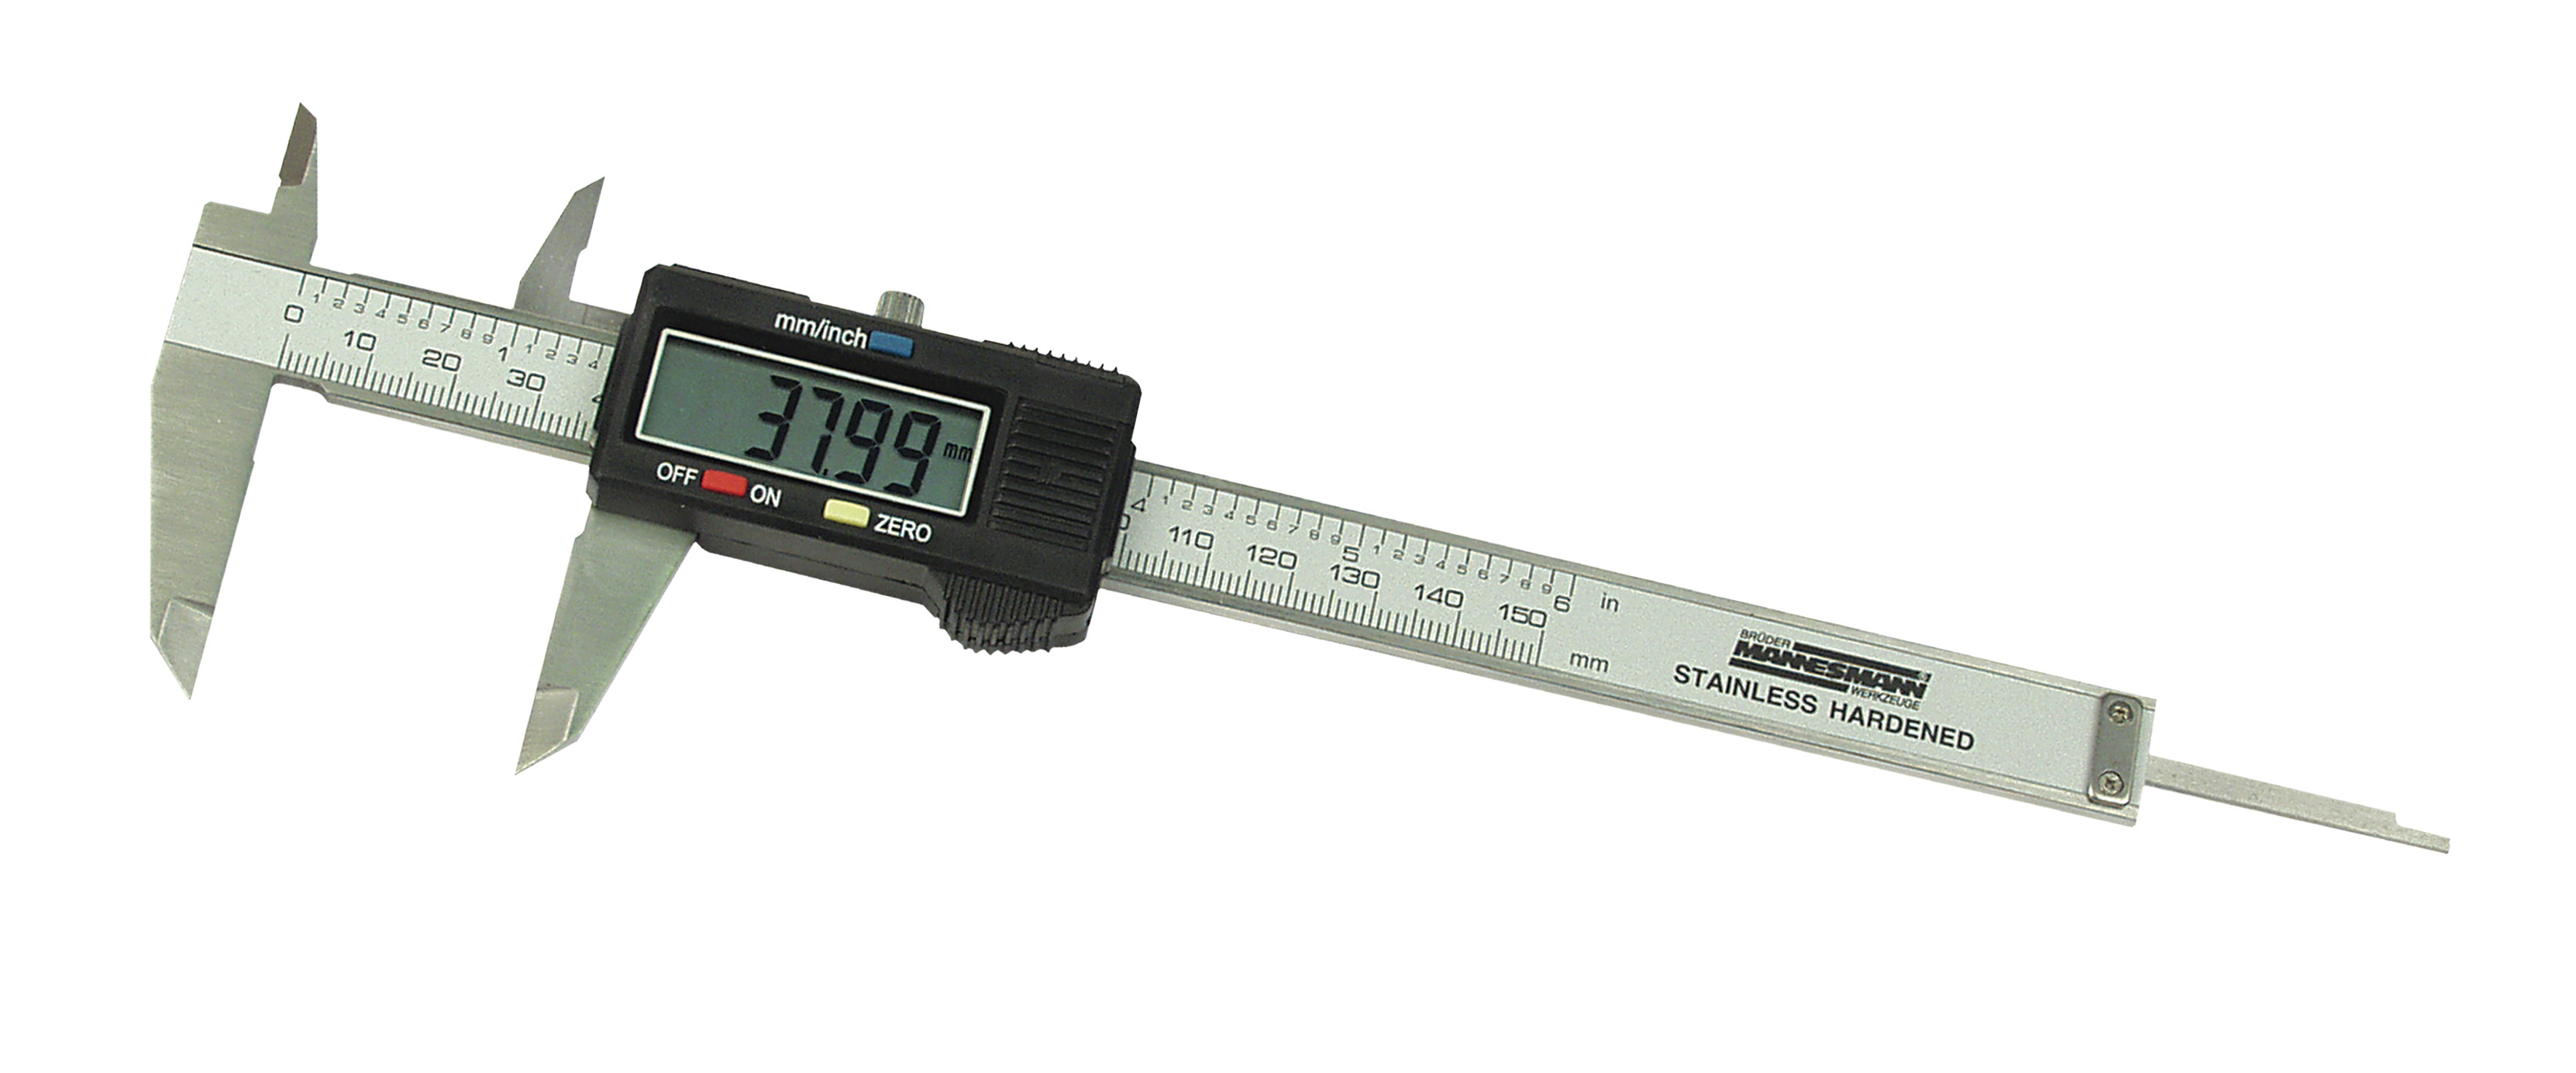
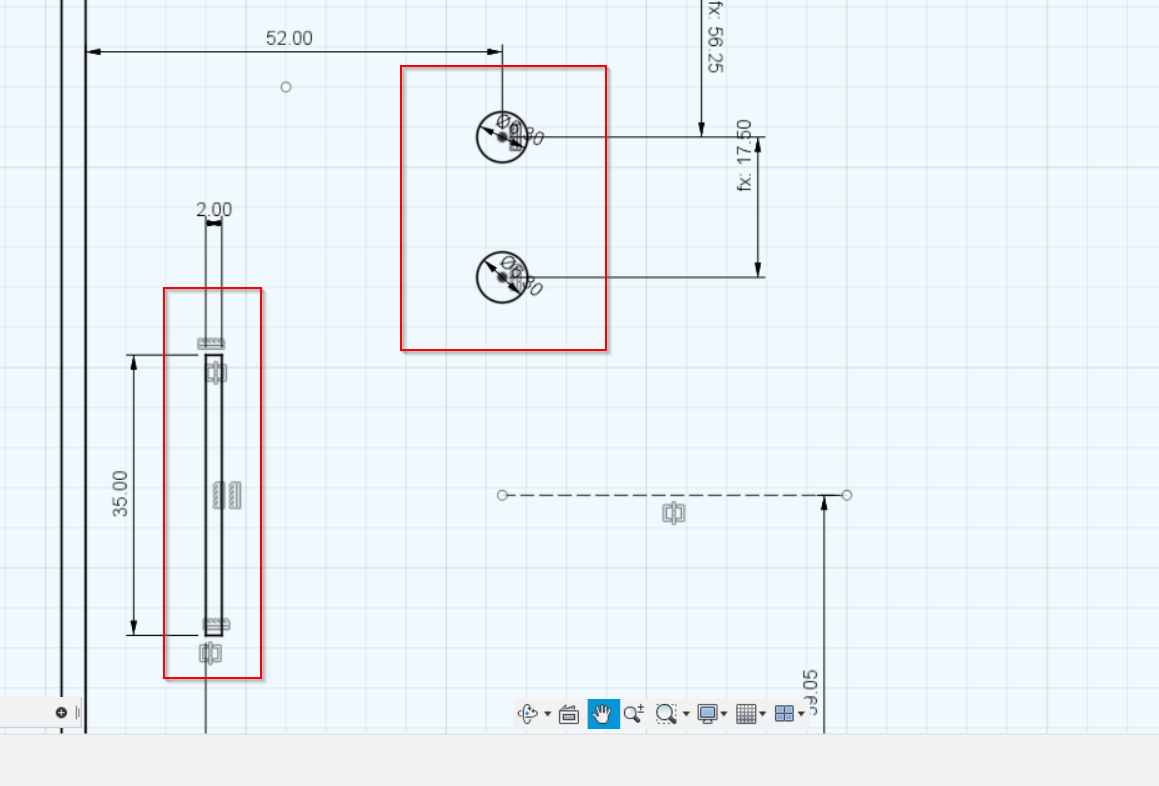
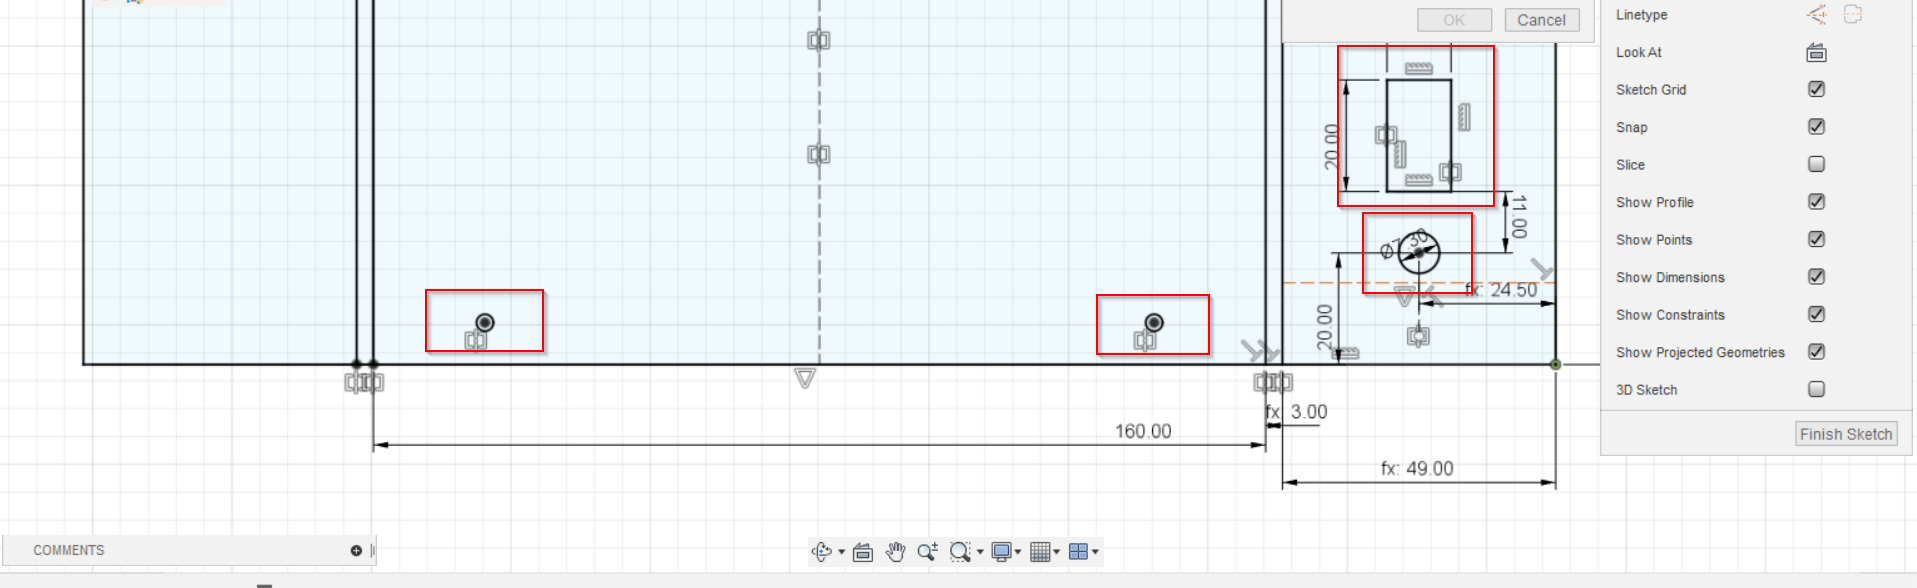
- Next, we used the calliper to take all the measurements like the holes for the screws, input & output, the touching sensors aperture and etc.
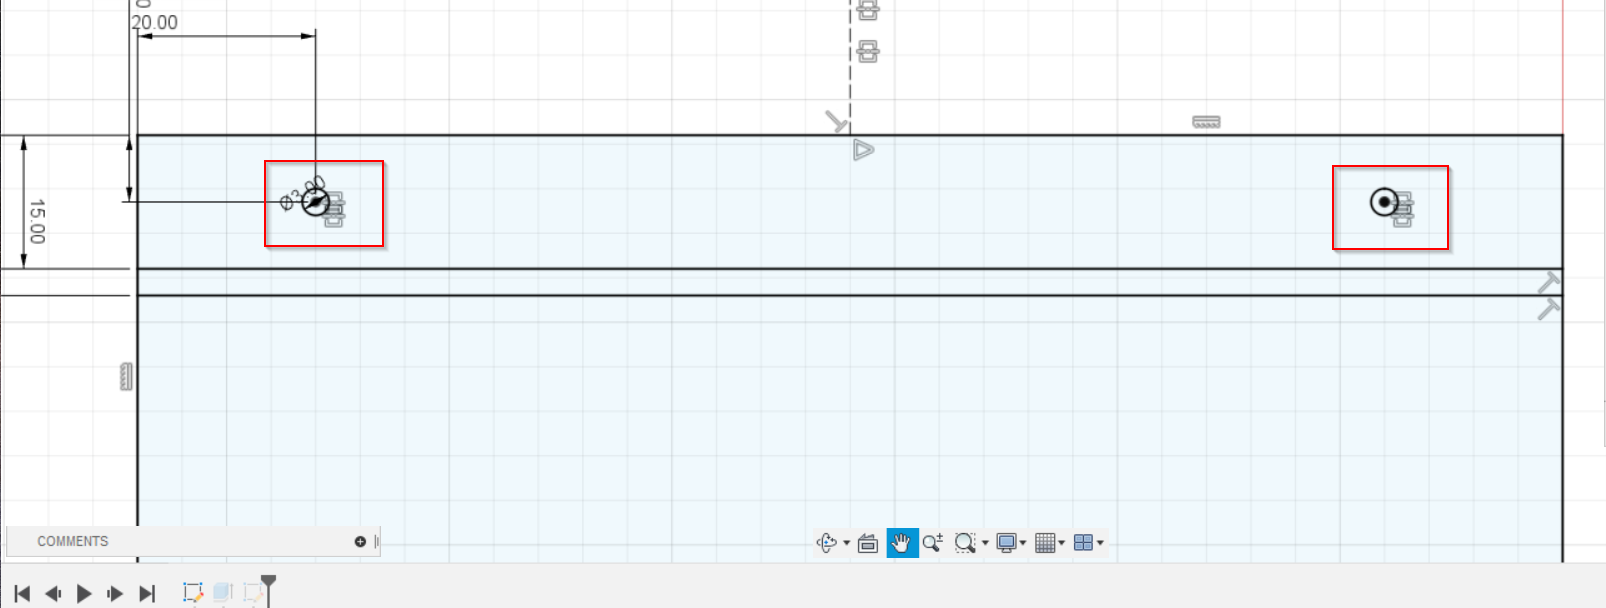
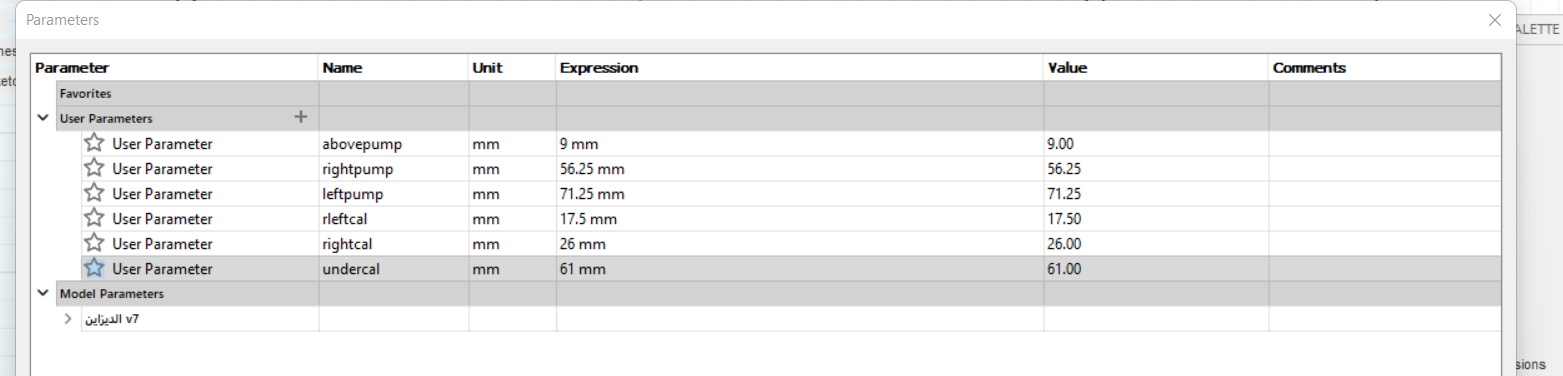
Hint: To make our life easier, we used the parameters to specify the dimentions of everything in the design.
- After that, we designed the second piece which is covering the back and the sides. So, again we started with drawing the rectangle with the same dimentions of the first piece but we substracted 6 mm from the length and width due to the thickness of the material that would be used in our case design which is acrylic material (3mm).
- Then, we added the same holes as we had on the first piece for the screws on the bottom to be able to remove the piece whenever we want to fix something inside the case. Also, we created a hole and aperture on the side for the power source and the ON/OFF switch.
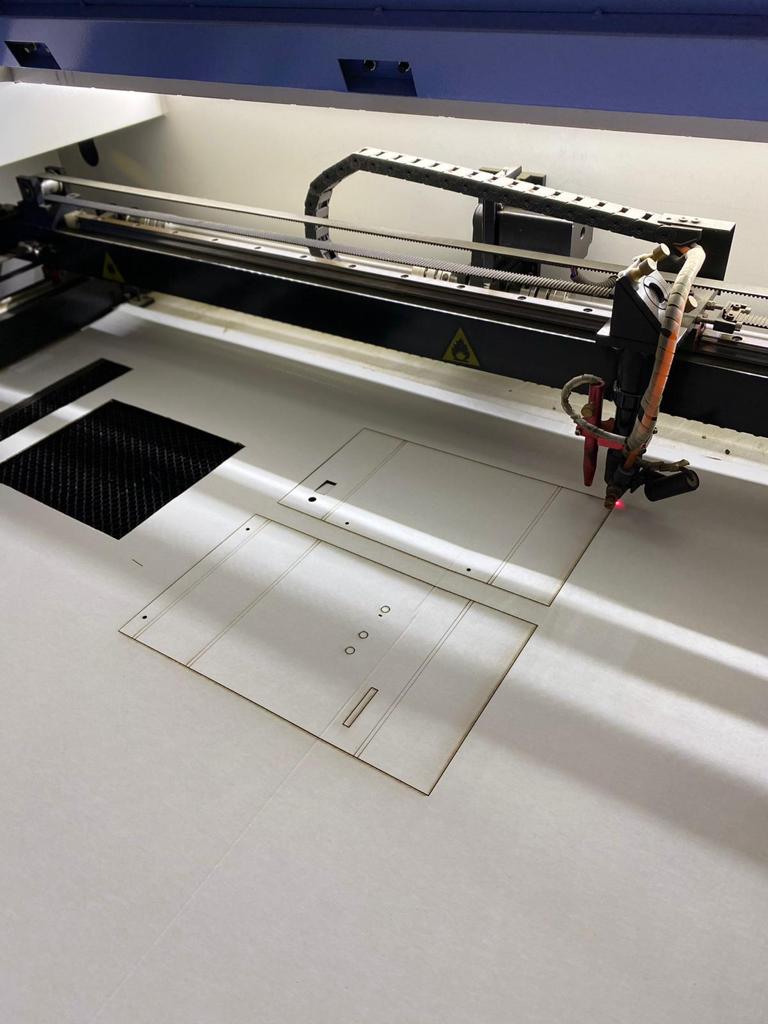
- After being done from designing the case, we saved the file as DXF file and we sent it to the main PC that has the software that is connected to the laser cutting machine. Then, we selected the required speed and power for the material that had been used for the cutting proccess which was the cardboard first for testing our dimentions and then the acrylic for the final result.

Original file
Designing the touching sensors
The touching sensors were made up by using the Fusion 360 software and the Vinyl Cutter machine.
- First, we started by sketching the base which is a plastic with a length of 118.5 mm and width of 35 mm.
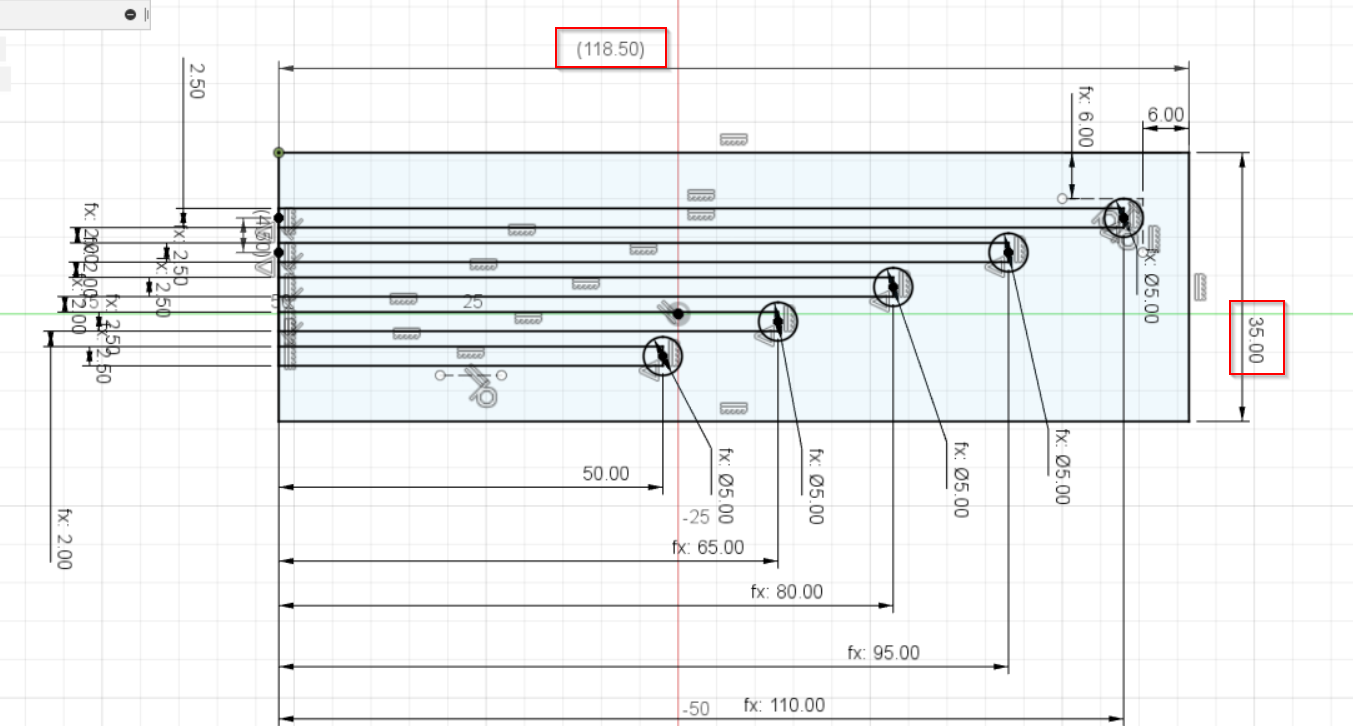
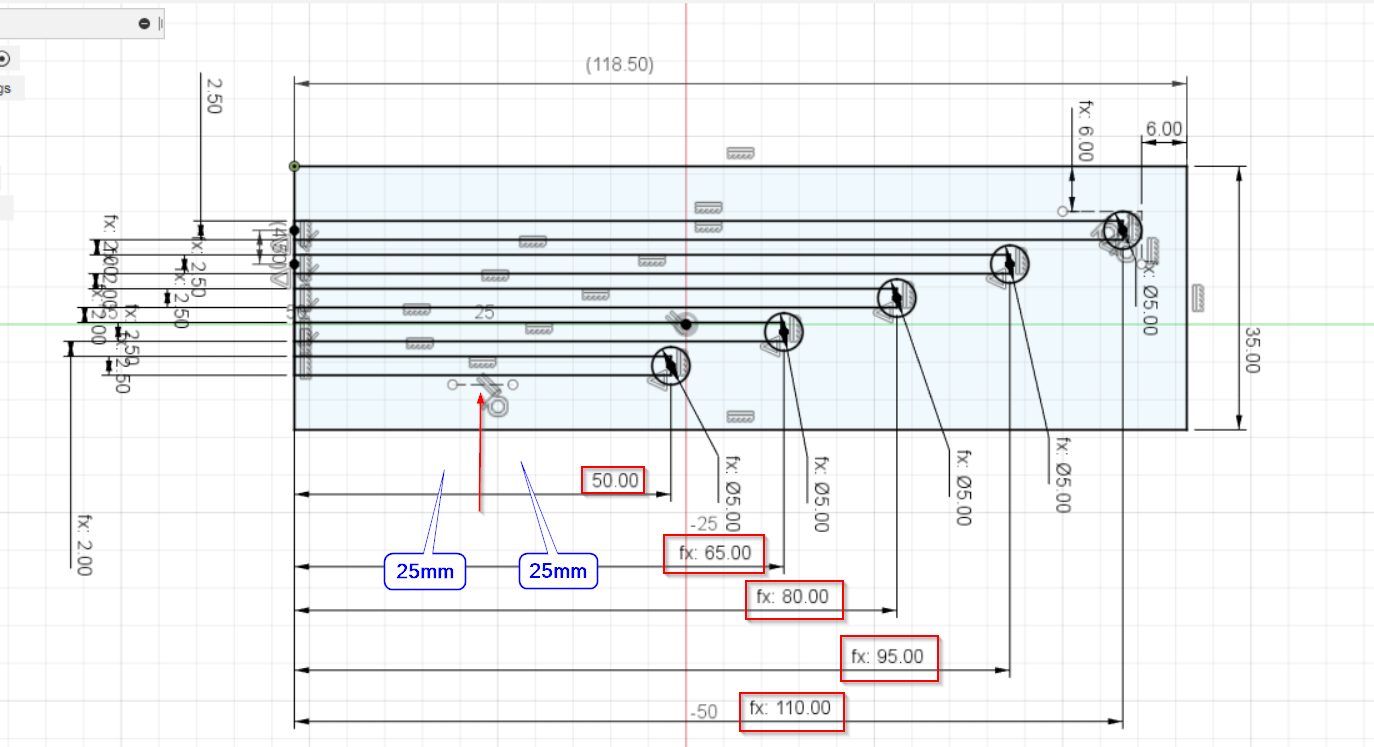
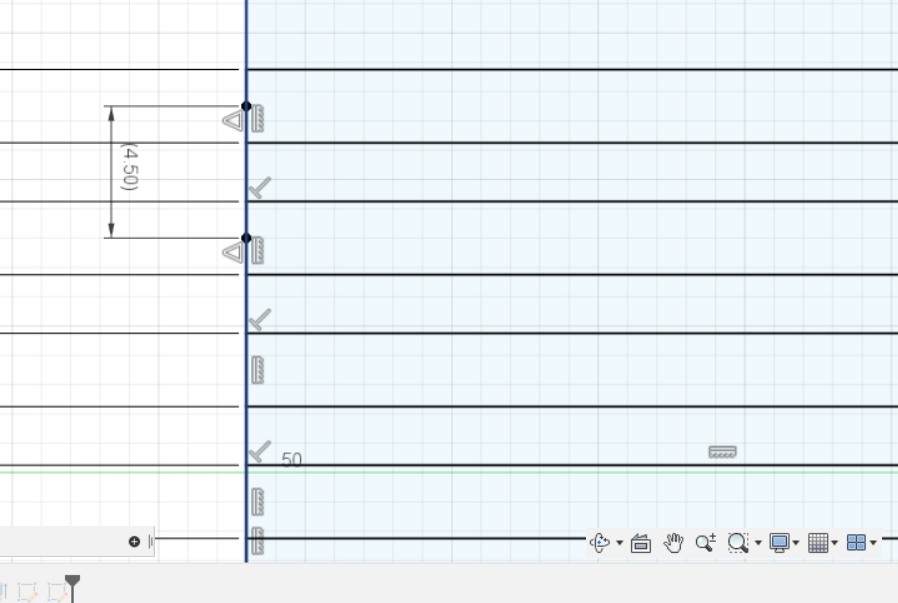
- Then, we measured the distance from the pins that are inside the case to the aperture and we found that it was 25 mm. So, we skipped 25 mm on the design before adding the 5 touching sensors with different length for each of them. The first pin had 50 mm length which is 25 mm the length of the skip and the other 25 mm which is the length of the touching sensor itselt. And then for each pin, we added up 15 mm on the previous length. Furthermore, the distance between the middle of each pin was 4.5 mm.
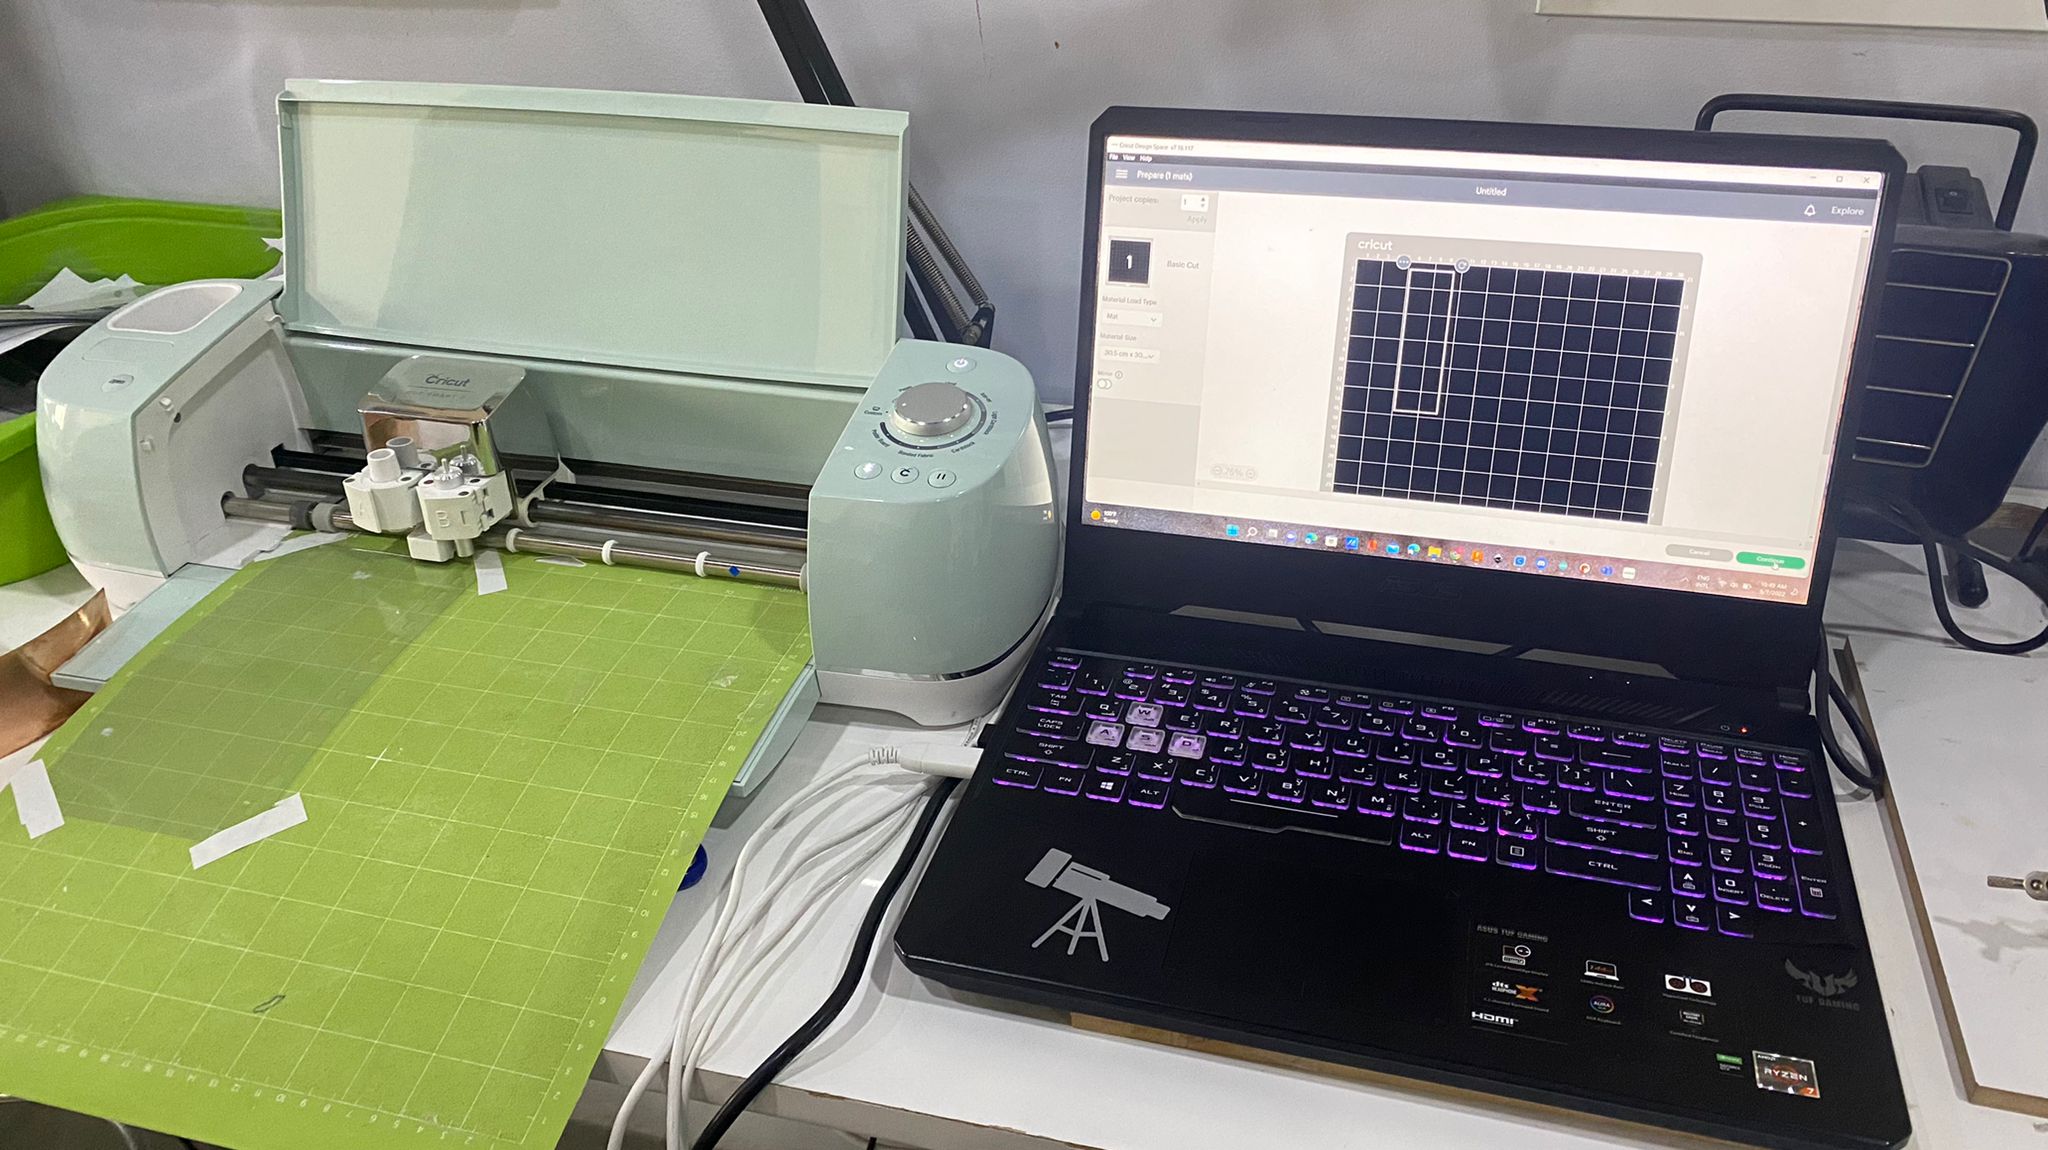
- After that, we saved the file as DXF file and uploaded it on the cricut software to start cutting the design. We started by cutting the base first which is the plastic by applying the mixmum power (Poster Board).
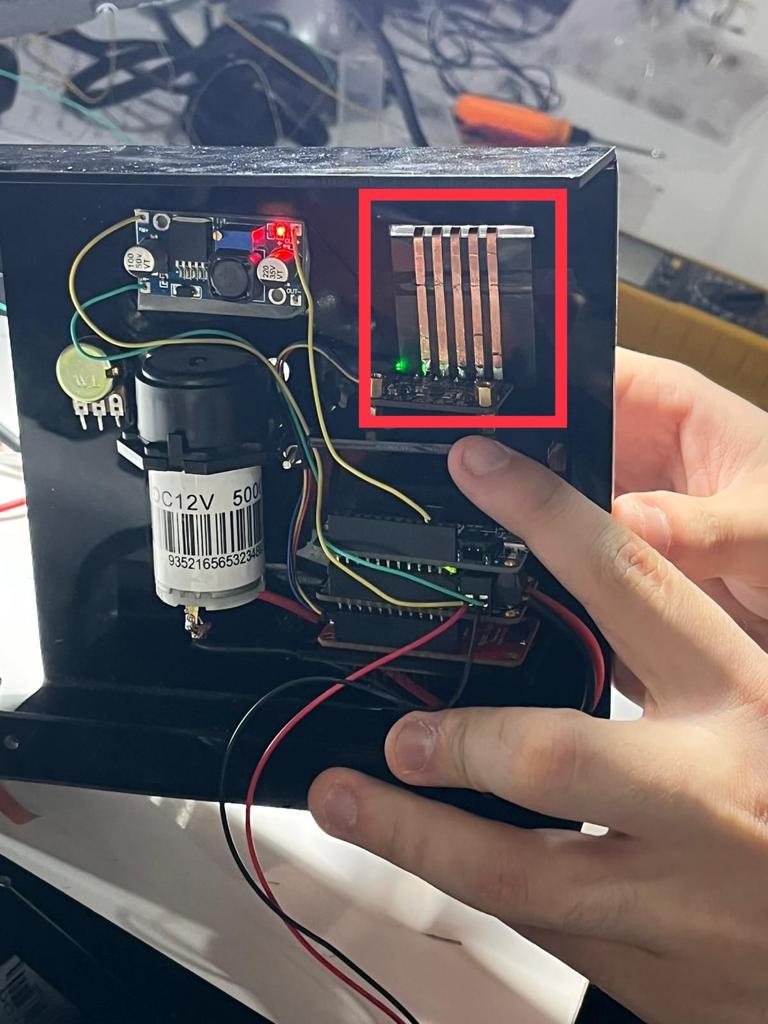
- Next, we sticked the copper on the plastic to let the cricut machine to cut the touching sensors on the copper only. And when the machine was done from the cutting process, we removed the extra copper material around the touching sensors. Finally, we folded it and placed it on it’s position using the aperture that was already made for it.
Hint: Why we used the copper for the touching sensors ? because the copper is a conductive material.
Original file
The final result
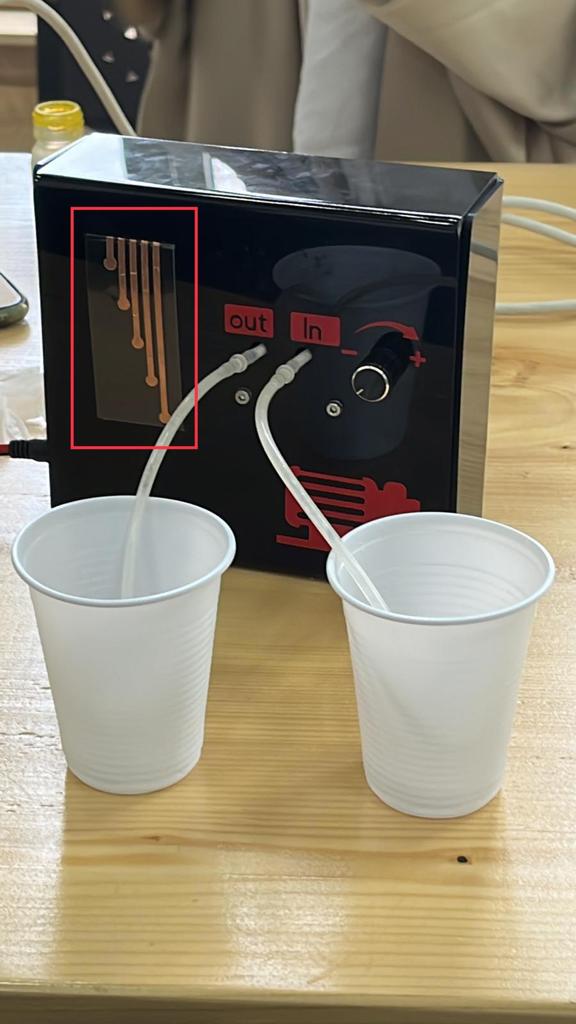
After being done from all the designing steps, we added some stickers to the case design using the vinyl cutter in order to show all the details and finish it off.
Problems
-
1- The case for the pump was looking great but there was an issue that it didn’t fit perfectly on the sides due to some errors on the dimentions while we were designing it.
-
2- The final result for the touching sensors were good but we faced a problem regarding touching them because they were too close to each other so it was little bit difficult to avoid touching the other pins at the same time. We recommend to increase the distance between them to be more comfortable while touching them.