6. Large format CNC (computer controlled Machining)
This week I worked on CNC machine, were we start to learn how the machine is work and what are the uses of this machine. Furthermore, one of the important subject that we Moreover, it is found that
Important thing to be learned before using a CNC machine:
-
Learning all the important safety procedure to use the CNC machine, and not using the machine without an expert person.
-
Learning about two important things to use the CNC machine:-
1- Bit speed which present the drill bit moving speed on three axis (X ,Y & Z)
2- Bit RPM where the bit is rotating in a very high speed to cut the specimen. - learned is the locks, were locks used to connect to or more part with each others without the need of using glue or metal nail.
Group Project
After learning about the speed and the RPM, the group project was to use the CNC machine to cut a peace of wood in two way. First to keep the RPM constant and change the drill bit movement speed, then to keep the drill bit movement speed constant and change the RPM speed.
This will present the differences between the RPM and the drill bit movement speed and it will present the best movement speed and RPM to be used to cut the wood sheet.
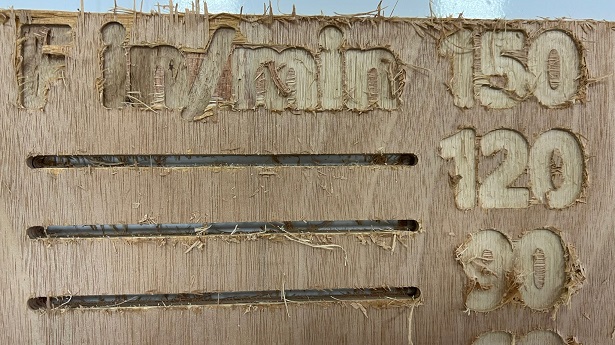
First test was conducted on 9000RPM while there four different movement speed (60, 90, 120, and 150in/min)
The constant at 100in/min while the RPM speed is changed in four different speed (8000, 11000, 14000, and 17000)
The final results for the test is presented in the bellow photo, which present the conducted tests:
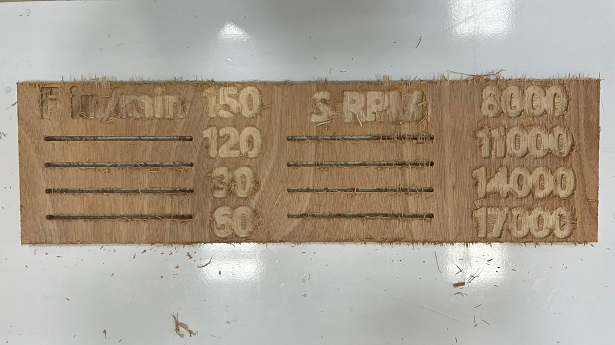
By taking closer view for the tested piece, the best result for the test was for the adjustment were the movement speed at 120in/min and the RPM at 9000RPM:
Individual Project
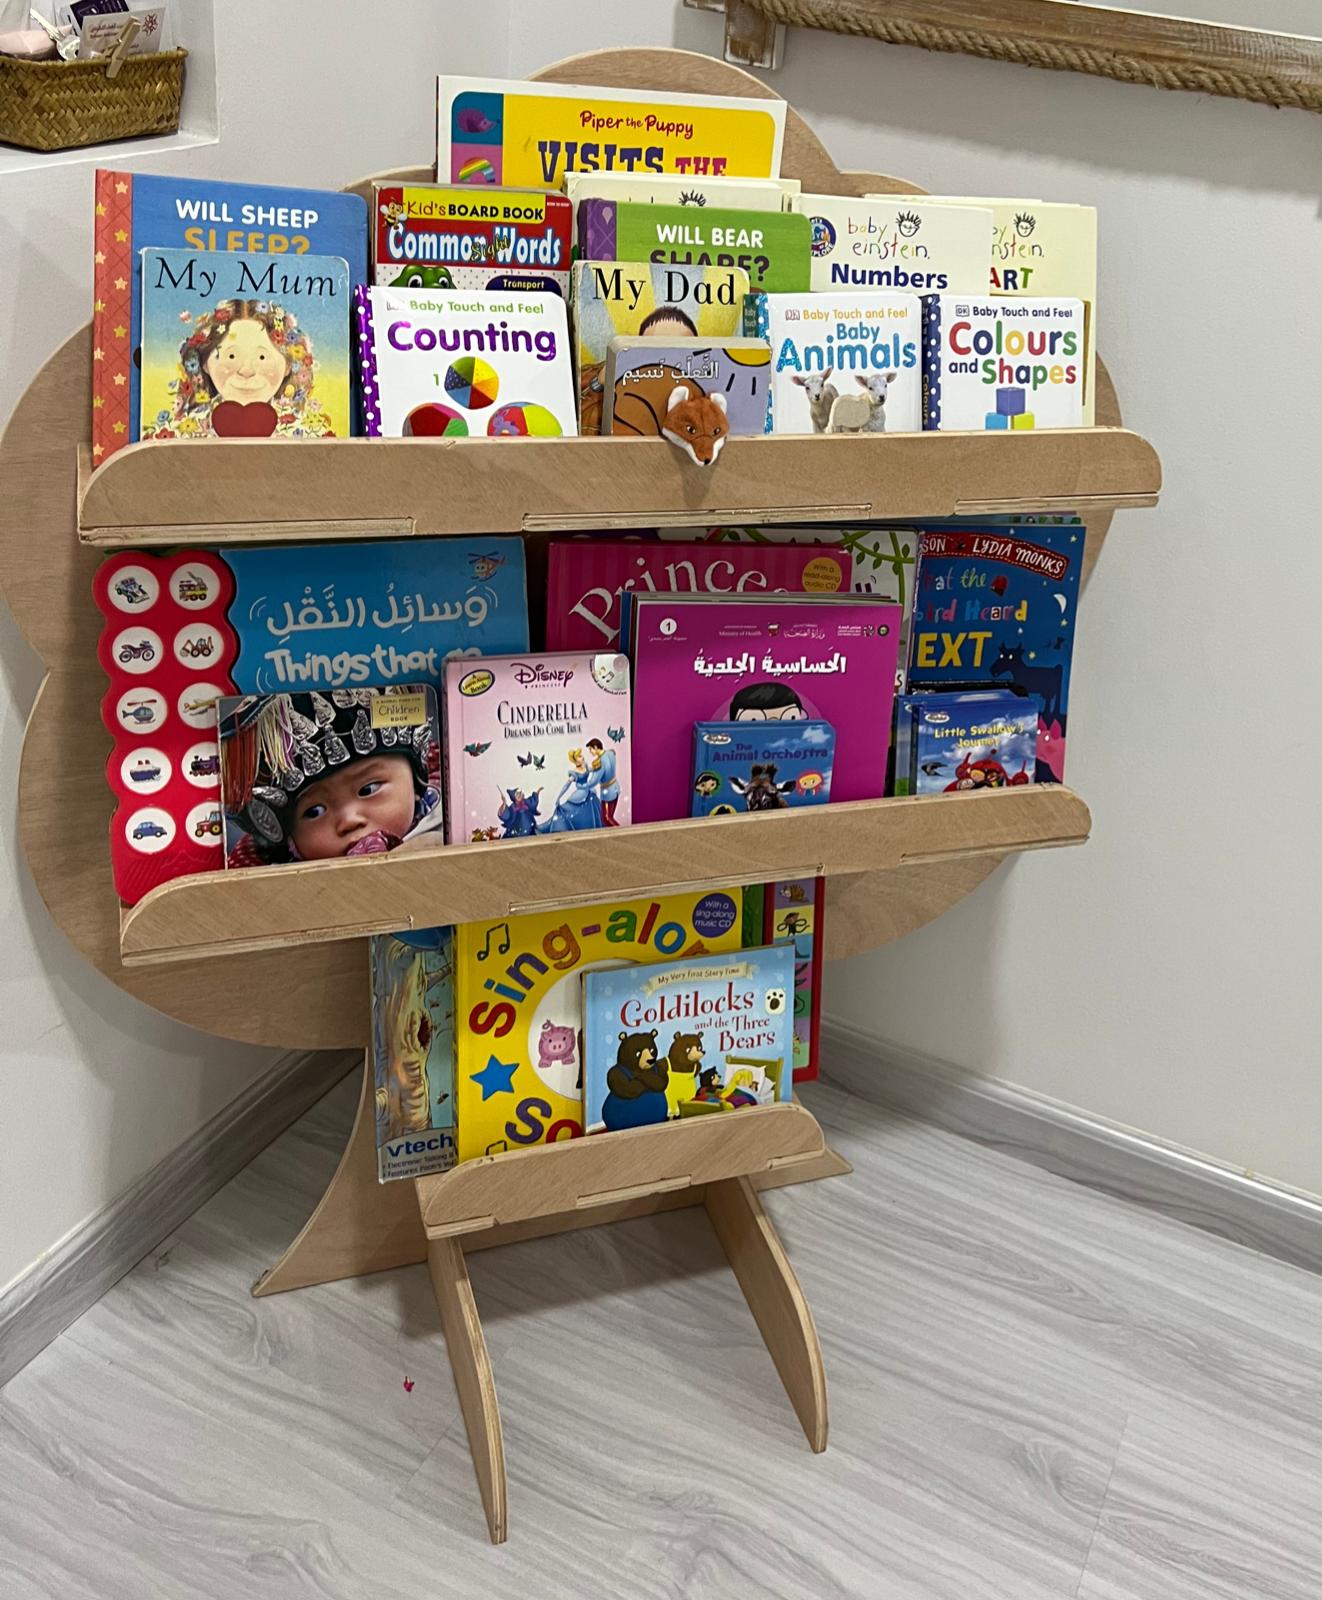
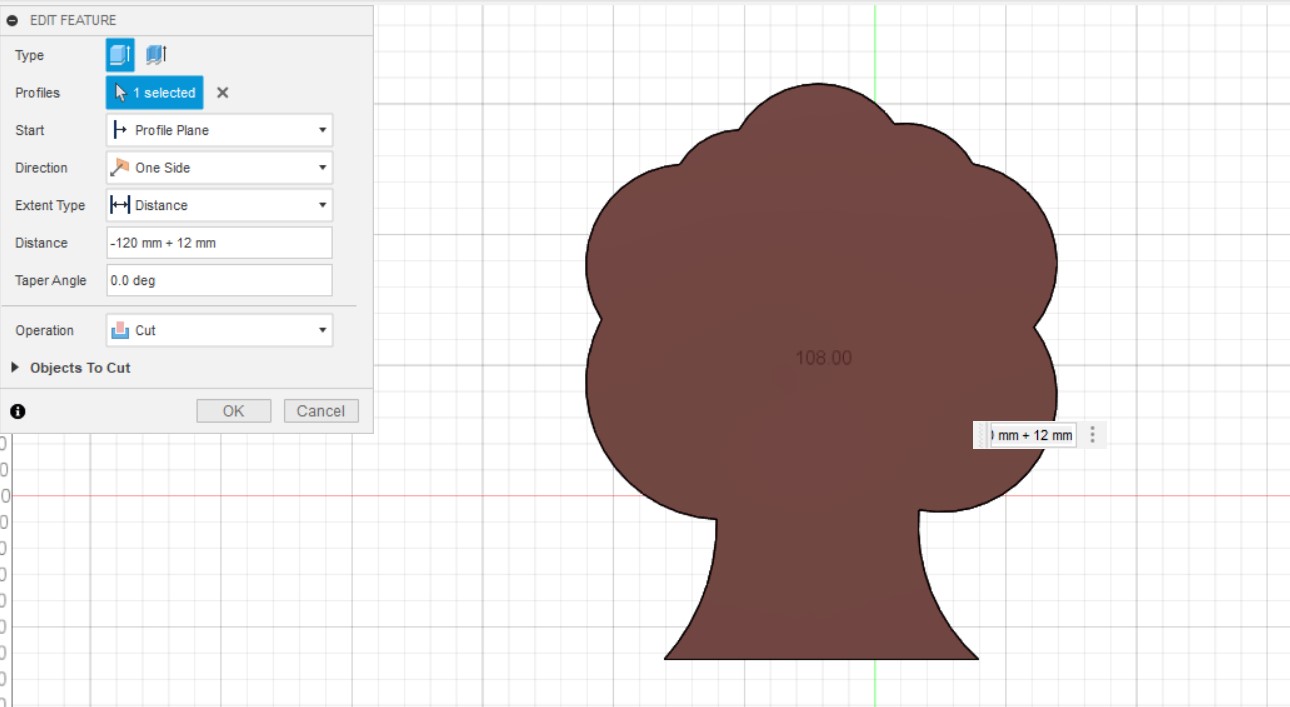
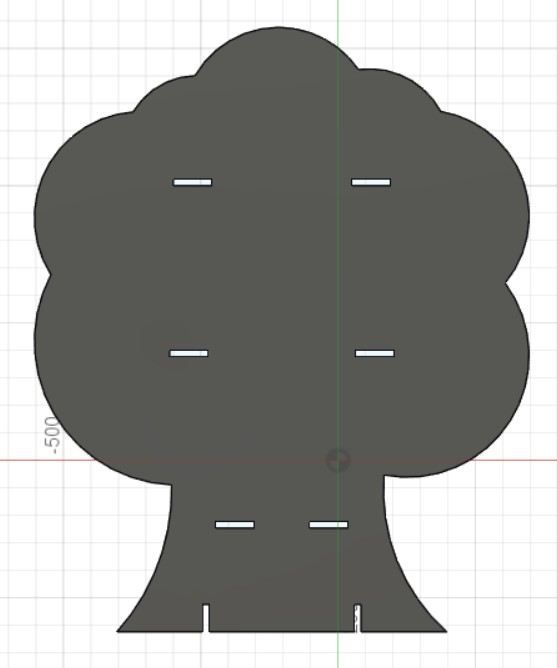
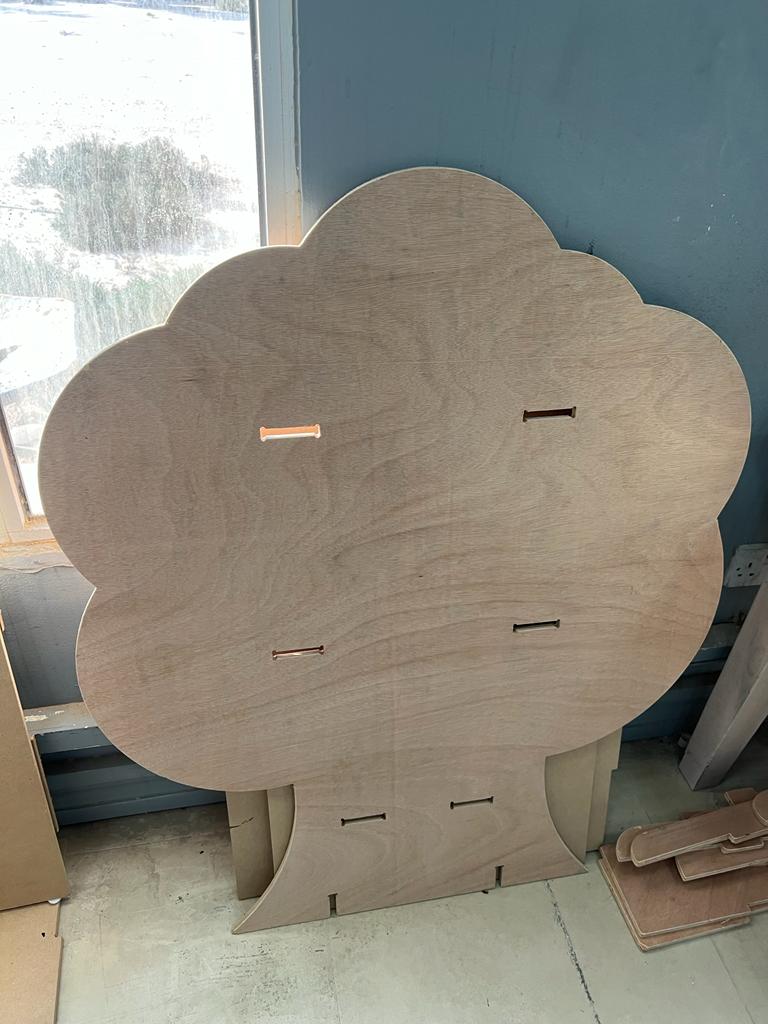
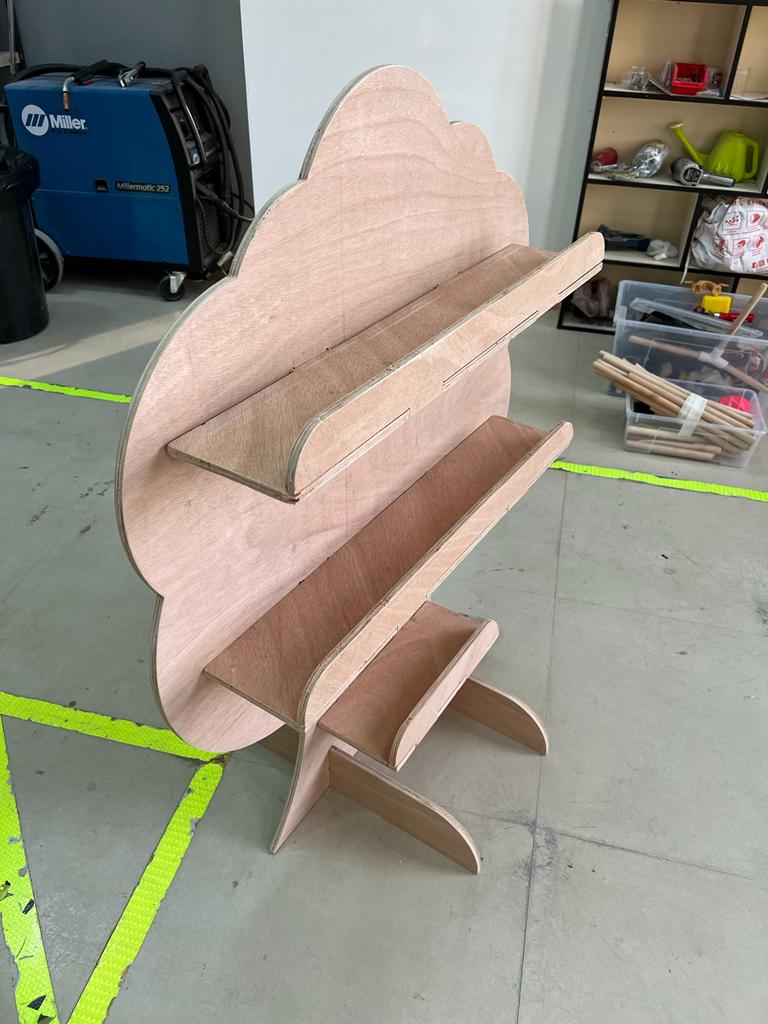
It was required to design a large scale design that is suitable for kids; therefore, a design for kids bookshelf were made to the CNC machine. The design contain a tree which is the main part of the bookshelf, then three shelfs were designed to be fixed to the tree. Two shelfs out of the three has the same dimension, while the third shelf is smaller since it will be fixe on the lower part of the tree. Furthermore, two stand were designed to hold the tree to avoid failing down. All these part were designed to be fixed with each others with out the need of metal nails or glue.
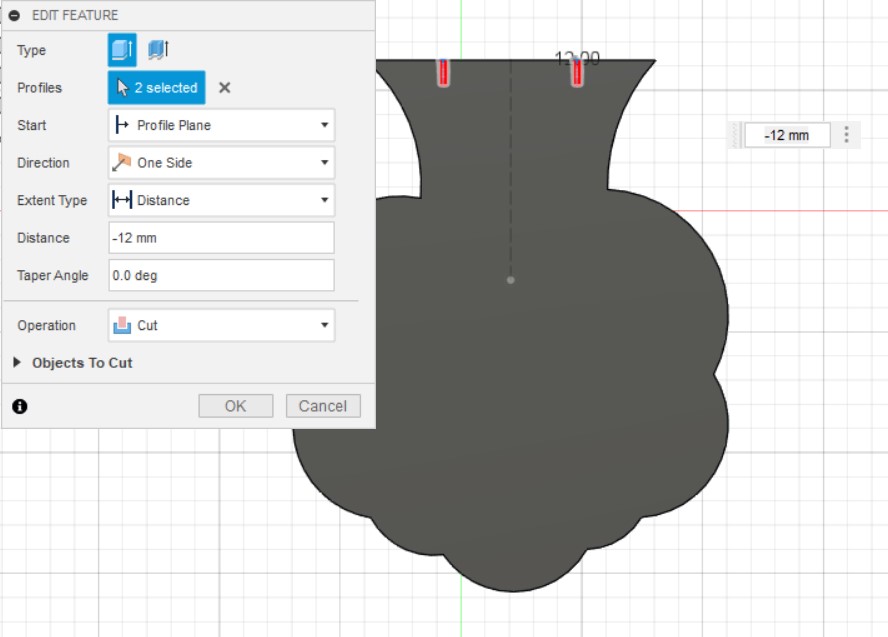
The design were made by using Fusion360 software, were the tree was designed in beginning and extruded to the same thickness of the plywood thickness which is 12mm as it can be seen in the bellow photo:
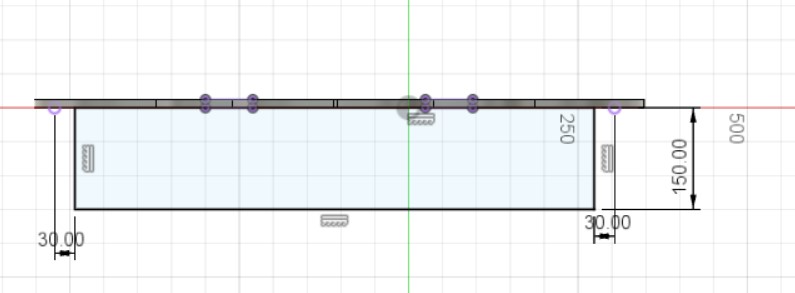
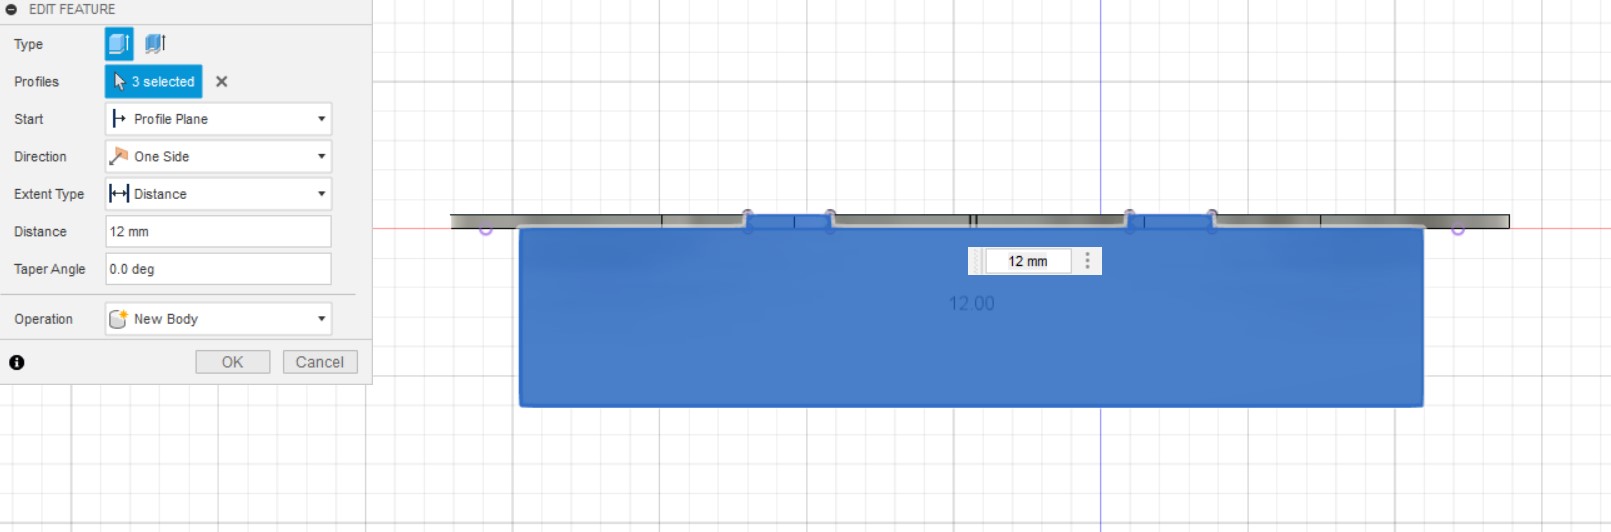
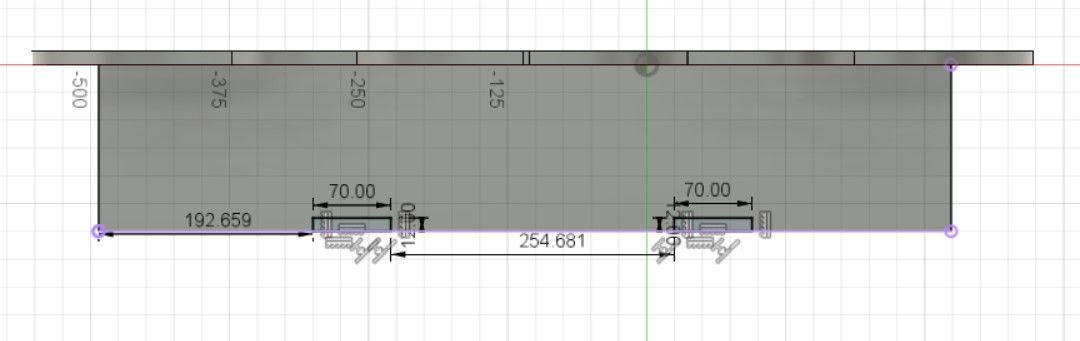
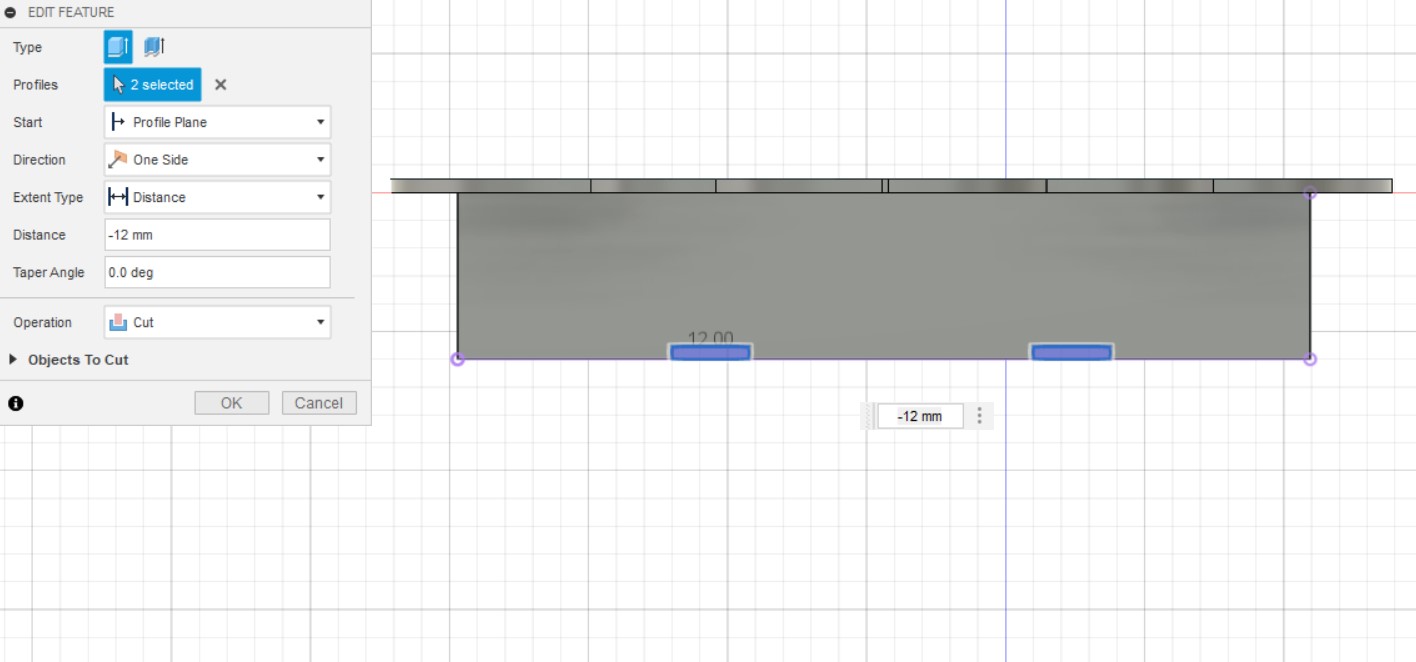
After extruding the main part, a cut were made in the main part to be able to fix the stand and shelfs to the main part:
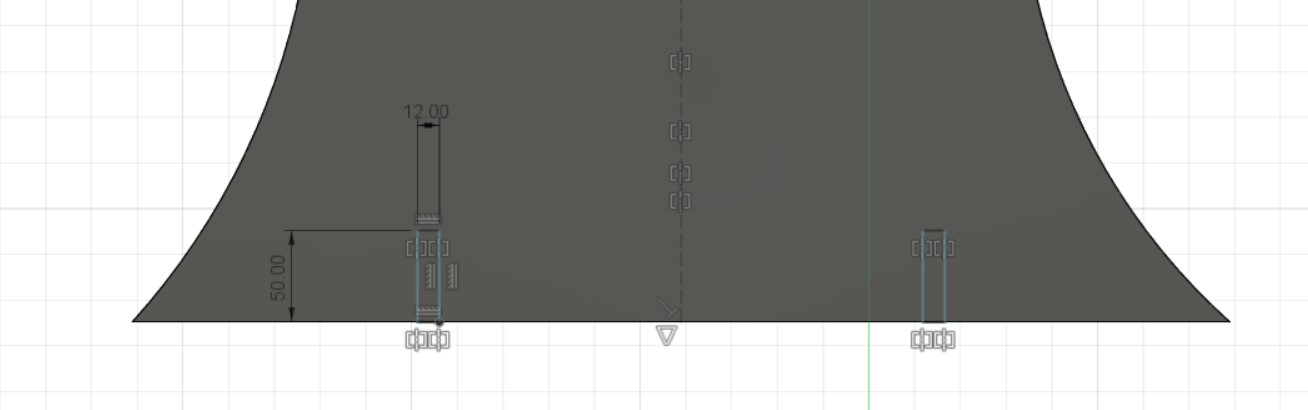 Sketching the on the part for the stand.
 Extrude cut for the unwanted parts.
 Sketching the on the part for the shelfs. As it can be seen in the sketch,, the hight of the hole is less than 12mm which is the thickness of the used material. The reason of making the hight of the hole less than the thickness is to ensure that the parts will be fixed very to each others.
 Extrude cut for the unwanted parts.
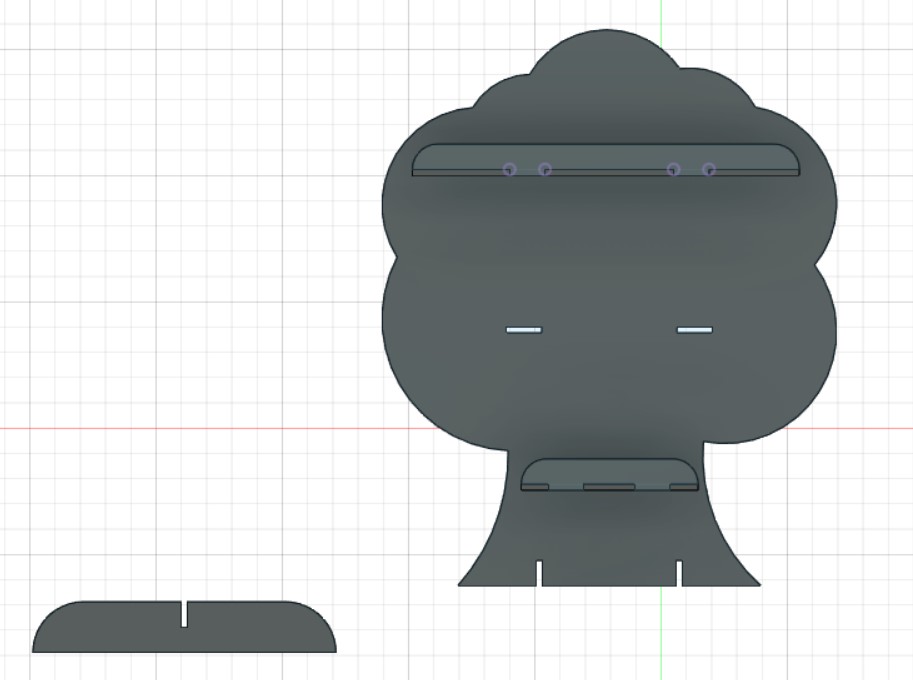
 Final view for the main part after removing the unwanted parts, were the stand and the shelfs will be fixed.
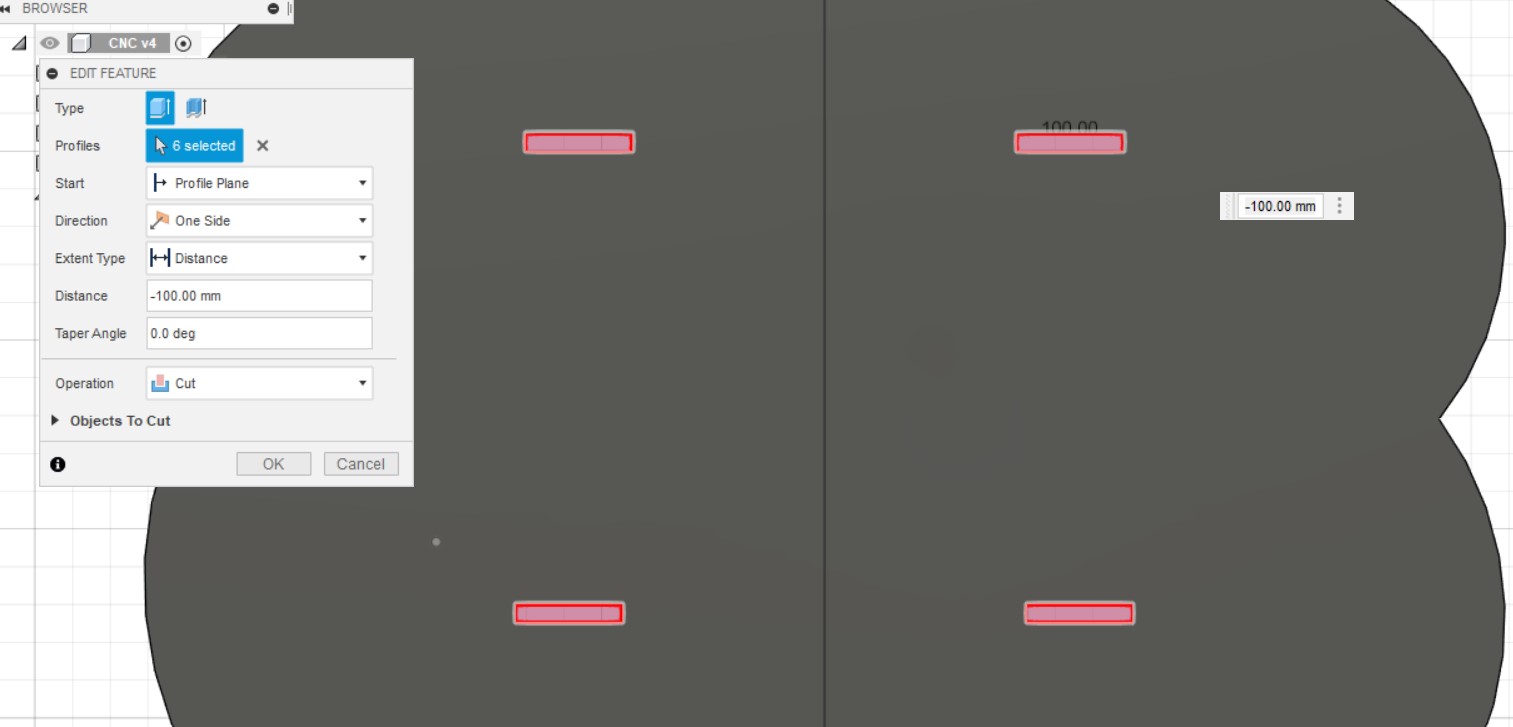
After designing the main part, the shelfs can be designed directly on the main part so the dimension will be the same and it will be presented to be checked before cut it in the CNC machine.
 Extruding the shelf sketch as the thickness of the used material (12mm)
 Sketching the on the part for the book stand.
 Extrude cut for the unwanted parts.
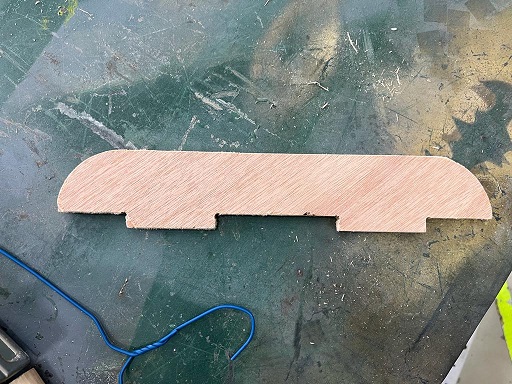
The following photo present the final view that will be cut in the CNC machine. it can be seen that only one long shelf were designed because it dimension is similar; therefore, while applying the design in the CNC machine, the shelf will be duplicate:-
The following link can be used to download the design:-
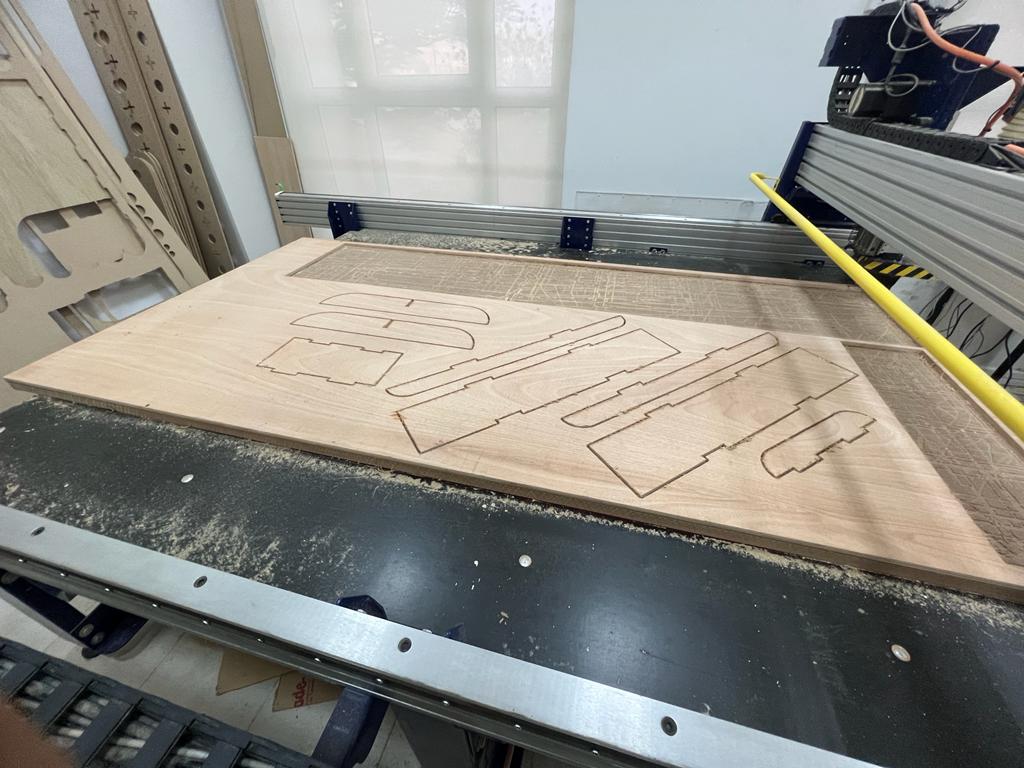
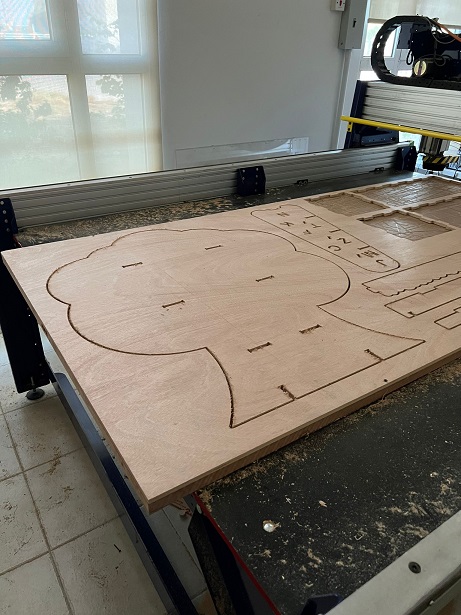
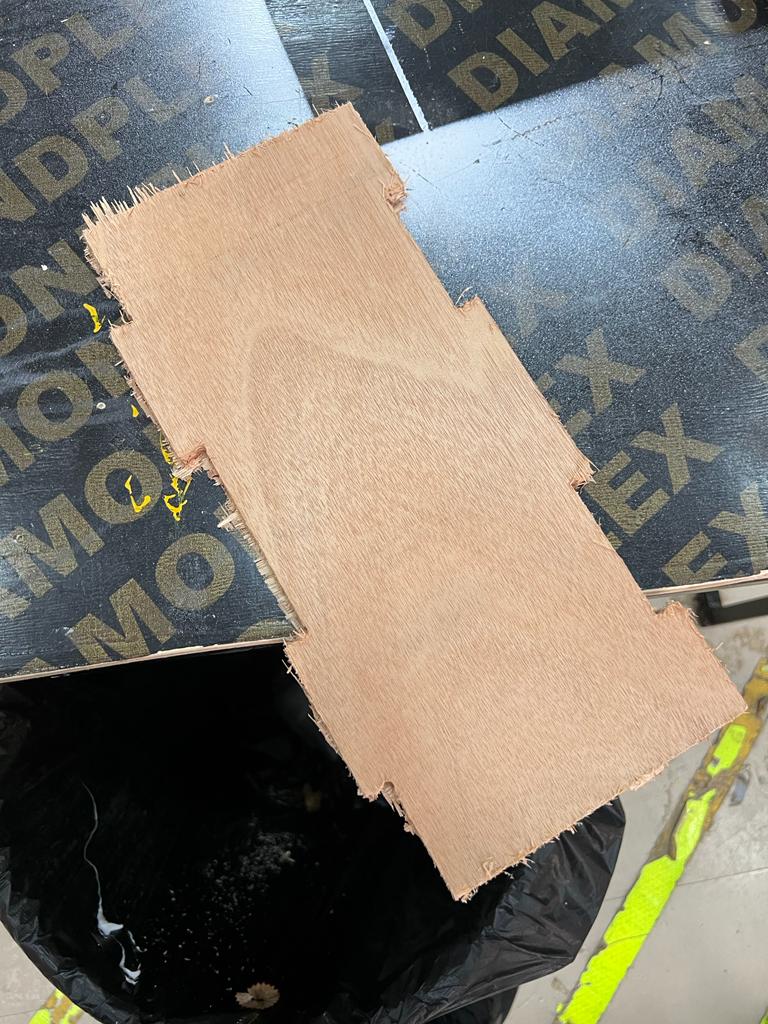
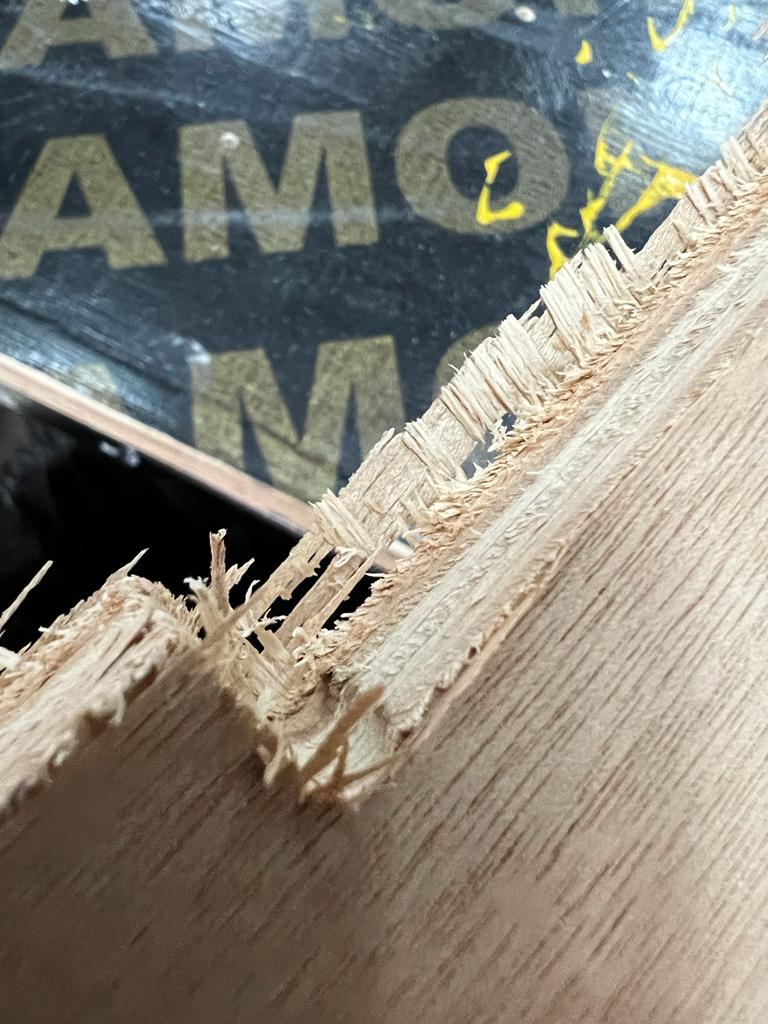
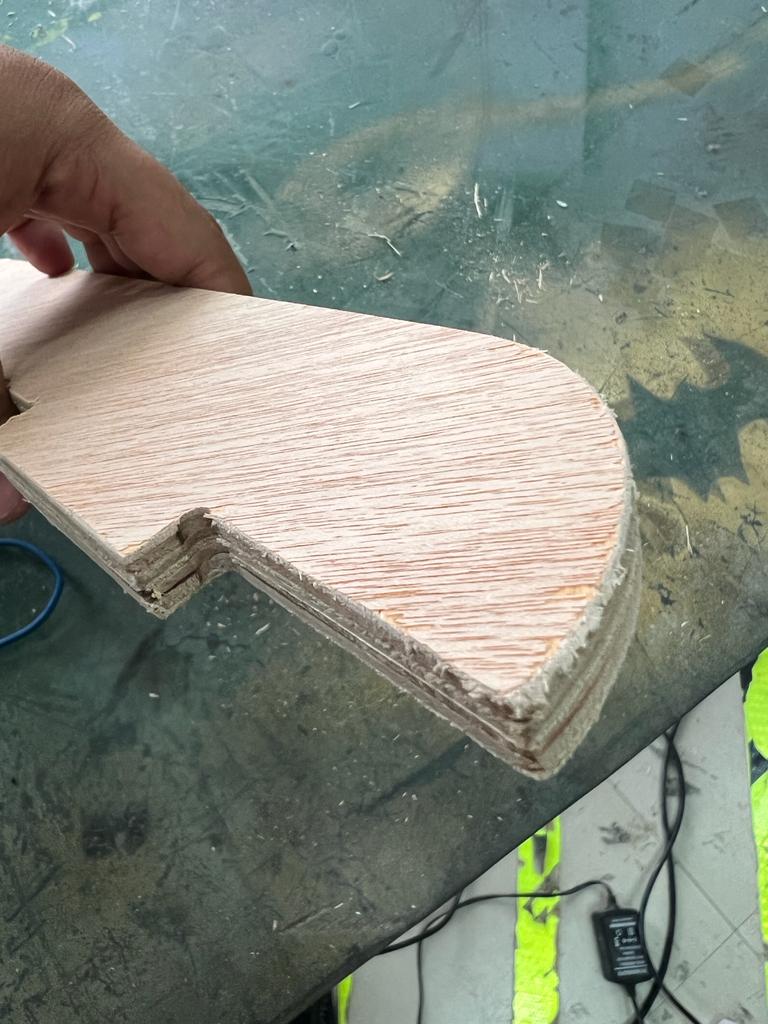
After the CNC machine finish from cutting the parts, it is found that there are tabs not cut. These tabs kept to make sure that the parts do not move while cutting it by the CNC machine that should be brake to remove the part from the plywood as it can be seen bellow:-

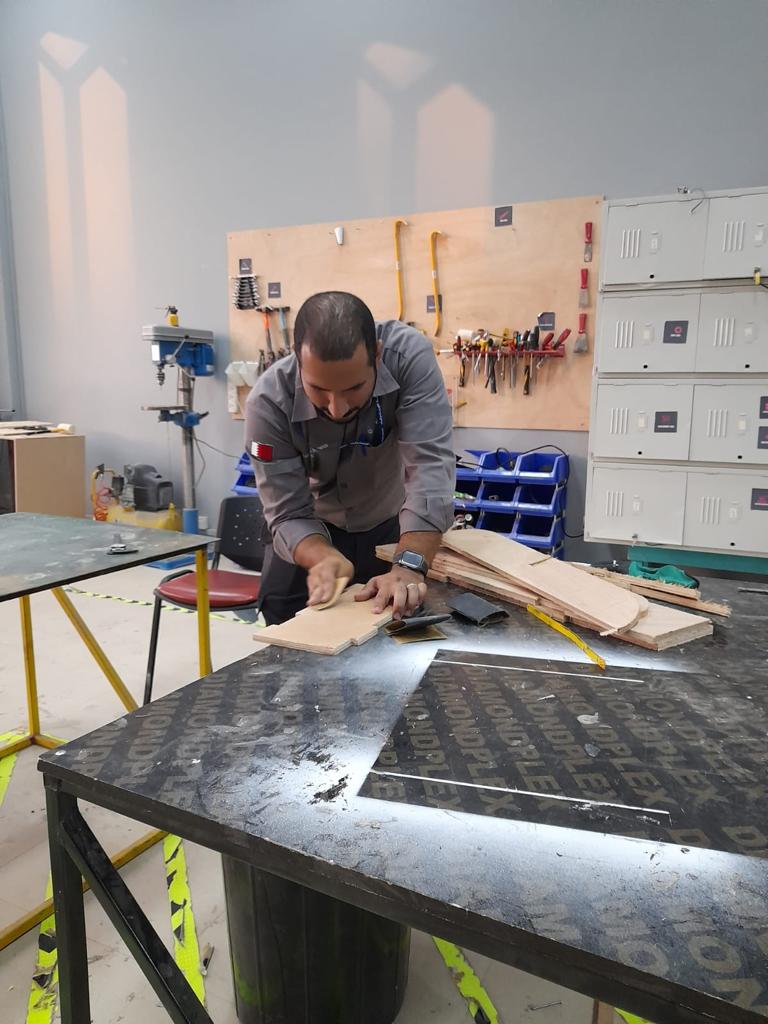
Furthermore, one of the problem that the cut part cannot be consider as a final part, because there are some additional wooden part that need to be cleaned by sandpaper to cut the finalized part. Three sandpaper where used with different grit, starting by 60 and 320 to get very smooth service were the lowest number has large grain and the highest number has smaller grain:-
The following photos present the use sand paper and how they were used to finalize the parts:-
Final part after sanding:
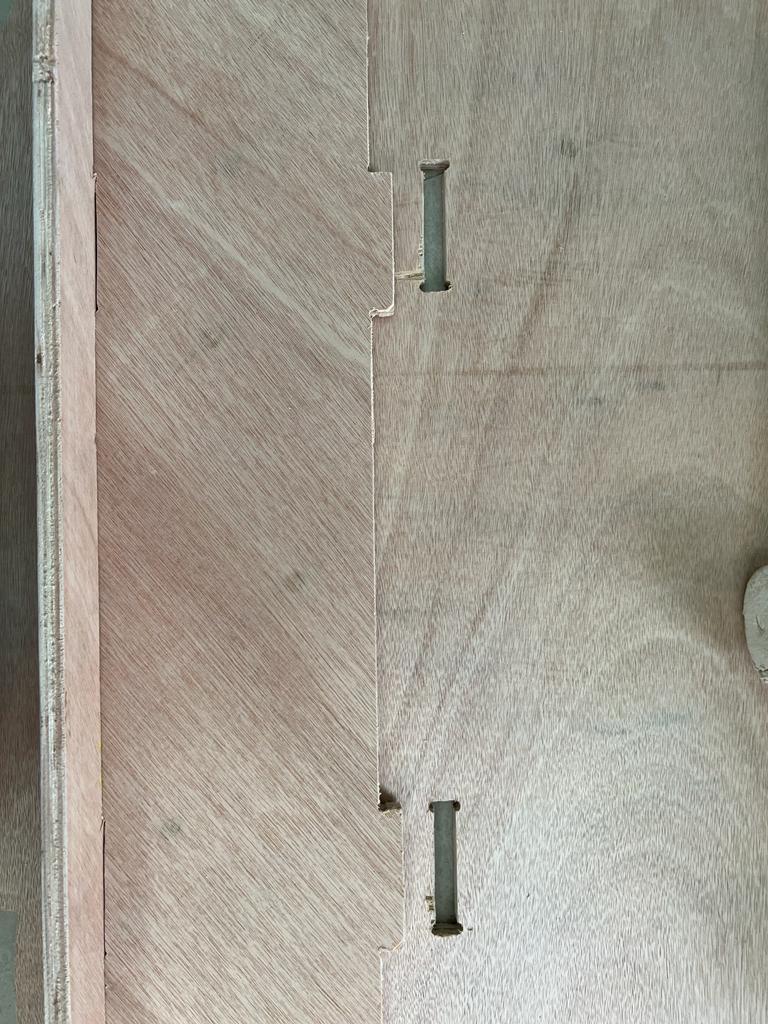
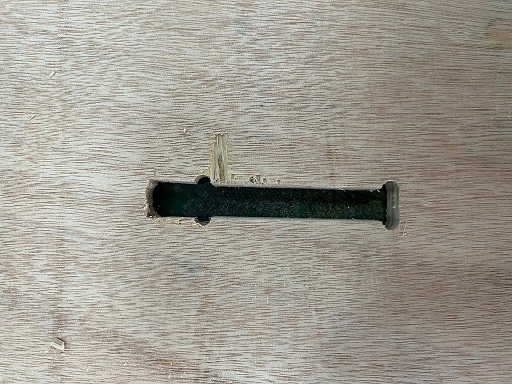
After sanding all the part and be ready for assembling, it is found that one of the holes for the lock is not aligned with the second part as it shown in the following photo:-
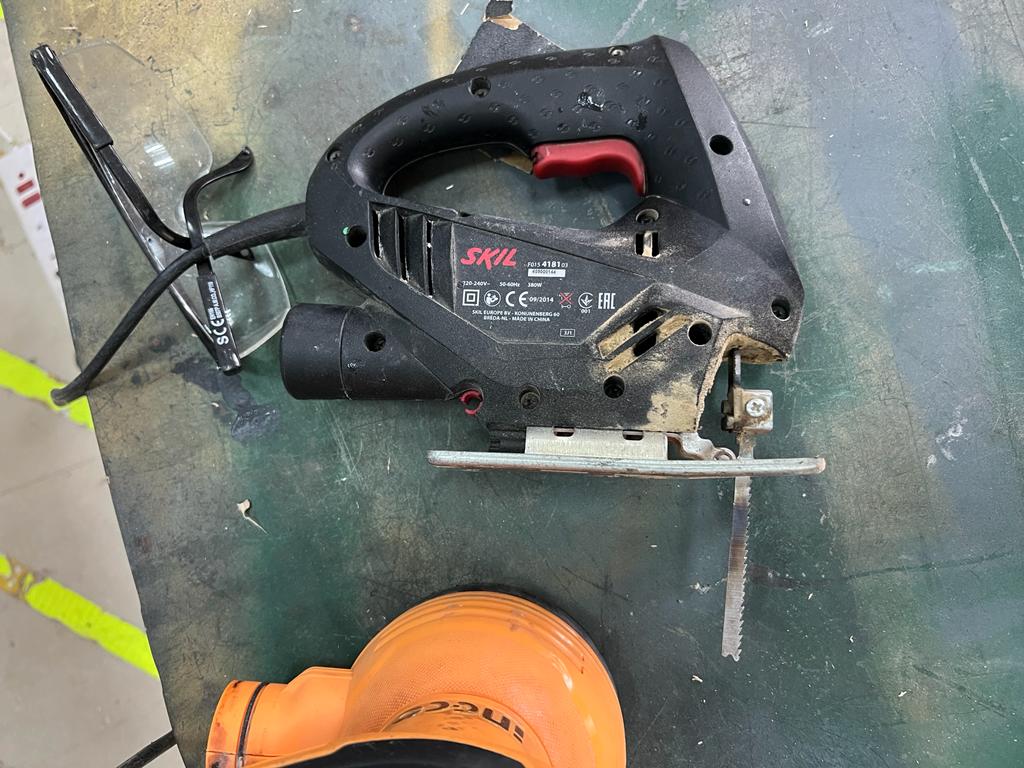
Therefore, a jigsaw were used to aligned the hole with the other part to make sure that they fixed with each other properly:-
Finally, assembling all part with each others to get the final bookshelf that is ready to be used and hold books and stories.
The following link can be used to download the design:-
After completing the CNC project, I took the permission to take the bookshelf as a gift for my daughter. She was very happy with the bookshelf and she start putting hear stories on it as it can be seen in the following photo:-