8. Moulding and Casting
Moulding and casting is one of the technique used to convert the 3D designed into real part which can be made by different types of material. The process start by designing the part on CAD program and then milling it on a machinable wax by a milling machine. After, pouring a special material into the cavity that made by the milling machine to get the mould that has the same details of the design. Finally, casting any selected material such as resin, soap, or gypsum, each type of these material has different specification and need for different time to be solid. Finally, the final product can be taken out from the mould after making sure that it fully converted to solid. Following, a detailed information with photos that will present the way to apply such technique and how we get the needed information to start the process.
Group Project
We were split into teams of two for our group project, and we were allowed to select any of the resources to explore. We were also given the opportunity to fill out the necessary information in a Google document that we would all have access to and share. Safety data sheets link
Individual Project
Designing
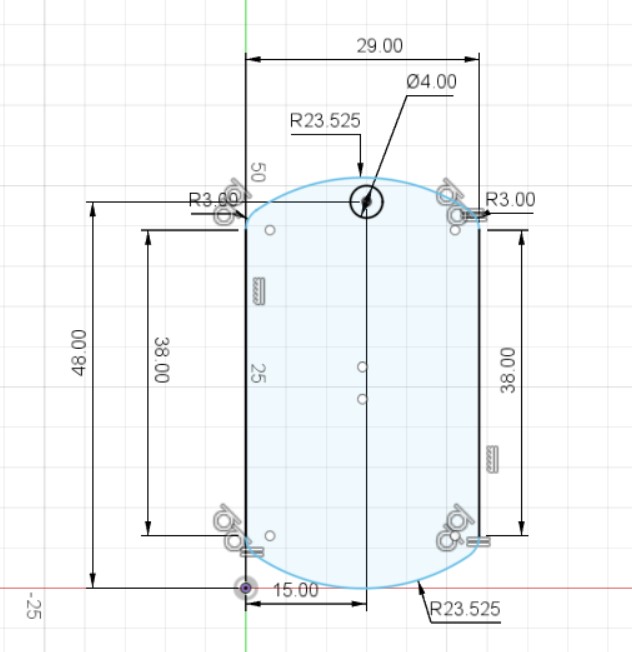
For the individual project we were requested to design our own key chain or a medal. Therefore, I chose to design a medal for my daughter back bag since she will attend necessary this year. The medal I chose to design is similar to the army medal, were there name wrote on it. So I took the dimension of the medal online and I redesign it according to the allowed dimensions which is 3cm x 6cm.
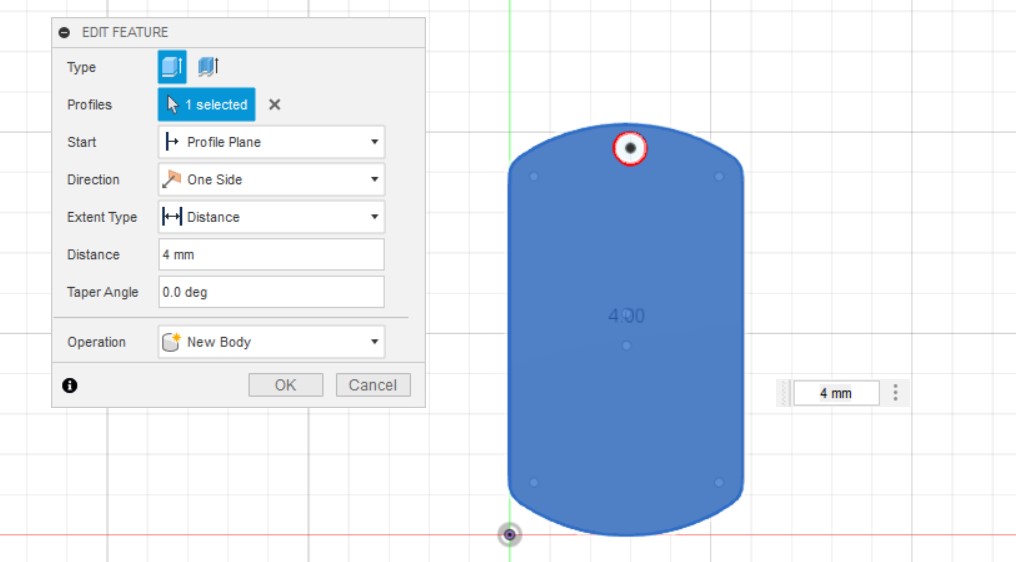
Then, I extrude the sketch to 4mm which is the thickness of the medal:-
After, sketching a boarder for the medal with 1mm and extrude it:-
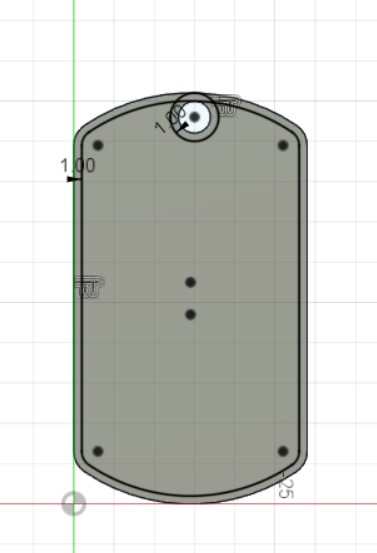
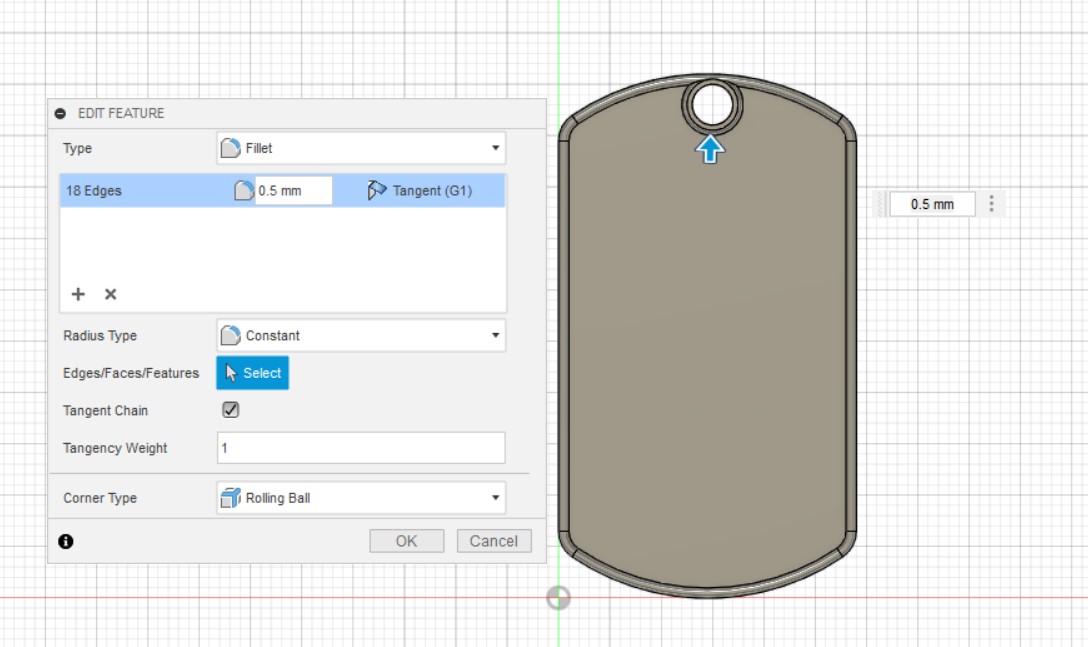
Following, Fillet the boards to get smooth boarder:-
Then, sketching the text wanted on the medal and place it on the face of the part:-

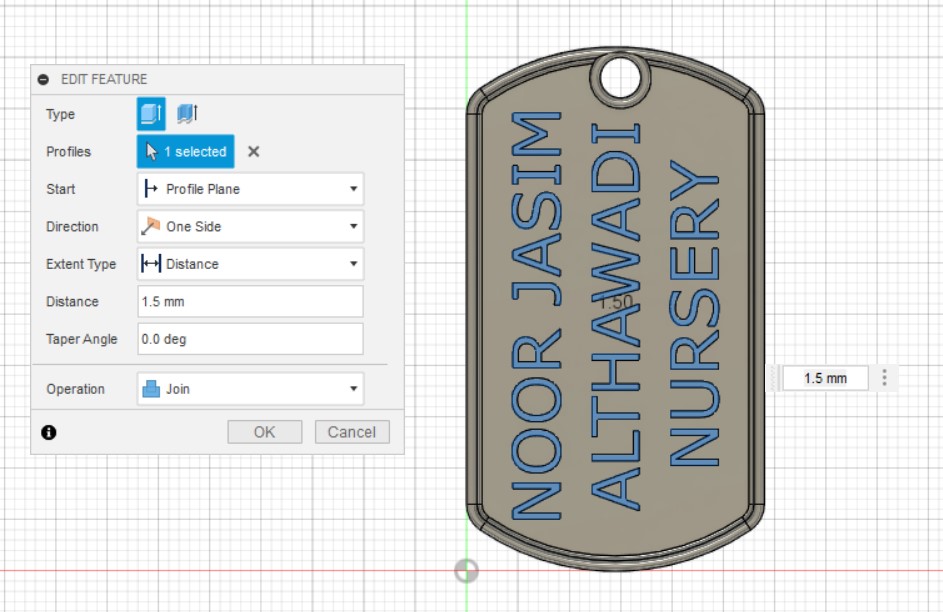
Finally, extrude the name for 1.5mm to show the written text:-
To download the design, please viset the following link:-
Or this Link
Milling and Mould
After completing the design, it is time to mill it in the milling machine. The design sent to the milling machine programme to be checked and edited of five steps before start milling it on the machinable wax.
Step 1: Finding the dimension of the design to compare it with the machinable wax specimen since to design we implemented in the program to save time and to get fully use of the machinable wax:-

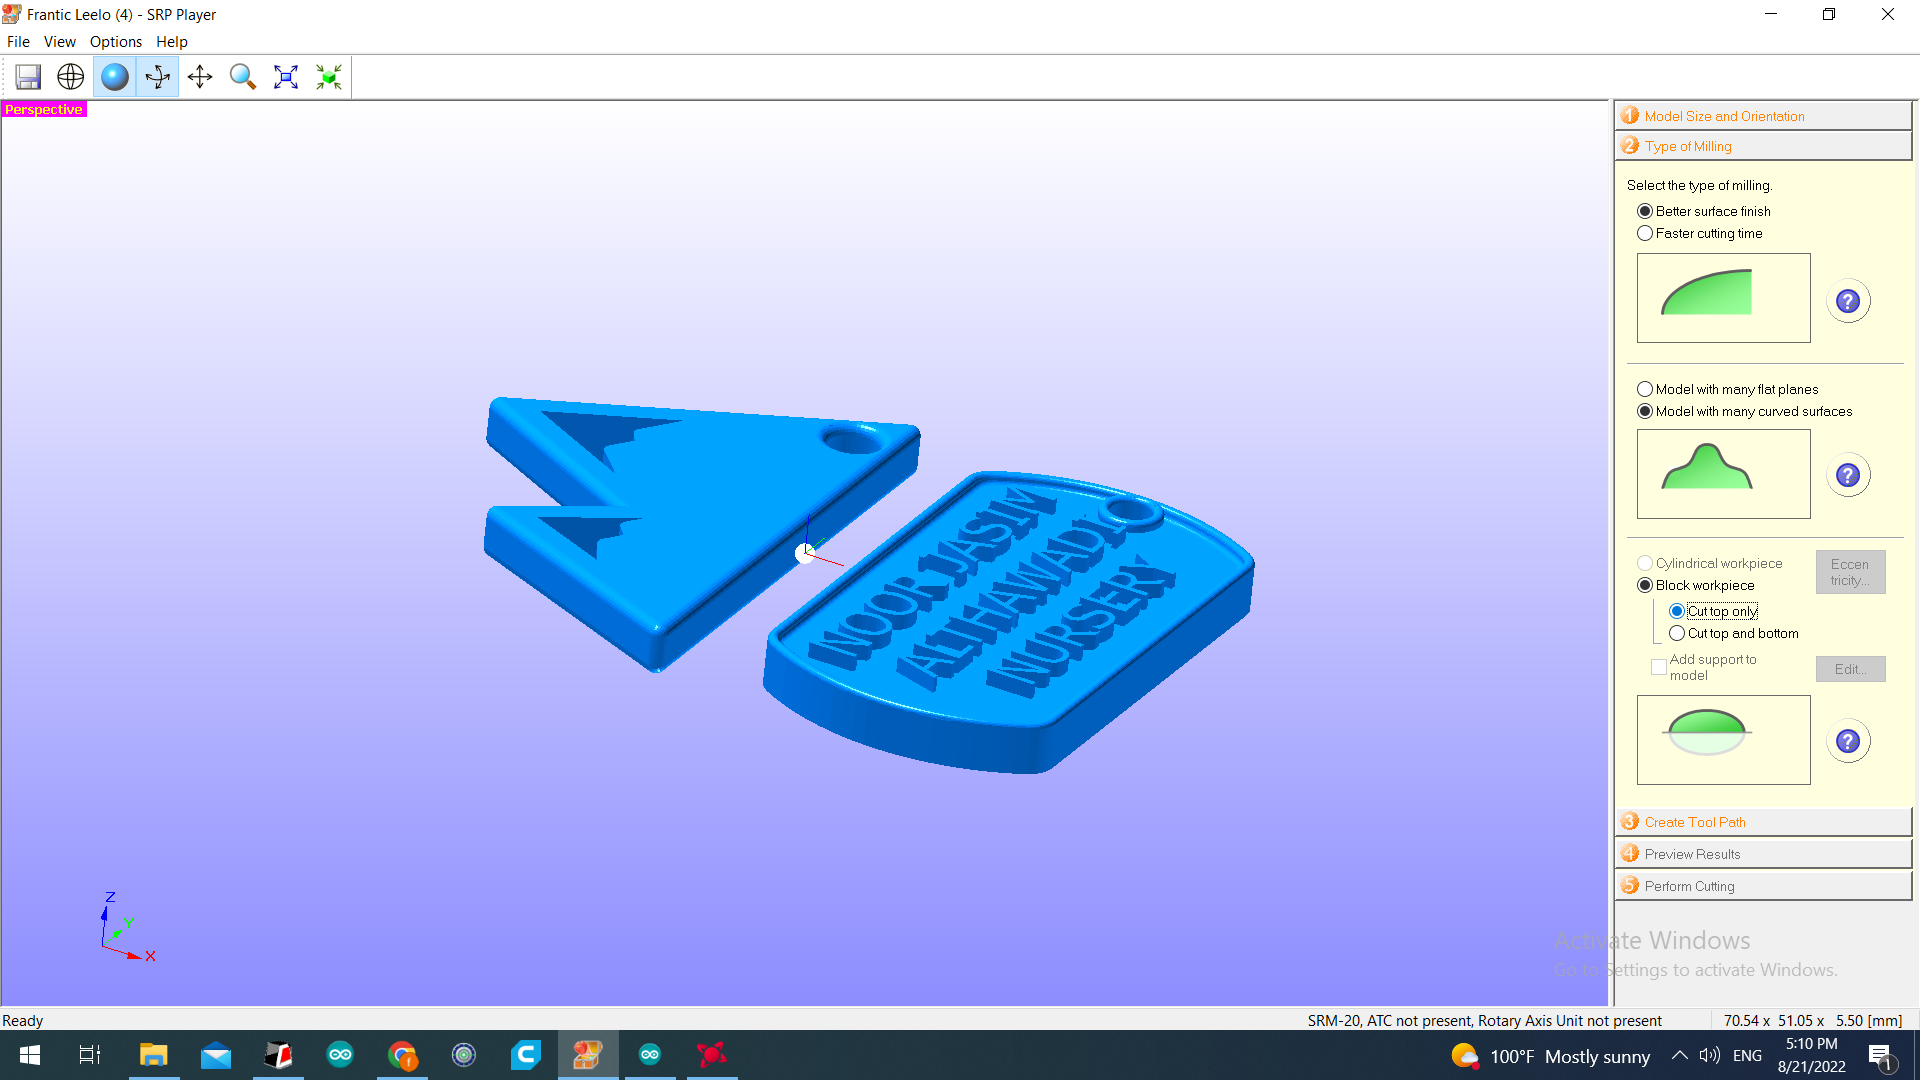
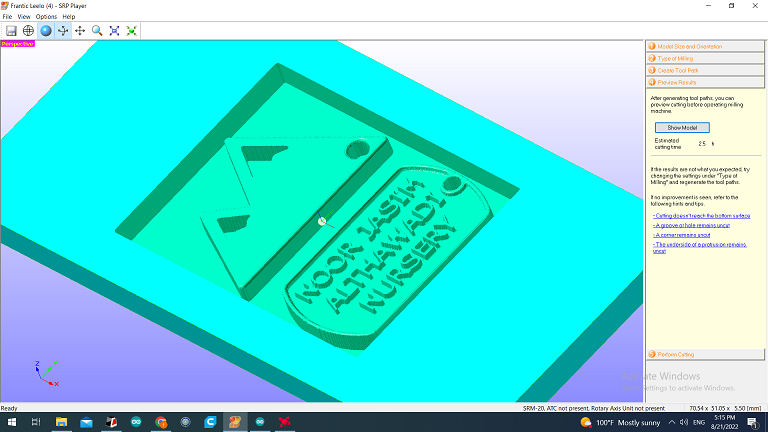
Step 2: selecting the type of milling, if the design need to has better surface finish or fast cutting time, that will affect the needed time to complete milling the part. moreover, to select if the design has many flat planes or many curved surfaces. To following photo present the selection for the design:-
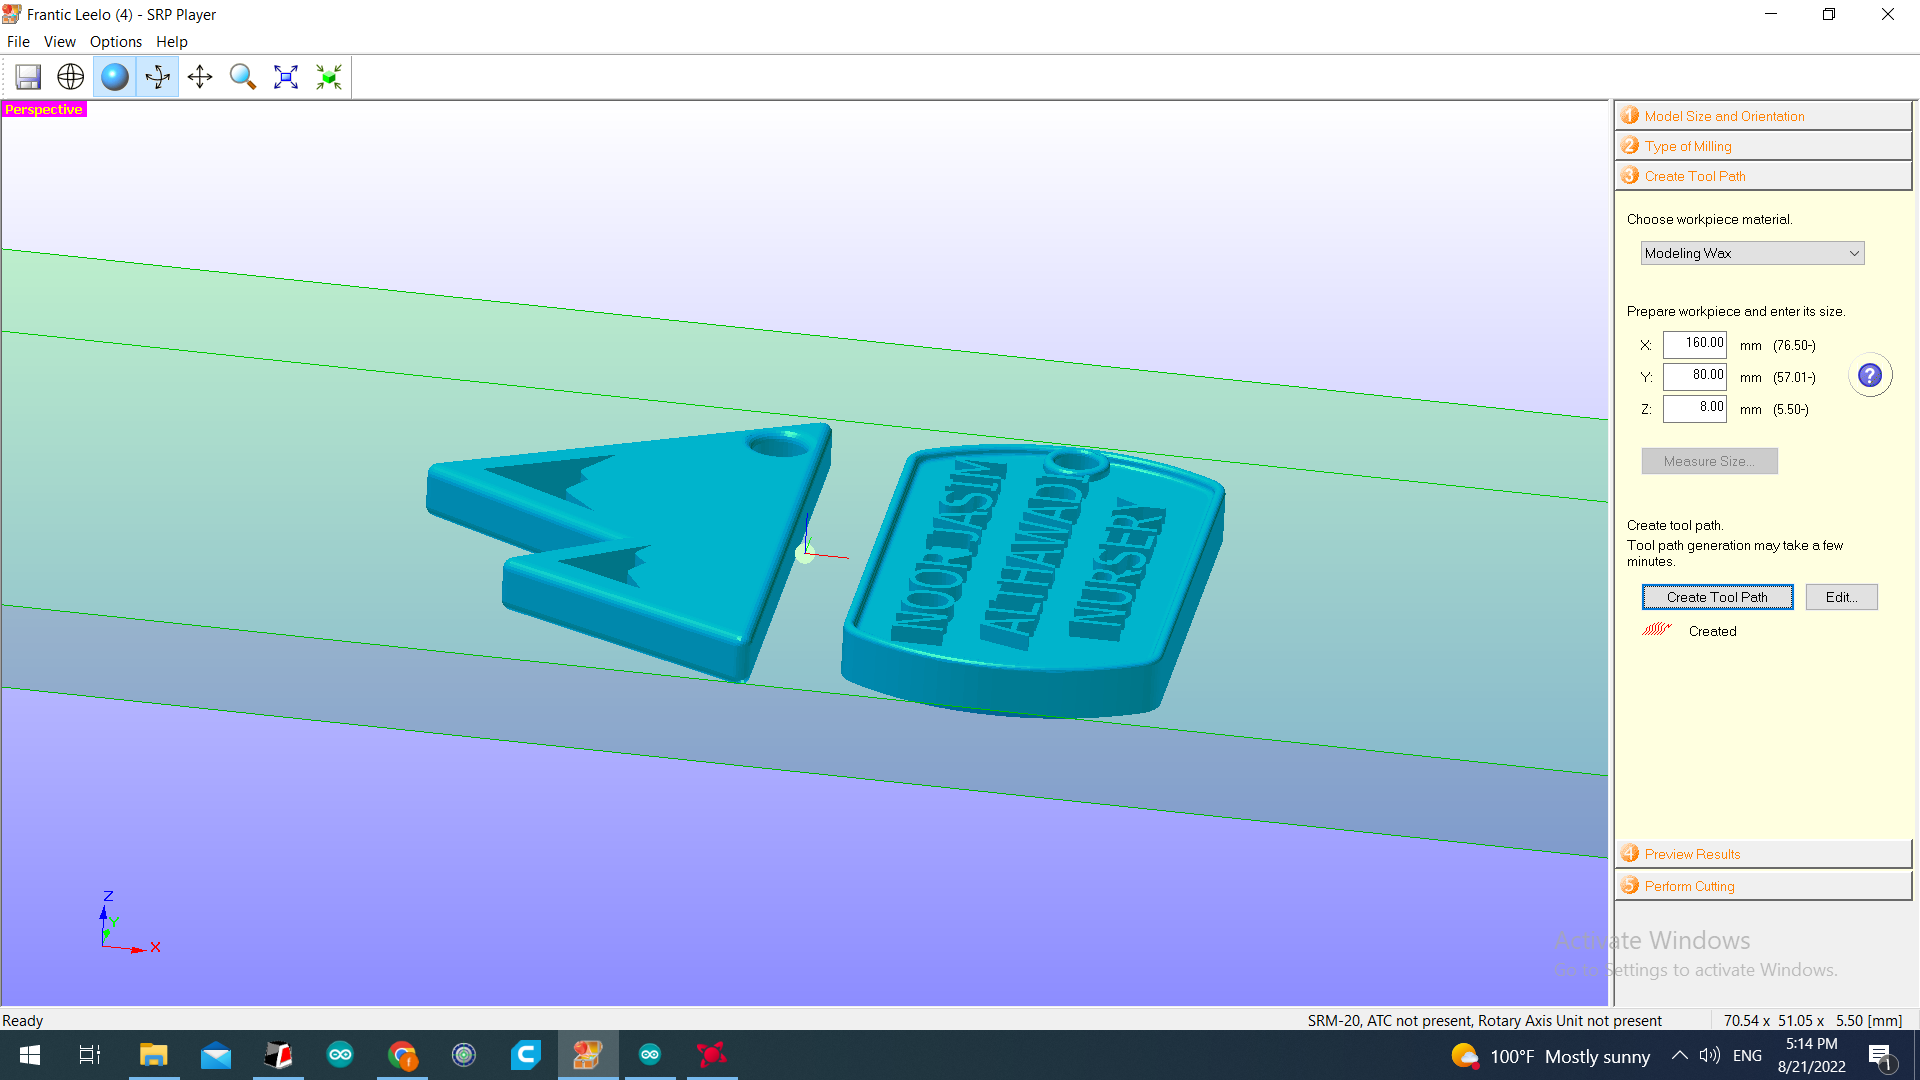
Step 3: Selecting the used material to be milled which is Modelling Wax then set the dimension of the working piece:-
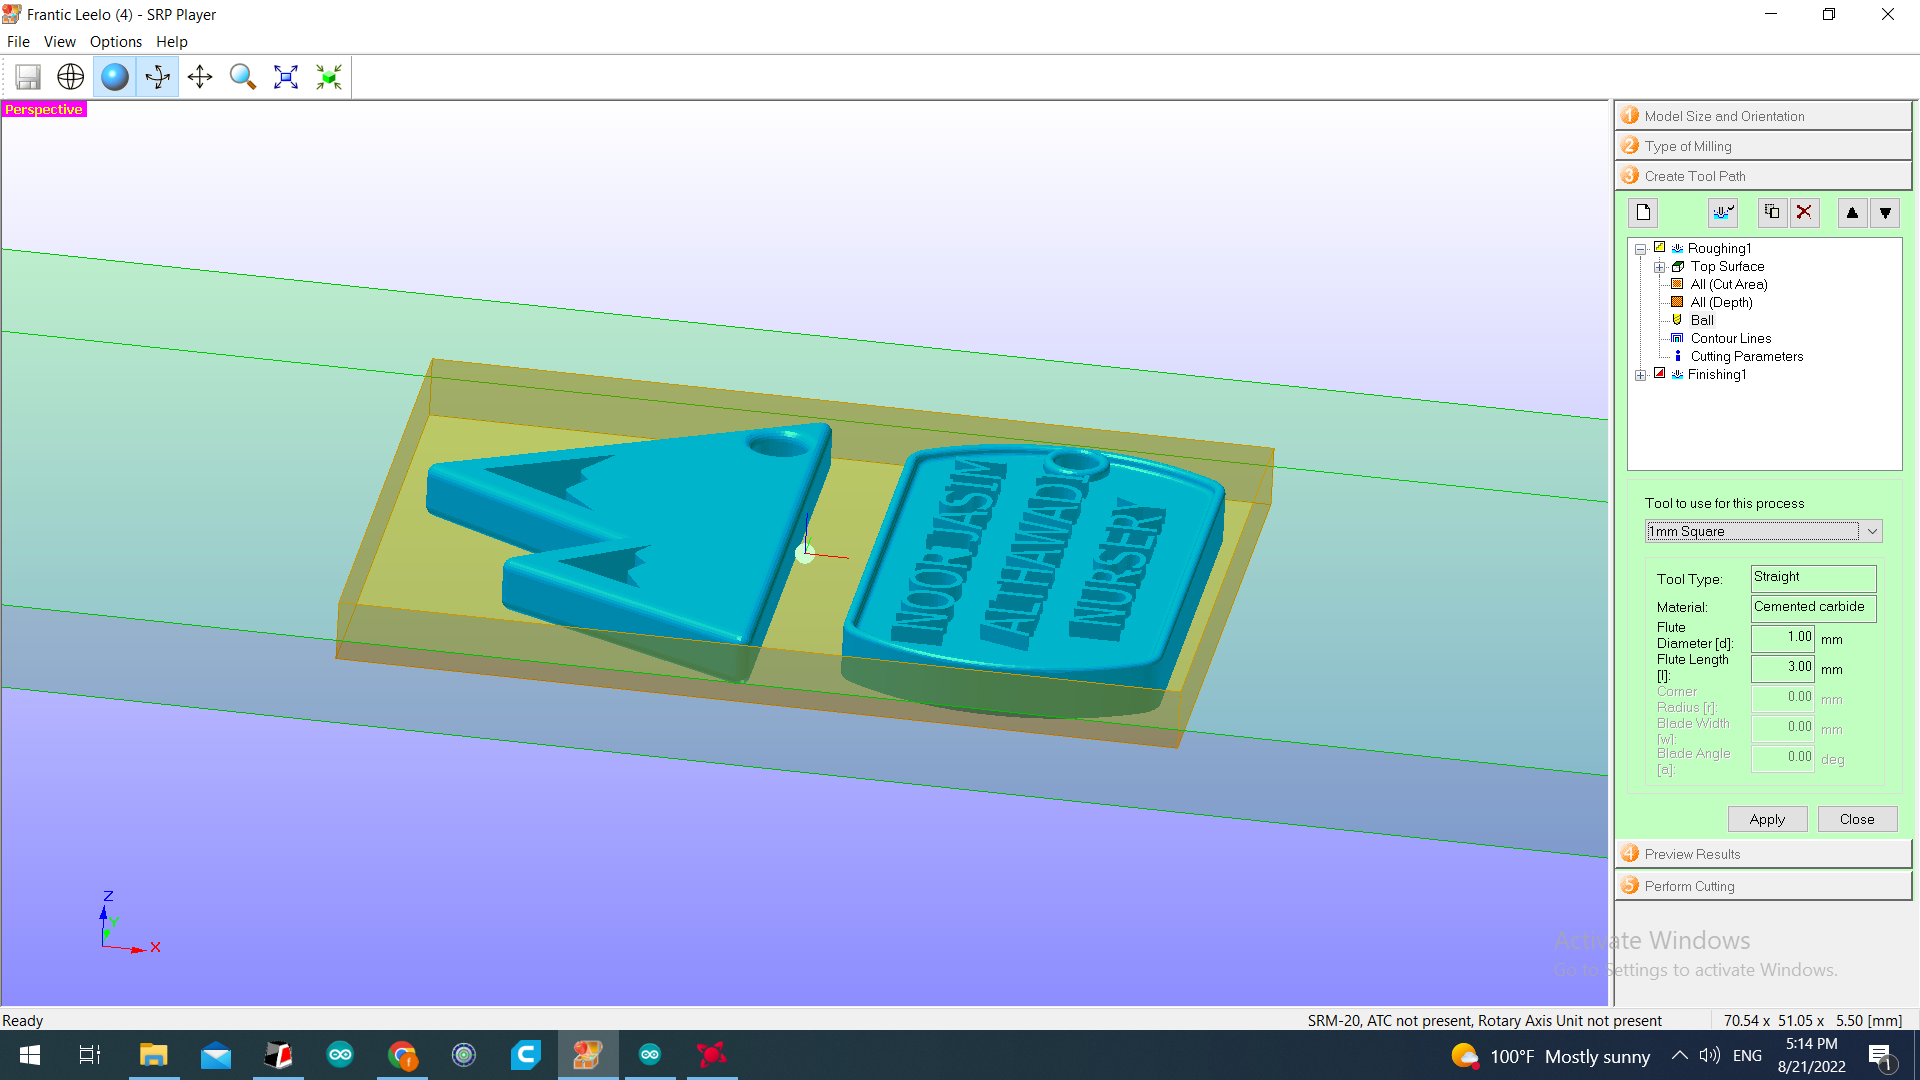
Following, set the dimensions of cutting tool diameter and flute length:-
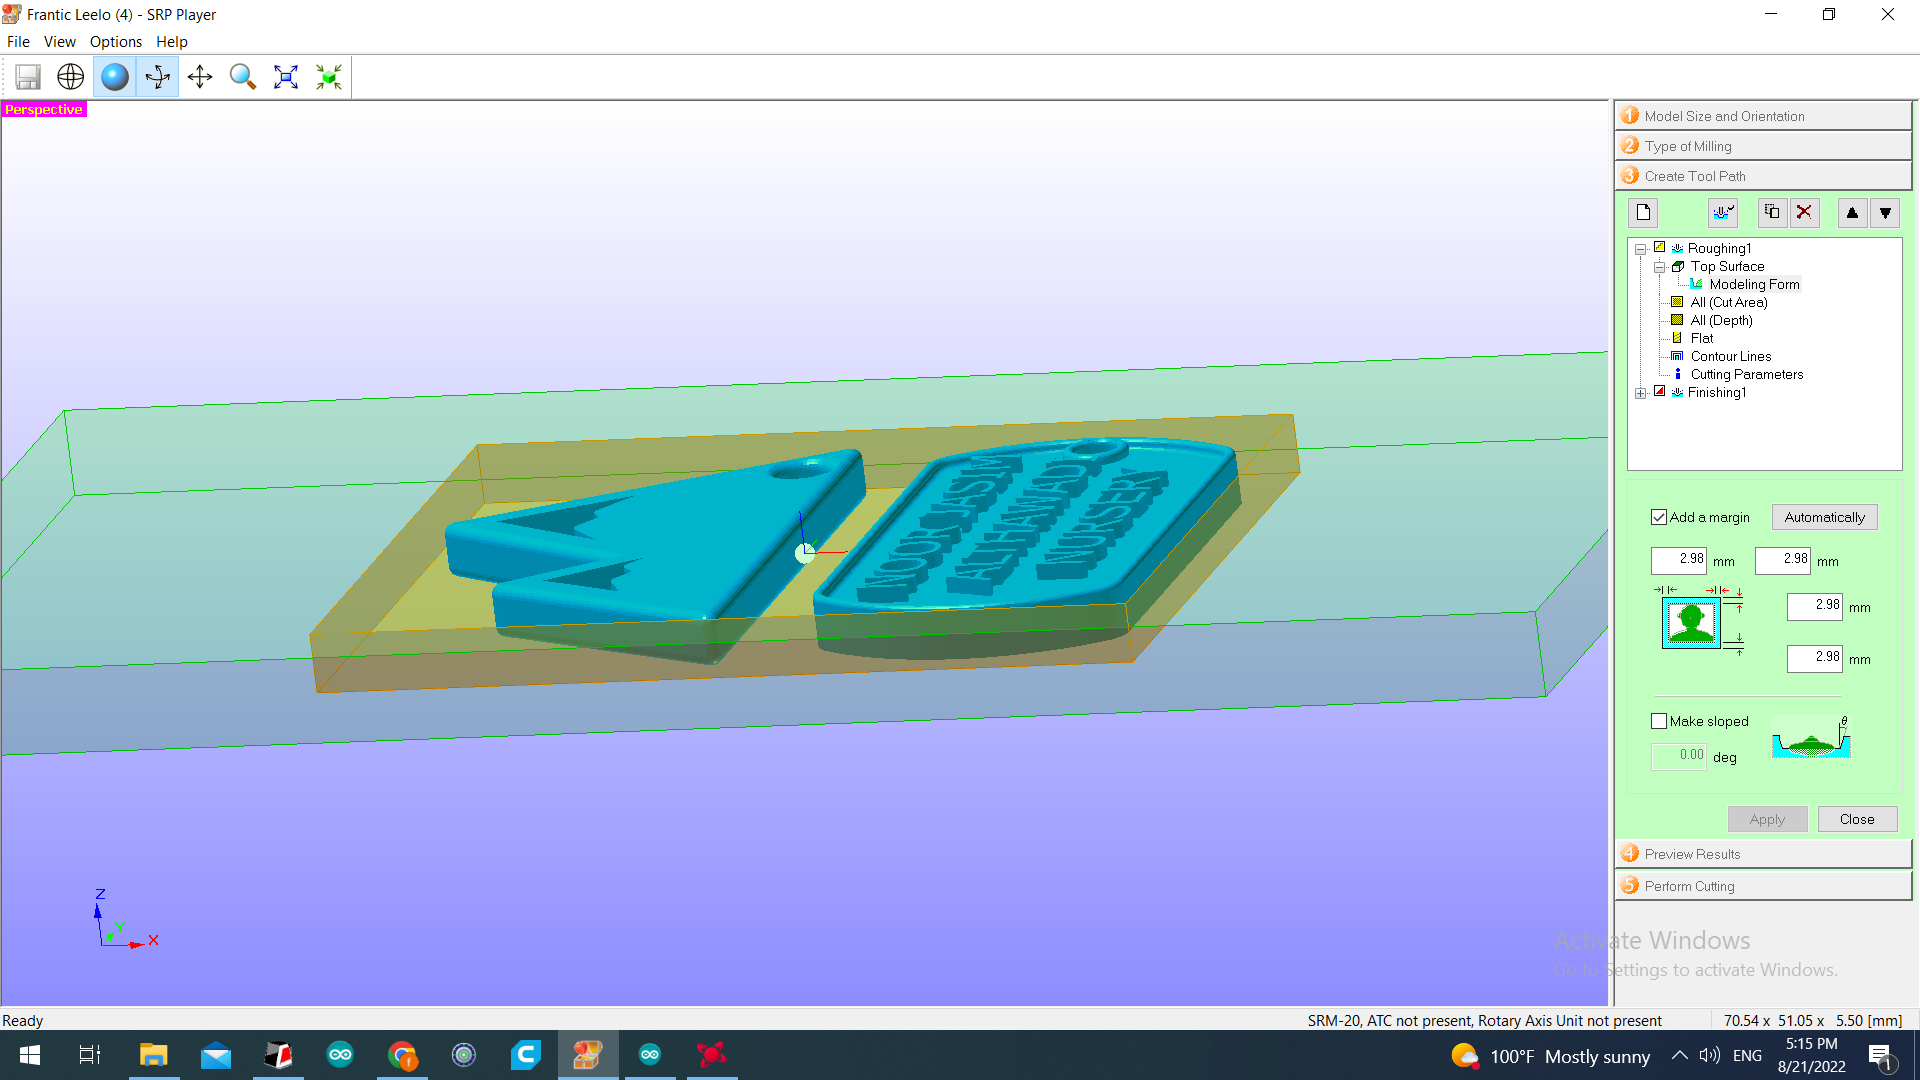
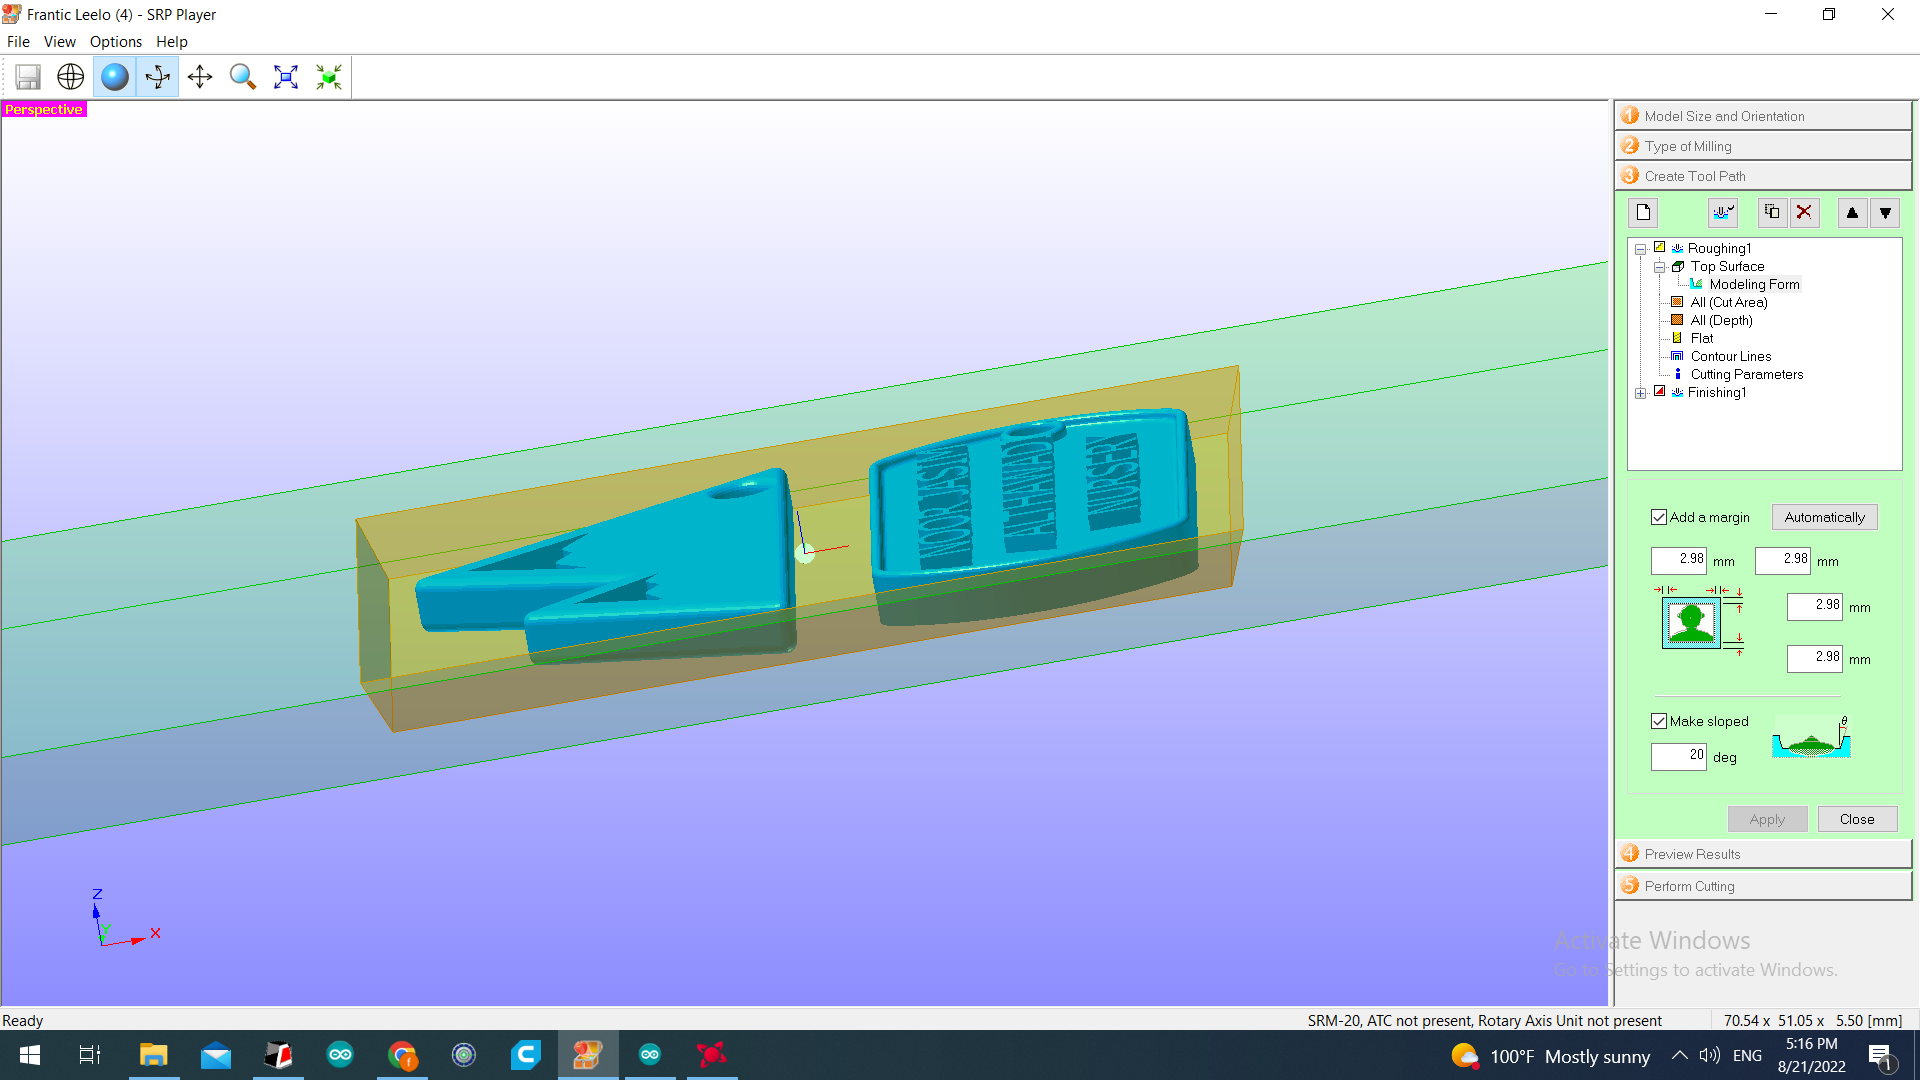
Adding margin to the pert and making a slop of 20 degree, to allow removing the mould after it dry and become a solid:-
Step 4: Checking how the final piece will be shown and the needed time to finish from the design, that will reduce the need of repeat the work from the beginning because some parts may missed if the diameter of the drill bit is larger then holes on the design:-
Note: in this step, it is found that the drill bit will not be able to do all the letter; therefore, the text were changed by increasing it size and font.
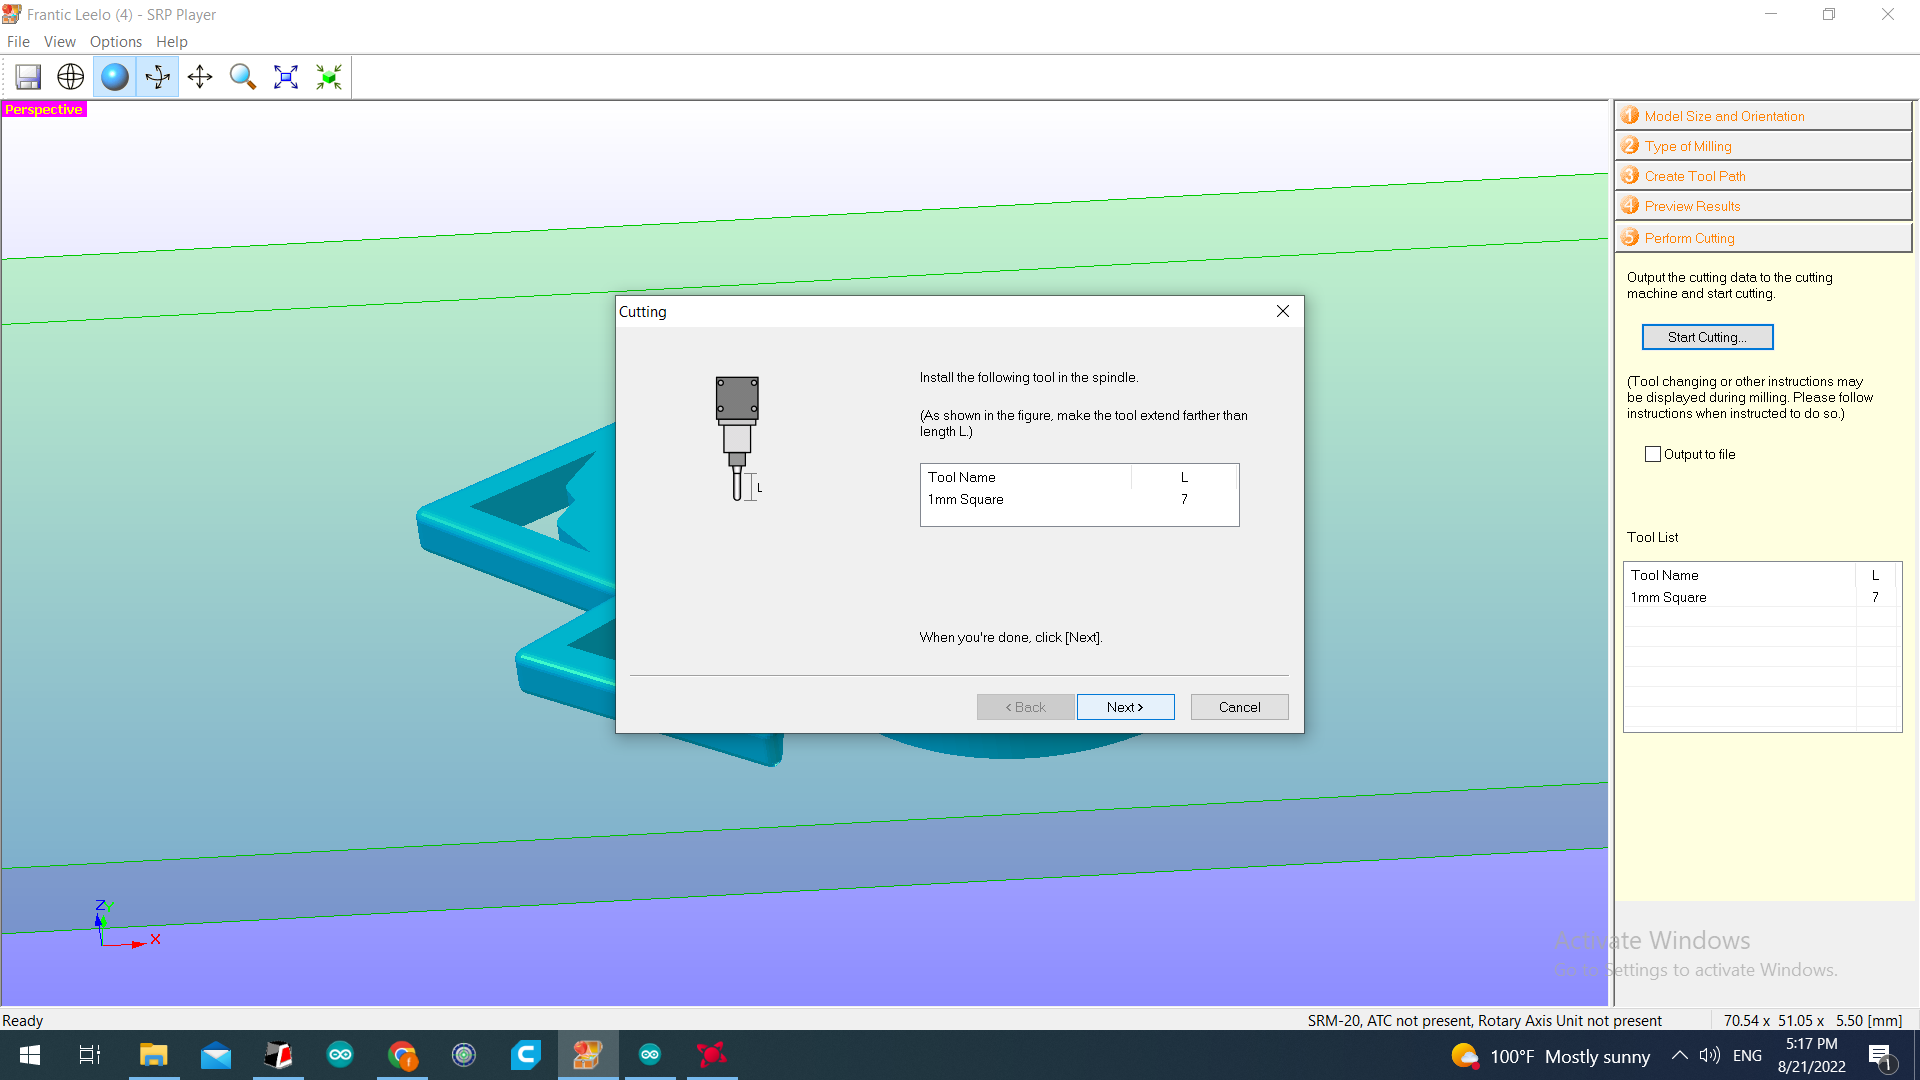
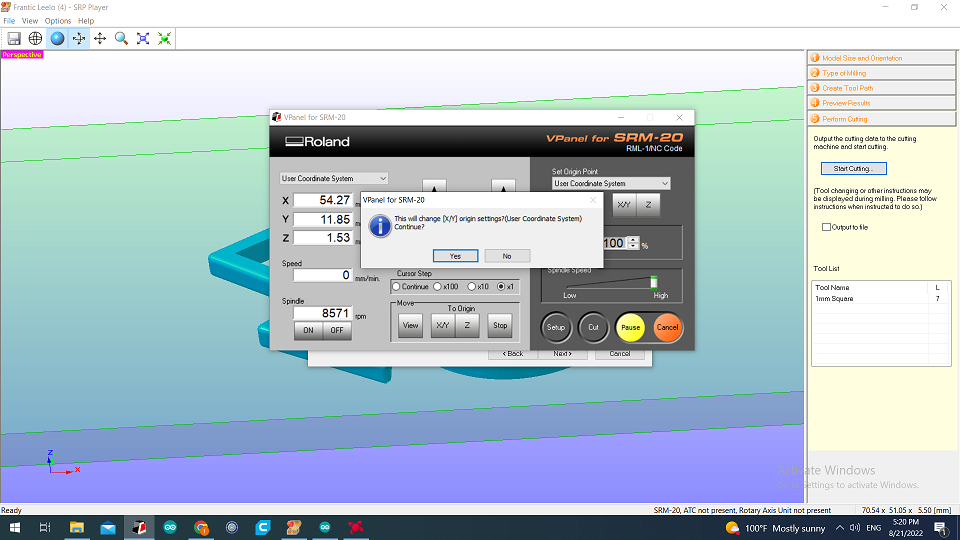
Step 5: Changing the tool (Drill Bit) with correct one in the spindle. The tool should be changed very carefully since its easy to be break.
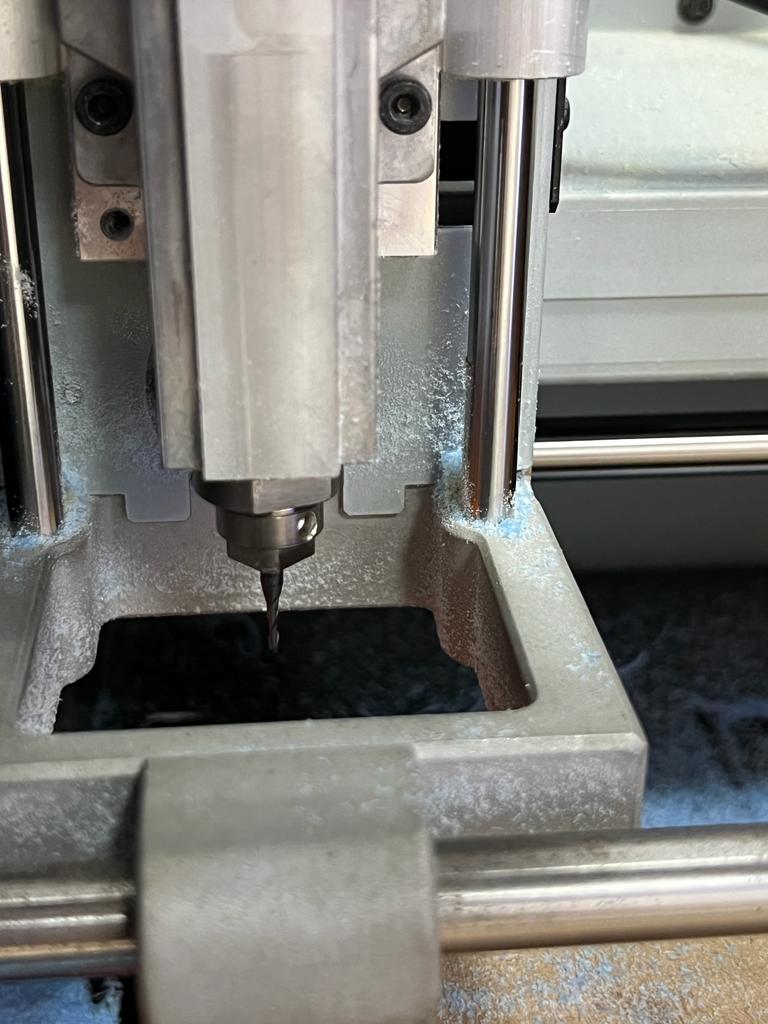
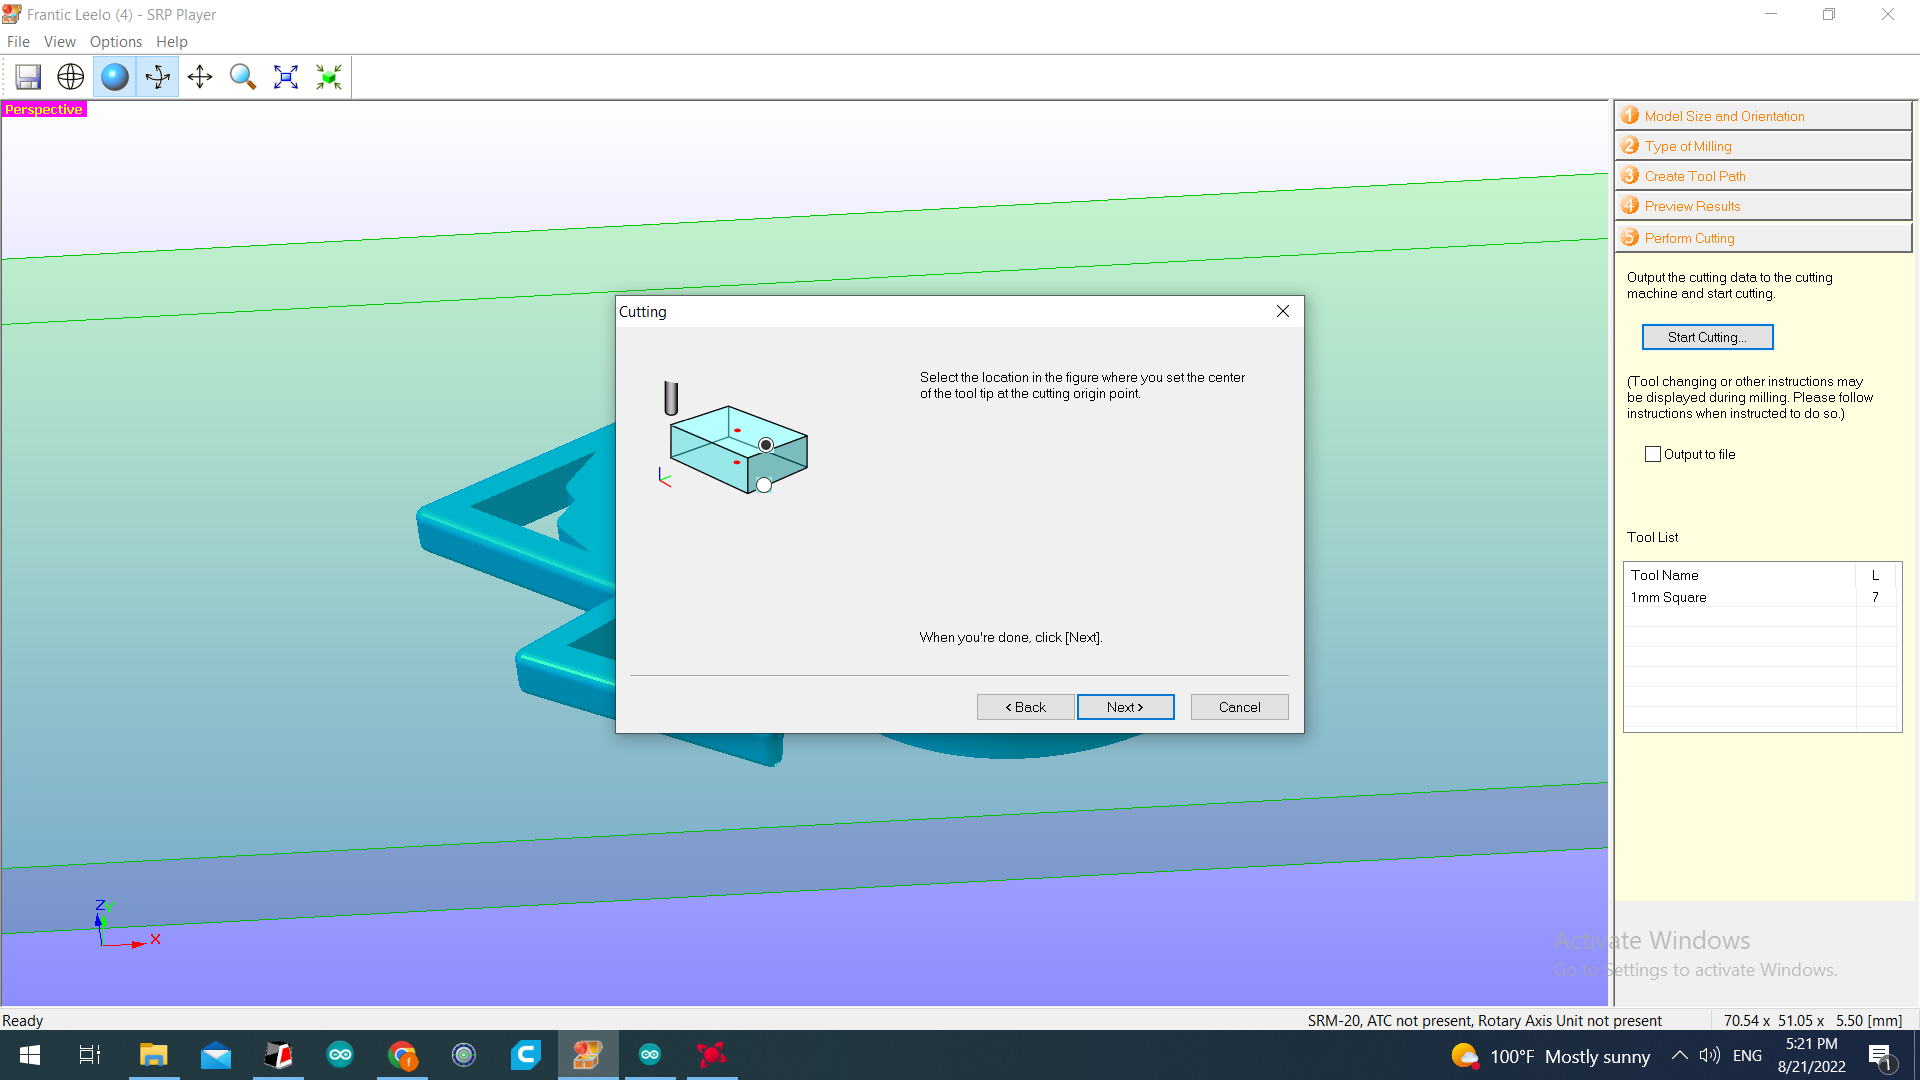
After changing the tool, the work piece should be lined to find the centre to adjust the tool on the centre of the piece to set the axis, so the machine can know were should it start.

Sticking the work piece by double tape to make sure that the working piece will not move while milling it:-
Set the X,Y, and Z axis, were the Z axis can be set by letting the tool touch the tope of the working piece while its working.
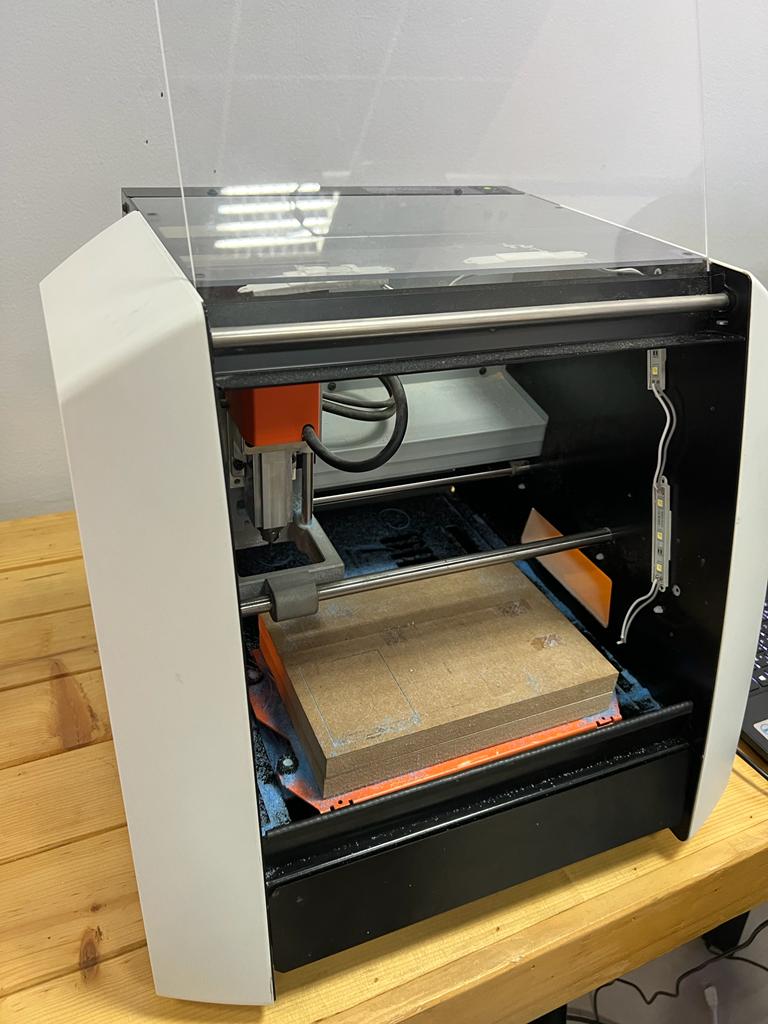
Finally, the machine will start to mill the working piece to get the design, which took 2.7 hours to be done:-
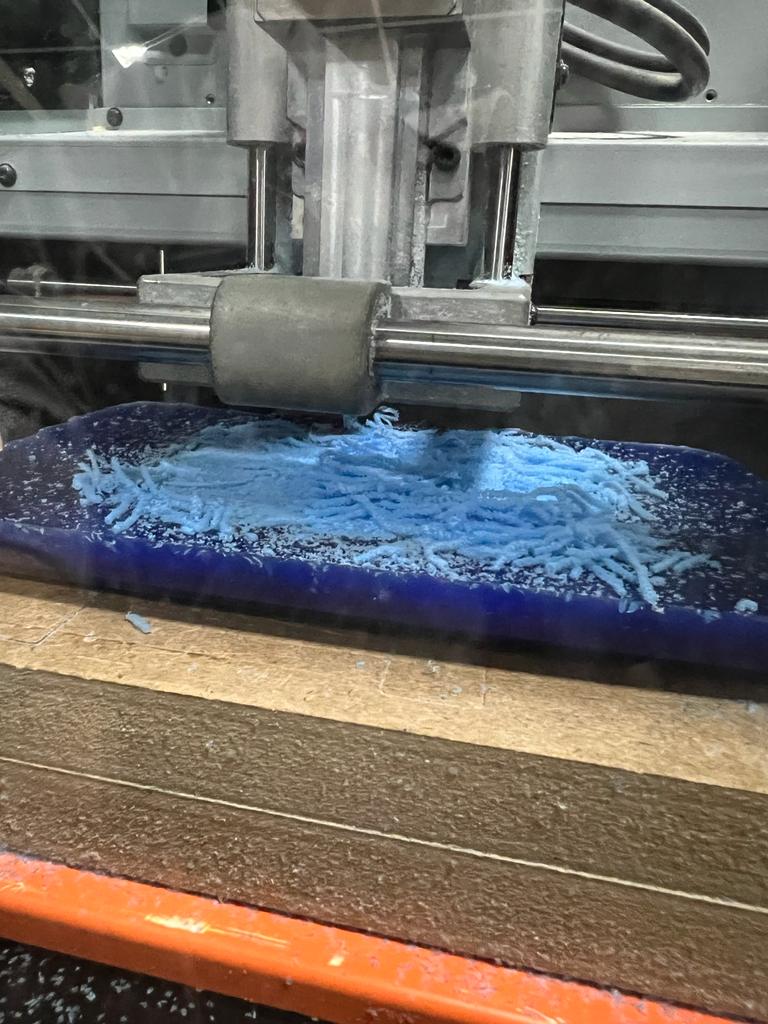
Final result of milling process:-
Moulding
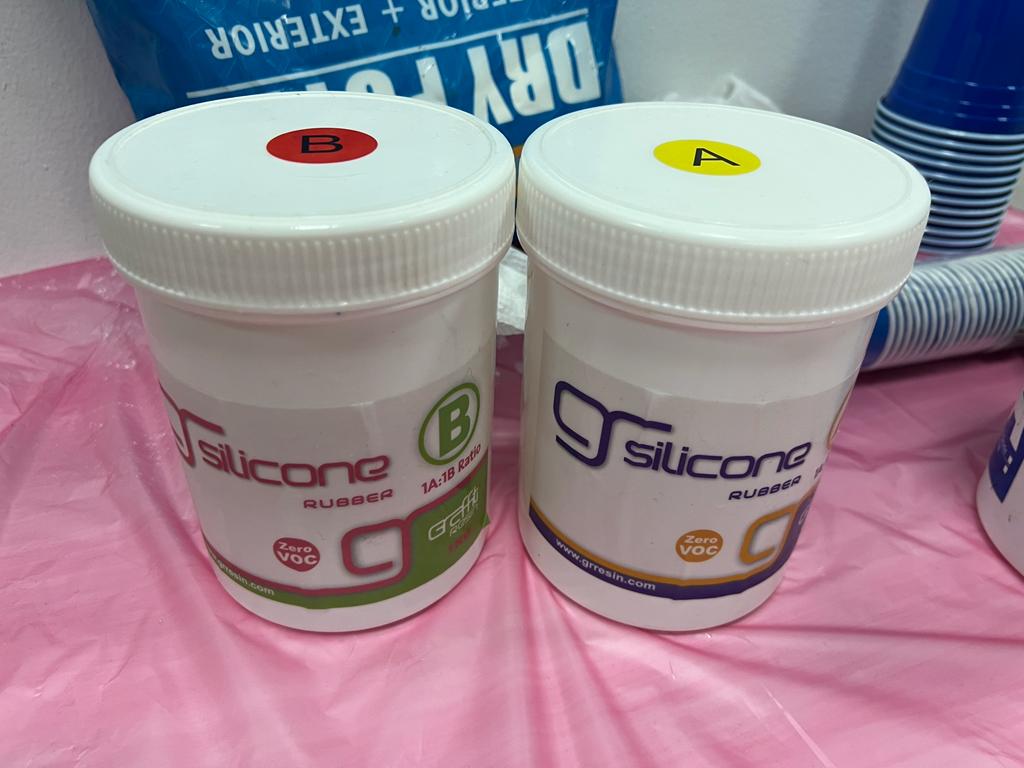
By getting the mould from the milling machine, it is ready for moulding the material that will be used to create the new cavity that will be used to cast the final components. Two types of rubber silicon will be used to create the cavity, were the ration between these two liquid is 1:1. Therefore, the same amount of each material will be poured in the same pouring cup to be mixed and place in the milled mould. Following photos present the used silicon and the mould with the mixture:-
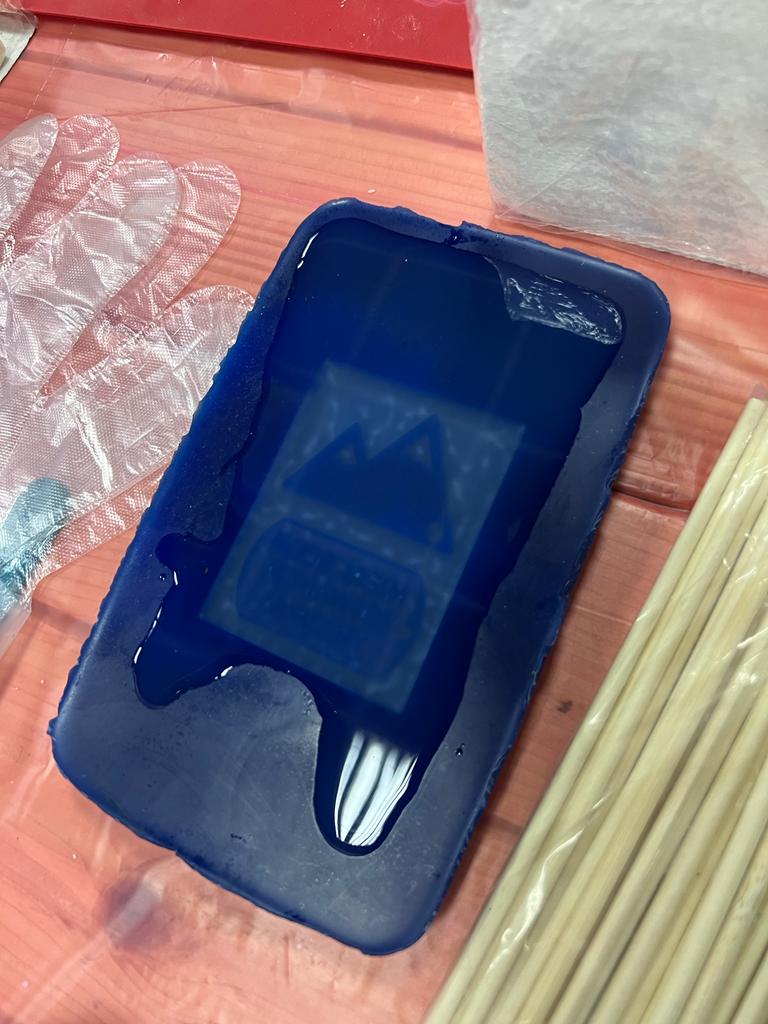
After pouring the mixture and let it dry for one day. The final cavity can be taken off from the milled mould.
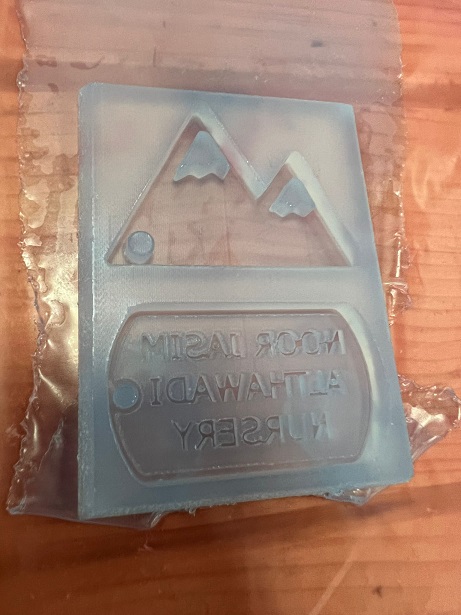
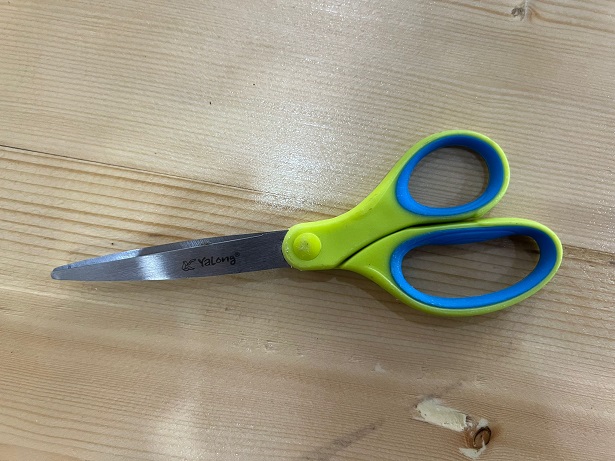
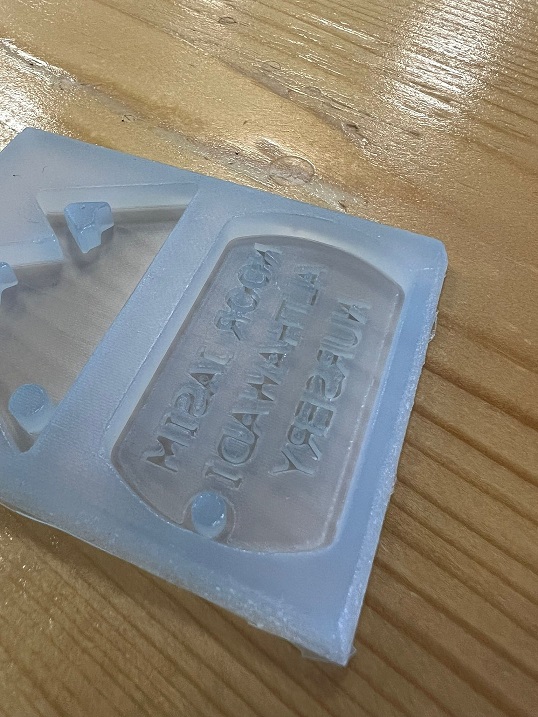
As it can be seen in the previous photo, there are some unwanted materials in the side om the cavity. Therefore, scissors used to cut all the unwanted material which may effect the casting process:-
Finally, the cavity is ready to cast the wanted material into it after checking that all the letters and other parts is correct in the cavity.
Casting
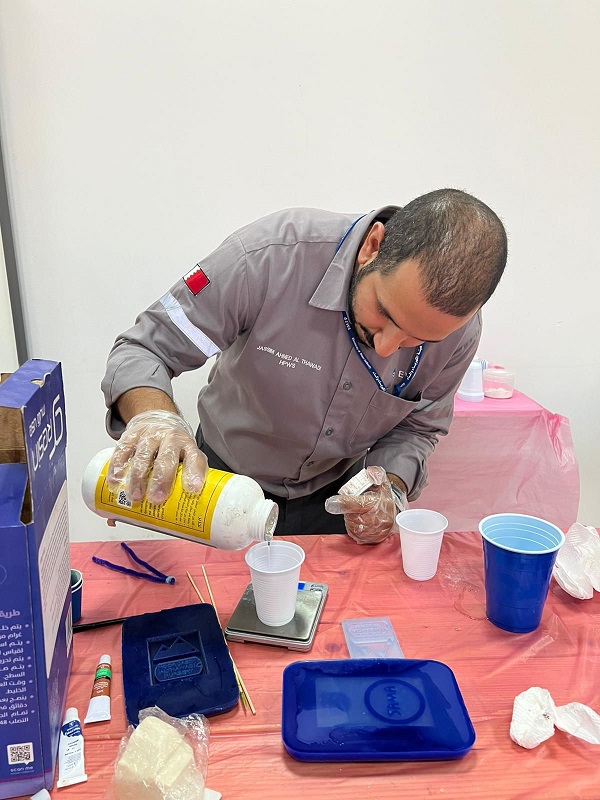
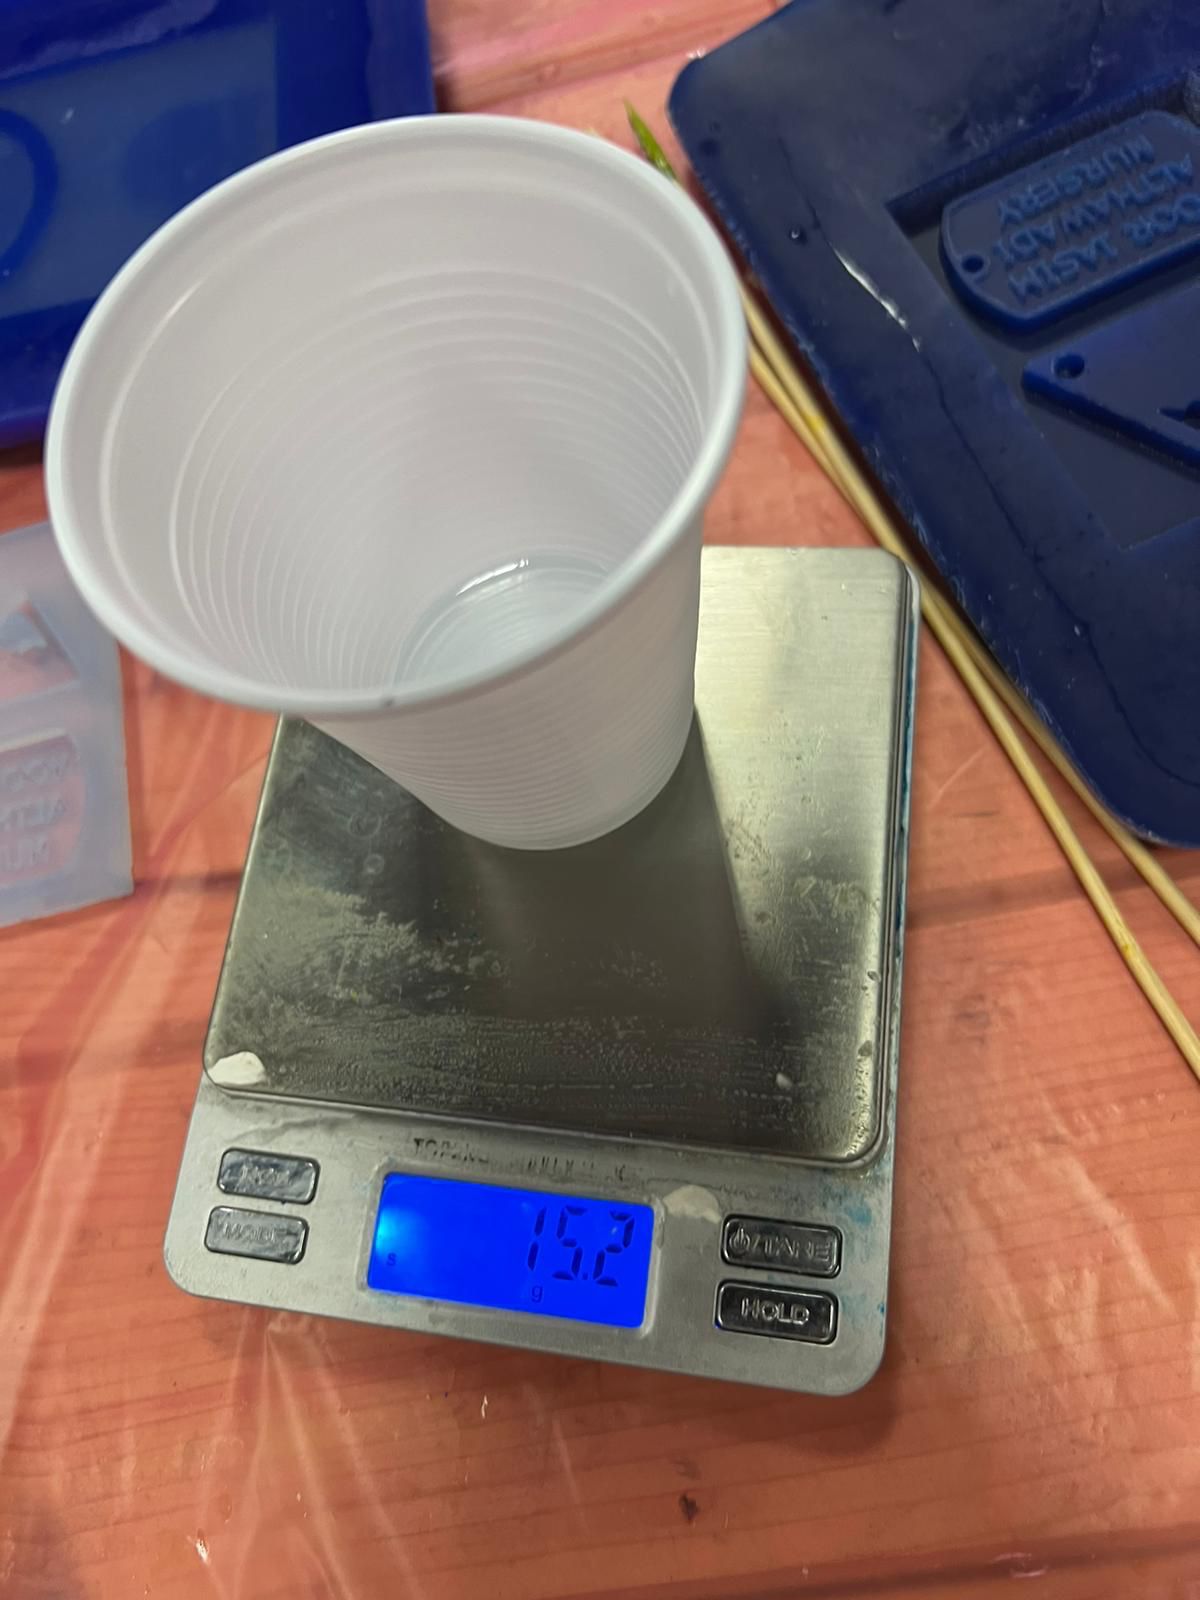
The selected material to be cast in the cavity is the resin. To create the resin, two material will be used which are resin and the hardener. The ratio between the two material is 10:6, that mean pouring 10g of the risen in the pouring cup then pouring 6g of the hardener. But for this project, more mixture were needed; therefore, 15g of the risen mixed with 9g of hardener.
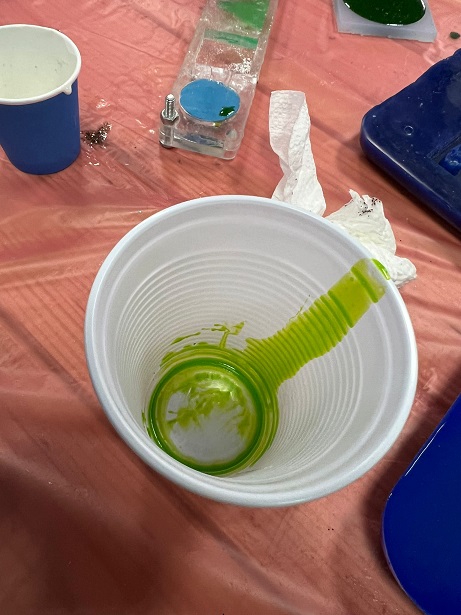
After pouring both liquids, they were mixed for 3 minutes to make sure that they mixed very well with each other, then the mixture separated in to two cups so each cup will has different colour. The fist cup mixed with yellow and dark green colour to get light green and mixed with the mixture:-
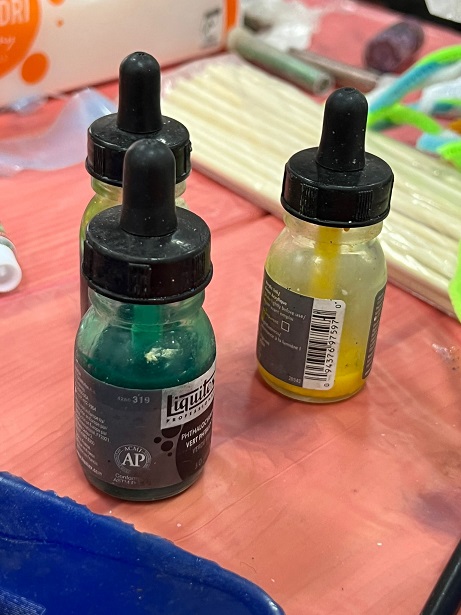
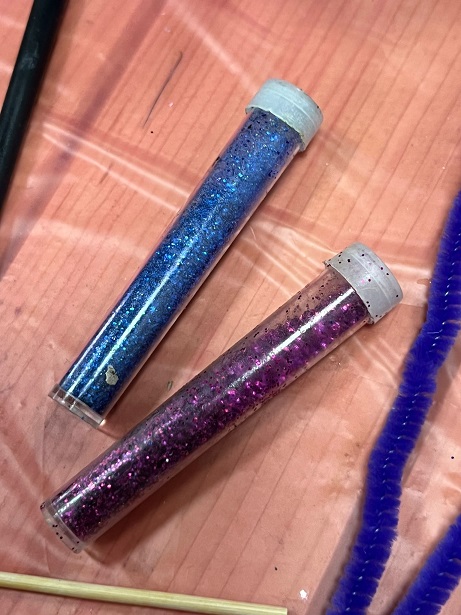
While the second cup were mixed with blue and purple gloss and mixed very well with the mixture:-
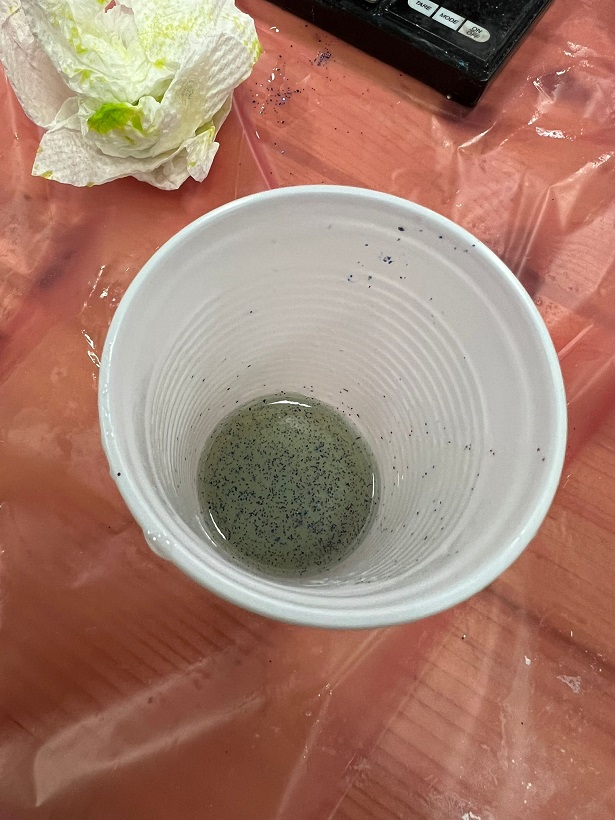
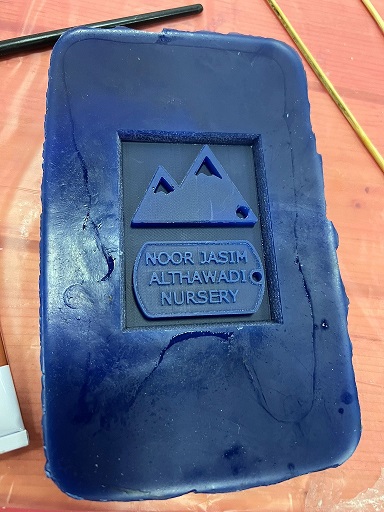
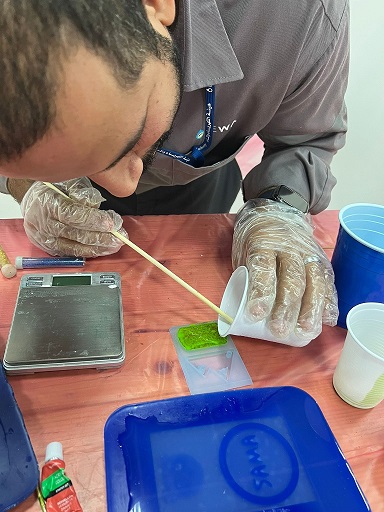
Carefully cast the light green on the letters and the boarder and fill the remaining of the cavity with the mixture that contain the gloss and let the casted material to be dry for 24 to 48 hours:-
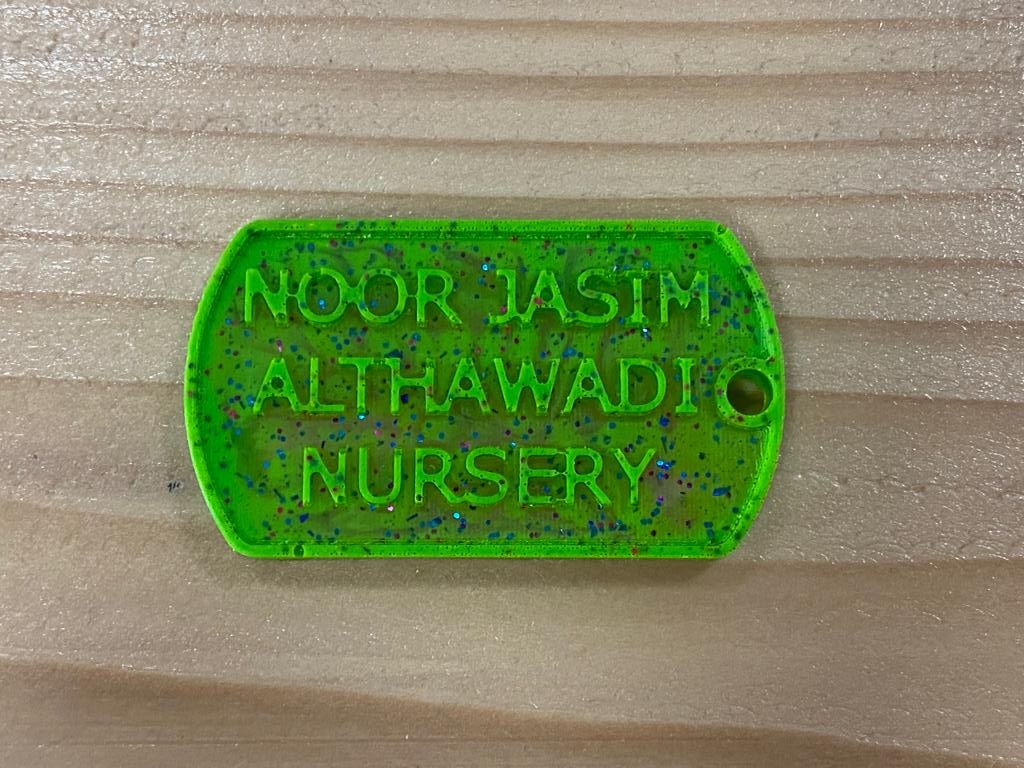
Following is the final result of the casted material after its dry and become ready to be use:-