5. 3D printing & Scanning
This week we were assigned to learn about 3D printing & Scanning
3D Scanning Objects
We learned how to 3D scan an object using our smart phones
We used Qlone app to 3D scan an object In order to be able to 3d scan an object we need to print a layout for the program to understand where is the object located Then we opened the program and started scanning and the scanning process is that there will be a dome and we need to scan the object by revolving on it from all directions
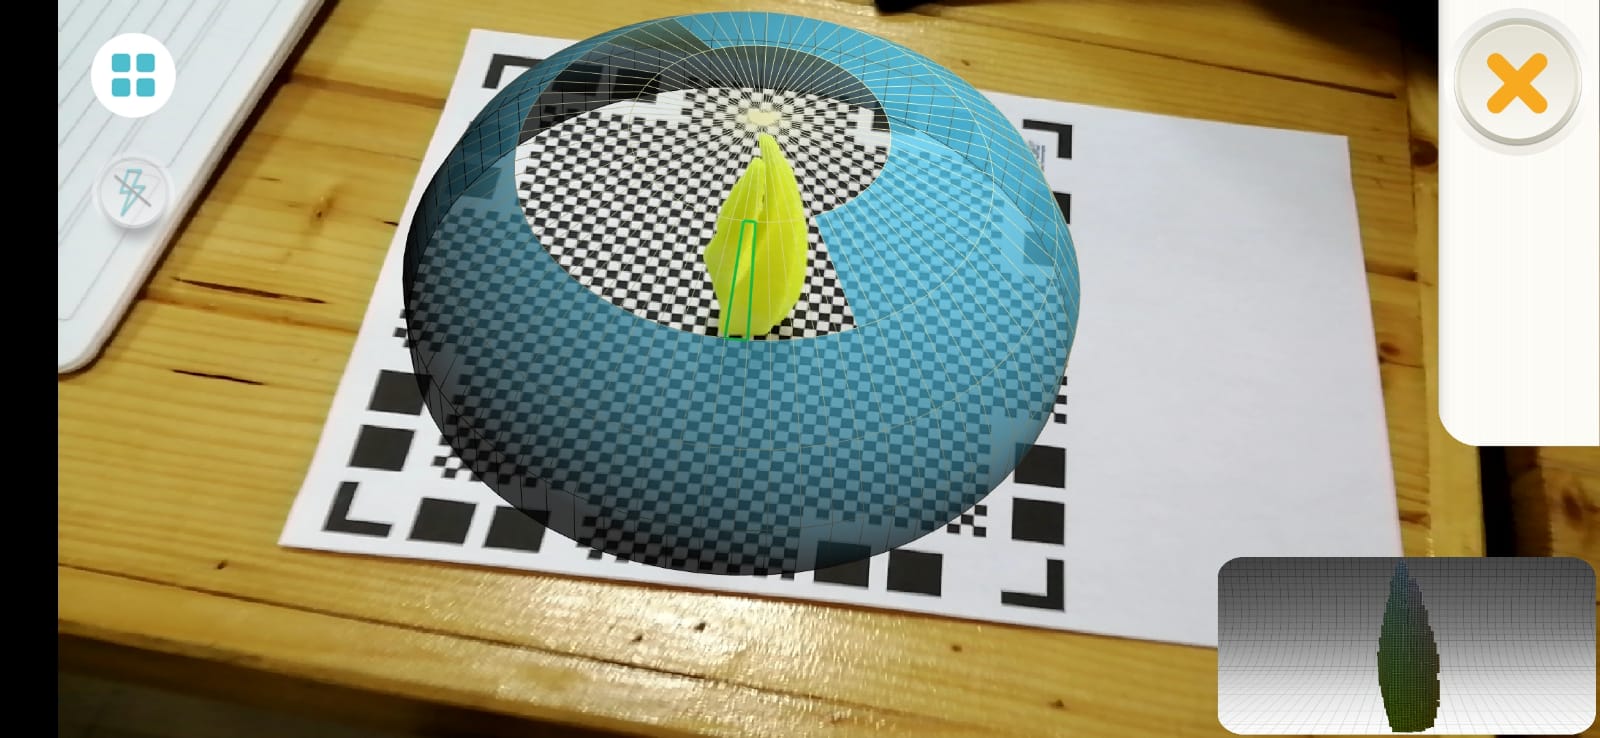
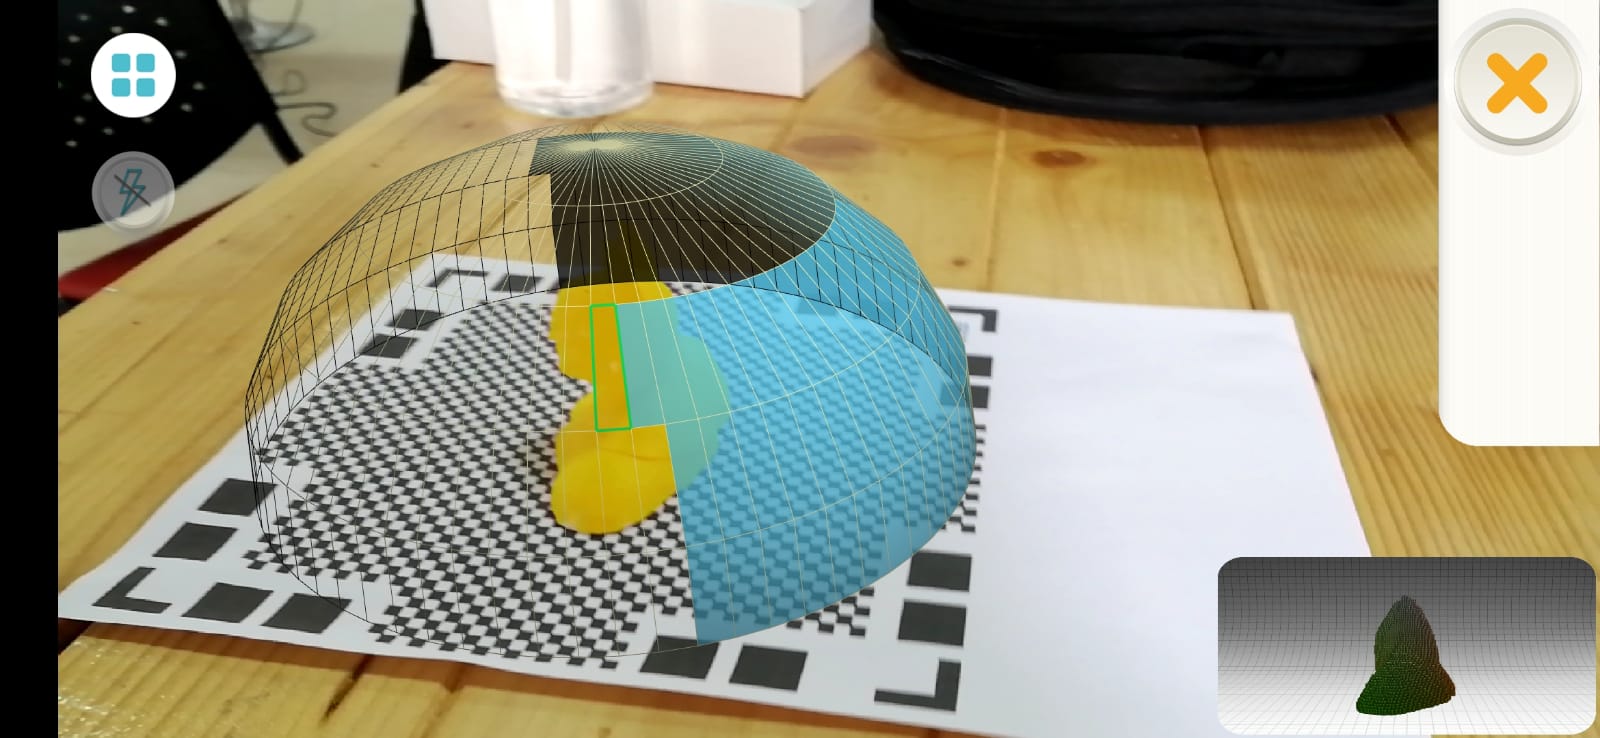
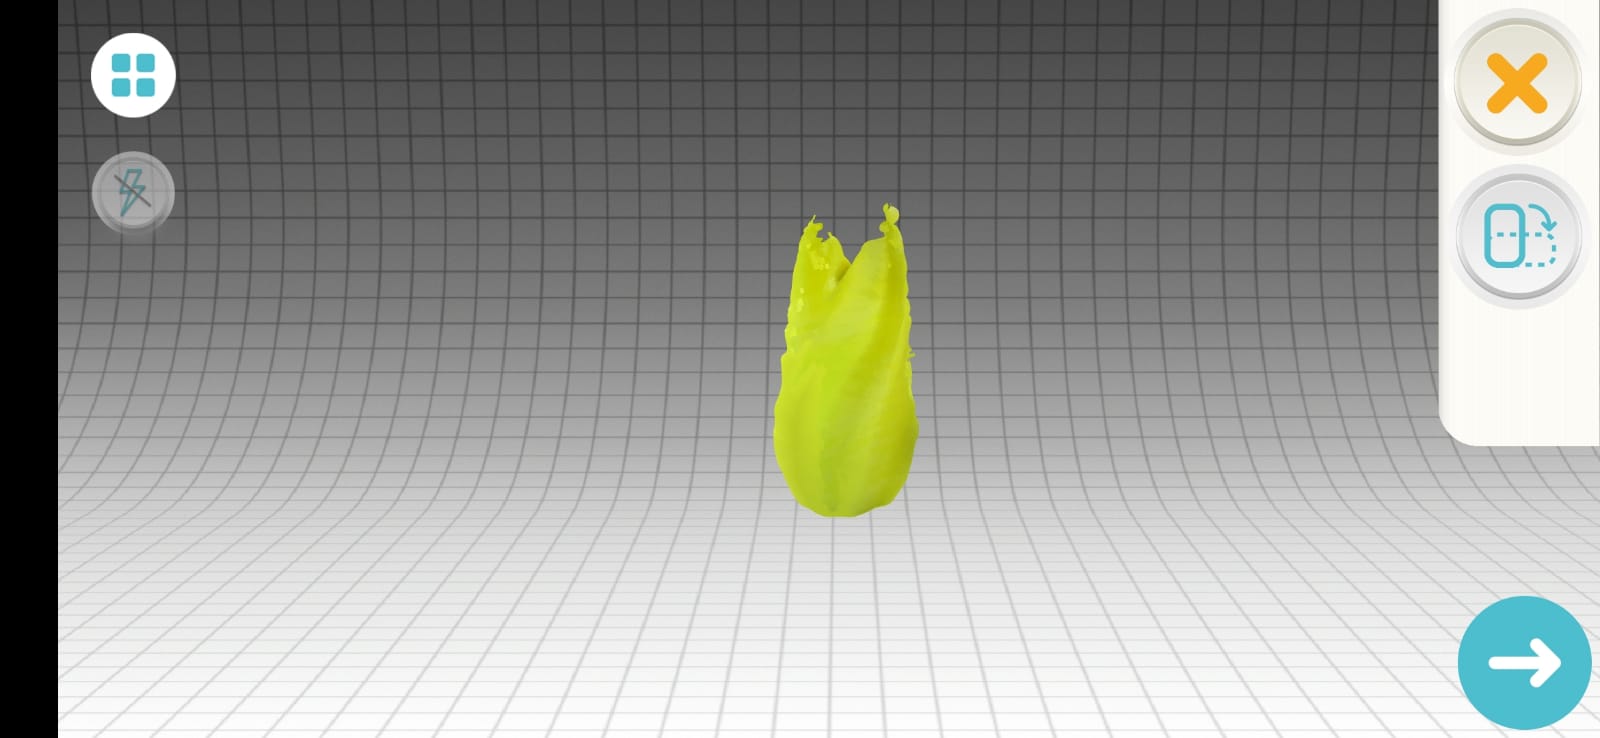
The final result showcased that the 3D scanning is not capable of scanning the fine details of an object

3D Scanning People
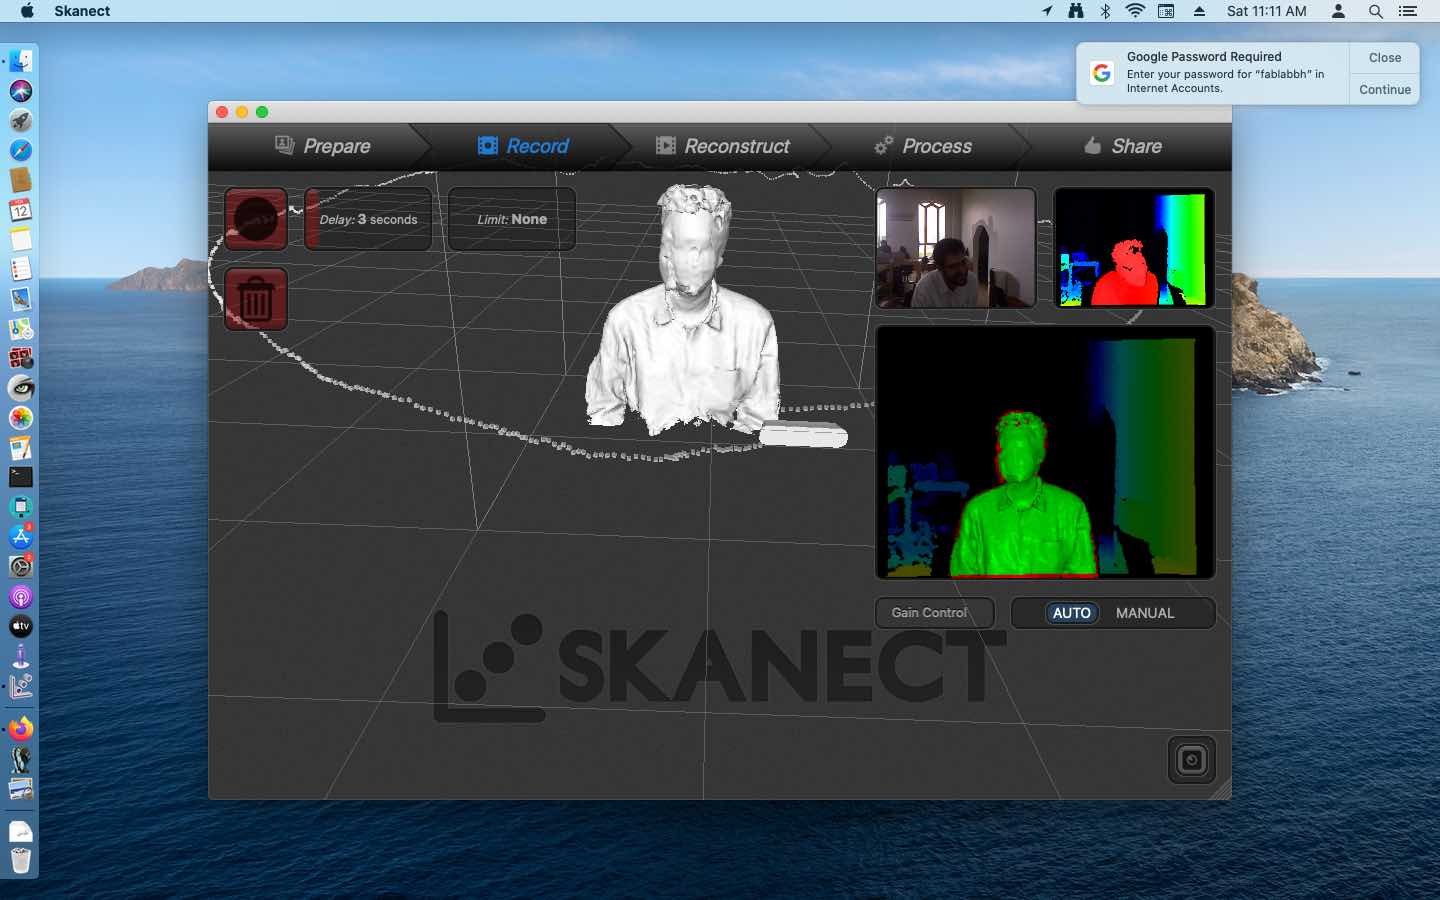
After we learned how to 3D scan our selves using kenect camera skanect
First we Prepare the program by choosing scanning body shaped

then we start the recording process by rotating in front of the camera - make sure you are in a good distance and height in front of the camera
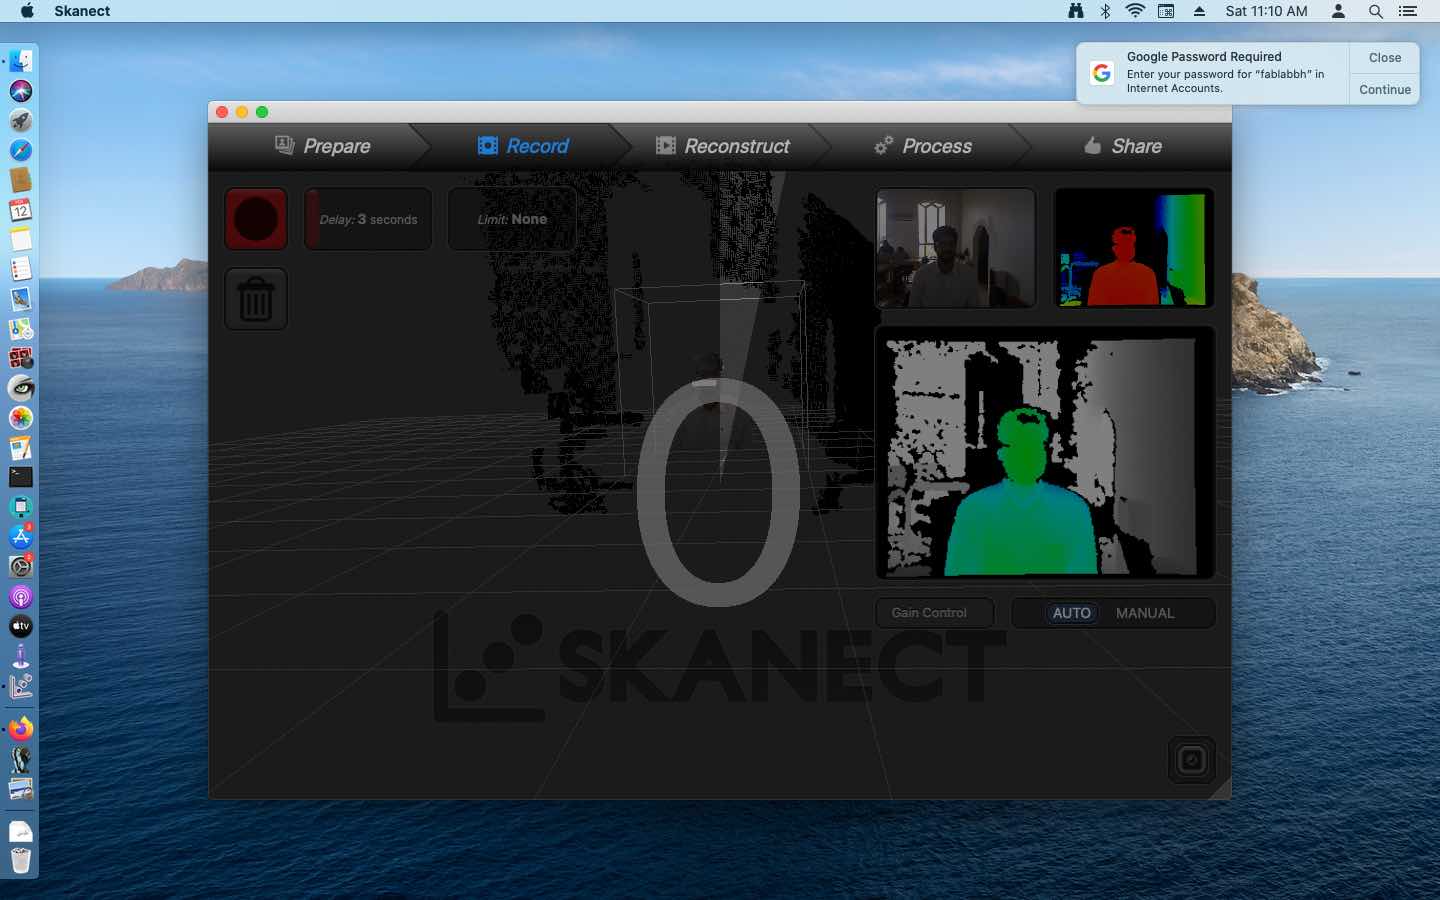
As I rotate in front of the camera the program start to create a shape of me
And here is the final outcome of the scanning
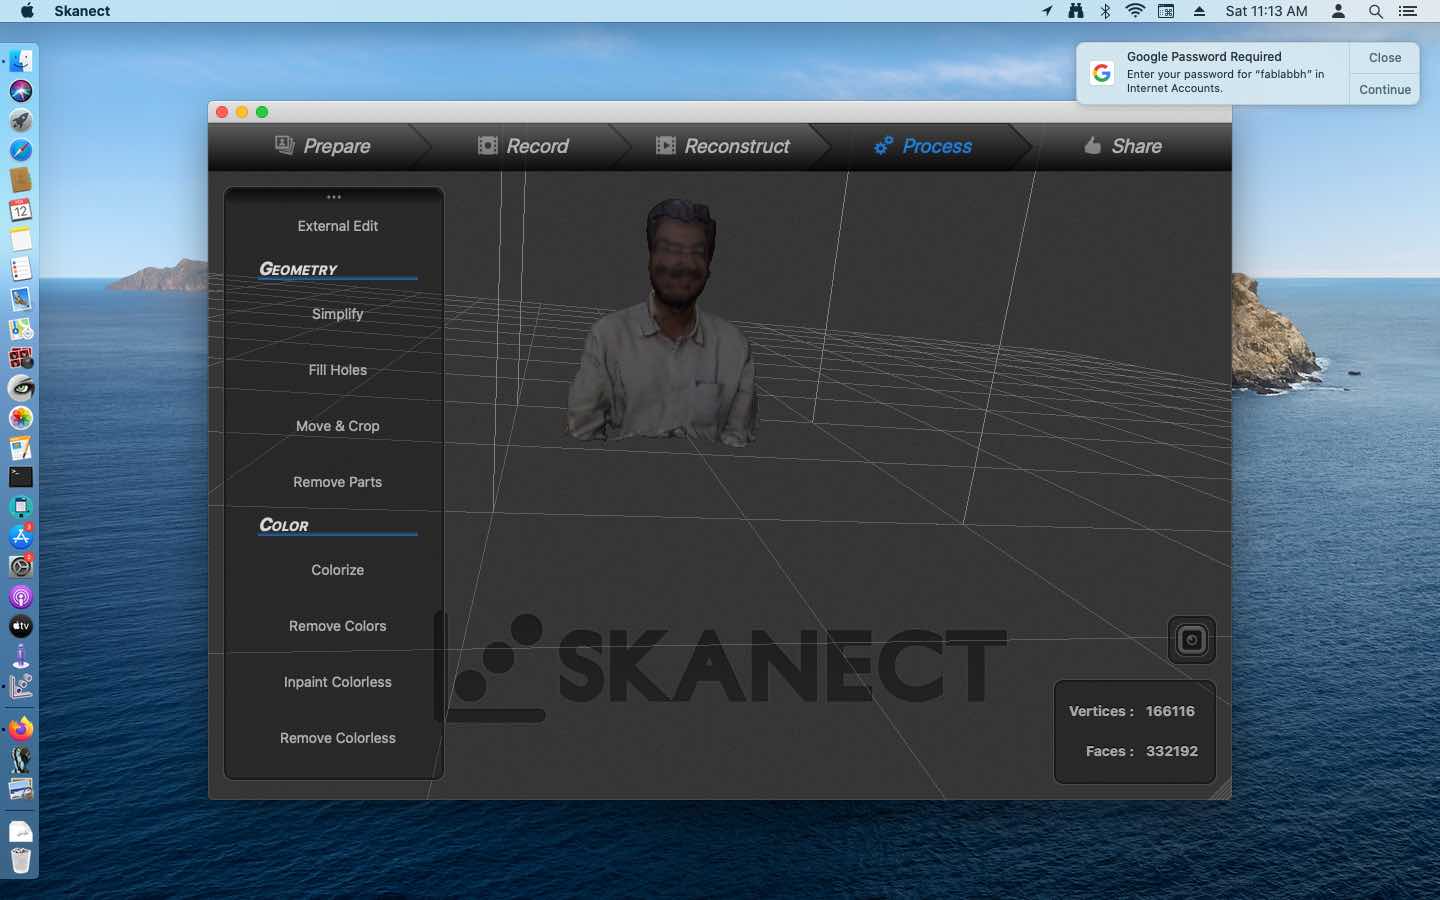
We notice that I have 2 faces and that is probably because I moved my head while rotating so make sure you stay still while revolving in front of the camera
3D Printing Gropu Research
We studied and researched the possibilities of 3D printing. You can Find the Full steps on Weaam Ajoor ’s Page
3D Printer Test
In order to print in a 3D printing machine we need to use the software ultimate cura that is capable to understand what the object and how to print
We first wanted to test the 3D printing machine so we downloaded 2 object from the internet to print them
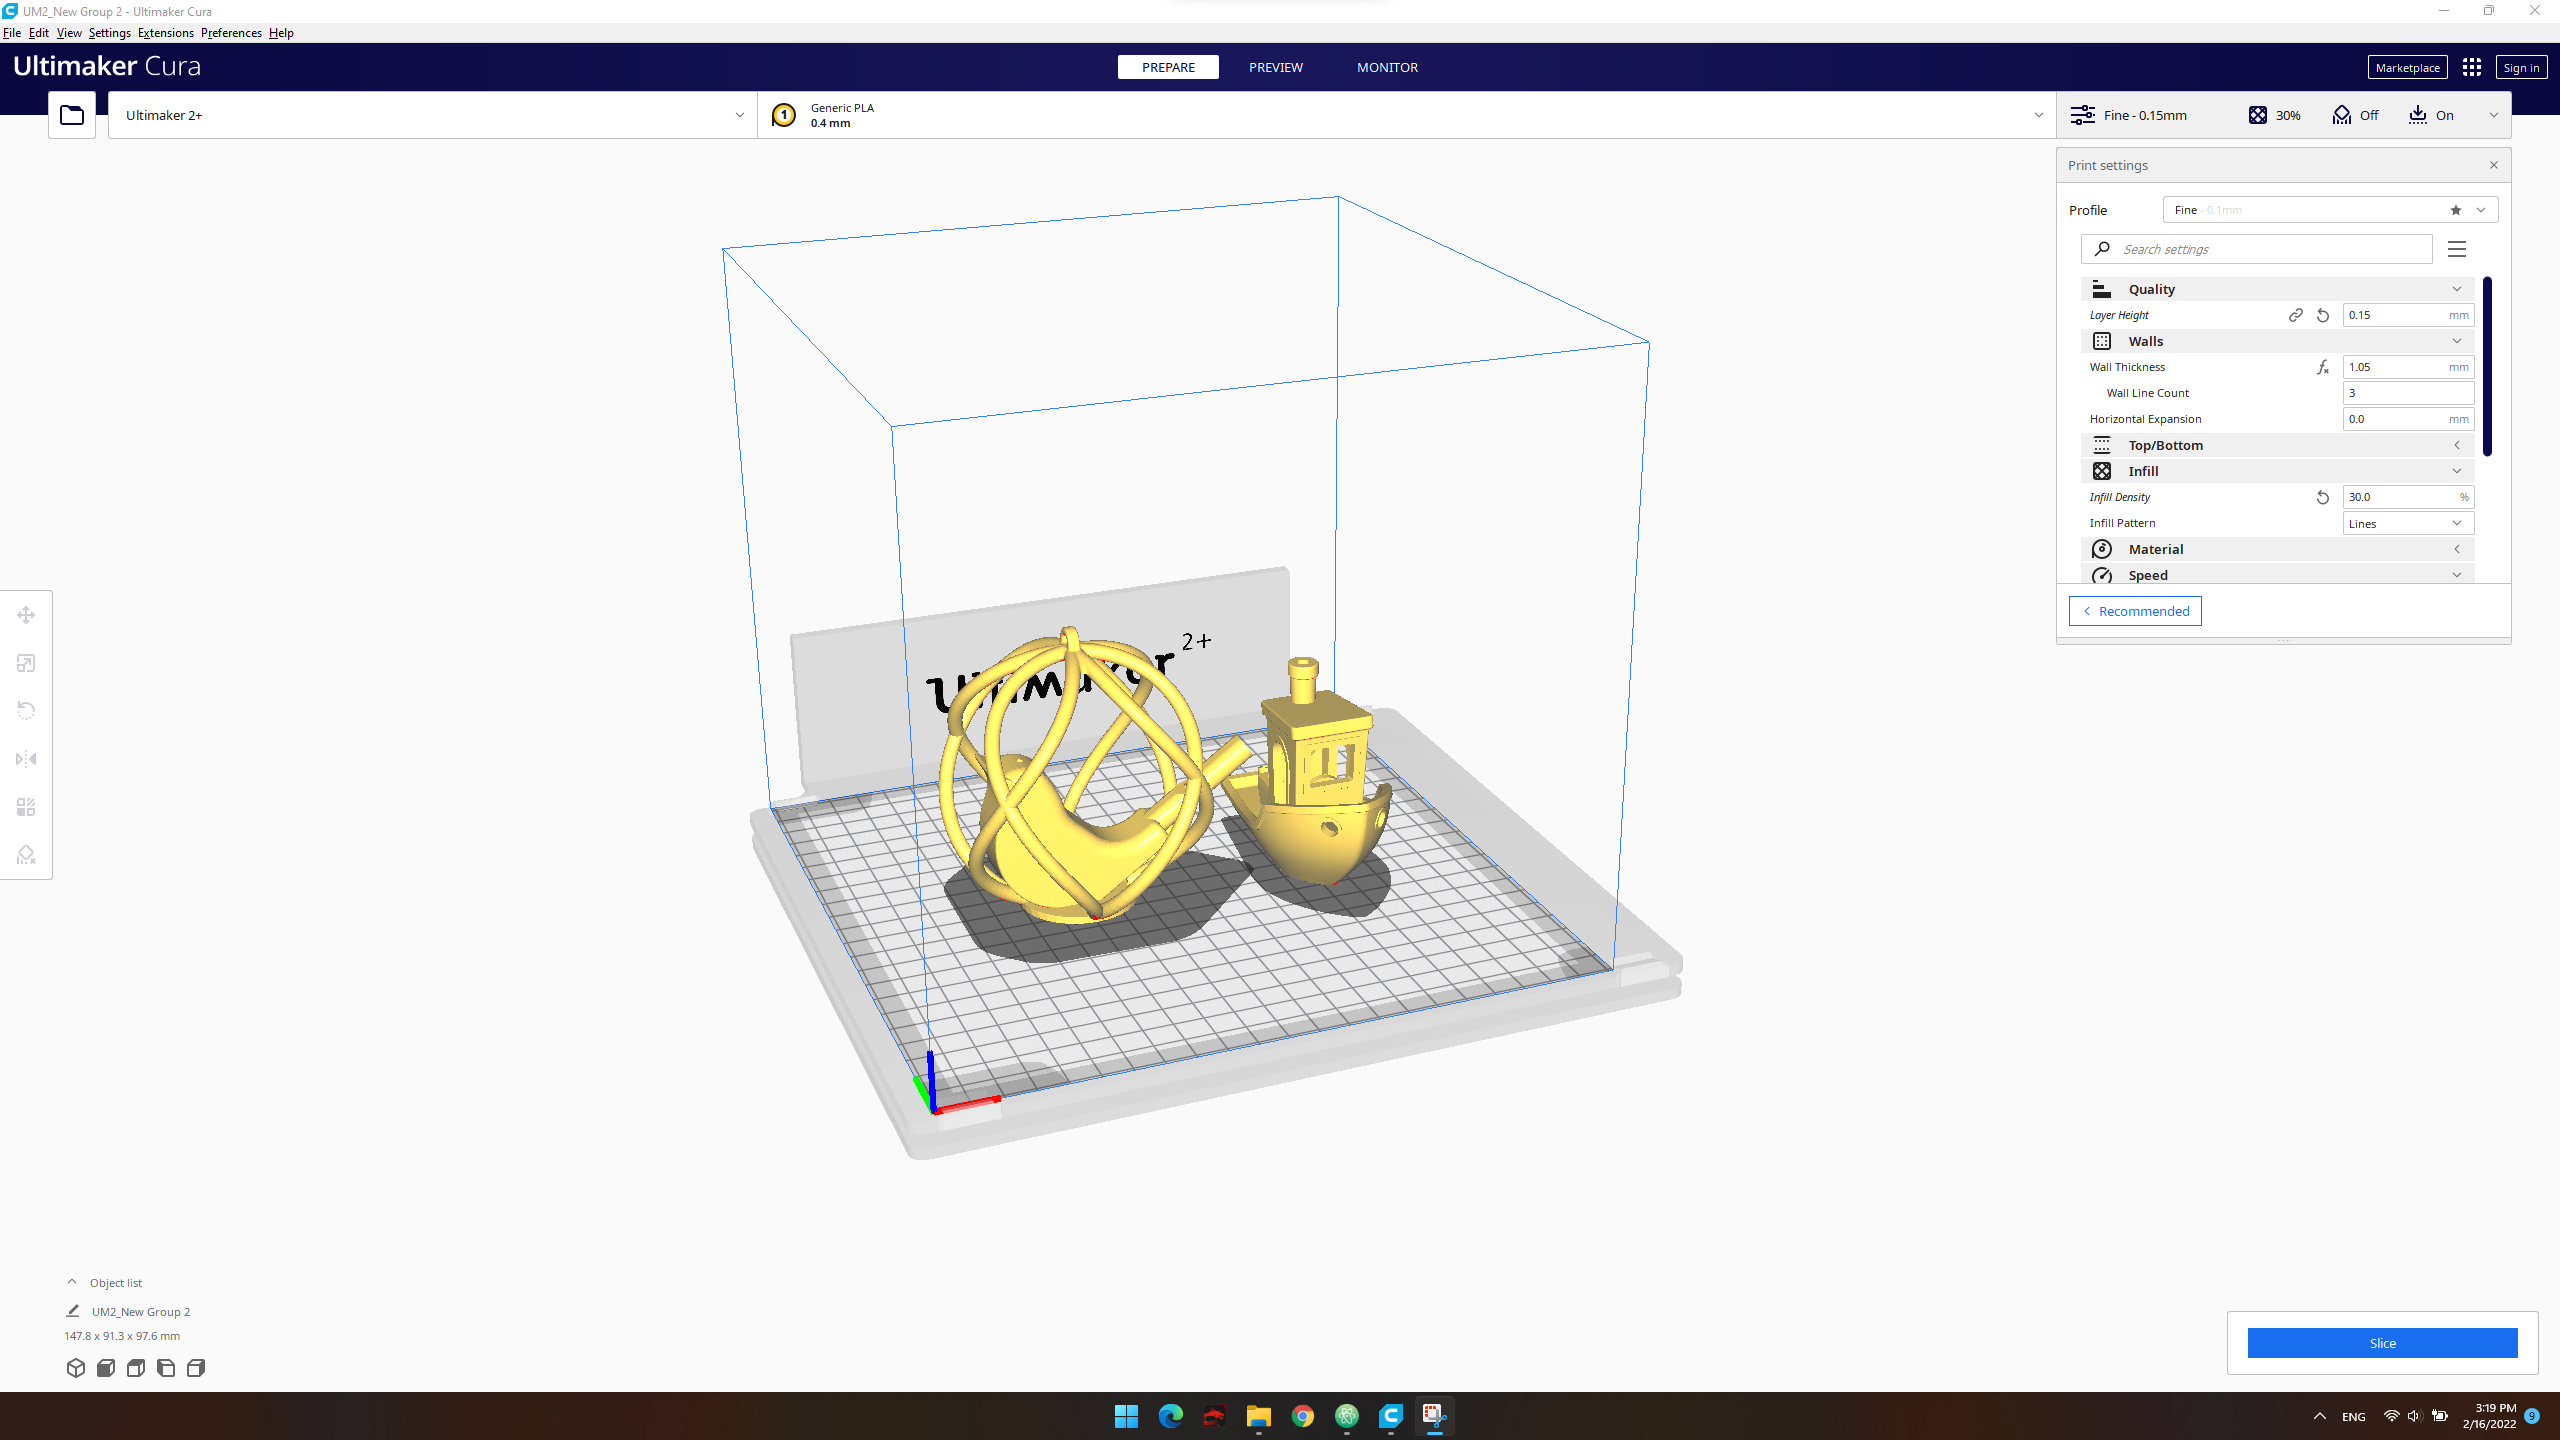
Several setting needs to be adjusted in order to let the machine print the objects
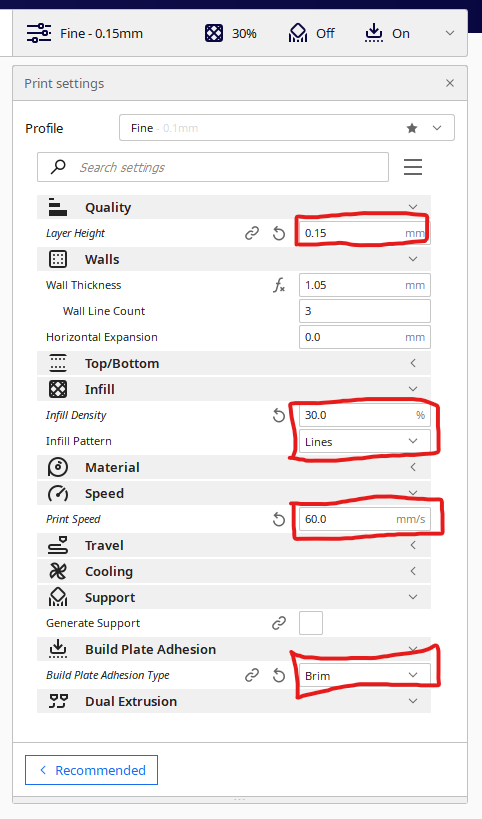
Then we started slicing the object to get printed layer by layer
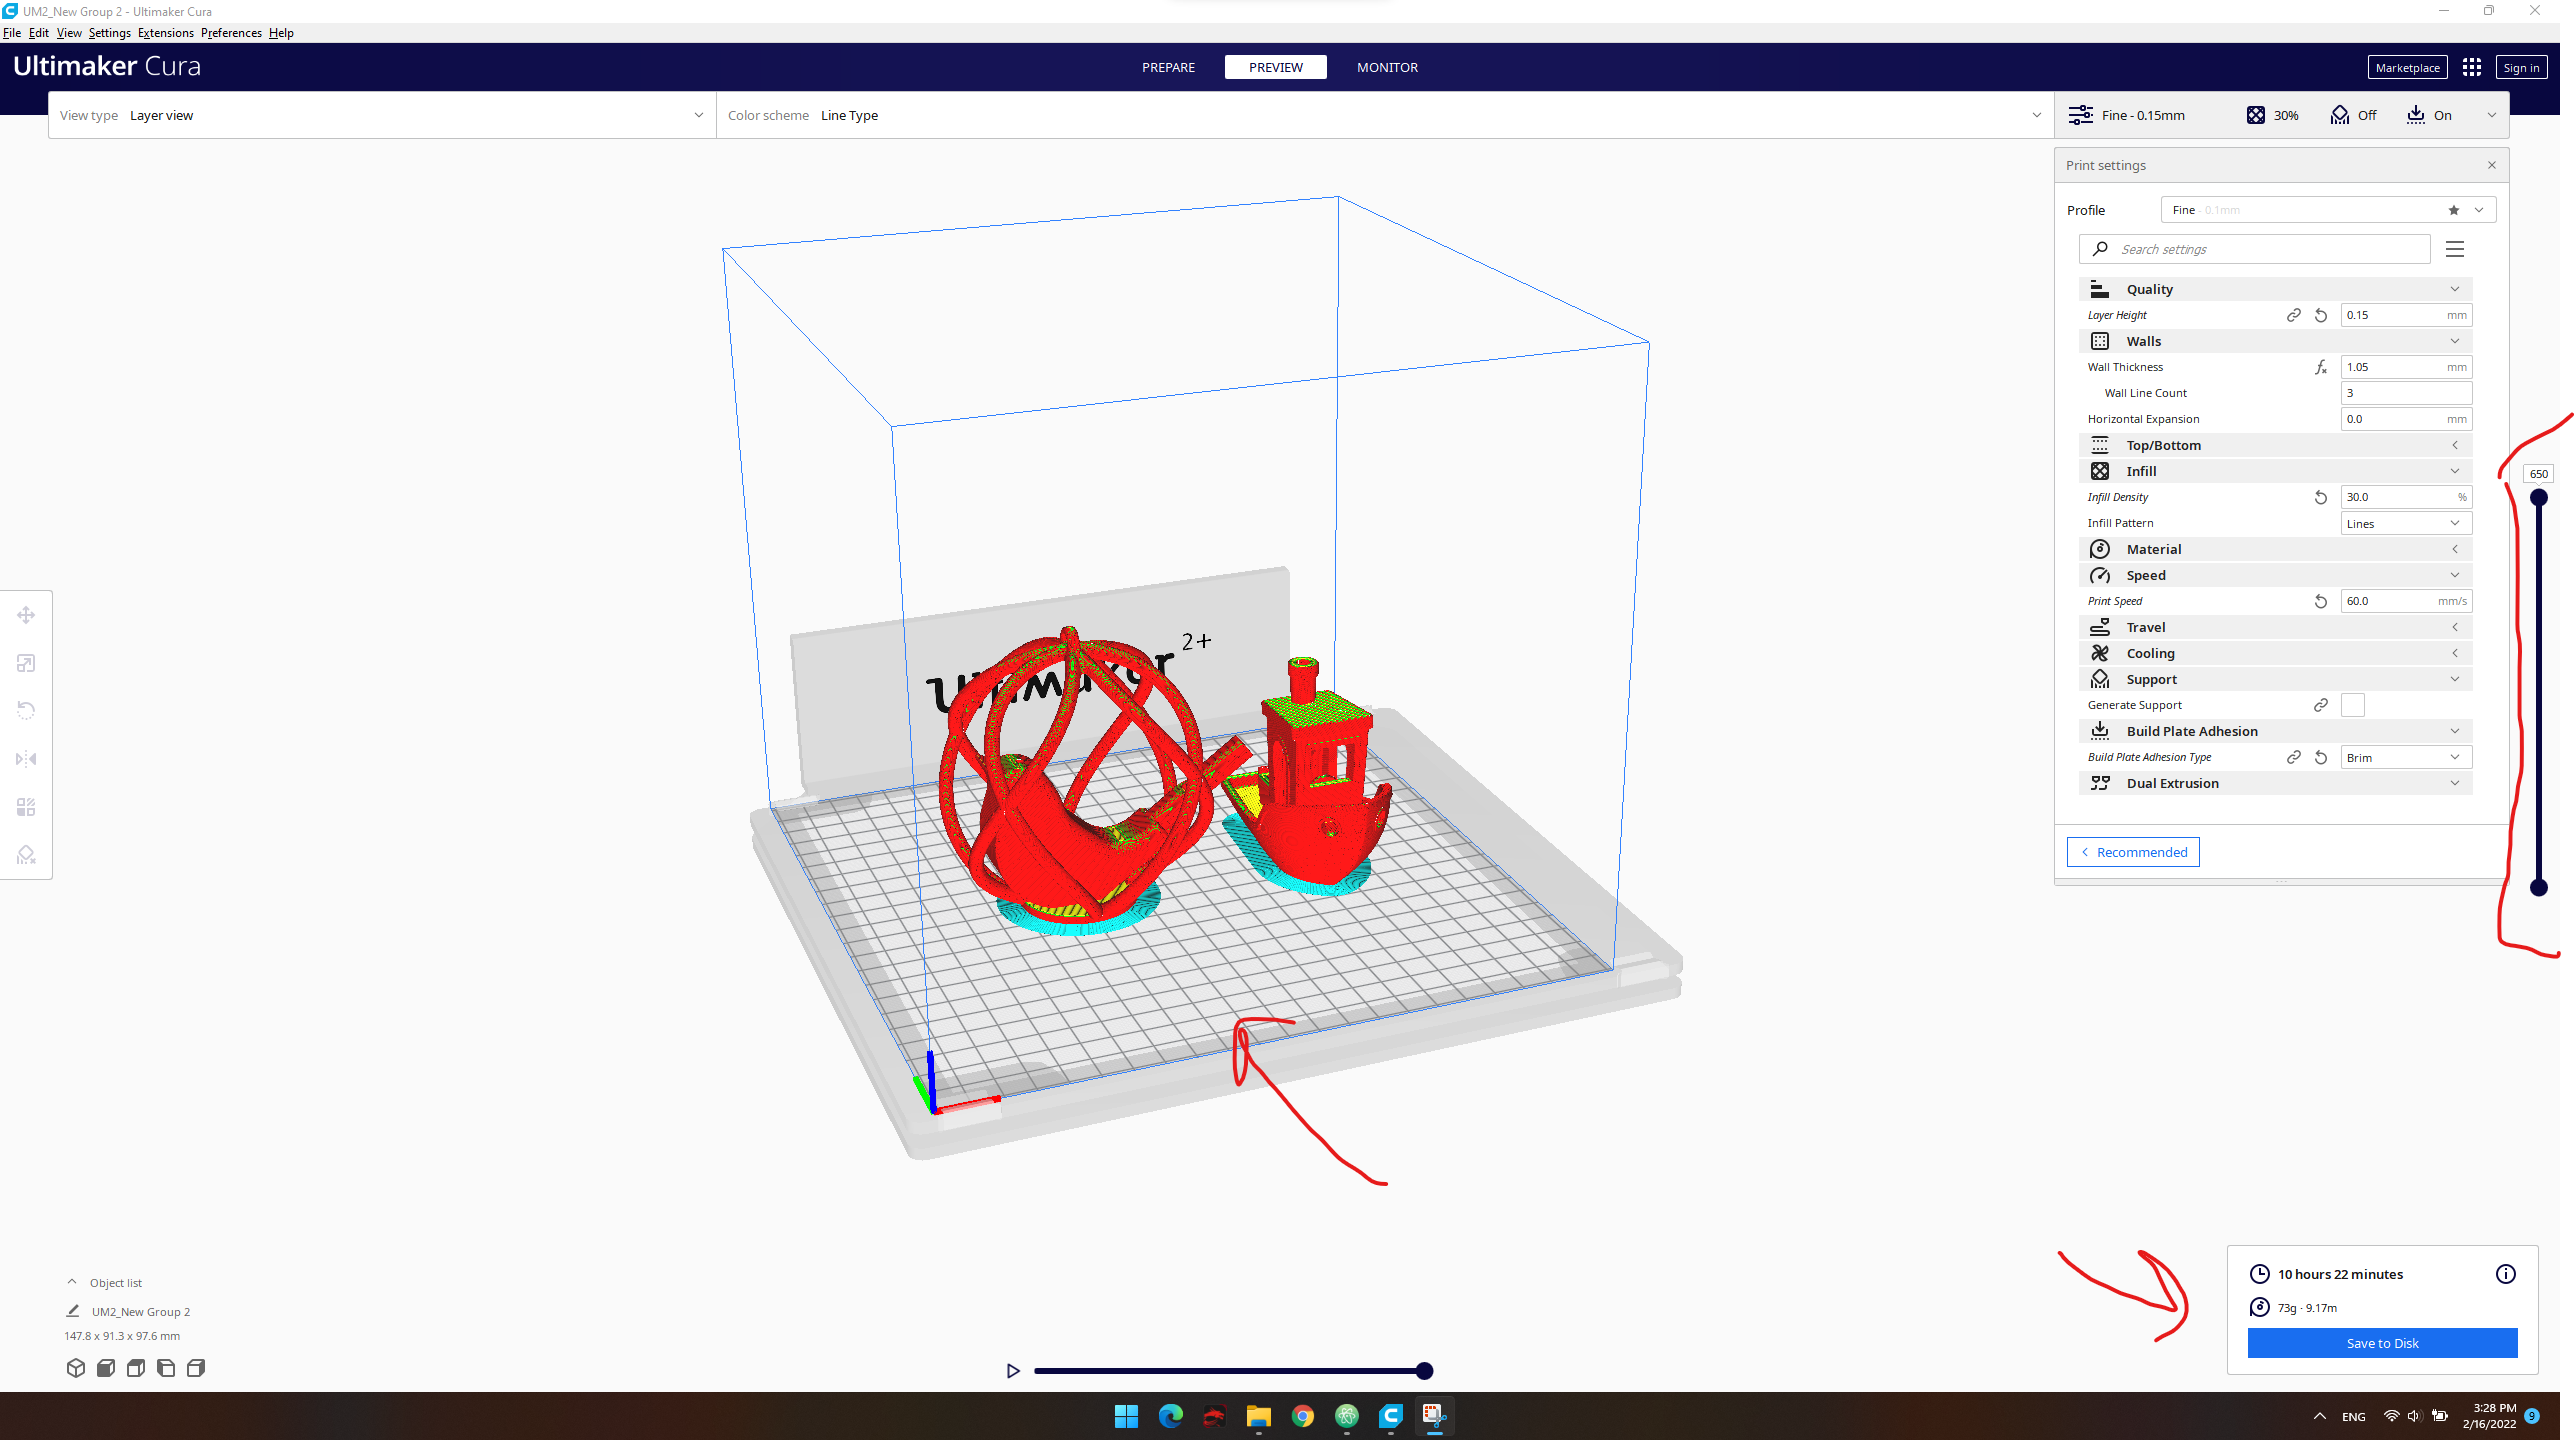
Then we save the file as (.gcode) format and put it in a SD card in order for the printer to understand the file format After we took it to the 3D printer and started the printing process
This is the final result
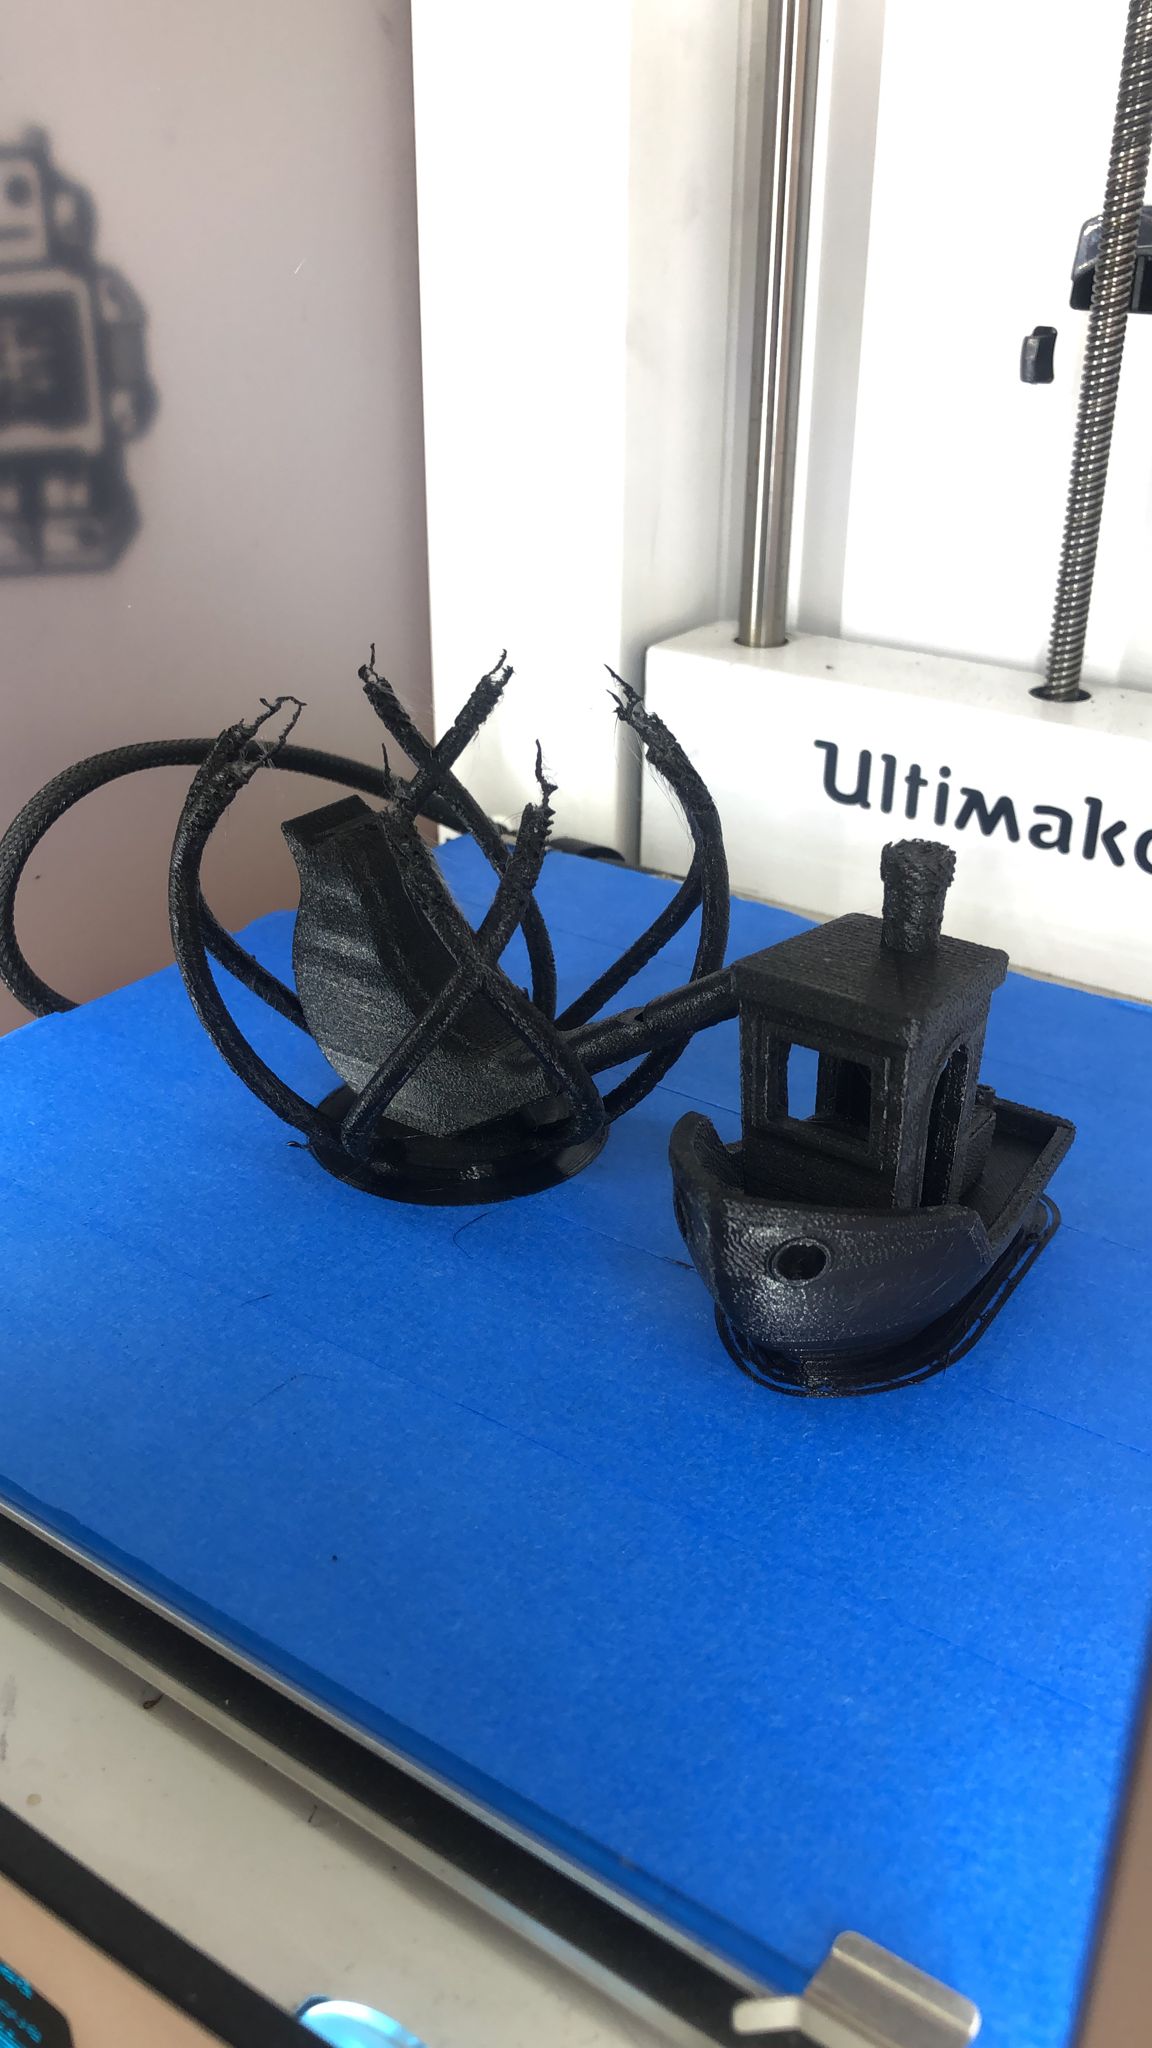
We learned that the printer could not print relativelly small object details since the bird on the left did not got printed fully as the bridging failed at a certain point of the printing. However, the boat was successfully Printed as it contained large details not fine ones
3D Printed Item
I wanted to create a skyscraper
I used 3D printing method because my 3D design can’t be made subtractively, as it contains curves and angles and details that only a 3d printer can do especially on the bottom opening part.
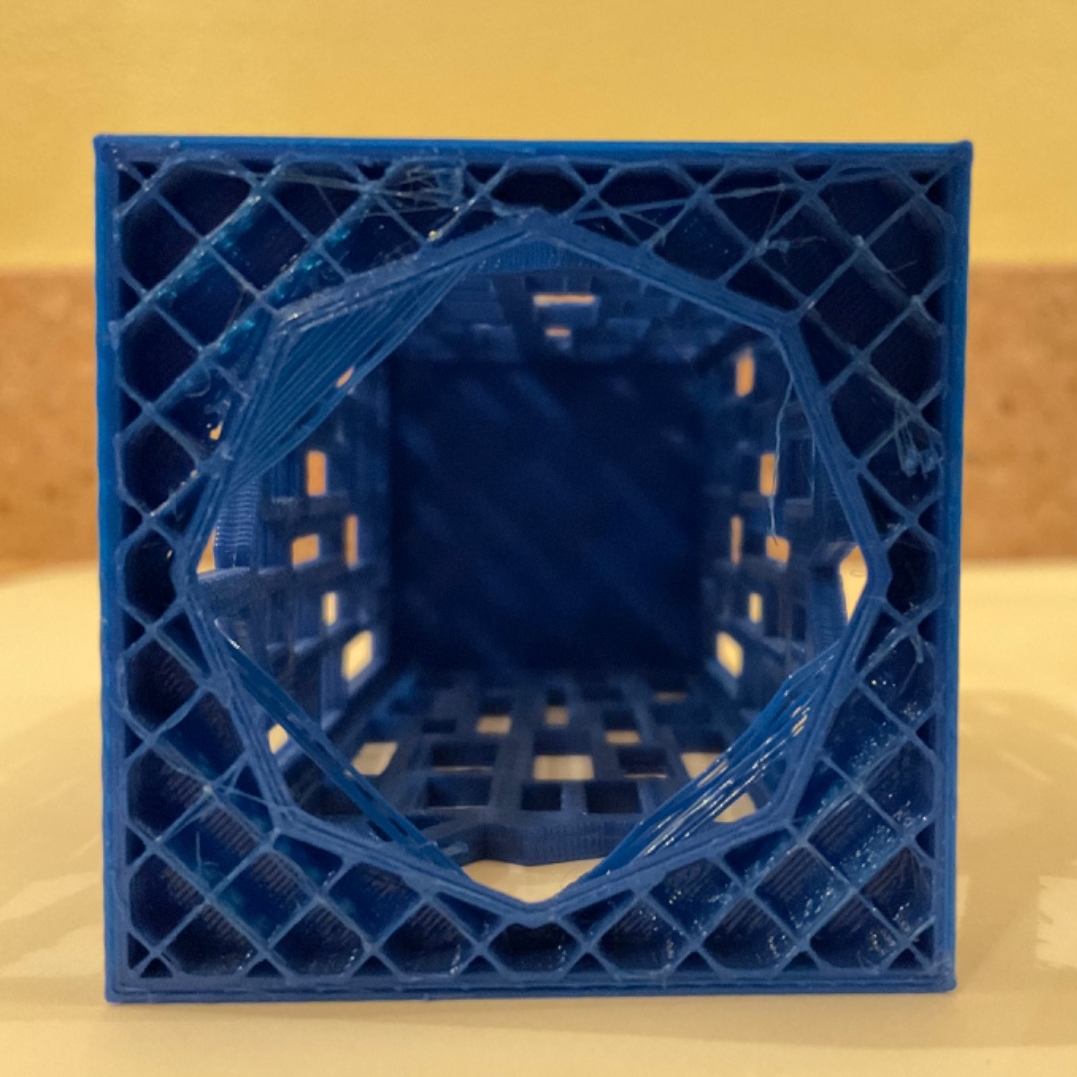
I used sketch up for the designing stage started with 2 Boxes Then I made the bottom box have walls and the upper box have a hole then I created a façade for the bottom box and distort the shape from above to look like its broken then I connected the 2 shaped with supports
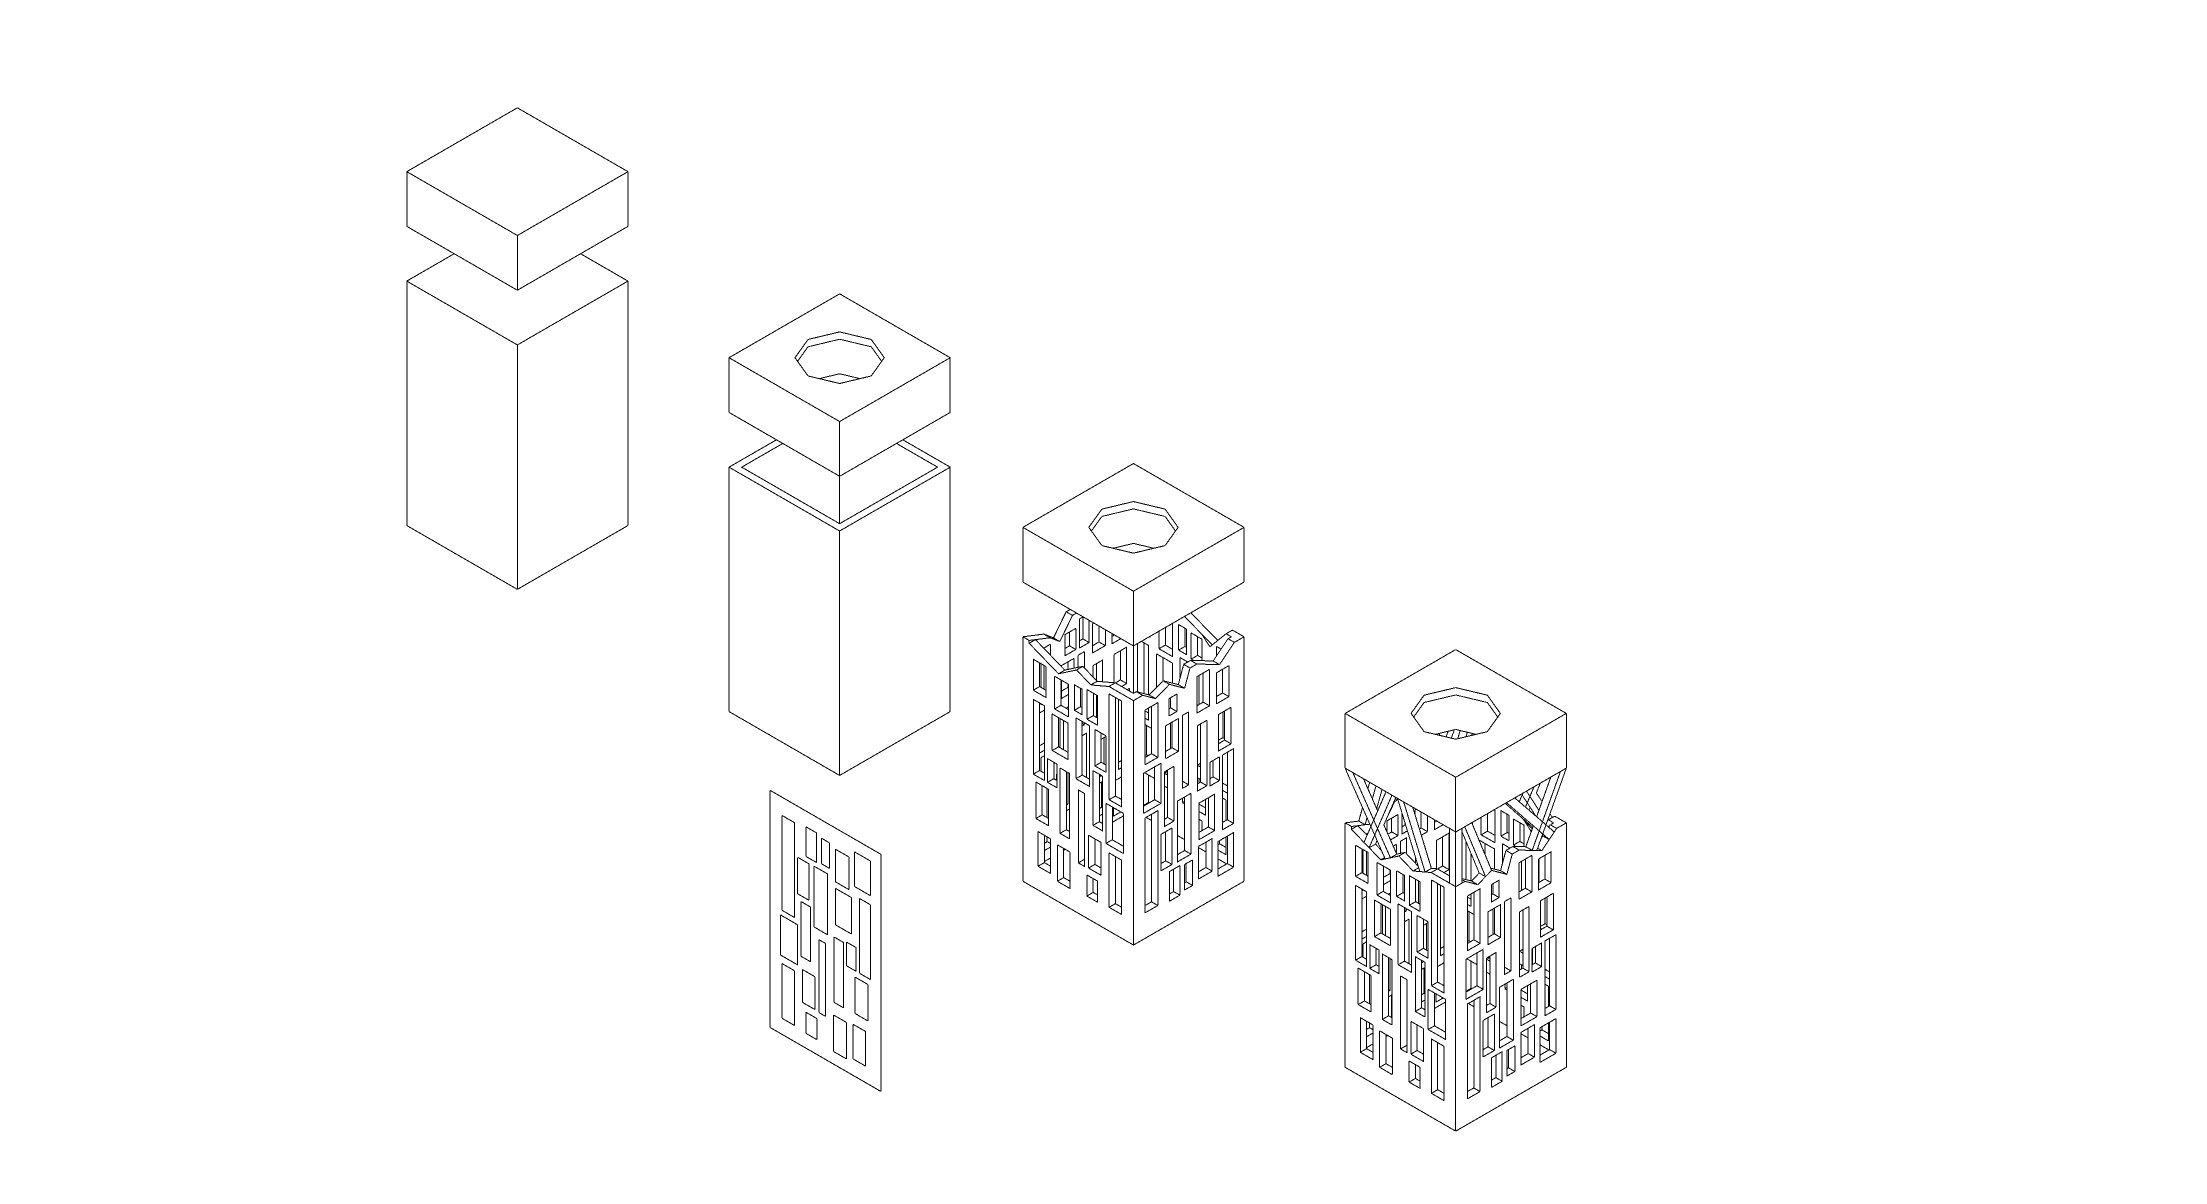
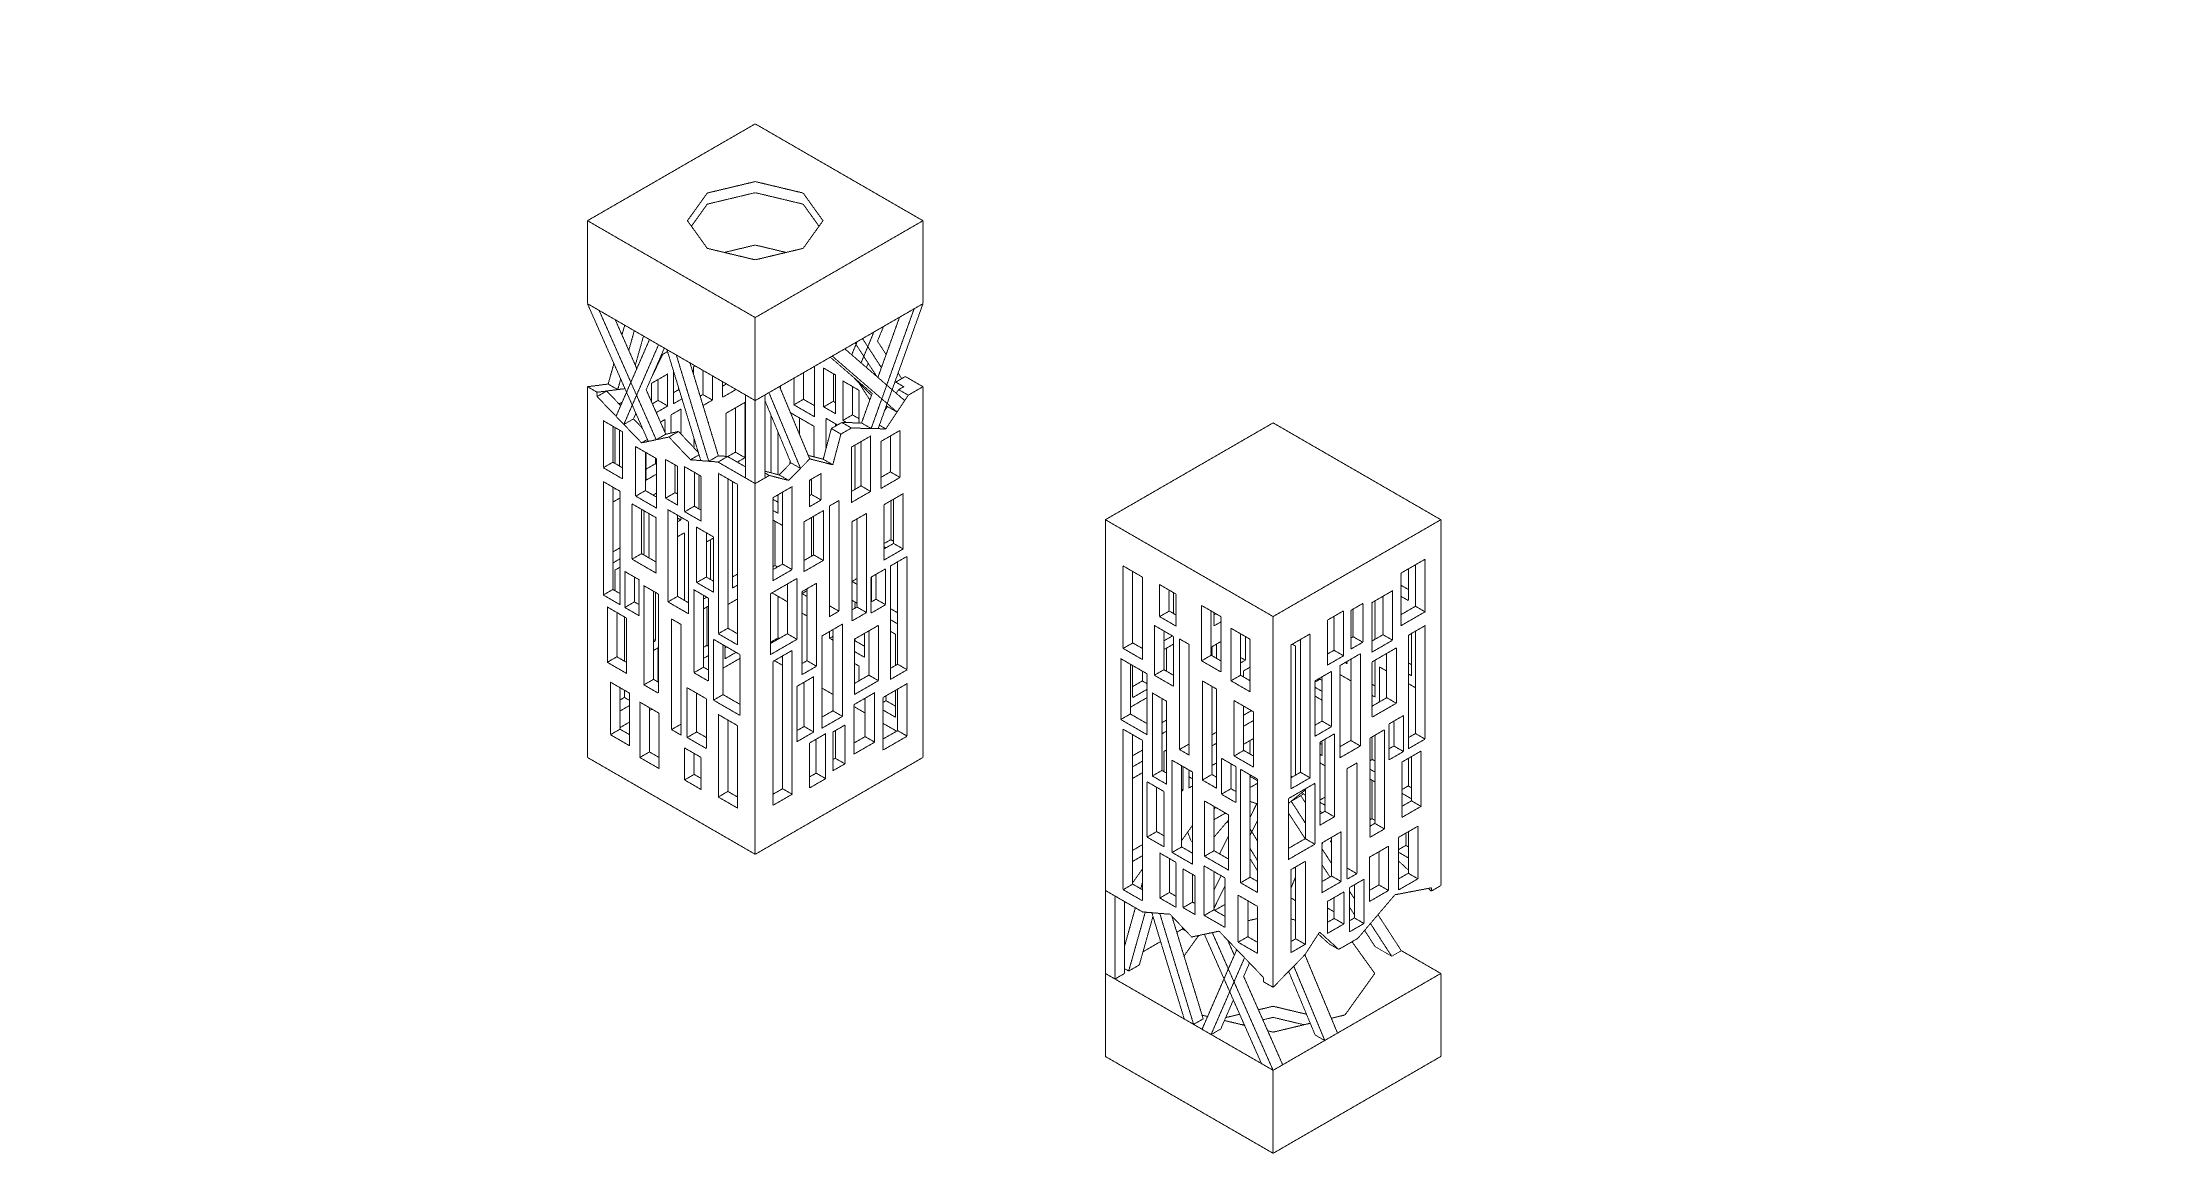
The final design is either a skyscraper or lamp stand if we flipped it
Then I saved the file as (.svg) format and took it to cura to 3d print it as I learned before.
The reason why this design is possible by 3D printing it and not by using alternative method is because of the fine details, the complexity of the support beinf slanted at an vertical angle, and the hole for the light that is organice and voulumetric
Final 3D
Final Outcome
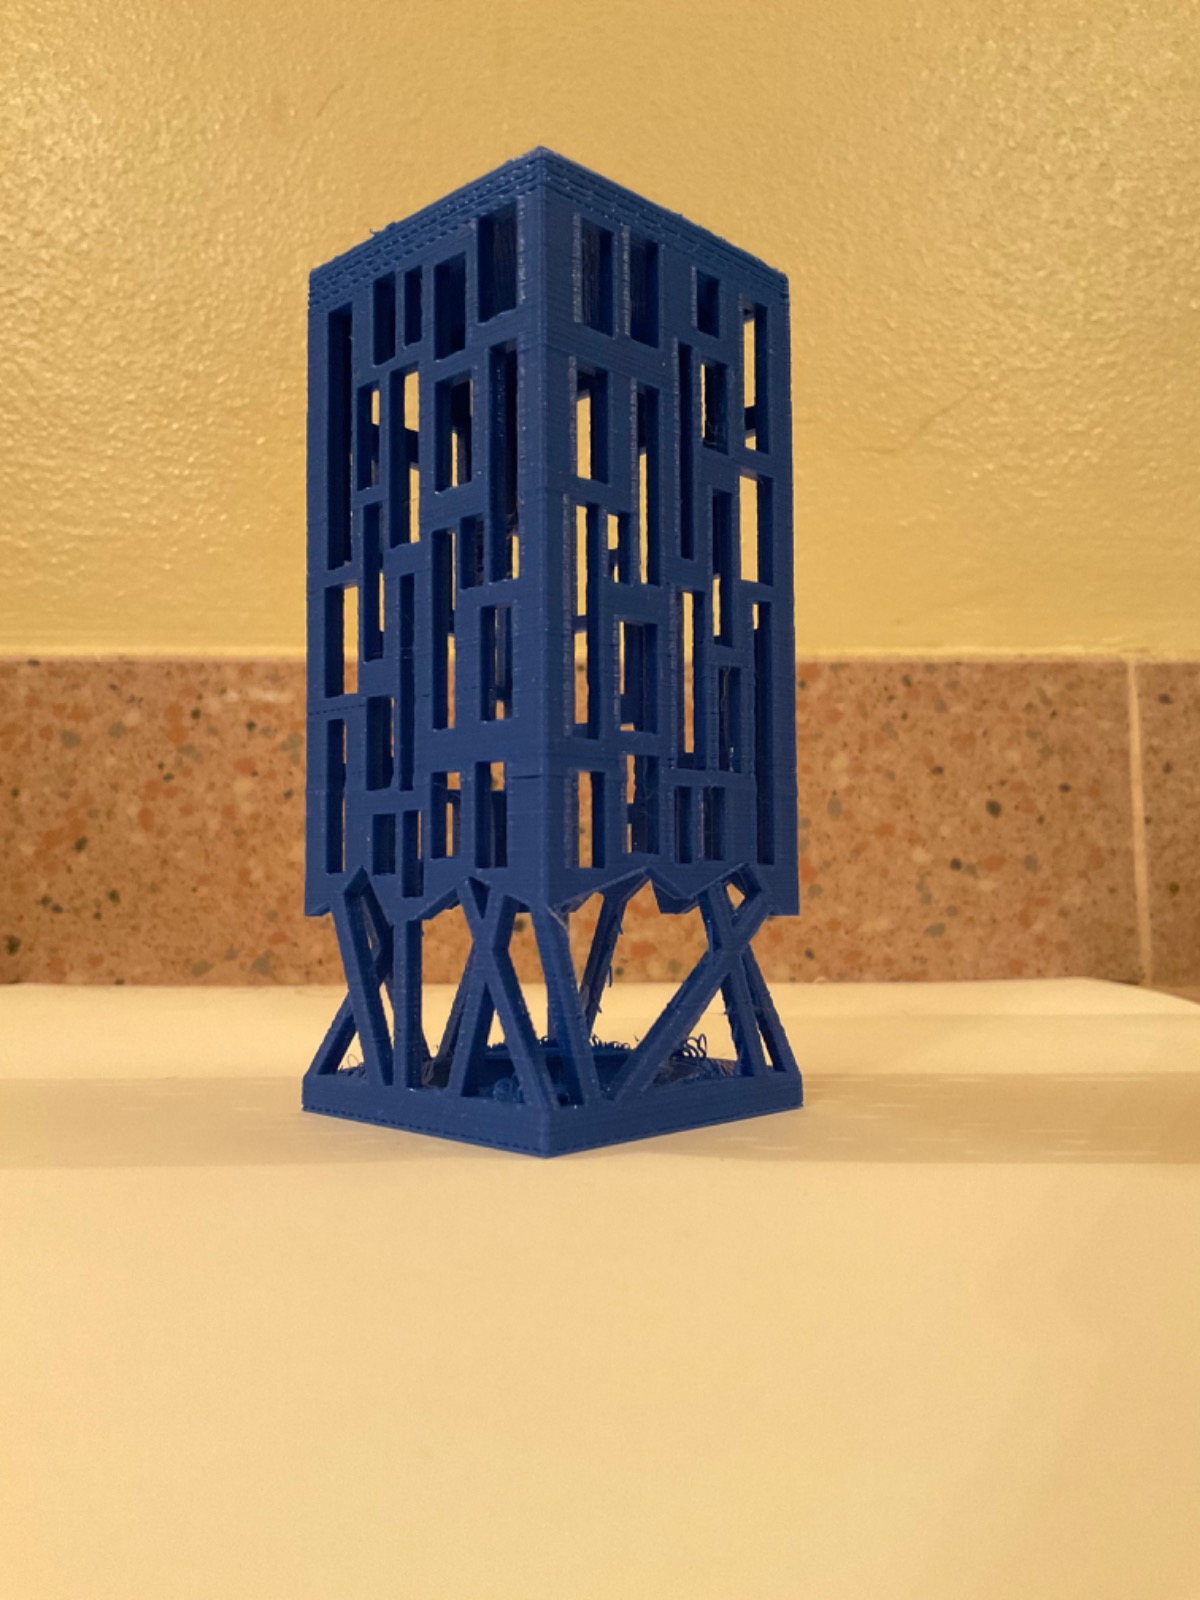
I noticed once the printing is done that the bottom of the design did not get printed as the thickness in the final outcome is less than the design. I believe that the printer could not reach a higher distance therefore it stopped printing. However, the outcome is much elegant and pretier than the design and I liked how it turned out
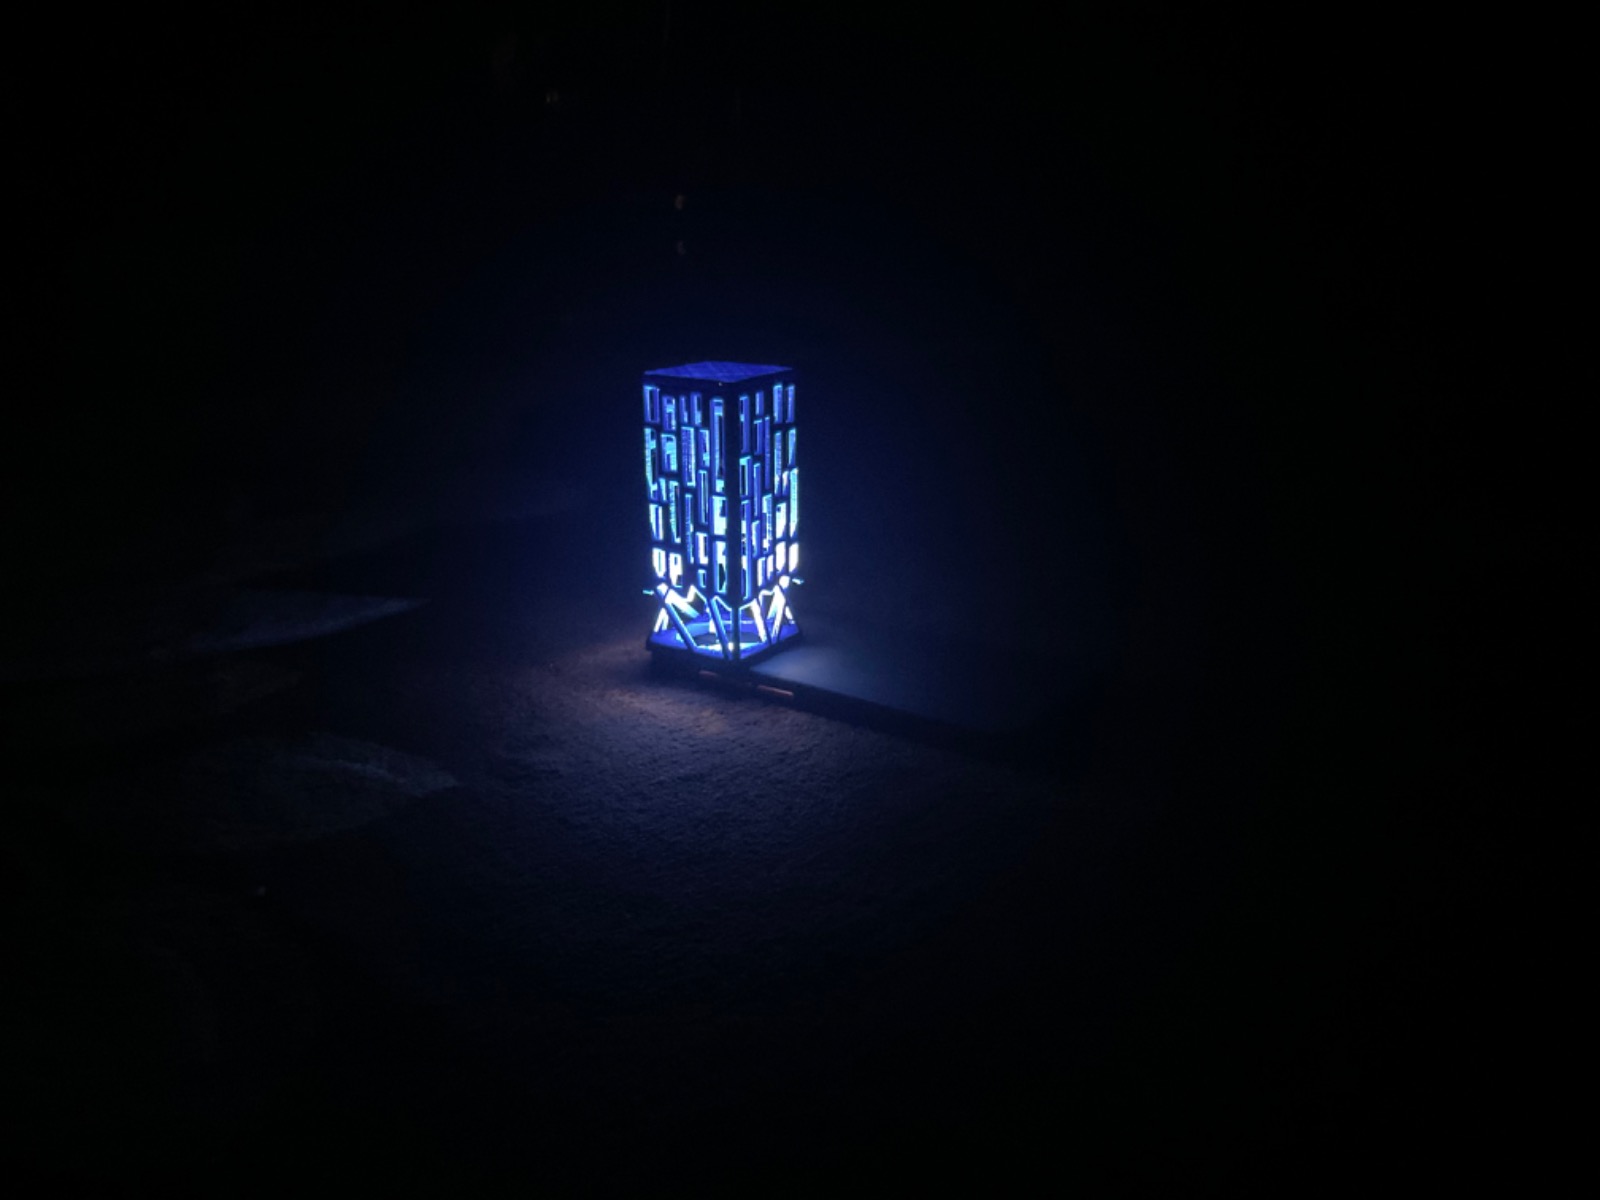 Night Shot