2. Computer Aided design
This week I learned different computer programs. these programs can make 2d and 3d shapes. through these programs I can make different shapes that will be cut or built by different machines that I will learn soon .
Cuttle program
to go directly to Cuttle website and start work click here
it is a 2d program that allow you to draw and create different shapes, based on your imagination. this program is very good for those who use laser cut machine.
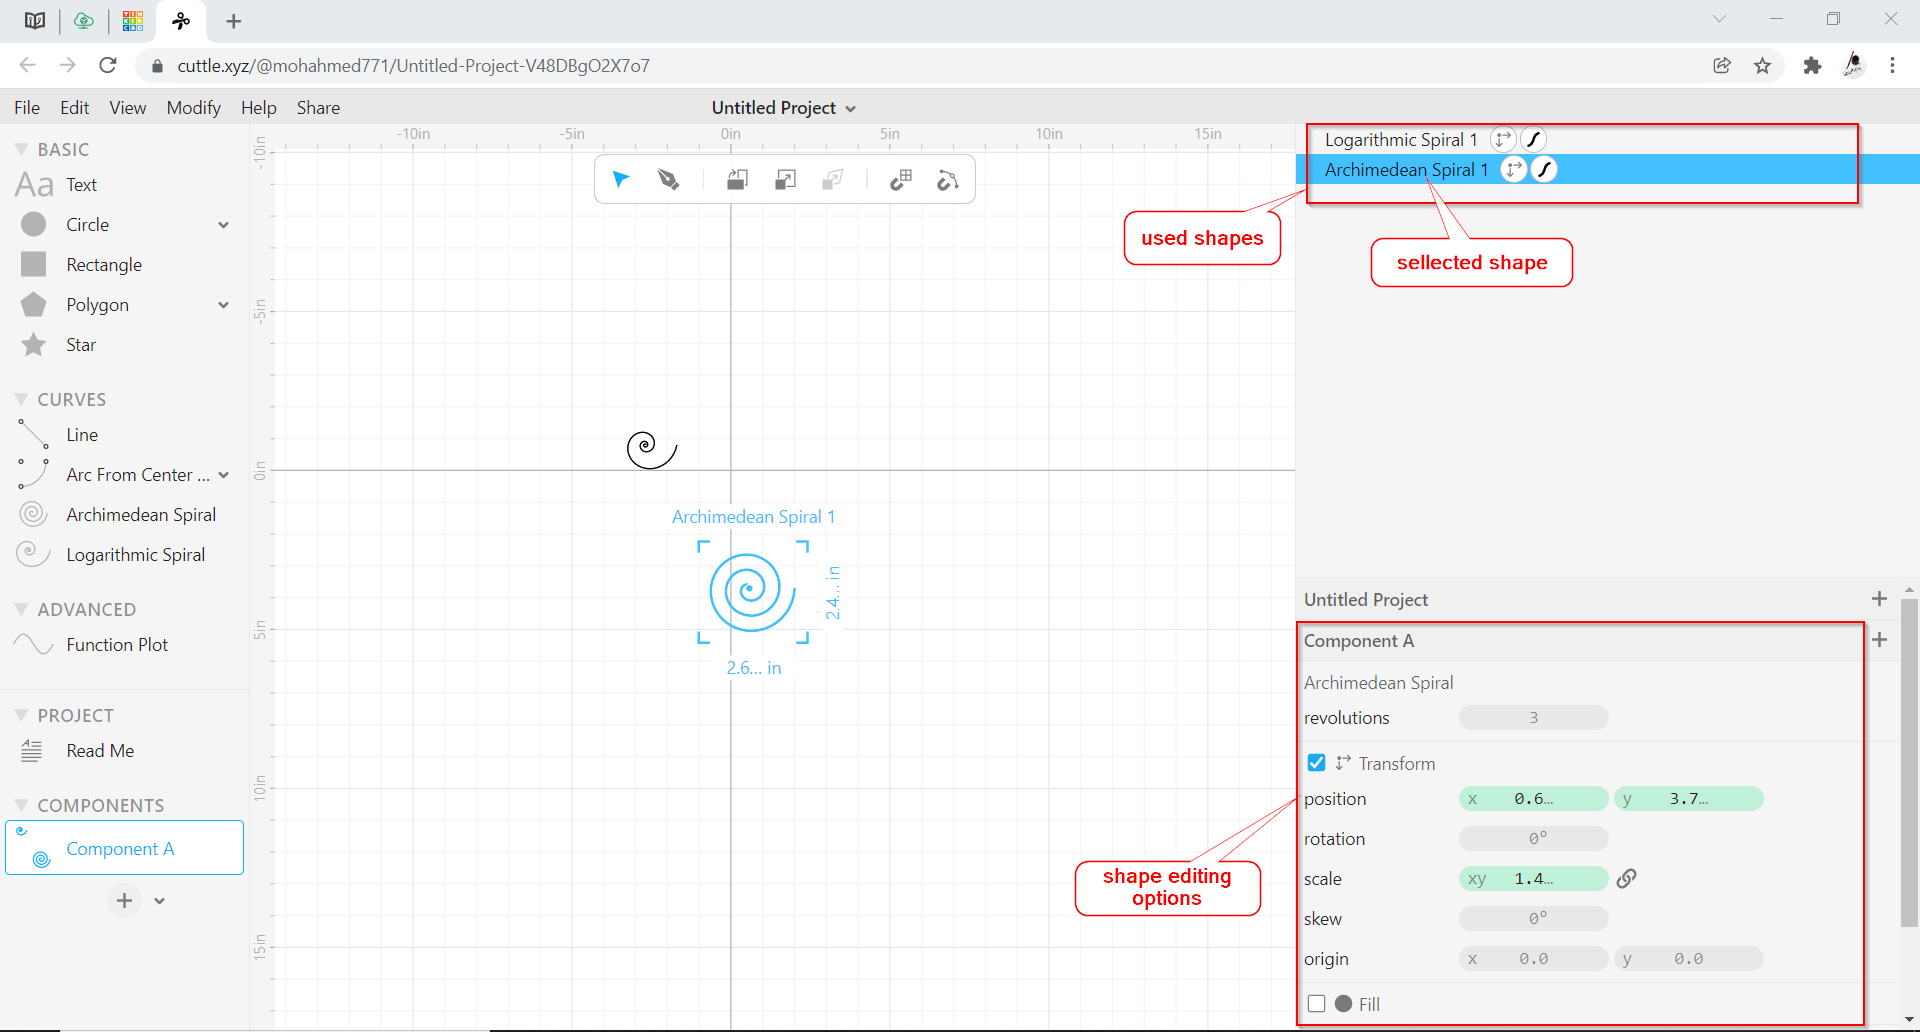
The following photo shows the main components of the program that shows to you when you open it.

to use the shapes that provide by the program you have only to click on it by the left click, then drag it to the work space. see the photo below:
 after drag the shape you want you have the ability to change its characteristics from the small window that opens to you in the left side of the screen.
after you finish your design you can export your design to cut it by the laser cut machine. follow these easy two steps as shown in the image below to export your file:

Tinker CAD program
to go directly to Tinker CAD website and start work click here
is a simple program provided by Autodesk company for easy and simple designs.
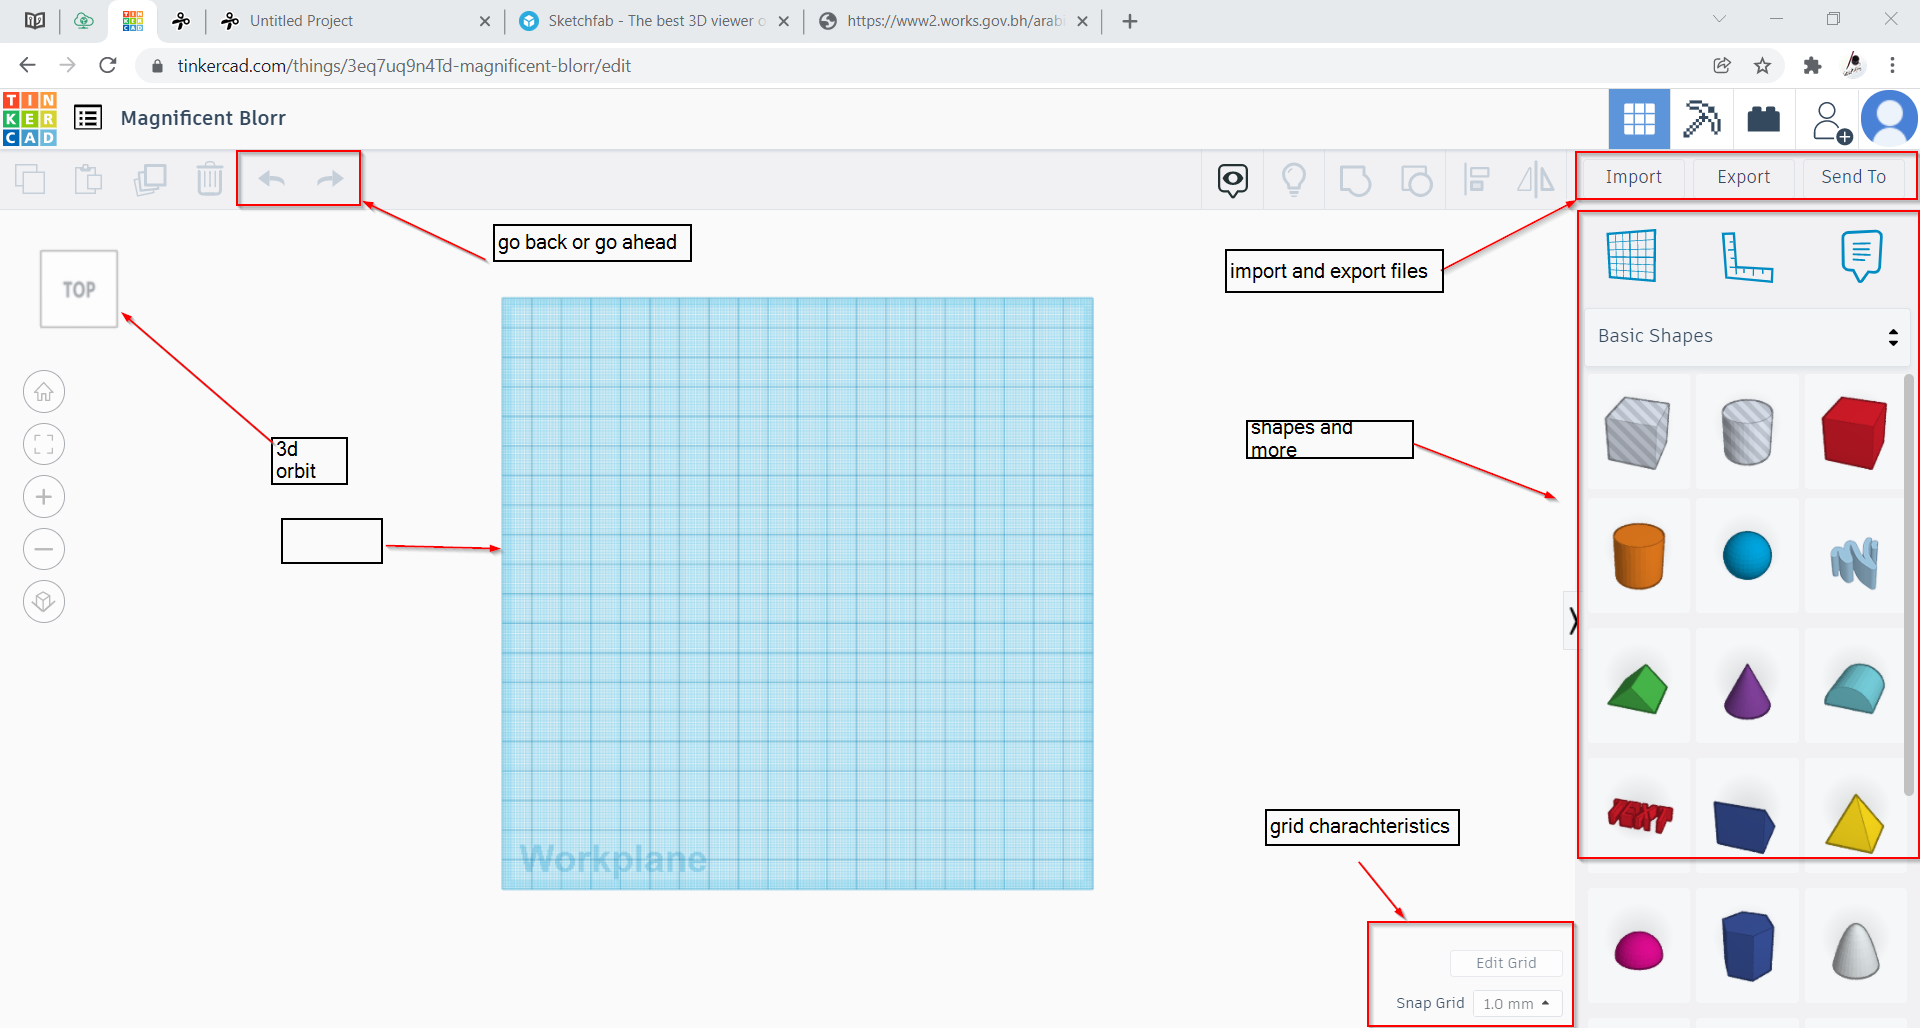
in the following image you can see the main component of the program when you open it
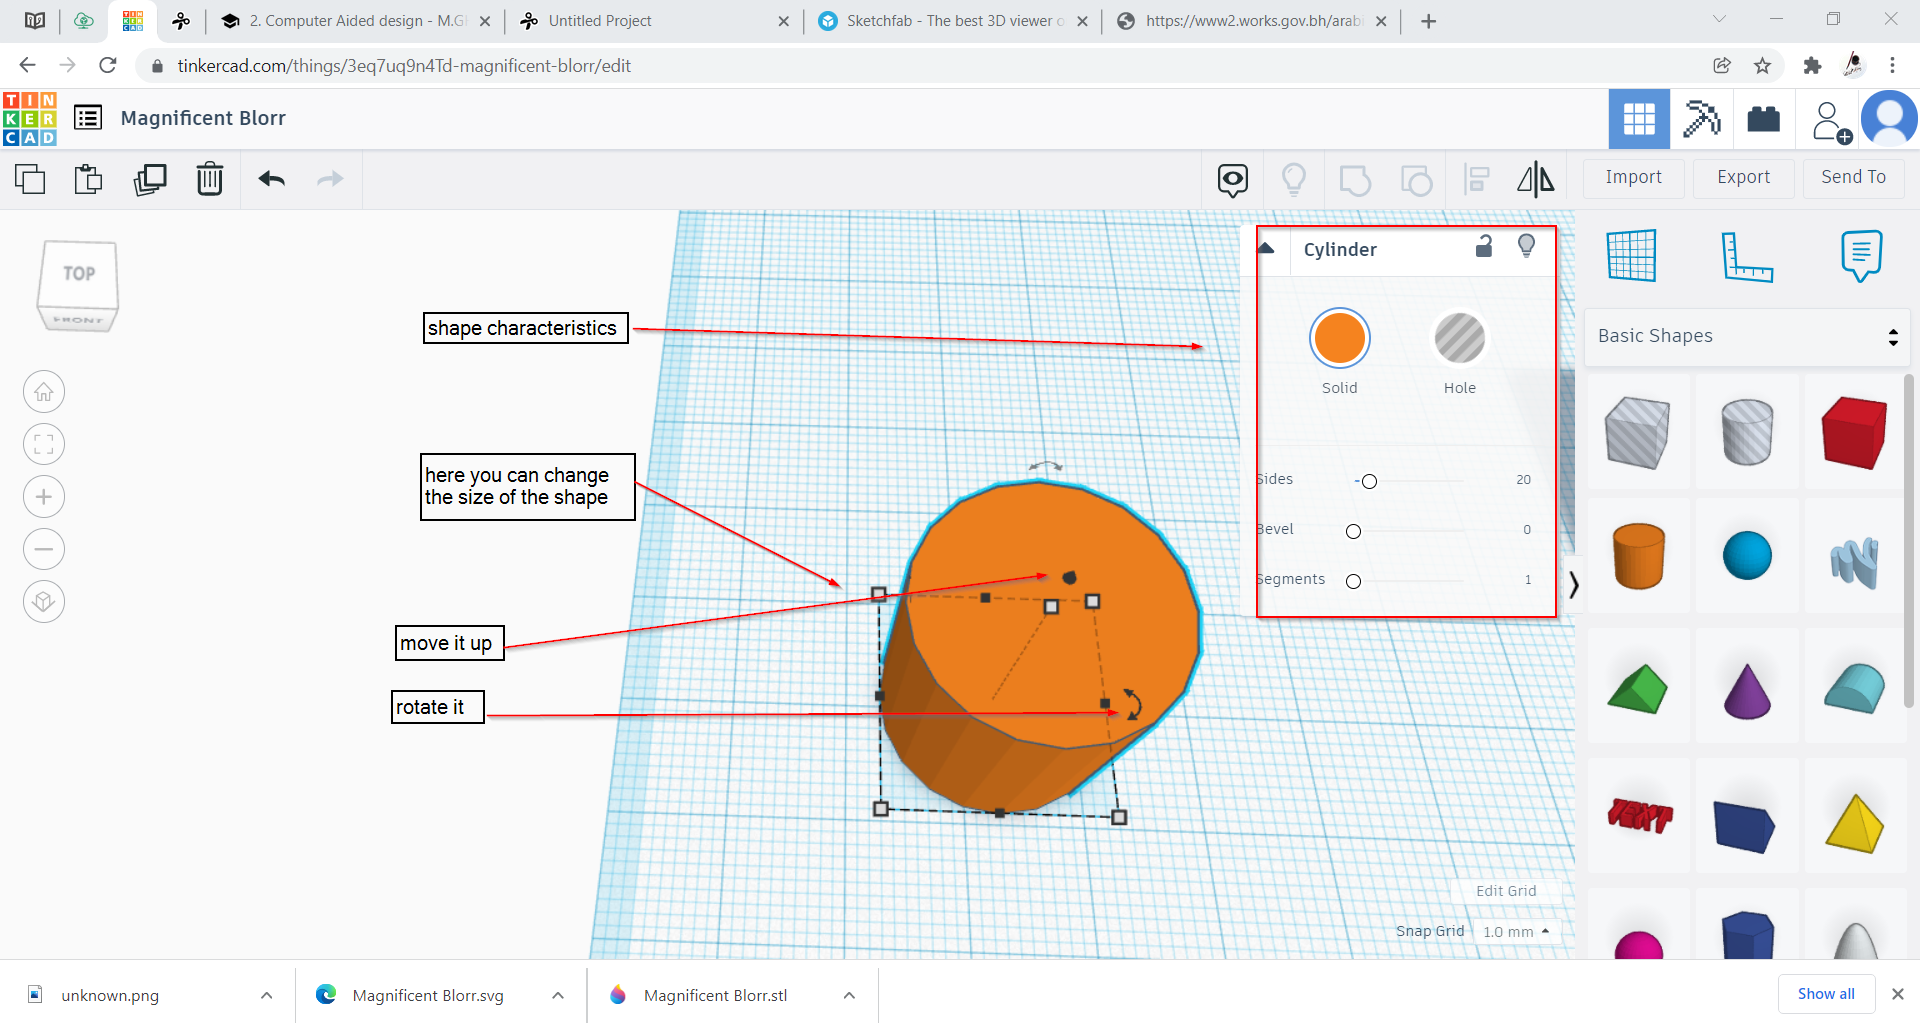
from the shape menu on the left you can click on the shape you want to use then click on the work space to put it where you want then you can modify it’s characteristics by changing its dimensions or make it solid or fill. as it shows in the next image:
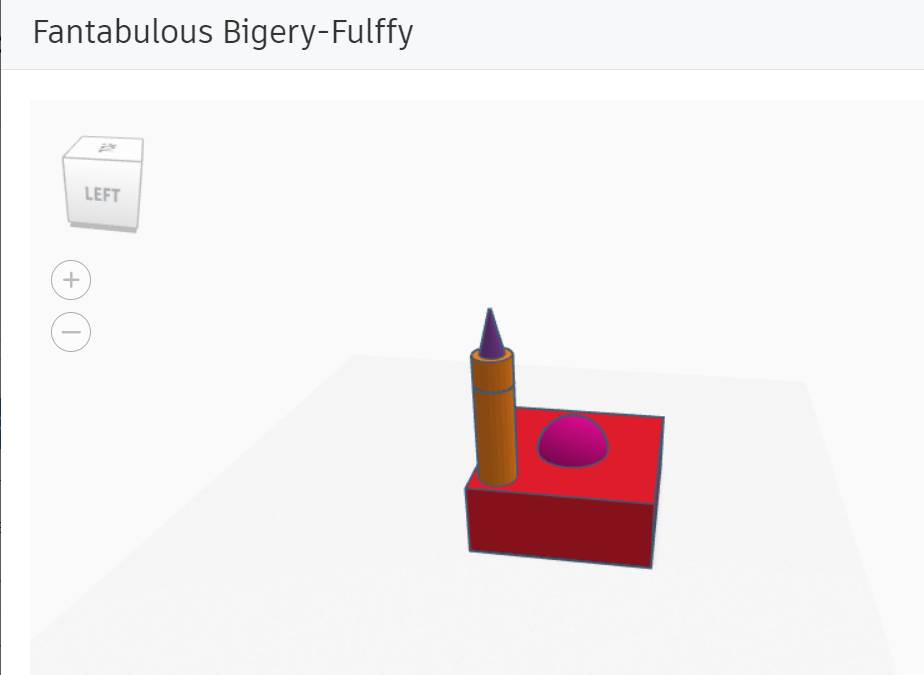
this is my first try on Tinker CAD program assembling a basic mosque 3d shape as it shown in the image below
AutoCAD
to download this program click here
it is an advanced program for 2d drawings usually used by professionals. it is an easy program to learn and through it you can make many things for different fields.
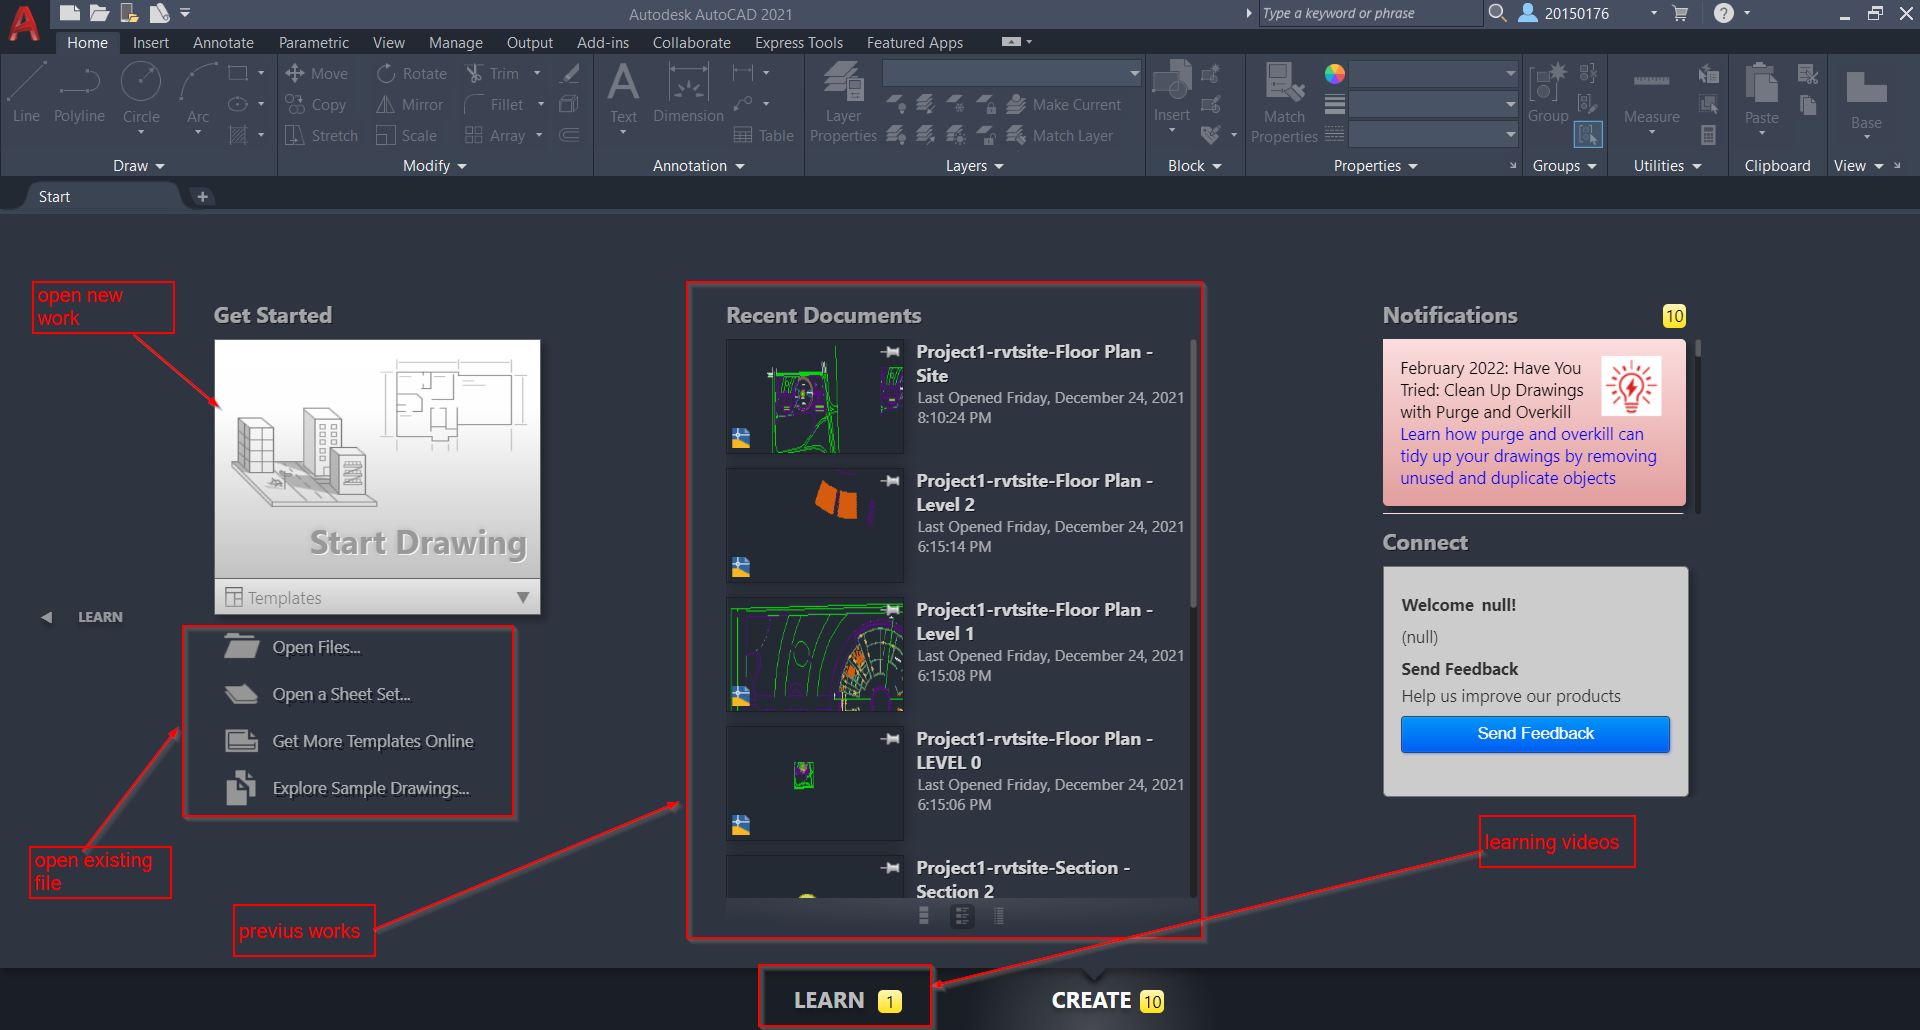
the main page that will opens to you since you open the program you can open new drawing space or open an existing work on your laptop. also, you can see your previous work. as it shown in the image below:
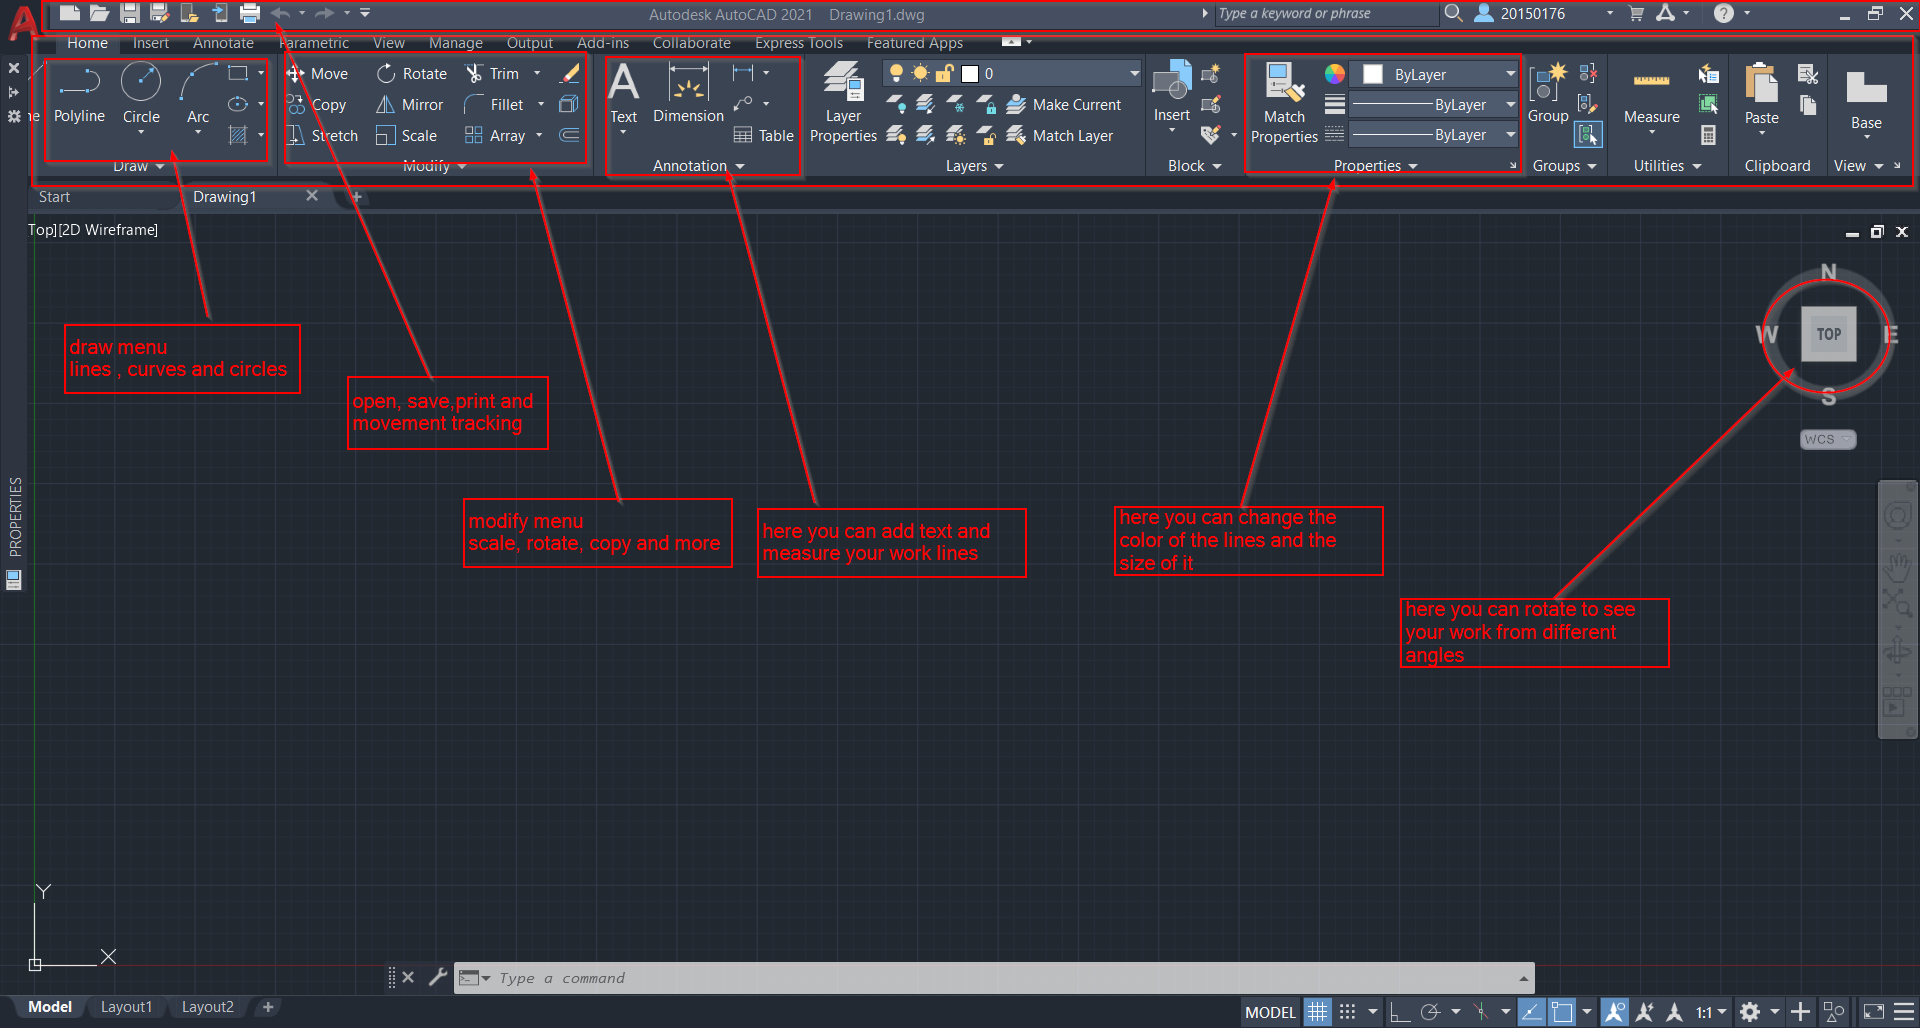
after open a new project you will see many tools on the top of the screen through these tools you can draw what you want related to the x&y axis. you can use shortcuts to faster your work ex: l= line r=rectangle c= circle co= copy di= dimension h= hatch
the image below shows more details:
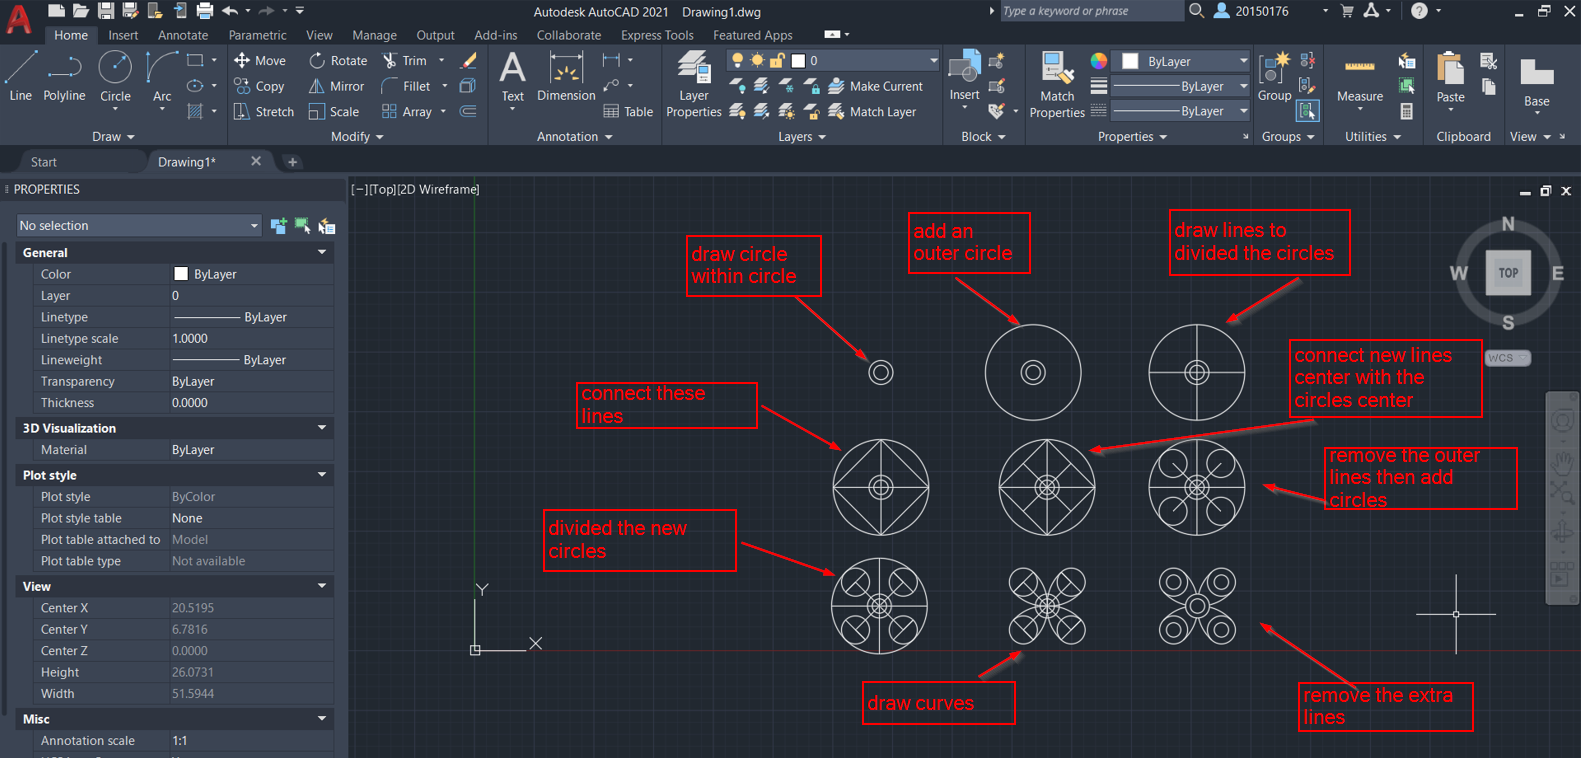
I draw a spenar by using auto CAD. in the following image it shows the steps that i did to draw it. it is very easy and simple.
Autodesk Fusion 360
to download this program click here
program that use to design 3d shapes usually used by engineers to design any part of machines or tools, then 3d printer used to form this shape.
follow the next steps to start work on the program:
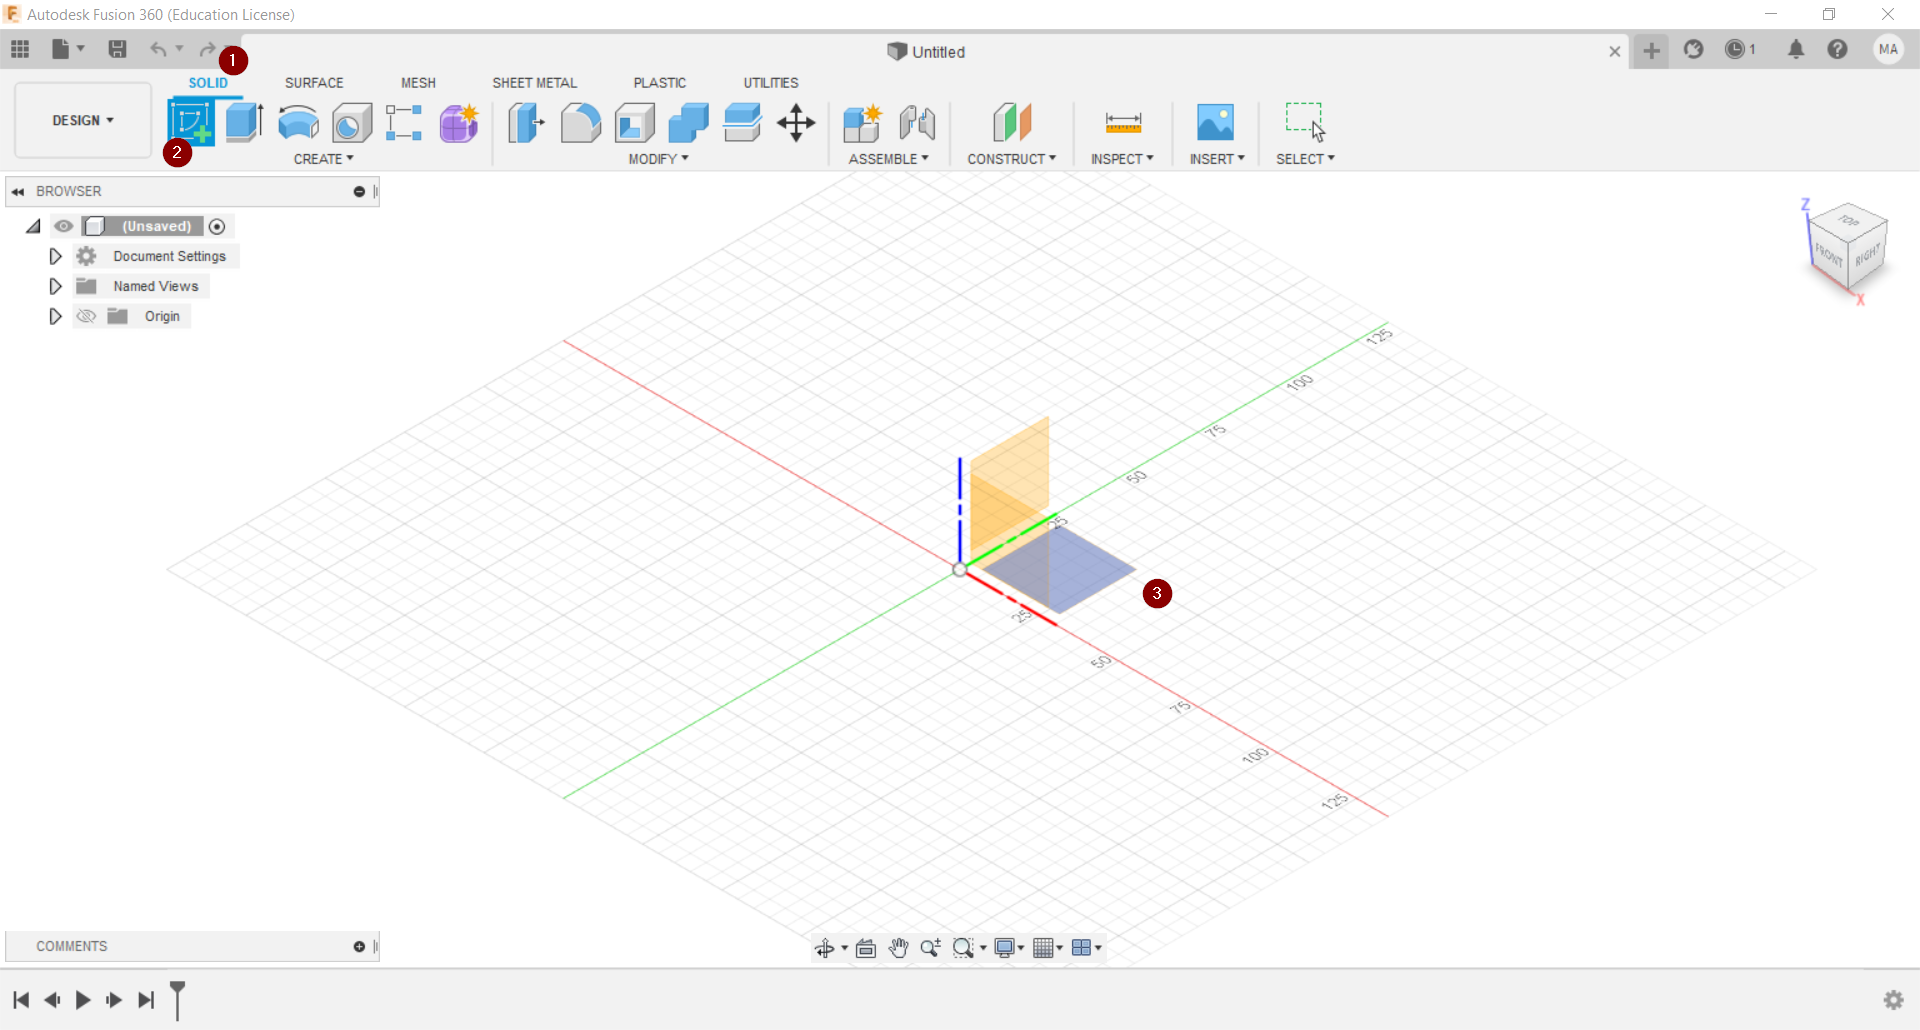
1- go to solid tools par
2- click on create sketch.
3- choose the work space based on x,y&z axis
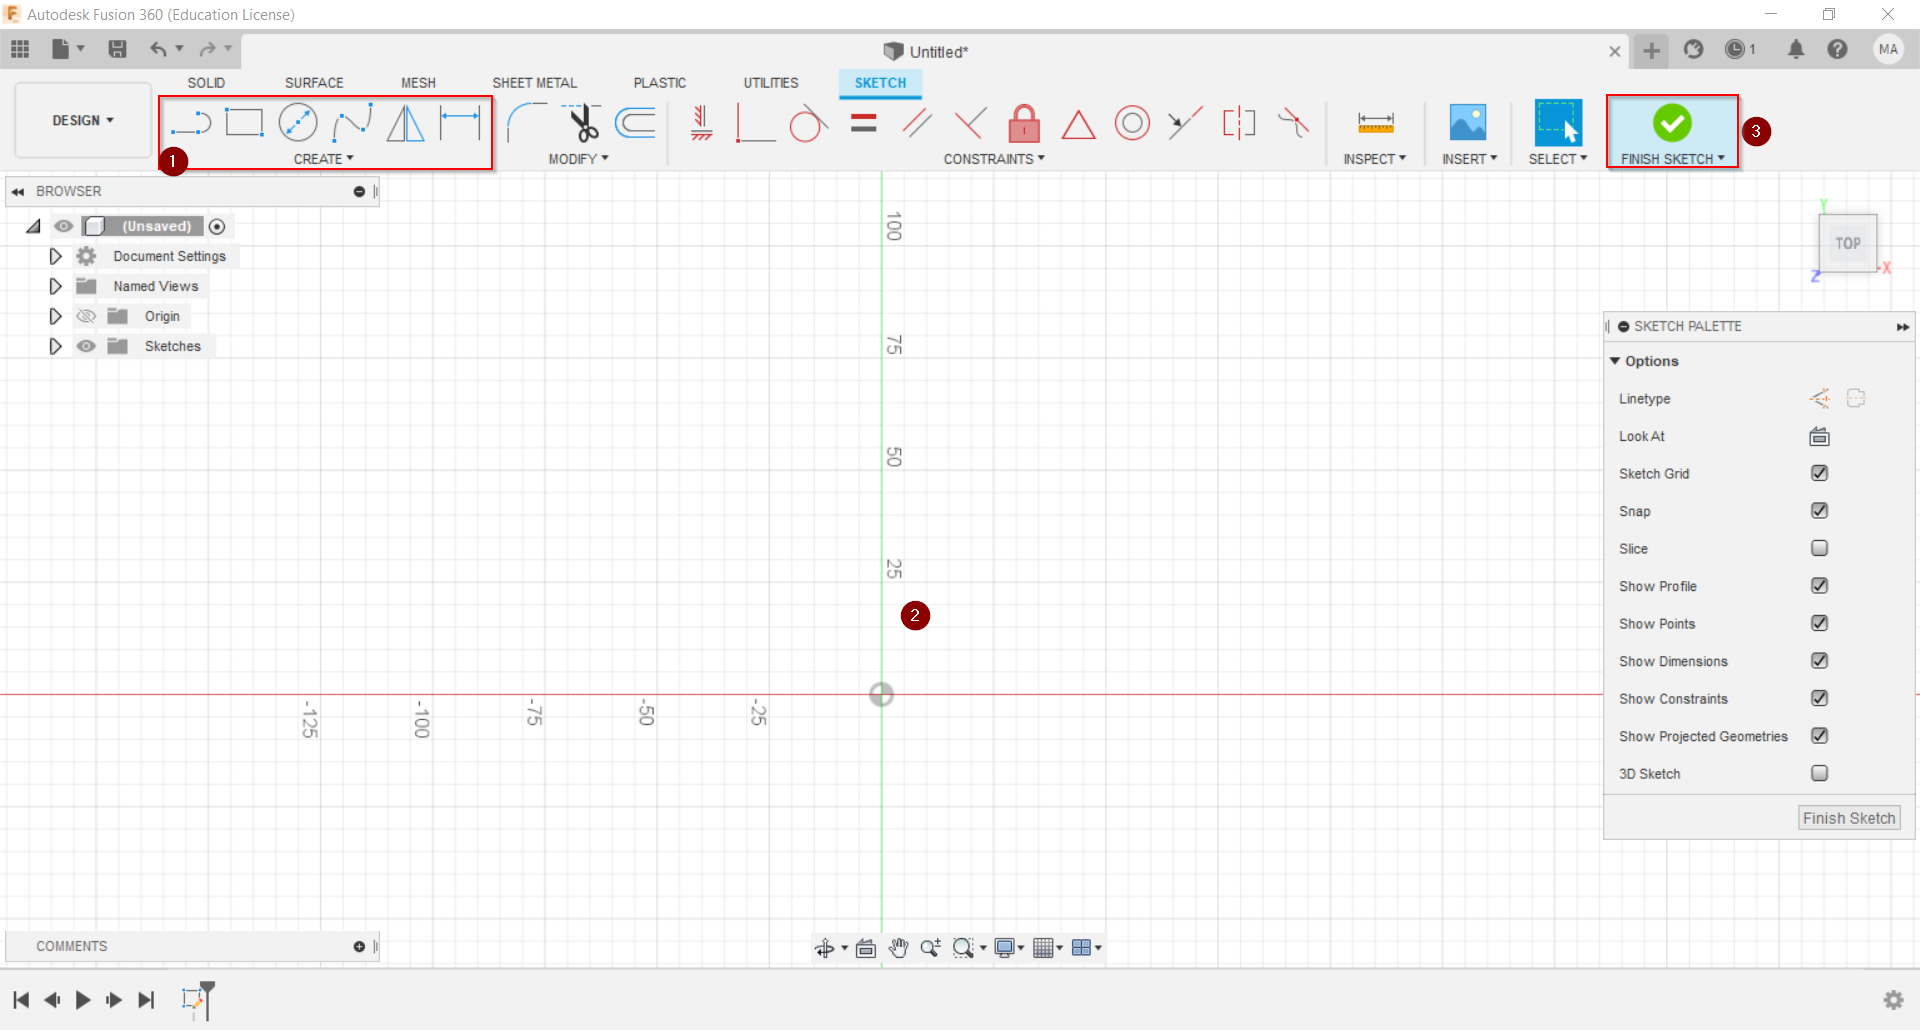
to start work or create shapes follow the next steps:
1- click on one of the shapes that appears to you when you clicked on create sketch.
2- start draw it on the work space.
3- click on finish sketch whenever you finish
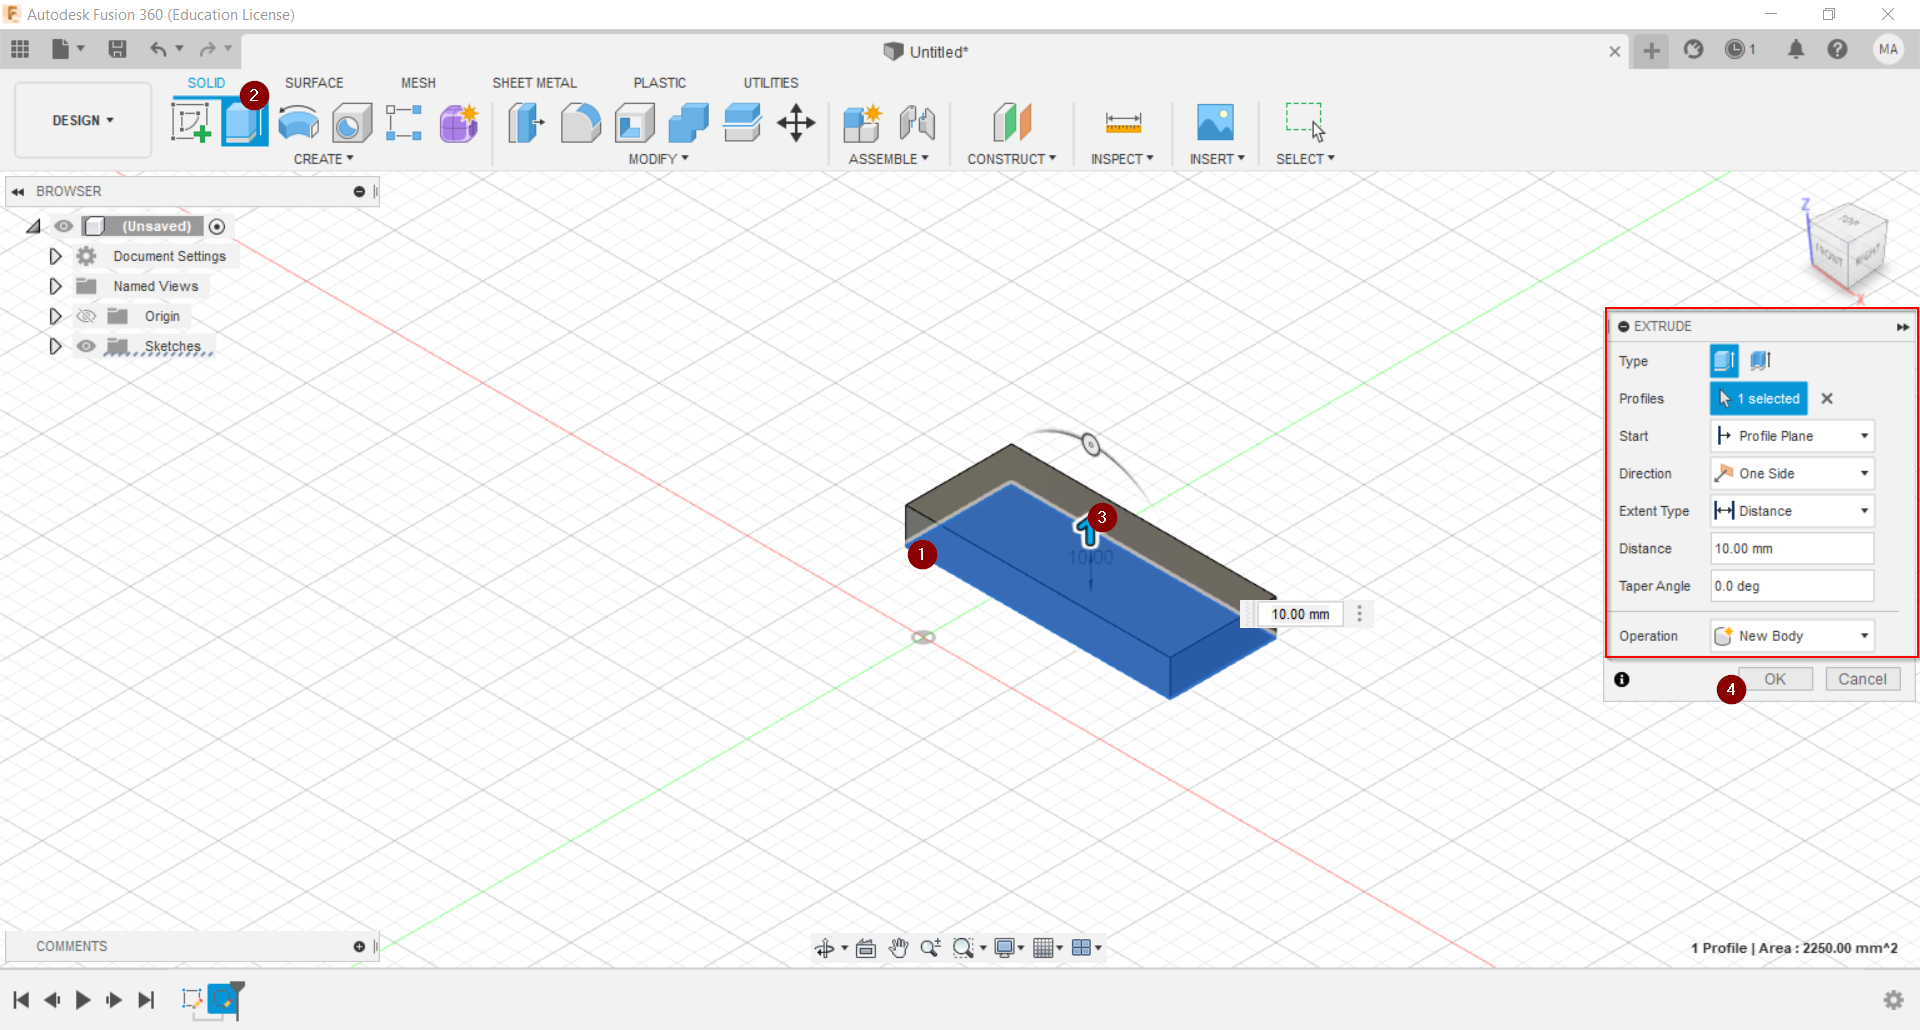
after you finish drawing your d surface you can convert it to 3d object by following the next:
1- select the surface you drawing
2- click on extrude from solid tools par
3- click on the surface again and start pull it up by the blue arrow appears
4- from the extrude characteristic box on the left side you can change the and play with the shape height, angle and direction.
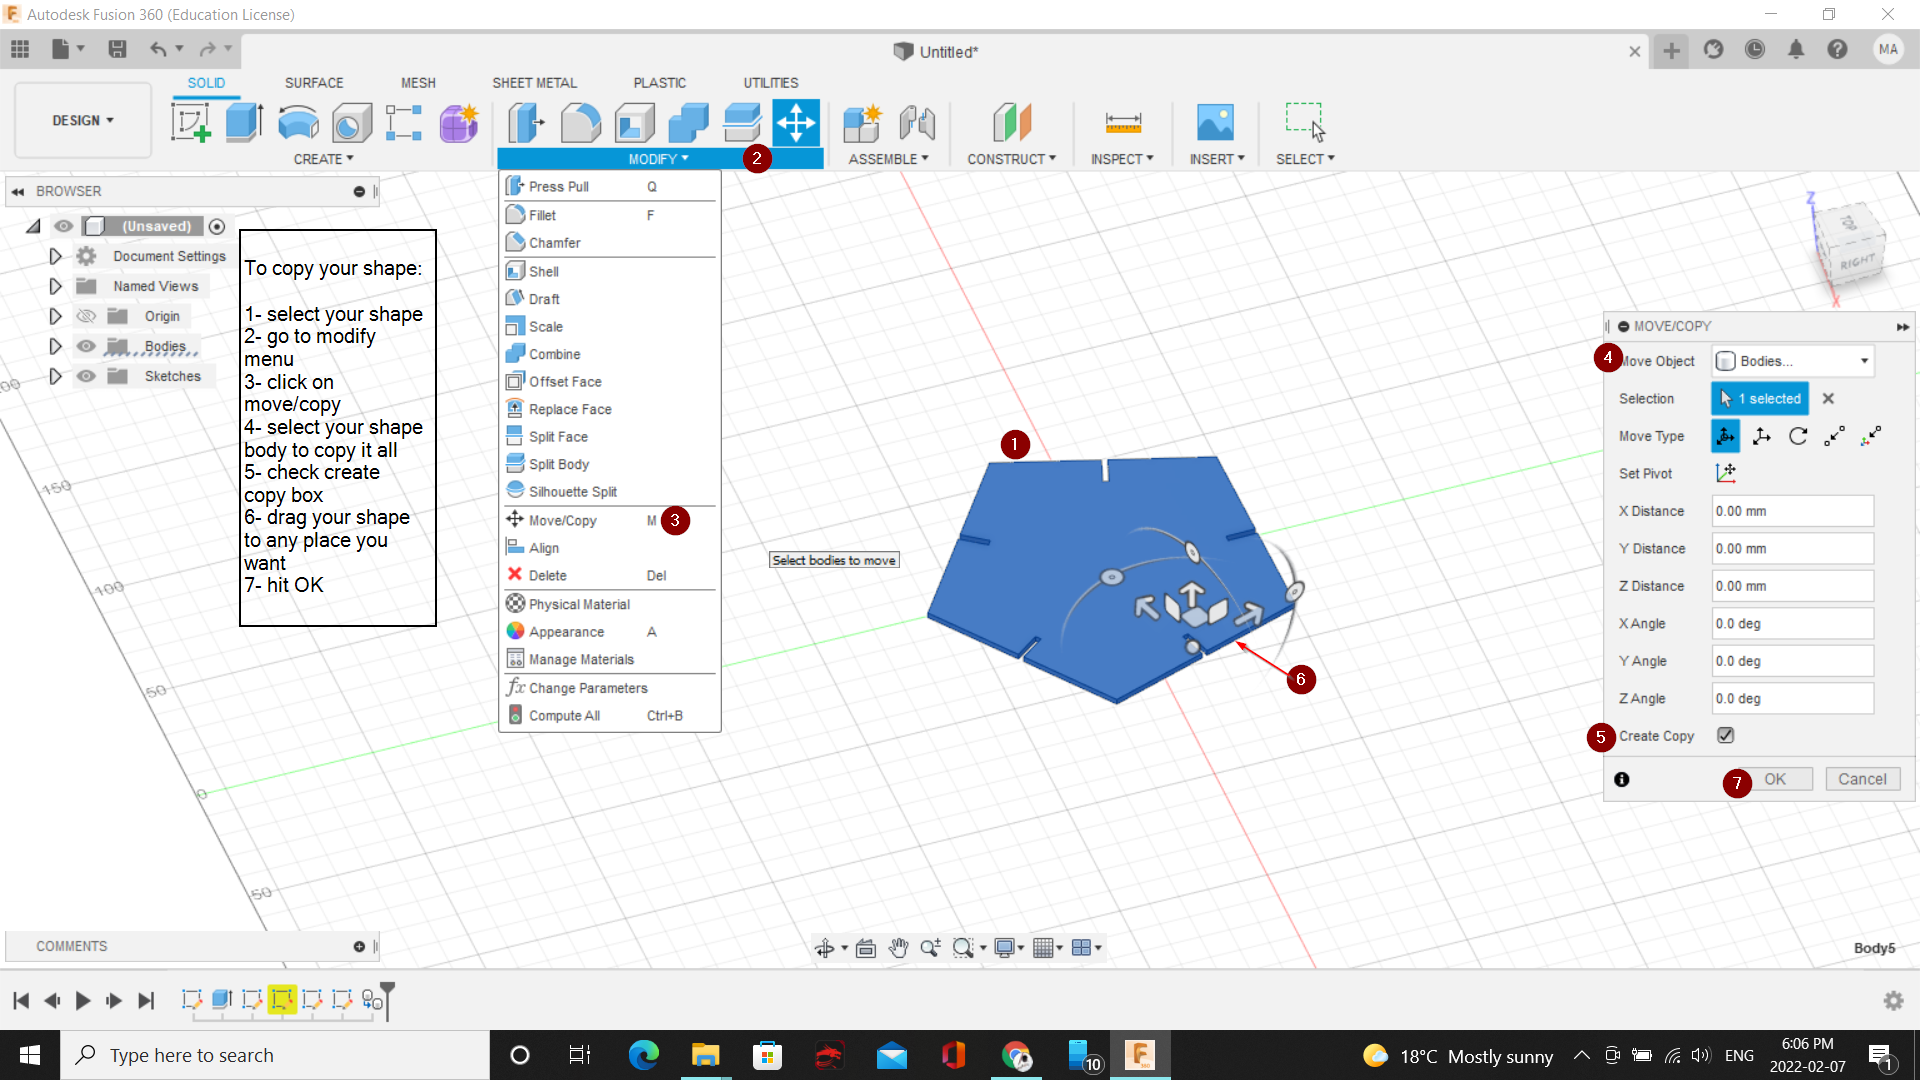
to move or copy your shape follow the steps in the image below:
Useful links
-
to download my work on cuttle program: click here to download
-
to download my work on tinker CAD program: click here to download first design click here to download second design
-
to download my work on AutoCAD program: click here to download
-
to download my work on Fusion Fusion360 program: click here to download