4. Embedded programming
This week I worked on Arduino IDE program to design and controlling my circuit.
Arduino IDE
Is on of the most popular programs of designing circuits and board. it is written bugged and produced by Arduino company. is a program using C++ language to write your codes, through it you can controlling on your board and design it the way you want to be look like. click here to download Arduino in the following link is a link for the first steps of starting Arduino and how to use it and install your board. click here to go to the instruction guide lines
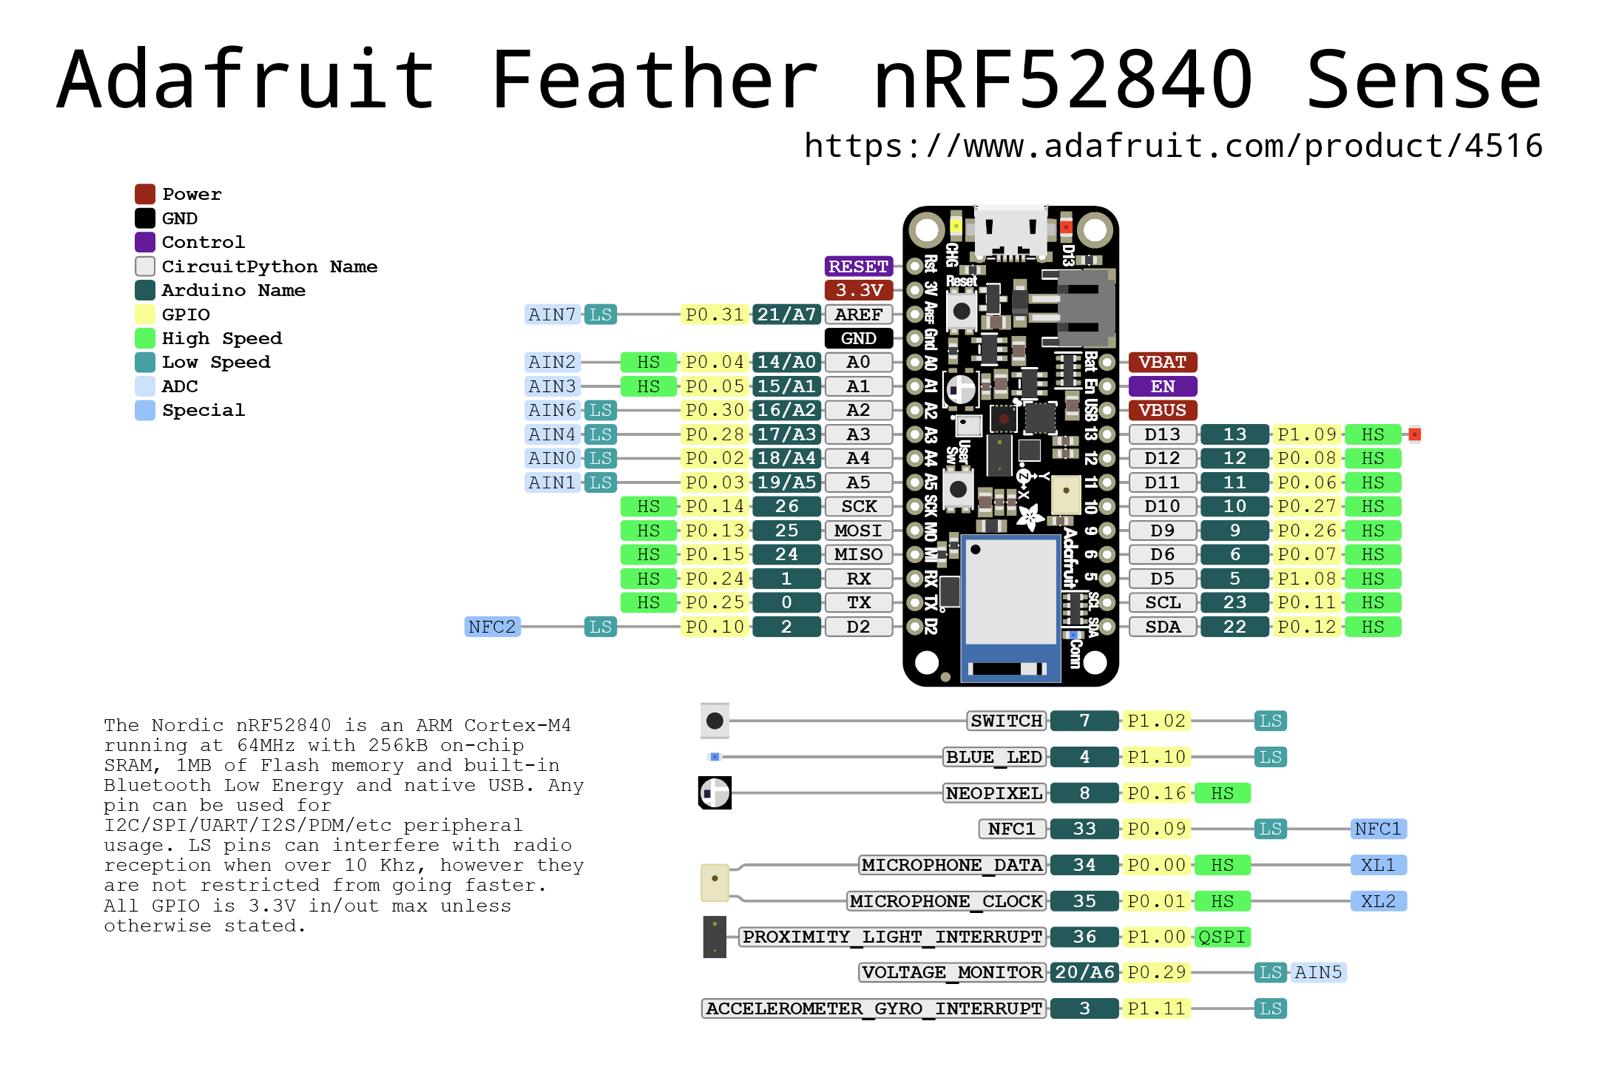
after downloading the app, we were asked to download a bored, that we are going to work on. this bored called (Adafruit Feather nRF52840 Sense), it shows in the image below
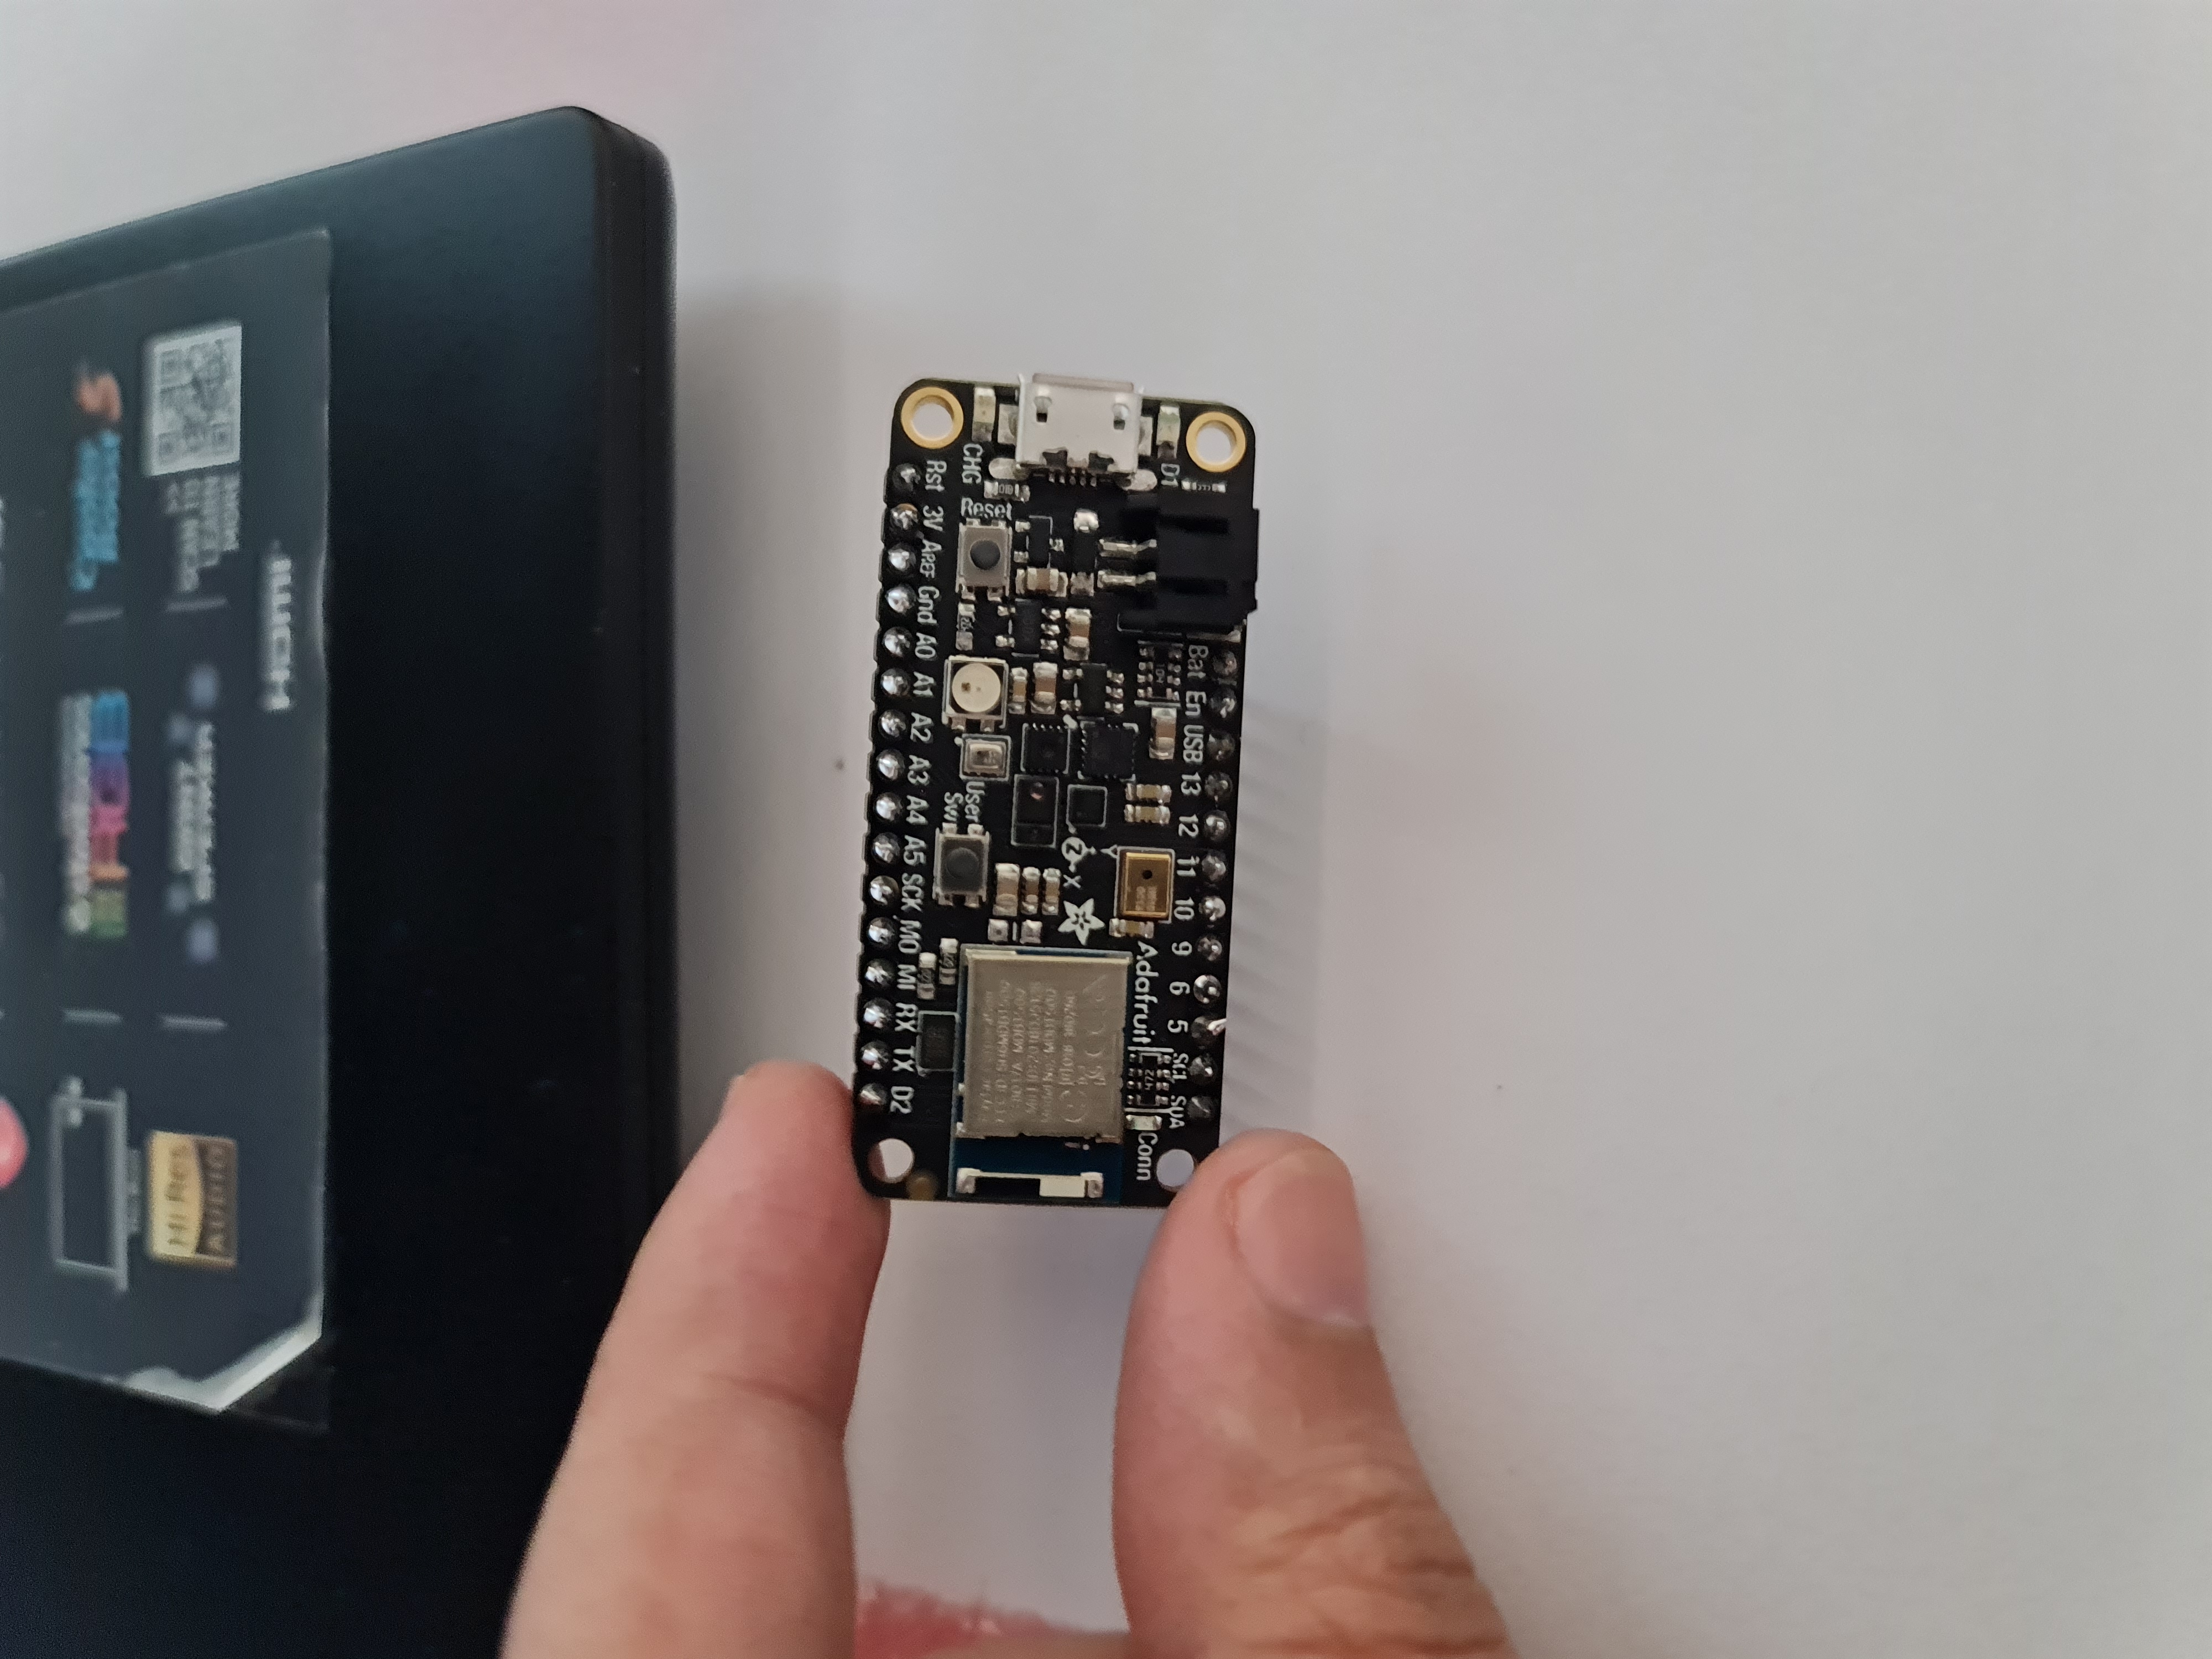
so to download this board in Arduino to start wok on it do the following steps:
1- open Arduino
2- go to file
3- go to preferences
4- ad the URL of the board manager
 then,
1- go to tools
2- click on board
3- board manager
a window of the board manger will opens in the left side. find out (Adafruit nRF52 by Adafruit) then install it.
then,
1- go to tools
2- click on board
3- board manager
a window of the board manger will opens in the left side. find out (Adafruit nRF52 by Adafruit) then install it.

after downloading the board
1- go to tools
2- click on board
3- click on the arrow next to (Adafruit nRF52)
then we choose the board type that we have which is (Adafruit Feather nRF52840 Sense)
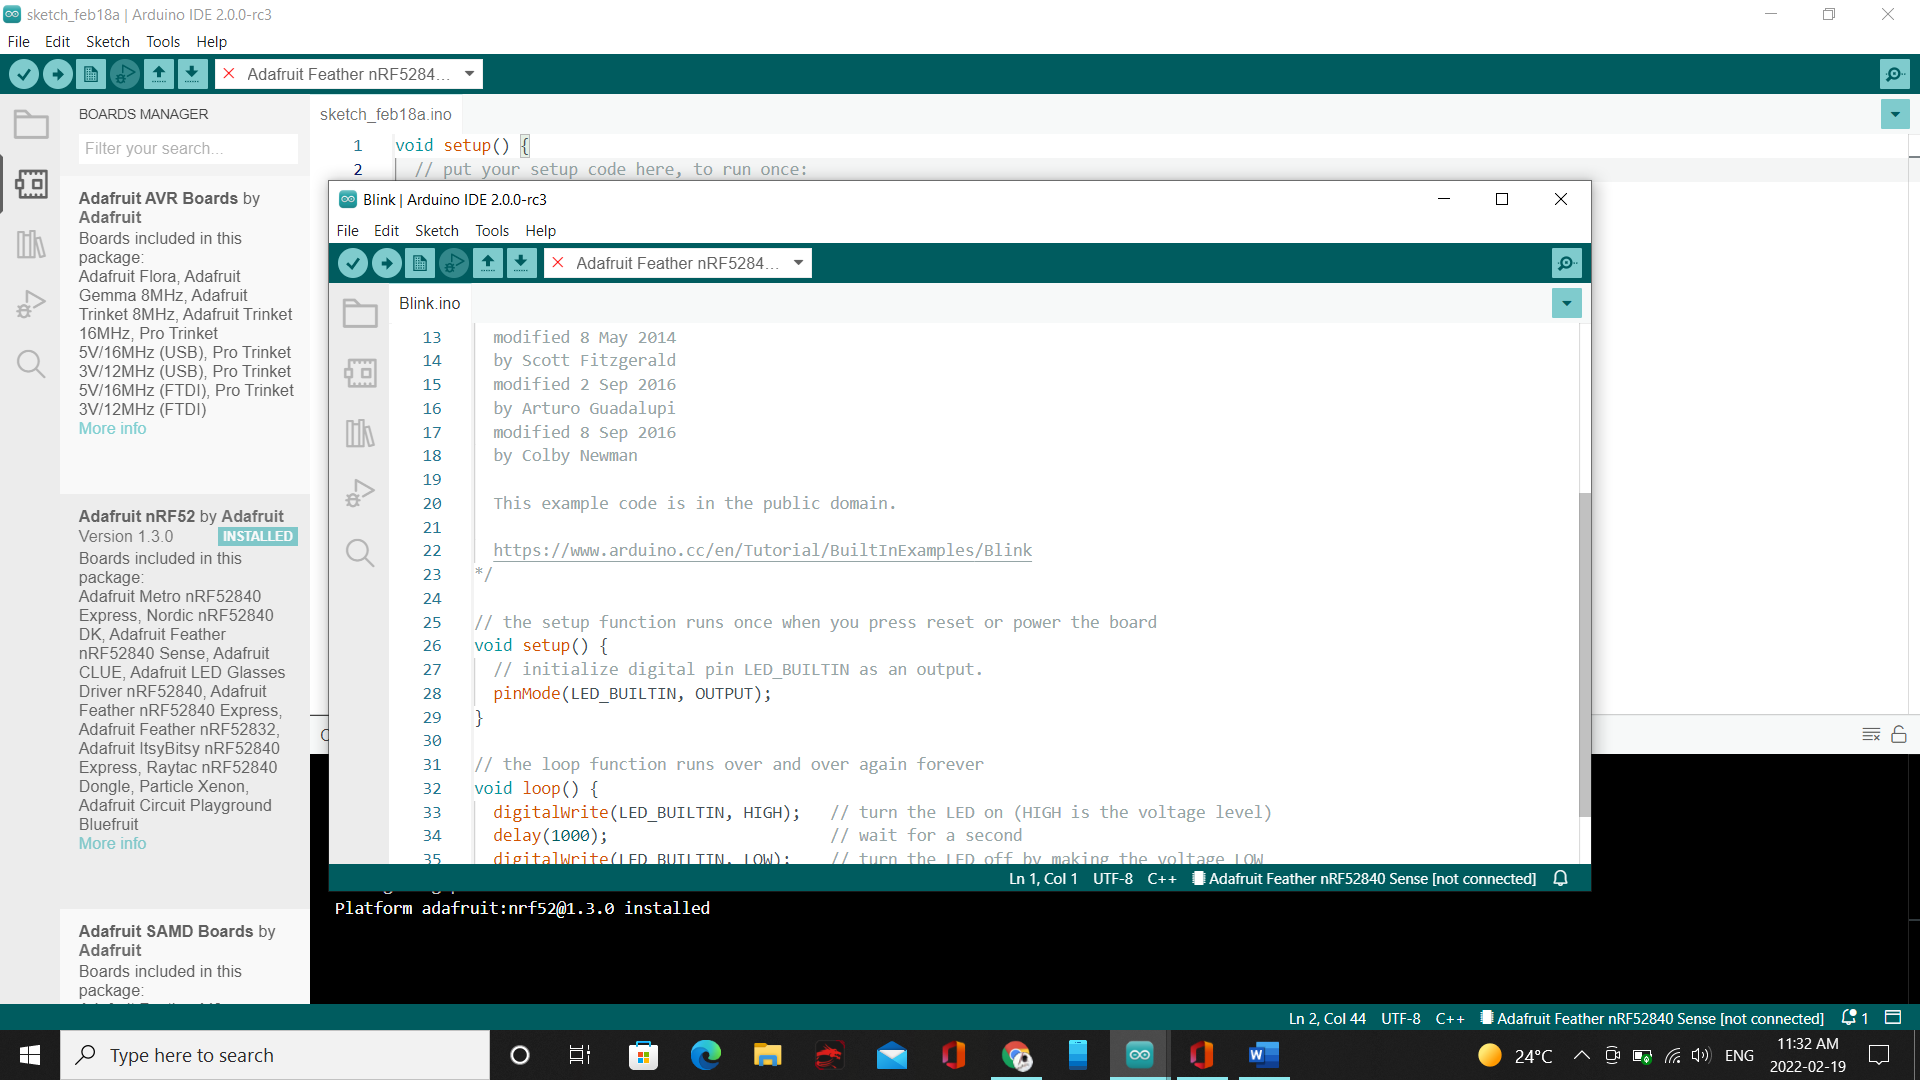
 after that we have to go to Examples,01. Basic, Blink
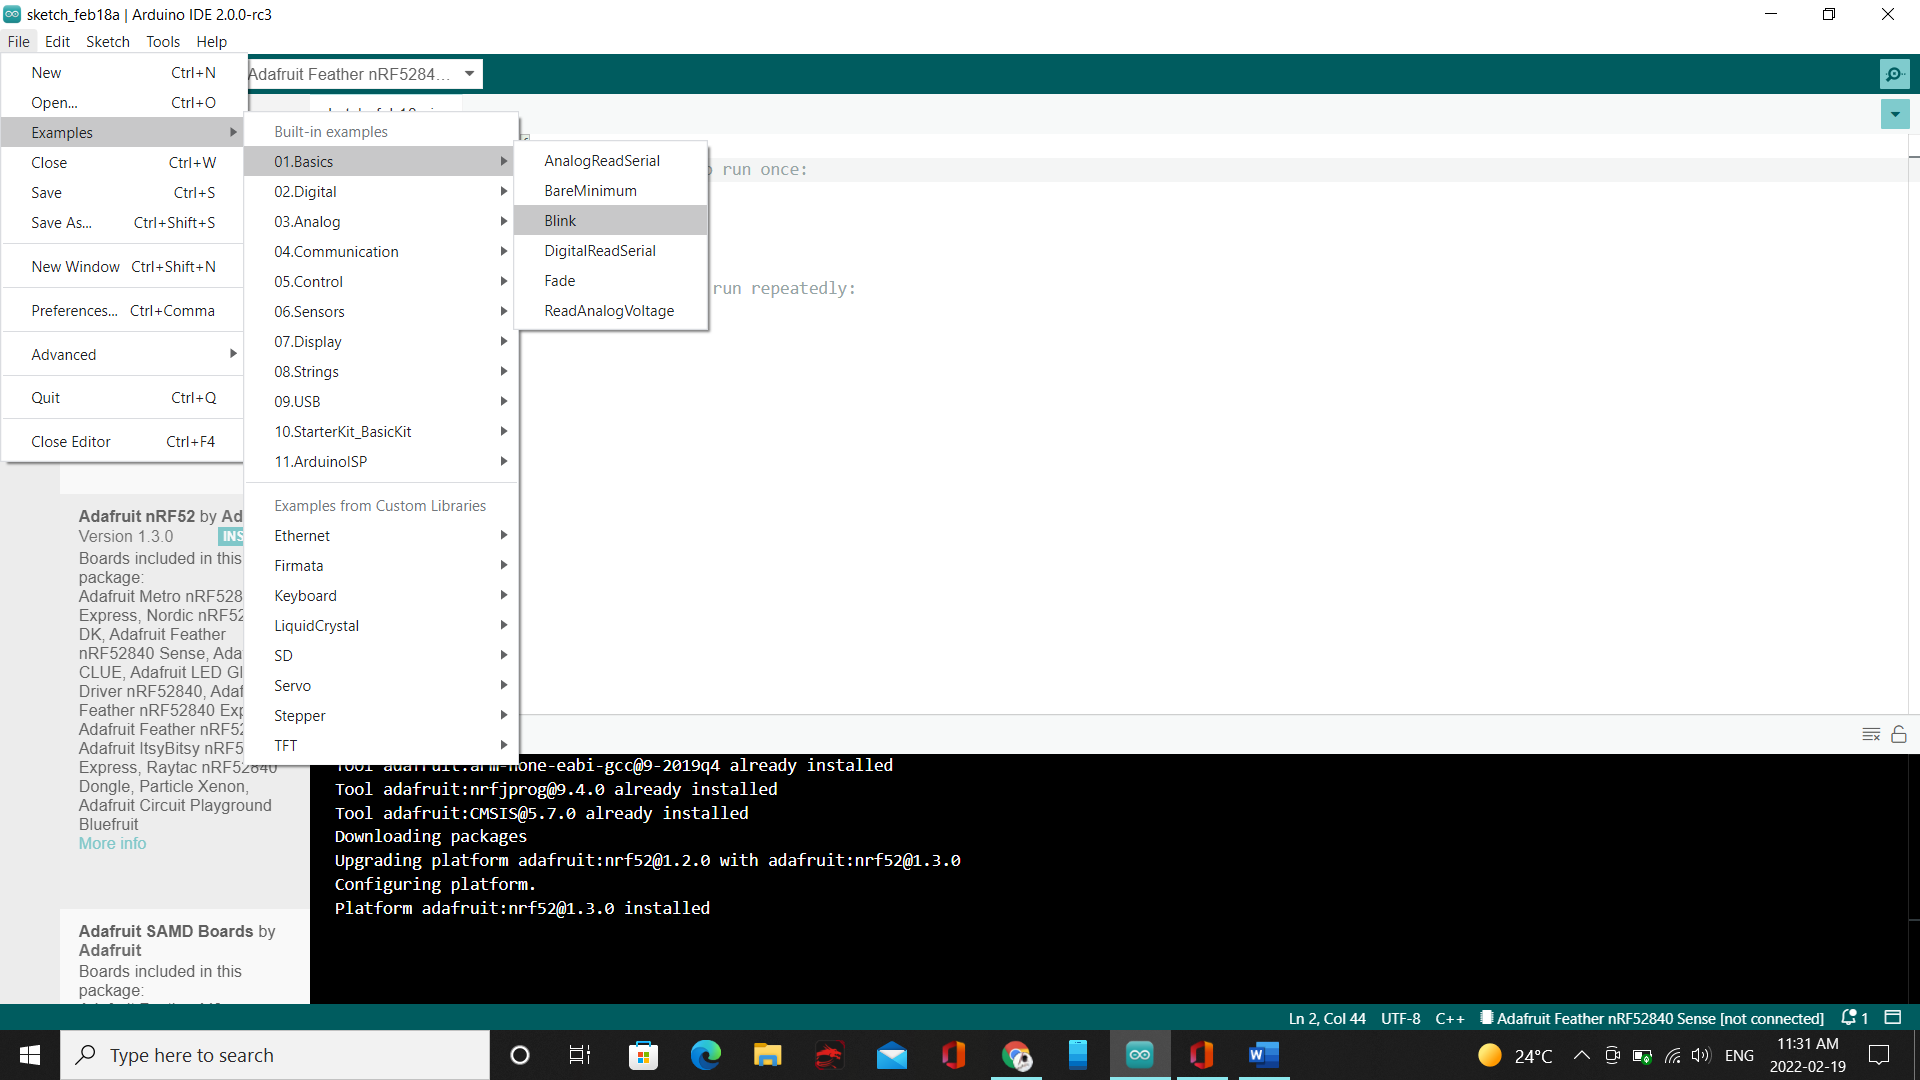
a new window tap will open, here where you can start coding your board
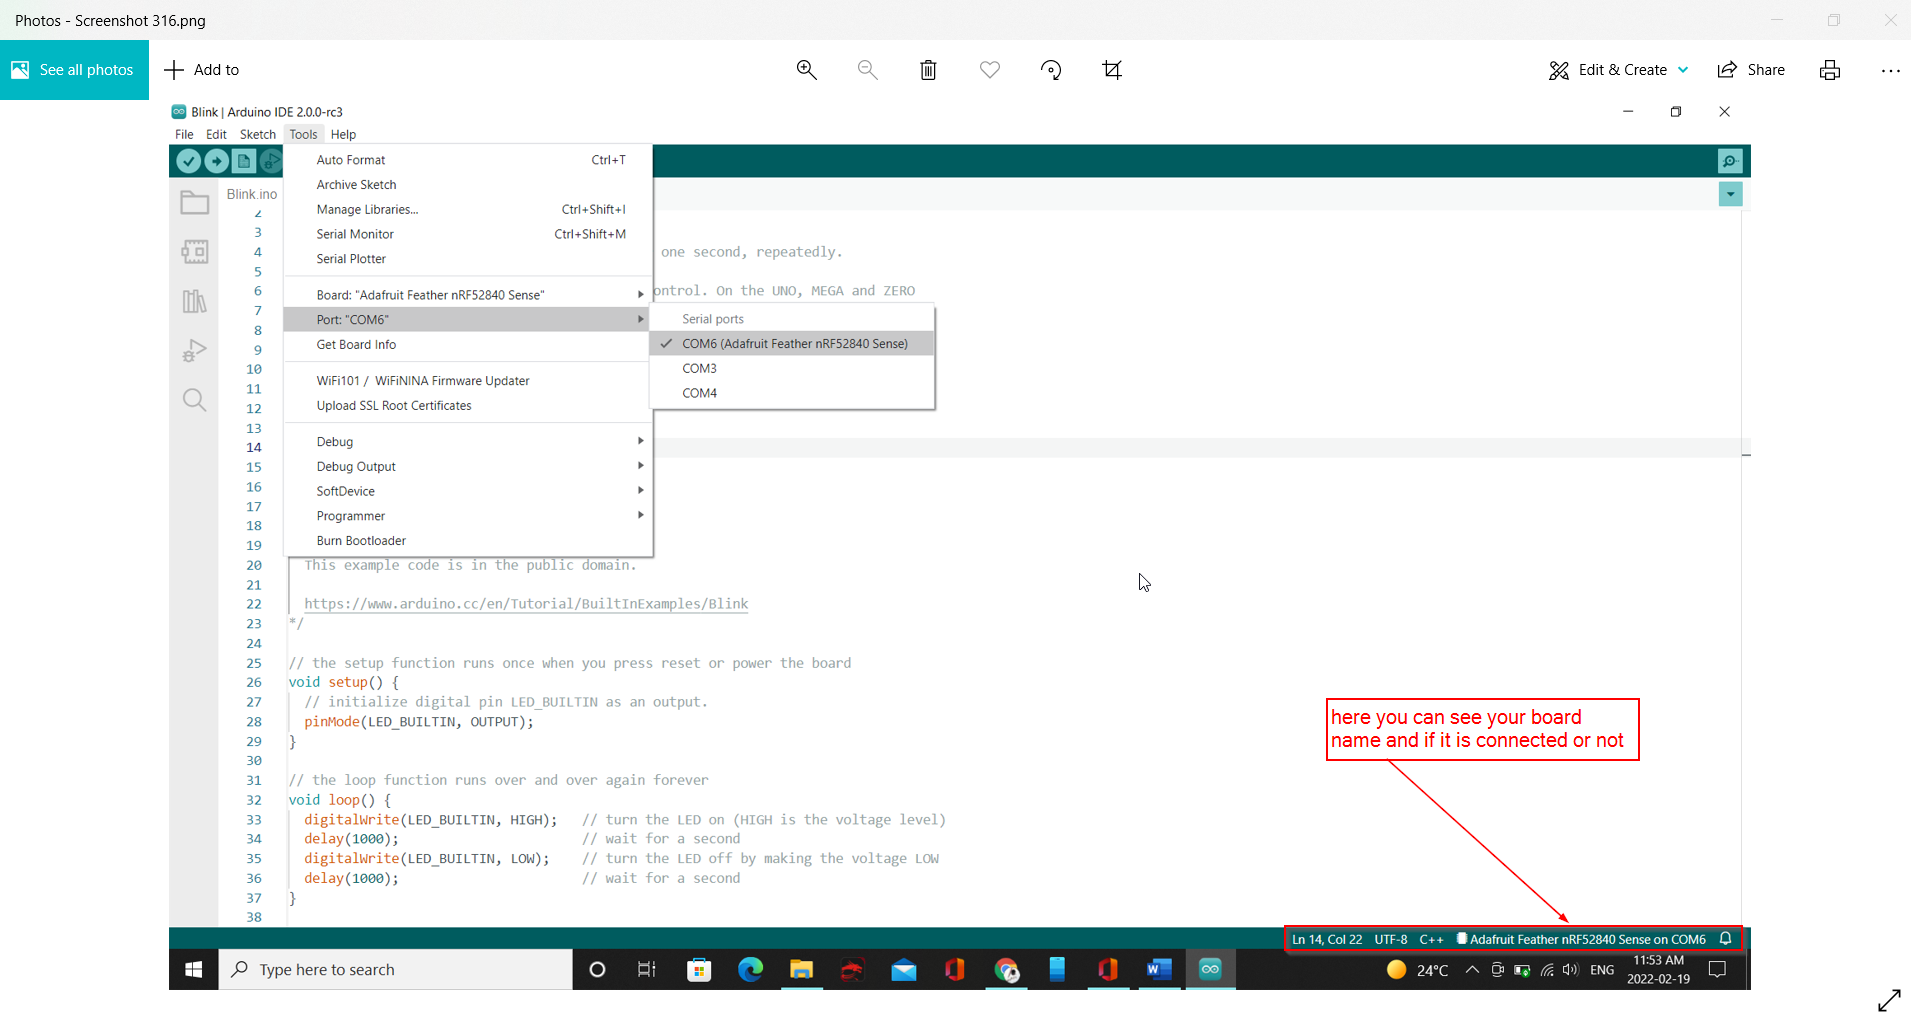
connect your board to your PC or laptop through the USB cable, then follow the next steps: 1-go to tools 2- click on port 3- choose the port that you connect your board in. you will see the board name next to the port name as it shown bellow:
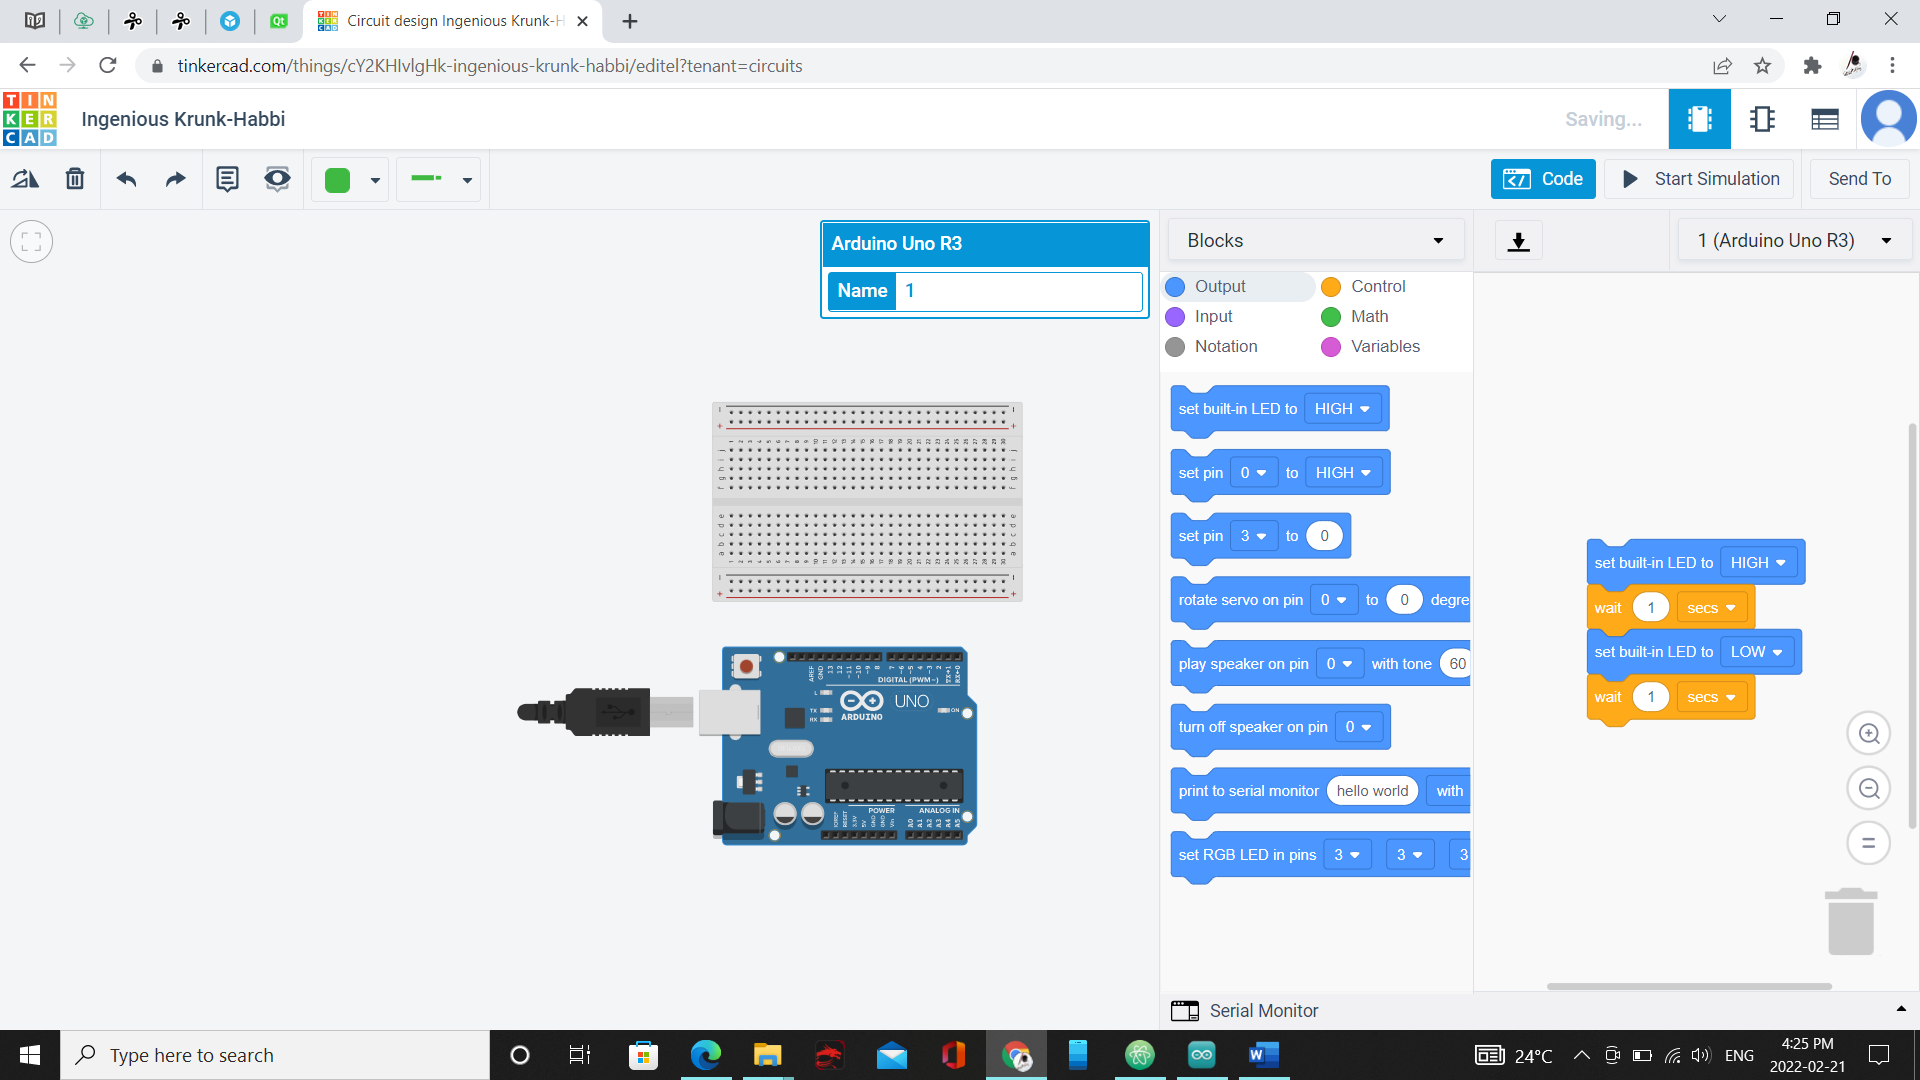
tinker CAD
tinker cad is a program previously discussed in week02, but now we use it for different purpose, not for 3d shapes as before no, but, for designing a circuit and code it.
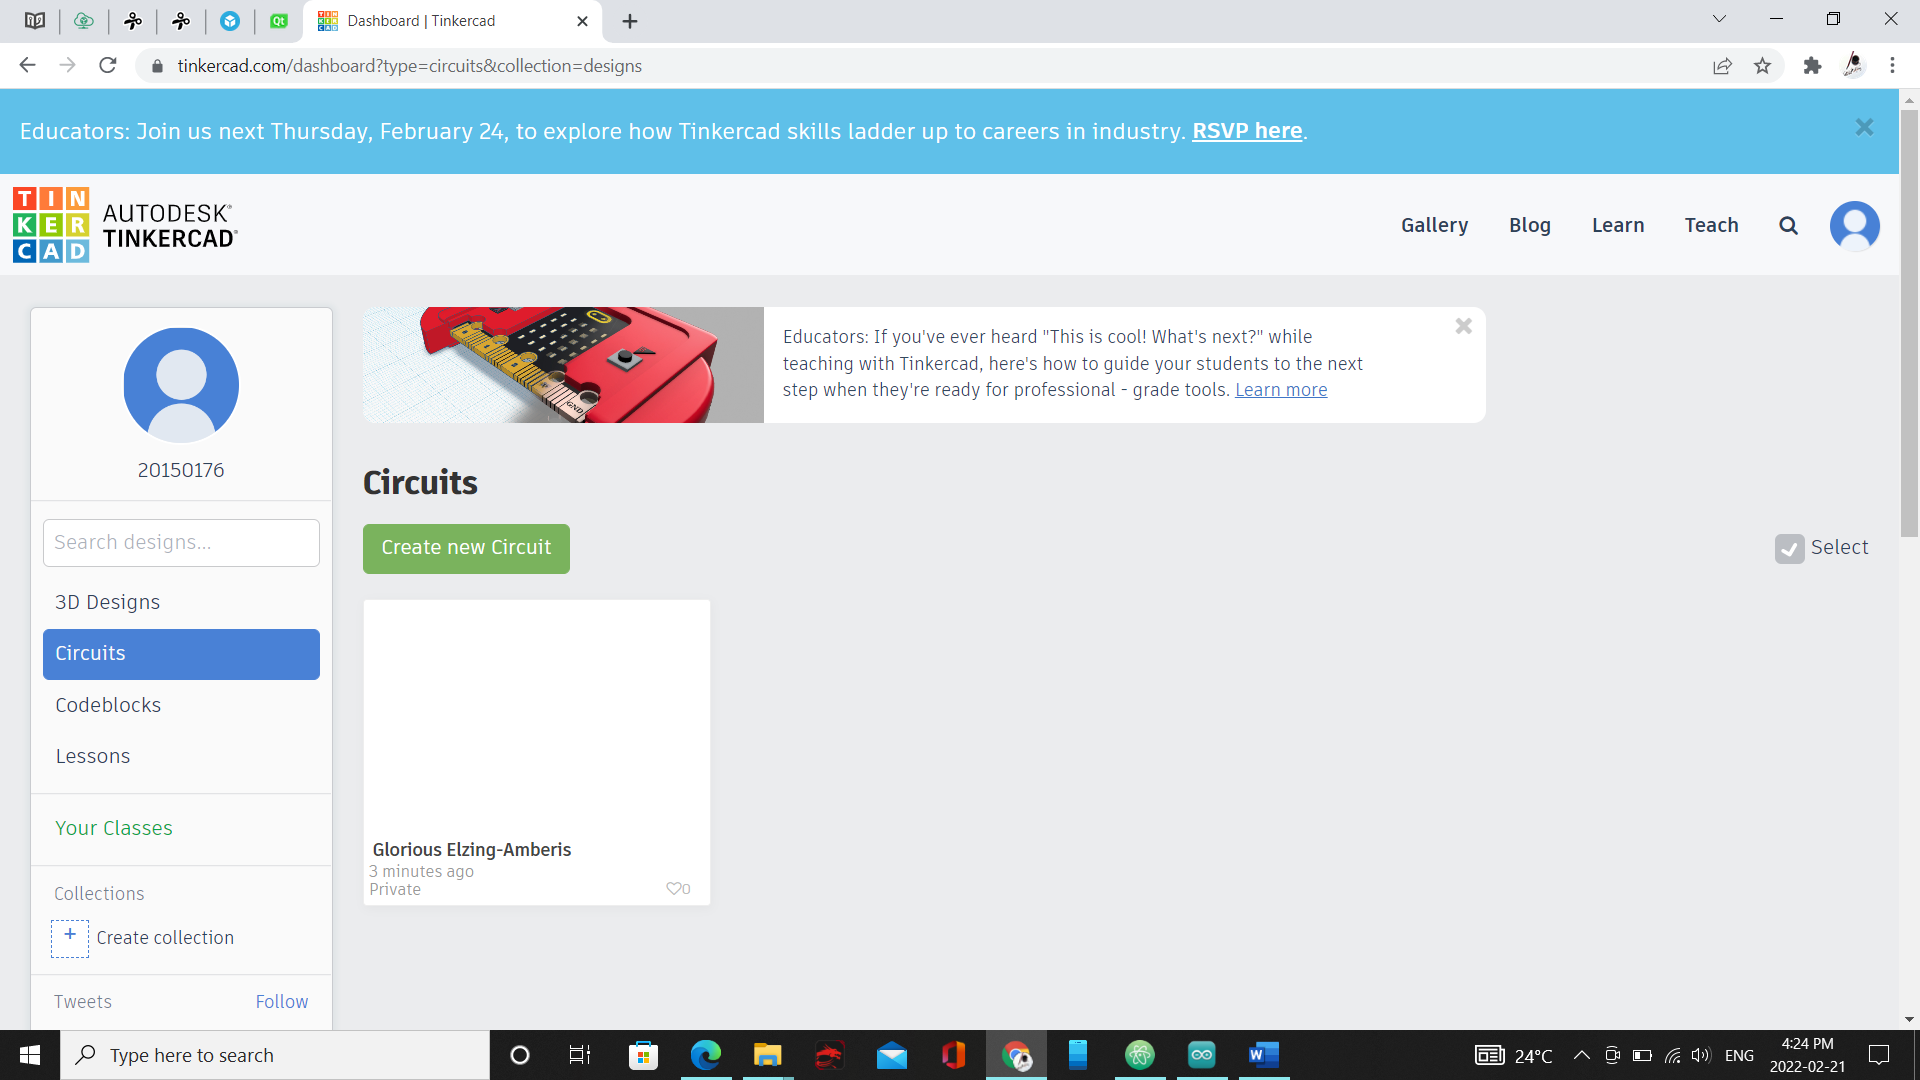 when we opens tinker CAD start menu from the left menu click on circuit and start new project.
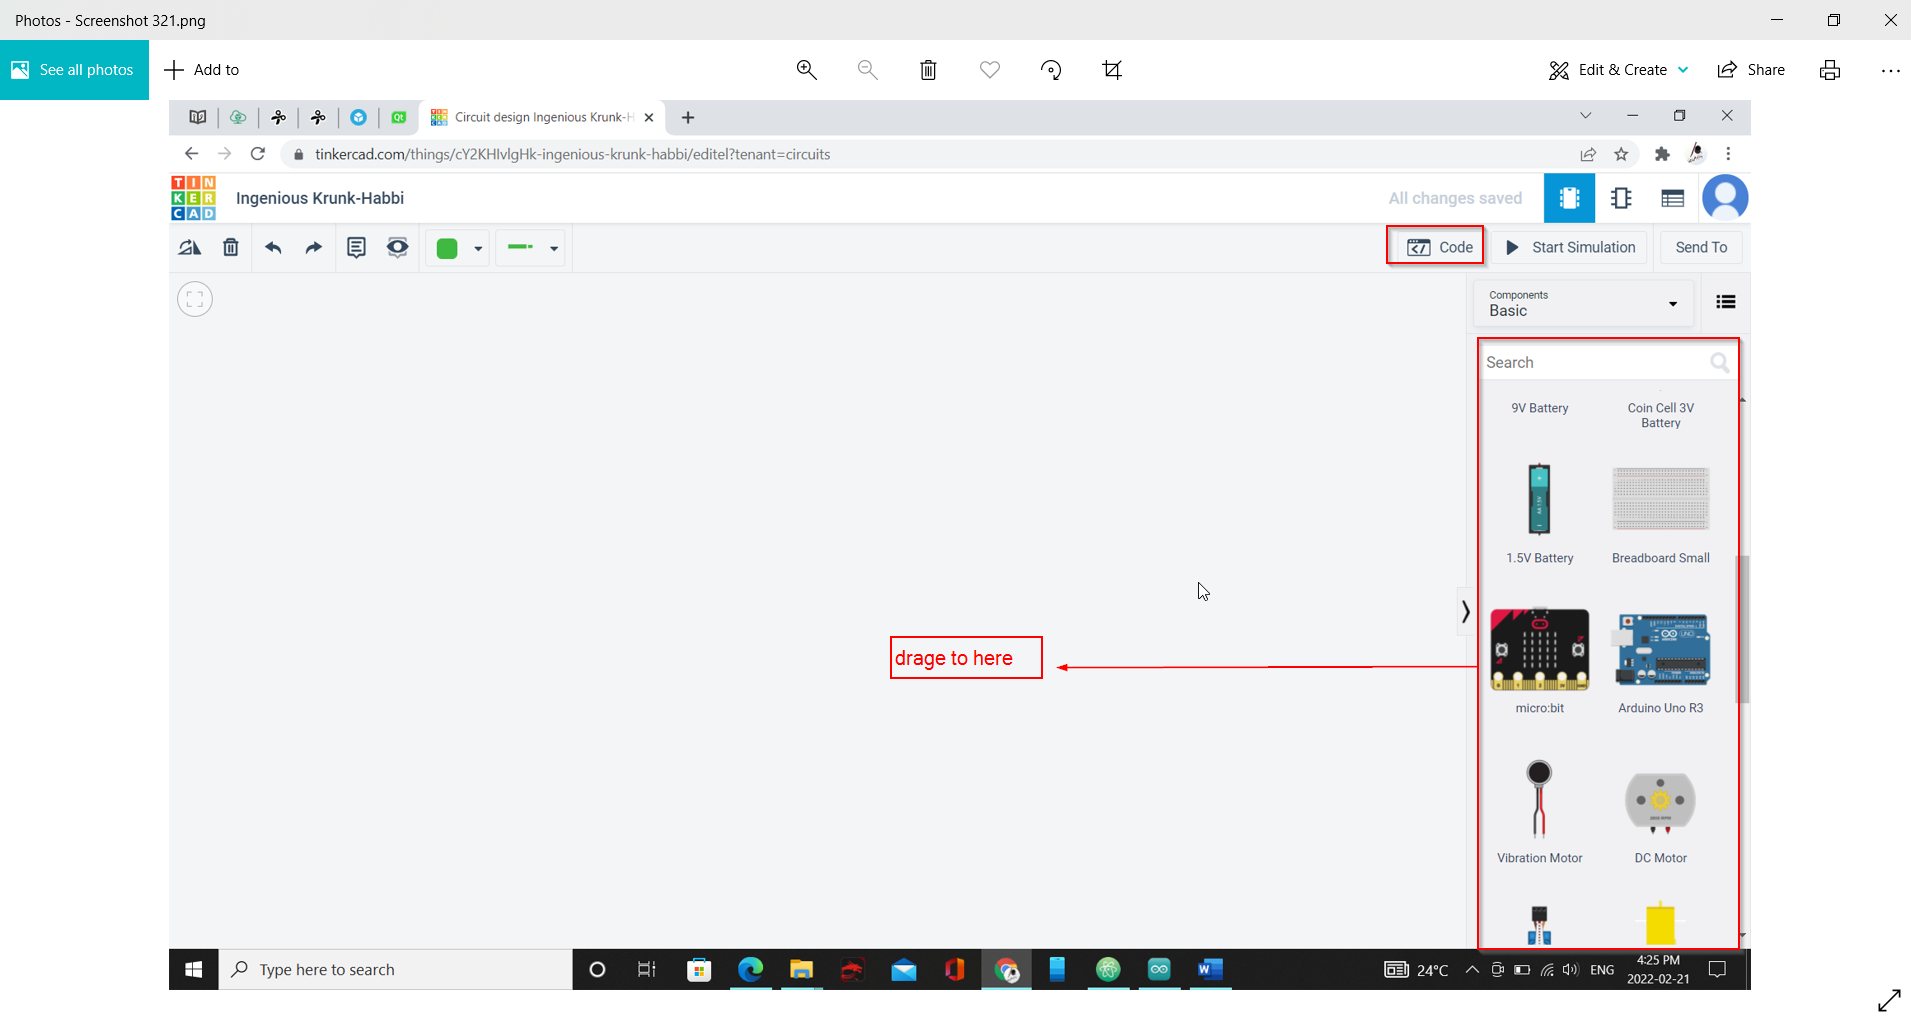
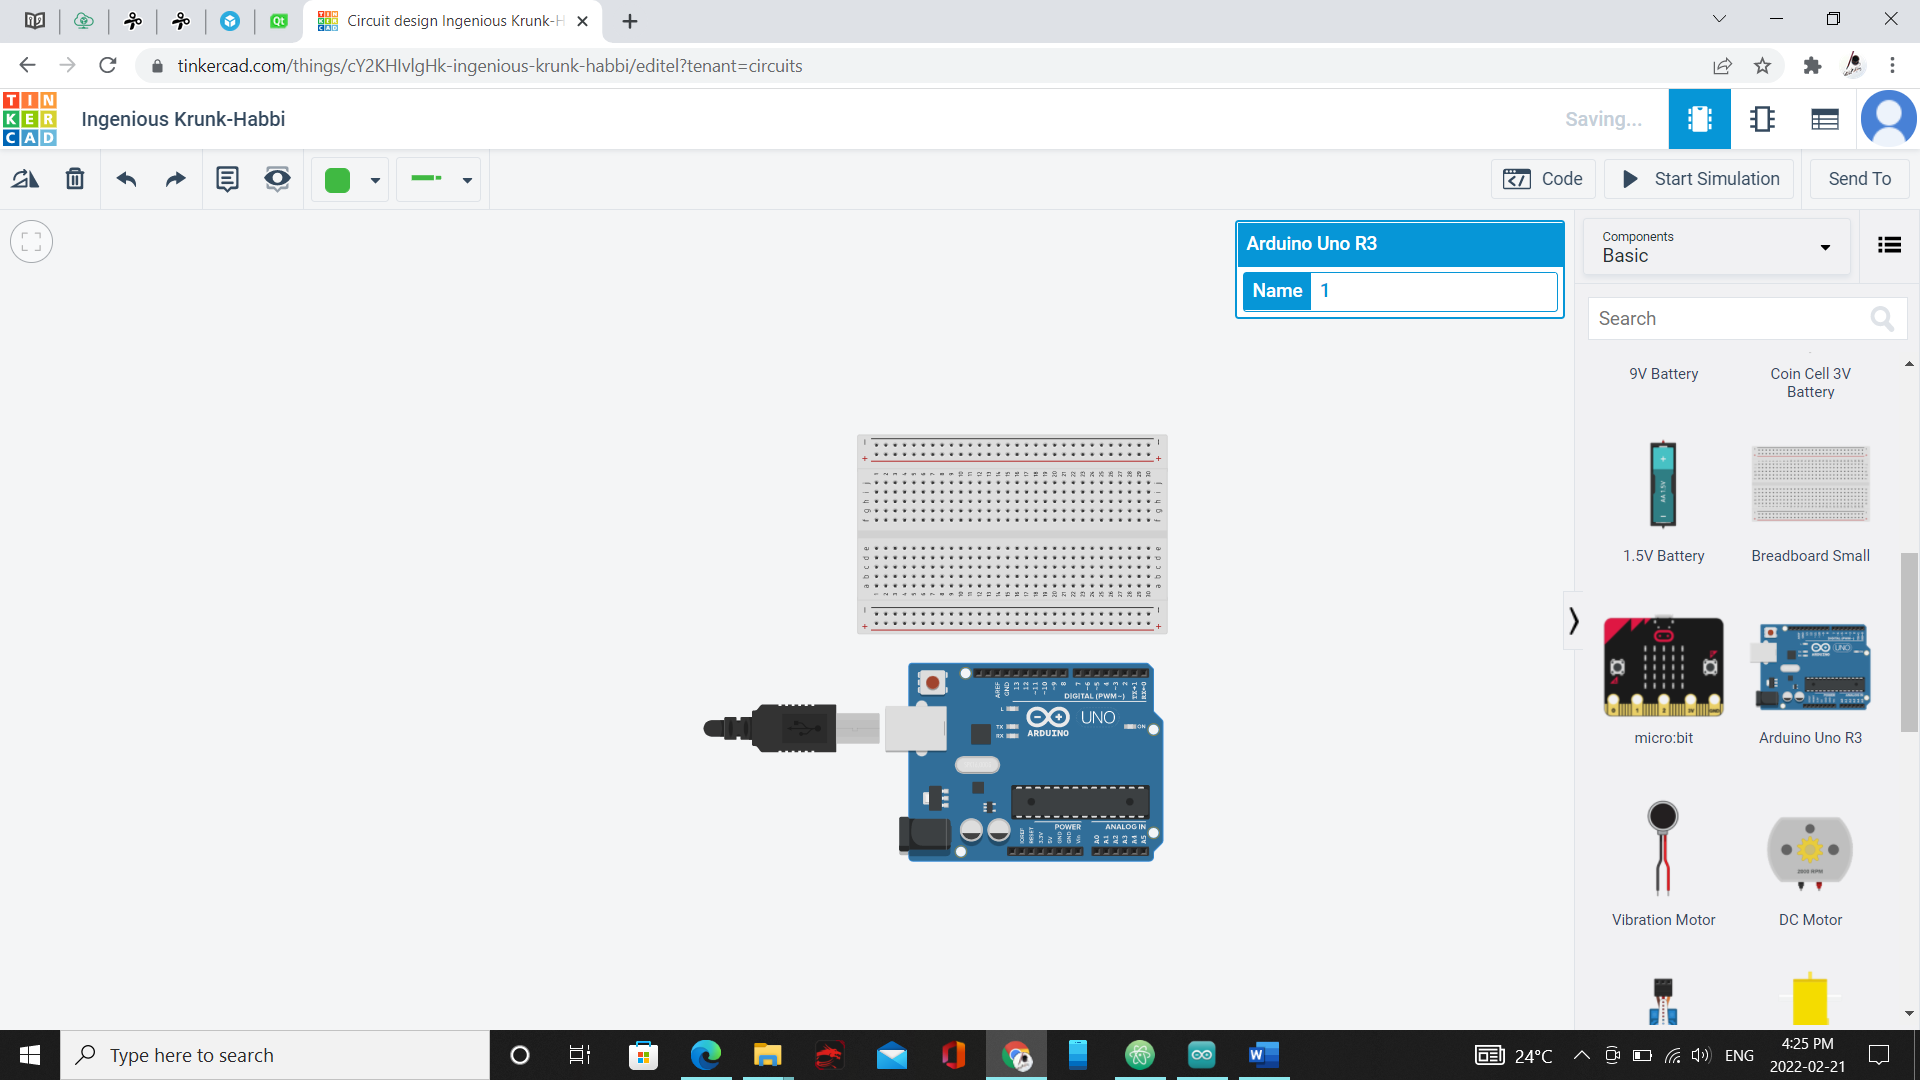 we dragged the board then click on code button up to start codding the board and trying to create a special code for our names.
Morse Code Translator
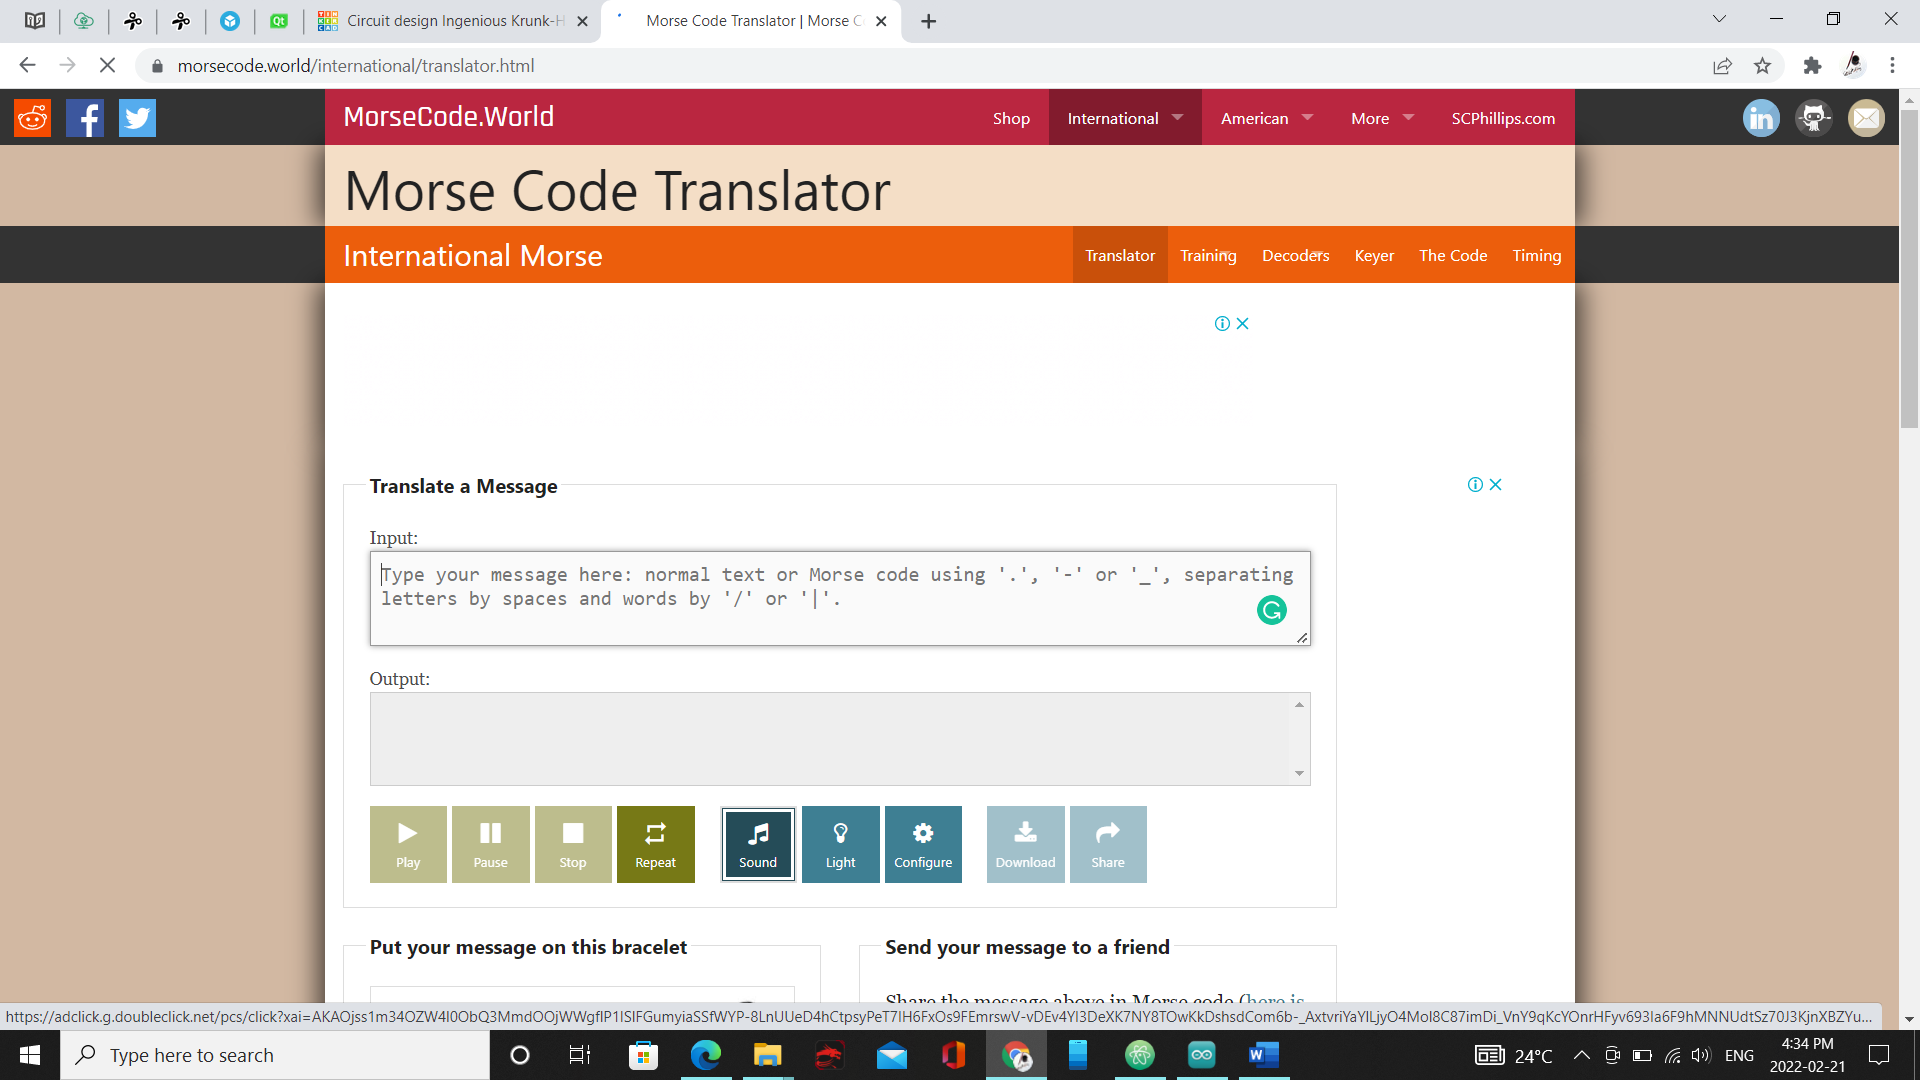
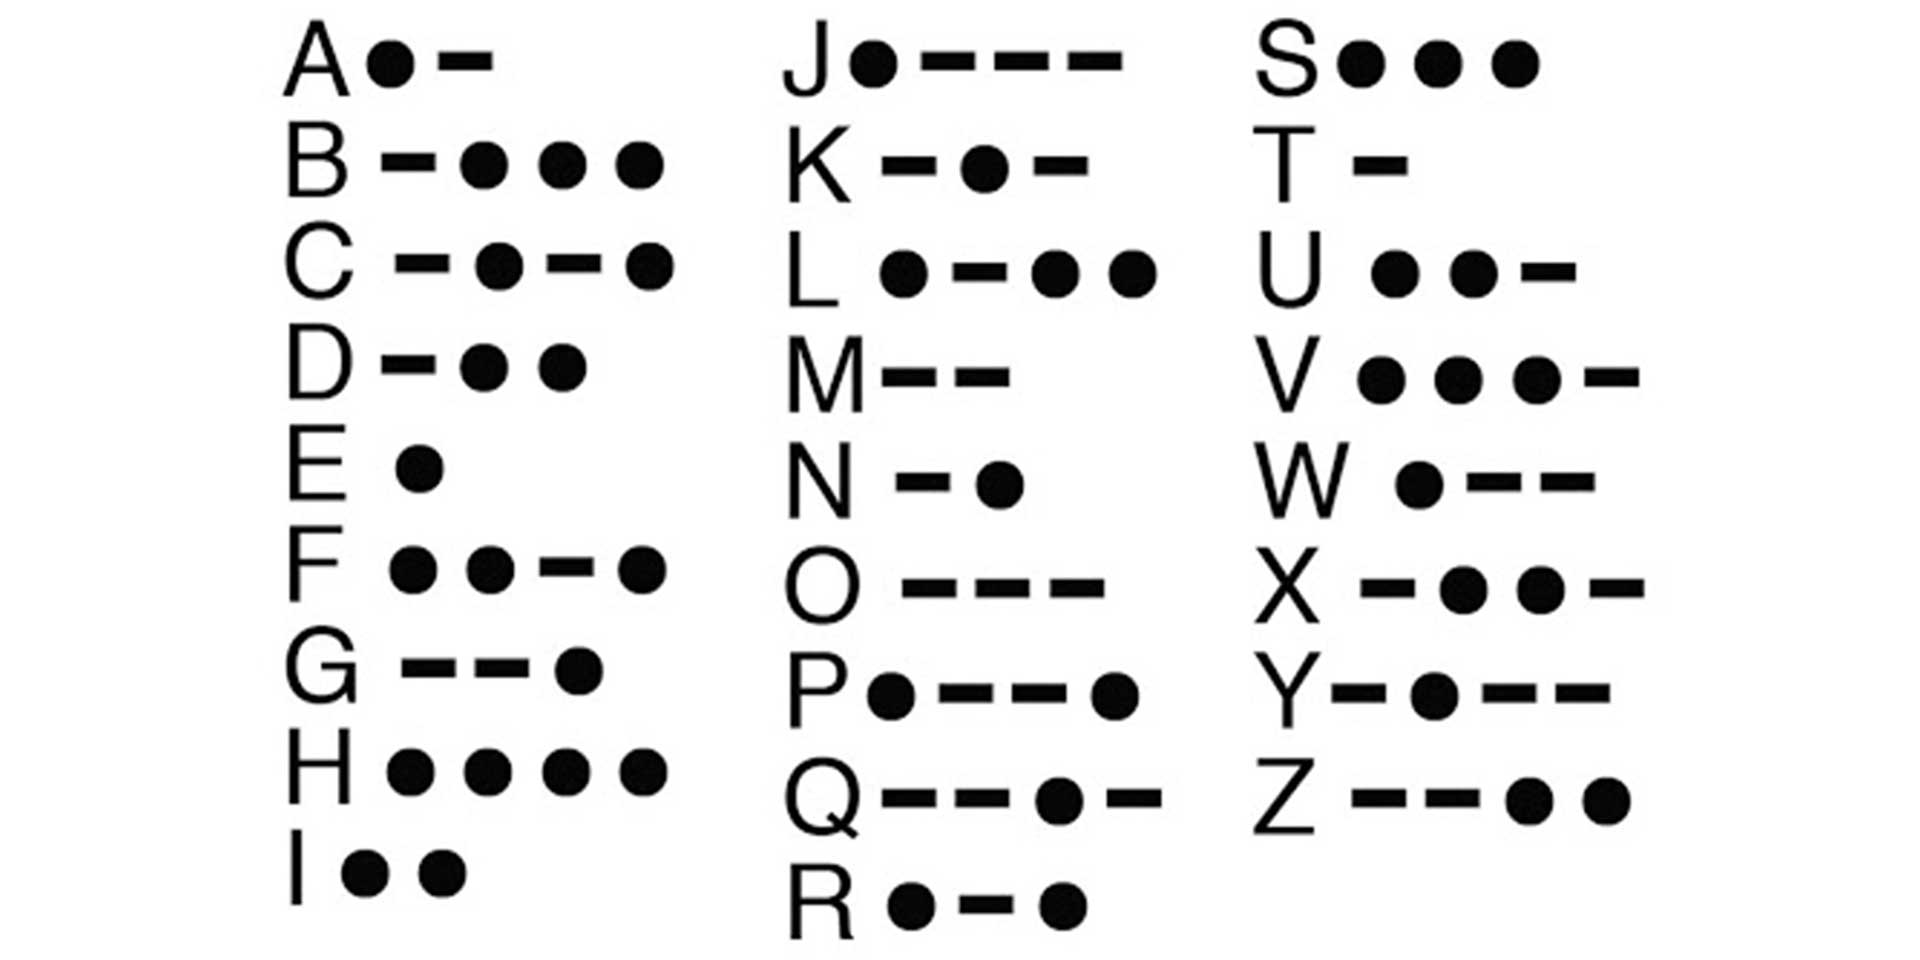
It is a way to translate or convert (letters or words) to codes/coding language. when you inter a work or message, it will convert to ( . or - or ‘) and from these you can start coding based on the mining of this result.
this is the result reading way
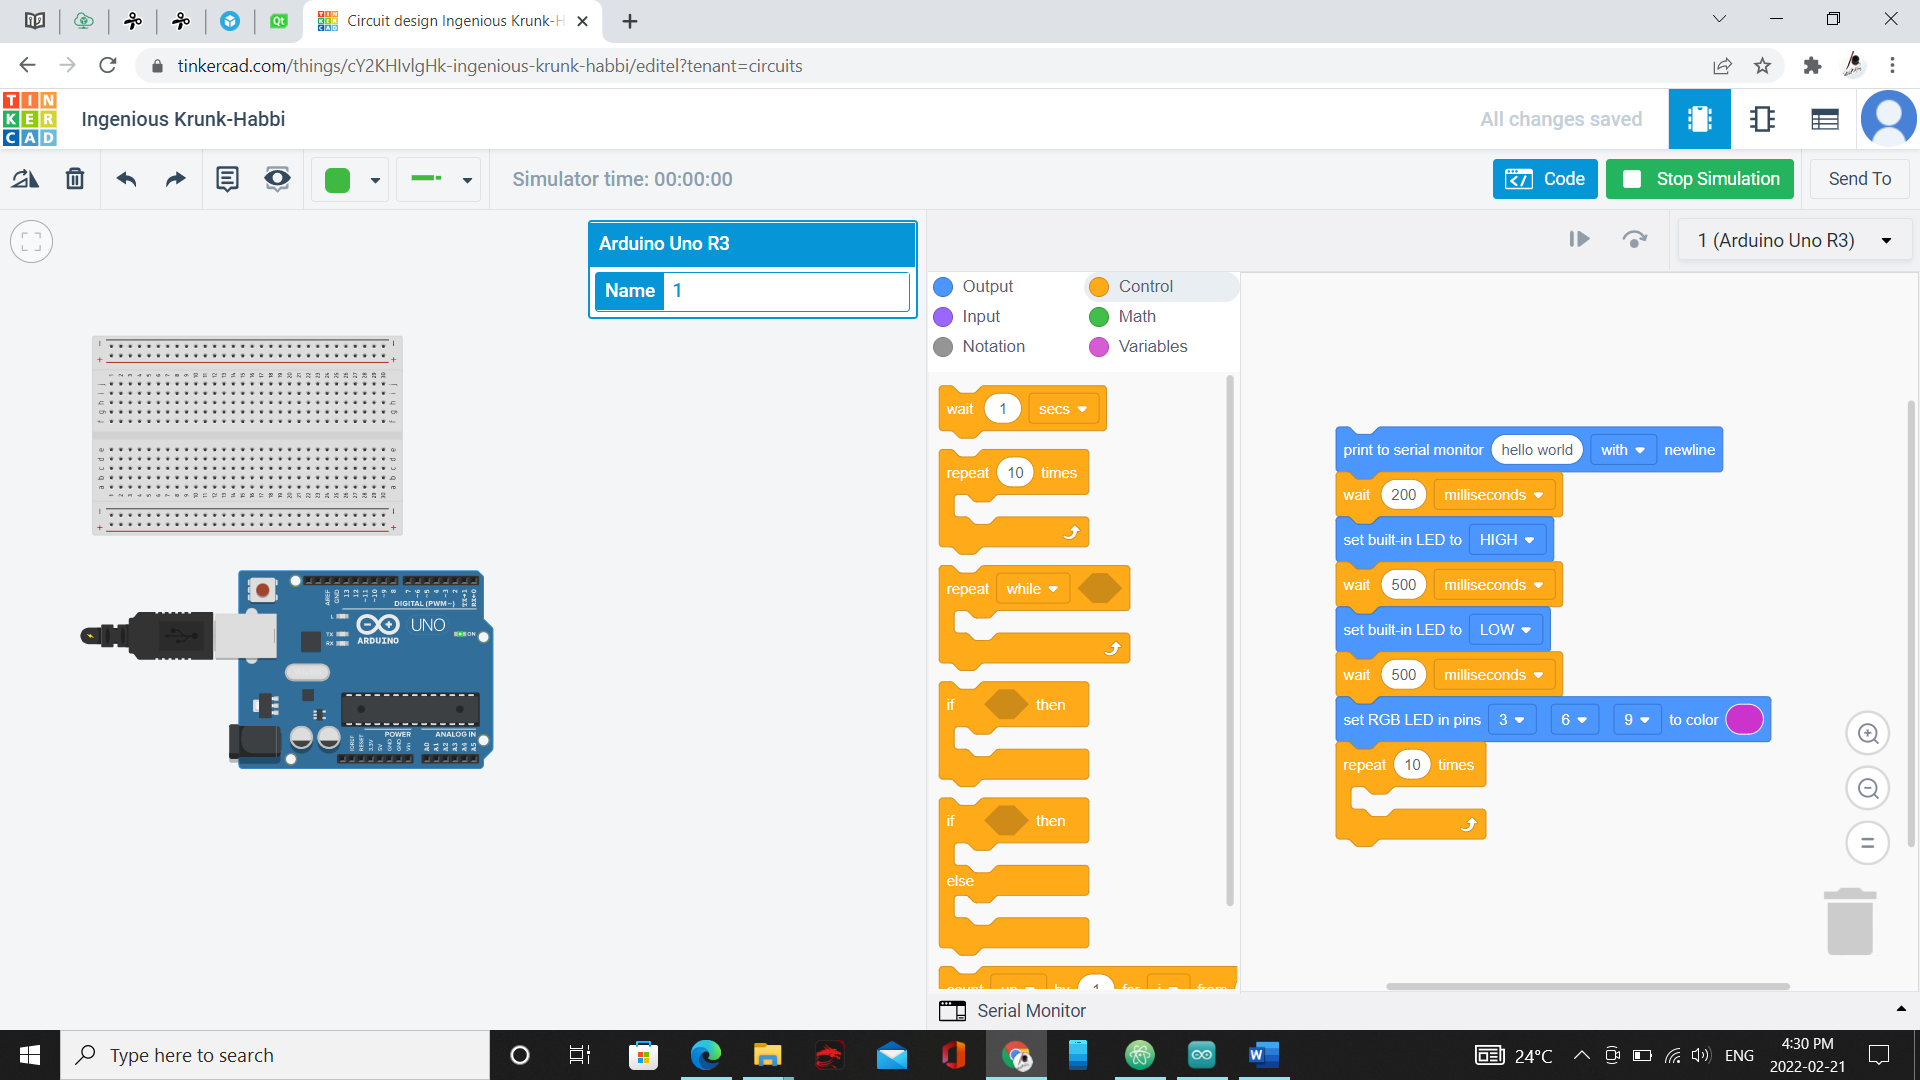
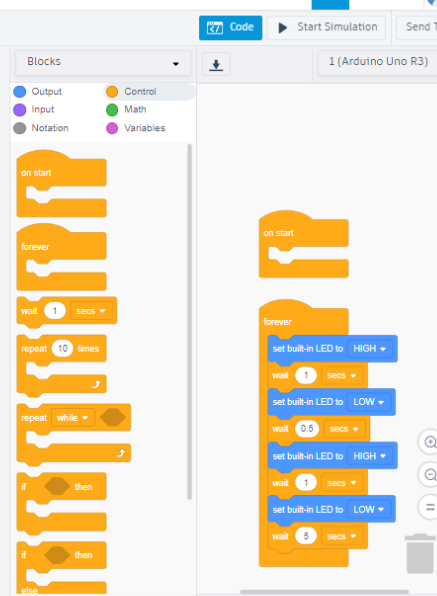
The word written is TE. The code was made in tinkercad in blocks:
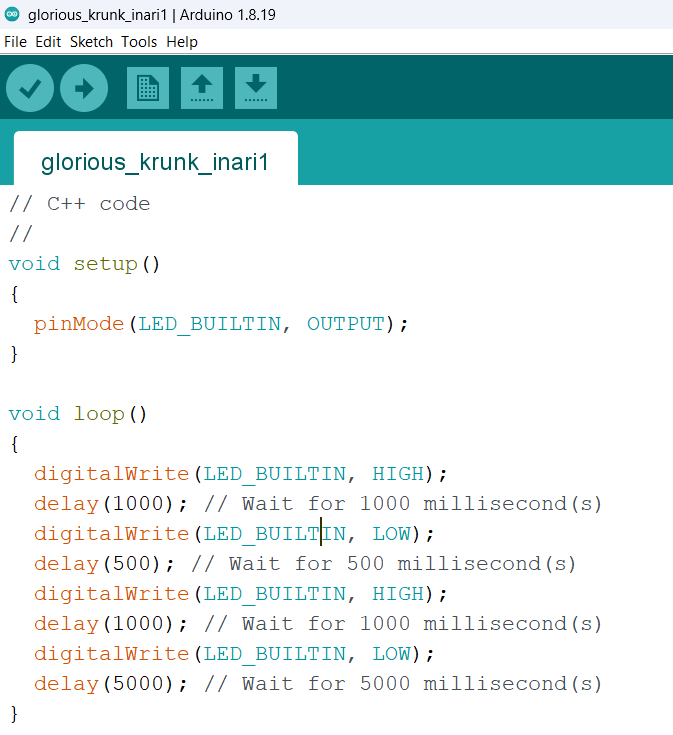
and then downloaded to C++
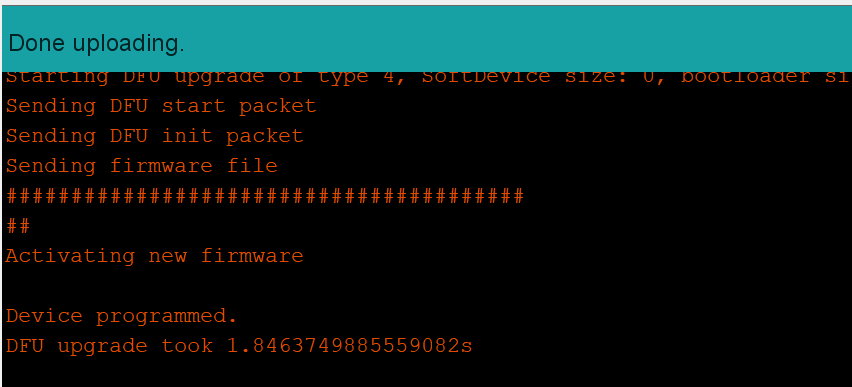
and uploaded to the board
The code:
// C++ code
//
void setup()
{
  pinMode(LED_BUILTIN, OUTPUT);
}

void loop()
{
  digitalWrite(LED_BUILTIN, HIGH);
  delay(1000); // Wait for 1000 millisecond(s)
  digitalWrite(LED_BUILTIN, LOW);
  delay(500); // Wait for 500 millisecond(s)
  digitalWrite(LED_BUILTIN, HIGH);
  delay(1000); // Wait for 1000 millisecond(s)
  digitalWrite(LED_BUILTIN, LOW);
  delay(5000); // Wait for 5000 millisecond(s)
}
The video:
Group assignment
we were asked to answer the following question: list some different types of an Embedded programing languages, what is their characteristics and for which program they could be used?
we gathered some of them and I am going to list them done :
C: it is an old language that is widely used, simple to use and learn. it is the building block for many other languages. this language is highly efficient, fast in programing or coding and stable. but, it need a good memory to memories many syntax. also, it has high technical details. this language could be used in many programing systems.
C++: It Can be thought of as an Upgraded version of C. It is Powerful library, efficient and time saving. but, it is complex and difficult to learn. It is as same as C used in many systems.
Python: it is a defined language. it is easy to learn, writing and reading from hardware. it dose not need for cross-compiled code. but, it cause to time delay, and need to be tested continuously. it dose not necessarily produced the same result, because it is not deterministic. this language used as a bridge between the user and the embedded system.
Java: it is a general language and an efficient language. it used widely for internet-based applications. it can be easy imported to other devices. but, it can be lead to performance issue and can not be used in real-time systems. it used in Android embedded systems.
Arduino simple and accessible user experience, used to build low cost scientific instruments, Designers and architects build interactive prototypes, musicians and artists use it for installations and to experiment with new musical instruments. It can control pins on the circuit “pin” is a type of electrical contact, which determines the power flow, can be used to control LED lights.
Main points of differentiation Cross-platform, runs on windows, macOS, and linux. Simple, clear programming environment easy-to-use for beginners Open source and extensible software, hardware available for extension by experienced programmers, easy for experienced circuit designers can make their own version of the module, extending it and improving it.
Syntax 1. The function used to combine chunks of code into one, encapsulated in 2 curly brackets. 2. the function does not return any value due to the presence of void The setup and loop function have void keyword present in front of their function name. 1. You can write your own function too. 2. The compiler of Arduino also ignores the spaces in the parentheses, commas, blank lines 3. The verify icon is used to compile the code, the upload buttons compiles, runs and uploads the code. 4. You need to use parentheses injunctions like void setup() and void loop(). 5. You need to add a semicolon at the end of a statement, unless its a setup or loop function. 6. The setup is considered as the preparation block, while the loop is considered as the execution block. 7. The loop contains statements that are executed repeatedly. The section of code inside the curly brackets is repeated depending on the value of variables. 8. The time in Arduino programming is measured in a millisecond.
for other groups assignment click here to see it
References links for group assignment: (Harvard style)
-
www.javatpoint.com. 2022. Arduino Syntax and Program Flow - JavaTpoint. [online] Available at: https://www.javatpoint.com/arduino-syntax-and-program-flow [Accessed 19 February 2022].
-
Qt.io. 2022. Embedded Software Programming Languages: Pros, Cons, and Comparisons of Popular Languages. [online] Available at: https://www.qt.io/embedded-development-talk/embedded-software-programming-languages-pros-cons-and-comparisons-of-popular-languages [Accessed 19 February 2022].
code for individual work
Code used
void setup() {
  // initialize digital pin LED_BUILTIN as an output.
  pinMode(LED_BUILTIN, OUTPUT);
}

// the loop function runs over and over again forever
void loop() {
  digitalWrite(LED_BUILTIN, HIGH);   // turn the LED on (HIGH is the voltage level)
  delay(100);                       // wait for a second
  digitalWrite(LED_BUILTIN, LOW);    // turn the LED off by making the voltage LOW
  delay(100);                       // wait for a second
}