7. Input & Output device
This week I learned about how to differentiate between input & output devices, their characteristics and an examples of them. also, we learned how to design a full electric circuit by using Adafruit board and designing it through Arduino IDE.
Input
input: is something that put into a system so that it could be operated. for example: - key board - electronic pen - mouse - programing Languages
output
output: is the result or the production that happens by using the inputs. for example: - lights - Sound - visual writing
Tools used

used to connect the other inputs with the electric source that represent from the board
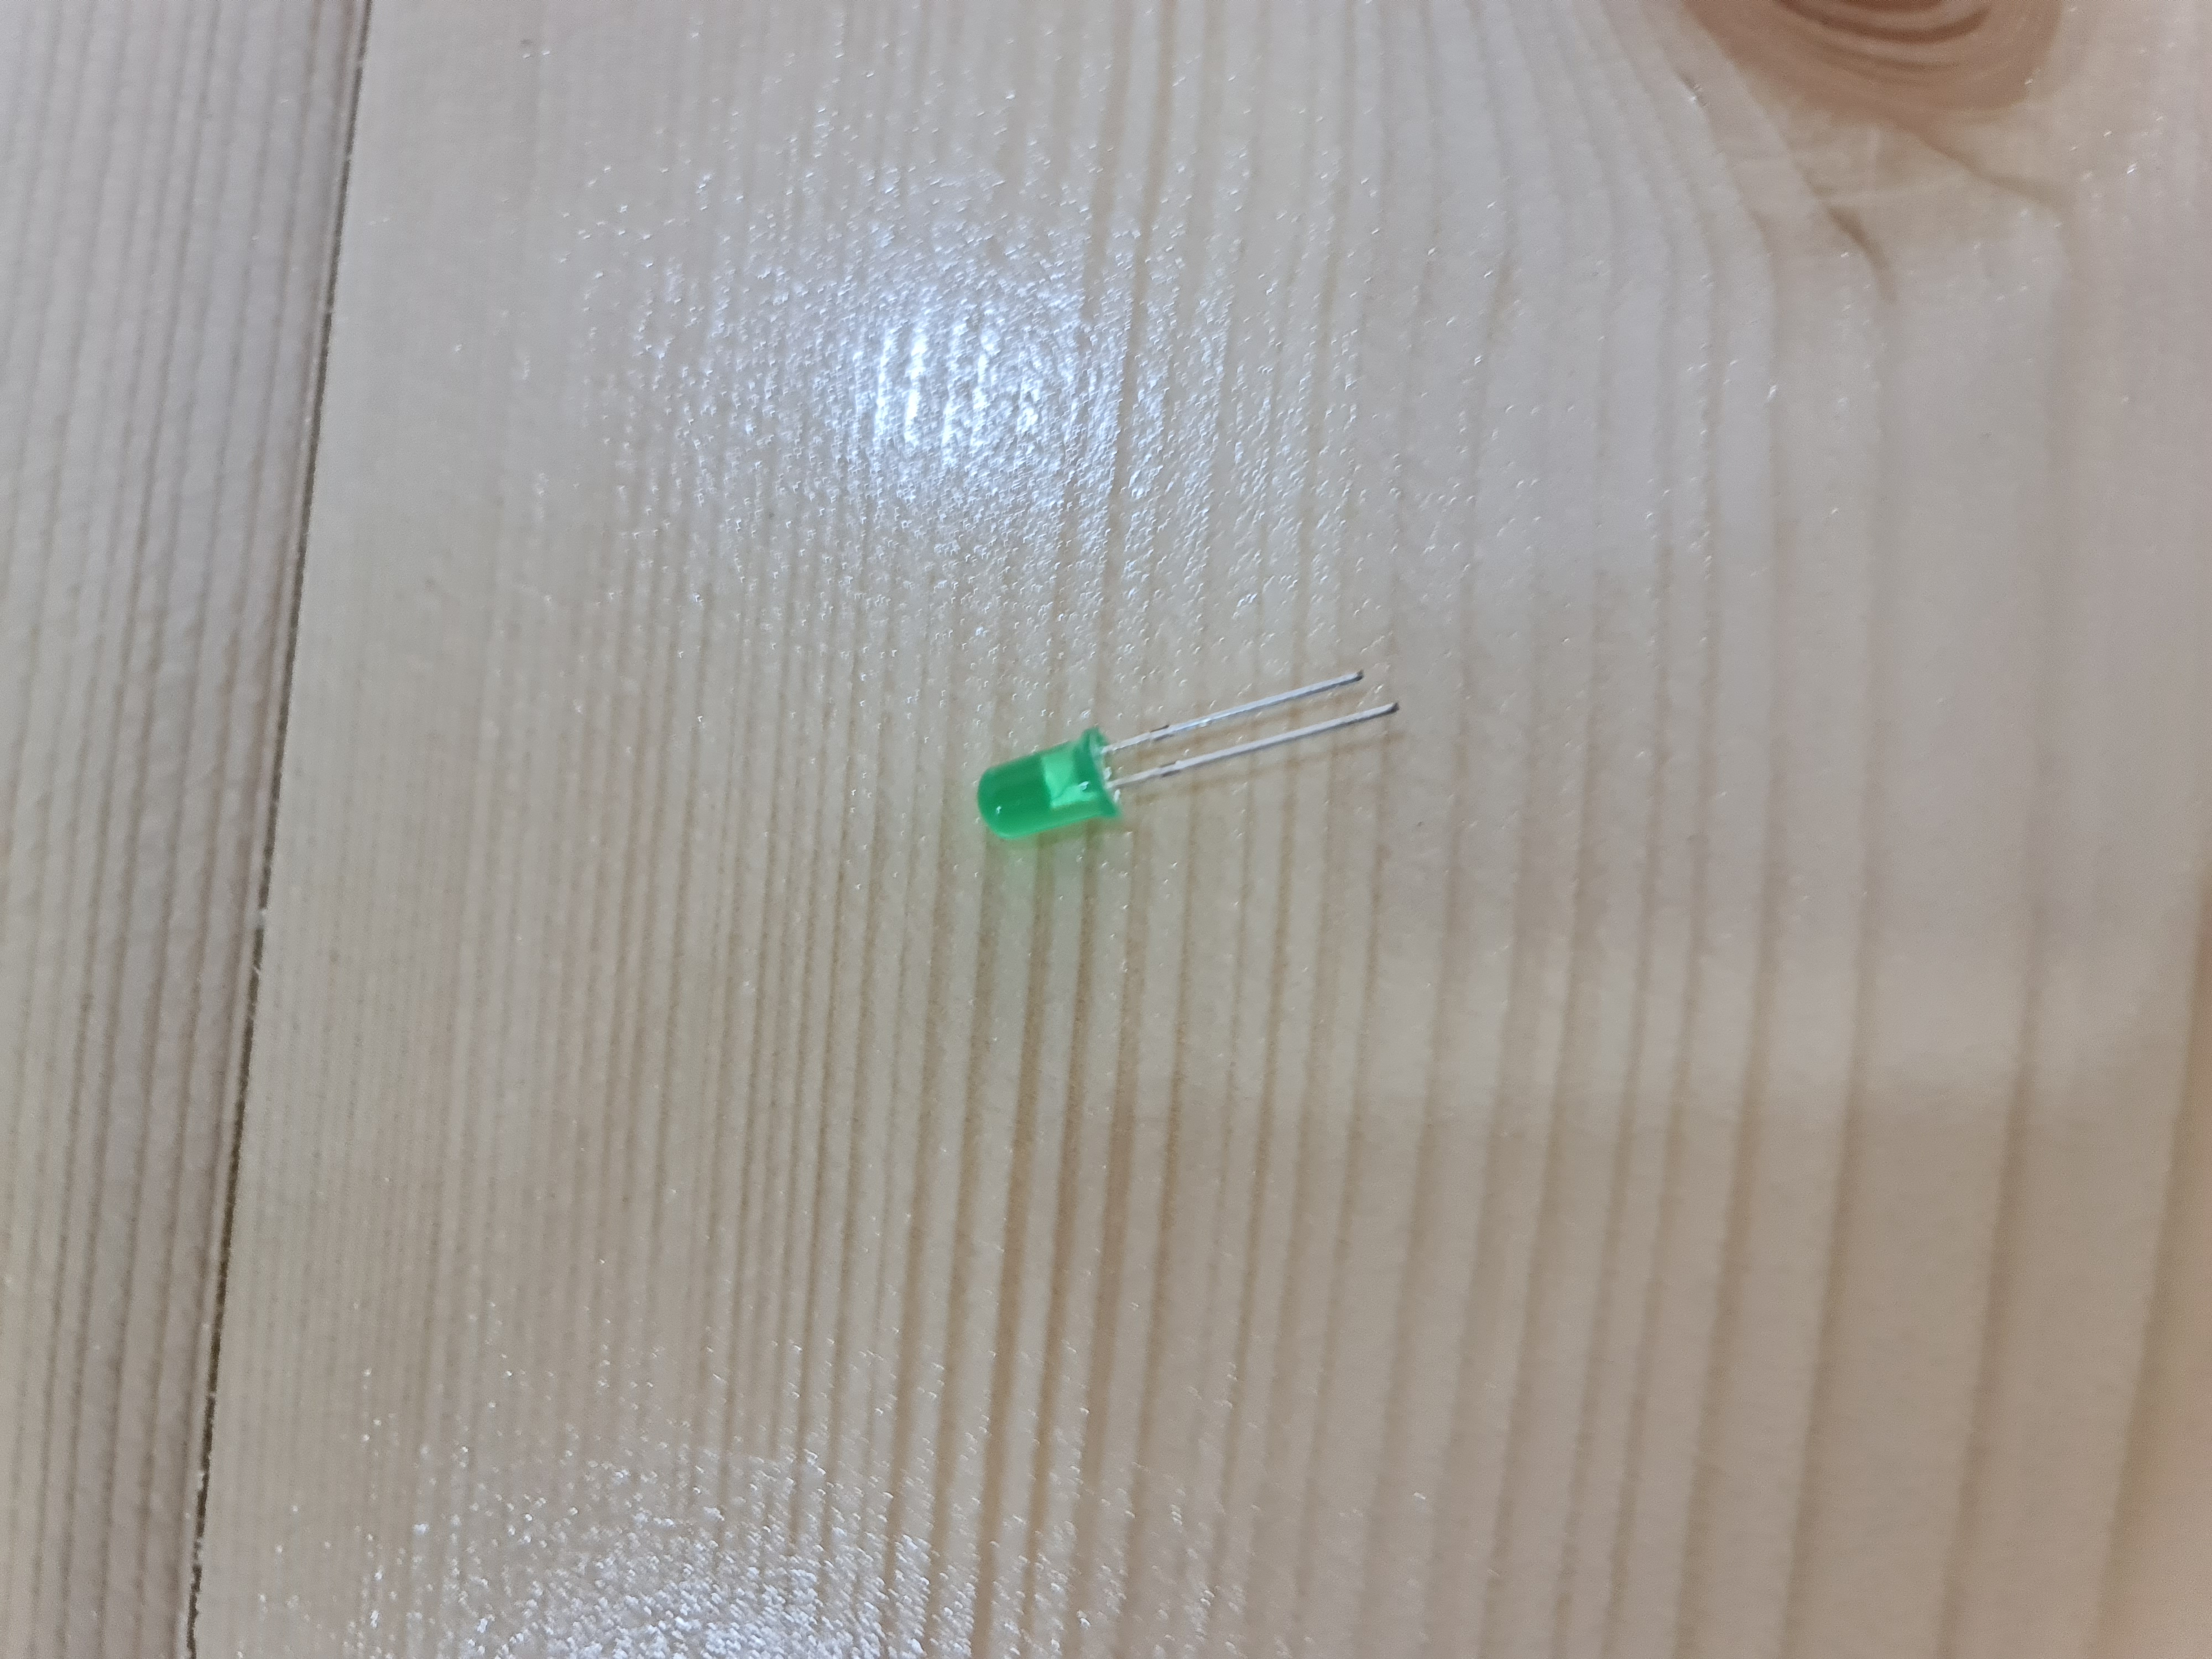
represented as the output. the LEd is gonna turned on when the board connected, then based on the coding that I interred to arduino the light is gonna work based on these codes.
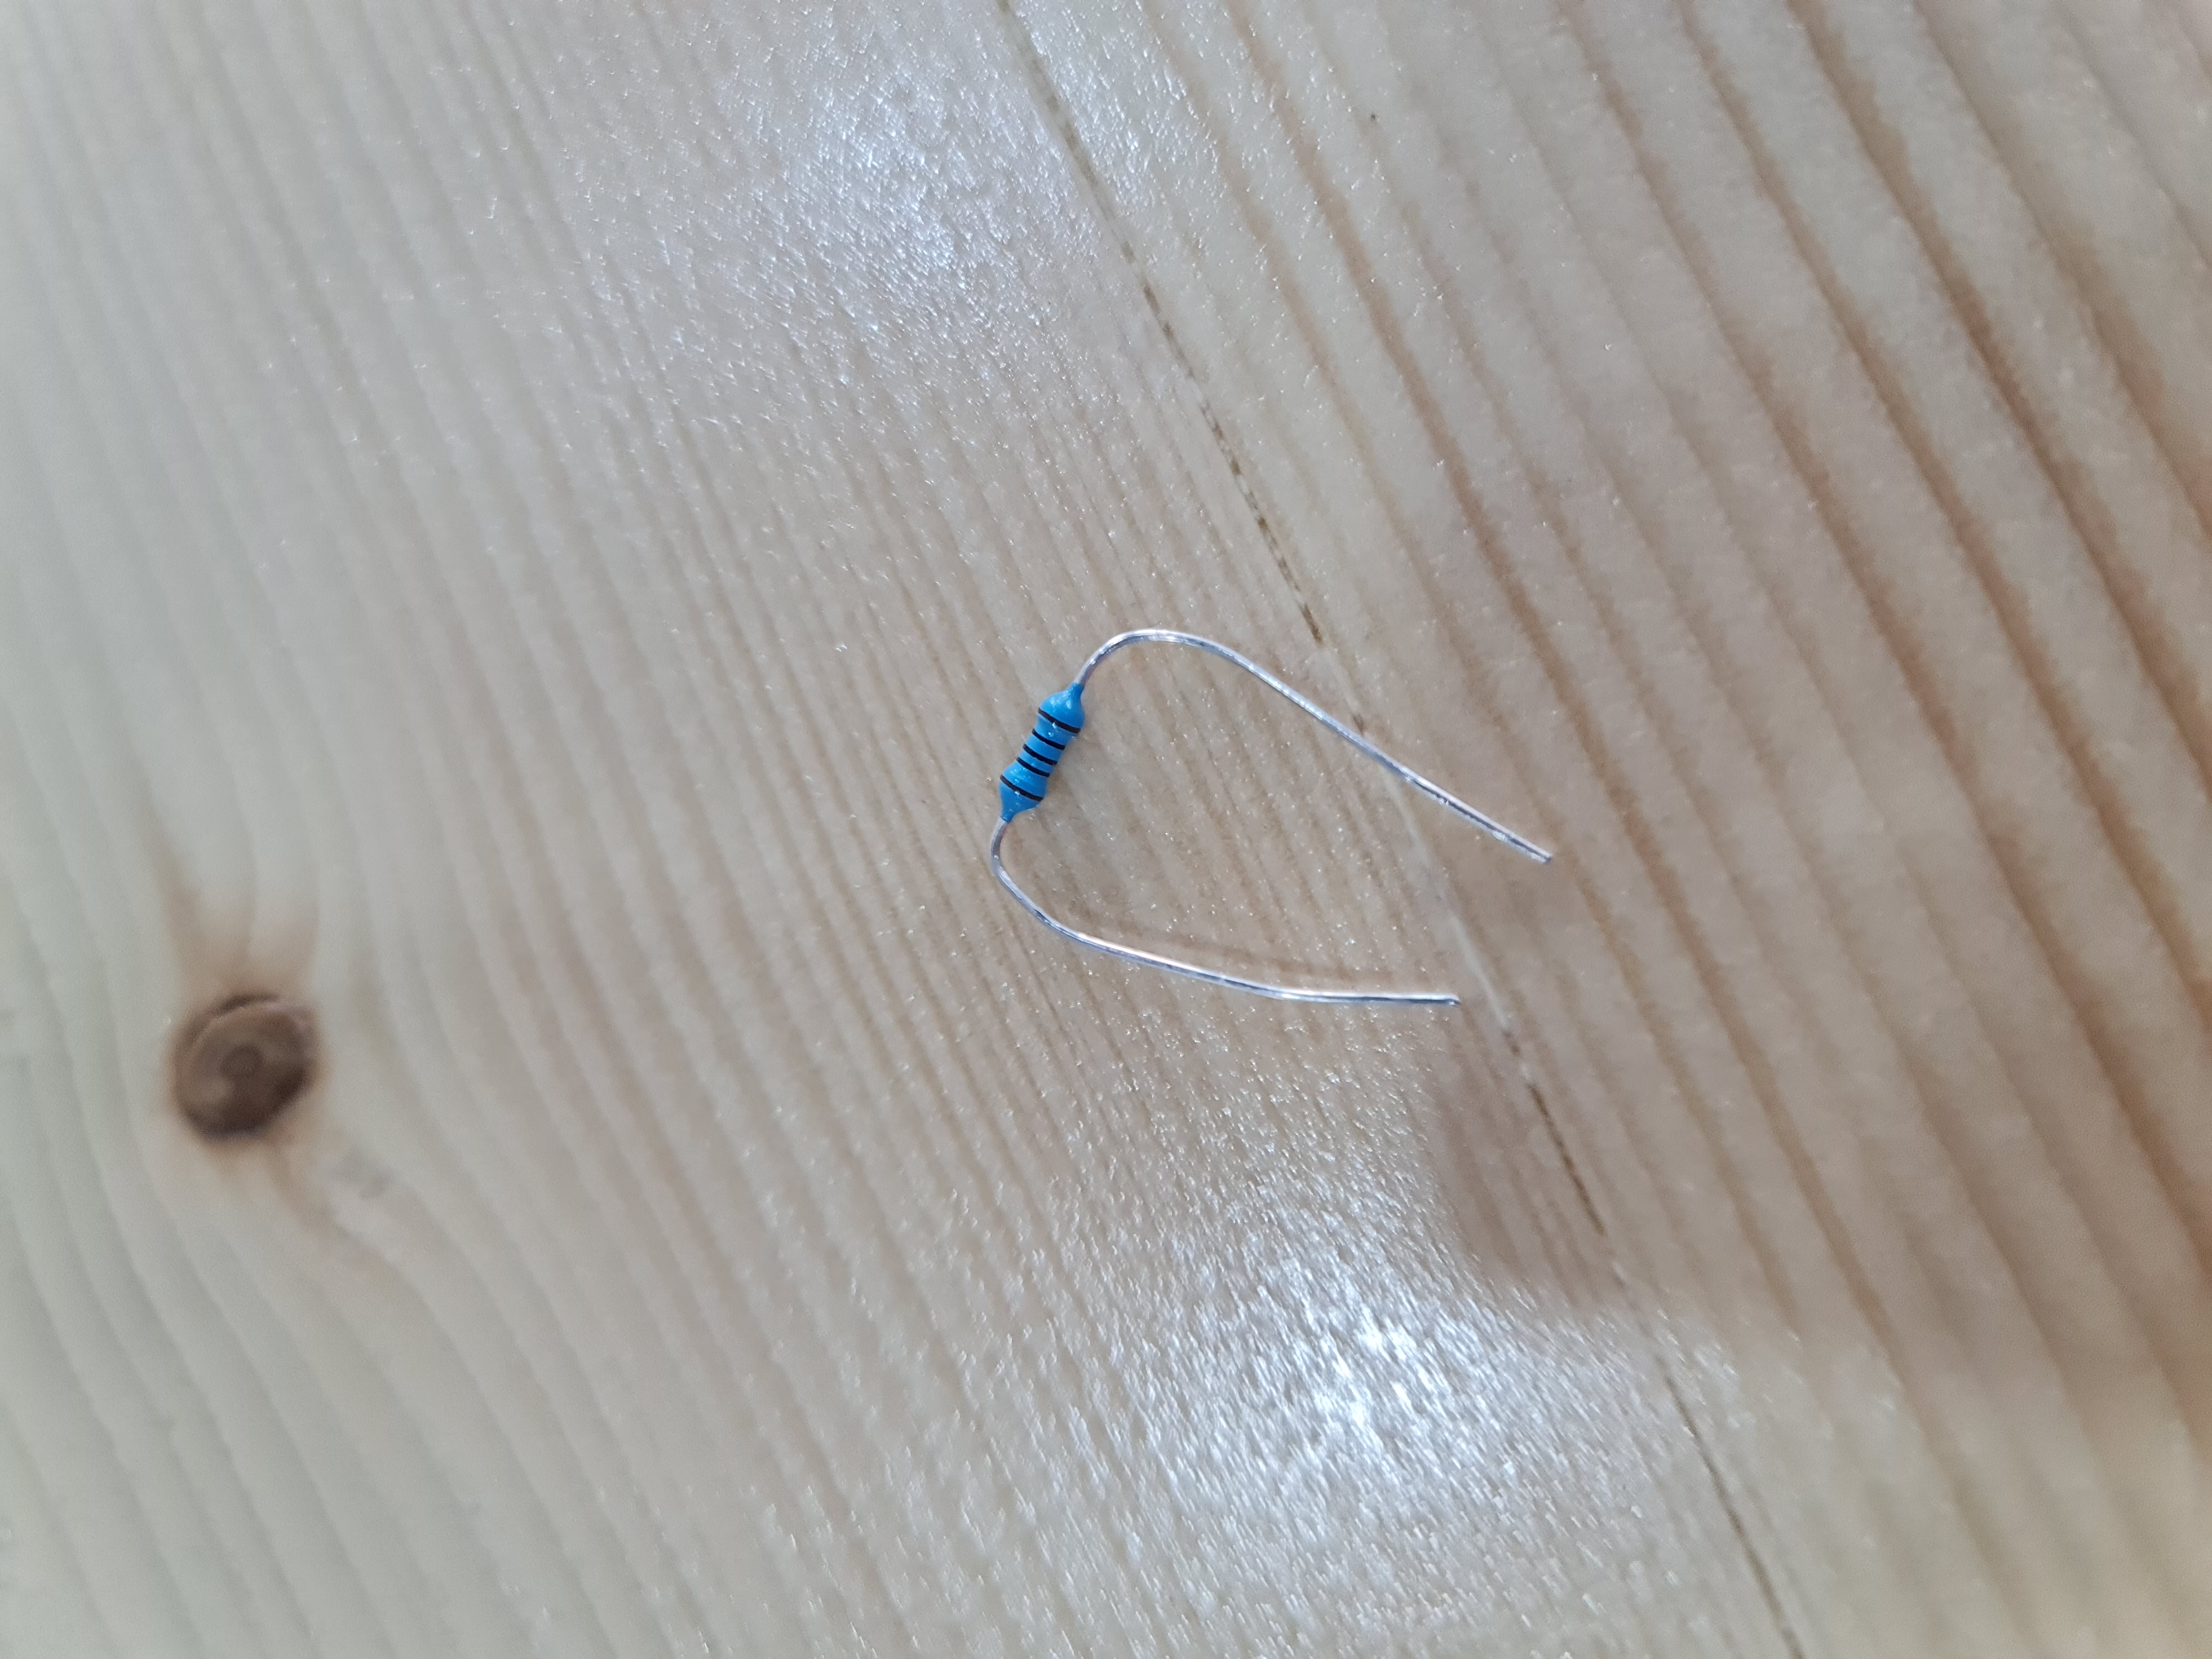
it used to balance the voltage comes to the LED (output device) to prevent it burned out.
LED Practice
I design and coding 2 LEDs, to make it work based on the code that i make.
Code used
#define LED_PIN 13
#define LED_PIN 12

void setup() {
  pinMode(LED_PIN 13, OUTPUT);
  pinMode(LED_PIN 12, OUTPUT);
}

void loop() {

    digitalWrite(LED_PIN 12, HIGH);
    delay(400);
    digitalWrite(LED_PIN 12, LOW);
    delay(100);

    digitalWrite(LED_PIN 13, HIGH);
    delay(400);
    digitalWrite(LED_PIN 13, LOW);
    delay(100);

  }
}
The push button
I design and coding a push button, to make the LED work (on/off).
so, when ever I push the button the LED will turn on and when I release my hand the LED will turn off
Code used
#define LED_PIN 13
#define BUTTON_PIN 5

void setup() {
  pinMode(LED_PIN, OUTPUT);
  pinMode(BUTTON_PIN, INPUT);
}

void loop() {
  if (digitalRead(BUTTON_PIN) == HIGH) {
    digitalWrite(LED_PIN, HIGH);
  }
  else {
    digitalWrite(LED_PIN, LOW);
  }
}
Notes
the LEDs & the push button have to: - be connected to the 5v/3v INPUT, as an electricity source - be connected to the ground INPUT - having resistor to control the power and prevent this small Outputs from burning. - every OUTPUT have to be connected to a separate port.
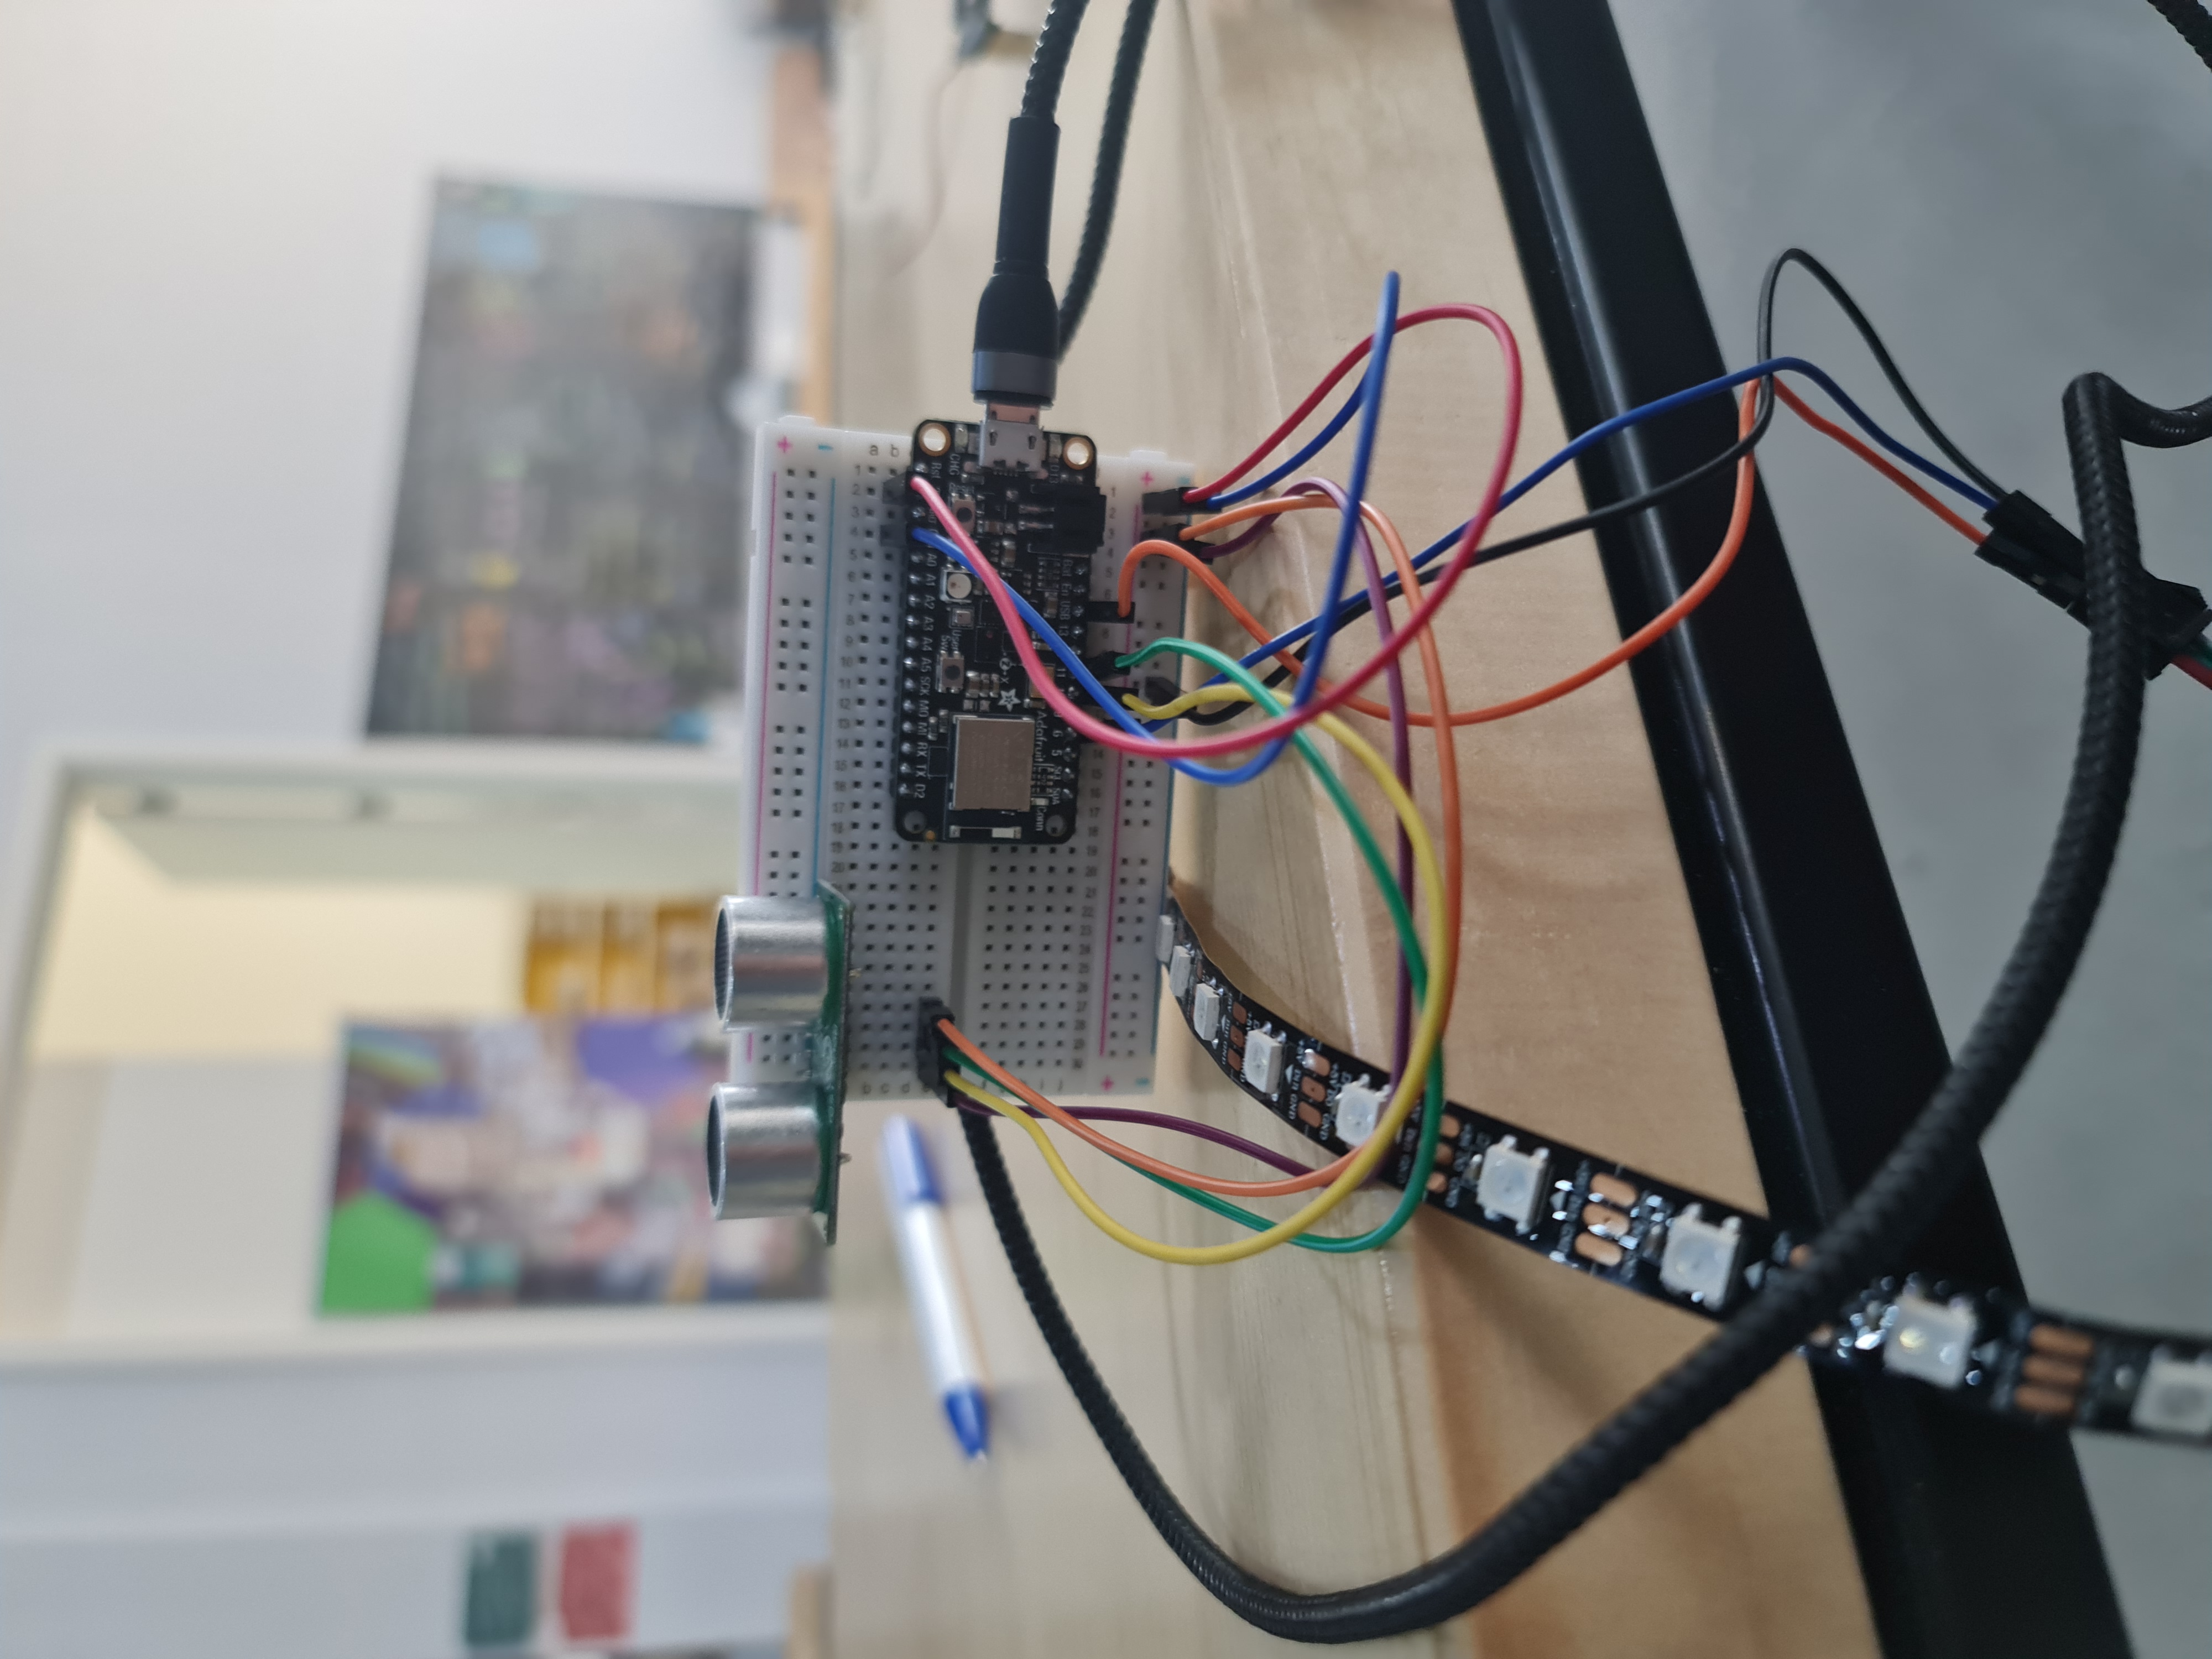
INPUT & OUTPUT USED IN THE FINAL PROJECT
In my final project I used an ULTRASONIC sensor & RGB LEDs
to use these outputs you have to download a specific library for Arduino IDE. these libraries are available at Arduino library manager. they are called: - (SPI) for ULTRASONIC sensor - (FAST LED) for RGB LED - also (NEO PEXIL) for RGB LED
From the final project
COMPINED CODE LED+SENSOR
#include <SPI.h>

#include <FastLED.h>

#define echoPin 10 // attach pin D2 Arduino to pin Echo of HC-SR04
#define trigPin 11 //attach pin D3 Arduino to pin Trig of HC-SR04
#define LED_PIN     6
#define NUM_LEDS    14
#define BRIGHTNESS  64
#define LED_TYPE    WS2811
#define COLOR_ORDER BRG
#define UPDATES_PER_SECOND 100
CRGB leds[NUM_LEDS];

/


CRGBPalette16 currentPalette;
TBlendType    currentBlending;
extern CRGBPalette16 myRedWhiteBluePalette;
extern const TProgmemPalette16 myRedWhiteBluePalette_p PROGMEM;
long duration; // variable for the duration of sound wave travel
int distance; // variable for the distance measurement


void setup() {
    delay( 3000 ); // power-up safety delay
    FastLED.addLeds<LED_TYPE, LED_PIN, COLOR_ORDER>(leds, NUM_LEDS).setCorrection( TypicalLEDStrip );
    FastLED.setBrightness(  BRIGHTNESS );
    currentPalette = RainbowColors_p;
    currentBlending = LINEARBLEND;
    pinMode(trigPin, OUTPUT); // Sets the trigPin as an OUTPUT
    pinMode(echoPin, INPUT); // Sets the echoPin as an INPUT
    Serial.begin(9600); // // Serial Communication is starting with 9600 of baudrate speed
    Serial.println("Ultrasonic Sensor HC-SR04 Test"); // print some text in Serial Monitor
    Serial.println("with Arduino UNO R3");
}


void loop()
{
    // Clears the trigPin condition
    digitalWrite(trigPin, LOW);
    delayMicroseconds(2);
    // Sets the trigPin HIGH (ACTIVE) for 10 microseconds
    digitalWrite(trigPin, HIGH);
    delayMicroseconds(10);
    digitalWrite(trigPin, LOW);
    // Reads the echoPin, returns the sound wave travel time in microseconds
    duration = pulseIn(echoPin, HIGH);
    // Calculating the distance
    distance = duration * 0.034 / 2; // Speed of sound wave divided by 2 (go and back)
    // Displays the distance on the Serial Monitor
    Serial.print("Distance: ");
    Serial.print(distance);
    Serial.println(" cm");

    ChangePalettePeriodically();

    static uint8_t startIndex = 0;
    startIndex = startIndex + 1; /* motion speed */

    if ( distance < 50){
    FillLEDsFromPaletteColors( startIndex);
    FastLED.show();
    FastLED.delay(1000 / UPDATES_PER_SECOND);}

    else if ( distance >= 50){
    FillLEDsFromPaletteColors(0);
    //FastLED.clear();
    //FastLED.show();

    }
}

void FillLEDsFromPaletteColors( uint8_t colorIndex)
{
    uint8_t brightness = 255;

    for( int i = 0; i < NUM_LEDS; i++) {
        leds[i] = ColorFromPalette( currentPalette, colorIndex, brightness, currentBlending);
        colorIndex += 3;
    }
}


void ChangePalettePeriodically()
{
    uint8_t secondHand = (millis() / 1000) % 60;
    static uint8_t lastSecond = 99;

    if( lastSecond != secondHand) {
        lastSecond = secondHand;
        if( secondHand ==  0)  { currentPalette = RainbowColors_p;         currentBlending = LINEARBLEND; }
        if( secondHand == 10)  { currentPalette = RainbowStripeColors_p;   currentBlending = NOBLEND;  }
        if( secondHand == 15)  { currentPalette = RainbowStripeColors_p;   currentBlending = LINEARBLEND; }
        if( secondHand == 20)  { SetupPurpleAndGreenPalette();             currentBlending = LINEARBLEND; }
        if( secondHand == 25)  { SetupTotallyRandomPalette();              currentBlending = LINEARBLEND; }
        if( secondHand == 30)  { SetupBlackAndWhiteStripedPalette();       currentBlending = NOBLEND; }
        if( secondHand == 35)  { SetupBlackAndWhiteStripedPalette();       currentBlending = LINEARBLEND; }
        if( secondHand == 40)  { currentPalette = CloudColors_p;           currentBlending = LINEARBLEND; }
        if( secondHand == 45)  { currentPalette = PartyColors_p;           currentBlending = LINEARBLEND; }
        if( secondHand == 50)  { currentPalette = myRedWhiteBluePalette_p; currentBlending = NOBLEND;  }
        if( secondHand == 55)  { currentPalette = myRedWhiteBluePalette_p; currentBlending = LINEARBLEND; }
    }
}

// This function fills the palette with totally random colors.
void SetupTotallyRandomPalette()
{
    for( int i = 0; i < 16; i++) {
        currentPalette[i] = CHSV( random8(), 255, random8());
    }
}

void SetupBlackAndWhiteStripedPalette()
{
    // 'black out' all 16 palette entries...
    fill_solid( currentPalette, 16, CRGB::Black);
    // and set every fourth one to white.
    currentPalette[0] = CRGB::White;
    currentPalette[4] = CRGB::White;
    currentPalette[8] = CRGB::White;
    currentPalette[12] = CRGB::White;

}

// This function sets up a palette of purple and green stripes.
void SetupPurpleAndGreenPalette()
{
    CRGB purple = CHSV( HUE_PURPLE, 255, 255);
    CRGB green  = CHSV( HUE_PINK, 255, 255);
    CRGB black  = CRGB::Black;

    currentPalette = CRGBPalette16(
                                   green,  green,  black,  black,
                                   purple, purple, black,  black,
                                   green,  green,  black,  black,
                                   purple, purple, black,  black );
}


const TProgmemPalette16 myRedWhiteBluePalette_p PROGMEM =
{
    CRGB::Red,
    CRGB::Pink, // 'white' is too bright compared to red and blue
    CRGB::Blue,
    CRGB::Black,

    CRGB::Red,
    CRGB::Pink,
    CRGB::Blue,
    CRGB::Black,

    CRGB::Red,
    CRGB::Red,
    CRGB::Gray,
    CRGB::Gray,
    CRGB::Blue,
    CRGB::Blue,
    CRGB::Black,
    CRGB::Black
};
From Vimeo
{LED Practice}
{The push button}
- Final project video